Introduction to Document Templates
Document templates help HR teams maintain consistency and efficiency by storing reusable formats for frequently used letters and requests. With Keka, you can create, customize, and save templates to generate documents for employees across their lifecycle—from joining to exit—without manually recreating the content each time.
Accessing the Document Templates Tab
-
Navigate to Org from the left navigation pane.
-
Click on Documents, and select the Document Templates tab.

This is where all templates are created, managed, and stored for easy access.
Creating a Template
In the Document Templates tab, click Create Template. You will be presented with two options:
Document Generation Template
-
Upload Request Template
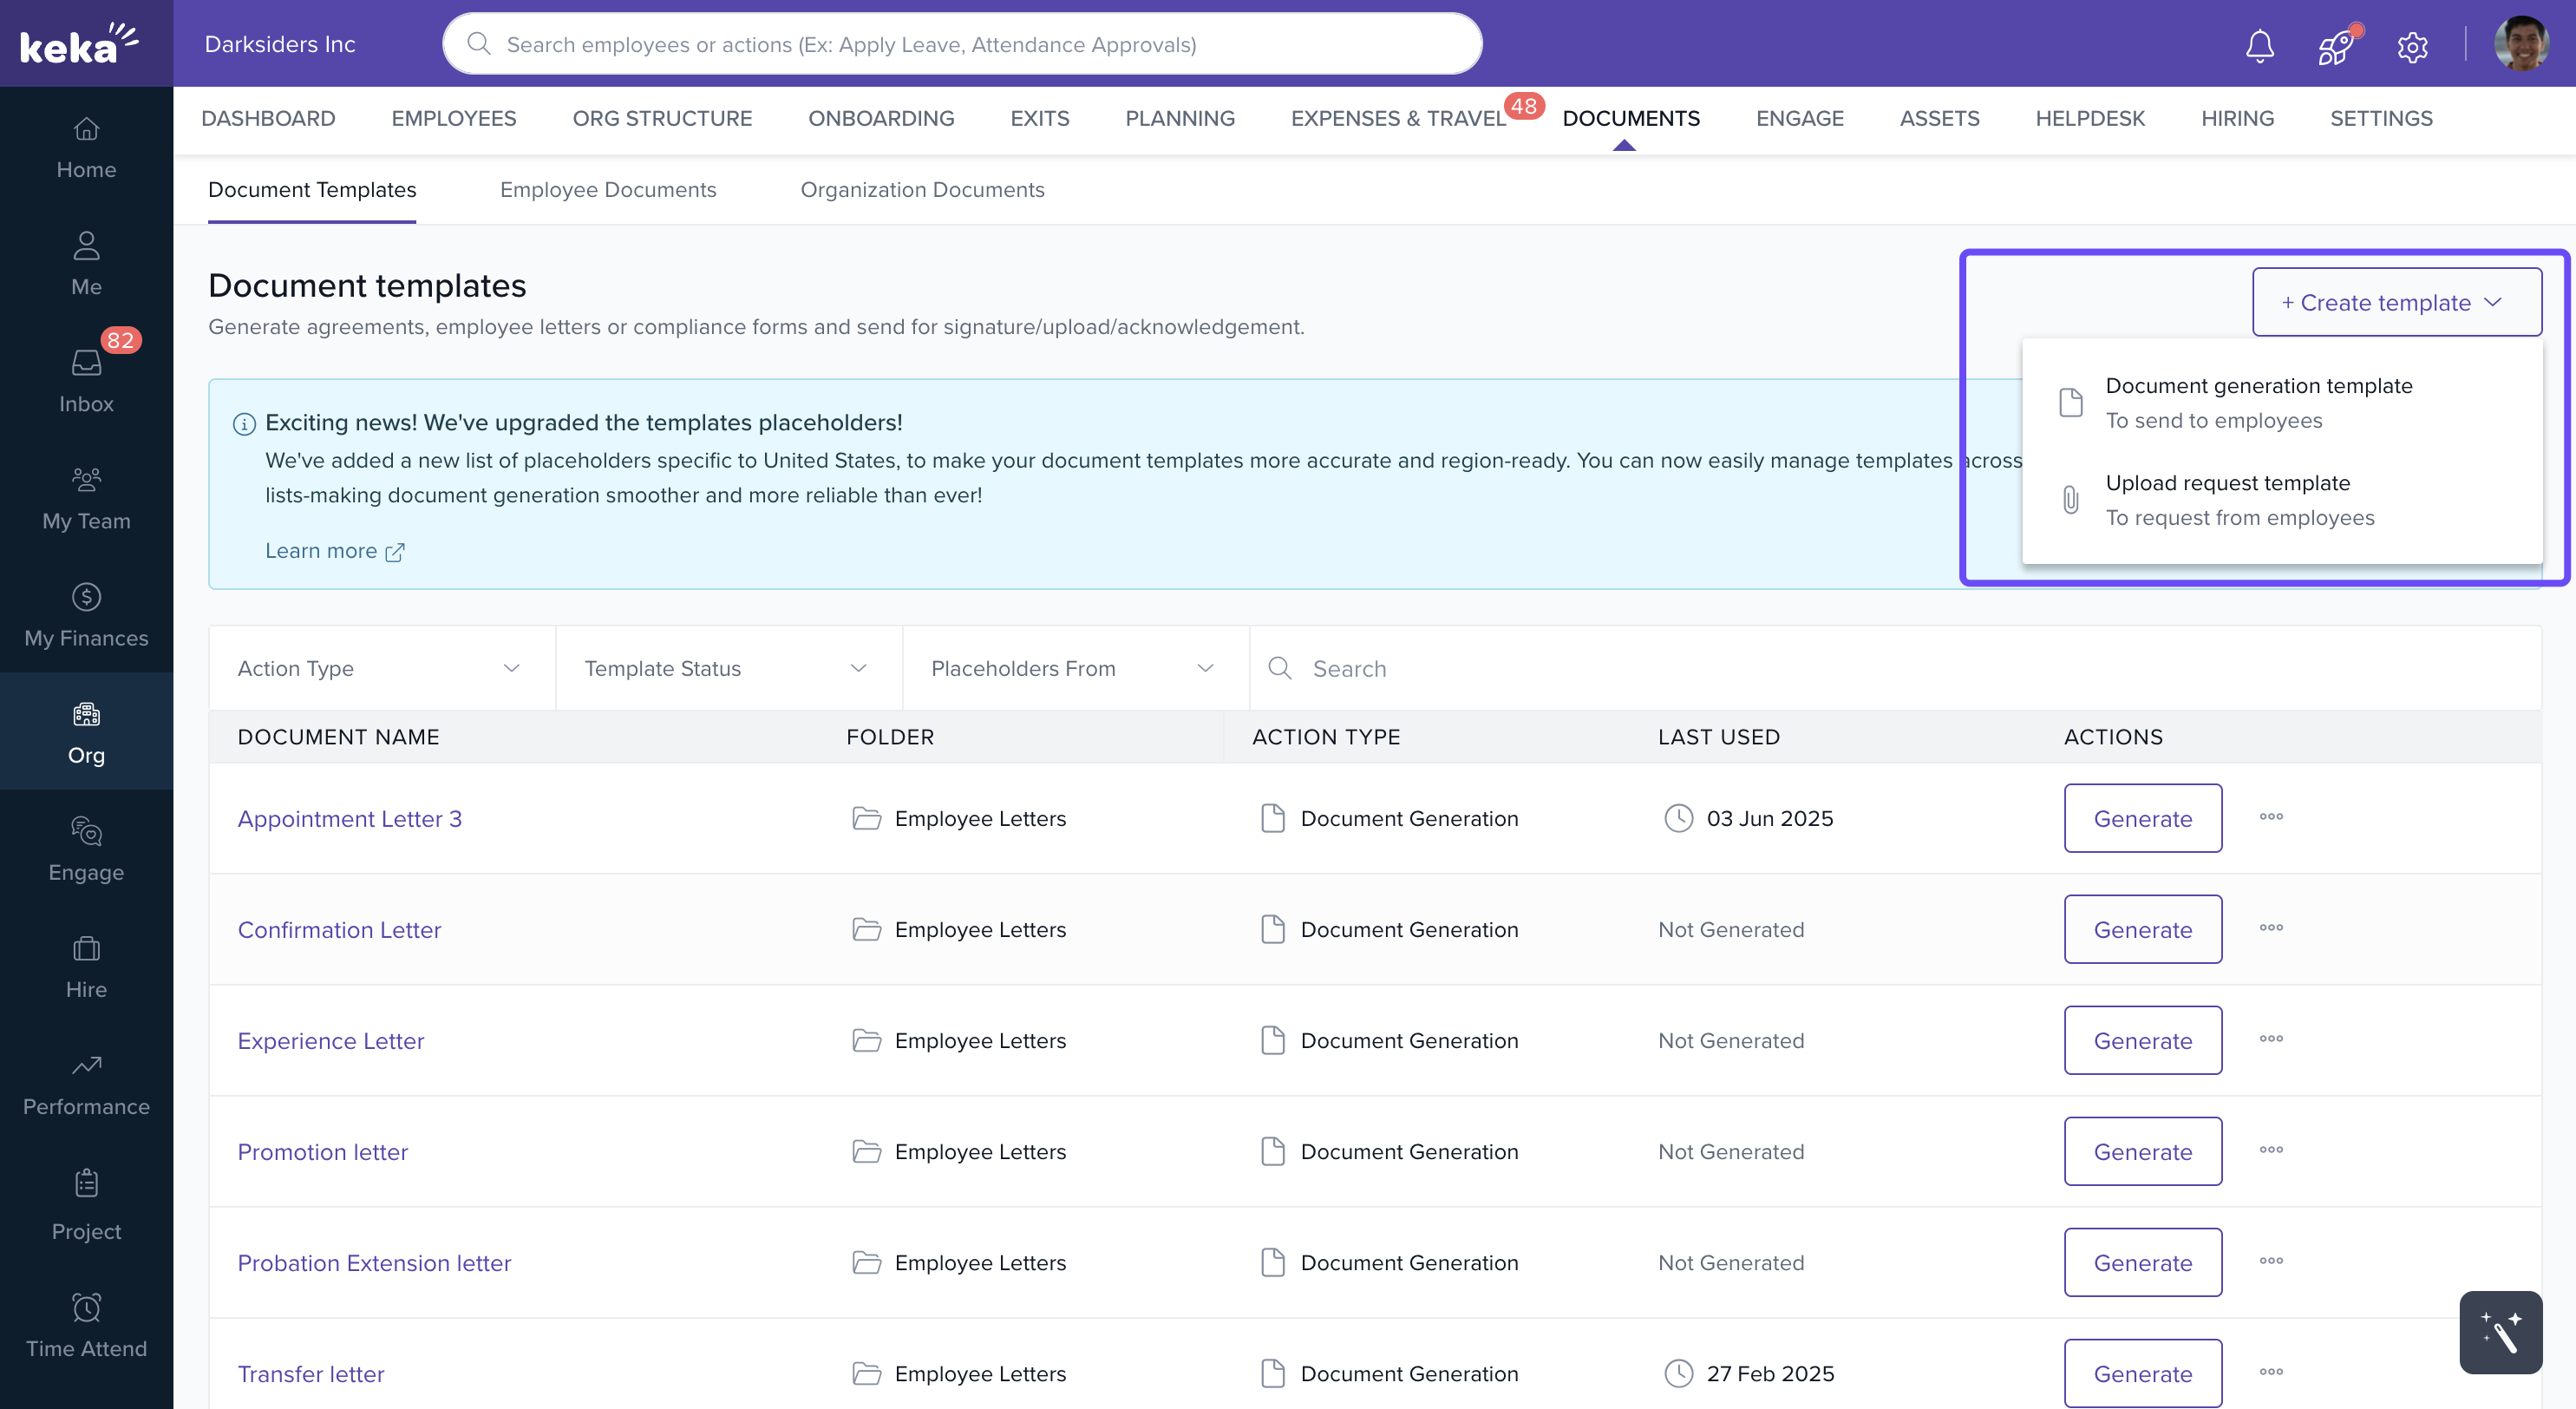
Document Generation Template
Document Generation Templates are used for standardised employee communications, such as offer letters, confirmation letters, and relieving letters.
Click Create Template and select Document Generation Template.
In the Setup tab, enter a Name and Description for the template and click Continue.
- By enabling Require document workflow Use acknowledge, approval or signature to define a workflow for the document. To read more about document workflow, click here.

-
In the Compose tab, Choose from a specific country, common list, or default list.
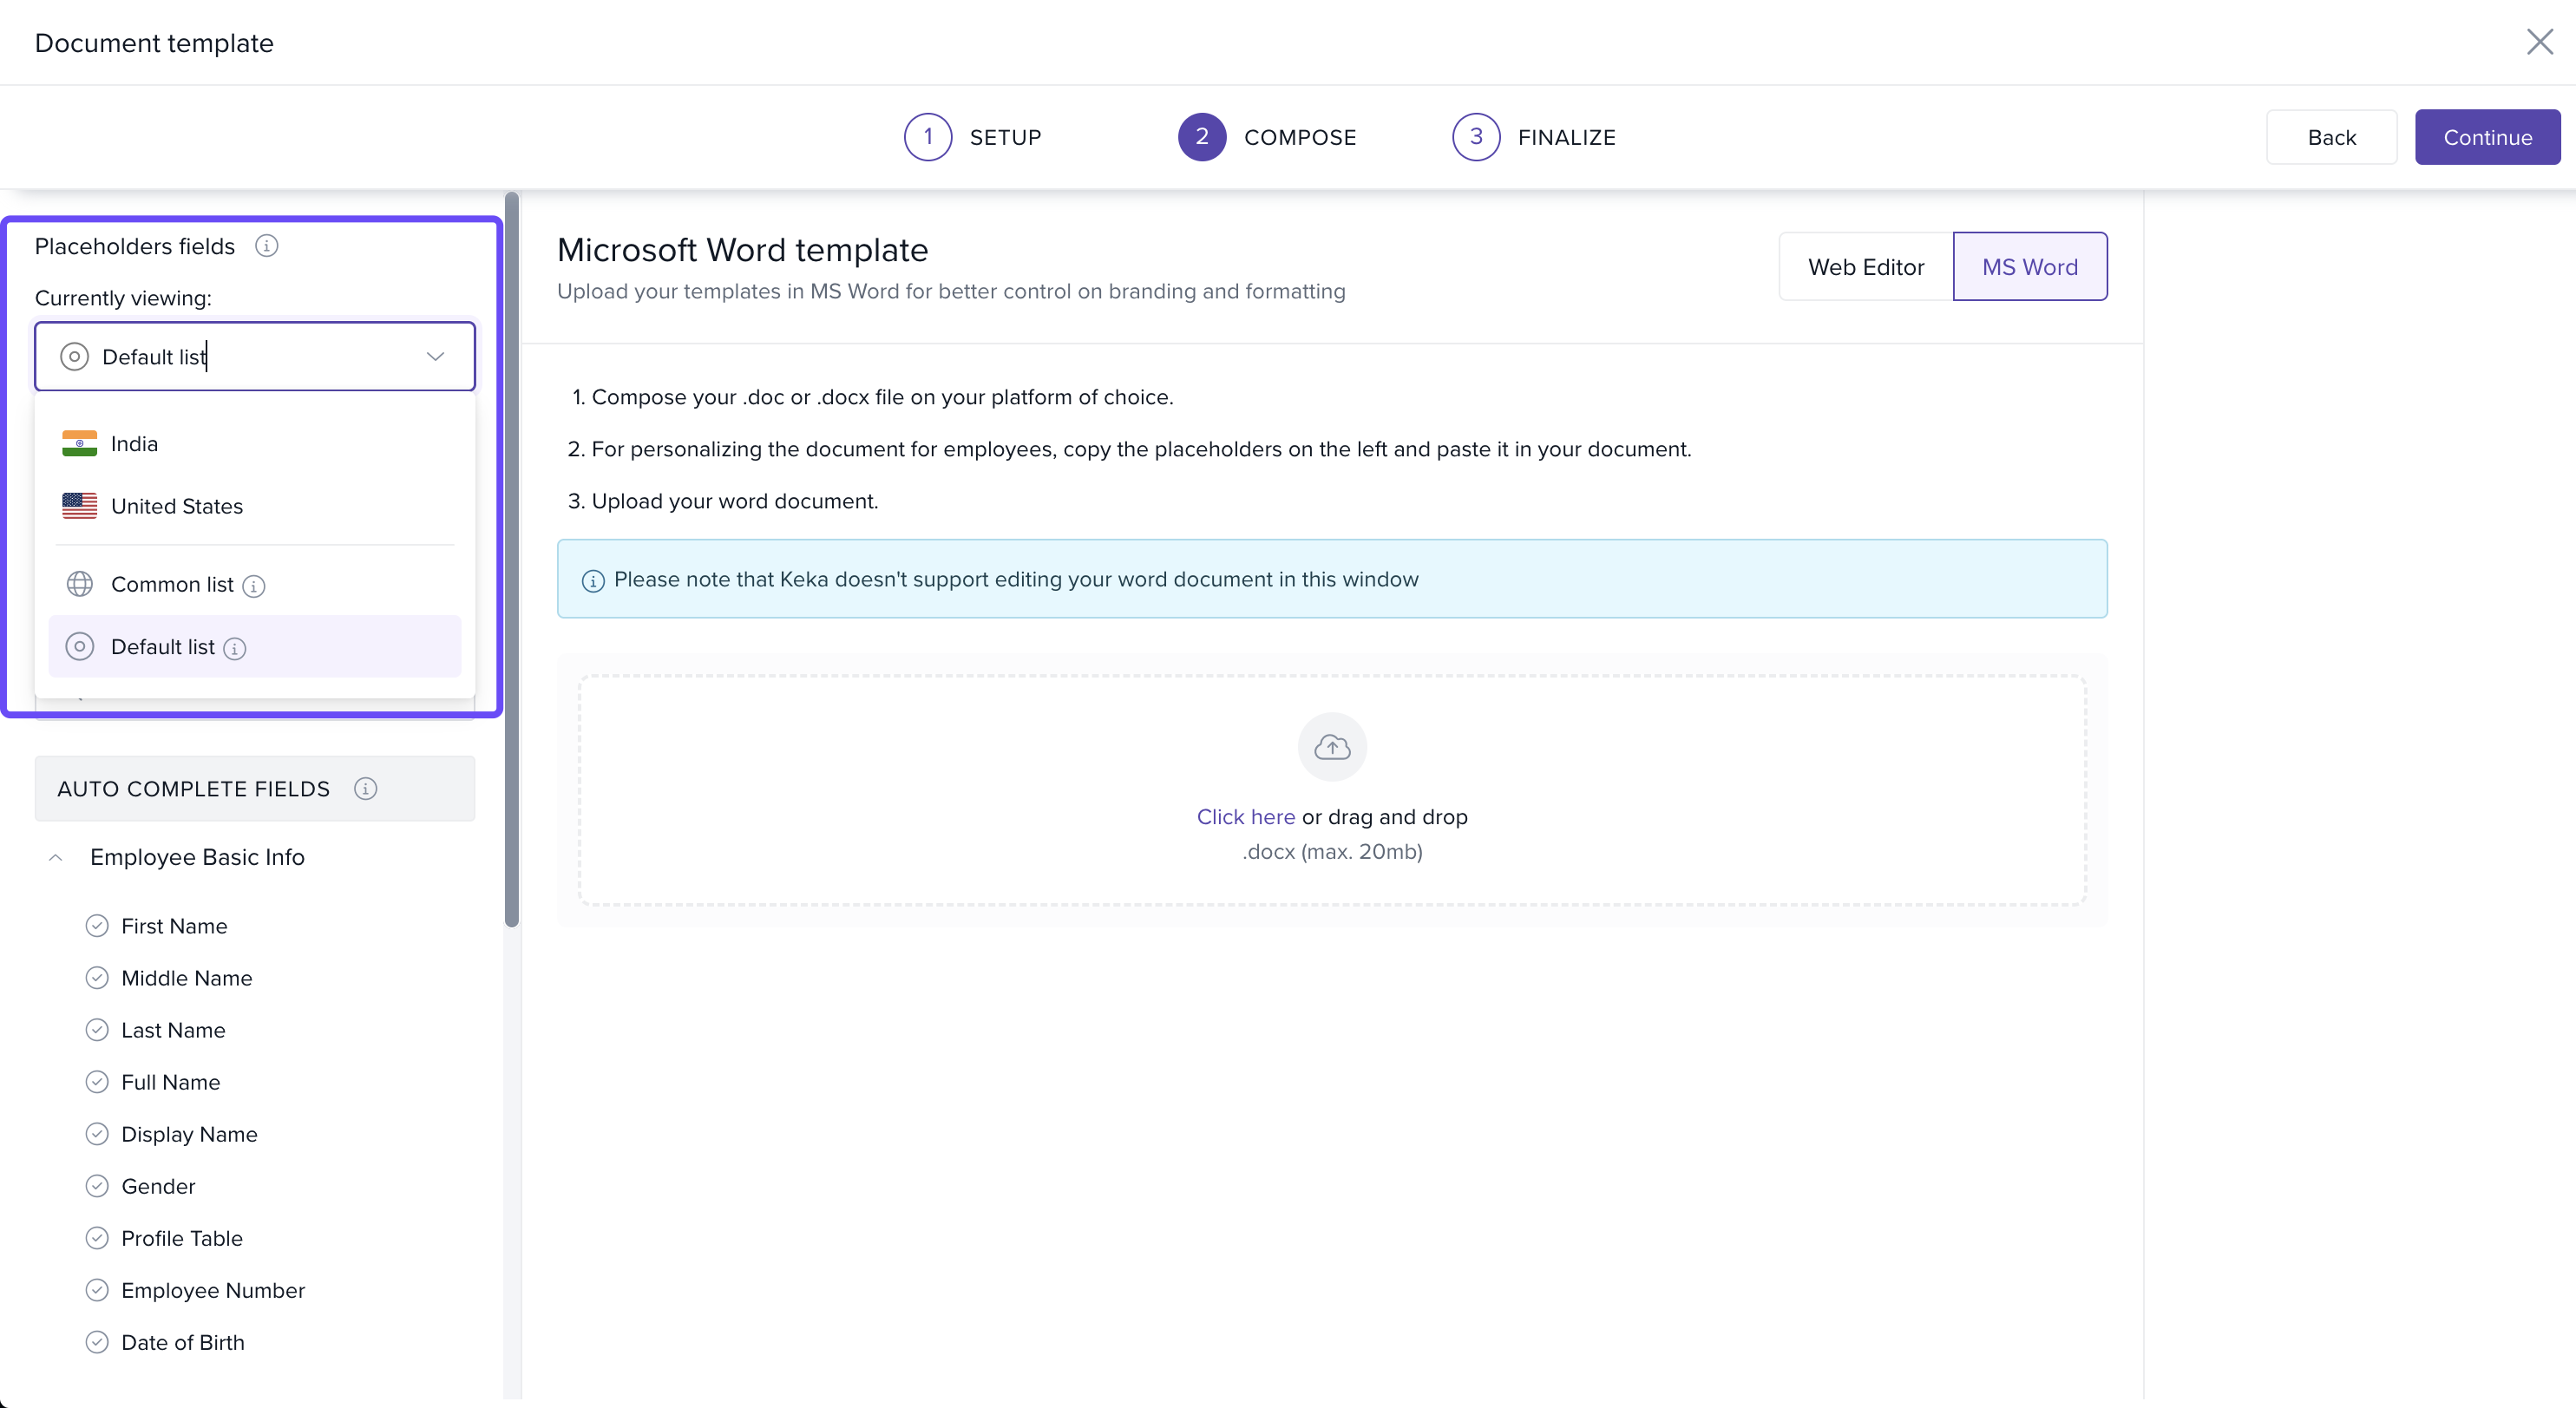
If you have an existing template in MS Word, you can upload it instead of creating a new one. Or else create a new one on the Web Editor. Copy and paste placeholders from Word as needed.
-
Use placeholders for dynamic information such as employee names, dates, designations, and signatures.
.jpg)
To know how to use custom fields check our article on Understanding Document Custom Fields In the Finalize tab, preview the template and select a folder from the dropdown to save it.
Click edit , choose the view and download permissions for different roles and save them.
Then, either give access to all Legal entities or select specific legal entities based on which privileged users could access this template.
Finally click Update.
You can assign access to specific legal entities or grant access to all entities, ensuring the right users have the appropriate permissions.
Upload Request Template
Upload Request Templates are designed for requesting specific documents from employees, such as ID proofs, driver’s licenses, or other compliance documents.
-
Click Create Template and select Upload Request Template.
-
On the File Upload Request screen, provide the Name and Description of the document. Select a folder where the uploaded files will be saved.

-
Click Continue to proceed to the Finalize tab.
-
Configure View and Edit permissions based on employee designations. Add any custom fields if required.

-
Click Finish to create the template.
Employees can access these upload request templates via the Documents tab in their profile and submit details or files by clicking Add Details.
Archiving Template
Archiving a template means deactivating it for further use. Once archived, a template is no longer available for generating new documents. This action is useful when you want to keep templates for historical reference or avoid using them in the future while retaining access to the generated documents.
How to Archive a Template
To archive a template, follow these steps:
In the template list, locate the template you wish to archive.
Click the three-dot menu icon beside the template name.
-
Select Archive from the dropdown.
A confirmation popup will appear, explaining that you will no longer be able to generate new letters from this template once archived. However, all previously generated letters will remain unaffected.
Click Yes, Archive to proceed.
Note : Archiving a template does not delete or remove any letters that have already been generated using the template. The generated letters remain in the employee’s document history, and they are unaffected by the archival process.
How to Unarchive a Template
If you need to reactivate a template, you can unarchive it at any time:
In the template list, filter by Archived status to view archived templates.
Locate the template you wish to unarchive.
Click the three-dot menu icon beside the template name.
-
Select Unarchive button.
A confirmation popup will appear explaining that you can start generating letters again once the template is unarchived.
-
Click Unarchive to proceed.
Finalising and Managing Permissions
Keka allows HR teams to:
Preview templates before saving.
Manage access by legal entity or designation.
Set permissions for viewing, editing, and downloading.
This ensures that templates are secure and accessible only to authorized users.
With Keka’s Document Templates feature, HR teams no longer need to create documents from scratch each time. The platform enables efficient template creation, consistent communication, and easy management of employee documents, saving time and improving productivity.
Comments
0 comments
Please sign in to leave a comment.