Introduction
Expense & travel categories help your organization organize spending areas, enforce limits, collect relevant details, and improve financial control. Whether for food, mileage, travel, or accommodations, well‑defined categories make claims clearer and easier to process.
TABLE OF CONTENTS
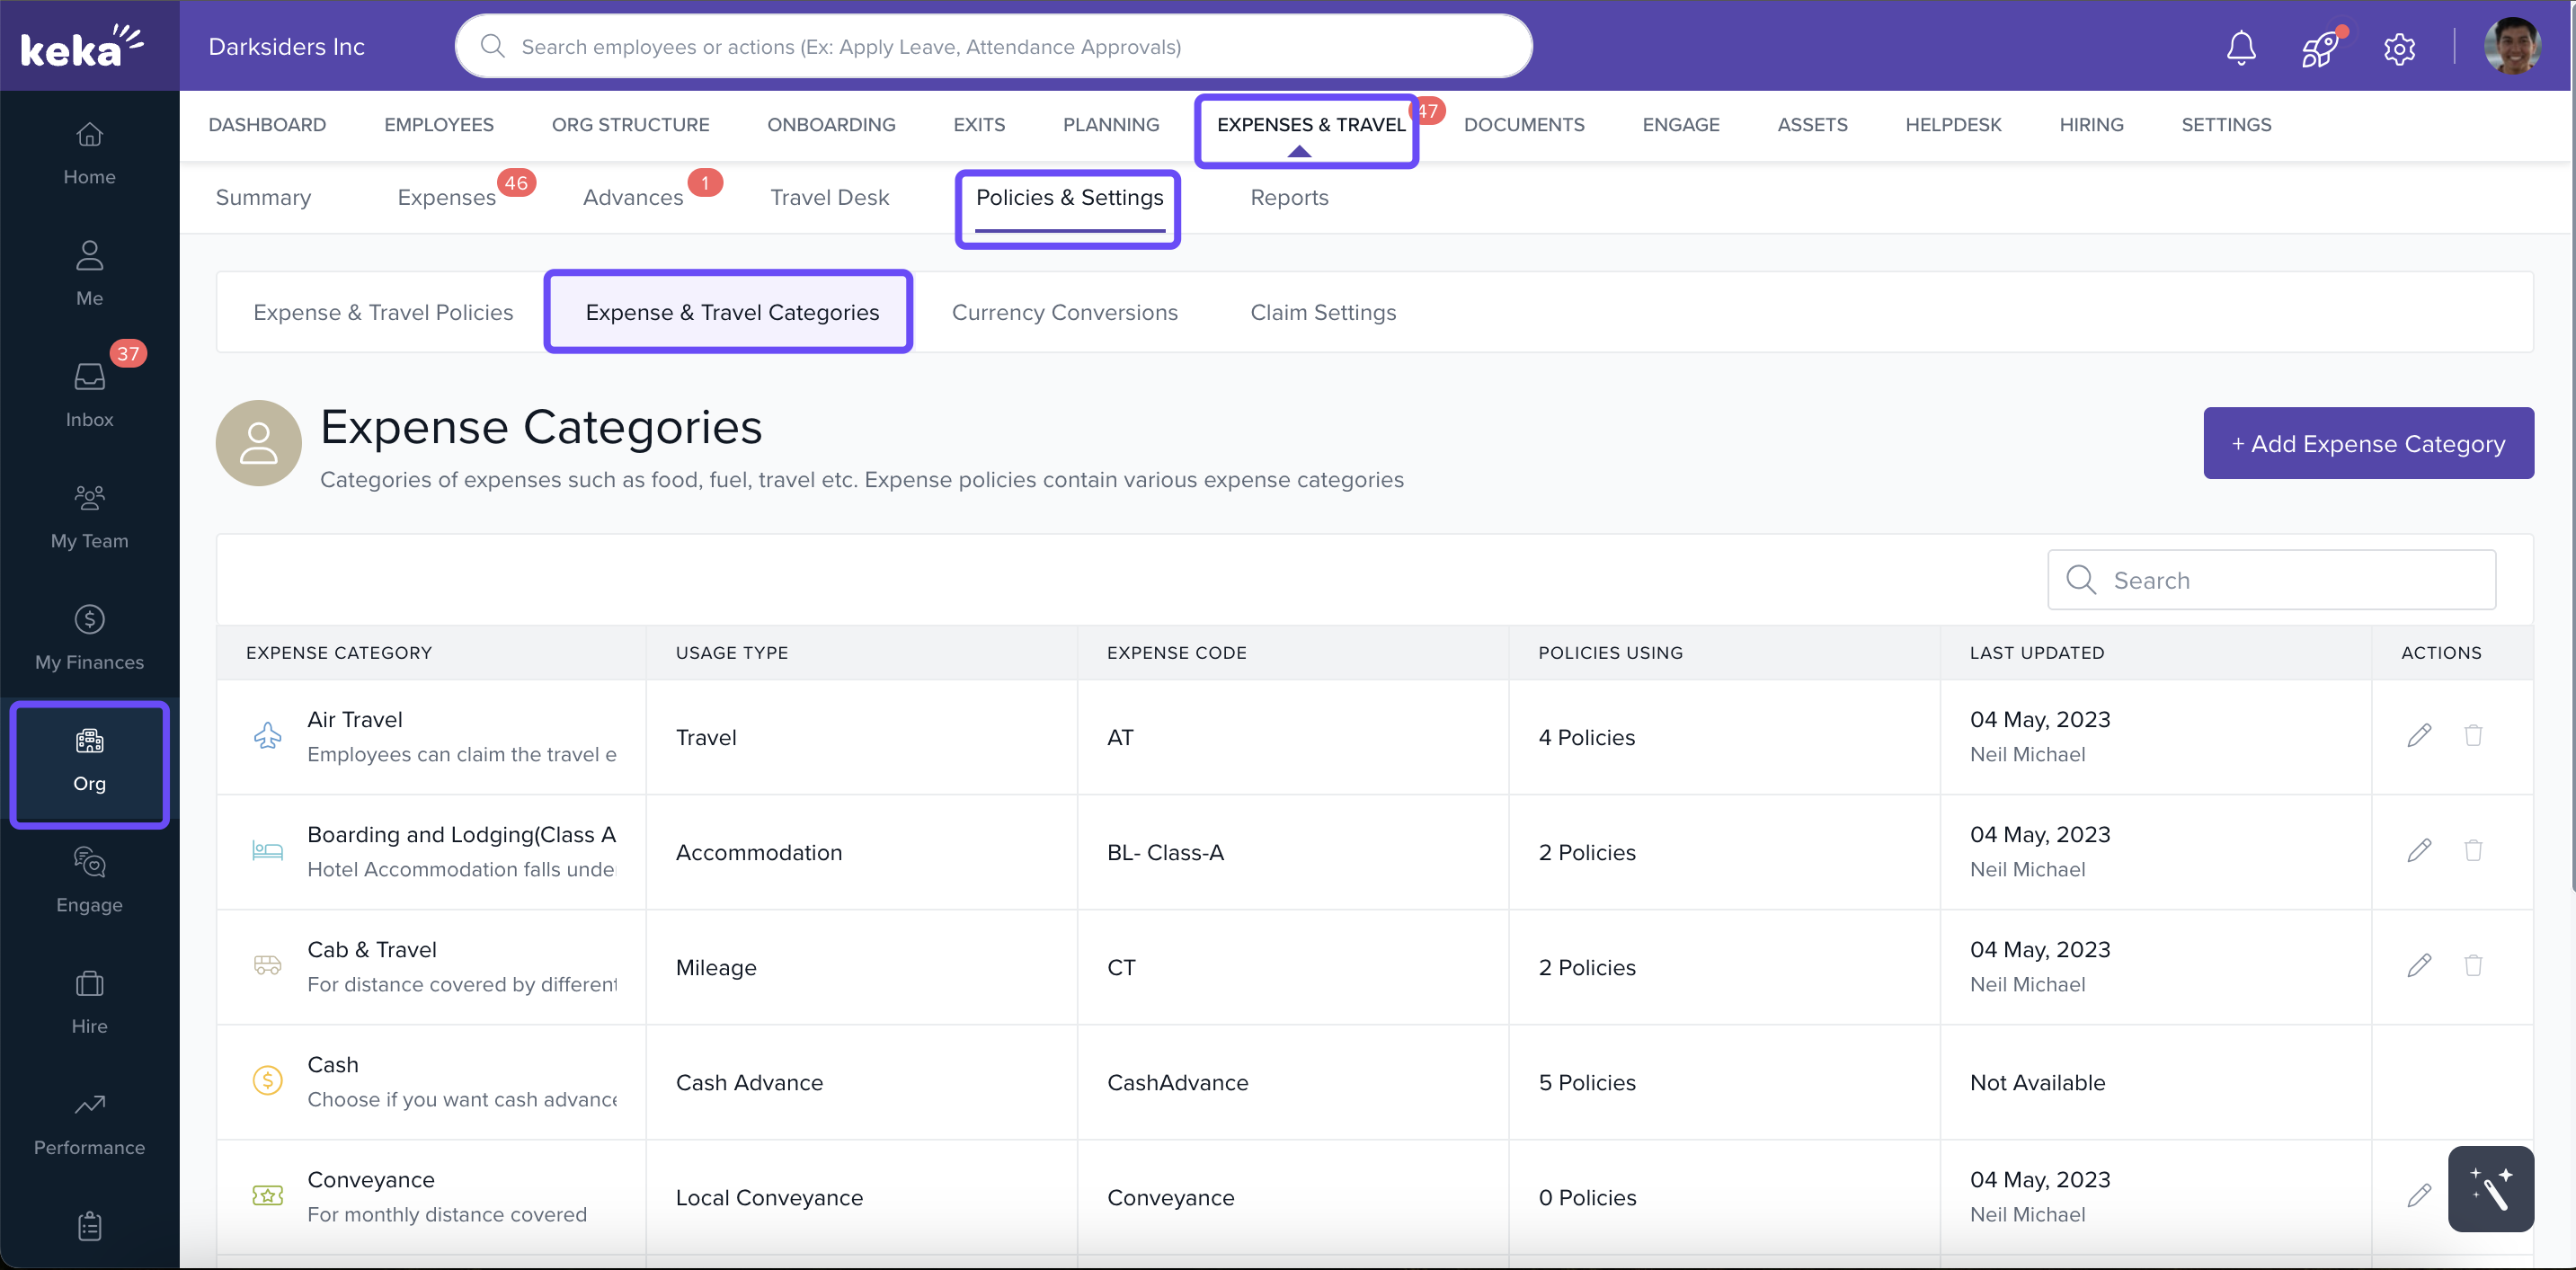
Navigate to Categories
-
From the left navigation menu, click Org.
-
Select Expenses & Travel.
-
Go to Policies & Settings, then click on the Expense & Travel Categories tab.'
Create a New Expense Category
-
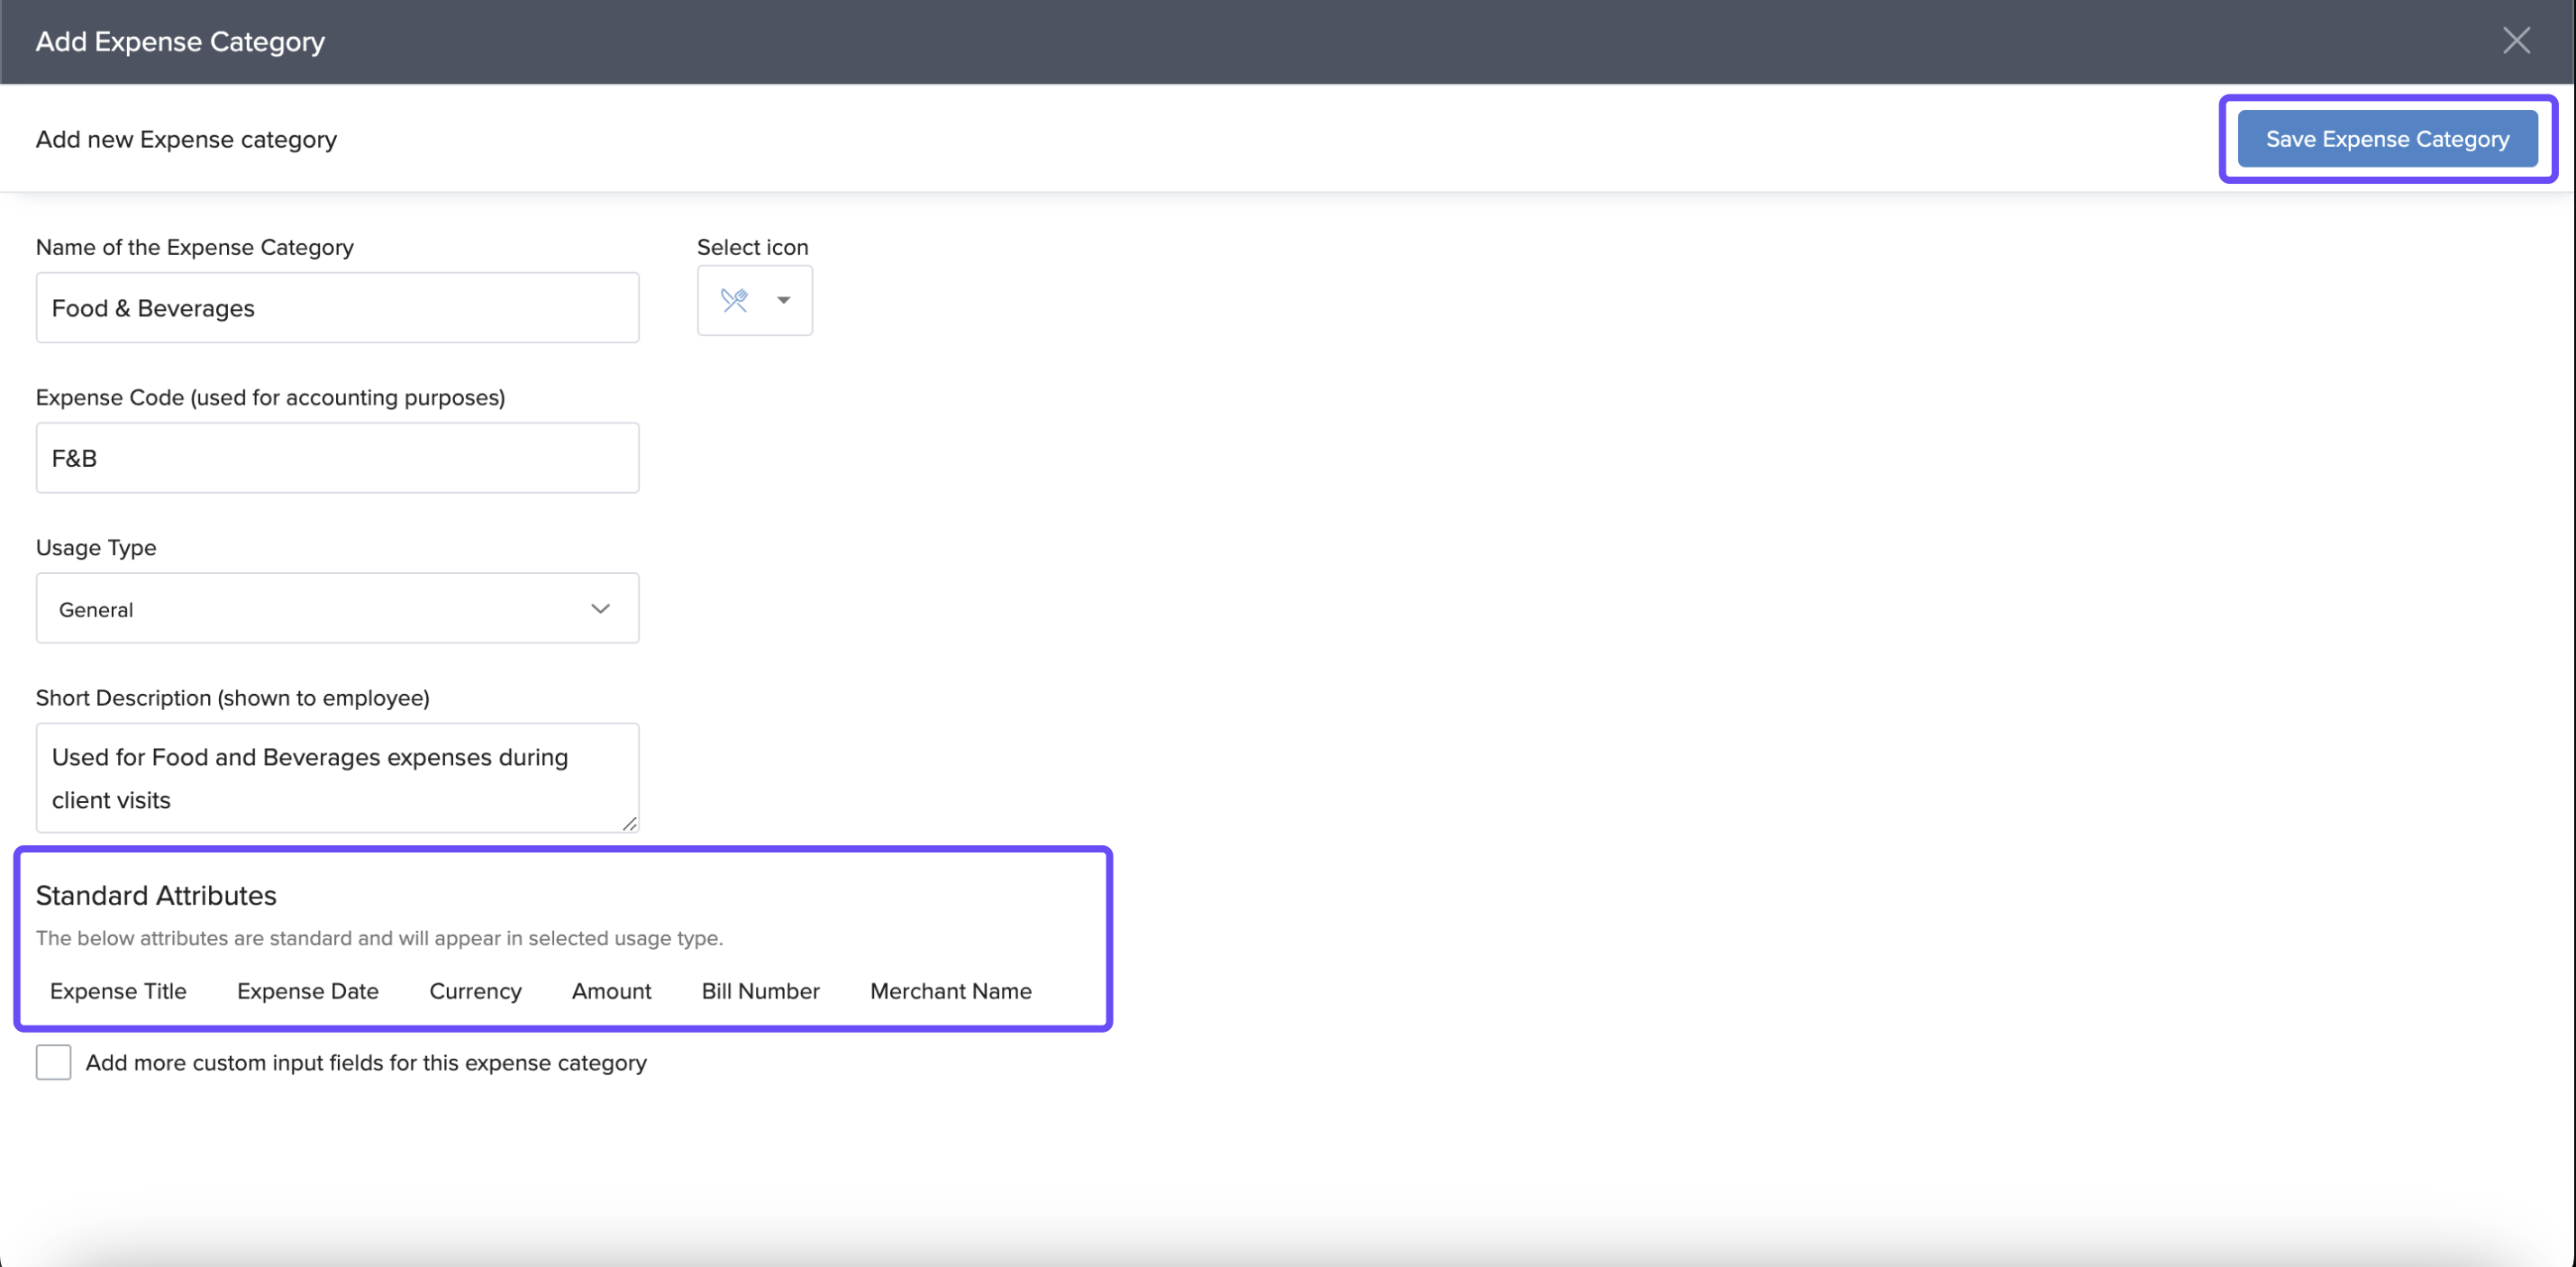
Click Add Expense Category to open the creation screen.

-
Fill in the following details:
-
Name: The display name for the category.
-
Icon: Choose an icon to visually represent it.
-
Expense Code: A short code used for accounting or internal reference.
-
Usage Type: Determines how this expense is tracked (for example, mileage, travel, daily vs actual expense).
-
Description: A short description to clarify what the category covers.
-
-
Add Attributes if you need extra fields—for example, restaurant name for F&B expenses. You can also mark these attributes as Mandatory so employees must fill them when claiming under that category.
-
Click Save Expense Category when done.
Edit or Delete Existing Categories
-
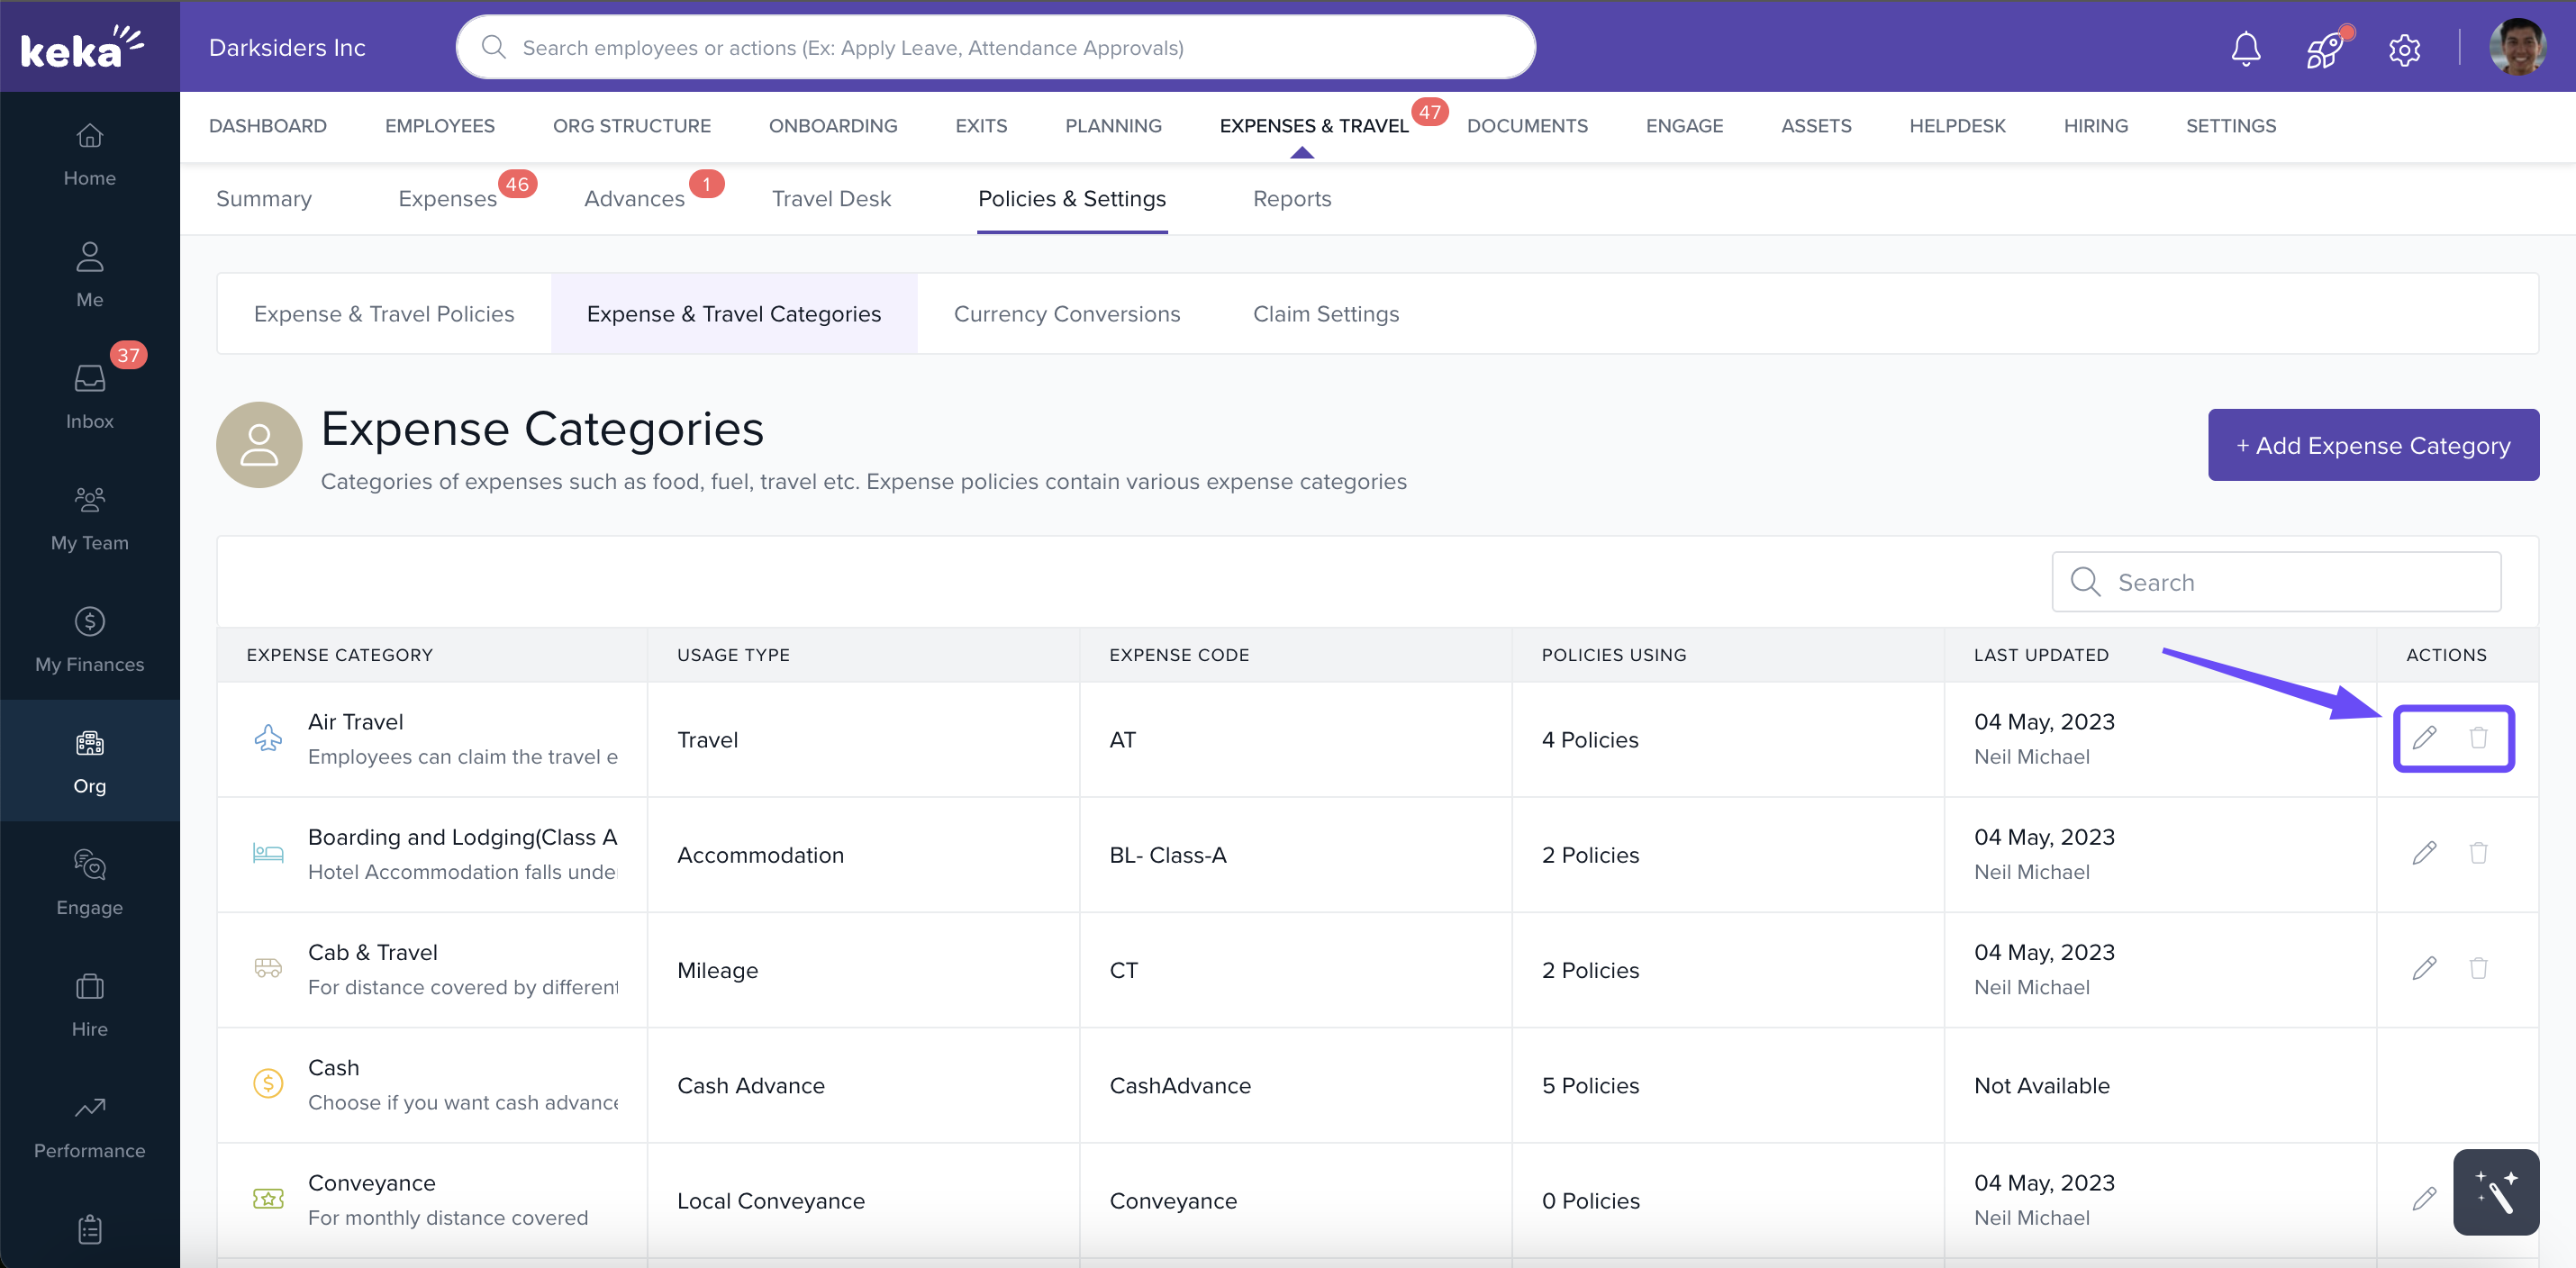
To edit, click the Pencil icon under Actions for the category you want to update. Change name, icon, usage type, attributes, etc.
-
To delete, use the Delete icon in the same Actions section. Be cautious: deleting a category can affect existing expenses under that category if they are in use.
You can define a customized approval workflow for each expense category. Learn how to configure it
Setting up clear and well‑structured expense & travel categories in Keka is a key step in improving expense management. Proper categories reduce confusion, ensure employees provide needed details, and help finance teams analyse spend patterns. Once categories are in place, editing them as your needs evolve helps maintain relevance and accuracy over time.
Comments
0 comments
Please sign in to leave a comment.