Introduction
A Leave Plan is a crucial element in Keka HRMS that helps HR teams and administrators manage and configure leave policies for employees. It sets the rules for time off, such as how to request leave, the types of leave available (e.g., sick days, vacation, family leave), and who approves it. By defining a leave plan, organizations ensure that all employees are treated fairly and consistently according to the same rules.
In Keka, you can create different Leave Plans for each department, ensuring flexibility across different teams and functions. Let’s walk through how to create one from scratch.
Steps to Create a Leave Plan
1. Setting Up a Leave Plan
To create a new leave plan:
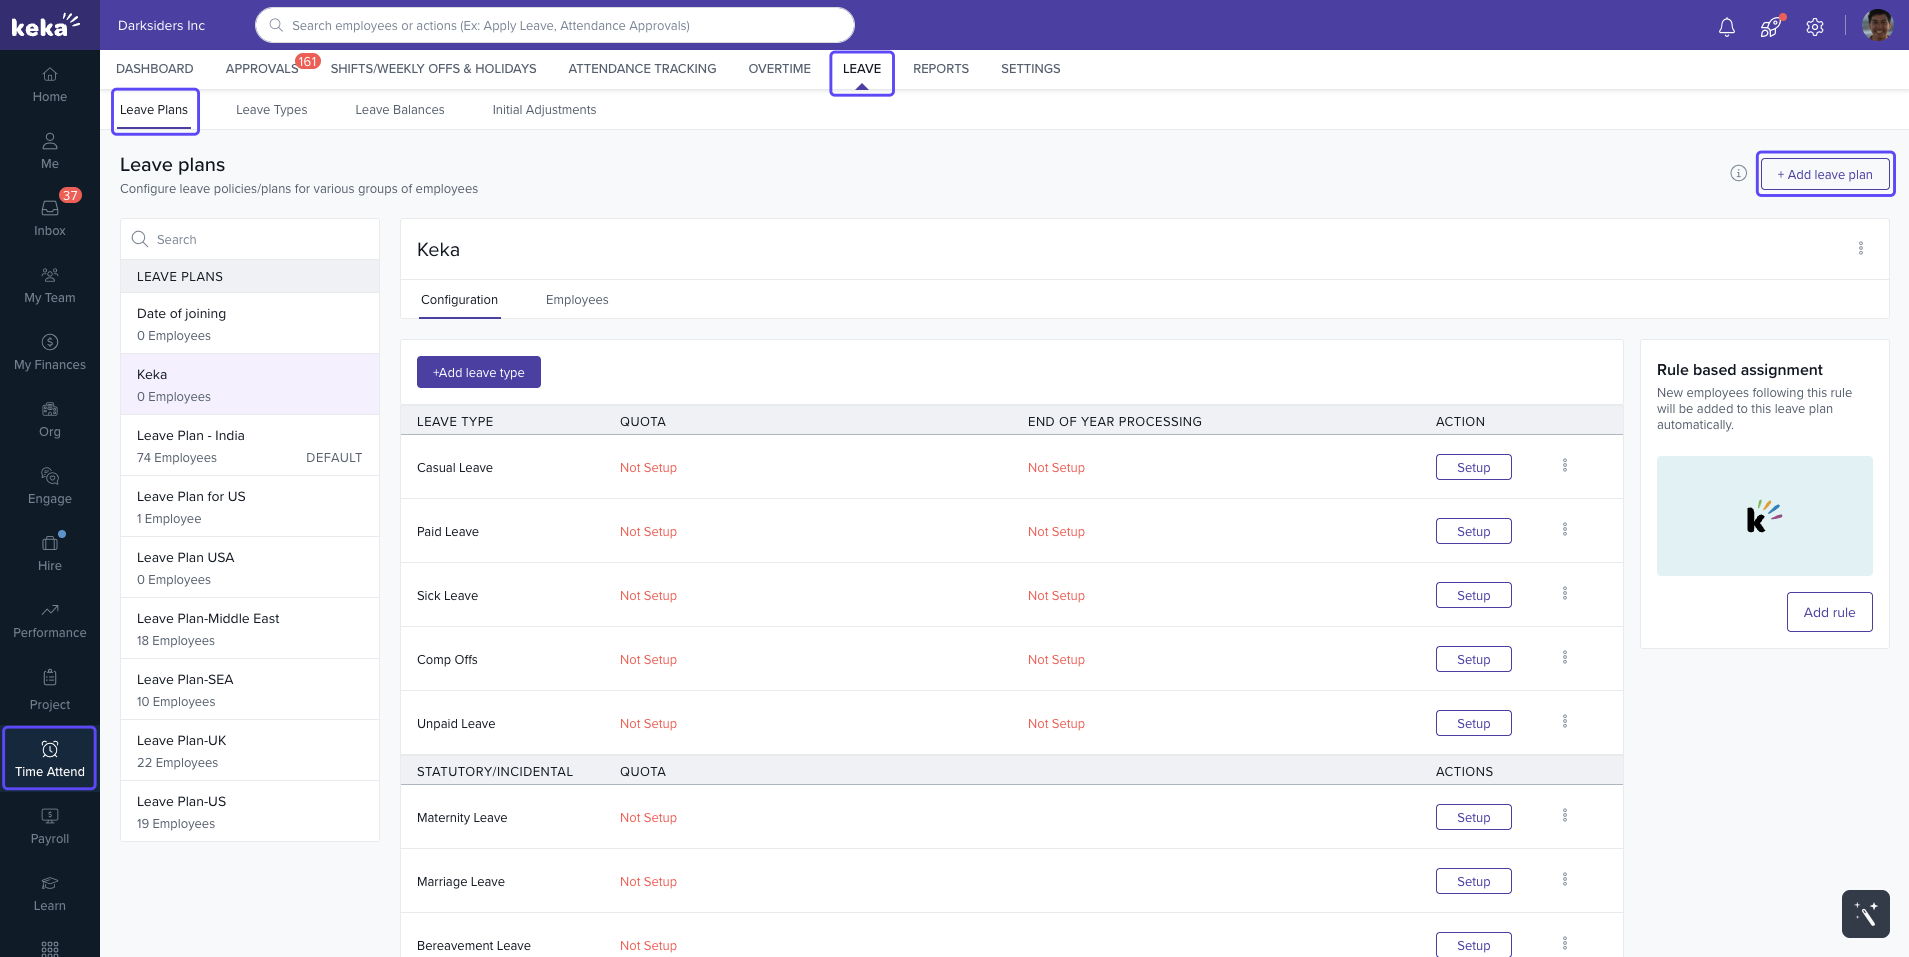
Navigate to the Time Attend section on the left-hand menu of your Keka portal.
Open the Leave section.
Under Leave Plans, click on +Add Leave Plan.
In the pop-up window that appears, follow these steps:
Name the leave plan and add a Description (optional).
Choose the starting month for the leave calendar year (typically January to December, though some organizations may prefer April to March).
Leave Calendar Year: This is the period employees use to accumulate leave. Once set, the calendar year cannot be modified. Choose a period that aligns with your organization’s leave policies.
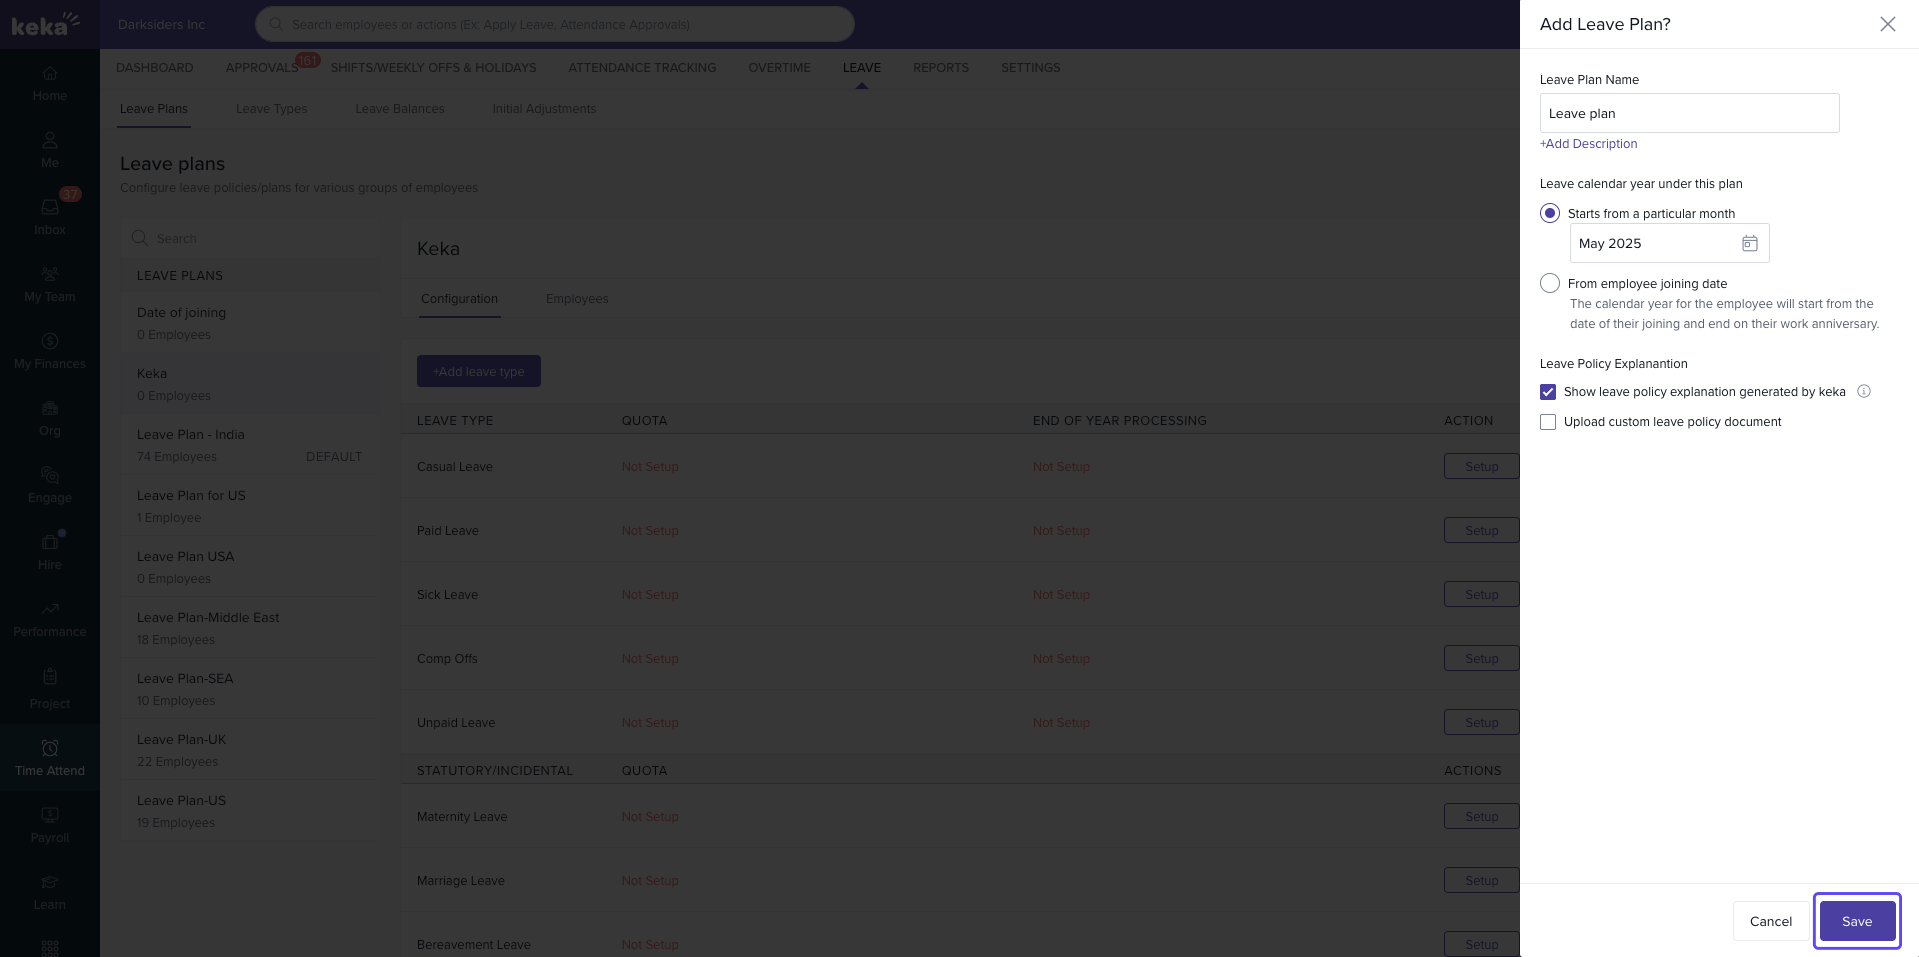
If you grant leave based on the employee's joining date, select the From Employee Joining Date option. This way, each employee’s leave calendar will align with their work anniversary.
In the Leave Policy Explanation section, you have two options:
Upload a custom document to explain the leave policy to your employees.
Let Keka automatically generate the policy document based on the configurations you’ve made.
Once these details are filled out, click Save to create your leave plan.
The Leave Calendar Year is the period employees earn leave, usually from January to December. It can also start from an employee’s joining date. It defines how leave is accrued, and whether unused leave is carried forward, encashed, or lapsed. Once set, it cannot be changed, so choose carefully as per your policy.
2. Adding Leave Types
Once the leave plan is created, the next step is to add leave types that your organization offers. Keka allows you to add several leave types, each with its own specific settings.
Under the Configuration tab, you’ll find options to add the following leave types:
For each leave type, you can define different rules, such as:
How leave is accrued (e.g., based on tenure, monthly, yearly, etc.).
Usage limits and restrictions (e.g., no combining with other leaves).
Application rules (e.g., notice period required, half-day leave allowed).
4. Next Steps After Adding Leave Types
After adding your leave types, you can move forward with customizing the specific rules for each type. Here’s what you need to set up for each leave type:
Accrual Rules: Define how leave is accumulated and when it is awarded (e.g., monthly, yearly).
Usage Rules: Specify the conditions for using the leave (e.g., how many days per month, notice period required).
Eligibility: Configure who qualifies for leave (e.g., based on department, employment type, etc.).
You can also set up other advanced options like the Sandwich Policy for how weekly offs and holidays are treated when they fall within a leave period.
Conclusion
Configuring Leave Plans in Keka HRMS helps ensure that your organization’s leave policies are streamlined, transparent, and fair. By customizing leave types, accrual methods, and approval workflows, you can easily manage leave requests, track usage, and maintain compliance with company policies.
With Keka’s flexibility, you can create leave plans tailored to specific departments, employee roles, and organizational needs.
If you found this article helpful, let us know, or reach out to our support team for any further assistance.
Comments
0 comments
Please sign in to leave a comment.