Introduction
The Regular Leave type in Keka HRMS provides the flexibility to manage various types of leave, such as casual leave, annual leave, or even custom organization-specific leave types. Whether your organization has a standard leave policy or requires specific configurations, Keka's leave management system offers comprehensive options for tailoring these policies to meet your needs.
This article will walk you through the steps to configure Regular Leave in Keka HRMS, from defining accrual rules to setting up approval workflows.
1.Setting up Regular Leave Type
To configure the Regular Leave type in Keka, follow these steps:
Navigate to Leave Management → Leave Plans → Add Leave Type → Assign Leave Types to Keka → Choose required Leave types.
Choose Regular Leave as the leave type to configure.
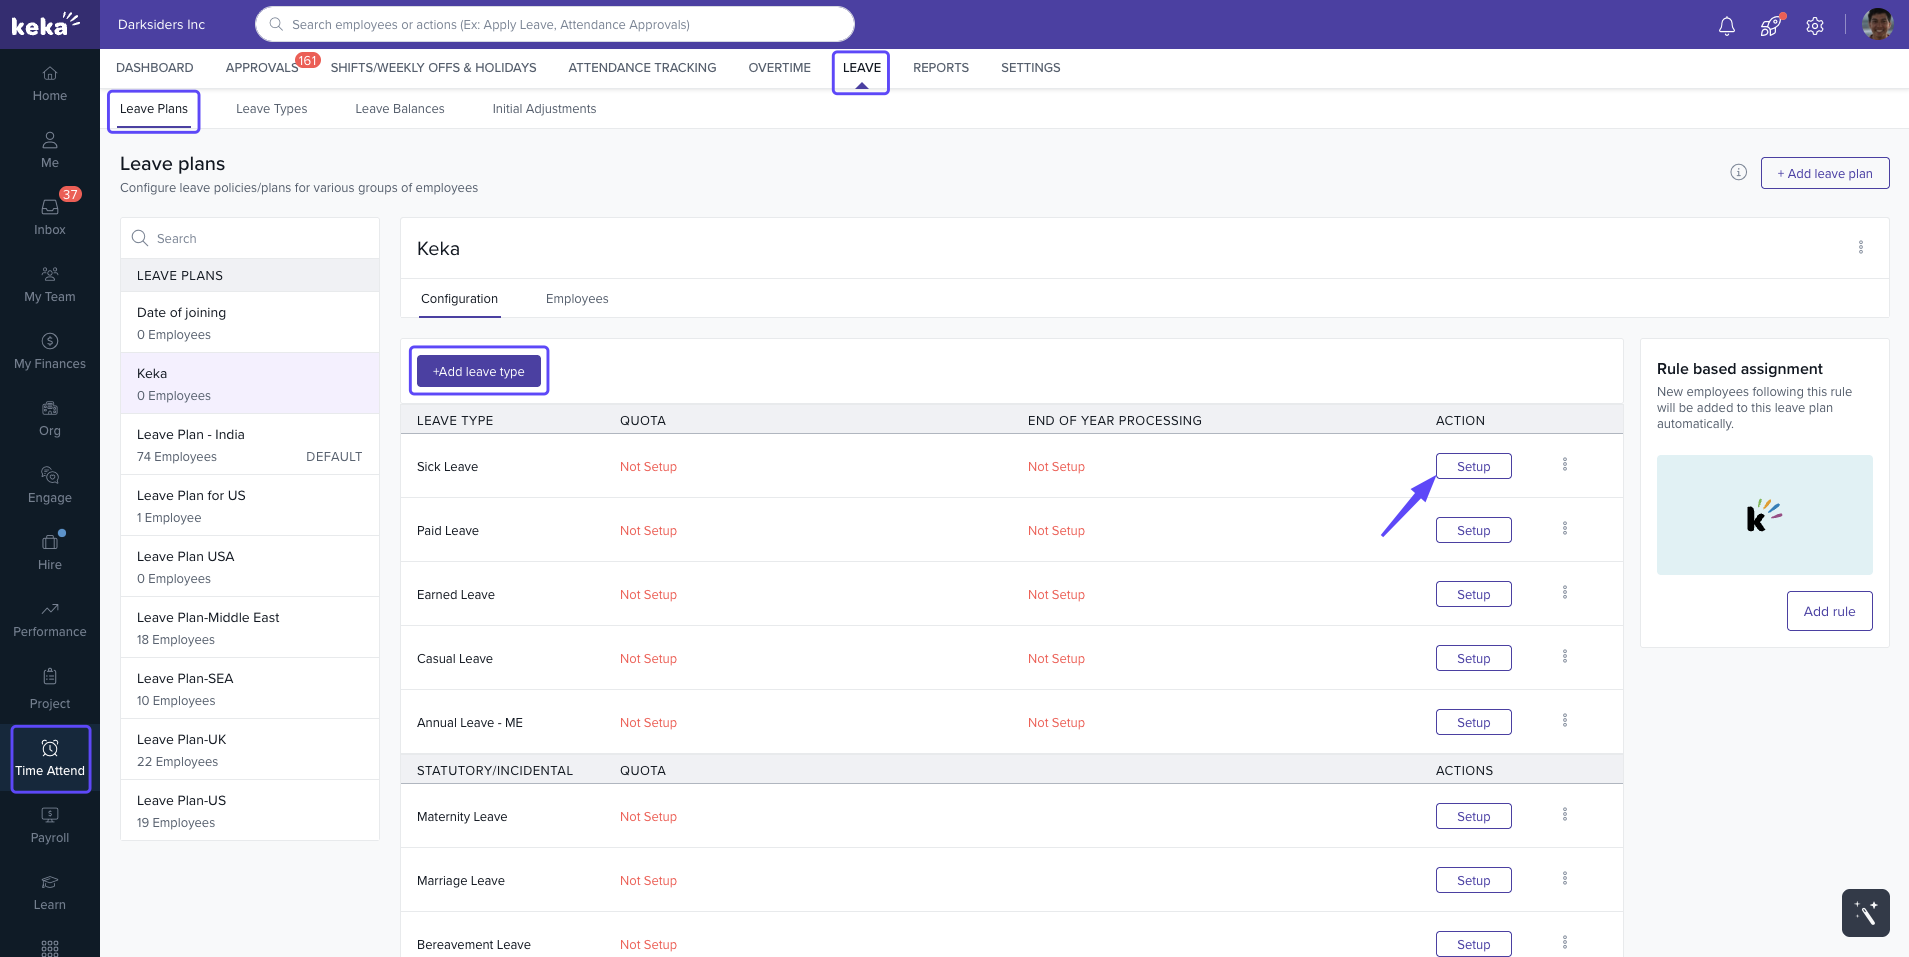
The configuration involves the following sections: Accrual, Leave Application, Approval, Probation, Notice Period, and Year-End Processing.
2. Accrual
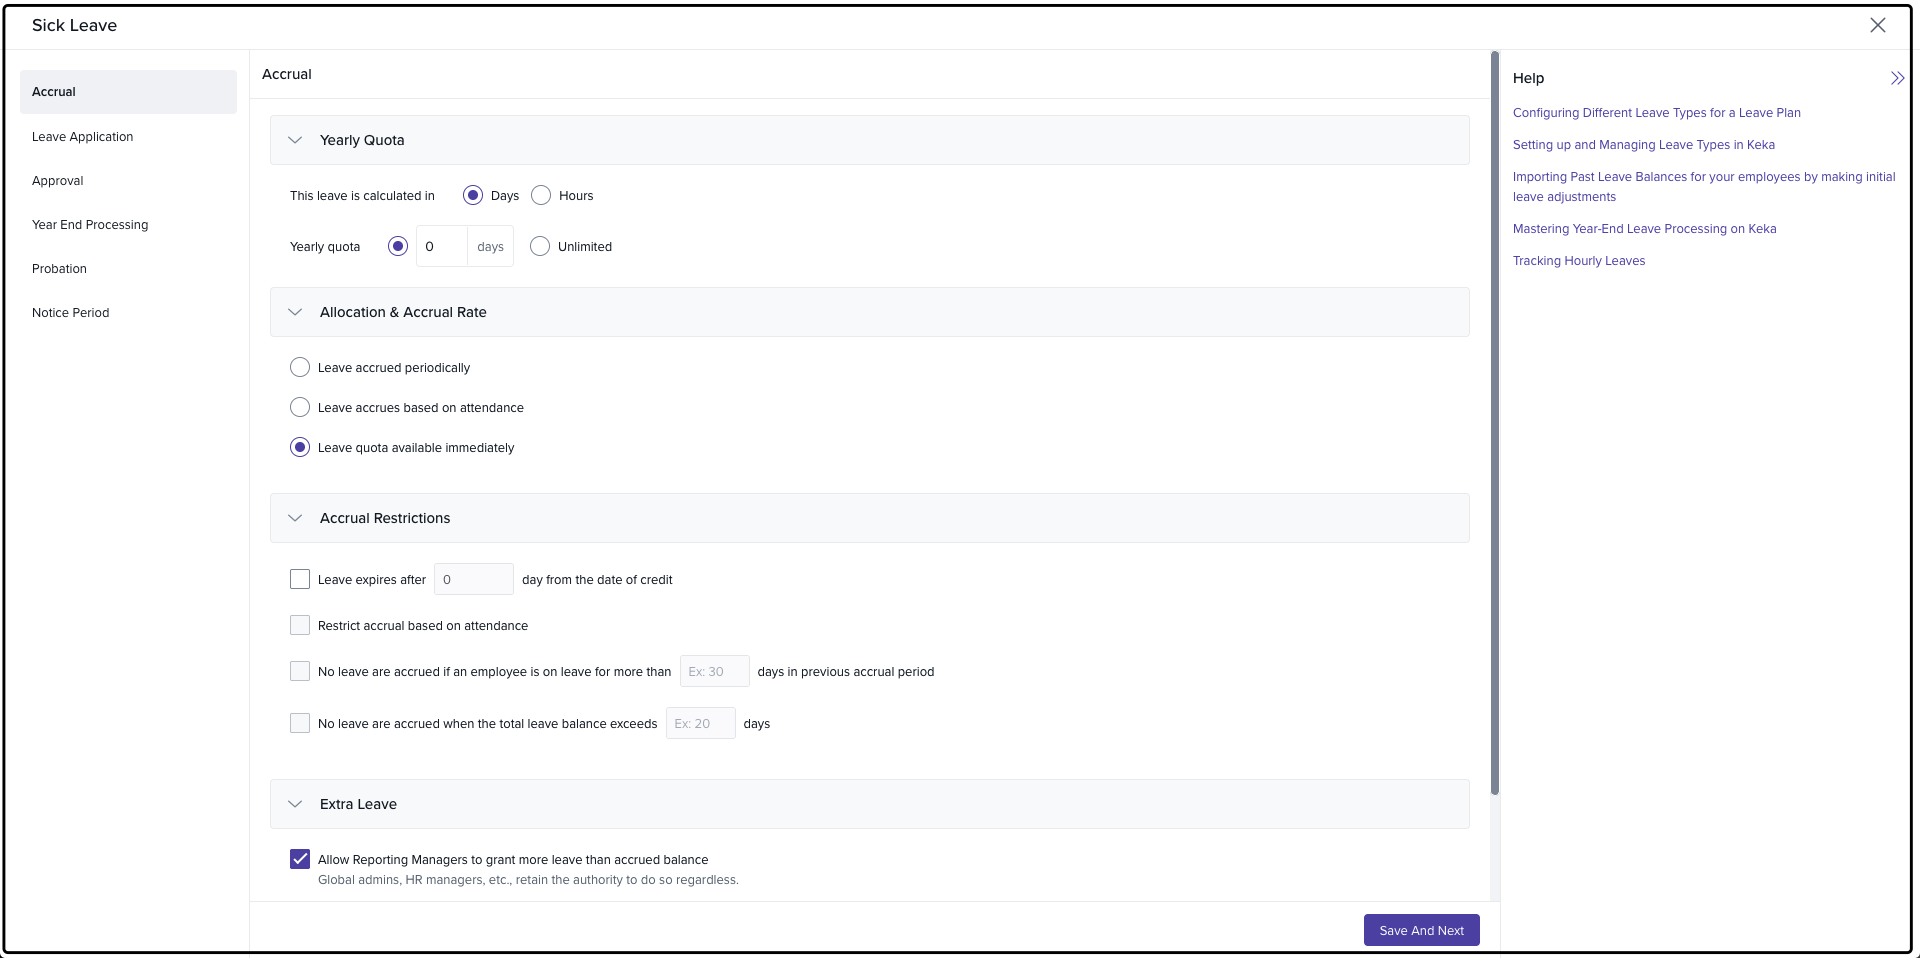
In this section, you define the rules for how leave is accrued over time.
a) Yearly Quota
Choose whether leave should be calculated in Days or Hours.
You can set a specific number of days as the yearly quota or opt for Unlimited leave.
b) Allocation & Accrual Rate
Leave Accrued Periodically: Choose whether leave should accrue monthly, quarterly, semi-annually, or annually.
Accrual Day: Select a specific day of the month for accrual (e.g., on the X day of the month).
Leave Quota Available Immediately: Enable this if you want the full leave quota available from the start.
c) Accrual Restrictions
Expiry: Set a rule for when leave expires after being credited (e.g., expires after X days).
Attendance-Based Restrictions: Define rules like no leave accrual if the employee was on leave for more than X days in the previous month.
Exceeding Balance: Prevent accrual when the leave balance exceeds a set limit.
Leave will not accrue if the employee is on probation
d) Extra Leave
Allow managers to grant more leave than accrued balance.
-
Define the number of extra days employees can take beyond their leave balance, with options for:
Within yearly quota: Restrict extra leave to the annual quota.
Beyond yearly quota: Decide how to handle negative balances at year-end (e.g., nullify or reset to zero).
Click Save and Next to continue.
3. Leave Application
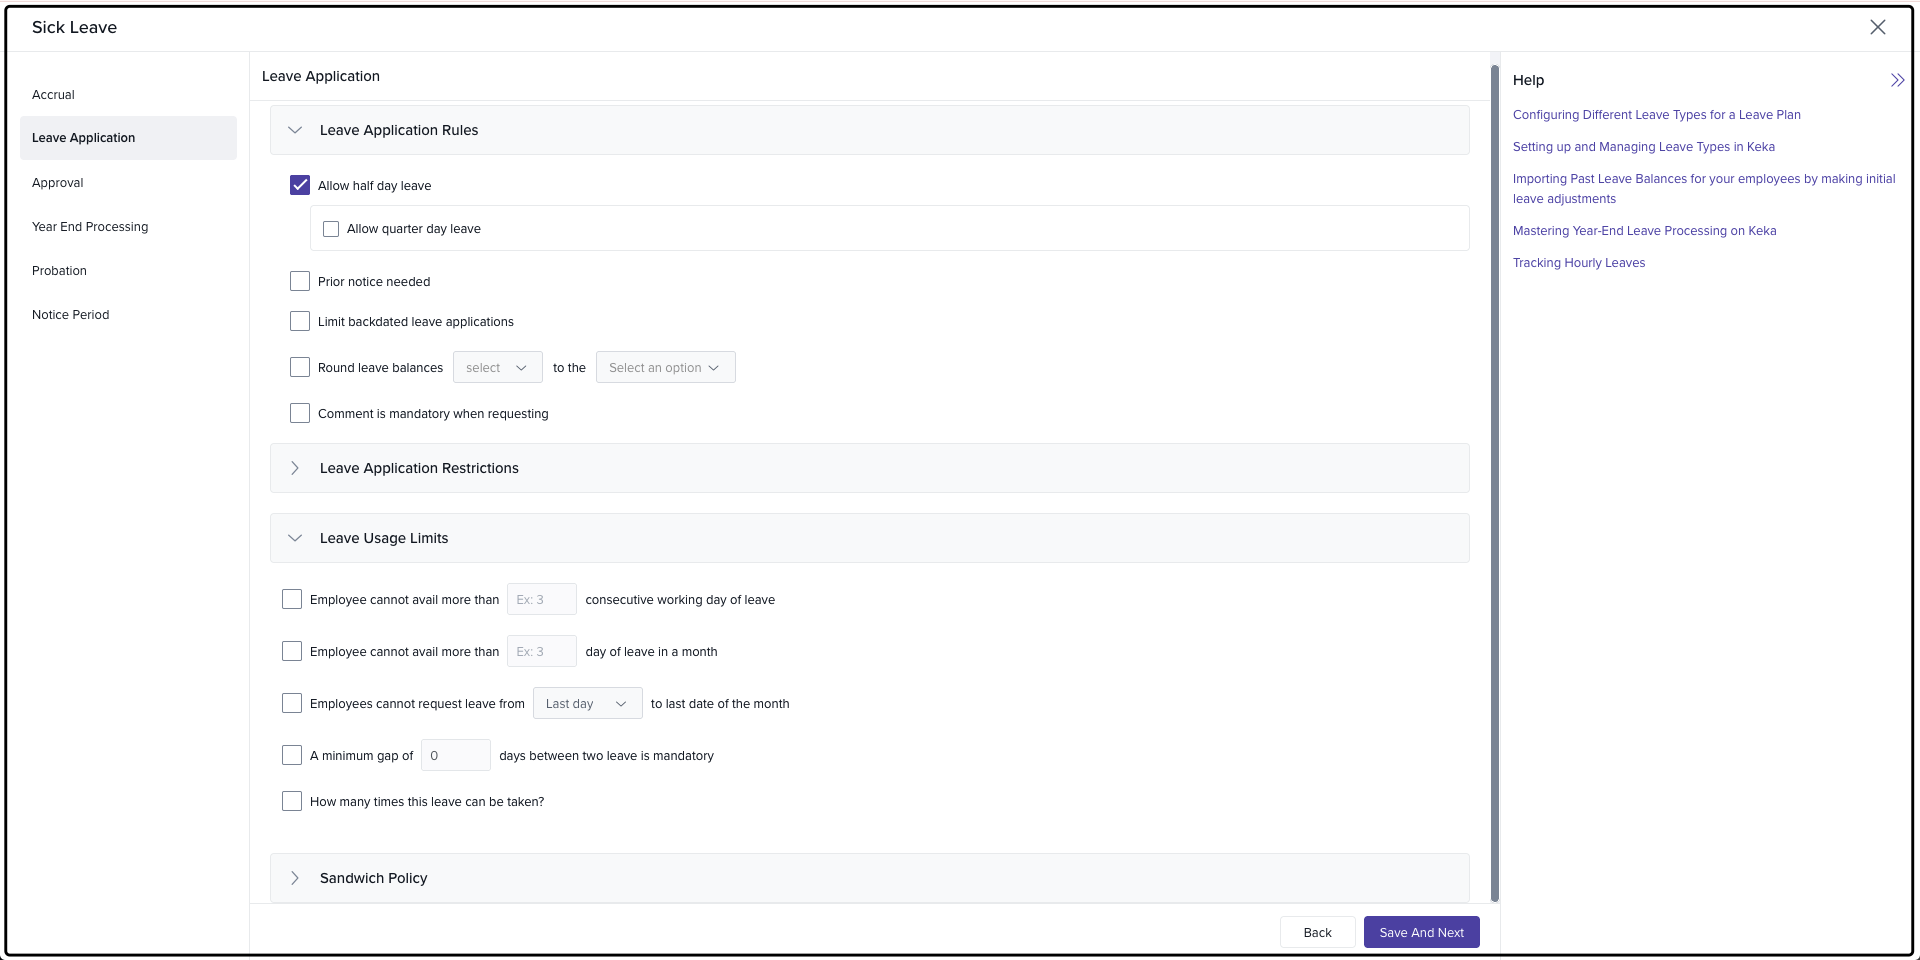
This section defines how employees can apply for Regular Leave, including application rules and restrictions.
a) Leave Application Rules
Half-Day & Quarter-Day Leave: Enable these options if employees can apply for leave in smaller increments.
Prior Notice: Set the required notice period for leave applications.
Backdated Leave: Restrict employees from applying for leave after a set number of days following the leave date.
Comment Required: Make comments mandatory for leave requests.
Joining Date Rule: Prevent leave from being awarded if an employee joins after a specific day of the month.
b) Leave Application Restrictions
Self-Application: Restrict employees from applying for leave on their own (admins or managers must apply).
Attachment Requirement: Attachments can be mandatory for leave requests exceeding a specific number of days.
Leave Combination Restrictions: Restrict combining Regular Leave with other leave types.
Future Accrual: Prevent leave requests based on expected future accruals.
c) Leave Usage Limits
Maximum Consecutive Days: Set a cap on the number of consecutive leave days an employee can take.
Monthly Leave Limit: Define the maximum number of leave days an employee can take in a month.
Mandatory Gap Between Leaves: Set a minimum gap between two leave requests.
d) Sandwich Policy
Weekly Off Considered as Part of Leave: Enable and define when weekly offs should be considered as part of the leave (e.g., leave before, after, or between two days).
Holiday Considered as Part of Leave: Define when holidays should count as part of the leave.
Club Sandwich Policy Across Leave Types: Enable this option to apply the Sandwich Policy across various leave types, not just Regular Leave.
Click Save and Next to continue.
4. Approval
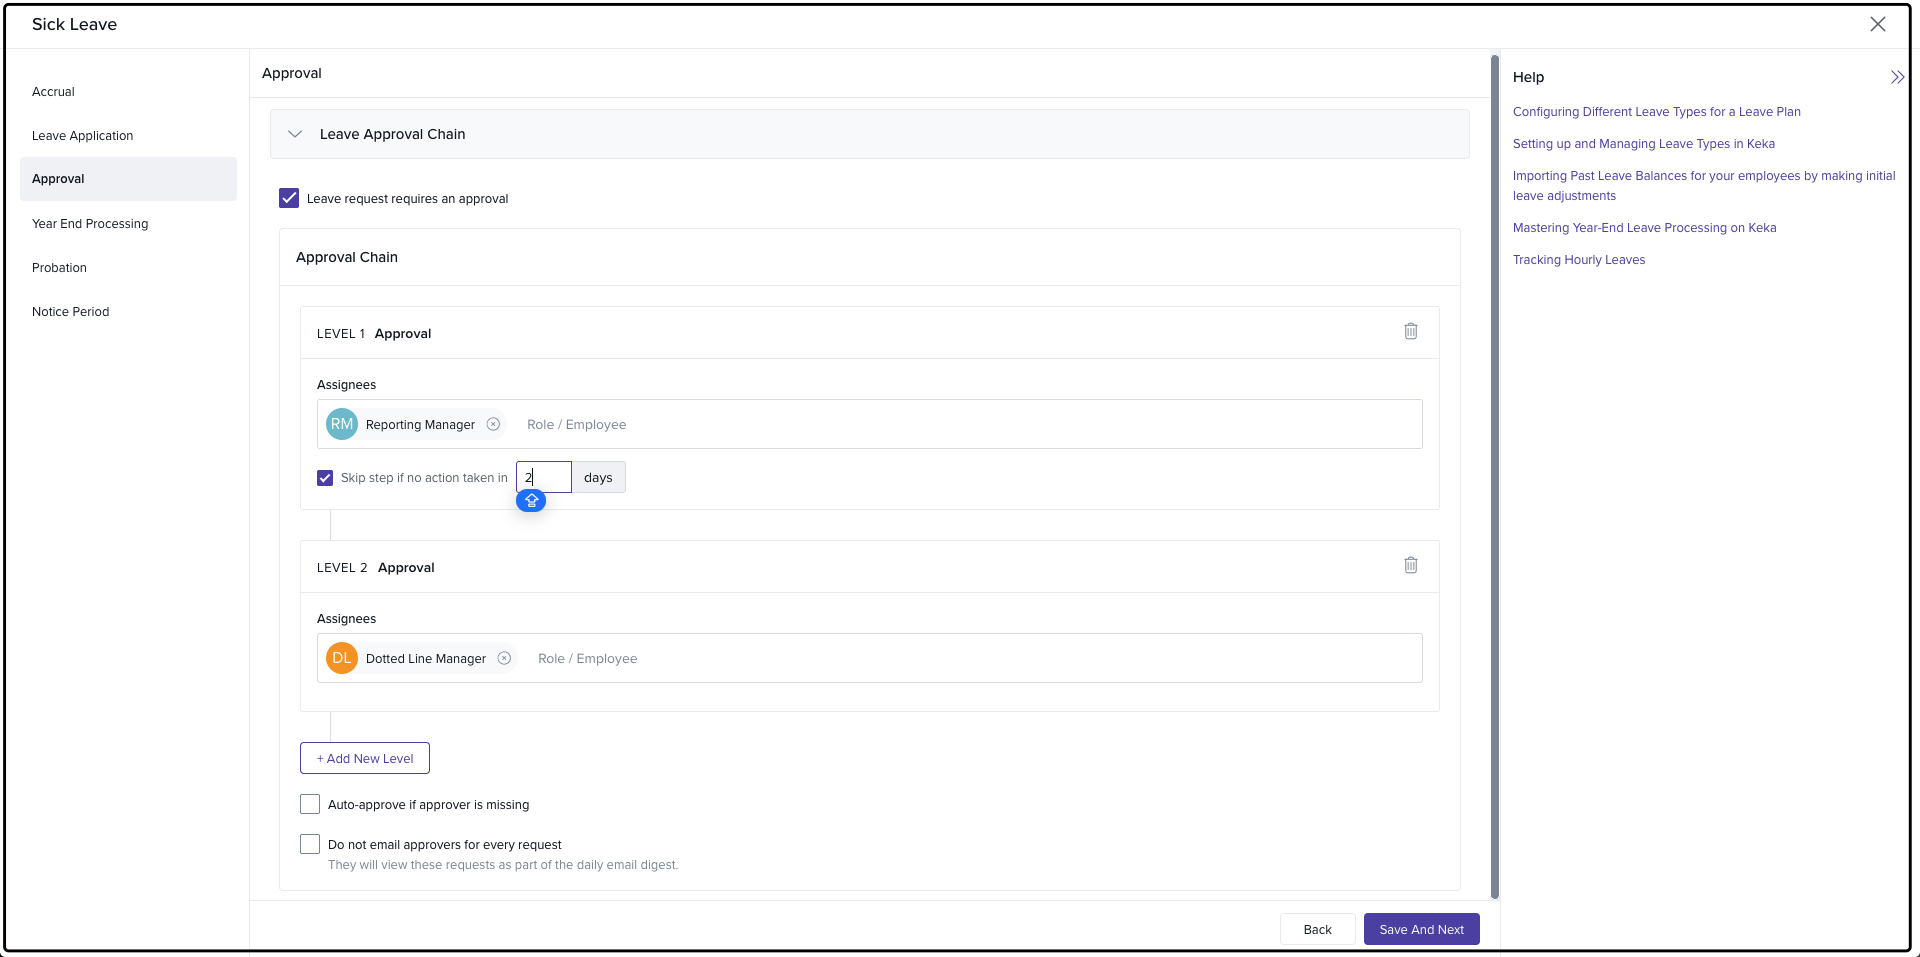
In this section, you configure the leave approval process for Regular Leave requests.
Approval Chain: Set up multiple levels of approval, defining who is responsible for approving leave requests.
Auto-Approval: Enable this option if leave requests should be automatically approved when the approver is unavailable.
Email Digest: Reduce email clutter by sending a summary email digest to approvers instead of individual notifications.
Click Save and Next to continue.
5. Year-End Processing
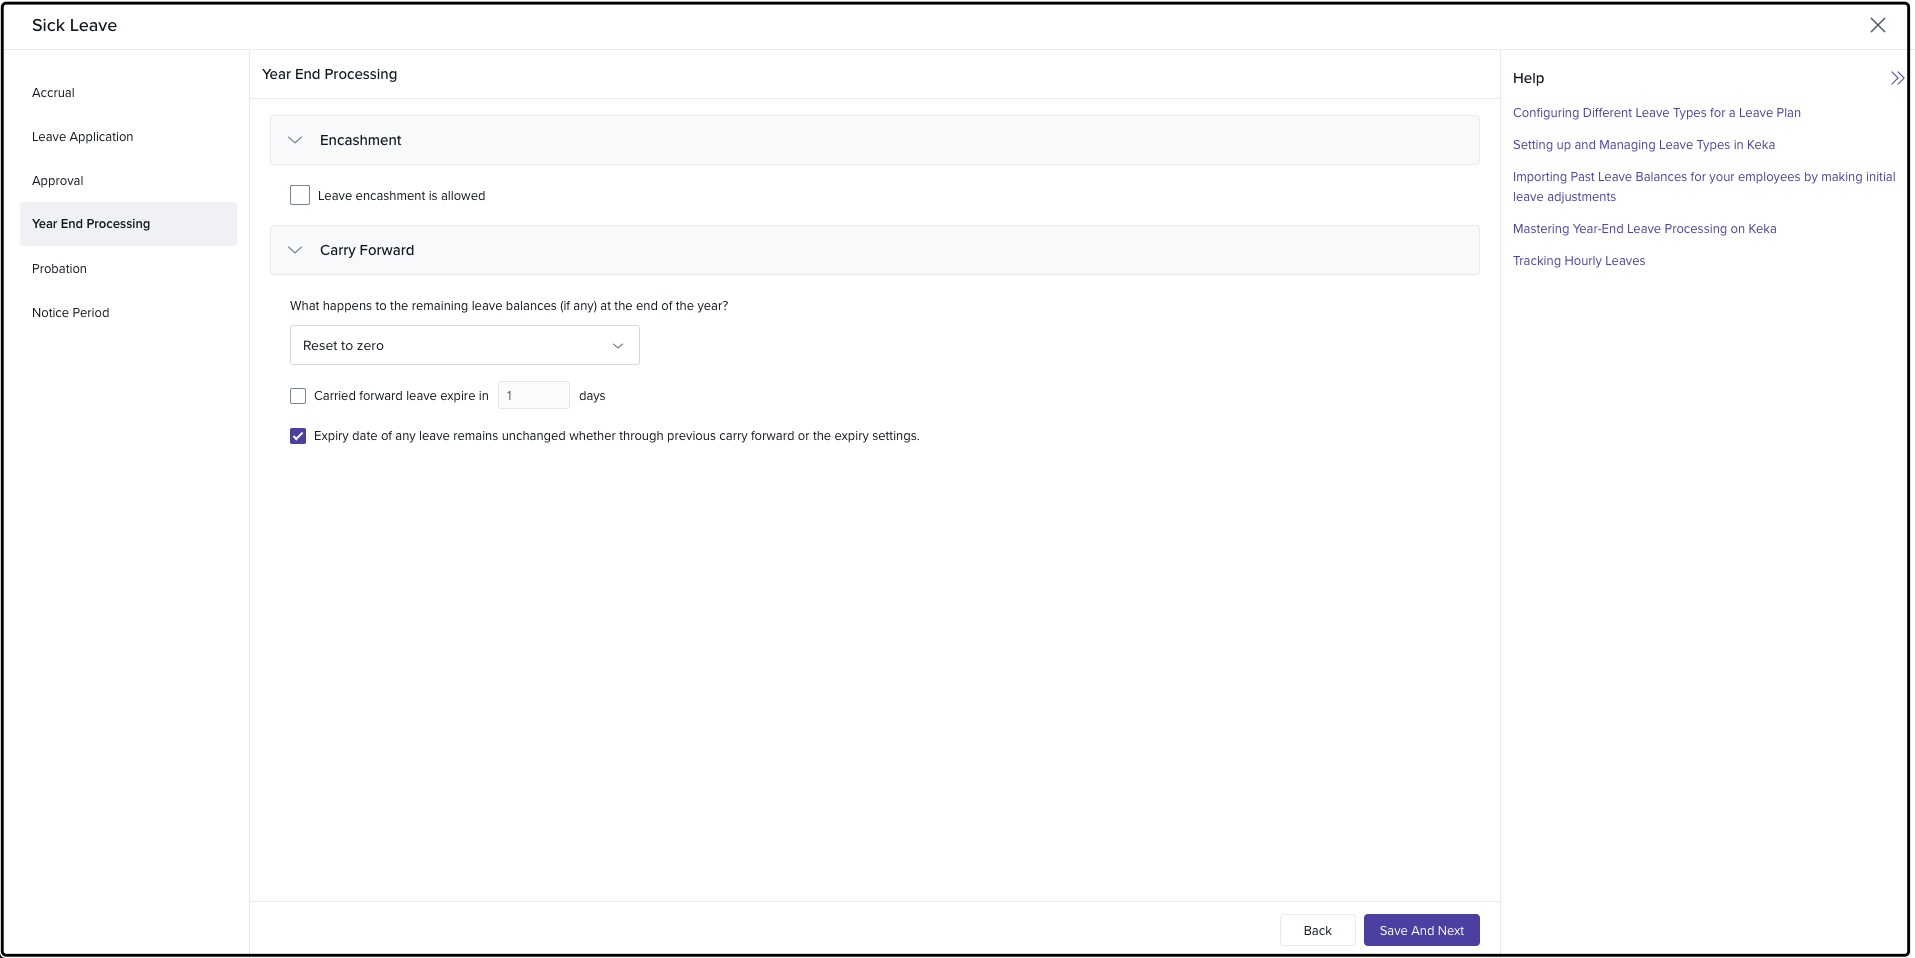
This section allows you to manage how leave balances are handled at the end of the year.
a) Leave Encashment
Enable Leave Encashment for unused leave balances.
Set the frequency and deadline for encashment requests.
Define whether managers can submit encashment requests on behalf of employees.
b) Carry Forward
Set the carry forward options (e.g., reset, carry forward, pay out).
Define how remaining leave balances are managed (carry forward, expire, or pay out).
Click Save and Close to finalize your configuration.
6. Probation
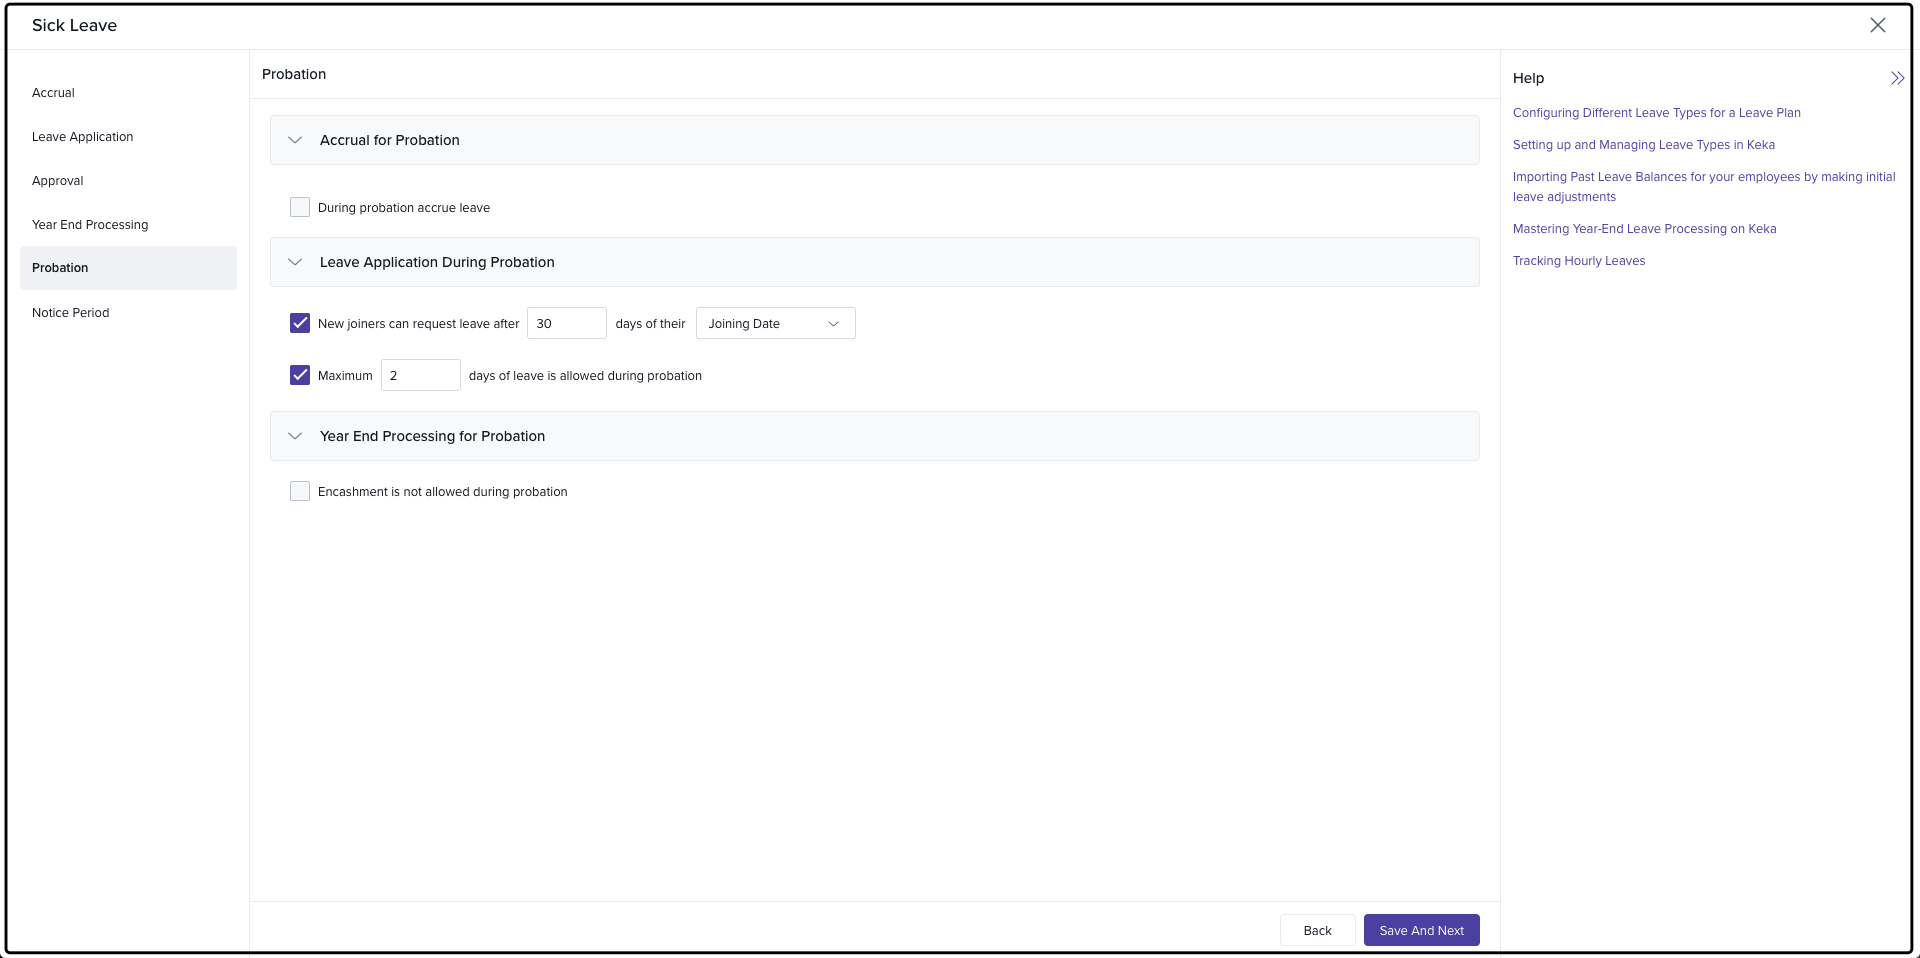
Configure how leave accrues and is used during the probation period.
a) Accrual for Probation
Enable prorated leave for the first month.
Set the start date for accrual to begin immediately or after a defined period.
Define how leave is accrued during probation (e.g., monthly accrual).
b) Leave Application for Probation
Set the rules for when new employees can start applying for leave during probation.
Define the maximum number of leave days allowed during probation.
c) Year-End Processing for Probation
Enable leave encashment for probationary employees at the year-end.
7. Notice Period
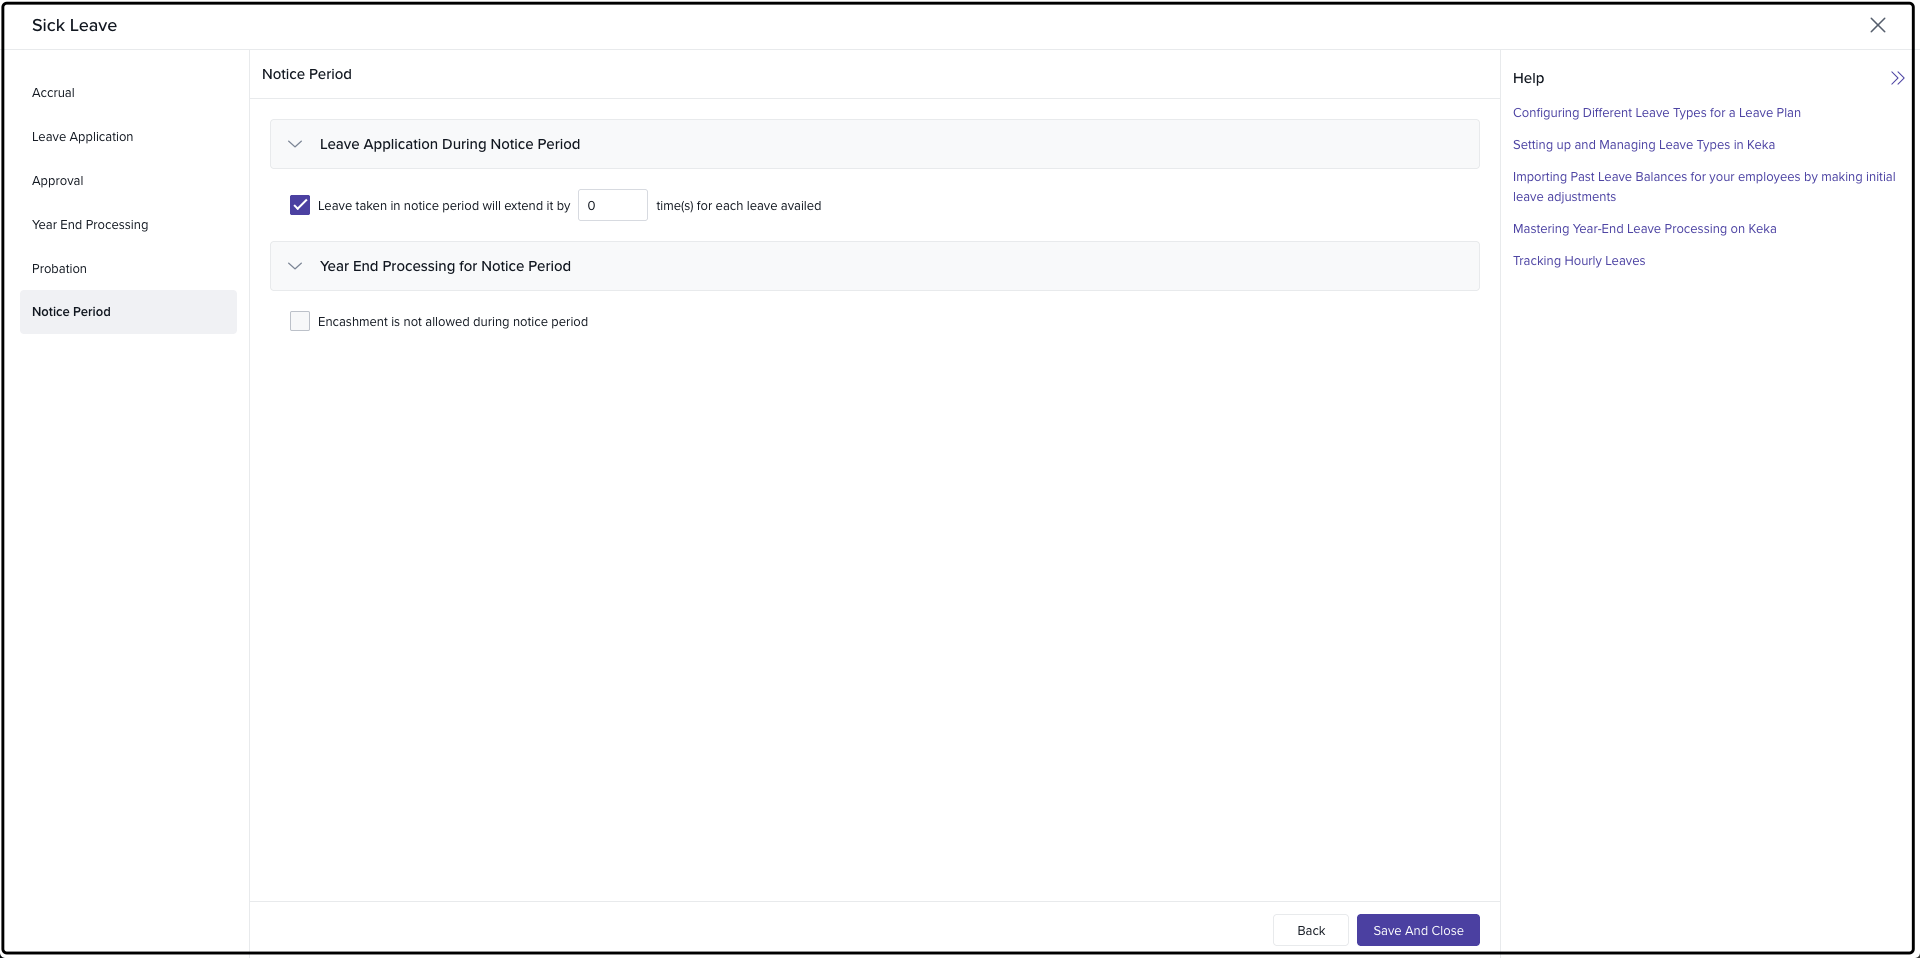
Configure leave settings for employees during their notice period.
a) Accrual for Notice Period
Enable prorated leave based on the exit date.
Define how leave is accrued during the notice period.
b) Leave Application for Notice Period
Set the rules for how leave during the notice period impacts the duration of the notice period.
c) Year-End Processing for Notice Period
Enable leave encashment for employees during their notice period.
Click Save and Close to finalize the configuration.
Conclusion
By configuring Regular Leave in Keka, you can effectively manage standard leave types like casual, annual, or organization-specific leave, all while maintaining flexibility in how leave is accrued and used. This comprehensive setup ensures that your organization can handle leave requests efficiently and in line with company policies.
For further assistance or any questions, feel free to reach out to Keka support or browse through our other helpful articles.
Comments
0 comments
Please sign in to leave a comment.