Overview
In this article, you’ll learn how to create and apply credit notes in Keka PSA. Credit notes help resolve overpayments, billing errors, and client disputes by adjusting the invoice amount or carrying forward the excess amount to future invoices.
Who Can Do This?
- PSA Admins
- Finance Admins
- Global Admins
- Client managers
Pre-requisites
- Invoices must be created in the system
- Clients must exist in your PSA setup
- Credit Note settings should be configured in billing entity settings under finances
What Are Credit Notes?
A credit note is a document issued to reduce the value of an invoice due to overpayment, service adjustments, or billing corrections.
Use cases include:
- Overpayment adjustments
- Correction of invoice errors
- Compensation for service dissatisfaction or project scope changes
Example: If a client pays ₹10,000 for an invoice worth ₹9,000, a credit note of ₹1,000 can be raised and applied to the client’s next invoice.
Benefits of Credit Notes
- Error Resolution: Fix billing issues without processing refunds
- Improved Client Relations: Keep billing transparent and professional
- Efficient Account Management: Track and apply outstanding credits with ease
Step-by-Step Instructions
Create a Credit Note
- Go to the Projects section.
- Click on the Finances tab.
- Navigate to Invoices > Credit Note.
- Click Raise Credit Note.

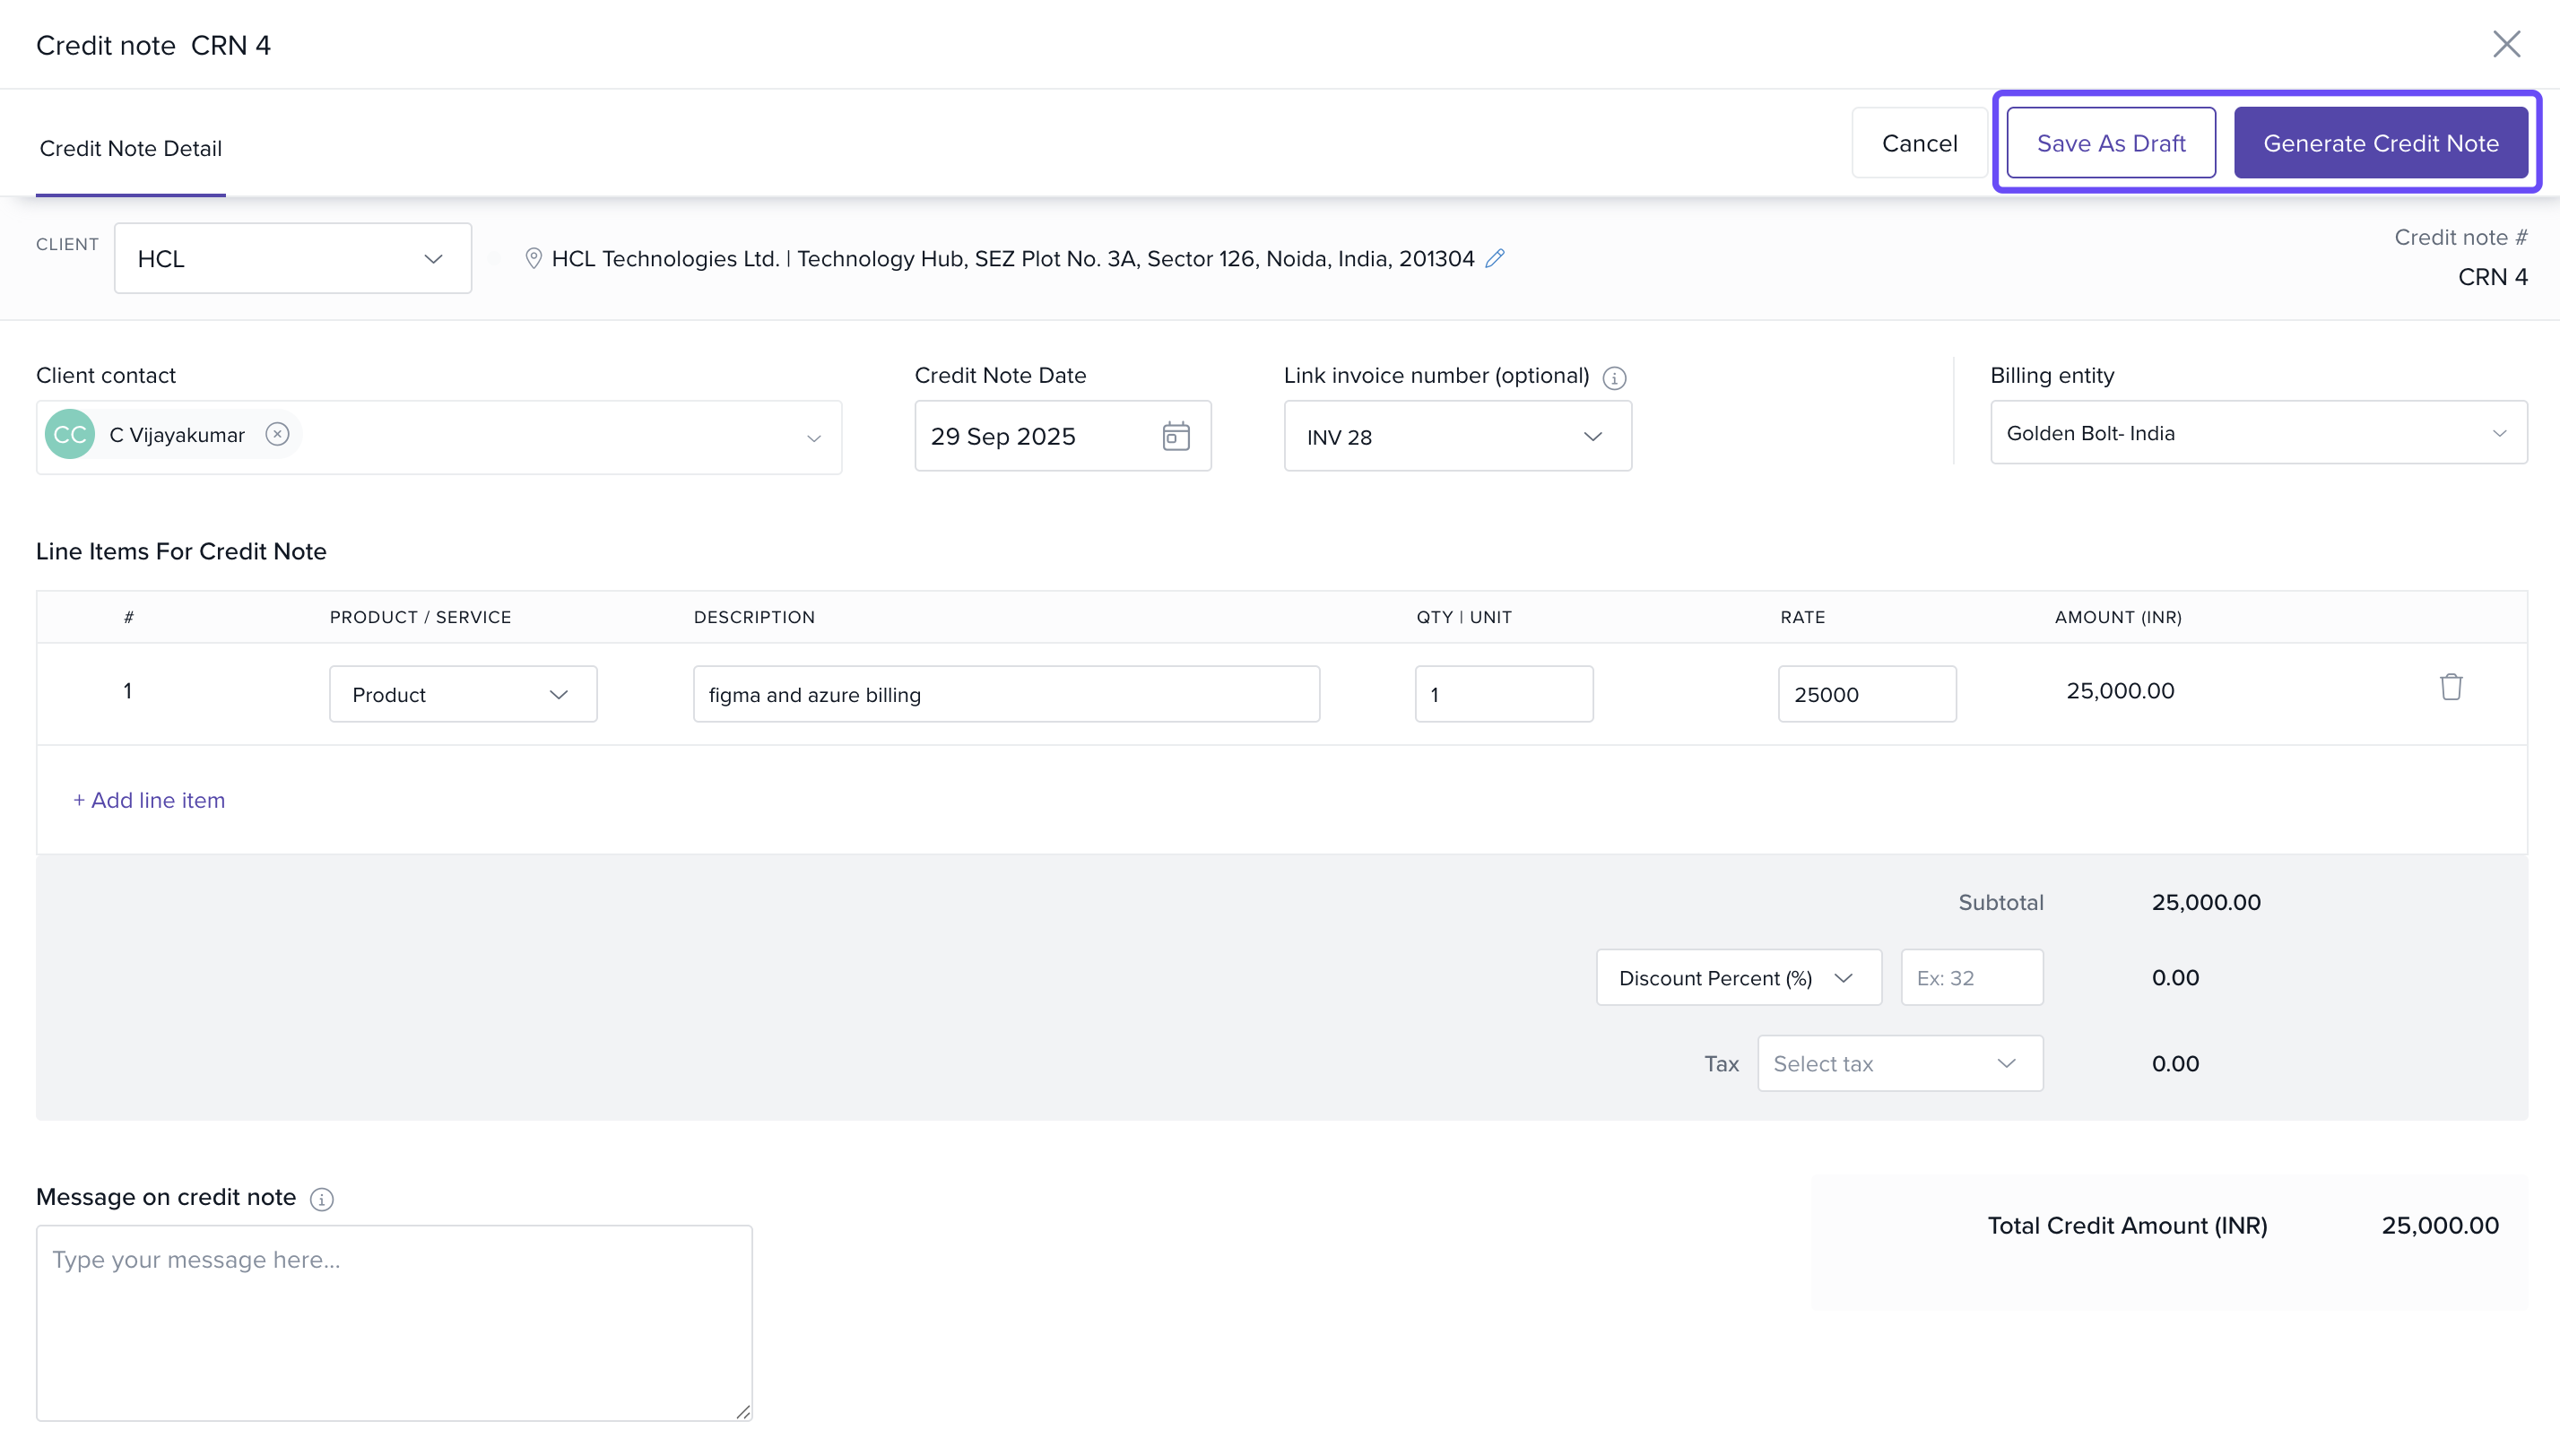
Fill in Credit Note Details
- Select Client: Choose the relevant client.
- Link to Invoice: Select the invoice and line item the credit applies to.
- Enter Details: Add the service/product name, description, quantity, and amount.
Save or Generate the Credit Note
- Click Save As Draft to store it for future use.
- Click Generate Credit Note to issue it immediately.
Apply a Credit Note to an Invoice
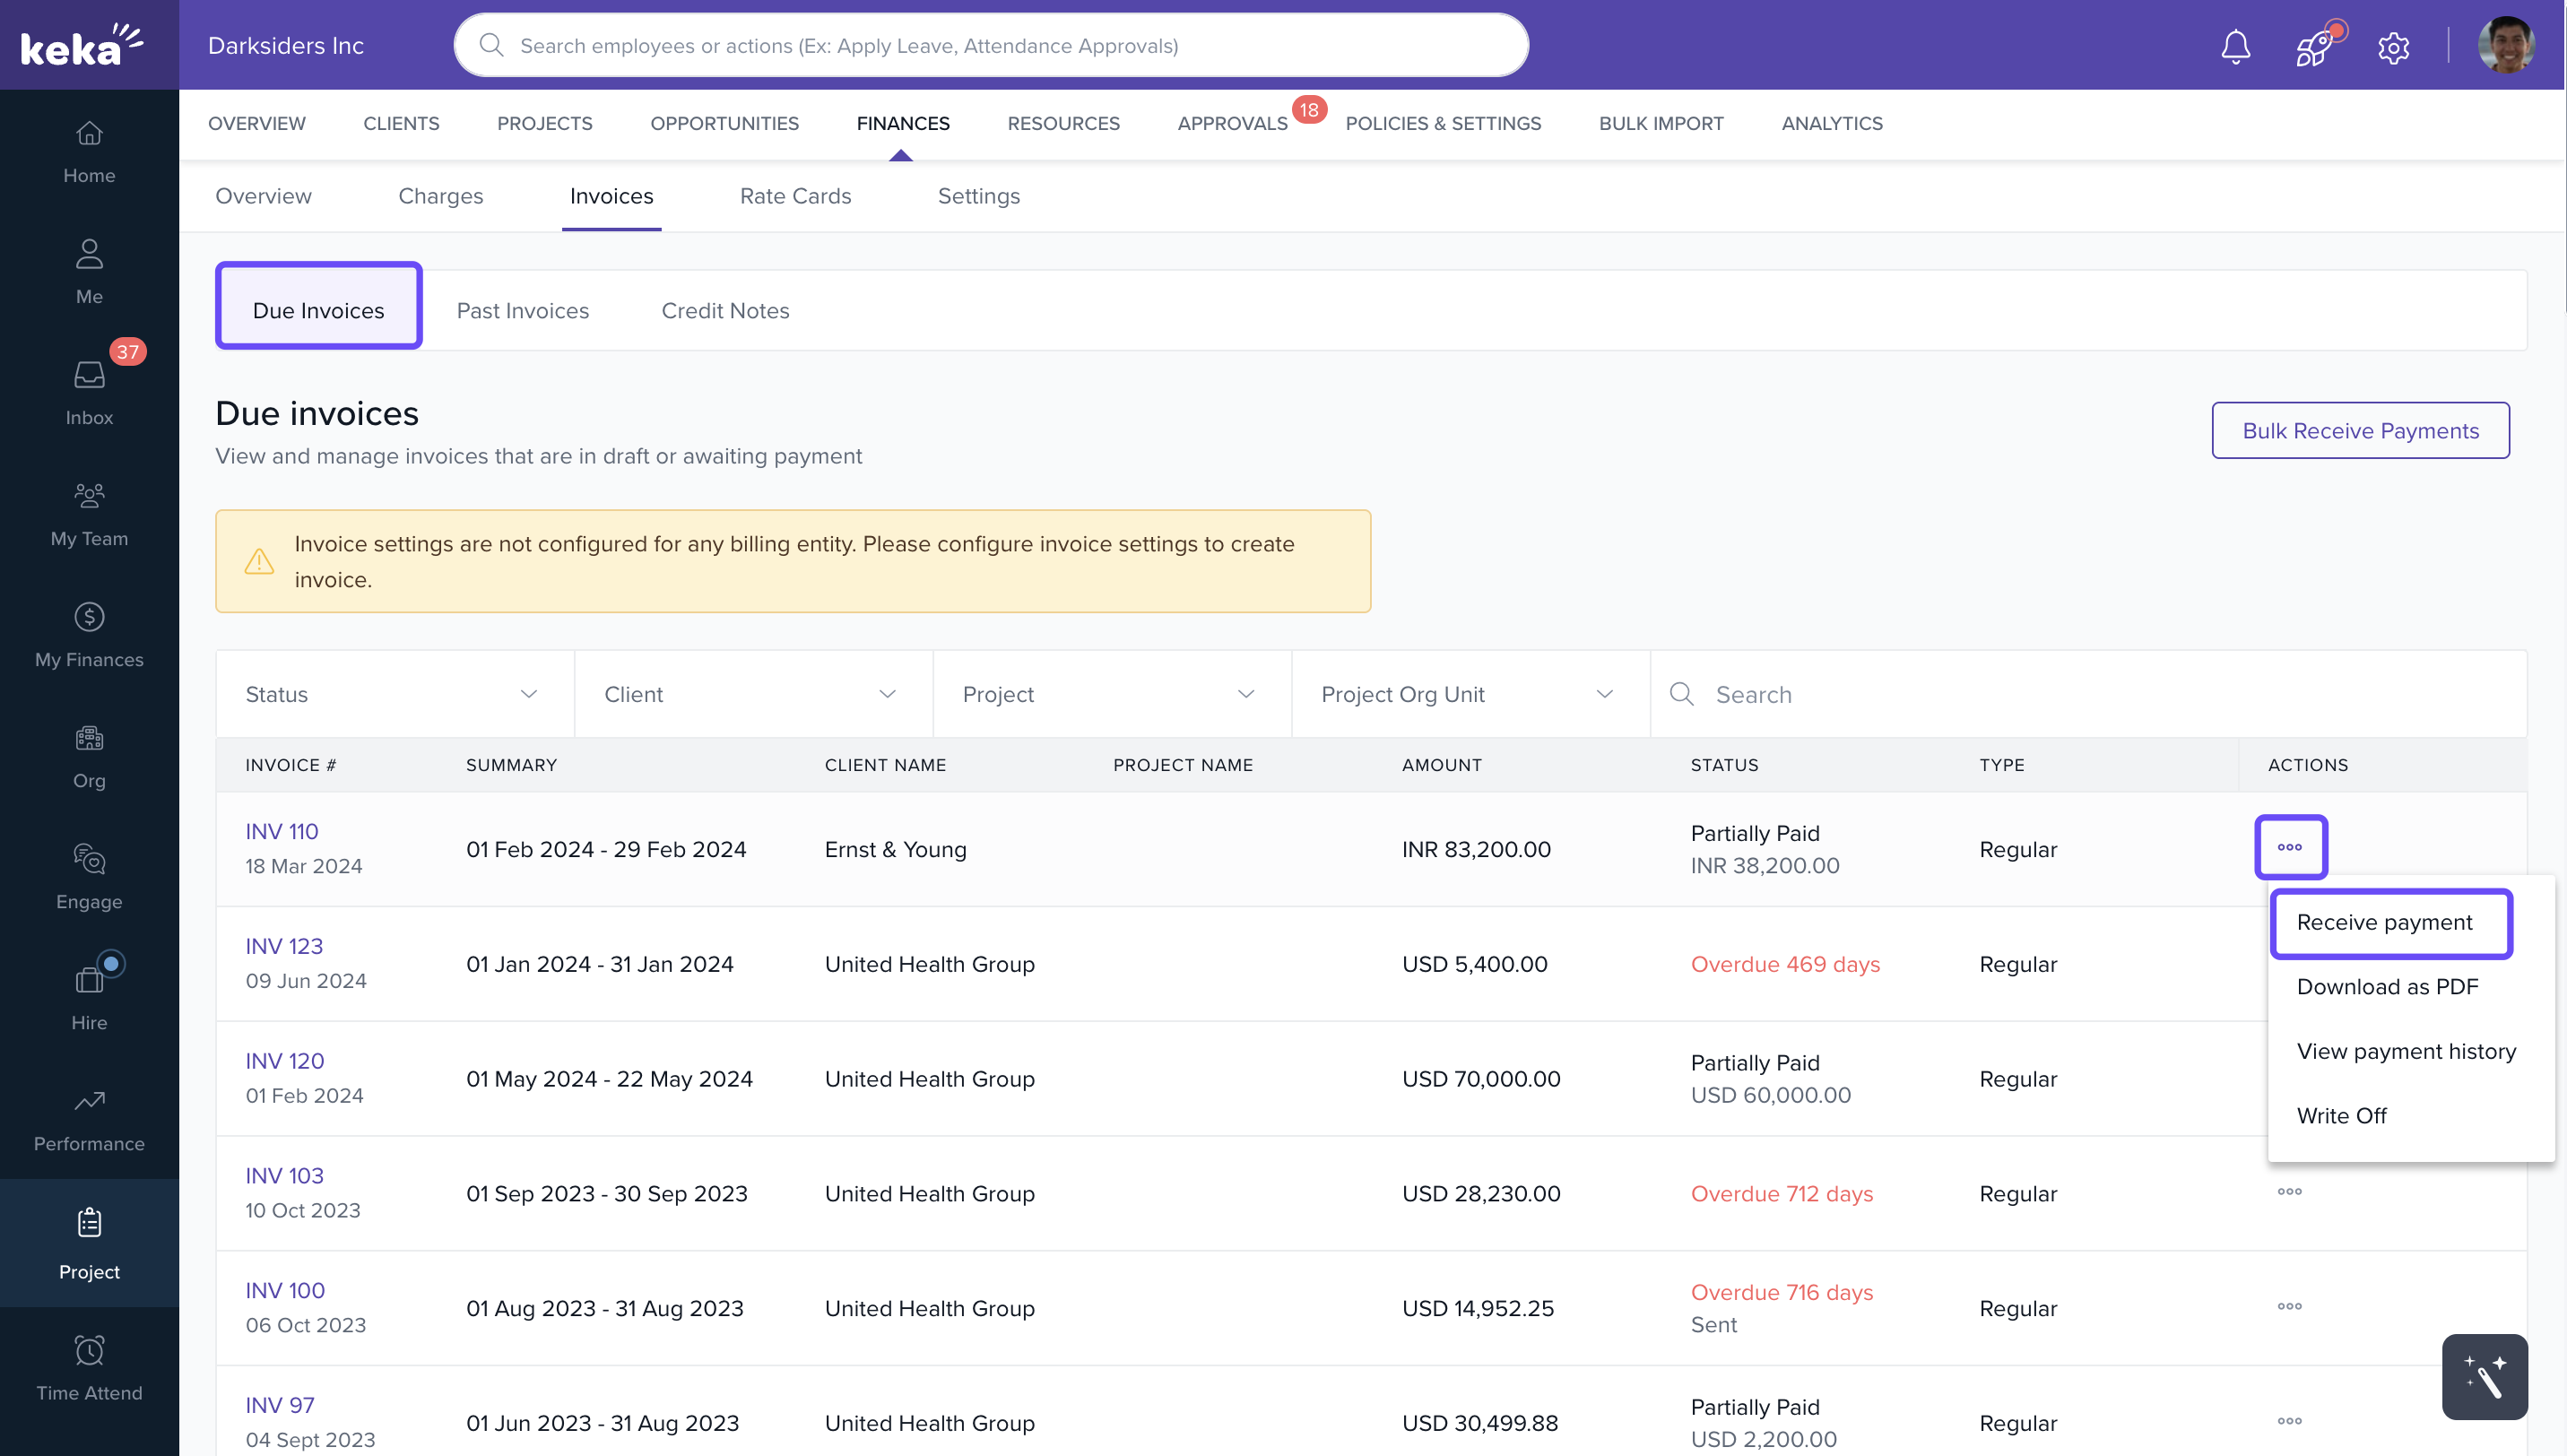
- Locate the Invoice: Go to Projects > Finances > Invoices > Due Invoices and find the invoice to which you want to apply the credit note.
- Open Receive Payments: Click the three-dot menu next to the invoice and select Receive Payments.
- Enter Payment and Credit Details: In the Receive Payment window, check the box for Apply Credits to This Invoice. Enter the Credit Amount, Payment Date, Mode, Reference Number, and Amount Received. Click Add to apply the credit and record the payment.
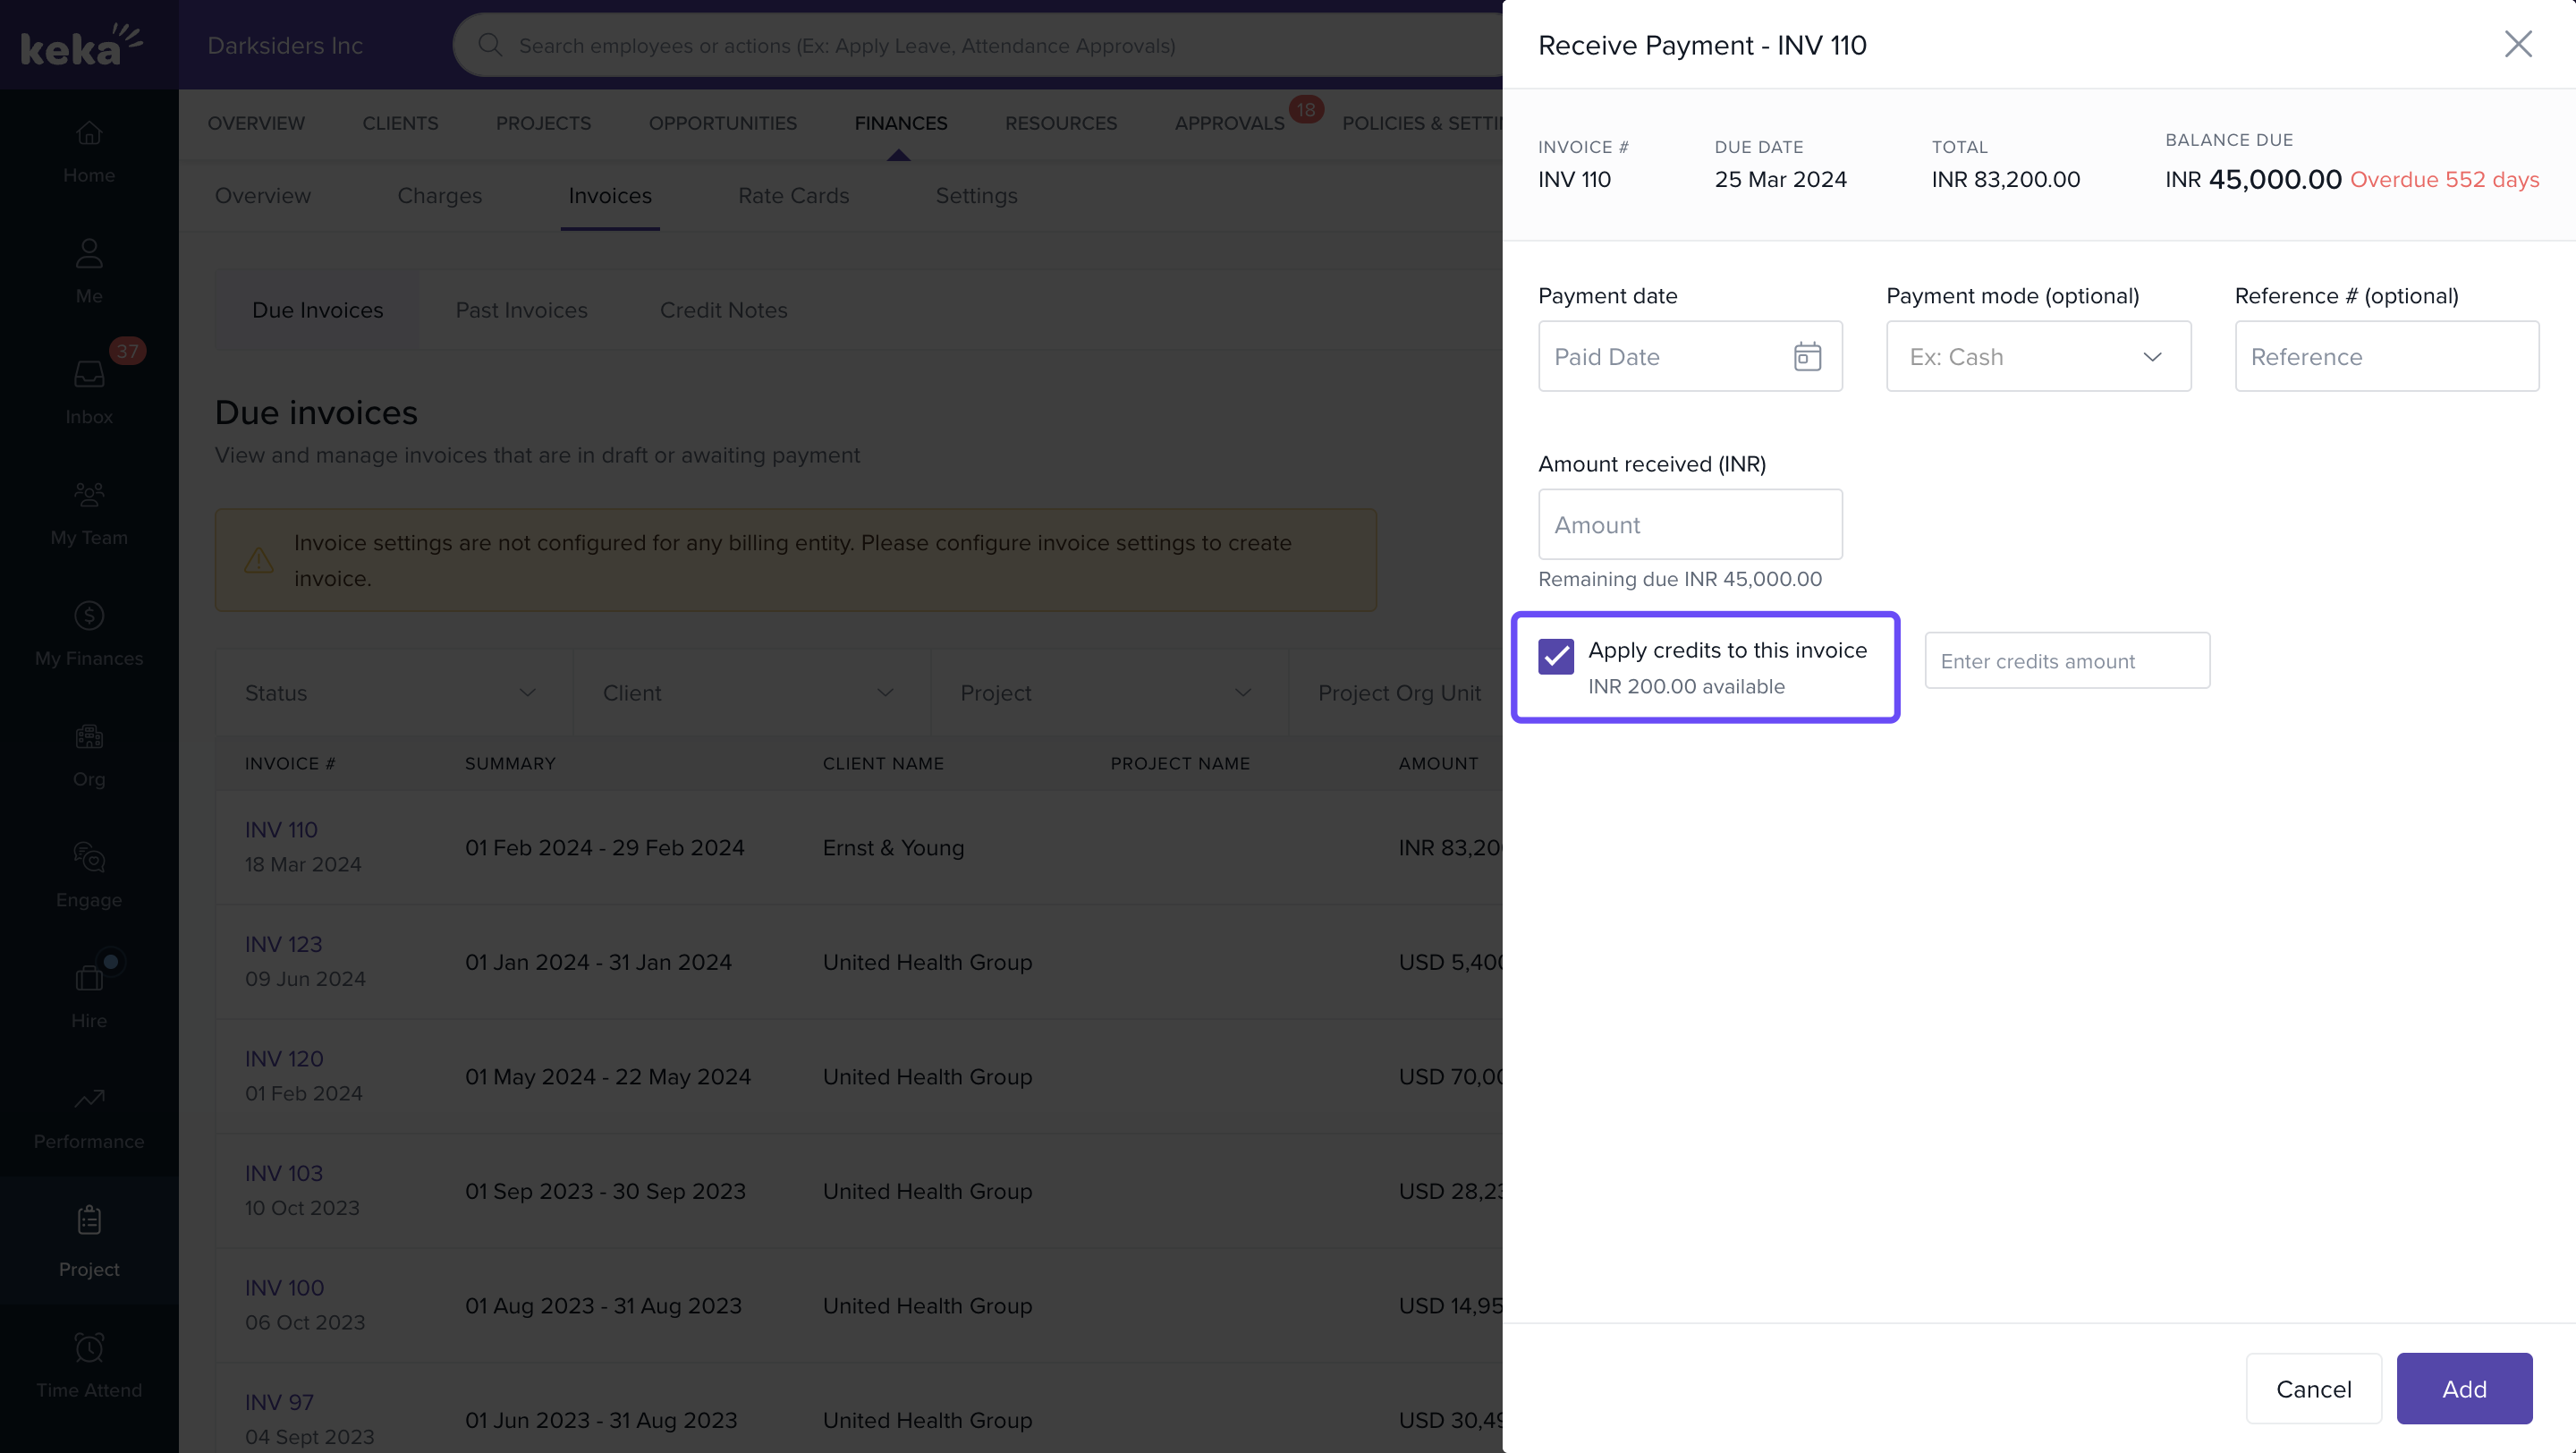
Remaining credits, if any, will be saved for future use.
FAQs
-
Q: Can I delete a credit note after it is applied?
A: No. Once a credit note is applied, it becomes part of your financial records. -
Q: Can I issue a credit note without linking it to an invoice?
A: No. Every credit note must reference at least one line item from a valid invoice. -
Q: What if the credit note is more than the invoice value?
A: The excess credit can be applied to future invoices automatically. -
Q: Can I apply multiple credit notes to one invoice?
A: Yes. You can apply more than one credit note as long as the total credit doesn't exceed the invoice amount.
To explore further details on managing client payments, including receiving full and partial payments, as well as utilizing credit notes, click on this link: Managing client payments- Receiving full and partial payments, & credit notes
Comments
0 comments
Please sign in to leave a comment.