Introduction
Some companies allow employees to request loans directly through Keka — for emergencies, education, travel, or other approved purposes. If your organization has enabled this benefit, you can apply for a loan, upload supporting documents, review repayment details, and check the status of your request through the portal.
Applying for a Loan
-
Go to My Finances
Log in to Keka → click My Finances in the sidebar. -
Open the Loans Section
Select Loans, then click Apply New Loan.
-
Fill in Loan Details
In the overlay window, enter the required information:-
Loan Category (what the loan is for)
-
Loan Amount
-
Number of installments / EMIs
-
EMI start date or repayment schedule
-
-
Upload Supporting Documents
Click Upload Document (is mandatory) → select and upload files like IDs, bills, or other proofs needed for verification. -
Review Repayment Breakdown
Click View Details to see the total amount repayable, interest, and how each EMI is calculated. -
Submit Application
Once all fields are filled correctly → click Apply.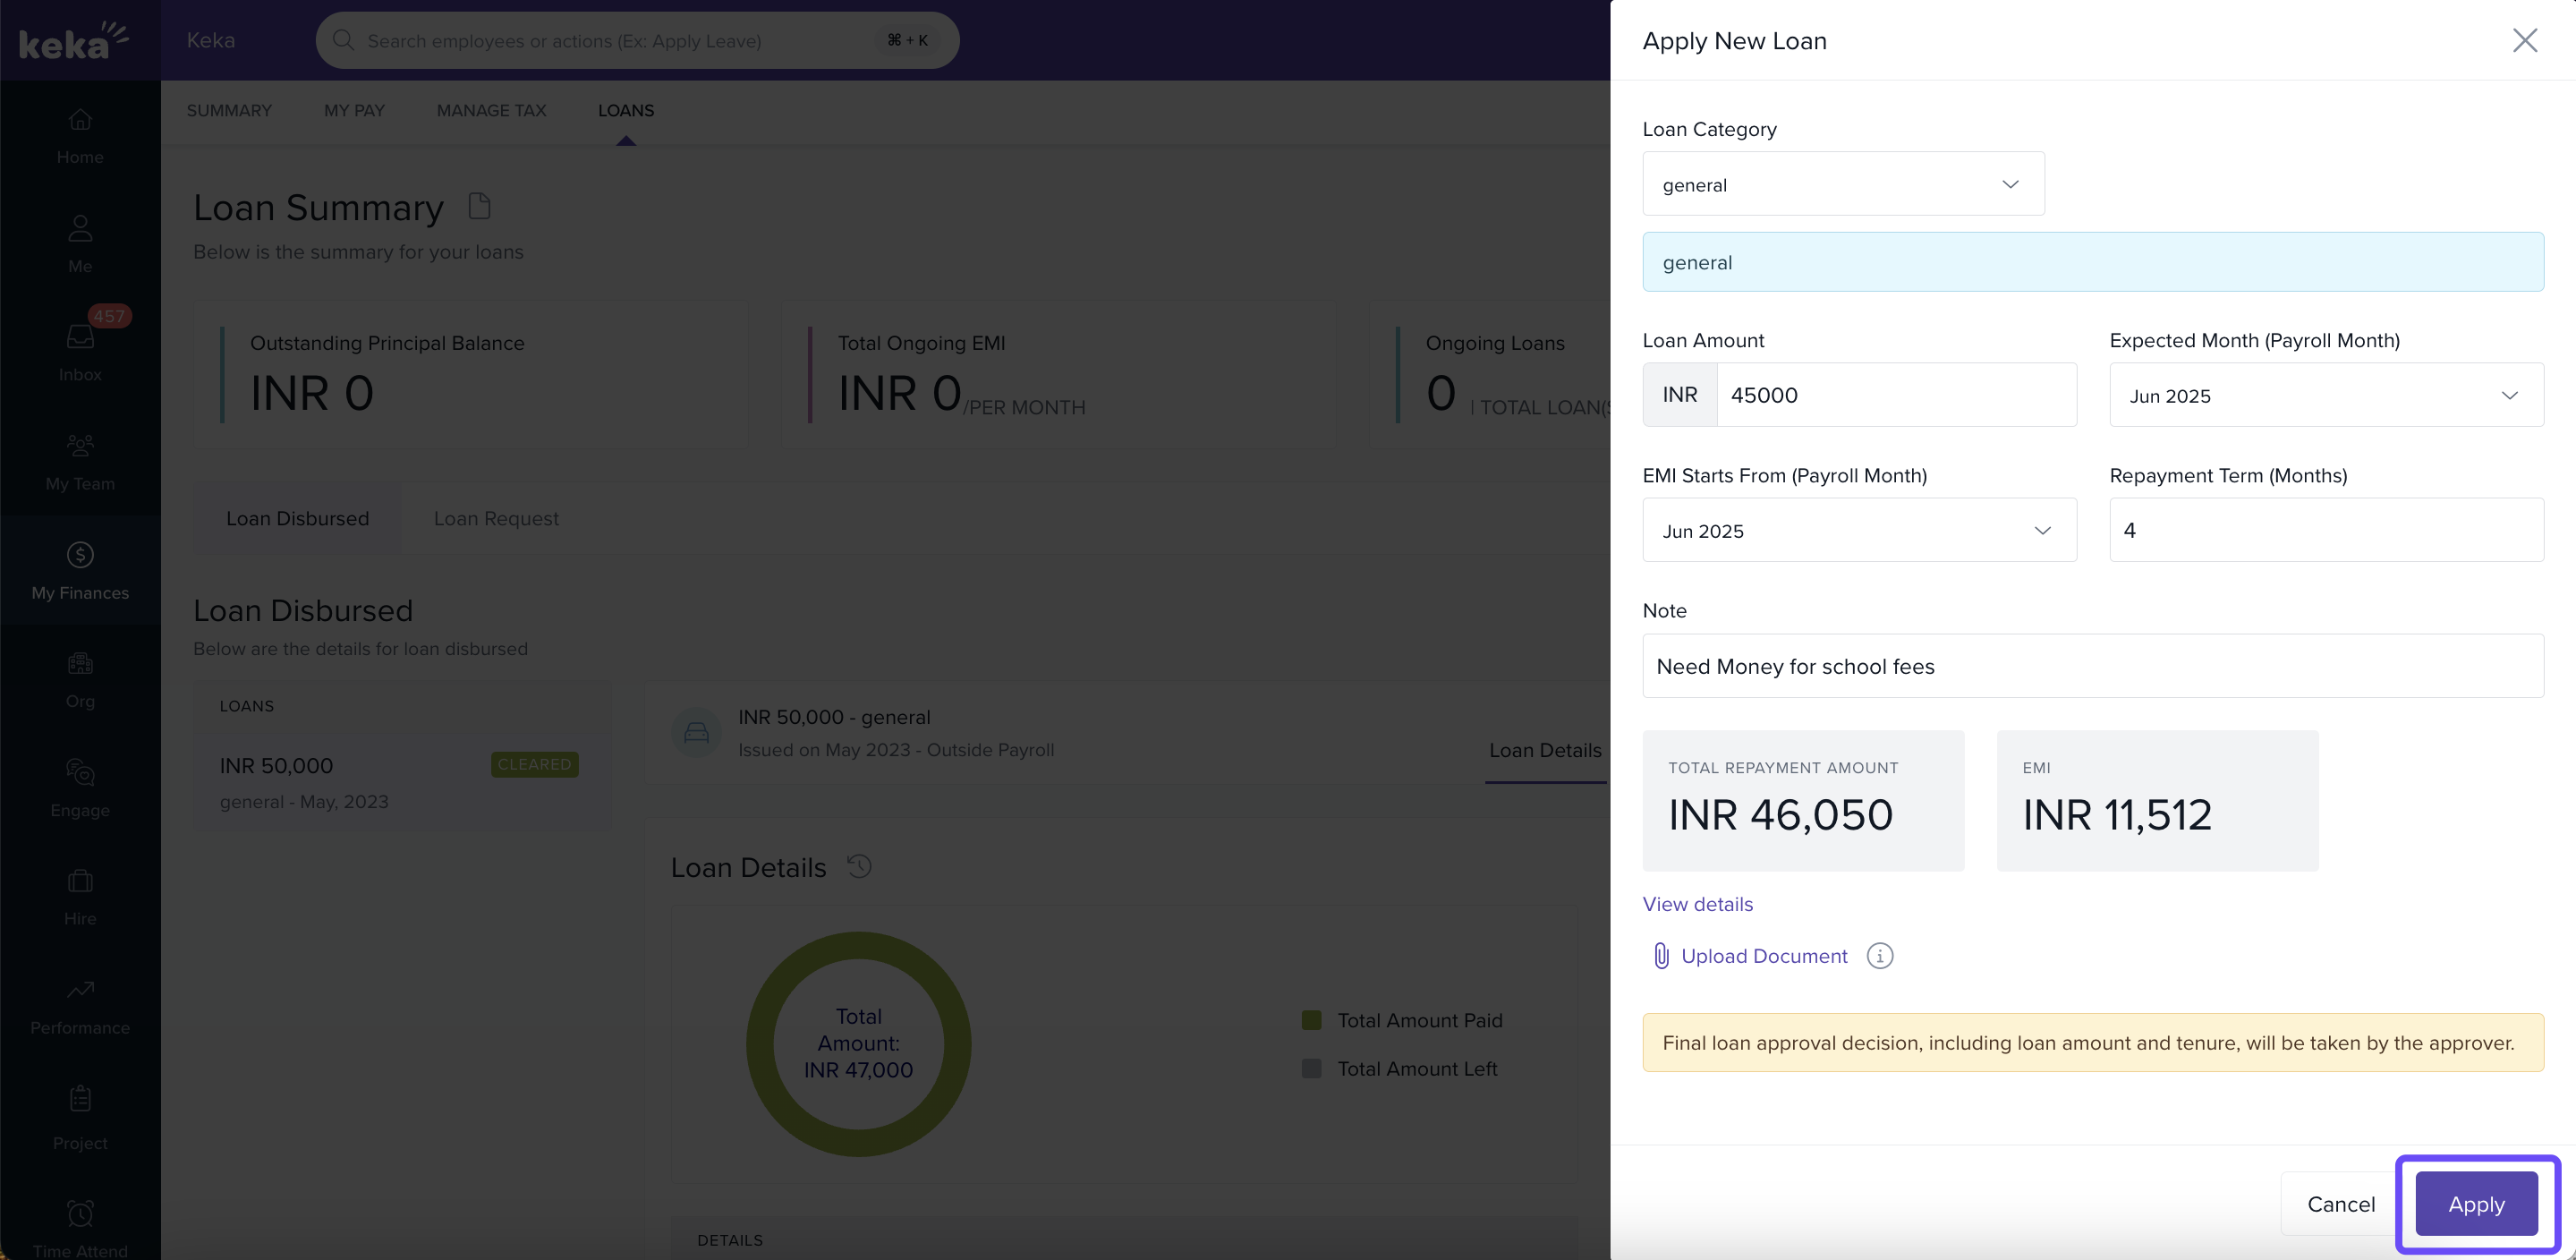
-
Notification & Approval
After submission, an email / in‑portal notification will go to individuals in your organization who approve loan requests. -
Check Request Status
To view your loan request progress, navigate to Loan Request in the Loans section. Here, you can see if your application is marked as Pending, Approved, or Declined. You can also edit or withdraw your request before any action is taken.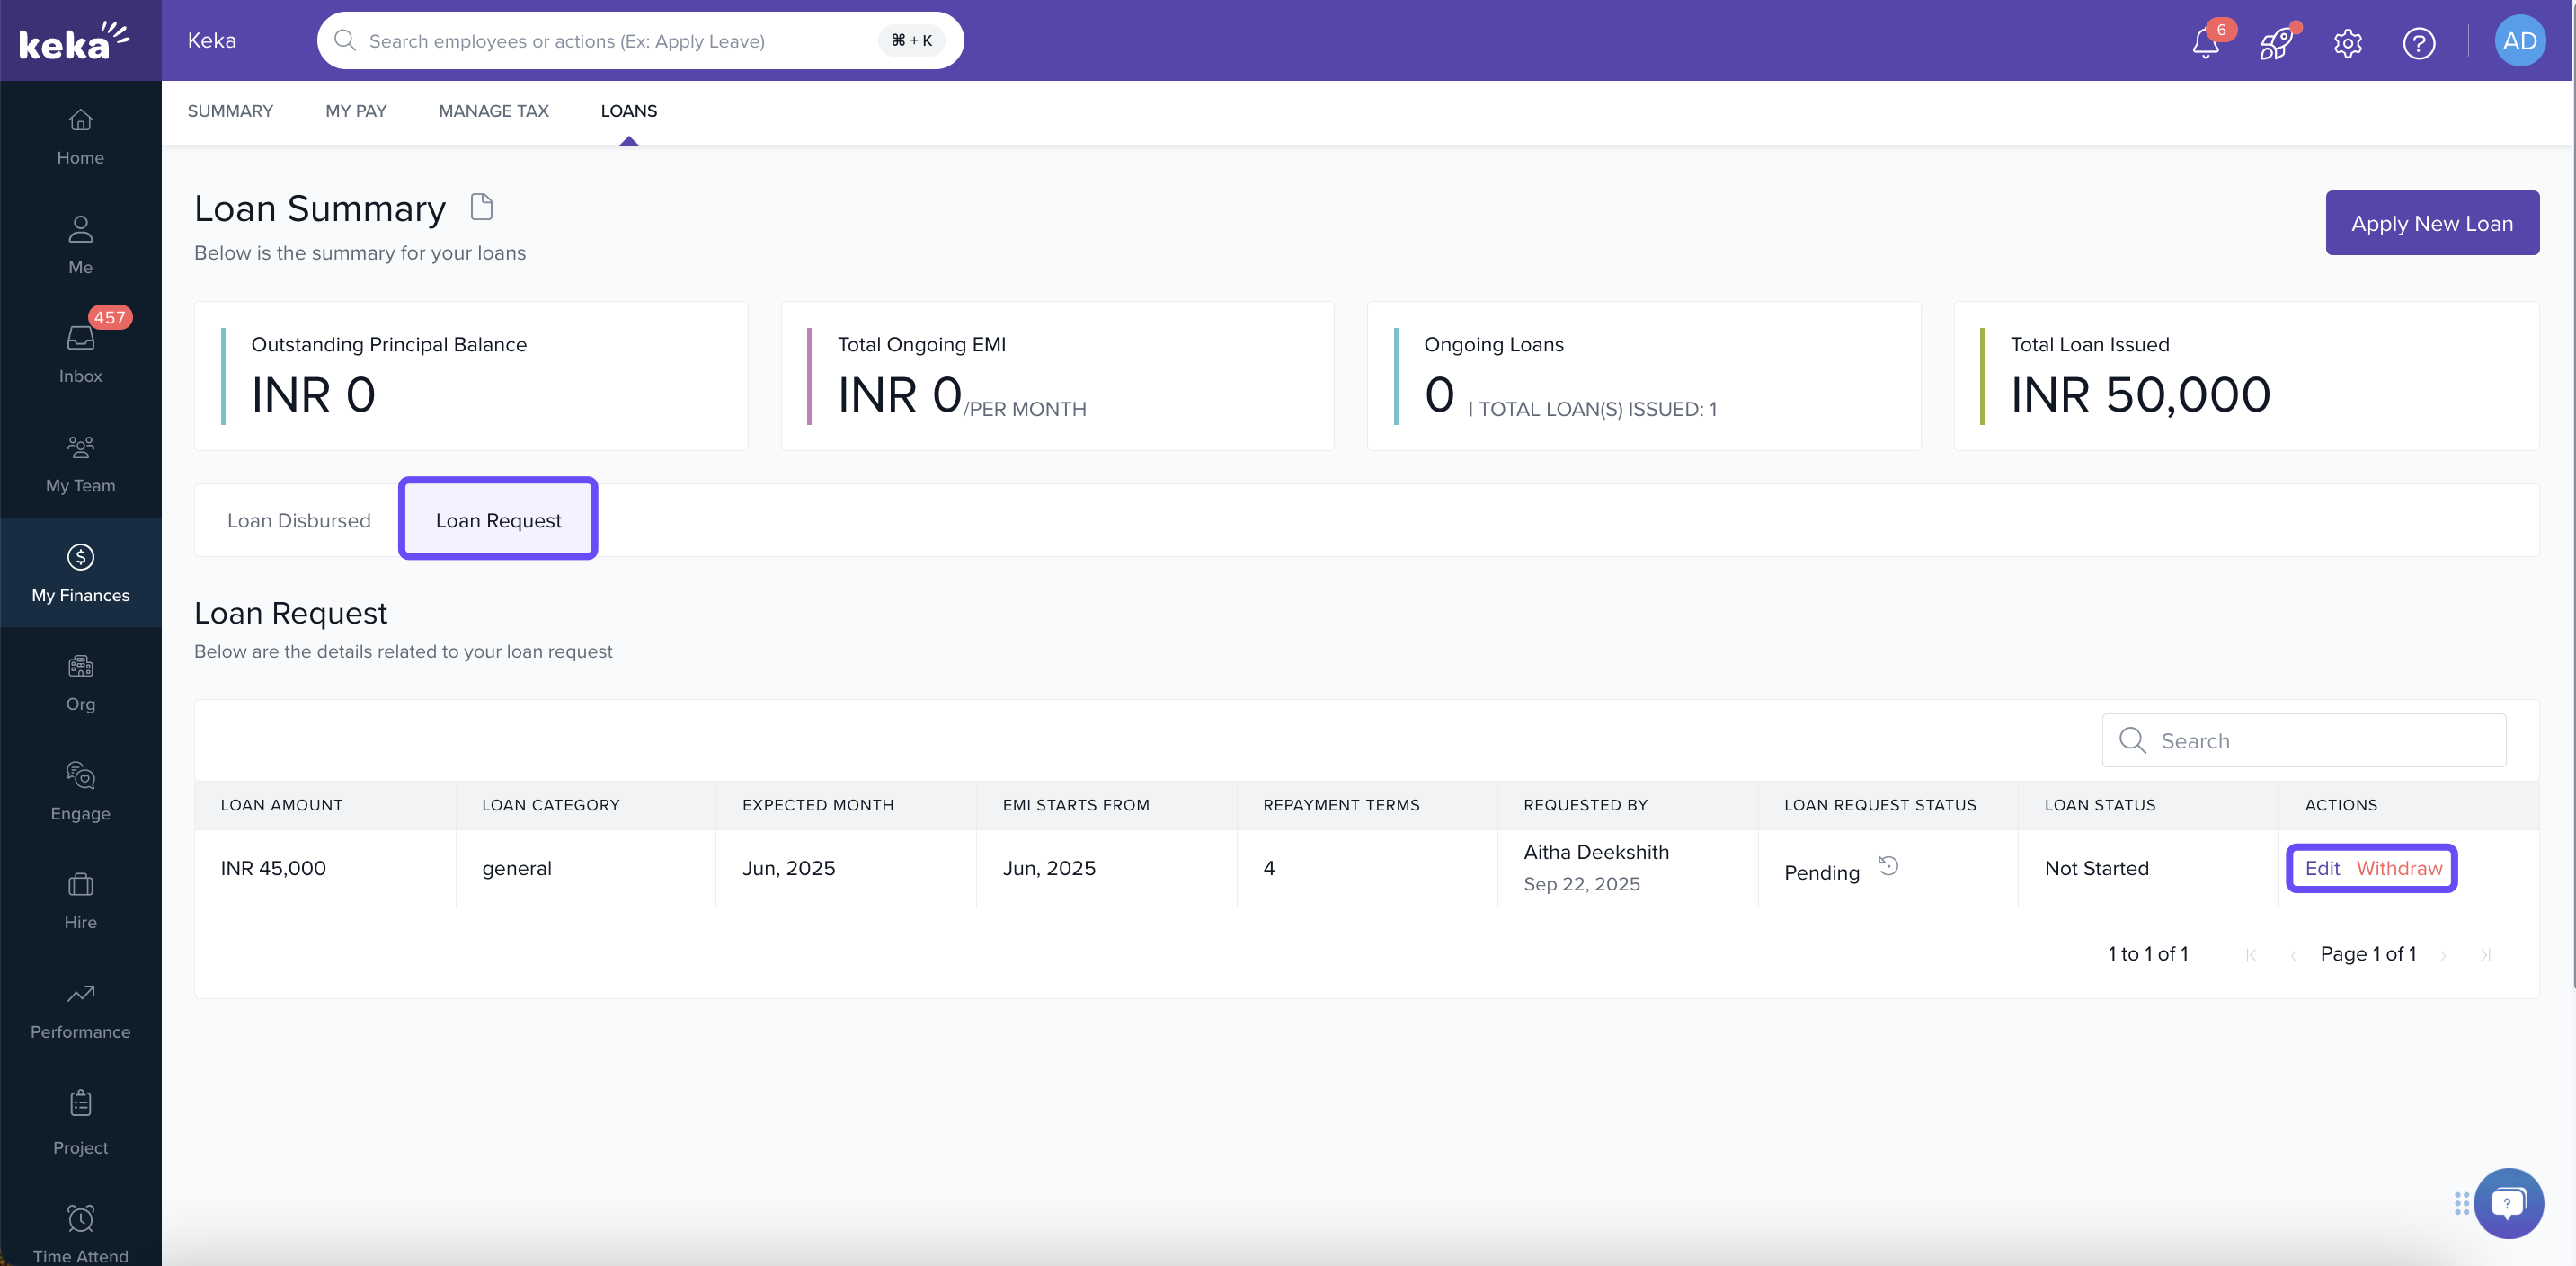
Applying for a loan through Keka is designed to be straightforward: select your category, enter loan details, upload documents for verification, and submit. Monitoring the request afterward ensures you stay updated on its status. Always follow your organization’s policy, and reach out to HR or Finance if anything in the process is unclear.
Comments
0 comments
Please sign in to leave a comment.