Introduction
In Keka, setting up payment information for employees can be done in multiple ways, either individually for each employee or in bulk by importing financial details. Here’s how you can efficiently manage payroll information for your workforce.
Add Payment Details During Employee Setup
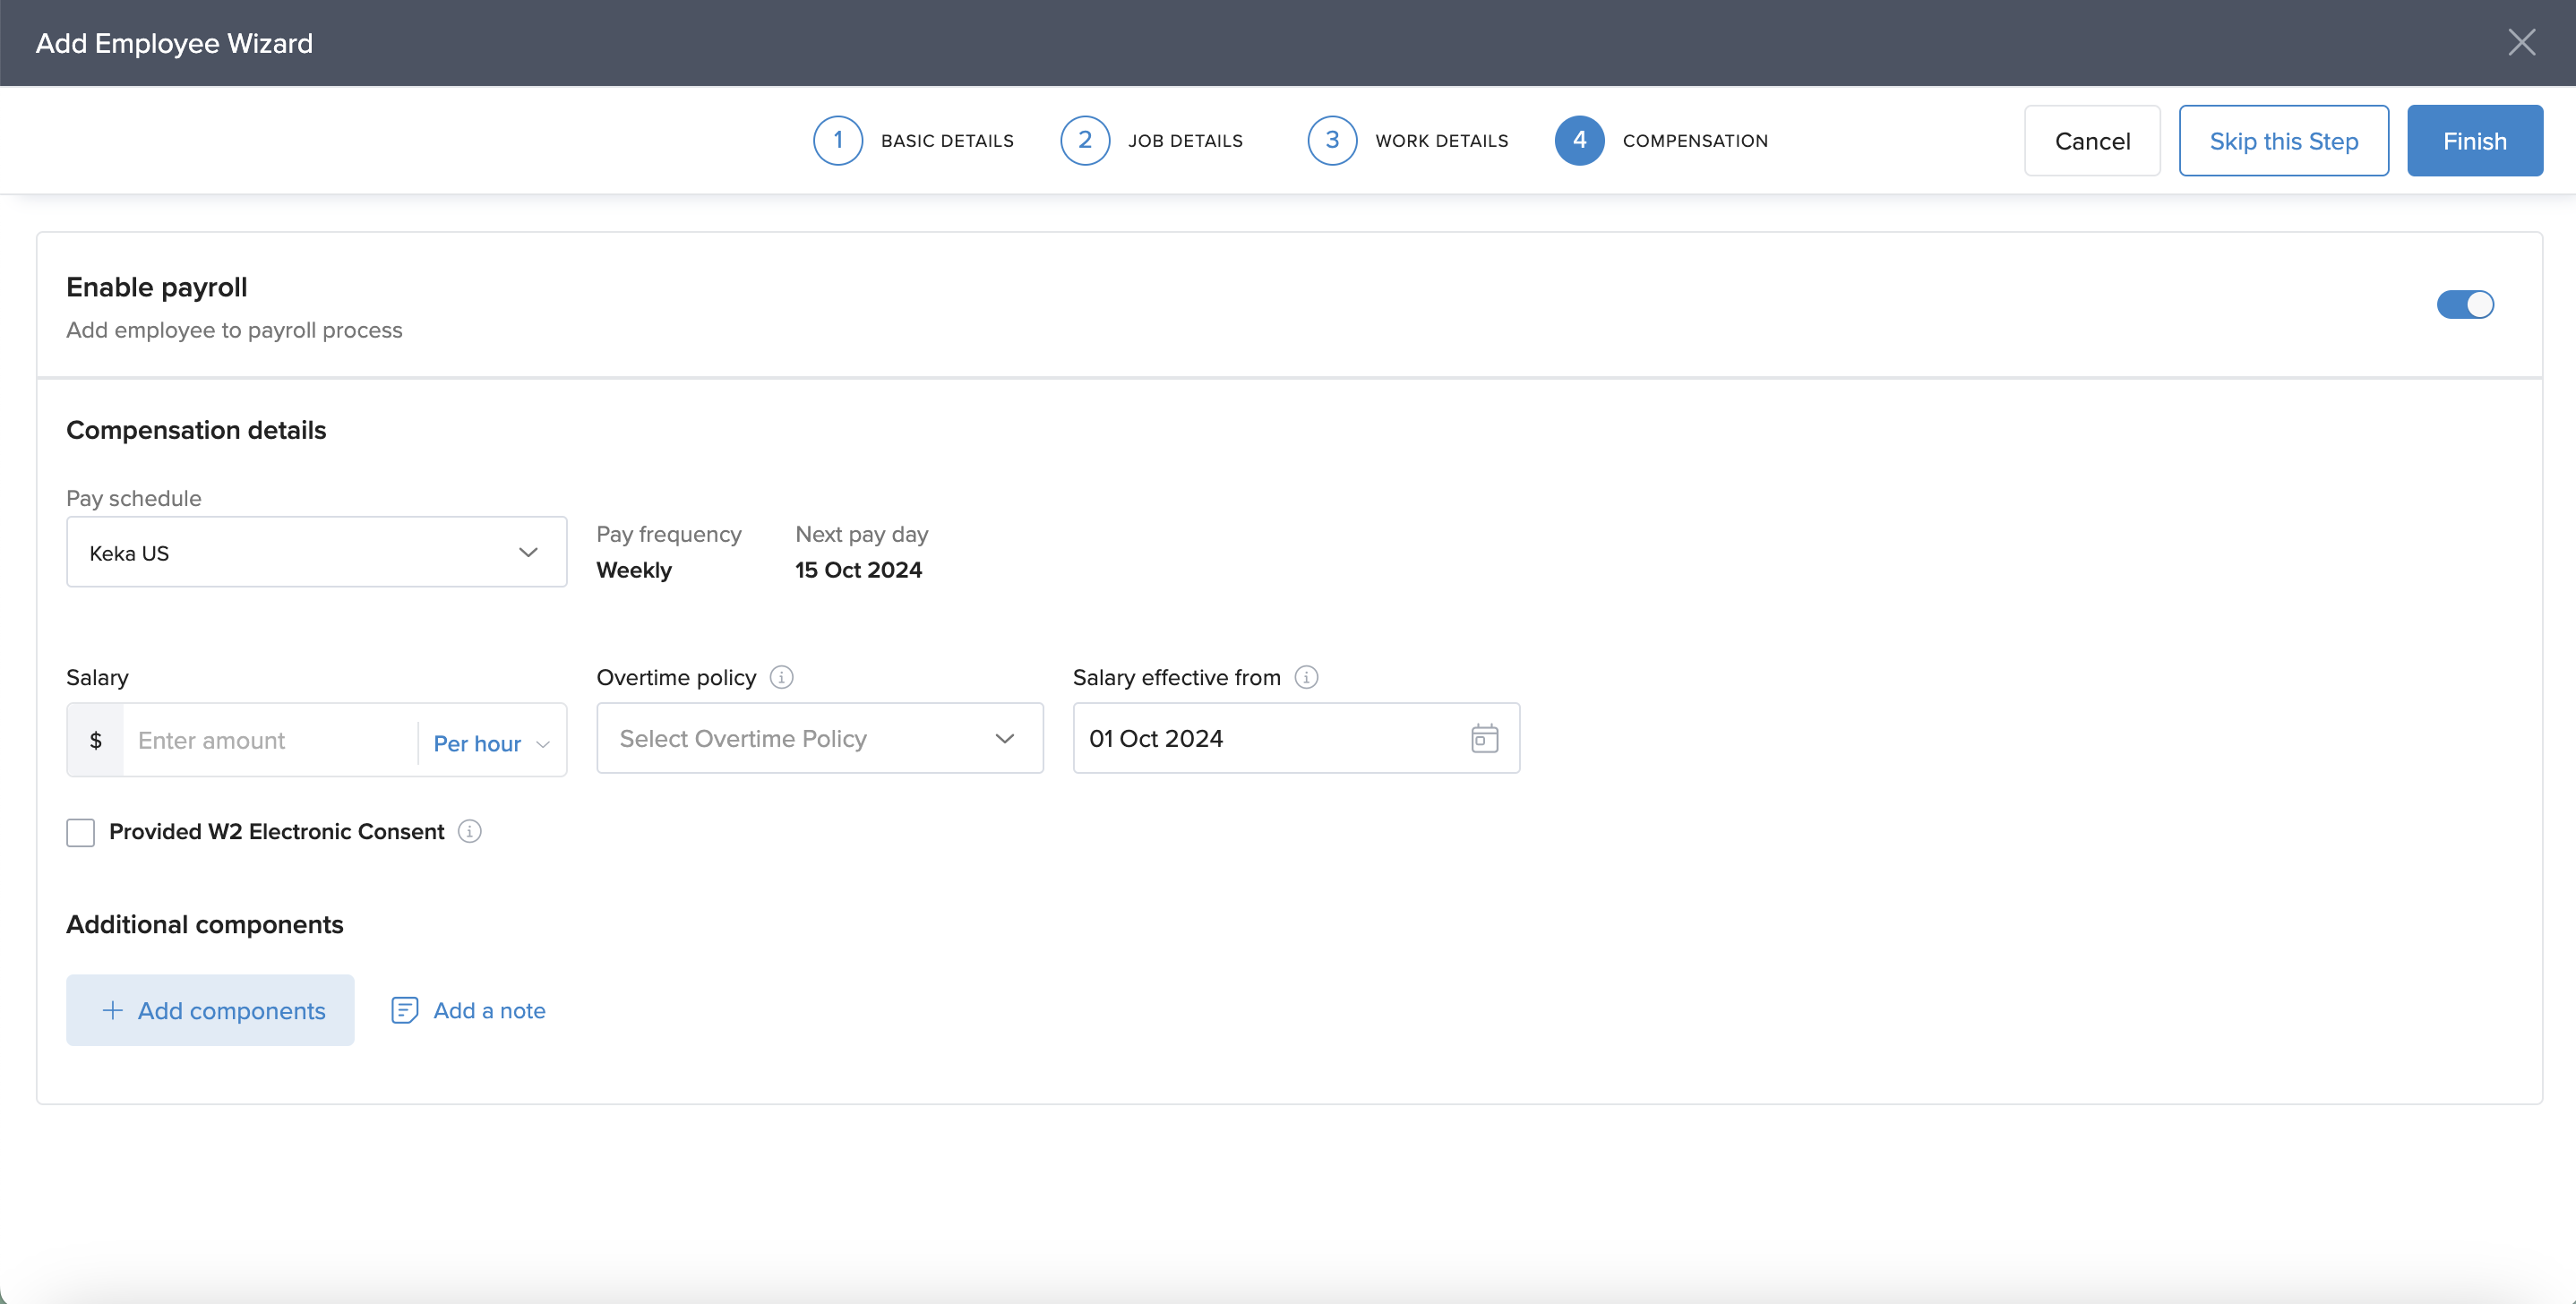
When adding a new employee through the Add Employee wizard, you’ll find a step to enter their financial details.
This includes key payroll information such as bank details, pay schedule, and compensation.
If payroll isn’t enabled for the employee or they were added via bulk import, you’ll need to update payment details manually.
However, if you haven’t enabled payroll for that employee or if the employee was added via bulk import, you'll need to manually navigate to the employee's profile and input the payment information.
Setting Up Payment Information for an Employee:
Find the employee using the search bar on your Keka dashboard.
2. Open their Profile,select Finances.
- In the Finances tab, you will land on a page where you can set up or update the employee’s payment information.
- This is where you can configure the Pay Profile, including compensation, benefits, and deductions.
3. Click Setup Now to begin.
4. Toggle Enable Payroll to include the employee in your payroll process.
5. Select the correct Pay Schedule from your configured pay groups.
Keka will automatically show:
Pay Frequency (like monthly or bi-weekly)
Next Pay Day based on the schedule
6. Choose if the salary is Per Annum or Per Hour and enter the amount.
7. From the Overtime Policy dropdown, pick the one that applies to this employee.
8. Select the Effective Date for this salary.
9. If the employee wants to receive tax forms electronically, check Provided W2 Electronic Consent.
This allows digital W2 delivery.
Add Salary Components
Include extra pay elements like bonuses, reimbursements, or allowances.
Click Add Components.
Choose the component from the dropdown.
Enter the amount and select how often it’s paid:
One Time Pay (requires a payment date)
Per Pay Period
Over multiple pay periods (up to six)
You can add more components by repeating these steps.
Adding a Note
- Click Add Note to include any comments about the setup or salary components.
- These notes are visible to the employee for transparency.
- Click Save to finish setting up payroll for this employee.
View or Revise Salary Information
Once saved, you’ll see the employee’s compensation details under the Finances tab.
Use the eye icon to hide or show salary figures.
Click the three dots (⋮) and select Revise Salary to make updates.
You can also click the revision link inside the compensation card to go straight to the revision page.
Comments
0 comments
Please sign in to leave a comment.