Introduction
Azure Active Directory (Azure AD) is Microsoft’s cloud-based identity and access management service. It provides secure, seamless access to applications and services—both in the cloud and on-premises.
By integrating Azure AD with Keka HR, you can synchronize employee data, automate account creation, and centralize user management. This ensures smoother onboarding and stronger access control.
This guide walks you through the steps to set up Azure AD integration in Keka.
Why Integrate Azure AD with Keka?
Automate account creation in Azure AD directly from Keka.
Save time by reducing manual updates of employee records.
Minimize errors that often occur in manual sync processes.
Prerequisites
HR Executive/Manager knows the domain name and email formula before adding employees in Keka.
All employees in Keka are already added to Azure AD.
-
A Global Administrator user exists in Azure AD to configure this integration.
If needed, follow Microsoft’s guide on setting up a Global Administrator role.
Setting up Azure AD Integration
Follow these steps to enable Azure AD in Keka:
-
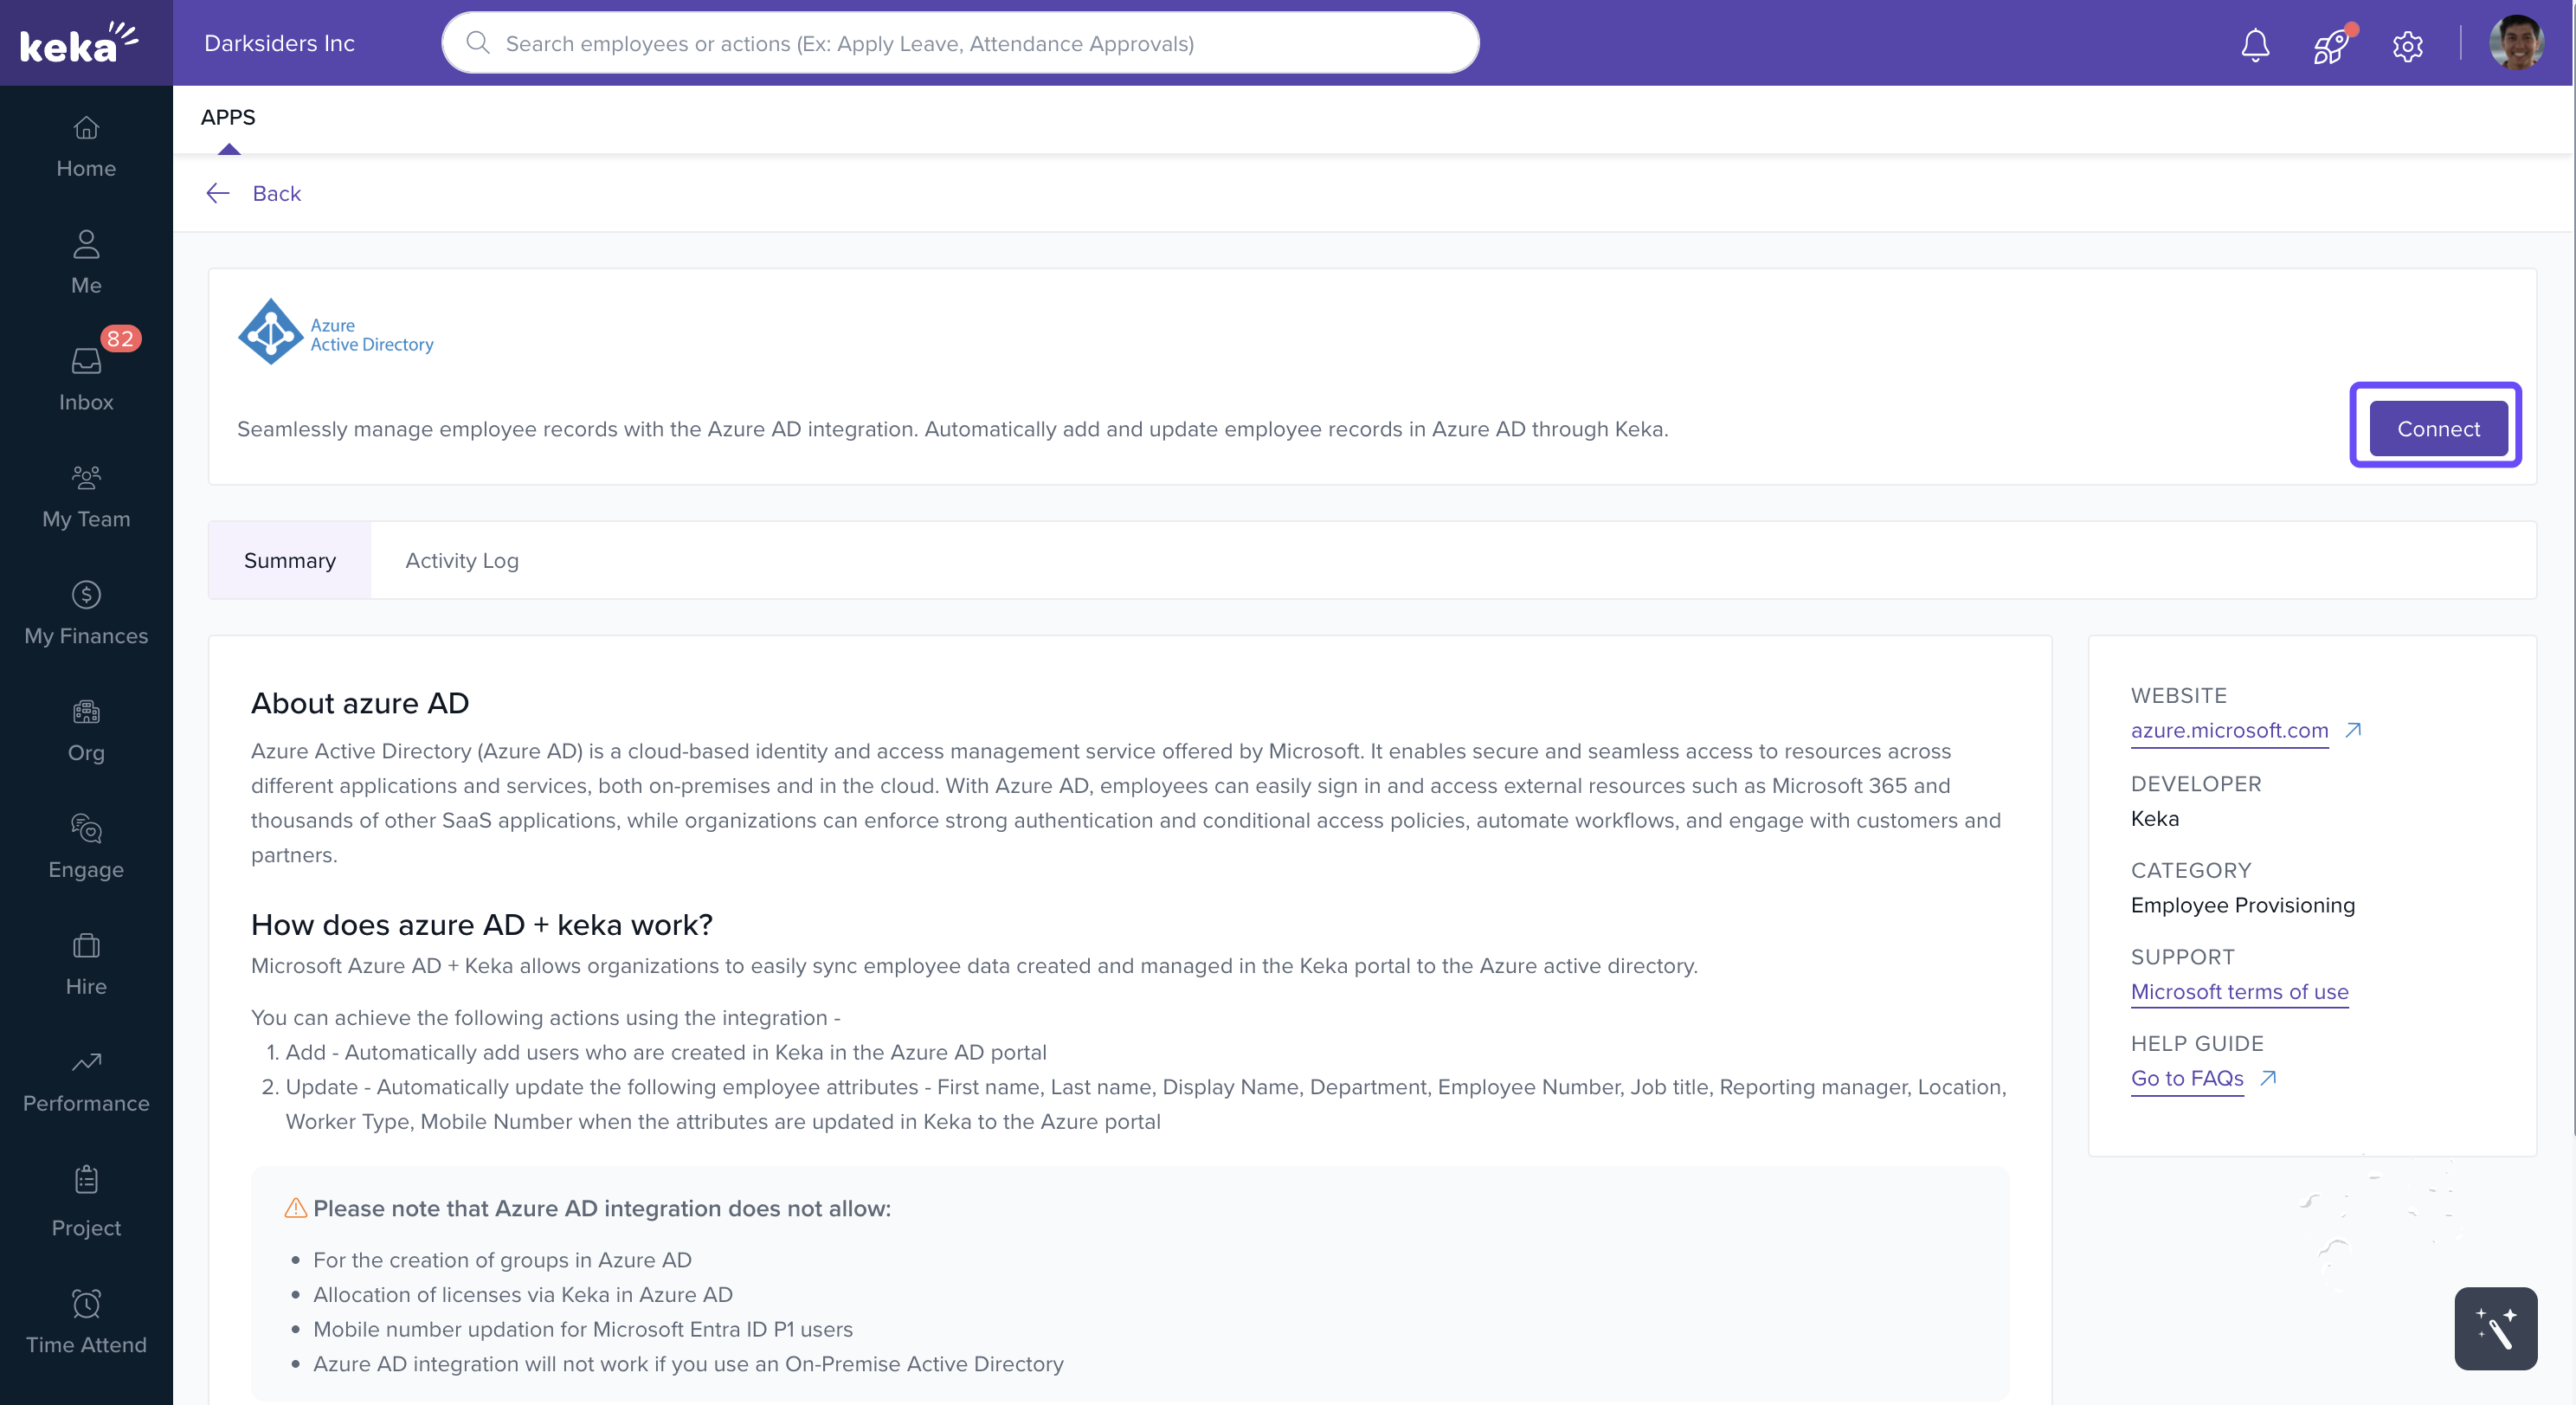
In Keka, go to Apps > Azure AD.

-
Click Configure.
You’ll be redirected to a summary page describing the integration.
-
Click Connect.
-
Complete the 2-step integration process:
Step 1 – Sign in with Microsoft
-
Click Sign in with Microsoft.
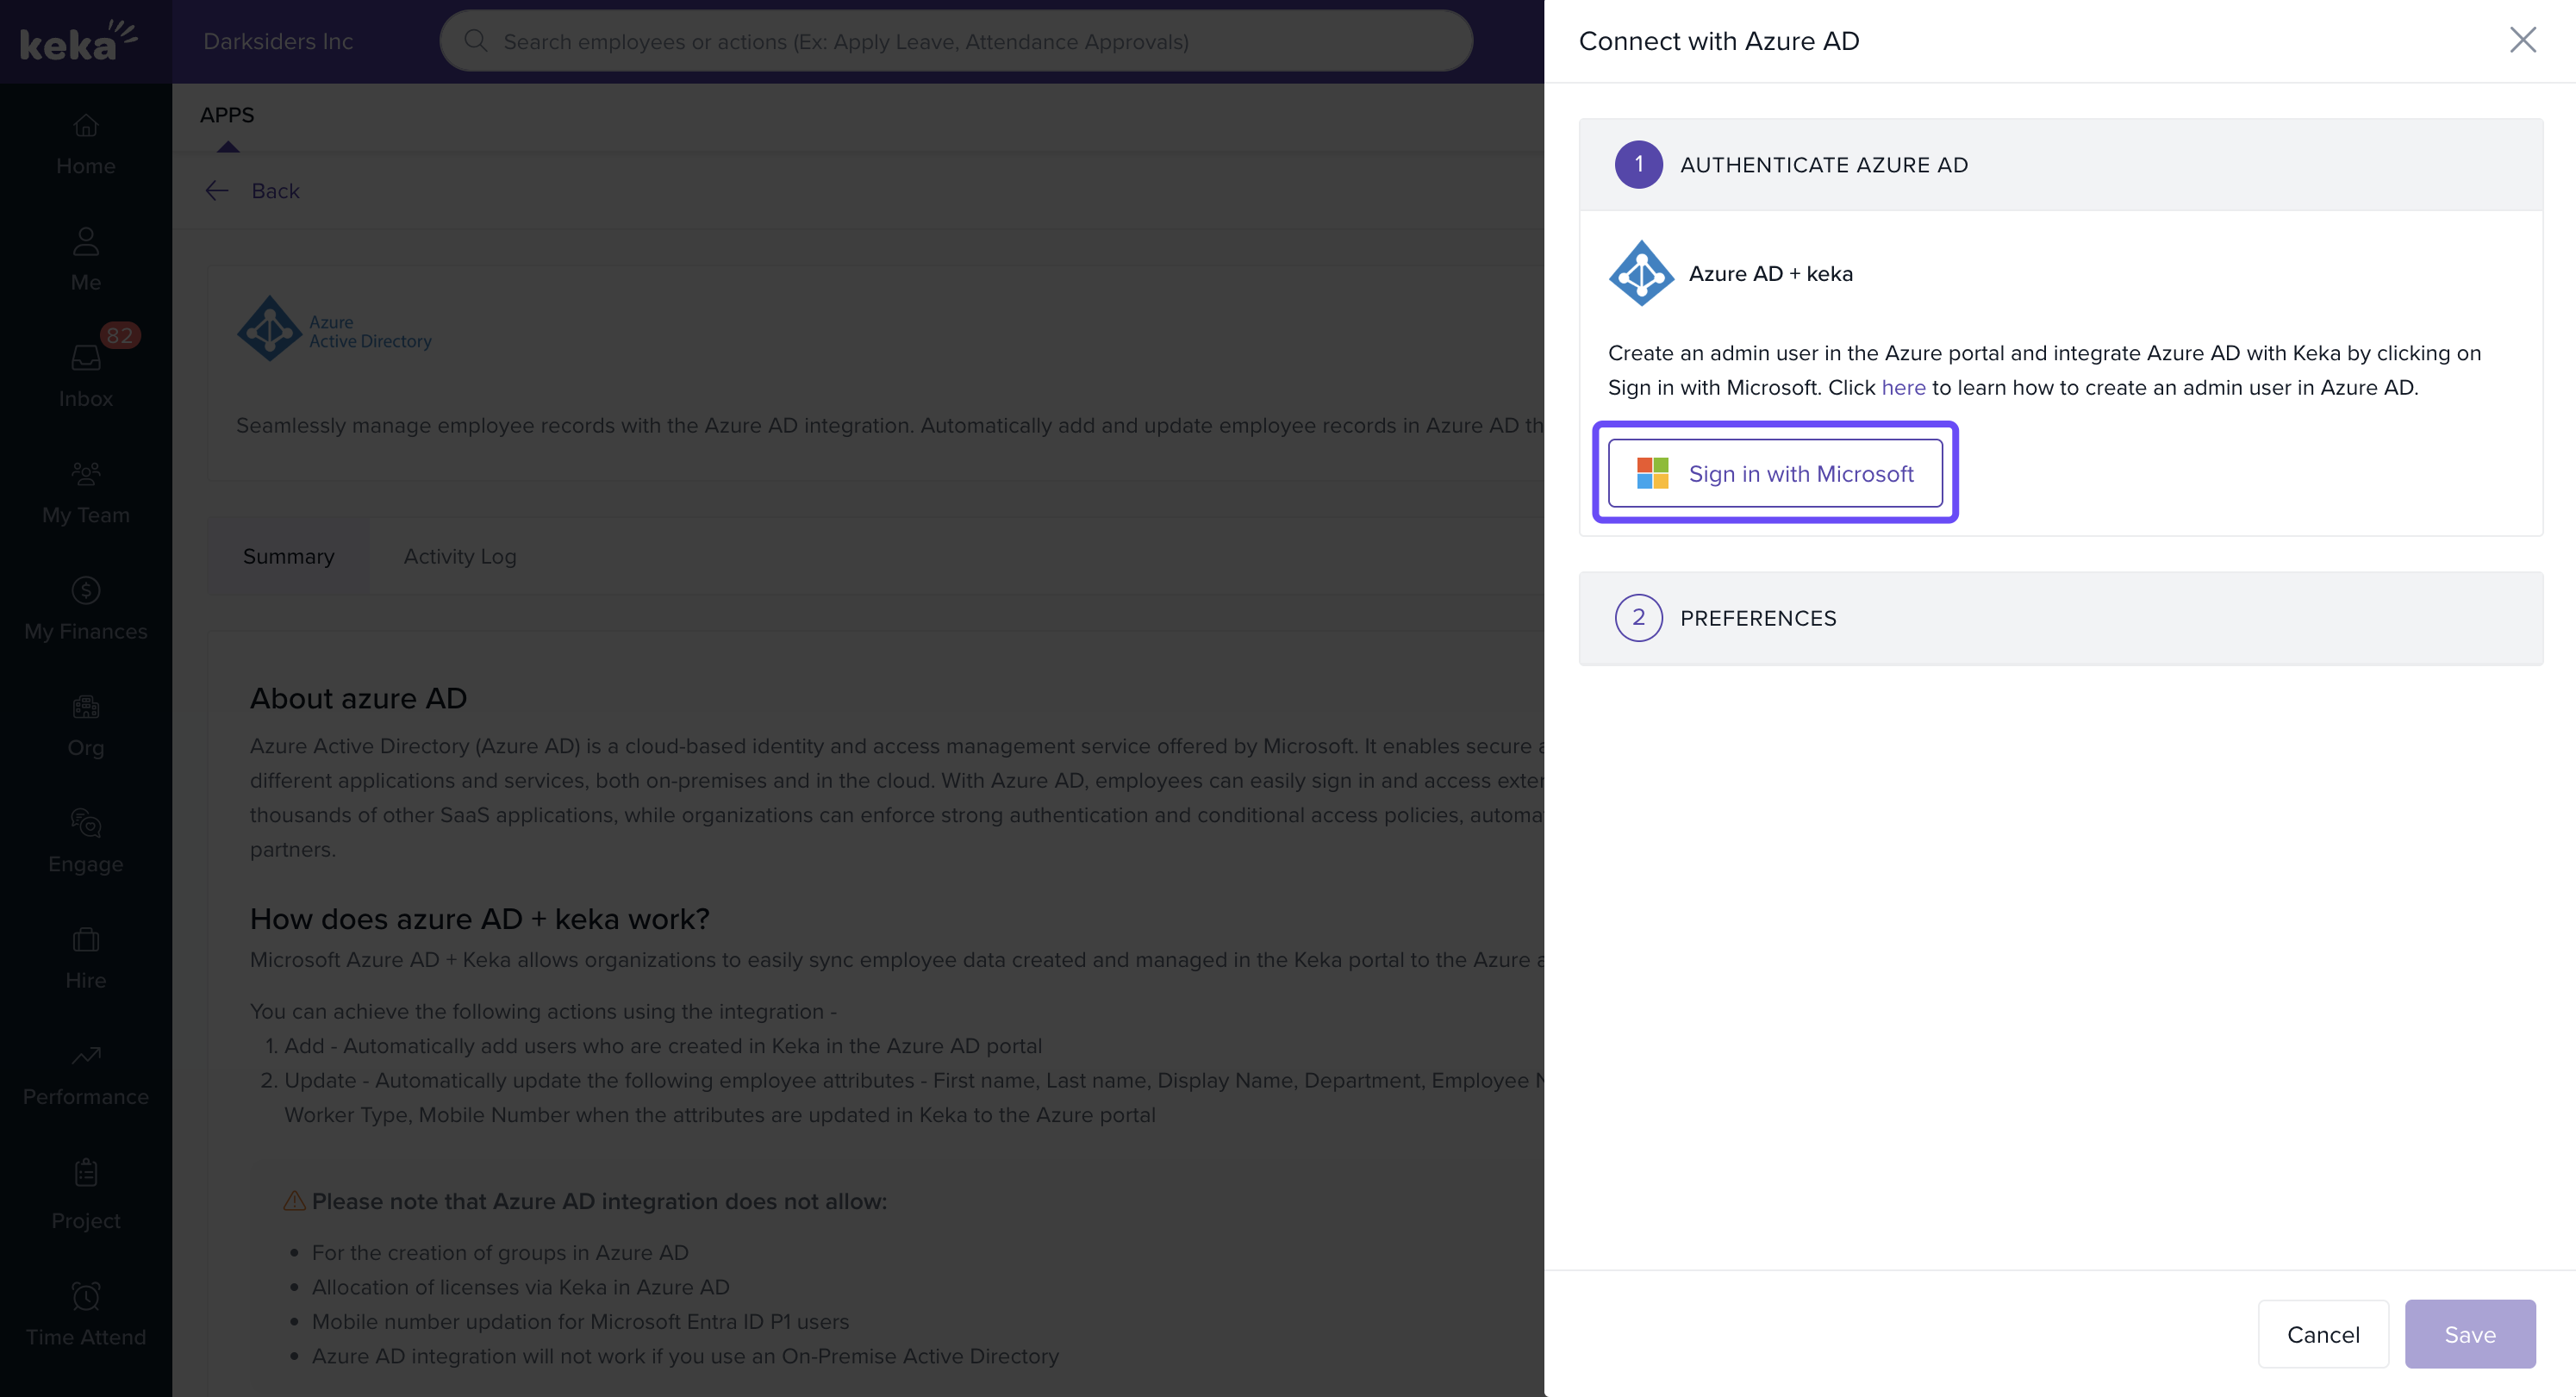
You’ll be redirected to the Microsoft login page.
Provide the necessary permissions for Keka integration.
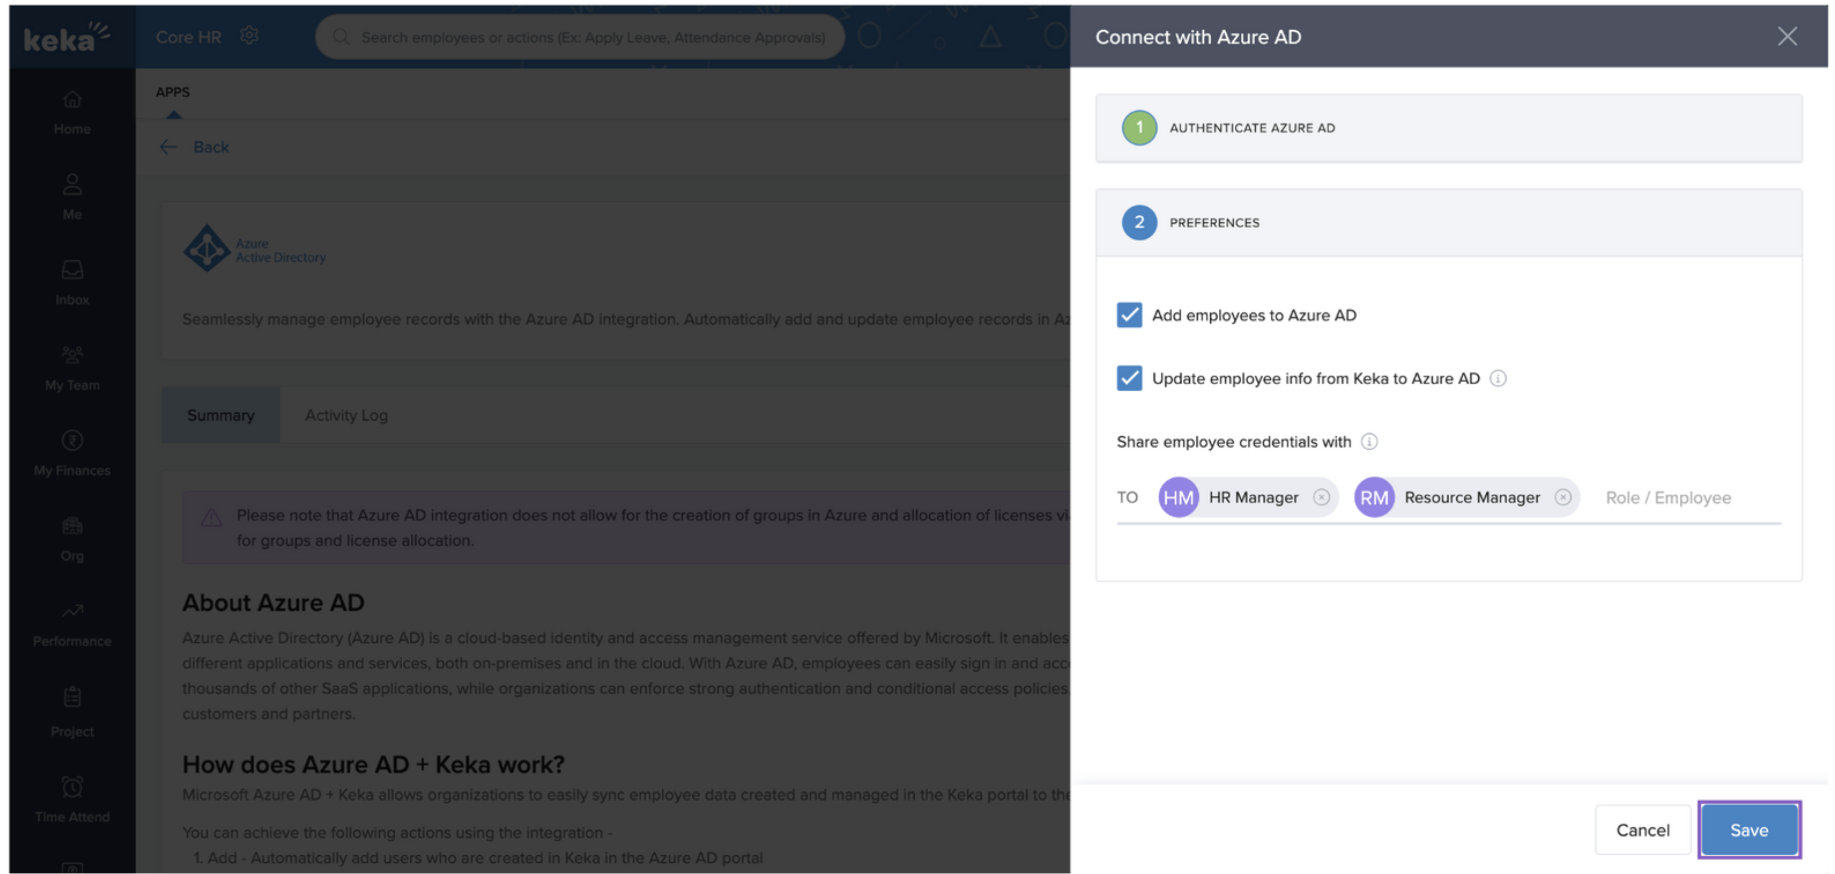
Step 2 – Set Preferences
-
Choose whether to:
Add employees only, or
Add and update employees in Azure AD.
-
-
Select the employee who will receive one-time use passwords for new Azure AD accounts.
-
Click Save to complete the setup.
Once saved, Azure AD is fully integrated with Keka.
Comments
0 comments
Please sign in to leave a comment.