Overview
Keka HR makes it easy to recognise employee contributions and foster a culture of continuous feedback. With the Badges, Certificates, and Internal Feedback features, you can create a structured system for appreciation and performance insights across your organisation.
In this article, you'll learn how to:
Enable and customise praises and certificates
Create your own badges
Manage feedback permissions and internal note visibility
Whether you're an HR admin setting up these tools or a manager tailoring feedback flows, this article will help you configure everything from a central location in Keka’s Continuous Feedback module.
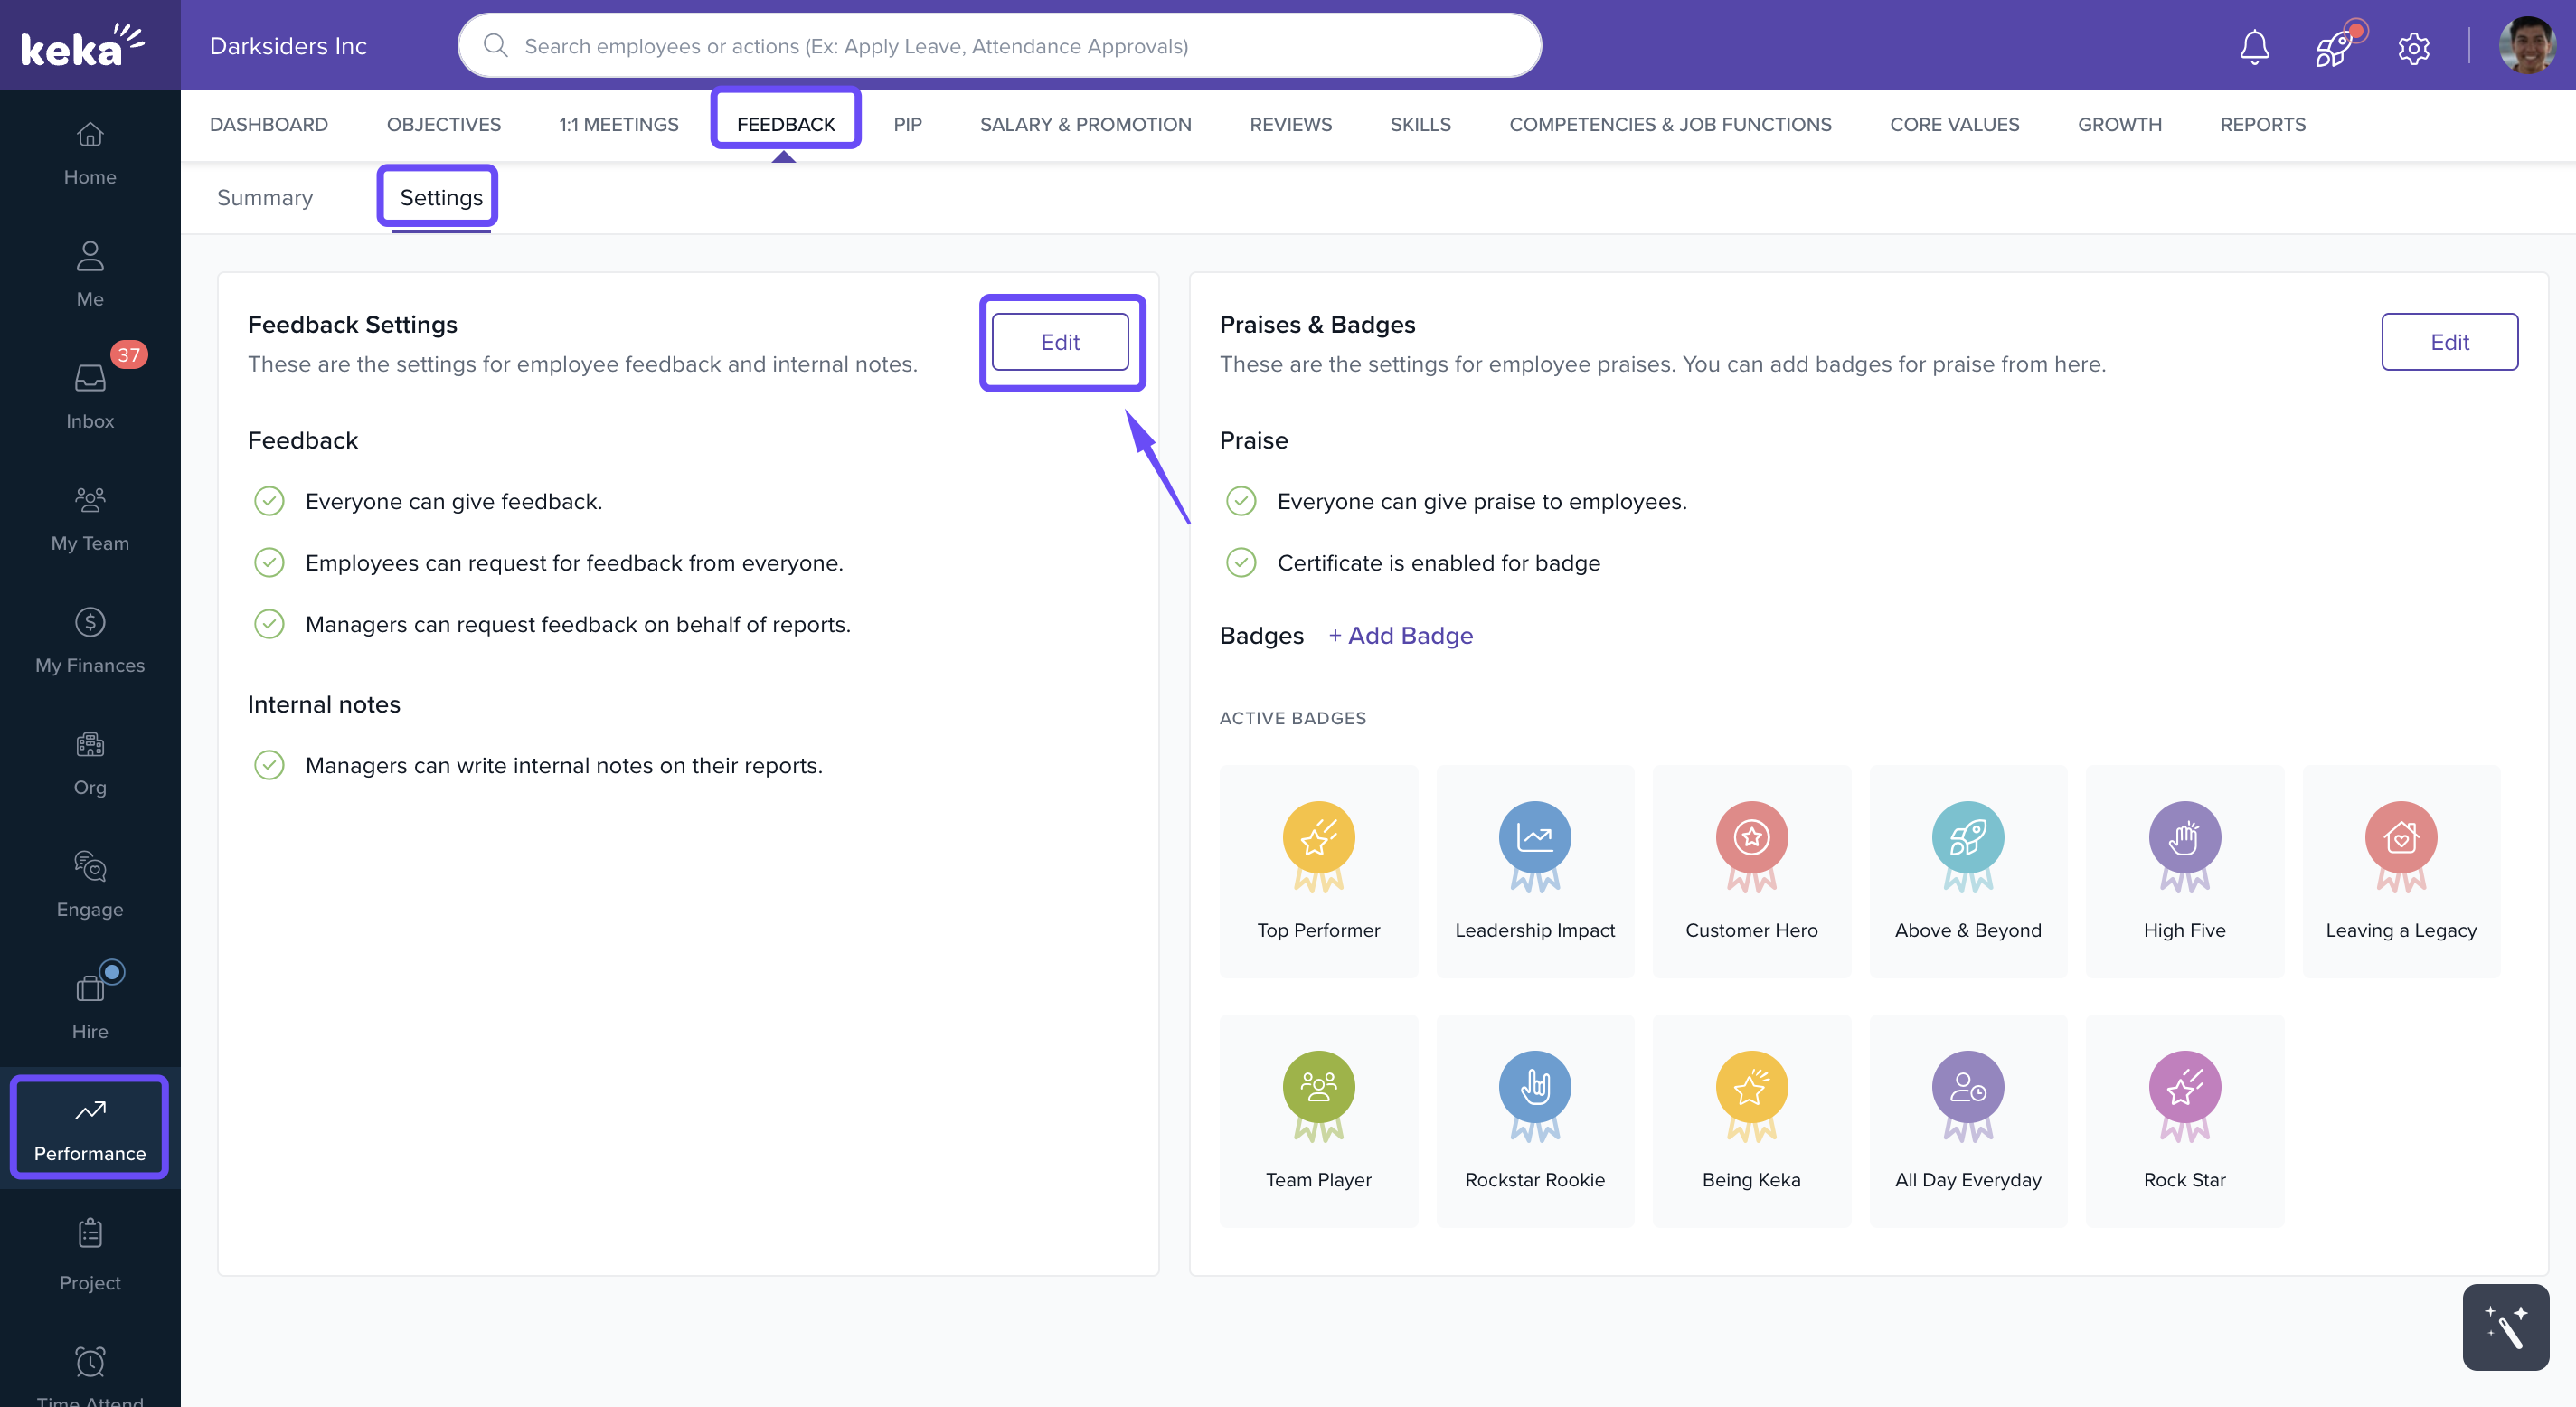
Setting up Badges and Certificates
The Keka HR portal provides a unique way for employees to show gratitude towards their colleagues. Whether it's for a helping hand or to highlight someone's excellent qualities, praises and badges can be posted on the organisation or department wall for everyone to see and engage with. In addition to badges, you can also give an official certificate of appreciation.
Before you dive into giving praises and badges, you'll first need to enable these features in the Keka portal's Performance Module.
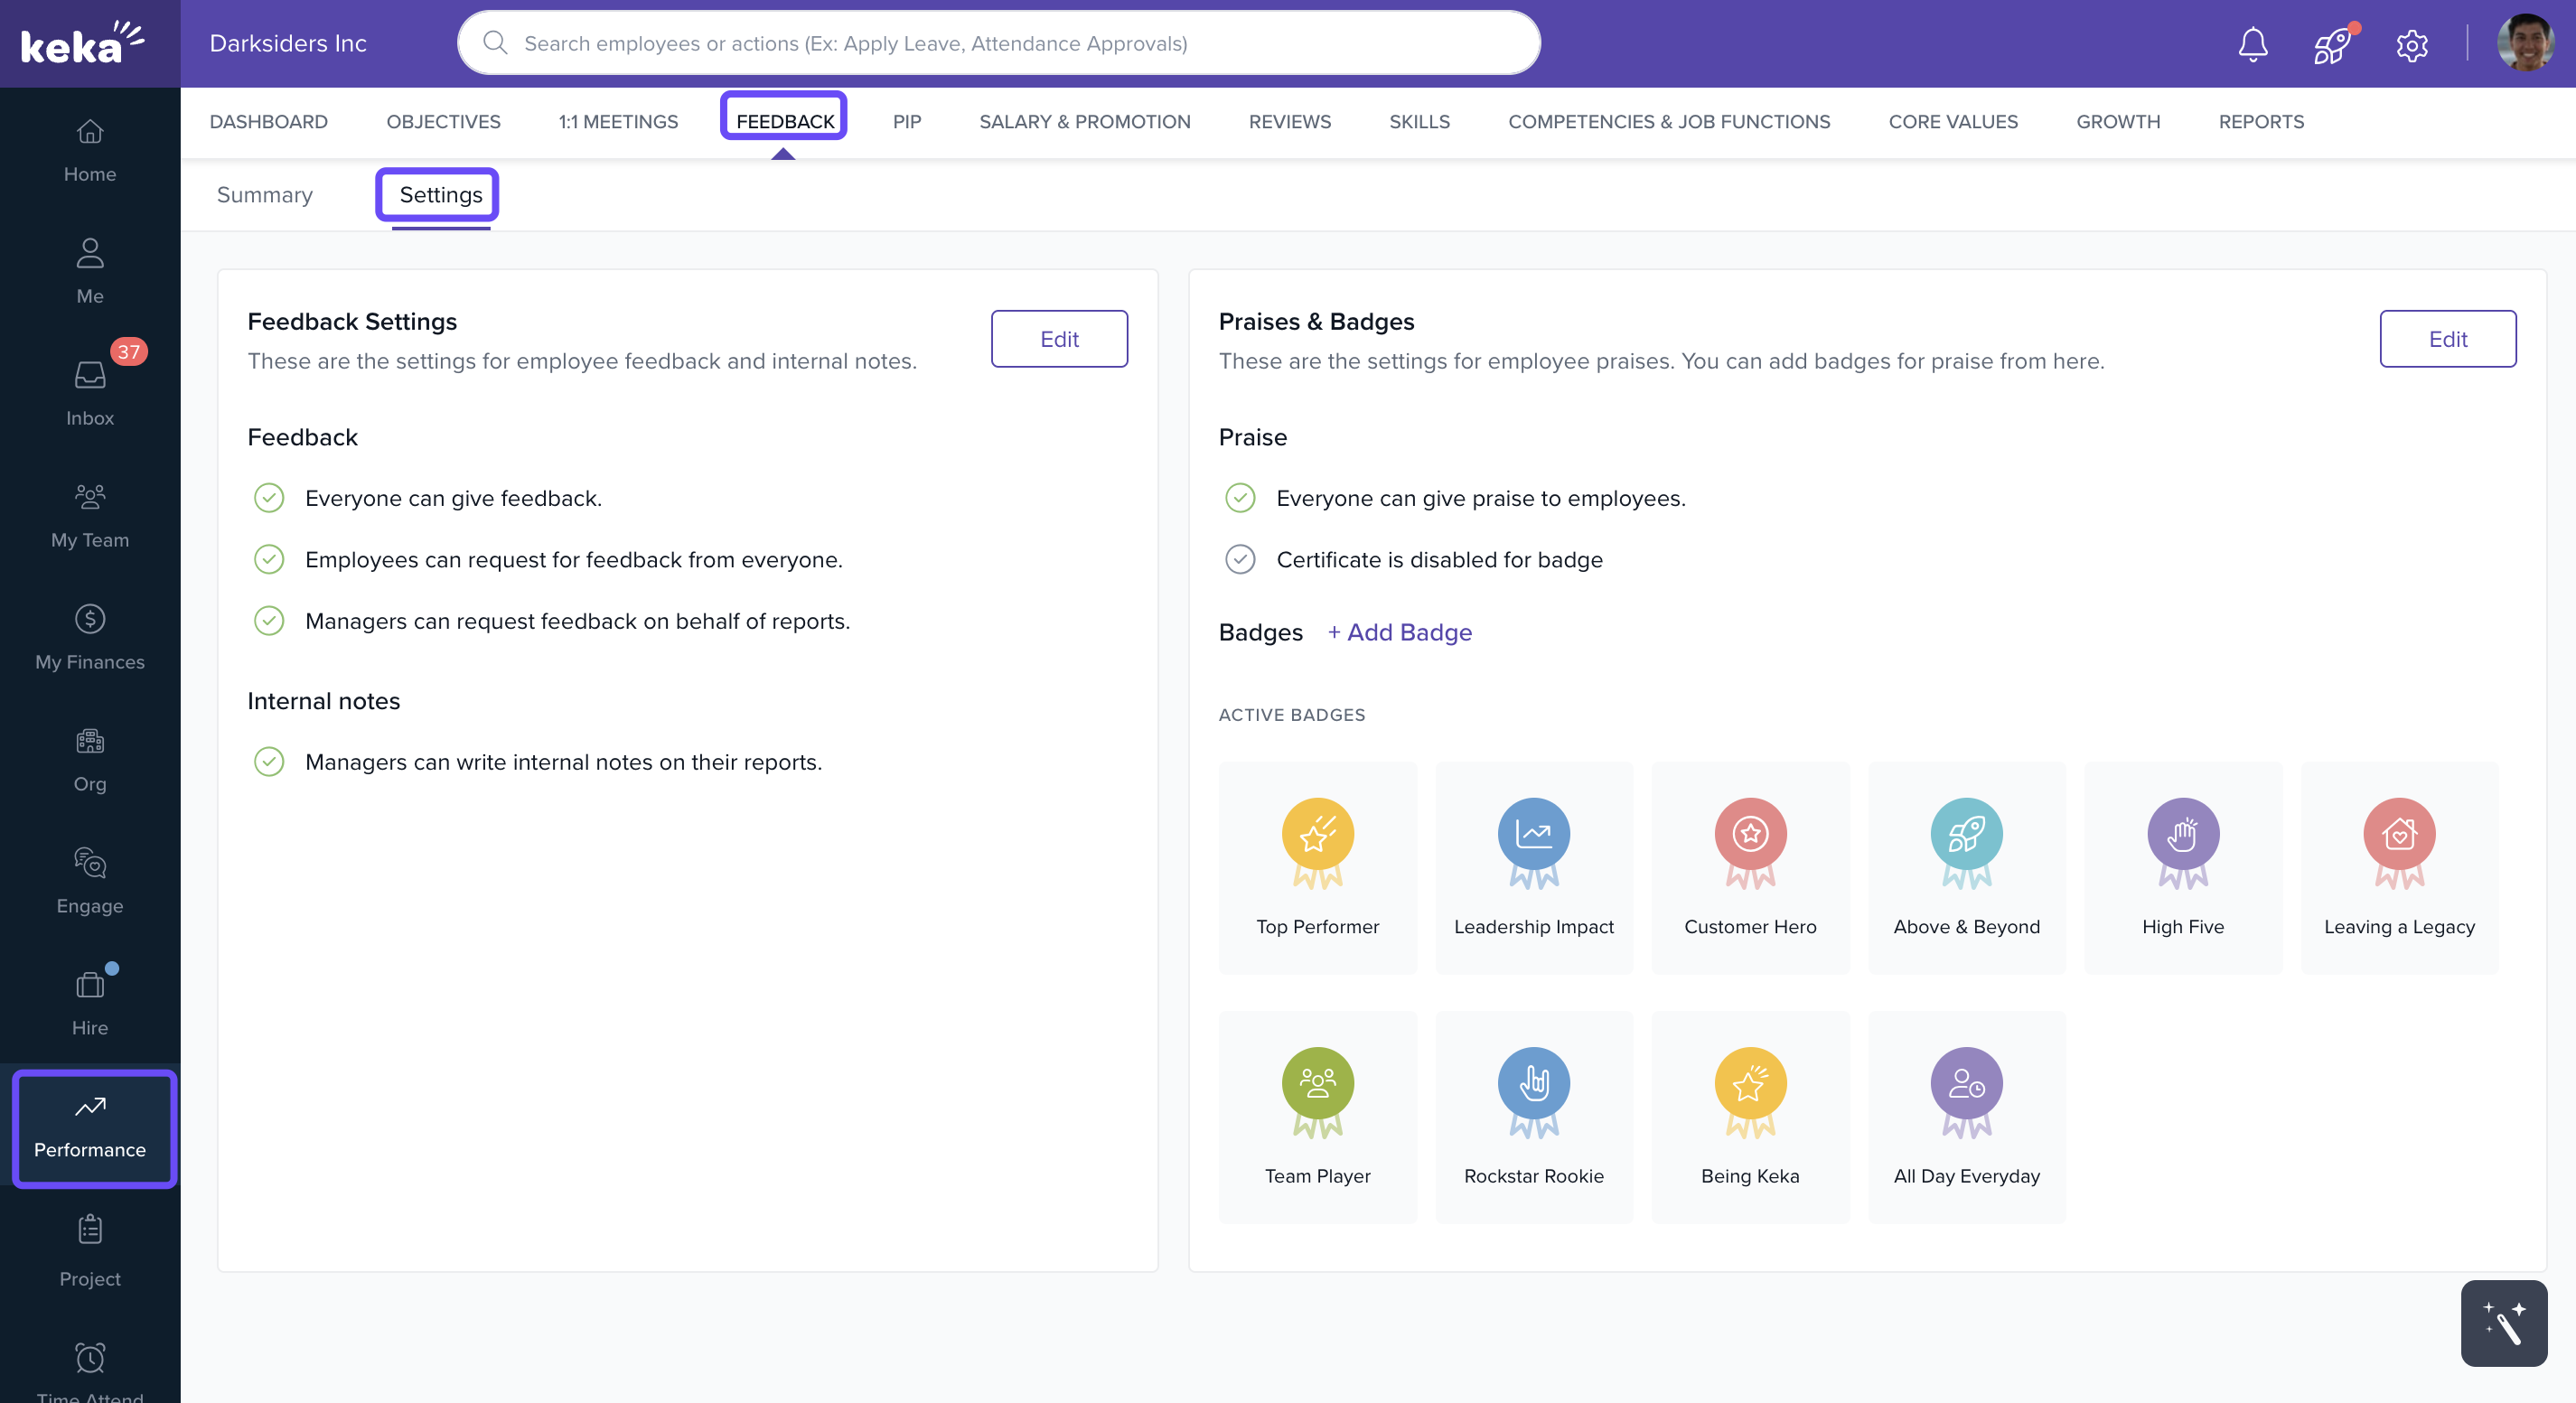
Go to Performance in the left-hand menu.
Click the Continuous Feedback tab.
-
Select Settings.
Enabling Praises and Certificates
-
In Settings, look for the Praises & Badges section and click Edit.
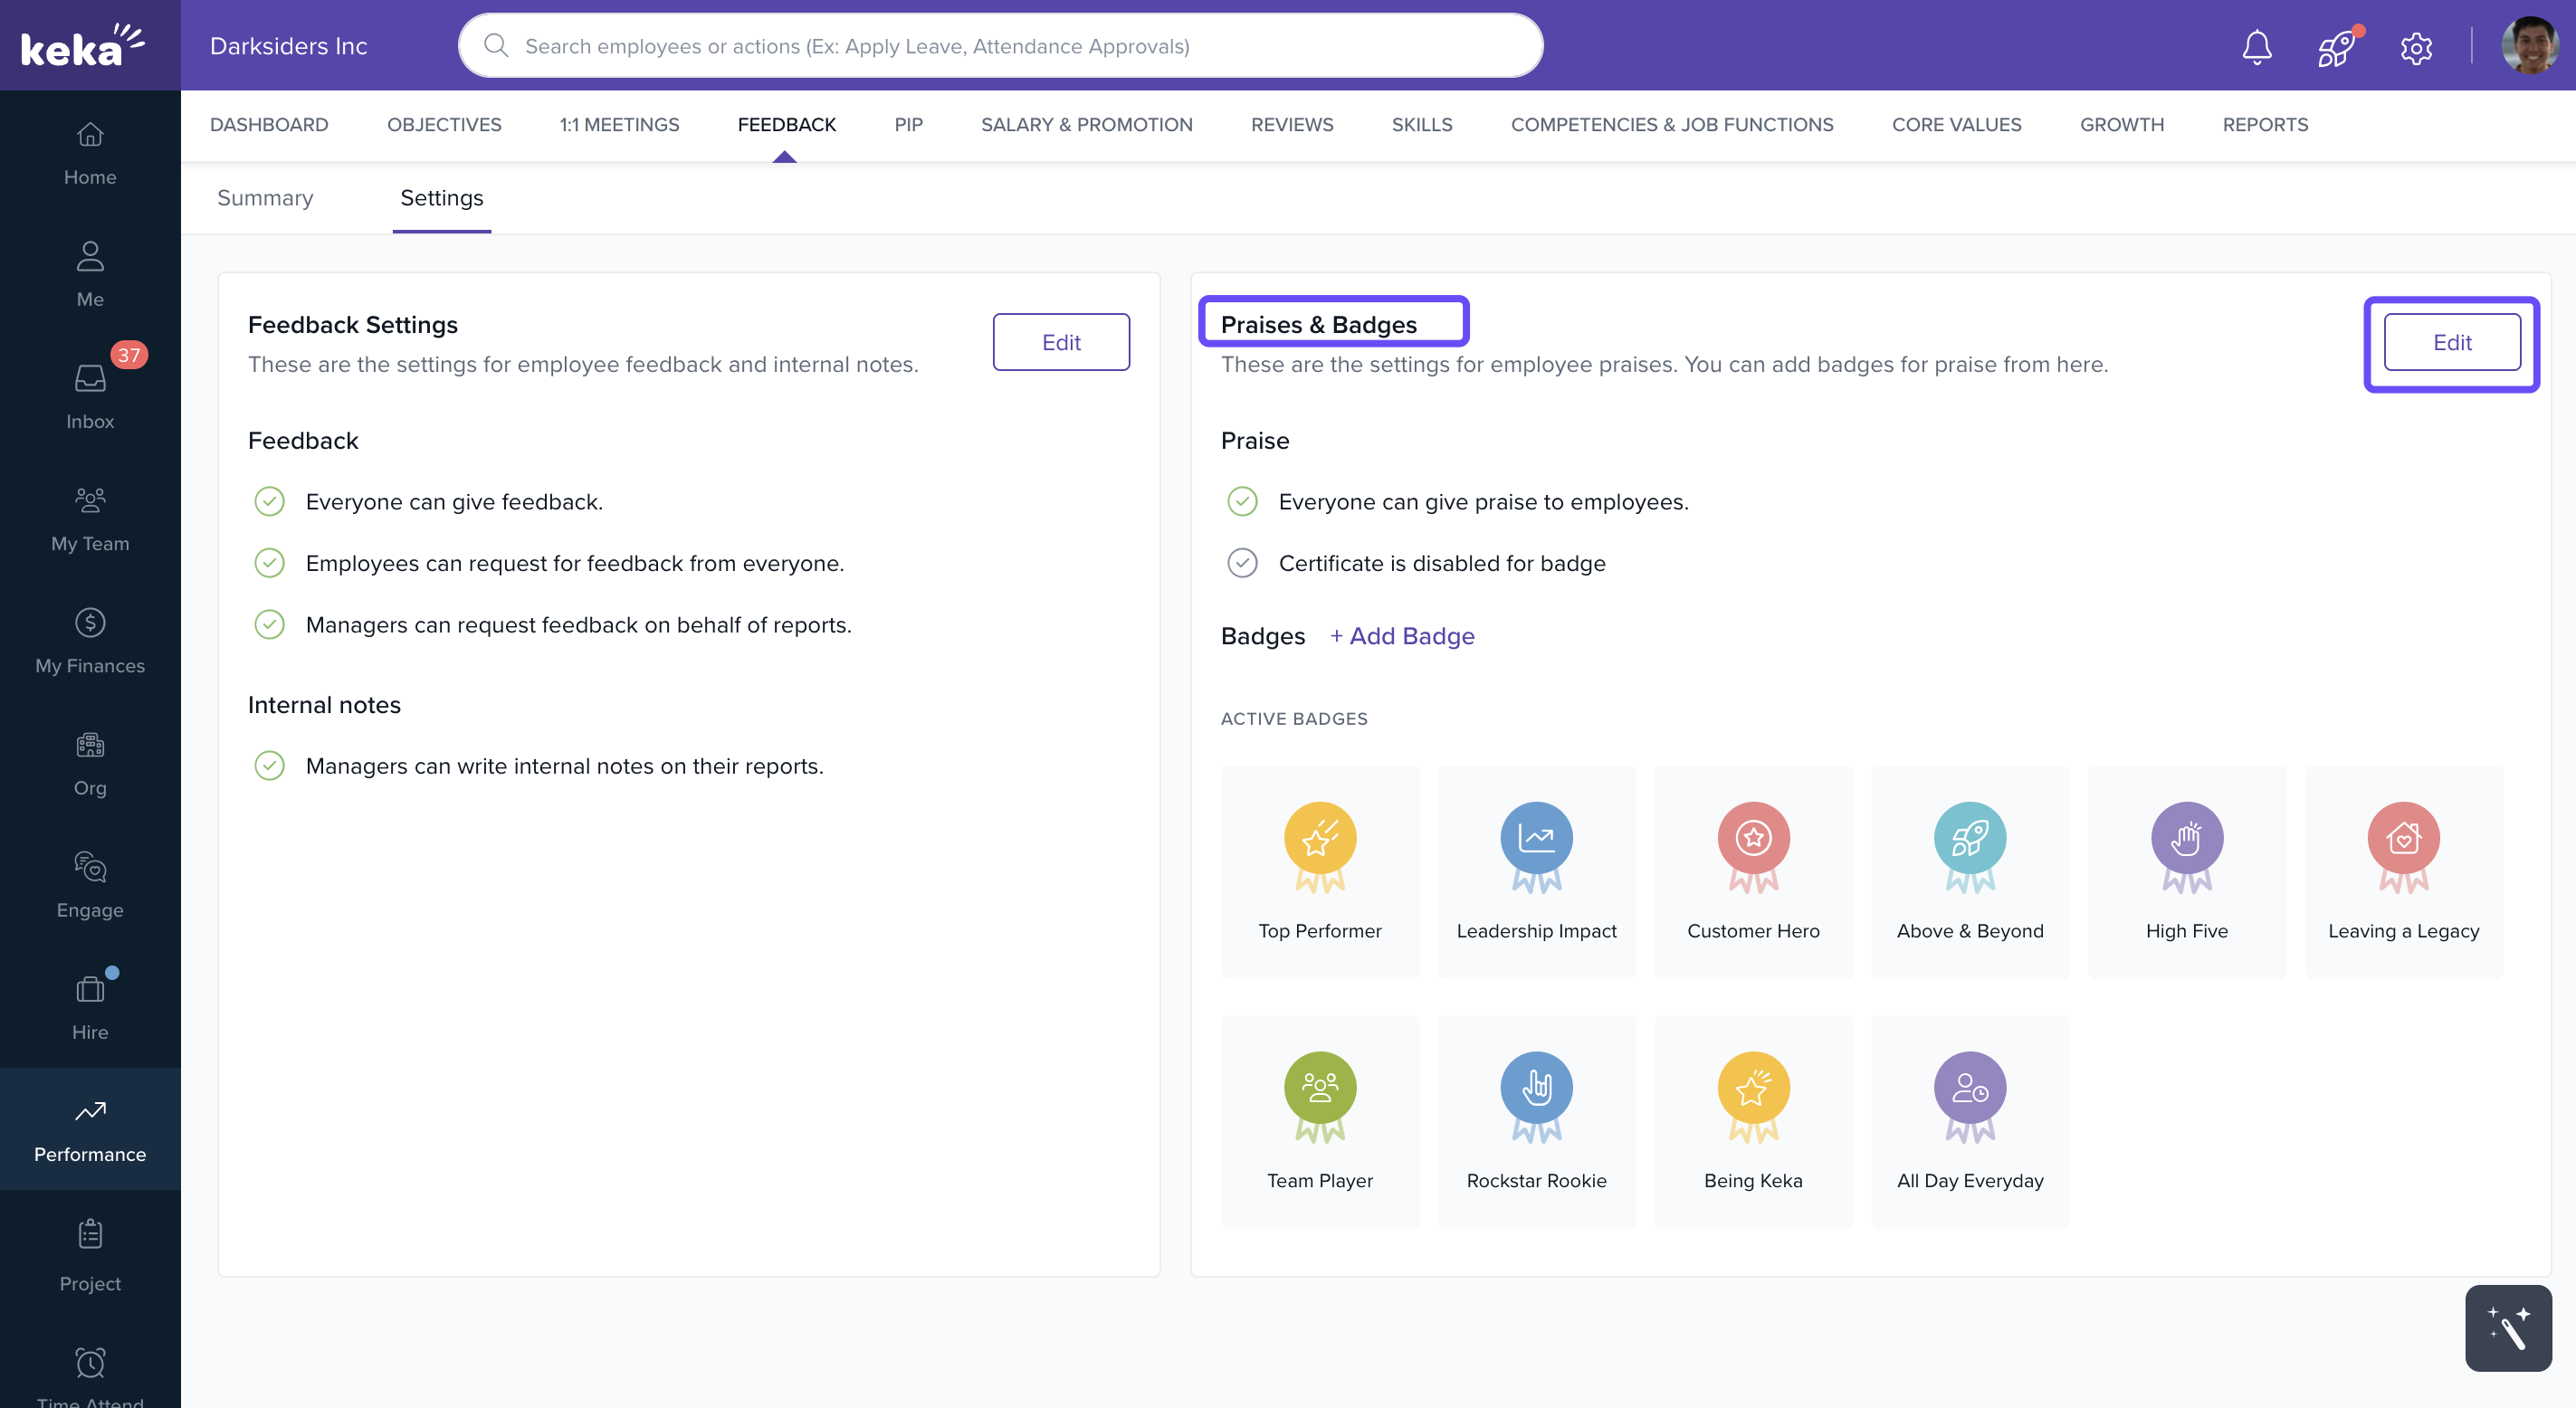
- A new window will appear where you can enable the Praises & Badges option to allow giving praises and issuing certificates.
-
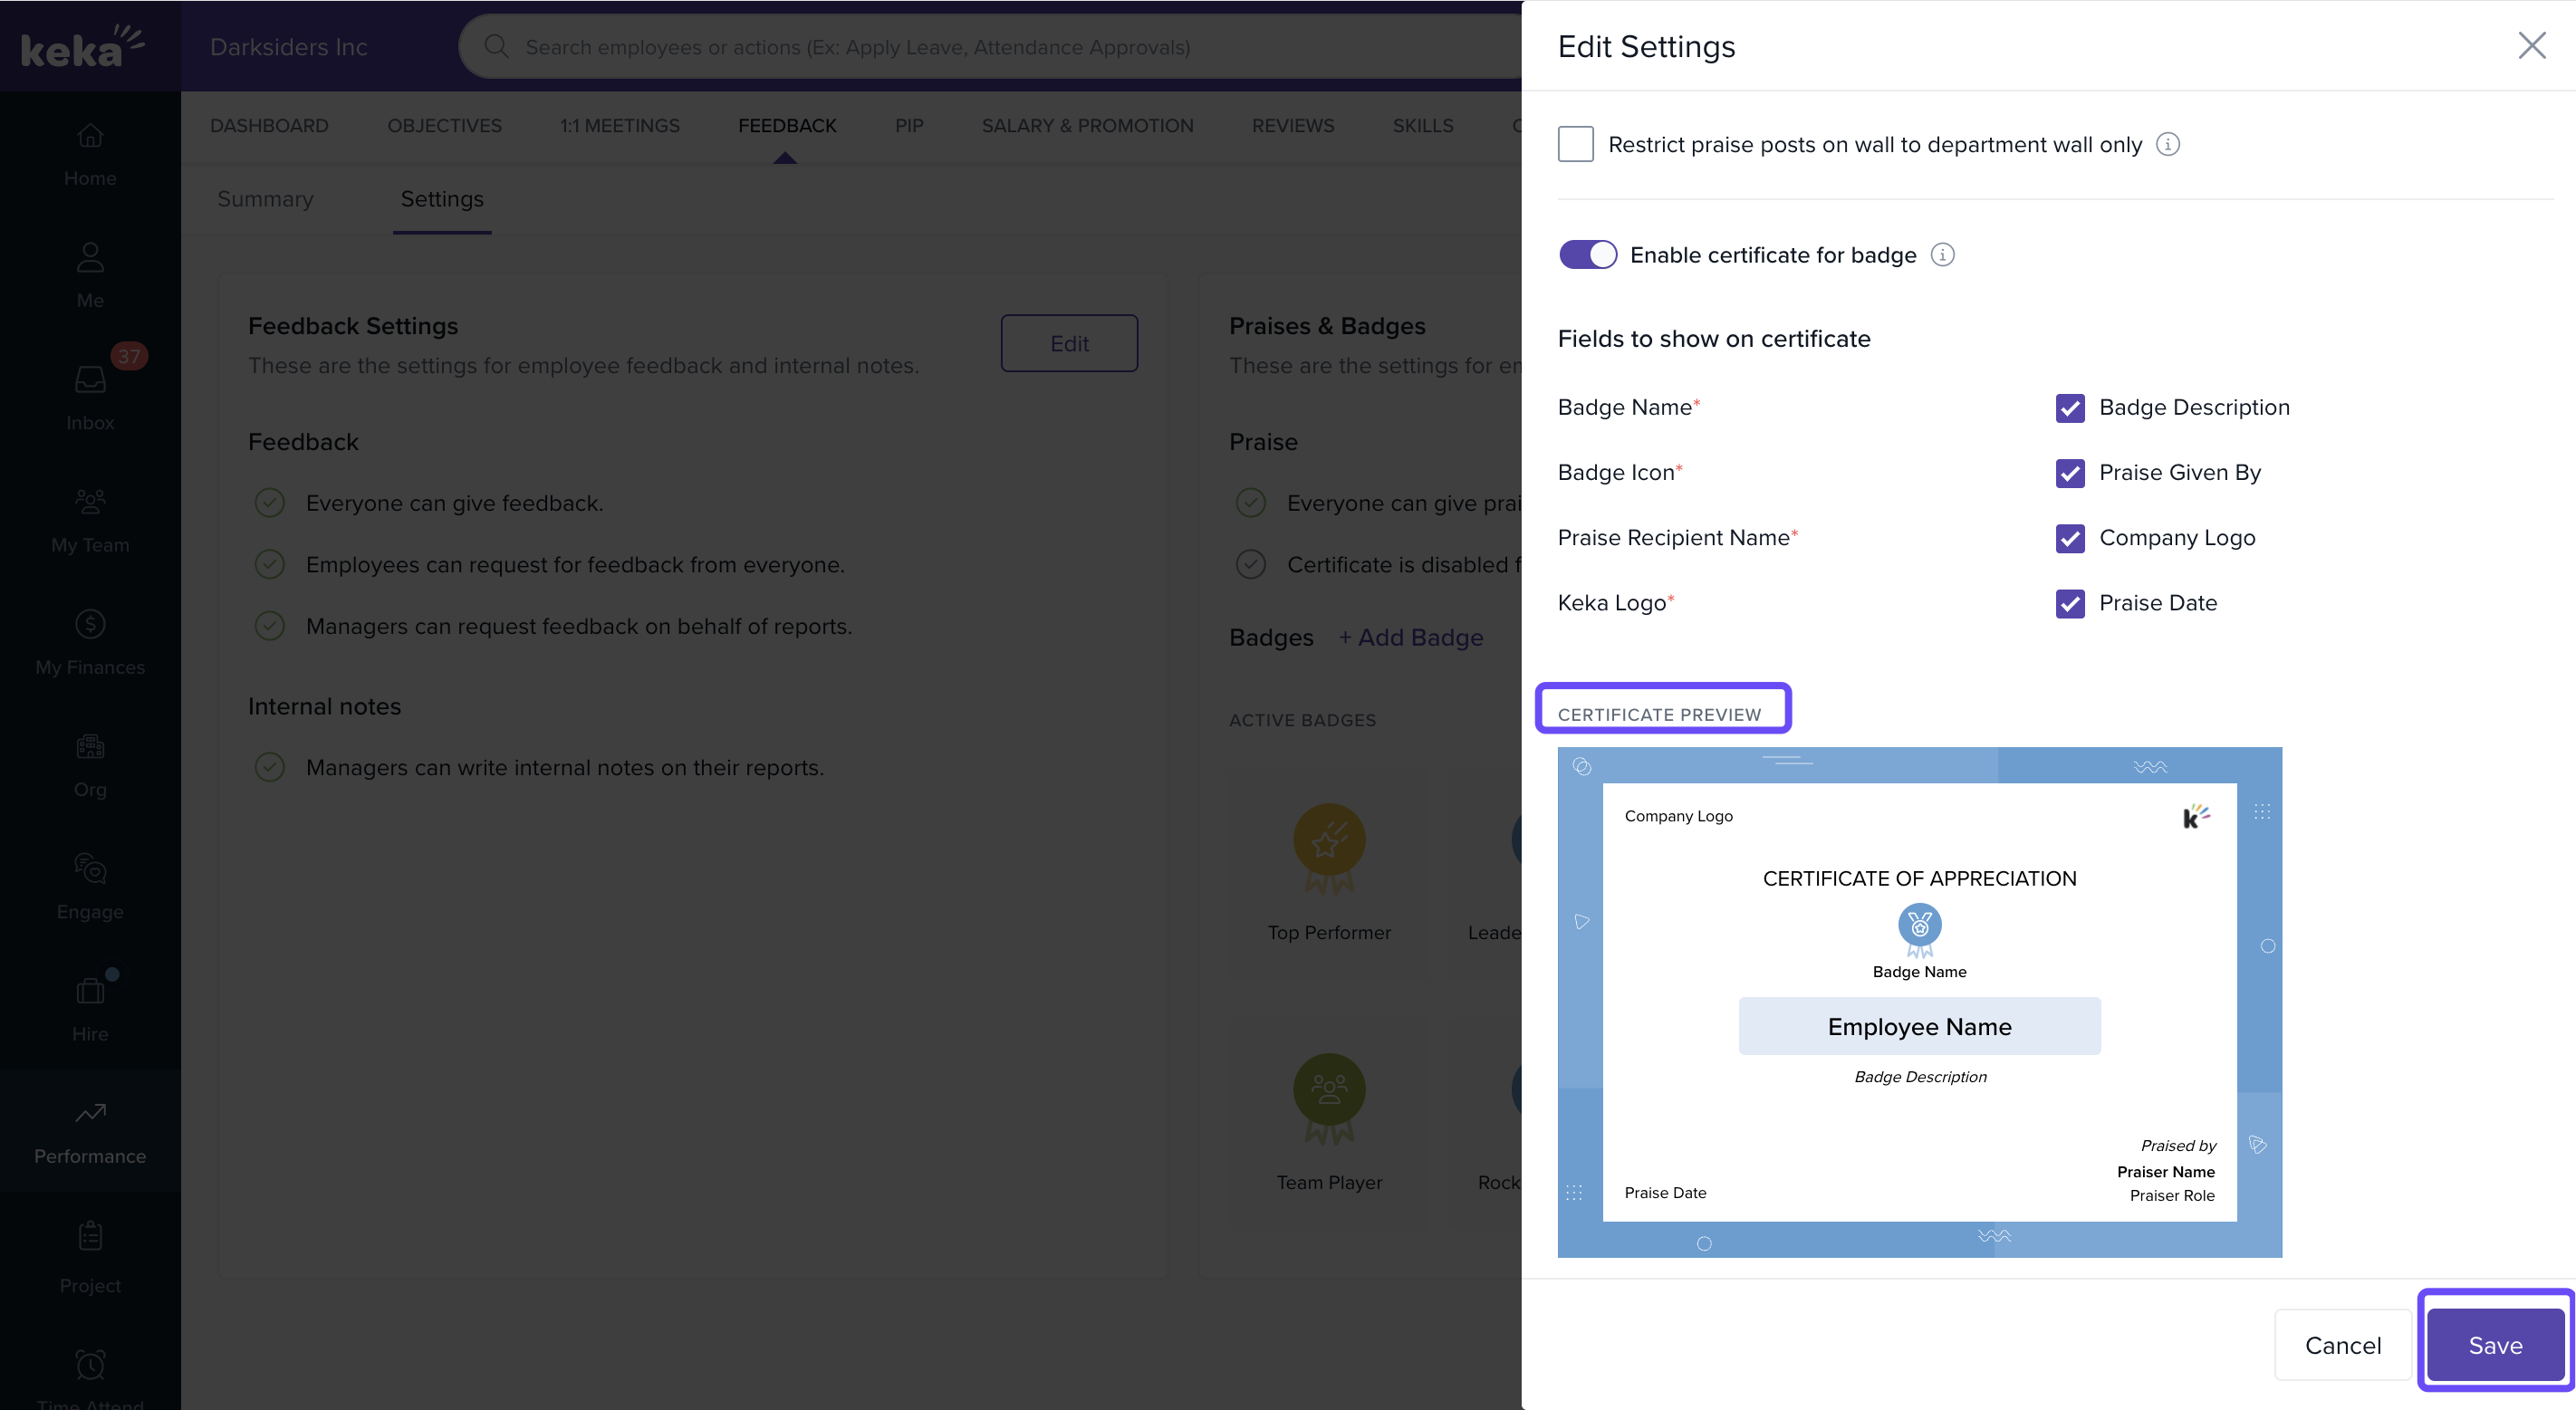
You can also:
Allow or restrict who can give praise.
Enable certificates of appreciation.

-
Customise your certificates:
Choose to include the page name, icon, recipient name, and Keka logo.
Optionally show the badge description, name of the person giving praise, company logo, and date.
-
Click Save when done.
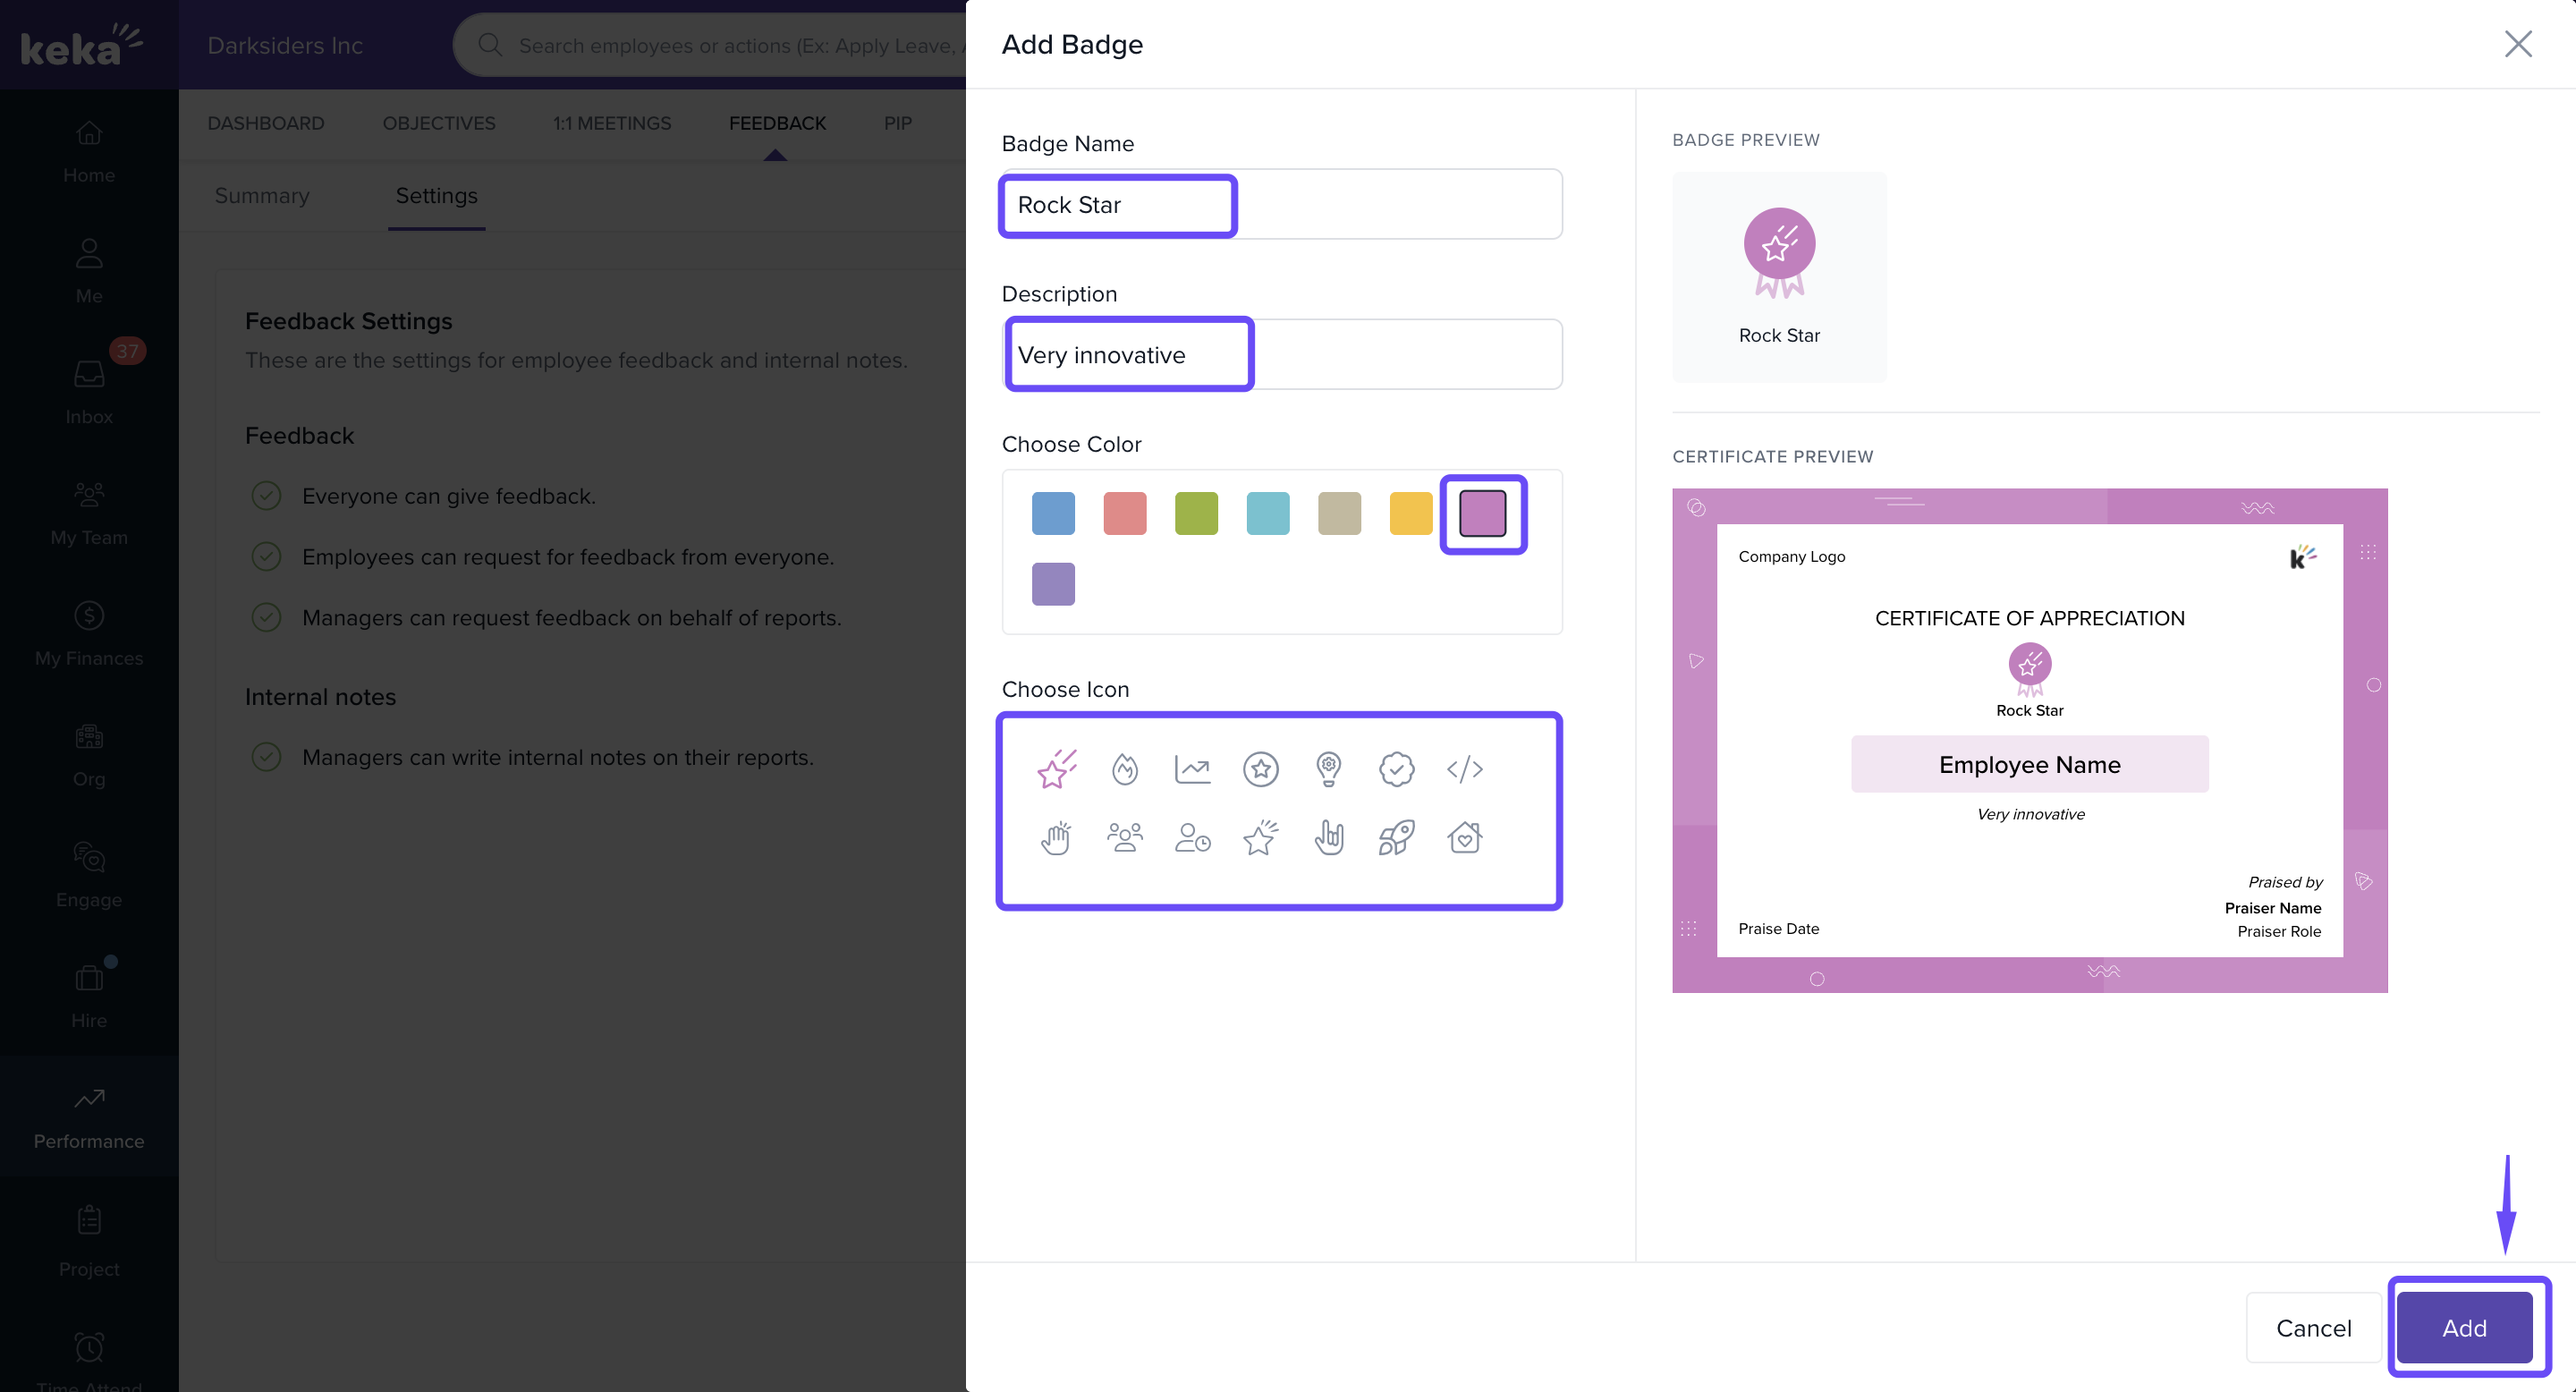
Adding Custom Badges
Keka provides default badges, but you can also create your own to reflect your team’s culture.
-
In the same Praises & Badges section, click Add Badge.
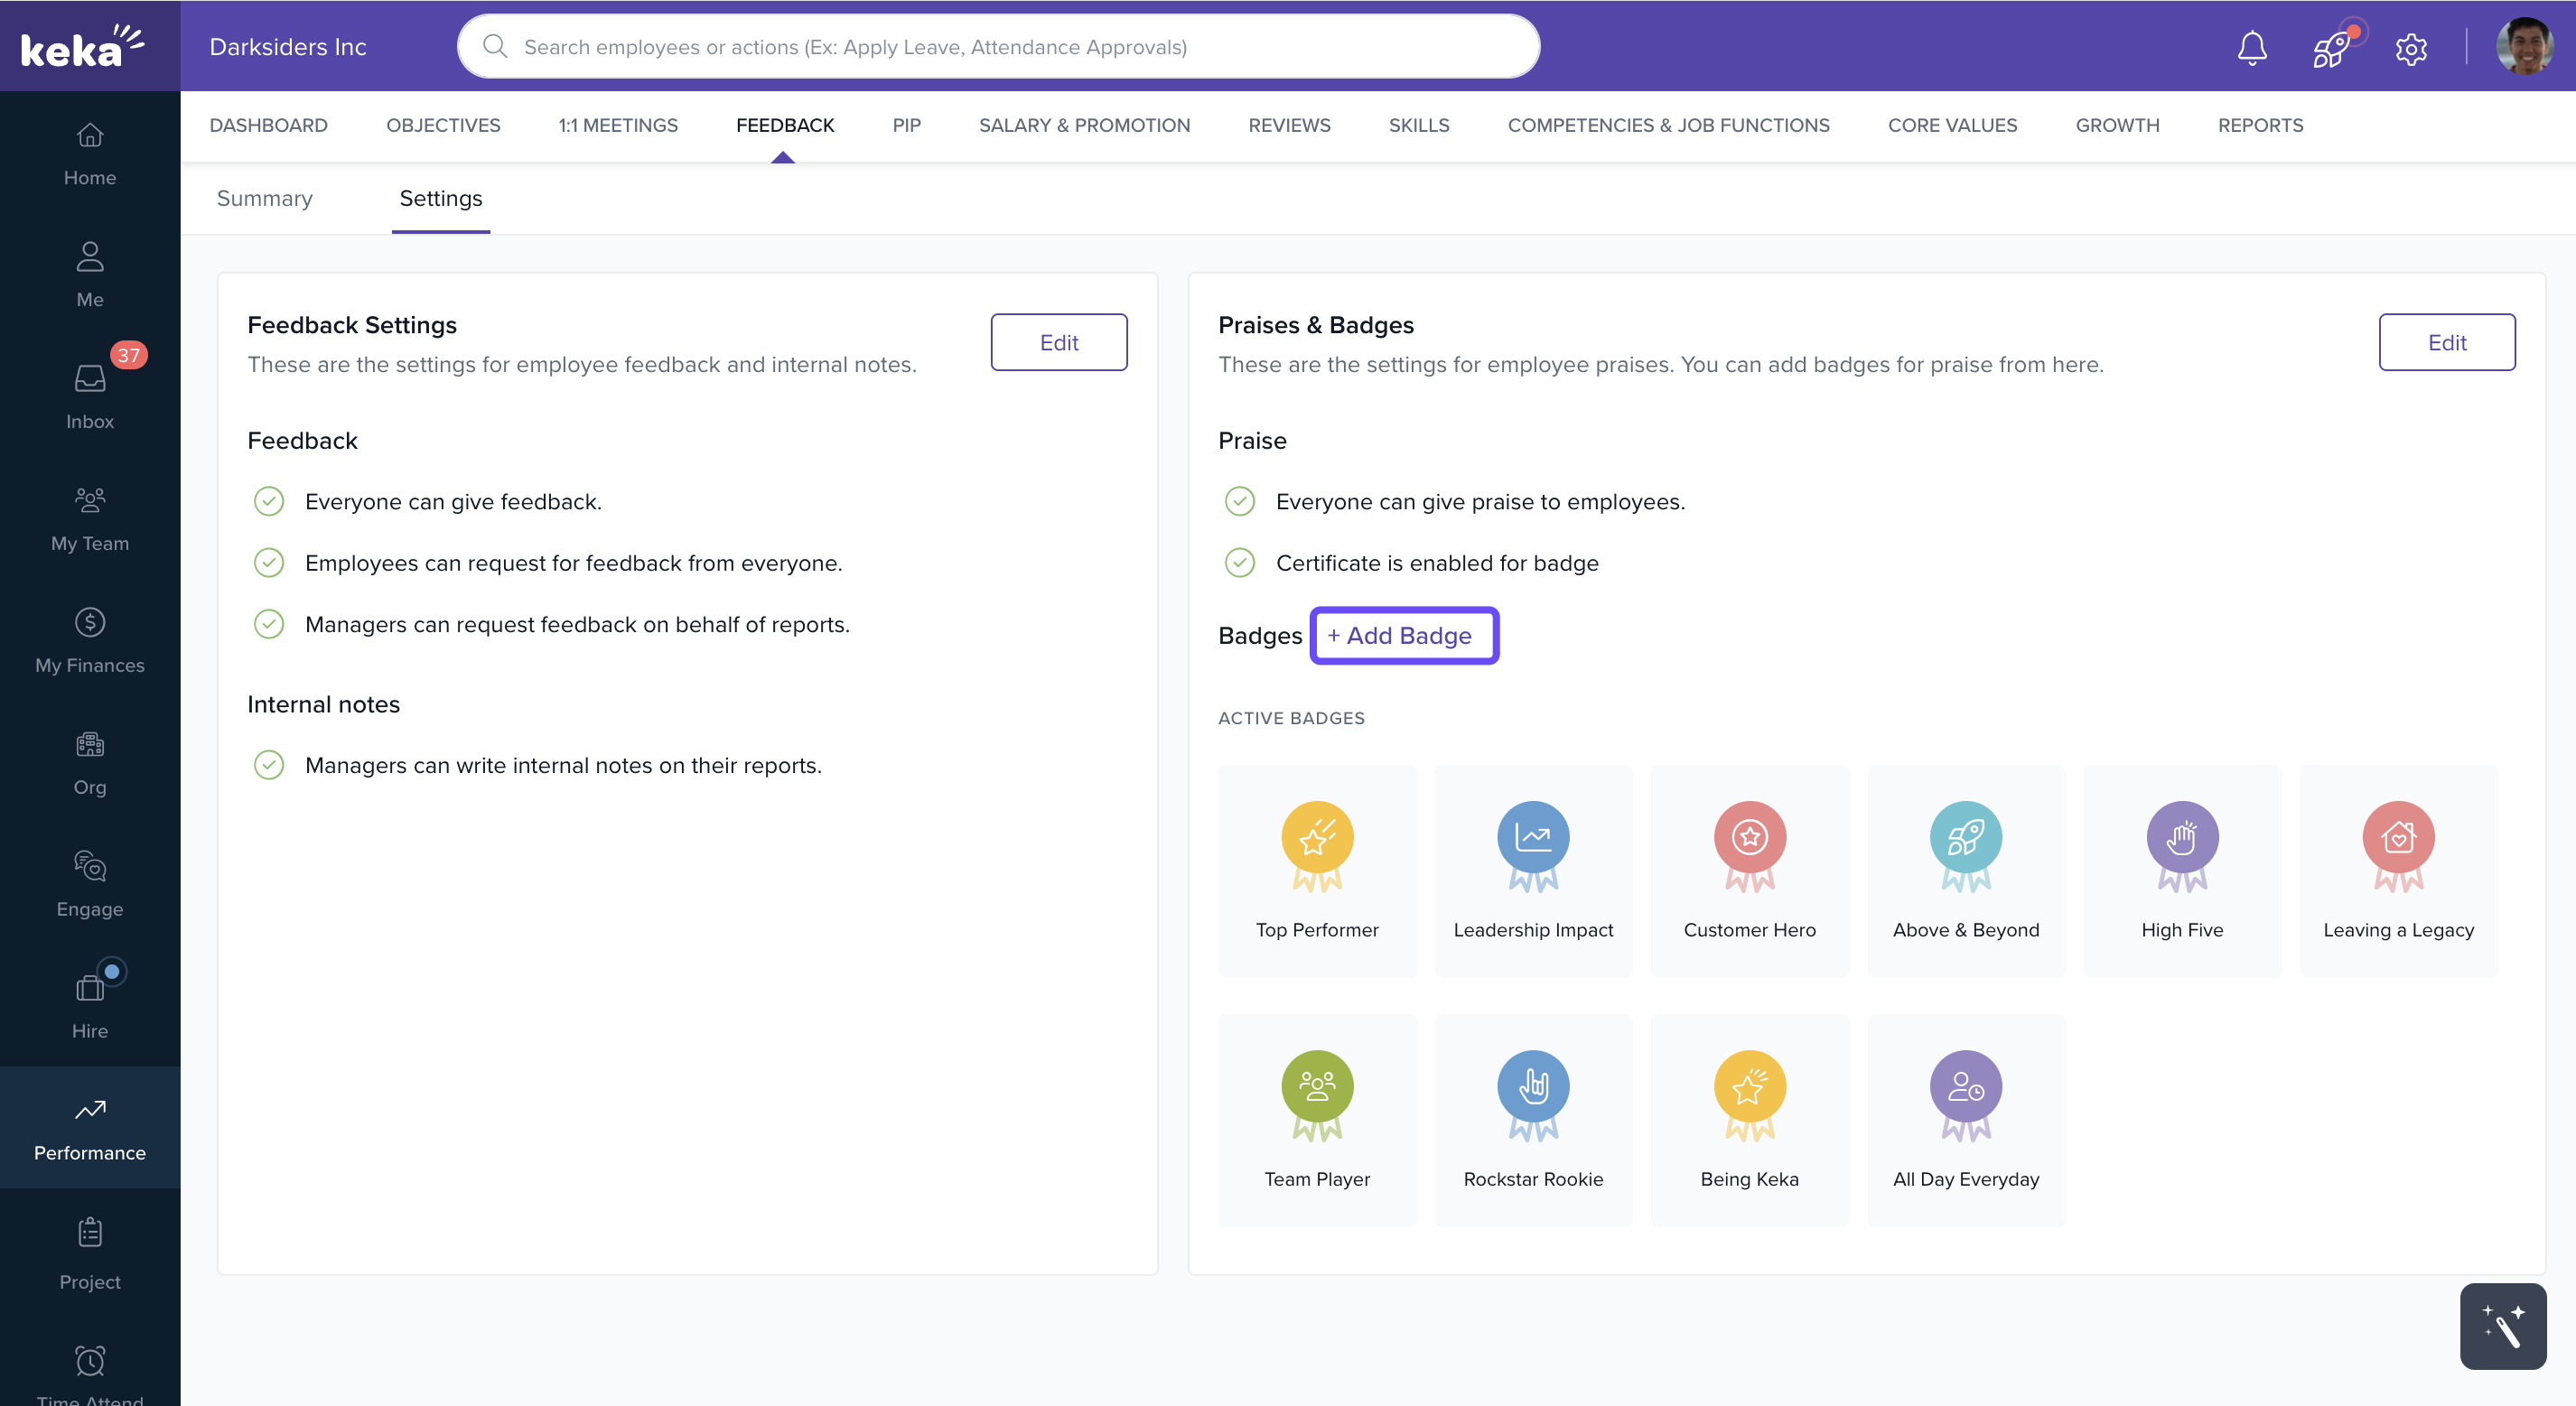
-
Fill in the badge details:
Name
Description
Color
Icon
-
Check the preview and click Add to save.
Now you’re ready to start recognising your colleagues, and your team can join in too.
Configuring Feedback and Internal Note Settings
To manage how feedback and internal notes are shared:
Go to Performance and click on Feedback. And then go to Settings.
-
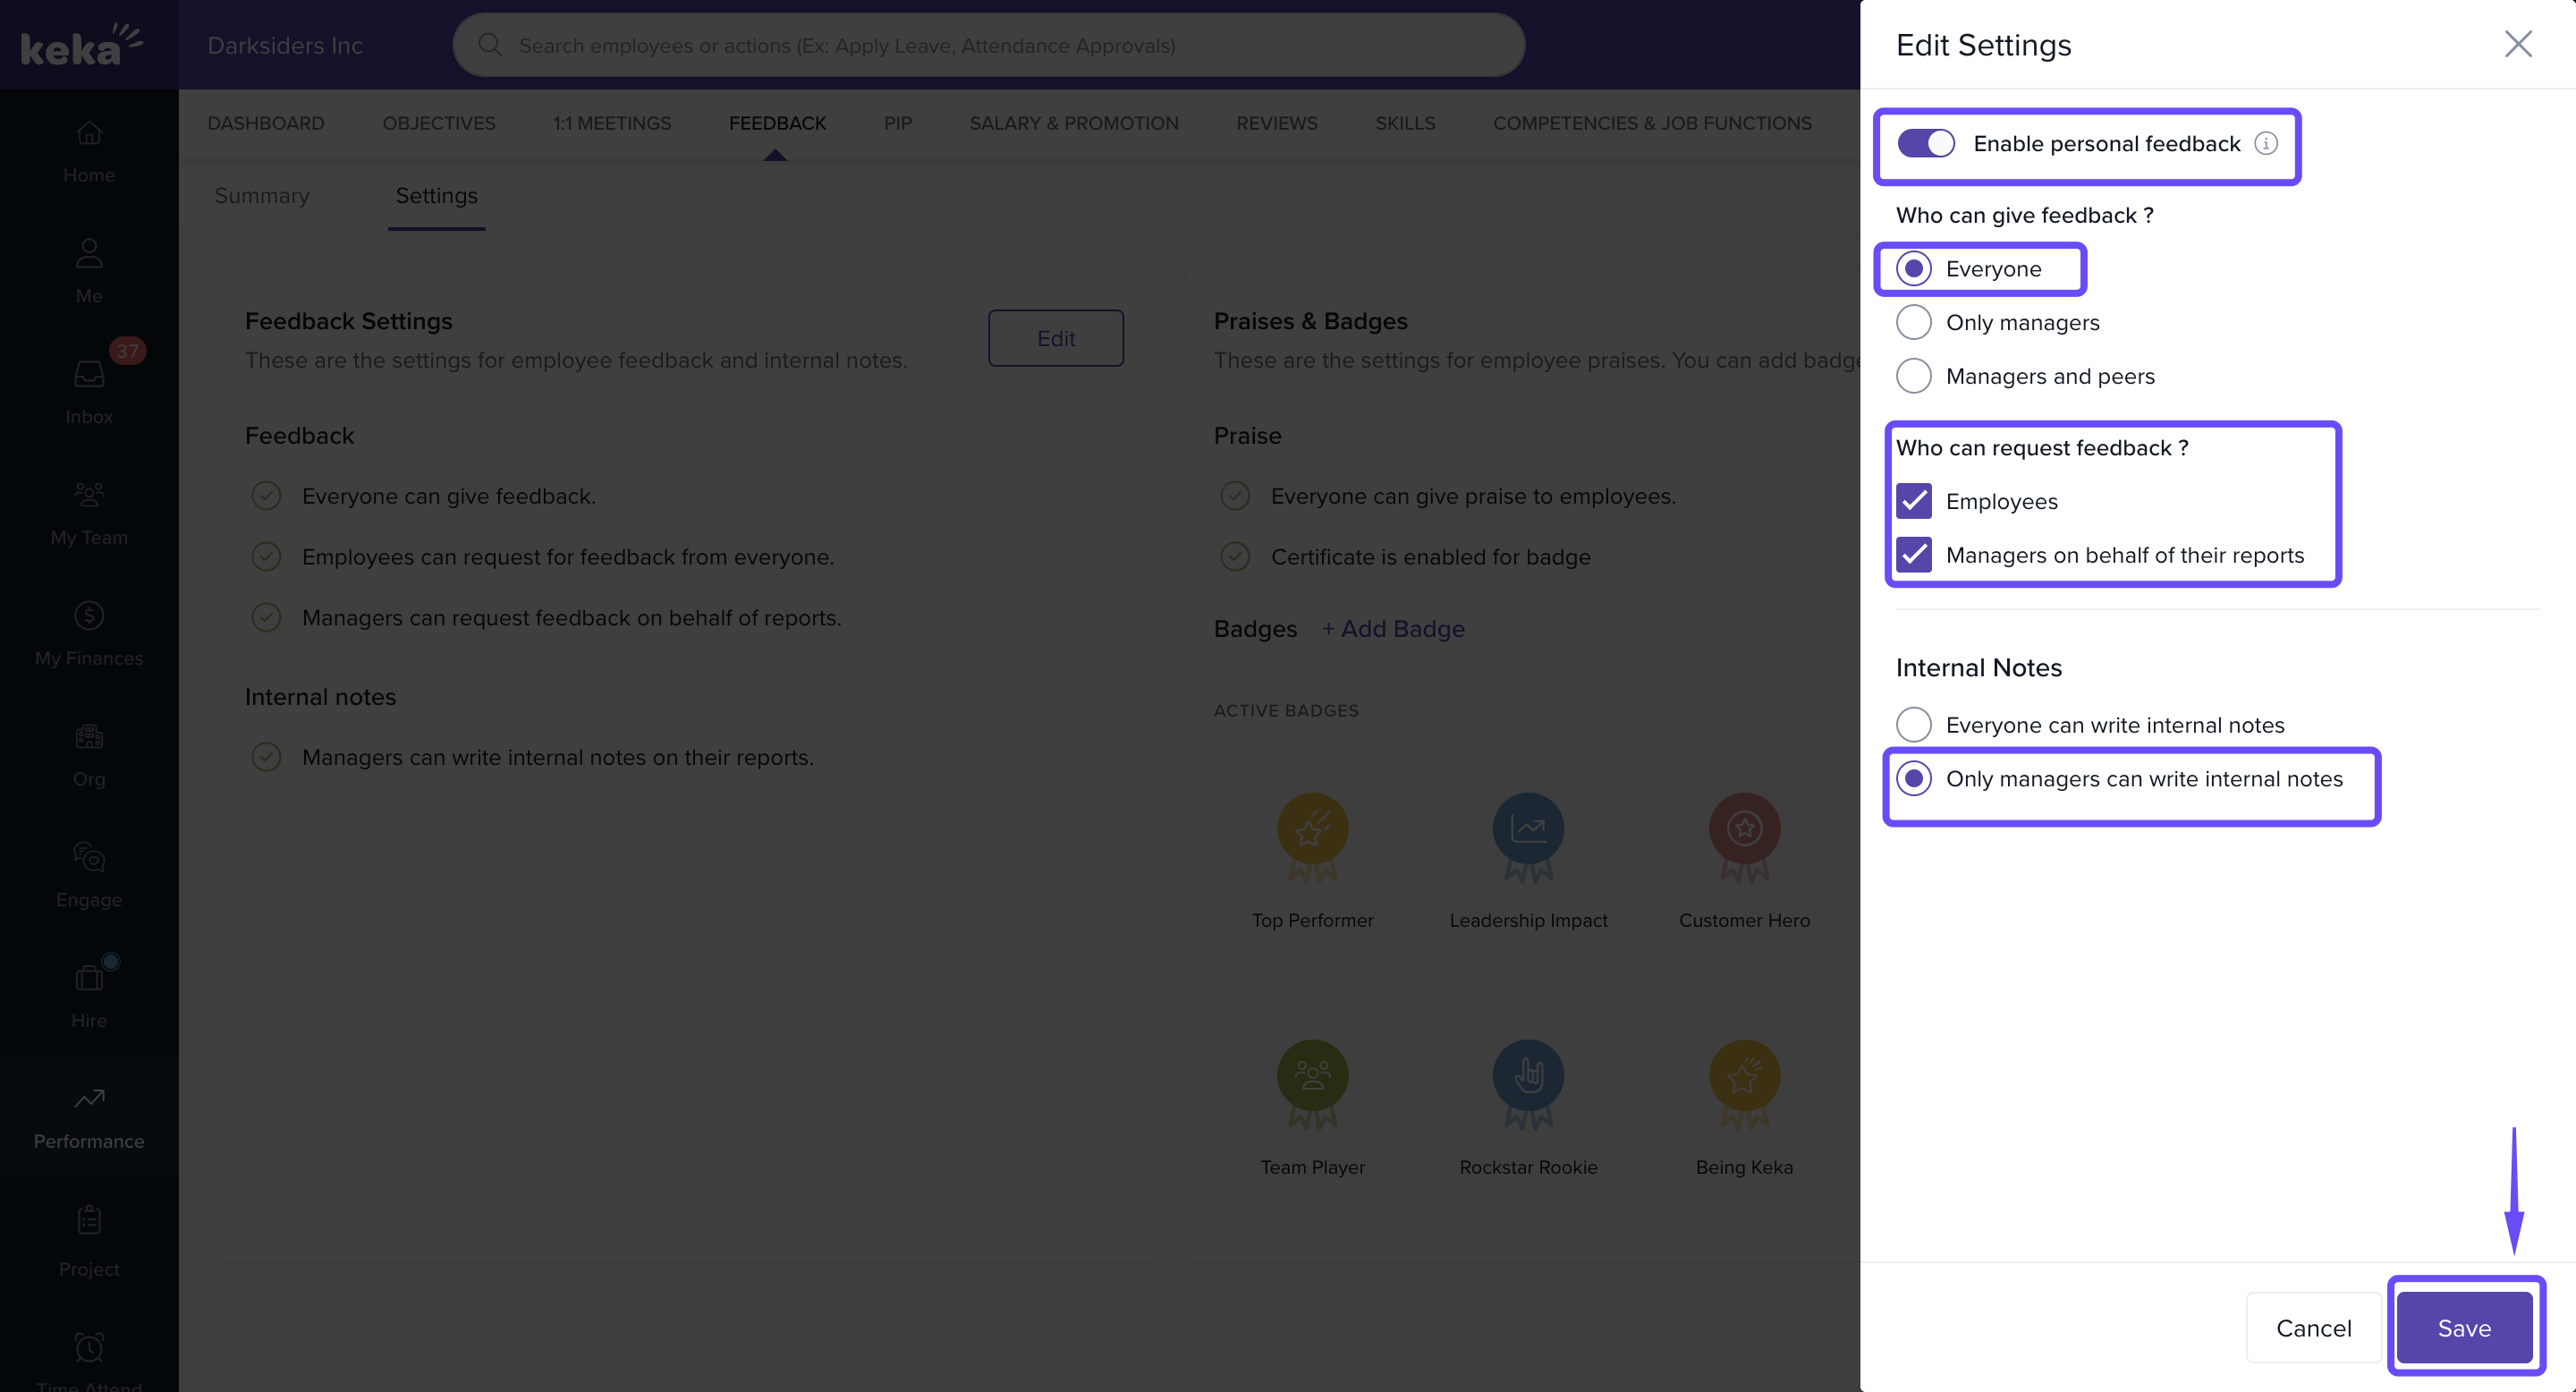
In the Feedback section, click Edit.
Here, you'll see several configuration options:
Personal Feedback Visibility
Toggle on or off.
Warning: If turned off, all previously submitted personal feedback will be hidden.
Feedback Providers
-
Choose who can give feedback:
Everyone
Only Managers
Managers and Peers
Feedback Request Permissions
-
Decide who can initiate feedback requests:
Employees
Managers on behalf of their team members
Both
Internal Notes Access
-
Set who can write internal notes:
Everyone
Managers only
Adjust these settings to match your organisation's structure, workflows, and cultural preferences.
Please refer to the following articles to add and view internal notes : Add Internal notes & View Internal Notes.
Options & Variants
| Setting | Options Available | Purpose |
|---|---|---|
| Praise Givers | Role-based | Control who can recognize peers |
| Certificate Customization | Logo, Date, Name, Giver, Badge Description | Tailor appreciation certificates |
| Badge Setup | Name, Description, Color, Icon | Define recognition types |
| Feedback Providers | Everyone, Managers only, Managers + Peers | Decide who can give feedback |
| Request Permissions | Employee, Manager, Both | Control who initiates feedback |
| Internal Notes Access | Everyone or Managers | Limit who can document internal notes |
Notes, Tips, and Warnings
Tip: Custom badges are a great way to highlight behaviours or values specific to your company culture.
Warning: Disabling personal feedback will hide all past feedback. Ensure your team is aware before turning it off.
Important: Only users with appropriate permissions will be able to edit these settings.
Examples & Use Cases
A peer thanks a teammate for mentoring using a badge called “Knowledge Sharer”.
HR issues a certificate titled “Above & Beyond” with the employee’s name, logo, and praise date.
Managers set feedback to be shared only among leadership to maintain discretion.
Next Steps
Continue building a culture of recognition and feedback by exploring these features:
How to View Praise Given for an Employee – Track all public recognitions received by an individual.
Making Praises Official with a Certificate of Appreciation – Learn how to issue formal certificates for standout contributions.
Comments
0 comments
Please sign in to leave a comment.