Overview
This article explains how to use the Resource Planner in Keka PSA to manage, filter, and allocate resources efficiently. You'll learn how to assess availability, apply filters, bulk allocate team members to projects, and visualize all allocations in a single view to support project delivery.
Who Can Do This?
- PSA Admins
- Project Managers
- Resource Managers
Pre-requisites
- Active resources with defined departments, roles, and billing rates
- Projects should be created and ready for allocation
- Roles must be configured in the system for billing assignment
Navigating to the Resource Planner
- Go to the Projects section.
- Select the Resources tab.
- Click on Resource Planner to view availability and current allocations across departments.
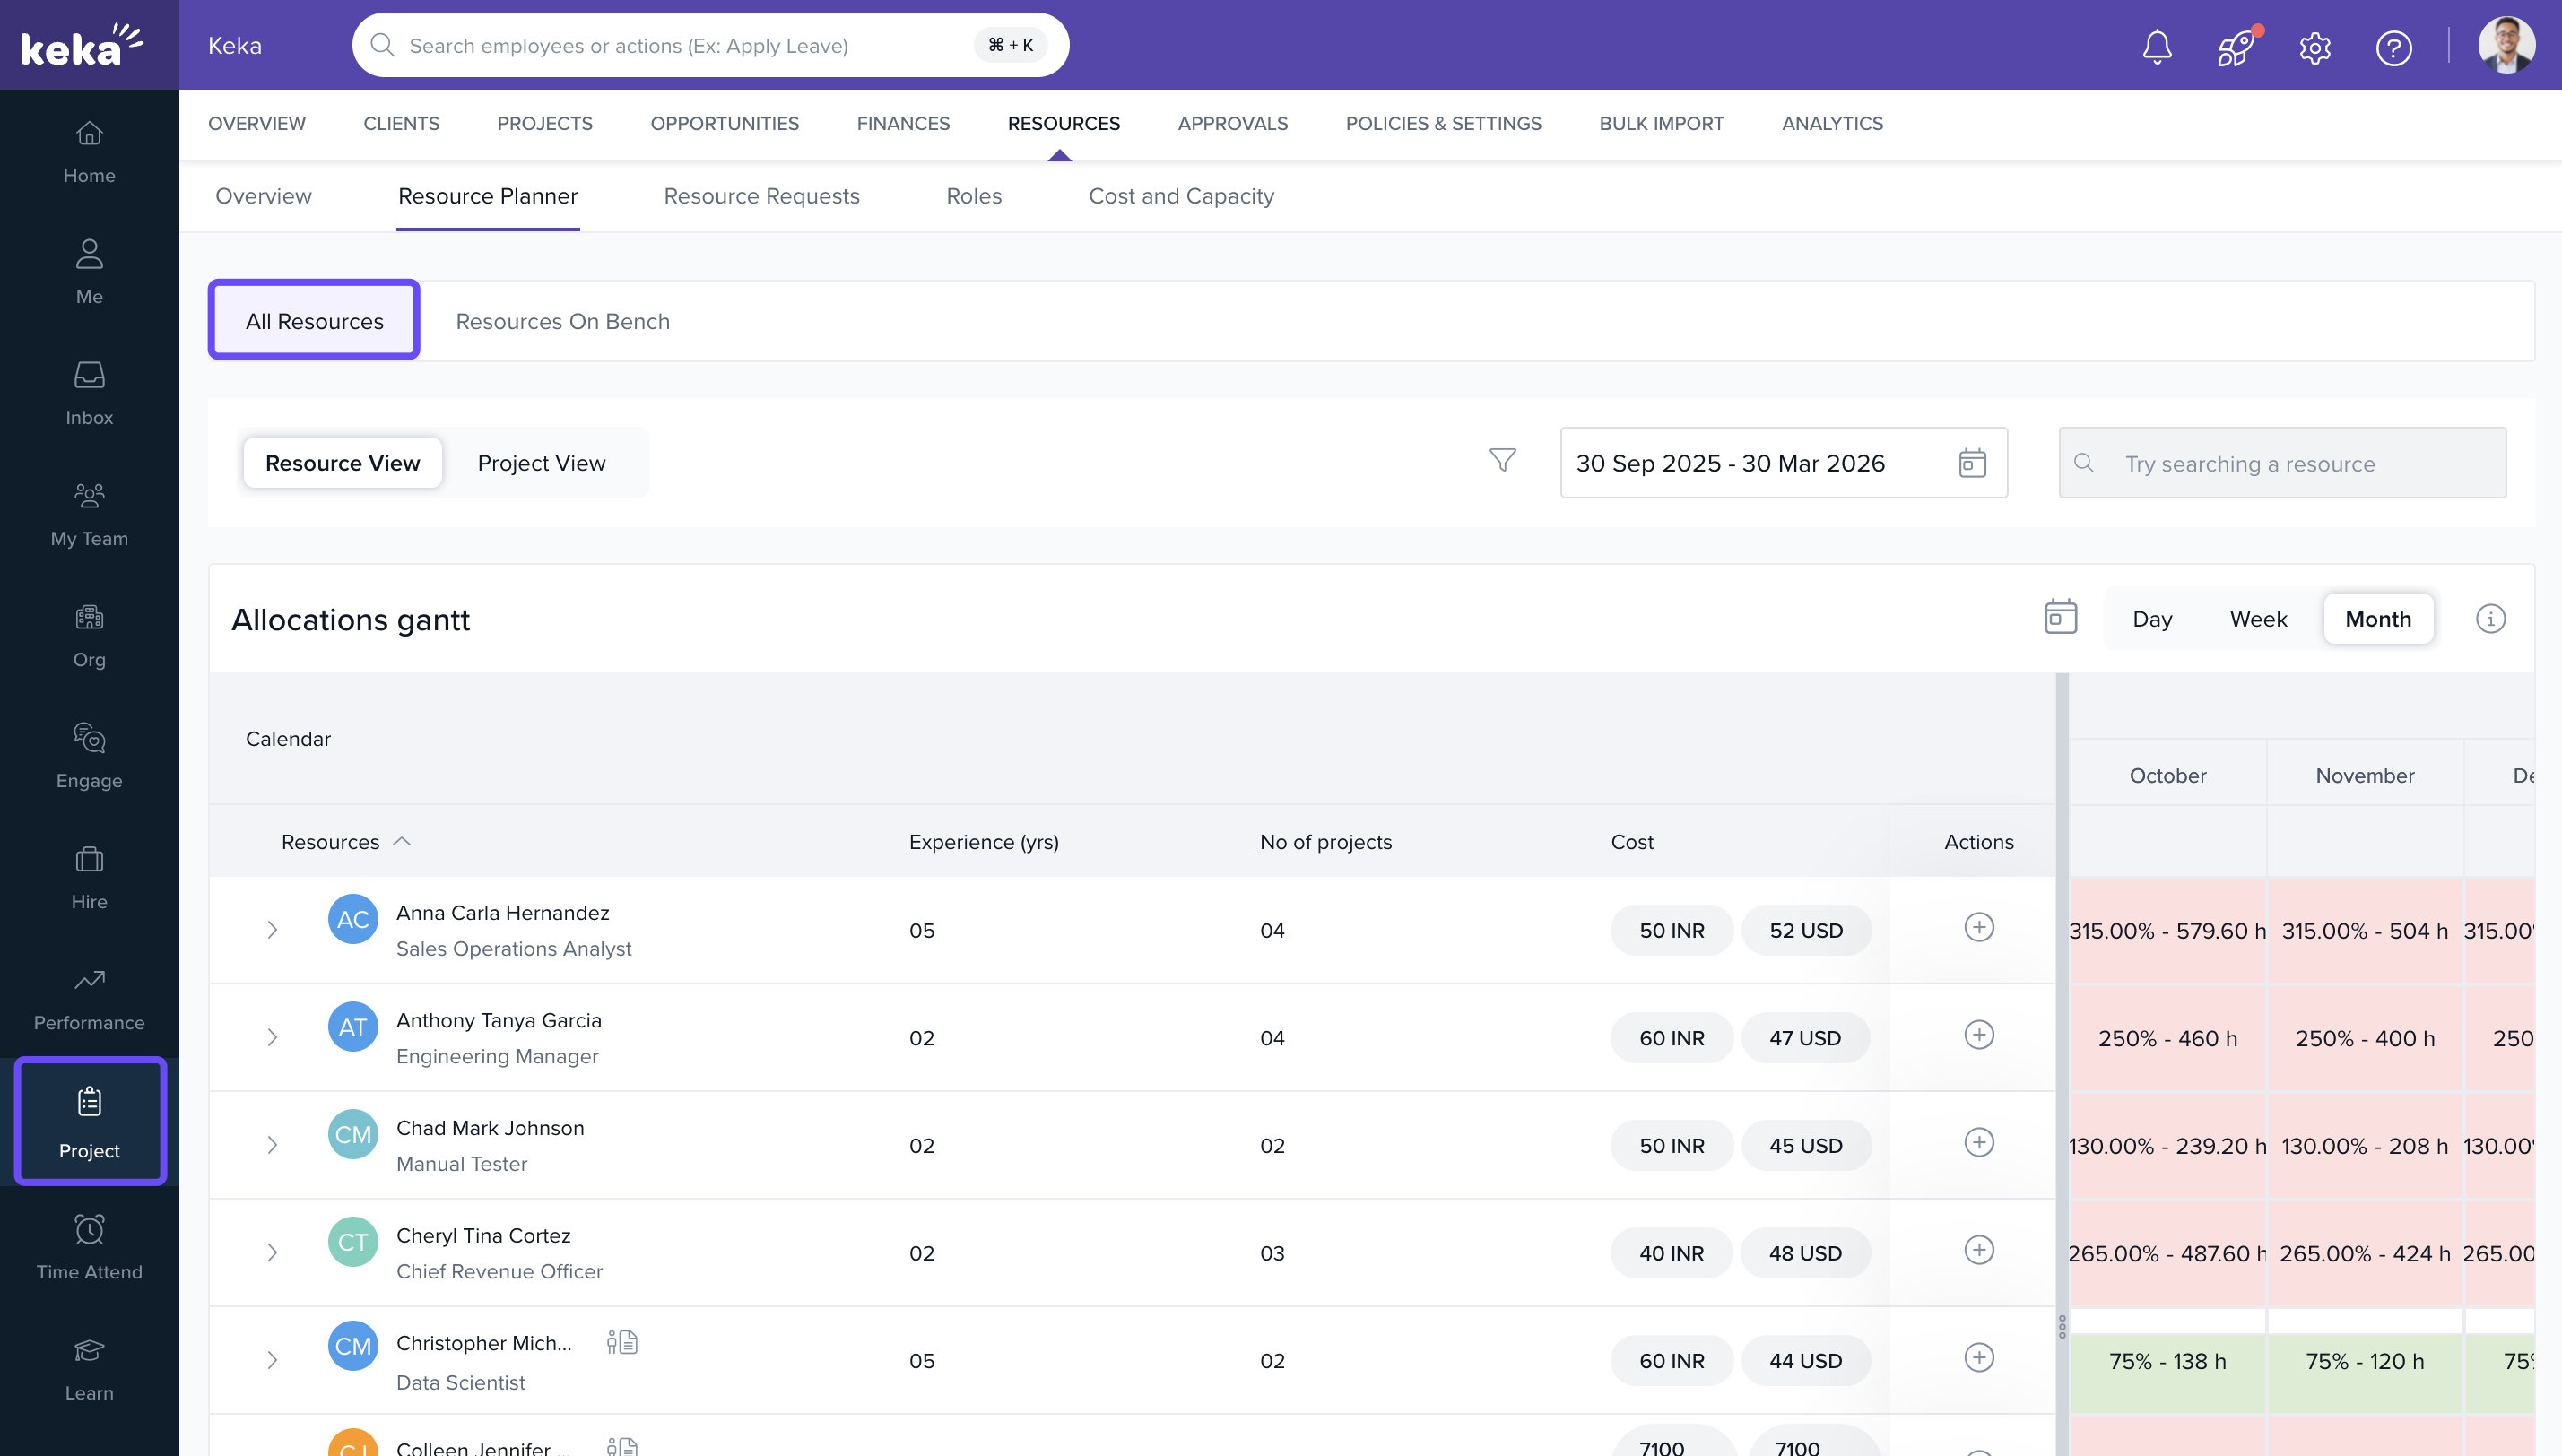
Understanding the Resource Planner Interface
- Review the overview of resources grouped by department.
- Check availability percentage, allocation dates, and associated projects per resource.
- Use this view to assess whether current capacity meets upcoming project demands.
- Example: To find team members from Customer Support (CS) with at least 50% availability, apply filters for Department: CS and Availability %: ≥ 50%.
- Decide whether to reallocate, soft-allocate, or hire based on real-time visibility.
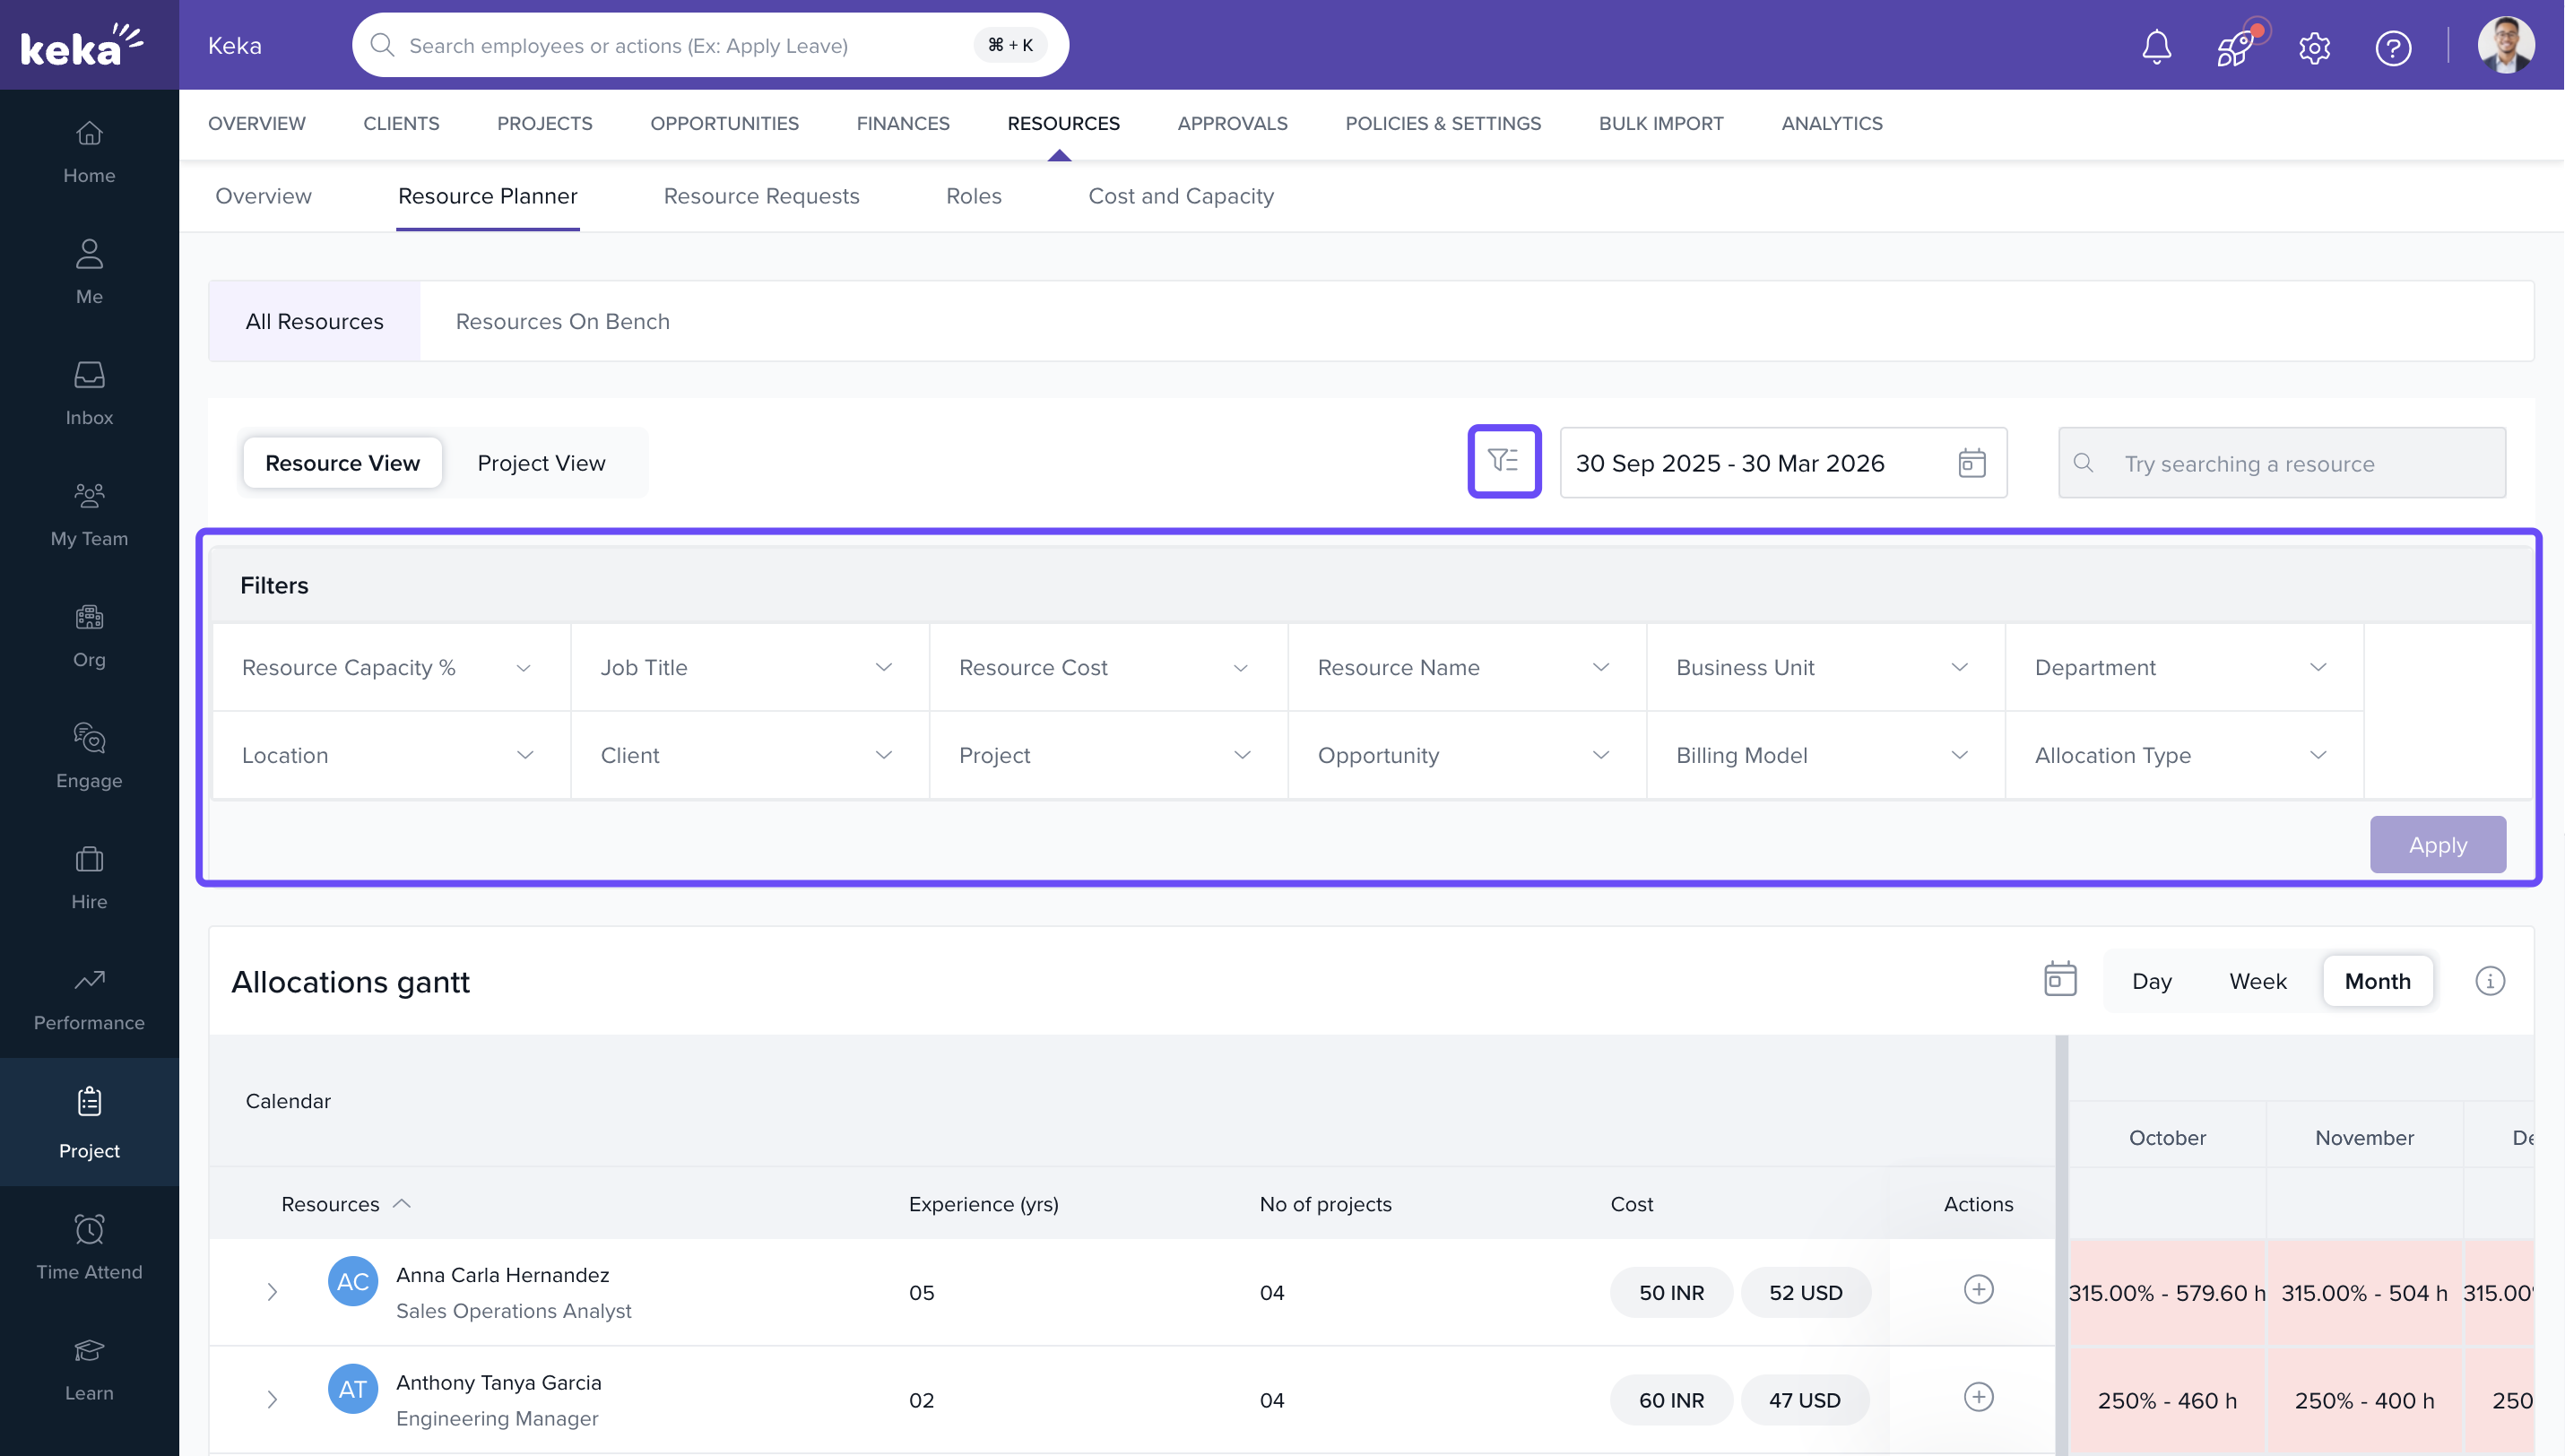
Filtering Resources
- Use the filters at the top of the planner to refine by:
- Department
- Job Title
- Project Assignment
- Availability Percentage
- Apply filters to quickly identify suitable and available resources for new or ongoing projects.
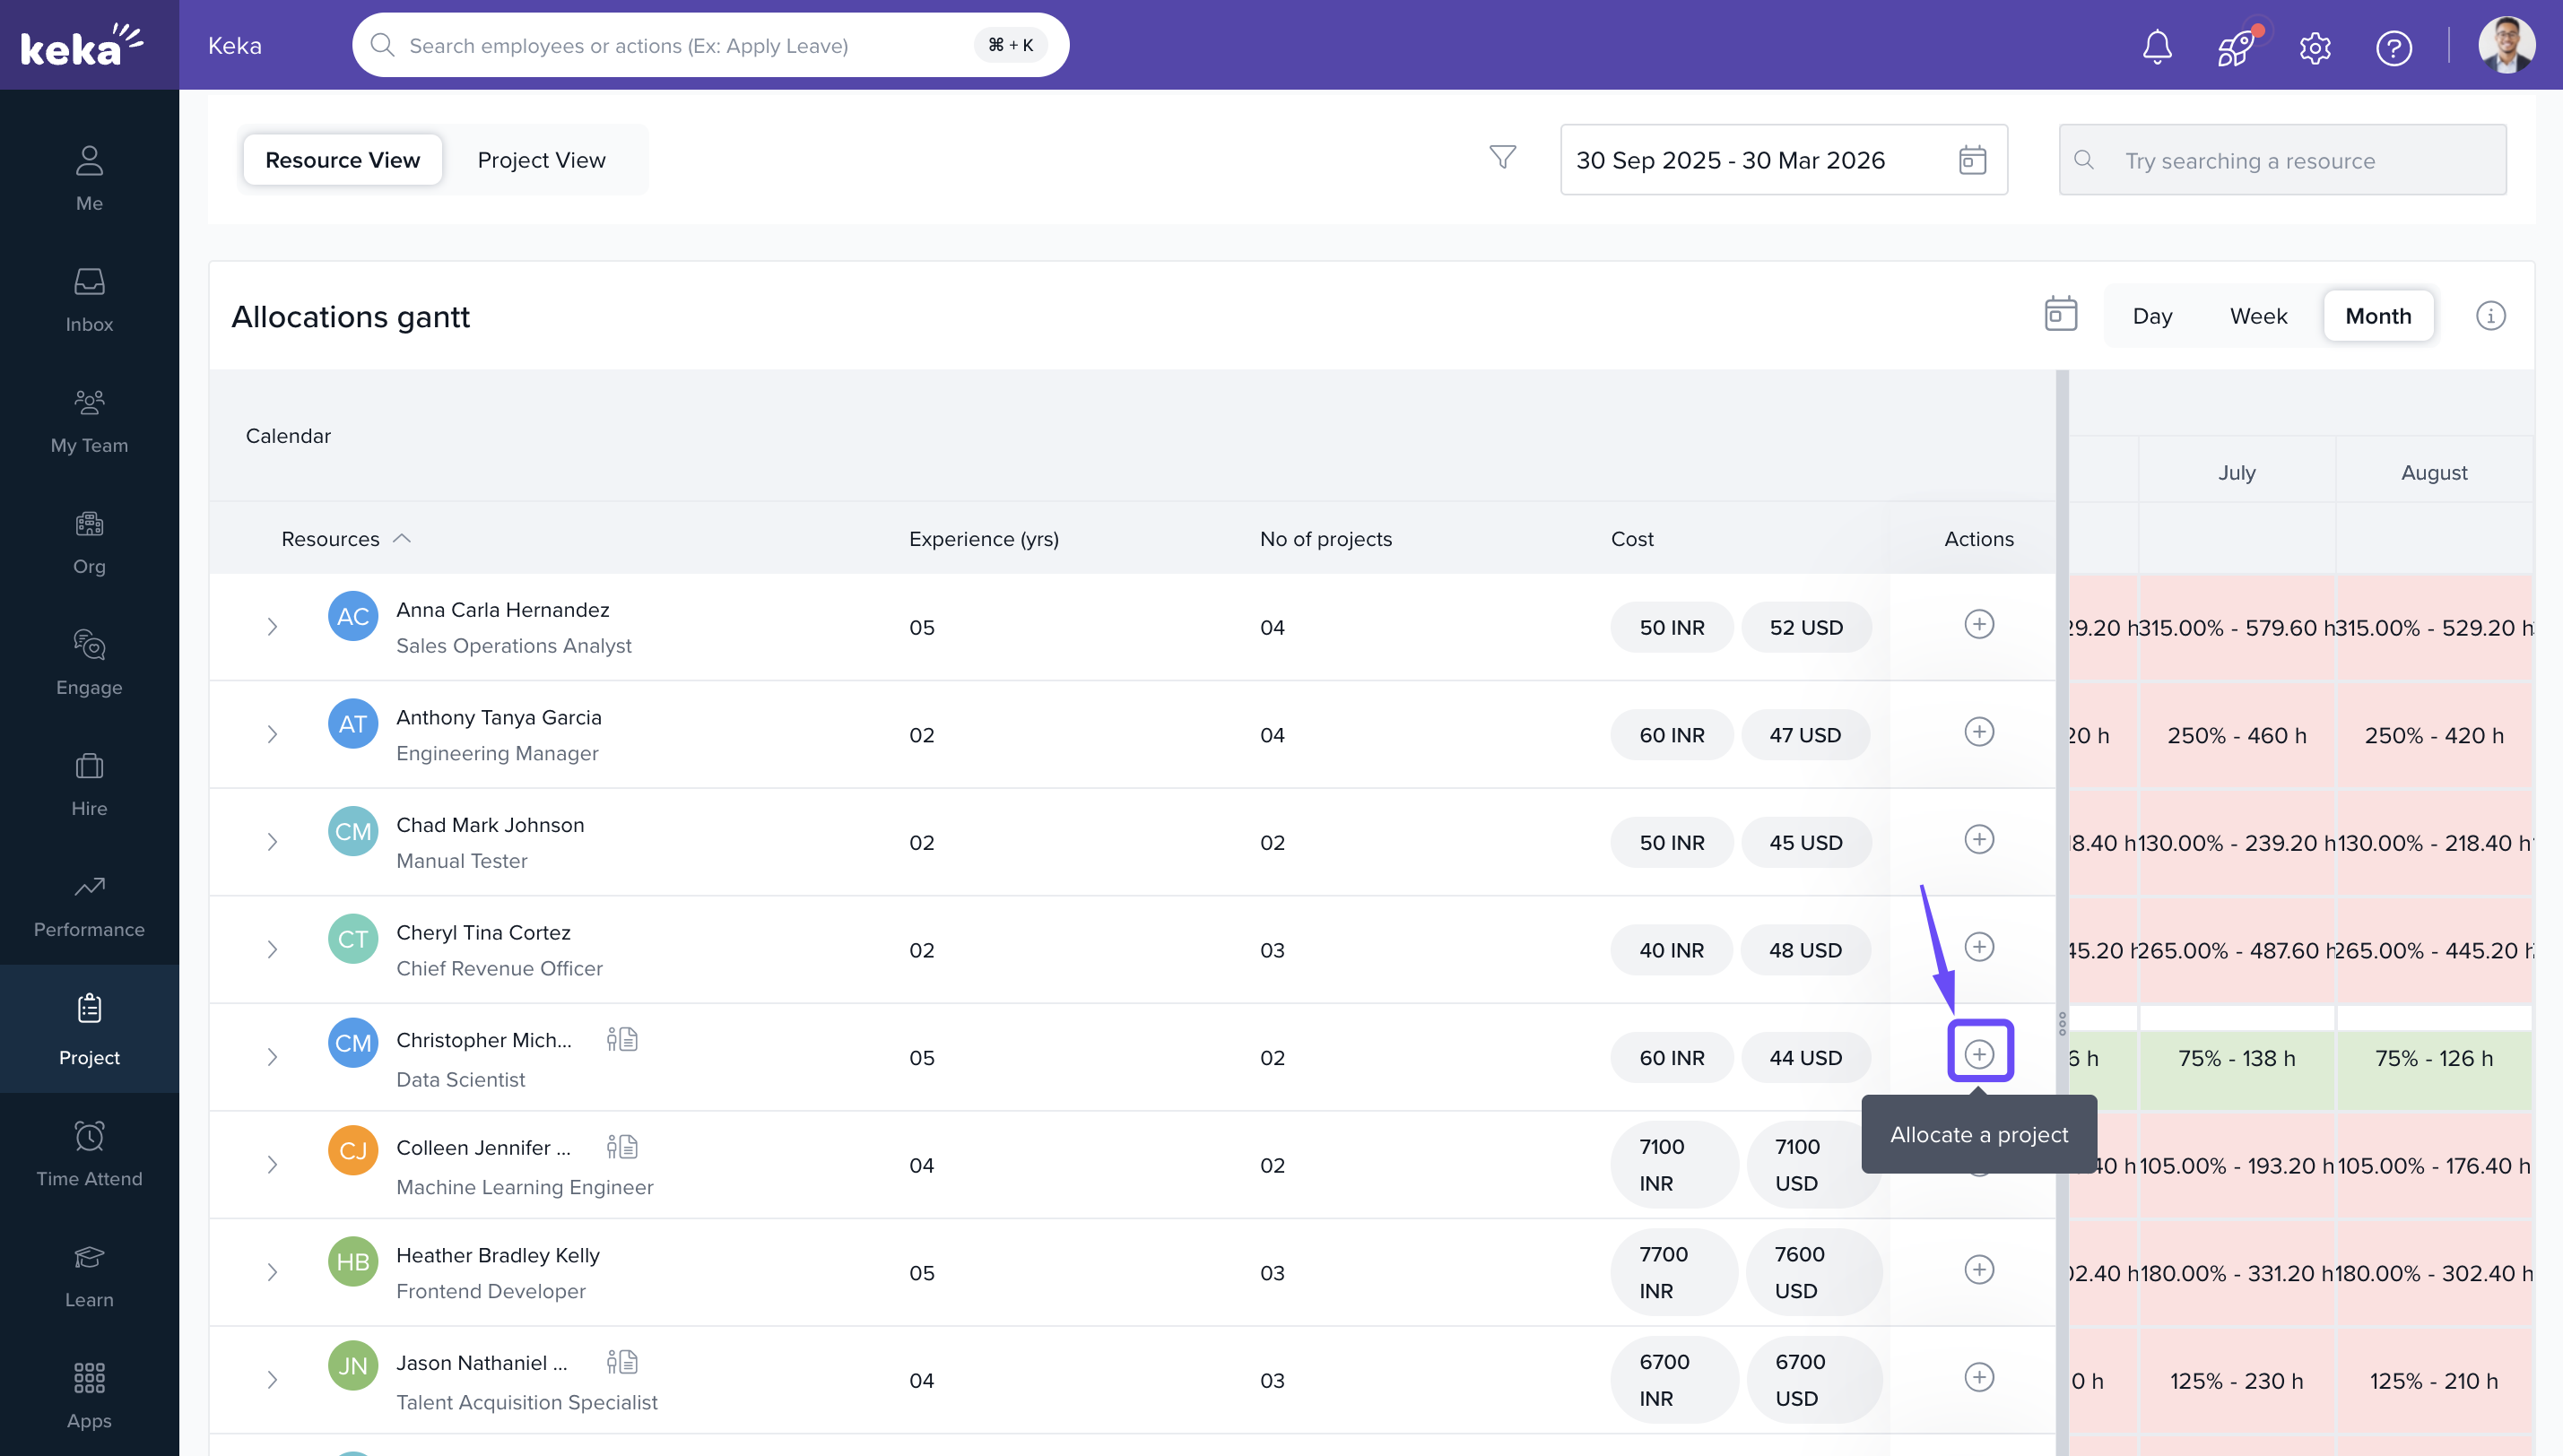
Allocating Resources to Projects
- Click Allocate Project next to the preferred resource to open the allocation window.
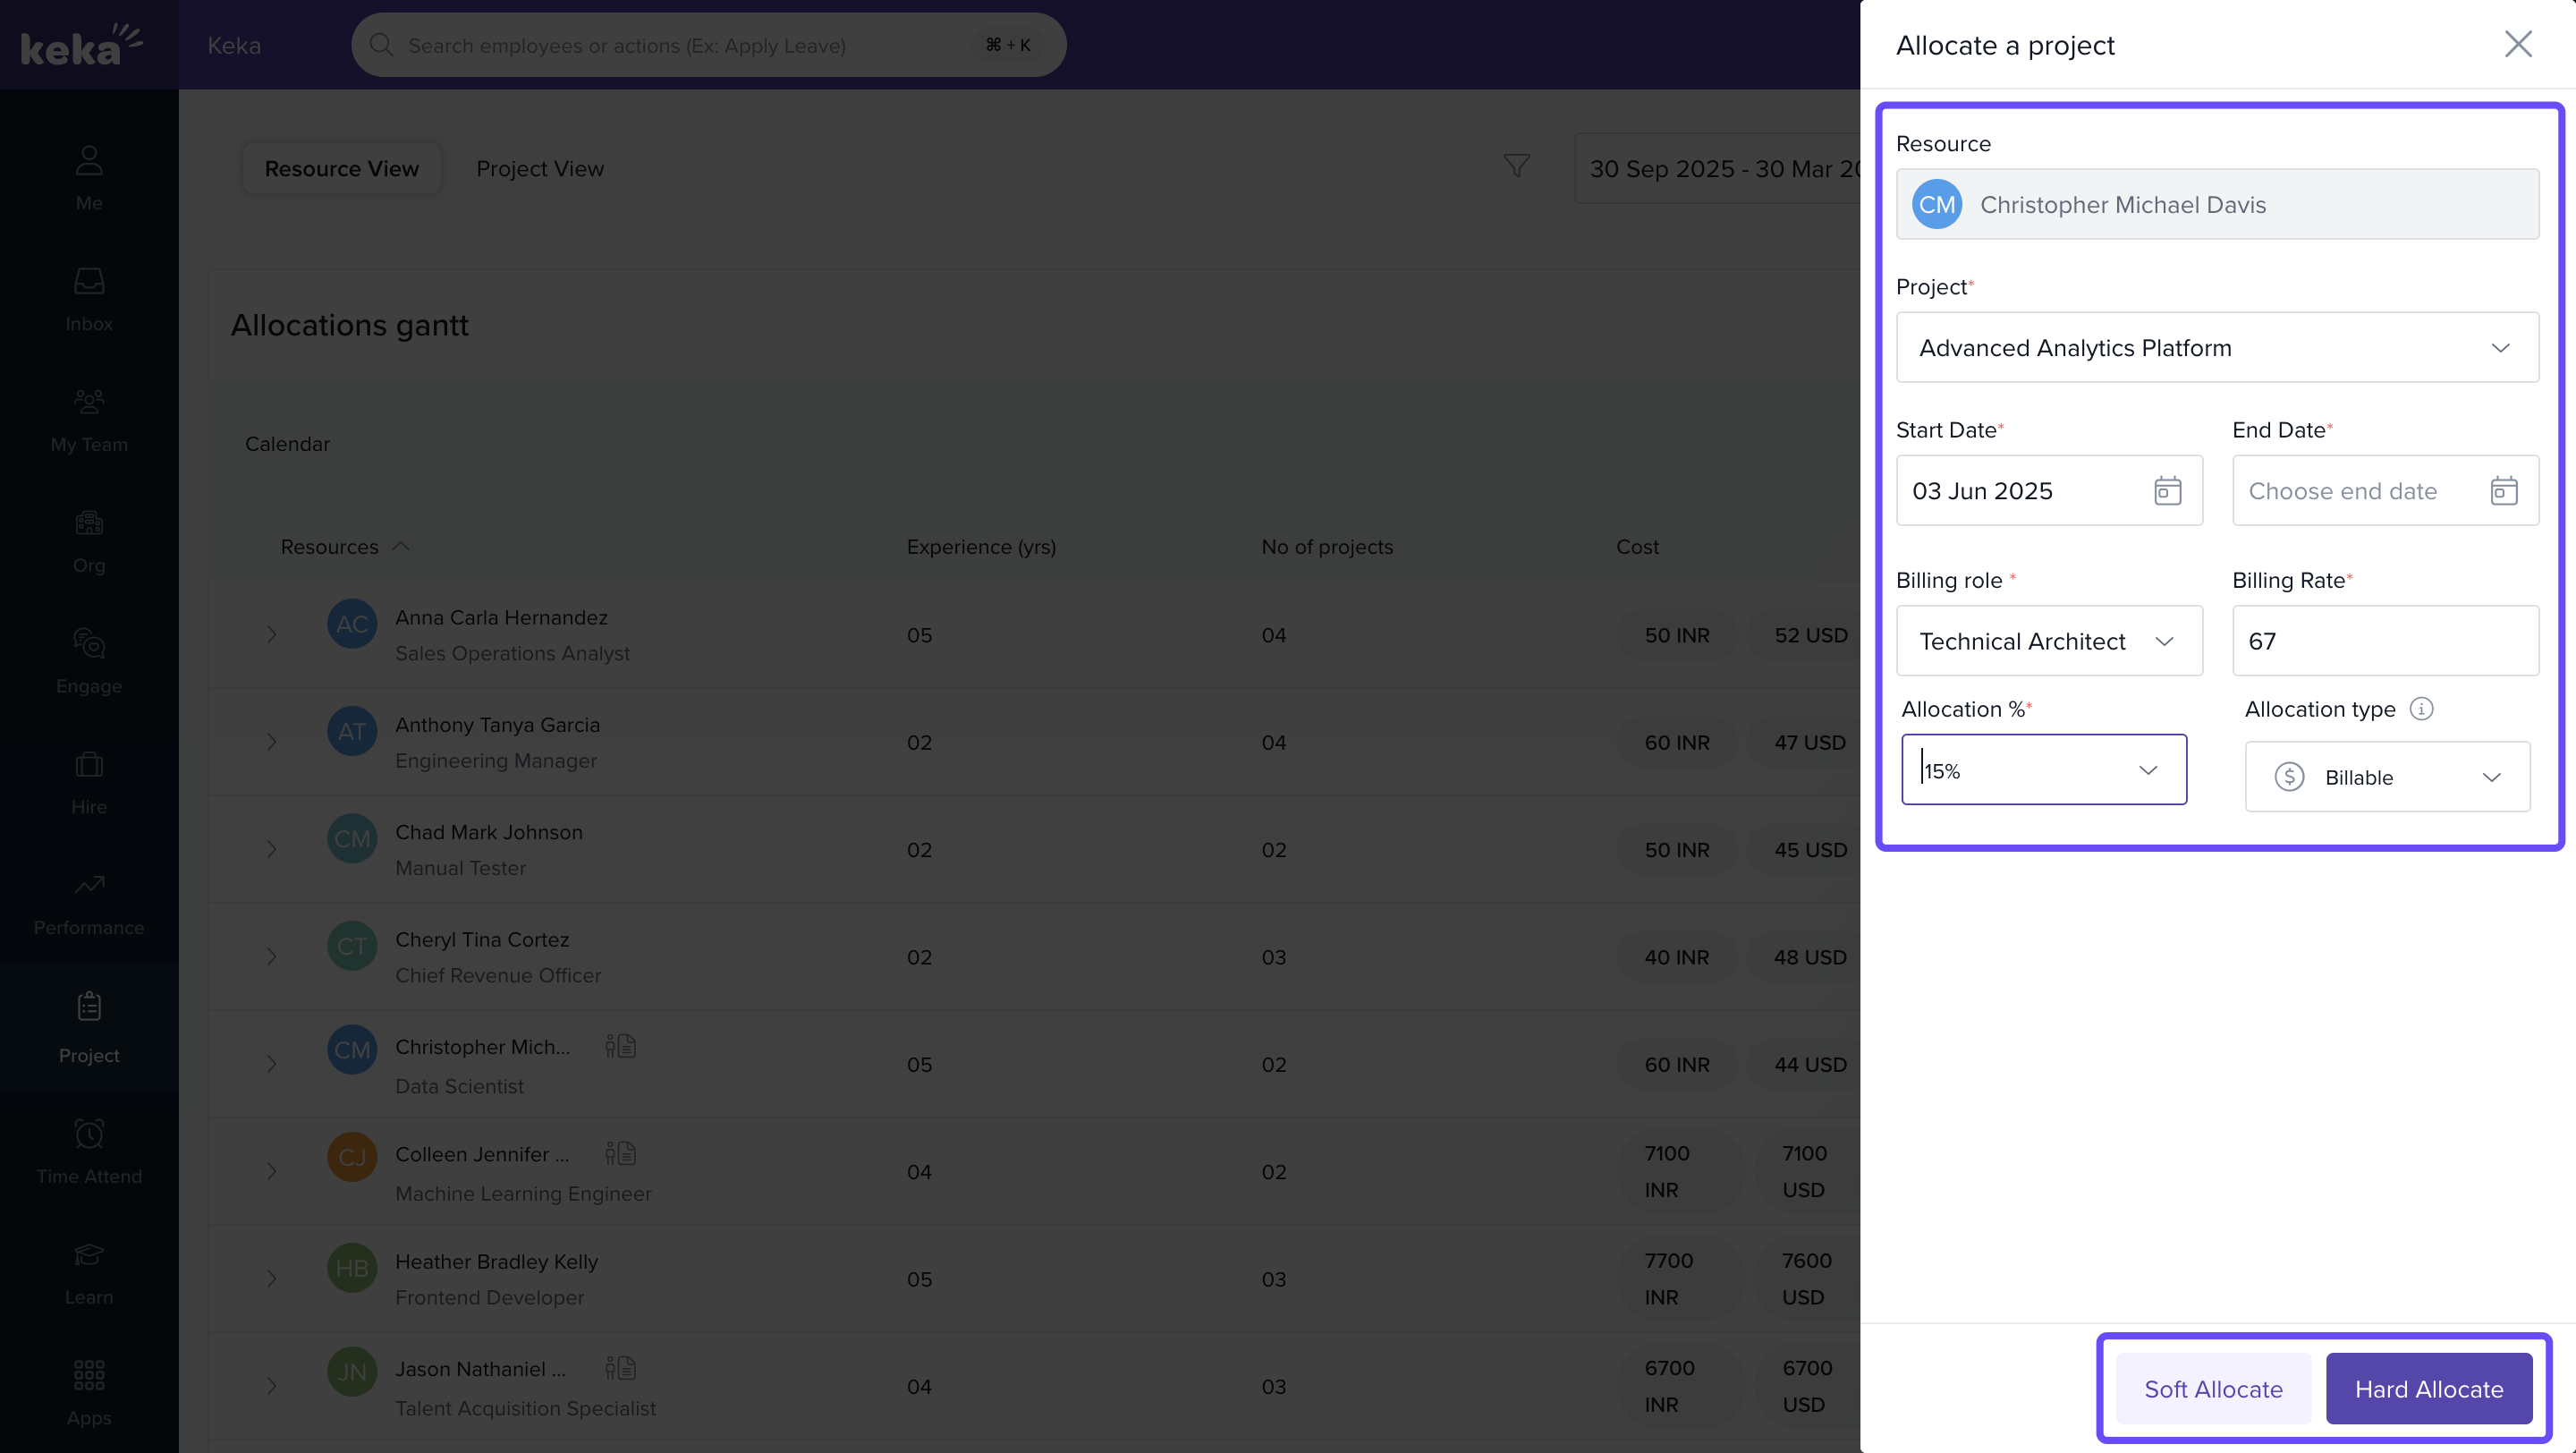
- In Allocate Project window, provide:
- Project Name
- Allocation Duration (Start & End Dates)
- Allocation %
- Billing Role
- Billing Rate
-
Click soft allocate/hard allocate to confirm the assignment.
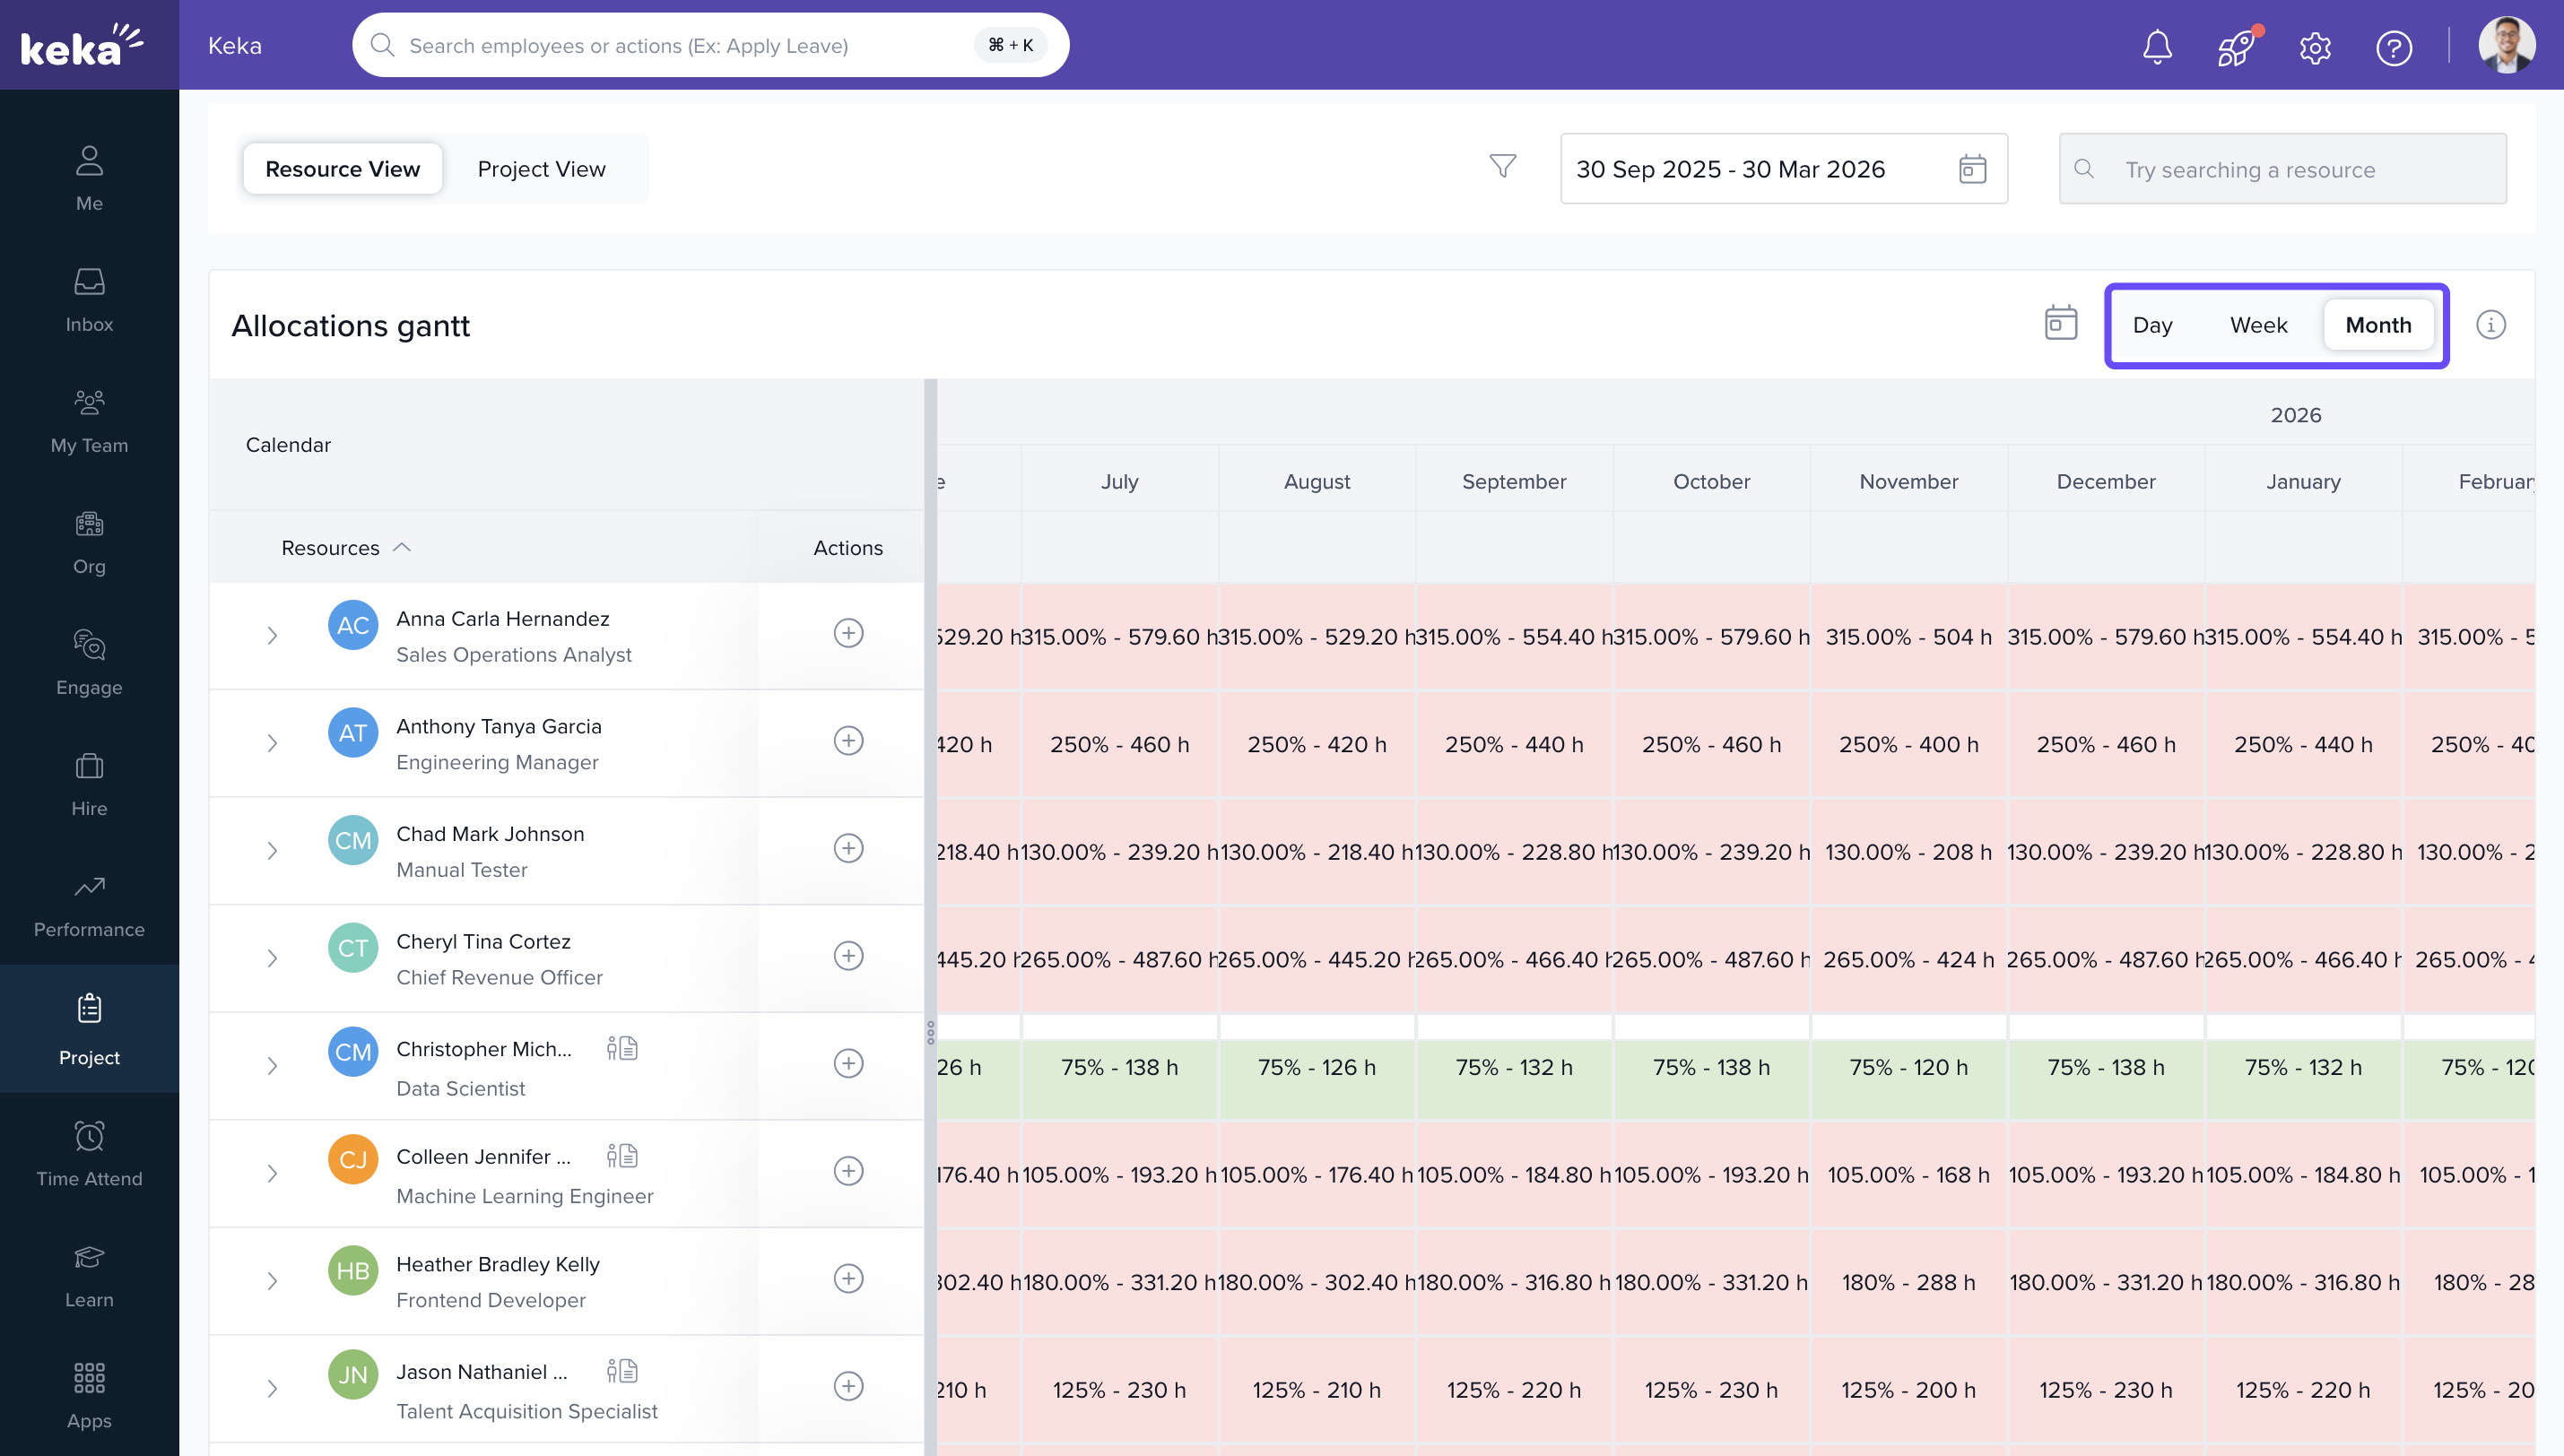
Viewing Resource Allocations
- Use the Gantt-style view to visualize:
- Start and End Dates of allocations
- Allocation %
- Projects assigned to each resource
- Switch between daily, weekly, monthly, or custom timeframes for precise insights.
How it connects with other modules
- Projects: Allocations update project teams and timelines for delivery planning.
- Resource Management: Centralized view for availability, skills, and assignment workflows.
- Billing & Roles: Uses configured roles and rates to align allocation with billing assignments.
- Timesheets: Allocation context supports downstream time tracking and utilization analysis.
FAQs
-
Q: Can I allocate multiple people to the same project at once?
Yes. Use the bulk allocation option after applying relevant filters. -
Q: Can I view resource availability in different timeframes?
Yes. Use the view toggle to switch between week, month, or custom durations. -
Q: Can I edit an allocation after assigning?
Yes. Navigate to the assigned project or the resource view and update the allocation details. -
Q: What’s the difference between hard and soft allocation?
This feature is available in Estimation and Request workflows. In the Resource Planner, allocations are typically treated as hard unless otherwise defined in upstream workflows.
Troubleshooting
-
Filters return no resources
- Broaden the availability range or remove one or more filters (e.g., department or job title).
-
Unable to bulk allocate
- Ensure all selected resources share valid dates and that the project is active.
-
Allocation not visible in Gantt view
- Verify the date range of the view includes the allocation period and that the allocation was saved.
Comments
0 comments
Please sign in to leave a comment.