Organizations assign various assets—like laptops, accessories, and software—to employees based on their job roles. When employees need a replacement due to damage or want to request new assets, you can enable the Asset Request feature in Keka so they can raise requests easily.
Follow these steps to enable and configure Asset Request Settings:
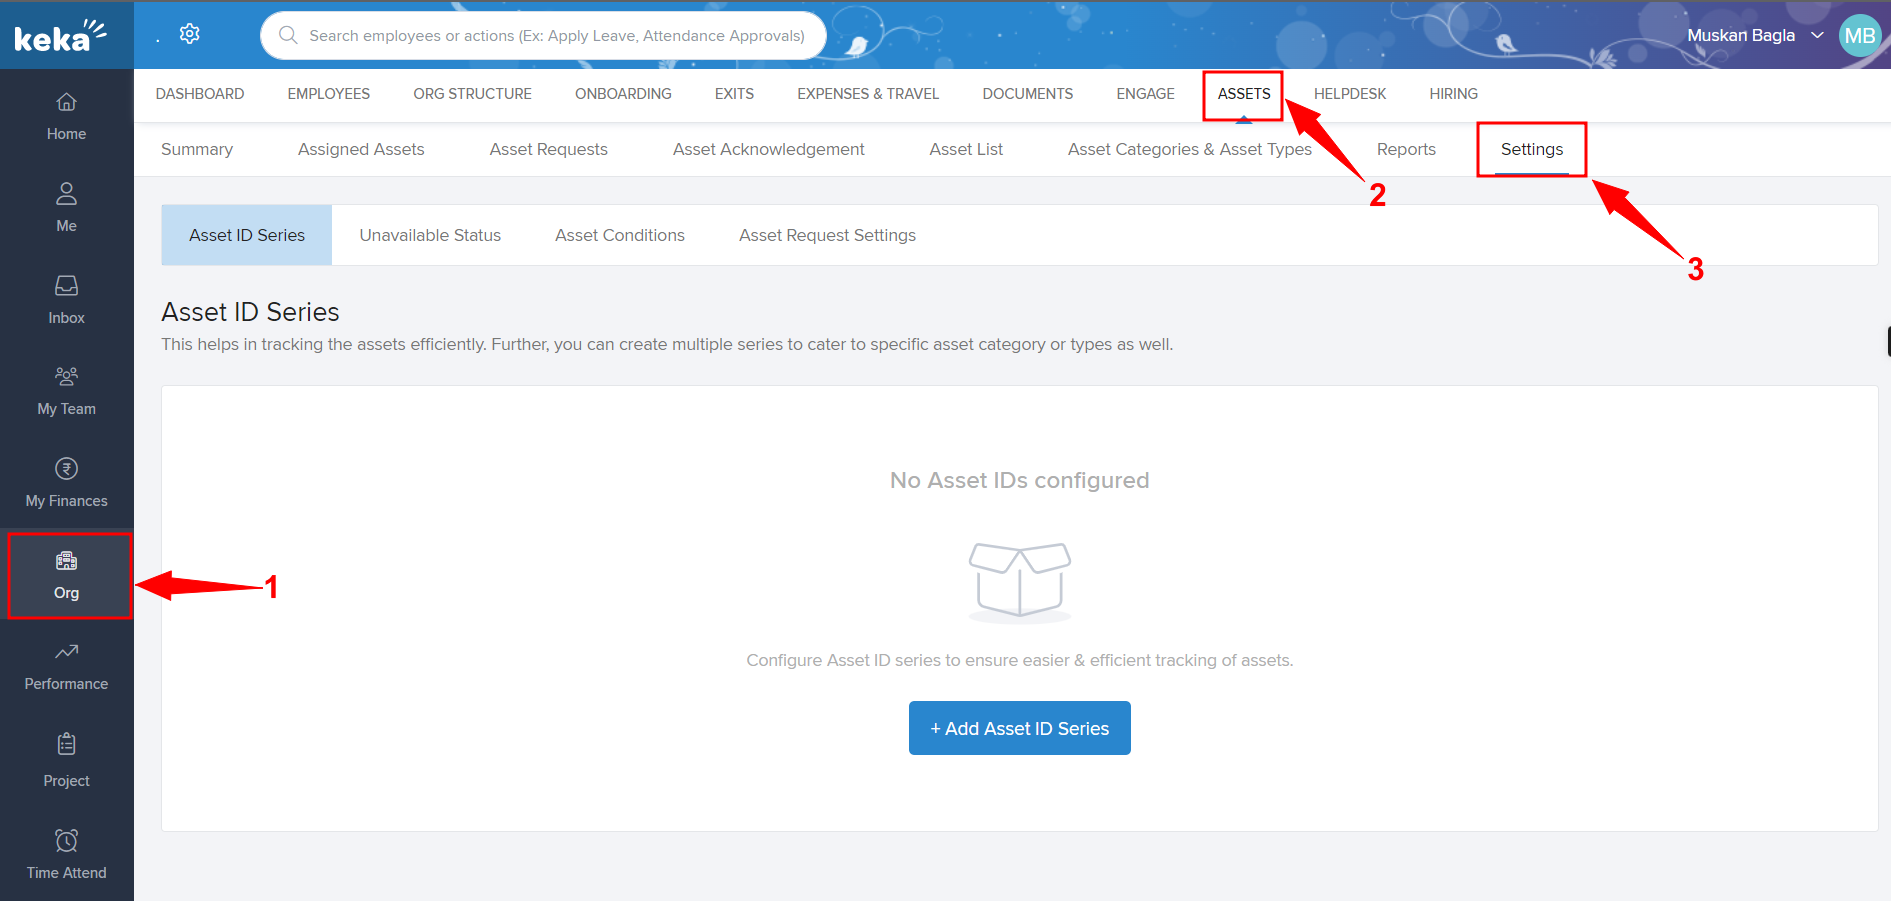
Go to the Org section of your Keka portal.
Click on Assets, then open the Settings tab.
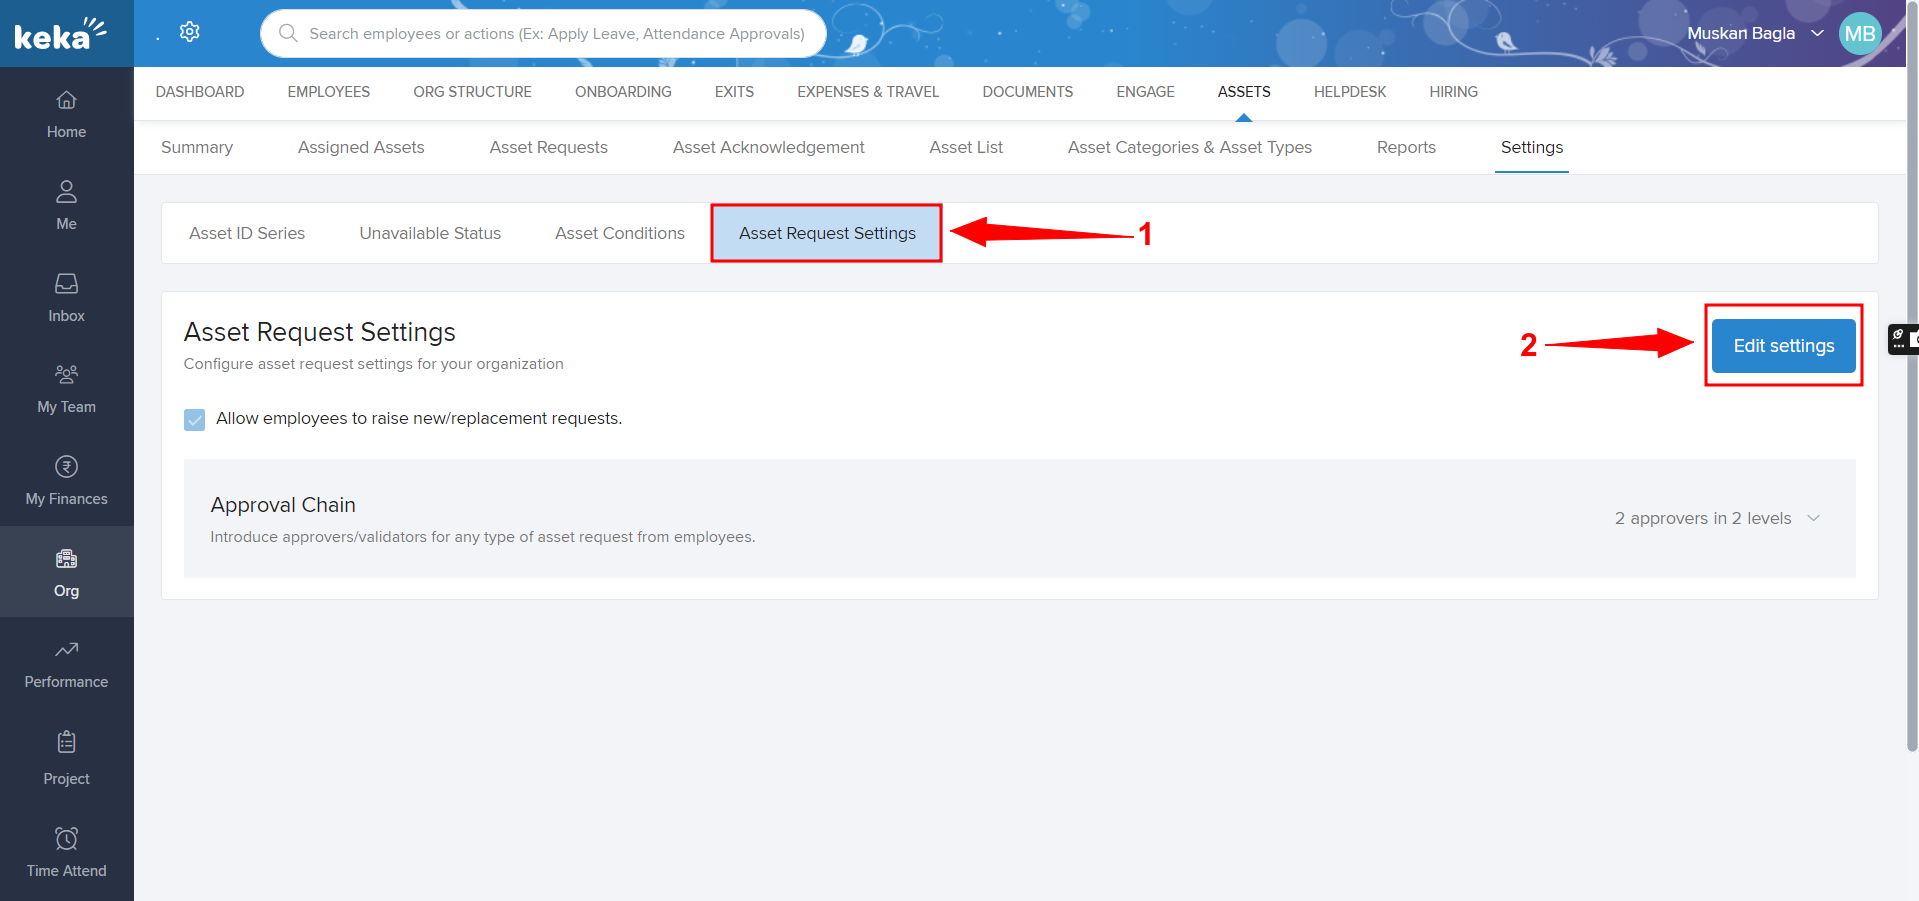
Select Asset Request Settings and click Edit Settings on the right side.
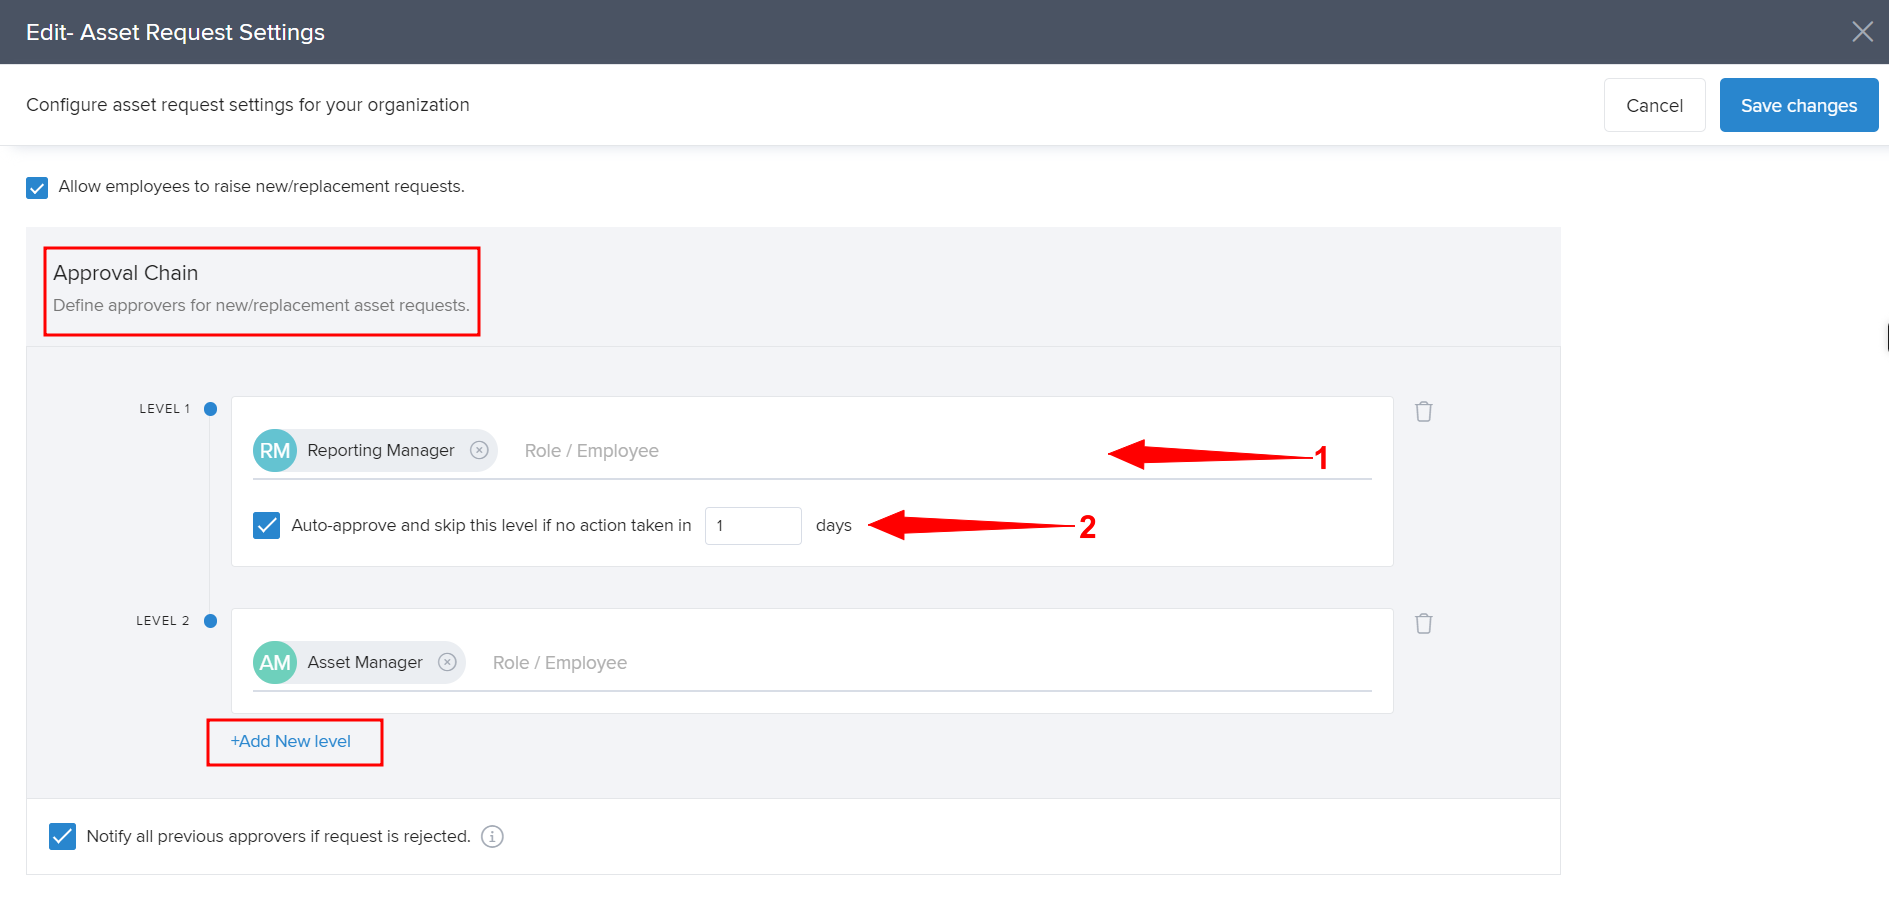
Check Allow employees to raise new/replacement requests to enable employee-initiated asset requests.
Set up the Approval Chain:
Add Level 1, Level 2, and additional levels as required using +Add New Level.
For example, Level 1 could be the Reporting Manager, and Level 2 could be the Asset Manager.
(Optional) Enable Auto-approve and set the number of days.
If Level 1 does not approve within this period, the request automatically moves to Level 2.
After configuring all settings, click Finish Setup.
Your Asset Request workflow is now enabled with the approval levels you’ve configured.
Within an organization, different assets are assigned to employees according to their job roles. However, if an employee needs to request a replacement due to damage or if they require new assets in line with their job role's demands, Keka provides a user-friendly option.
Here's how you can enable asset request settings:
Go to Org (1) section of your Keka Portal, then go to Assets (2) and open the Settings (3) tab.
There, you'll find the tab of Asset Request Settings (1). On the right-hand side, there is an option of Edit Settings (2).
To enable employees to submit new or replacement requests, use the checkbox labeled "Allow employees to raise new/replacement requests." This action will grant them the ability to initiate such requests.
Once this feature is activated, you'll have the opportunity to establish an approval chain (1). For instance, Level 1 could involve the Reporting Manager, while Level 2 might include the Asset Manager. In this structure, approvals at Level 2 can only occur once Level 1 approvals have been granted.
Furthermore, there's the Auto-approve (2) option. By selecting this checkbox and specifying a timeframe, the system will automatically bypass Level 1 approval if it's not endorsed within the designated duration. Instead, the request will proceed to Level 2 for approval.
You can create multiple levels by clicking on the +Add New Level option.
Once all the settings are done, click on Save Changes (1).
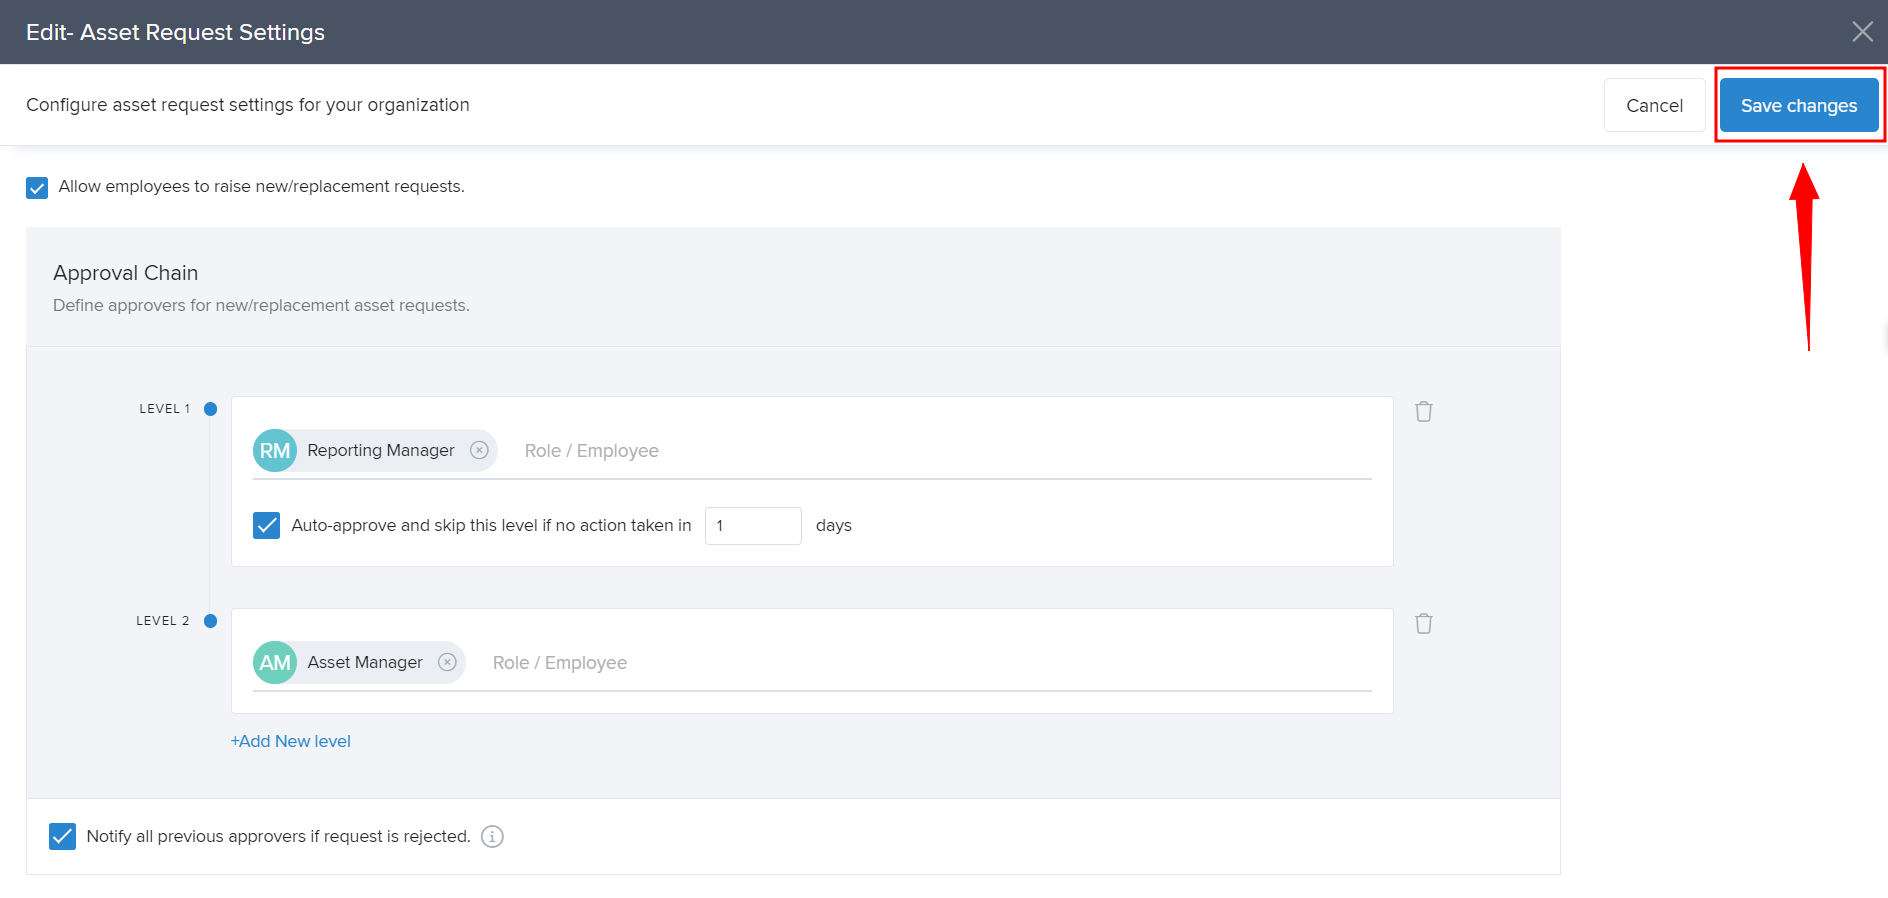
Now the Asset Request Settings will get enabled with the Level of approvals.
Comments
0 comments
Please sign in to leave a comment.