Introduction
Keka Learn makes it easy to create, organize, and publish courses for your employees. You can organize courses into sections, add various types of content, and assess learner progress through quizzes and assessments.
Let’s walk through the process of creating a course on Keka Learn.
Accessing Course creation page
Go to Keka Learn from the left panel to open the dashboard.
Click Manage Courses → + Add Course.
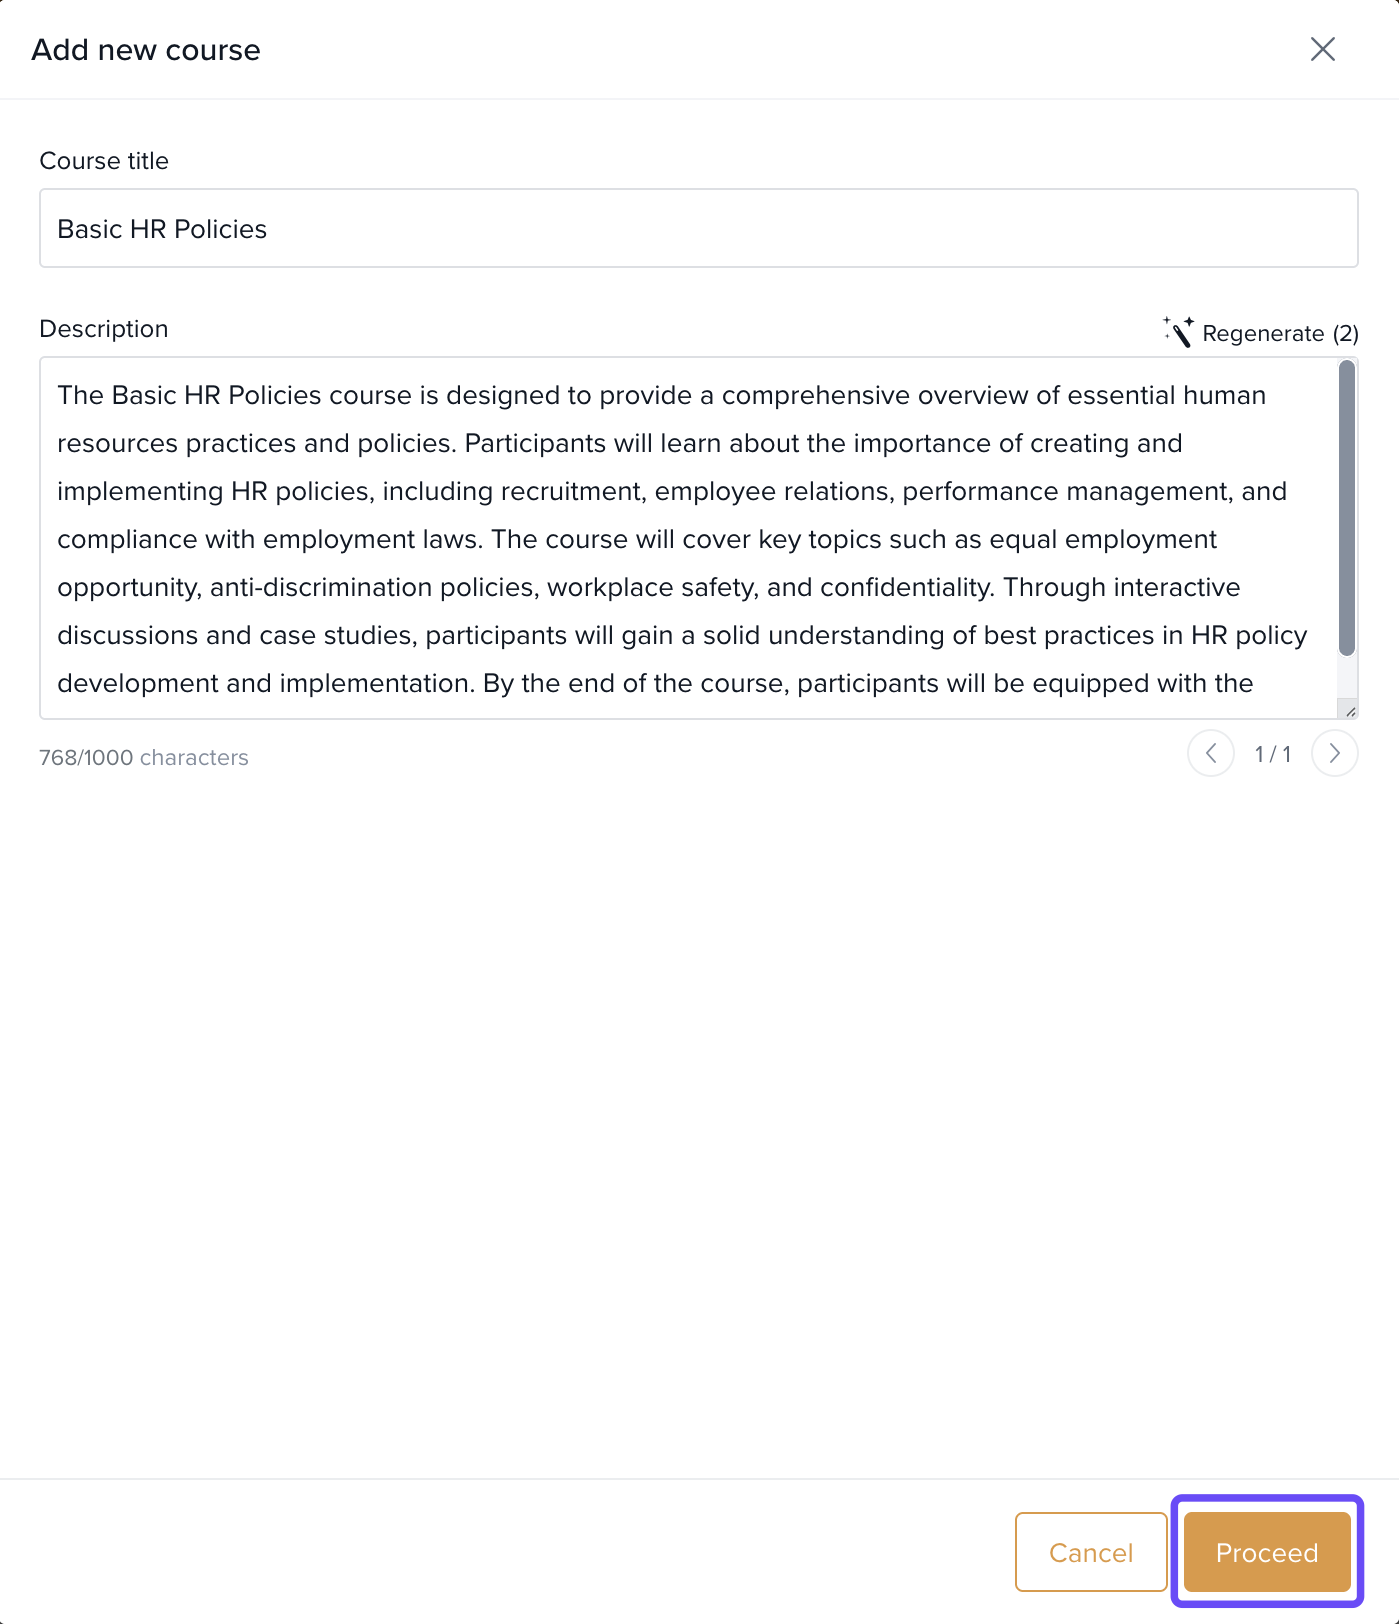
Enter a Title and Description (use Generate with AI if needed, and refine with Regenerate/slider).
Click Proceed to confirm details.
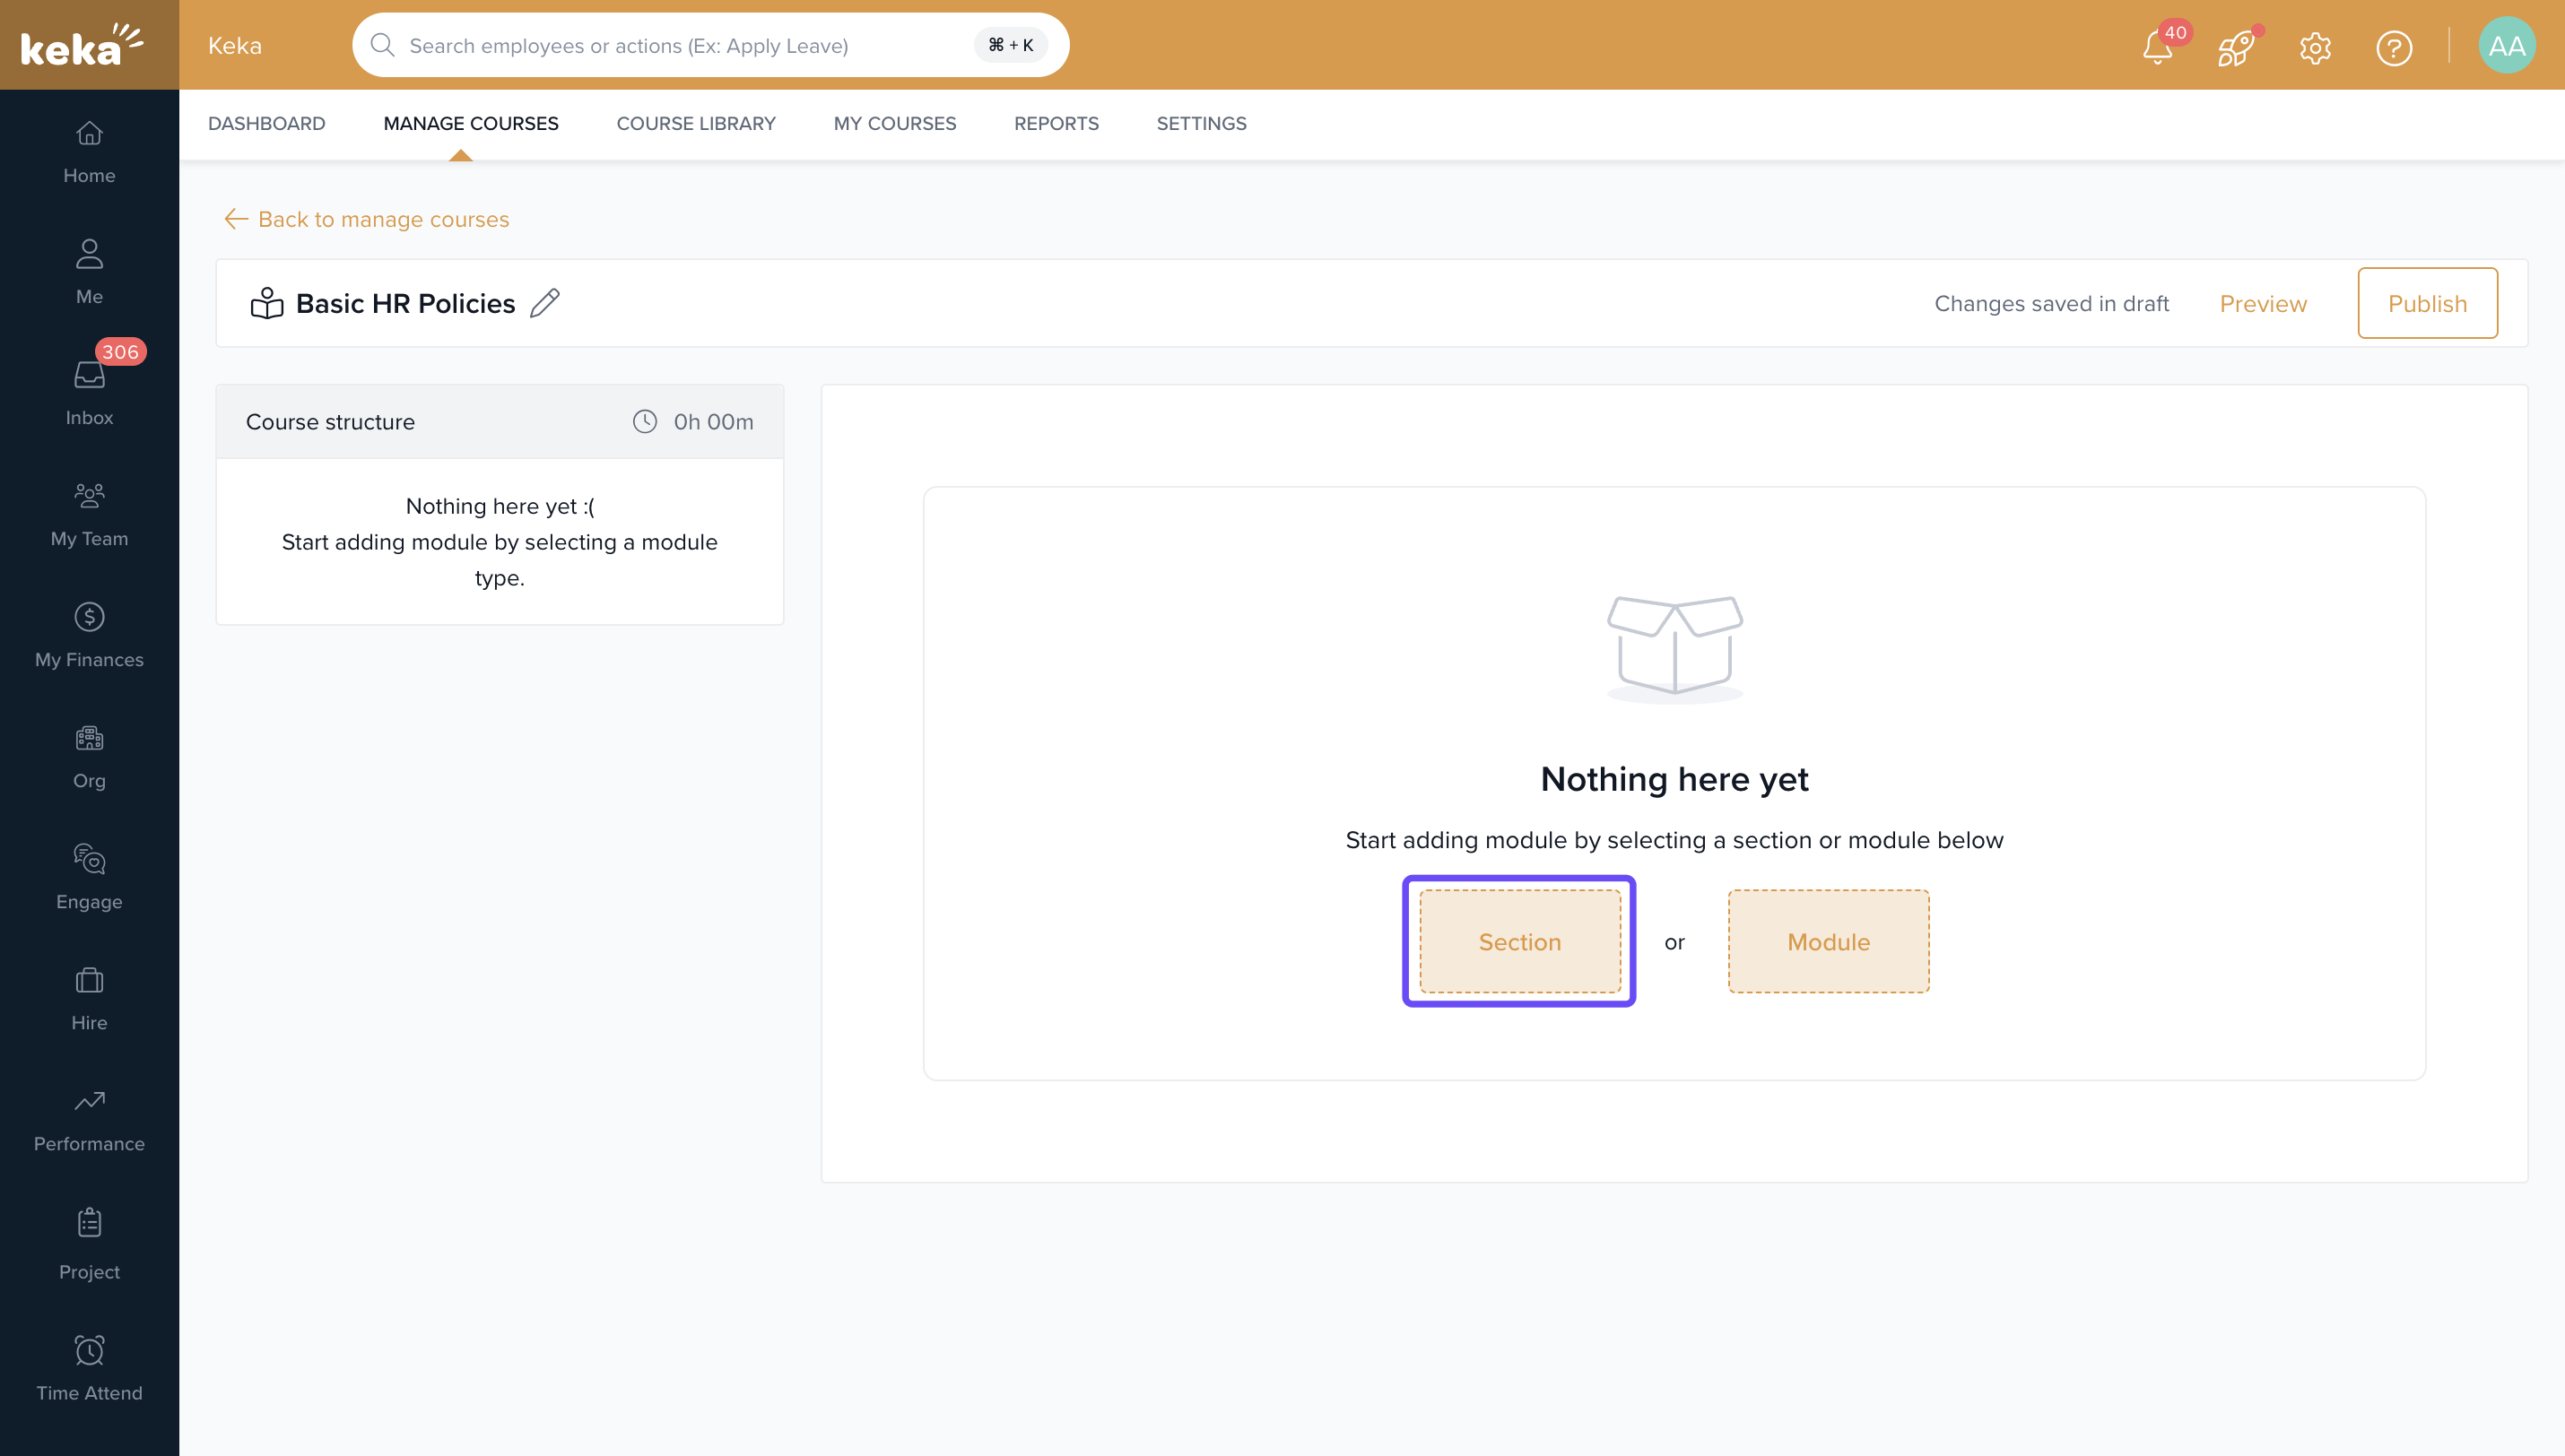
In the Course Builder, add and manage course content.
To read about Creating a course using AI , Click here.
Organising Your Course with Sections
You can organize your course into sections, making it easier for learners to navigate through different topics.
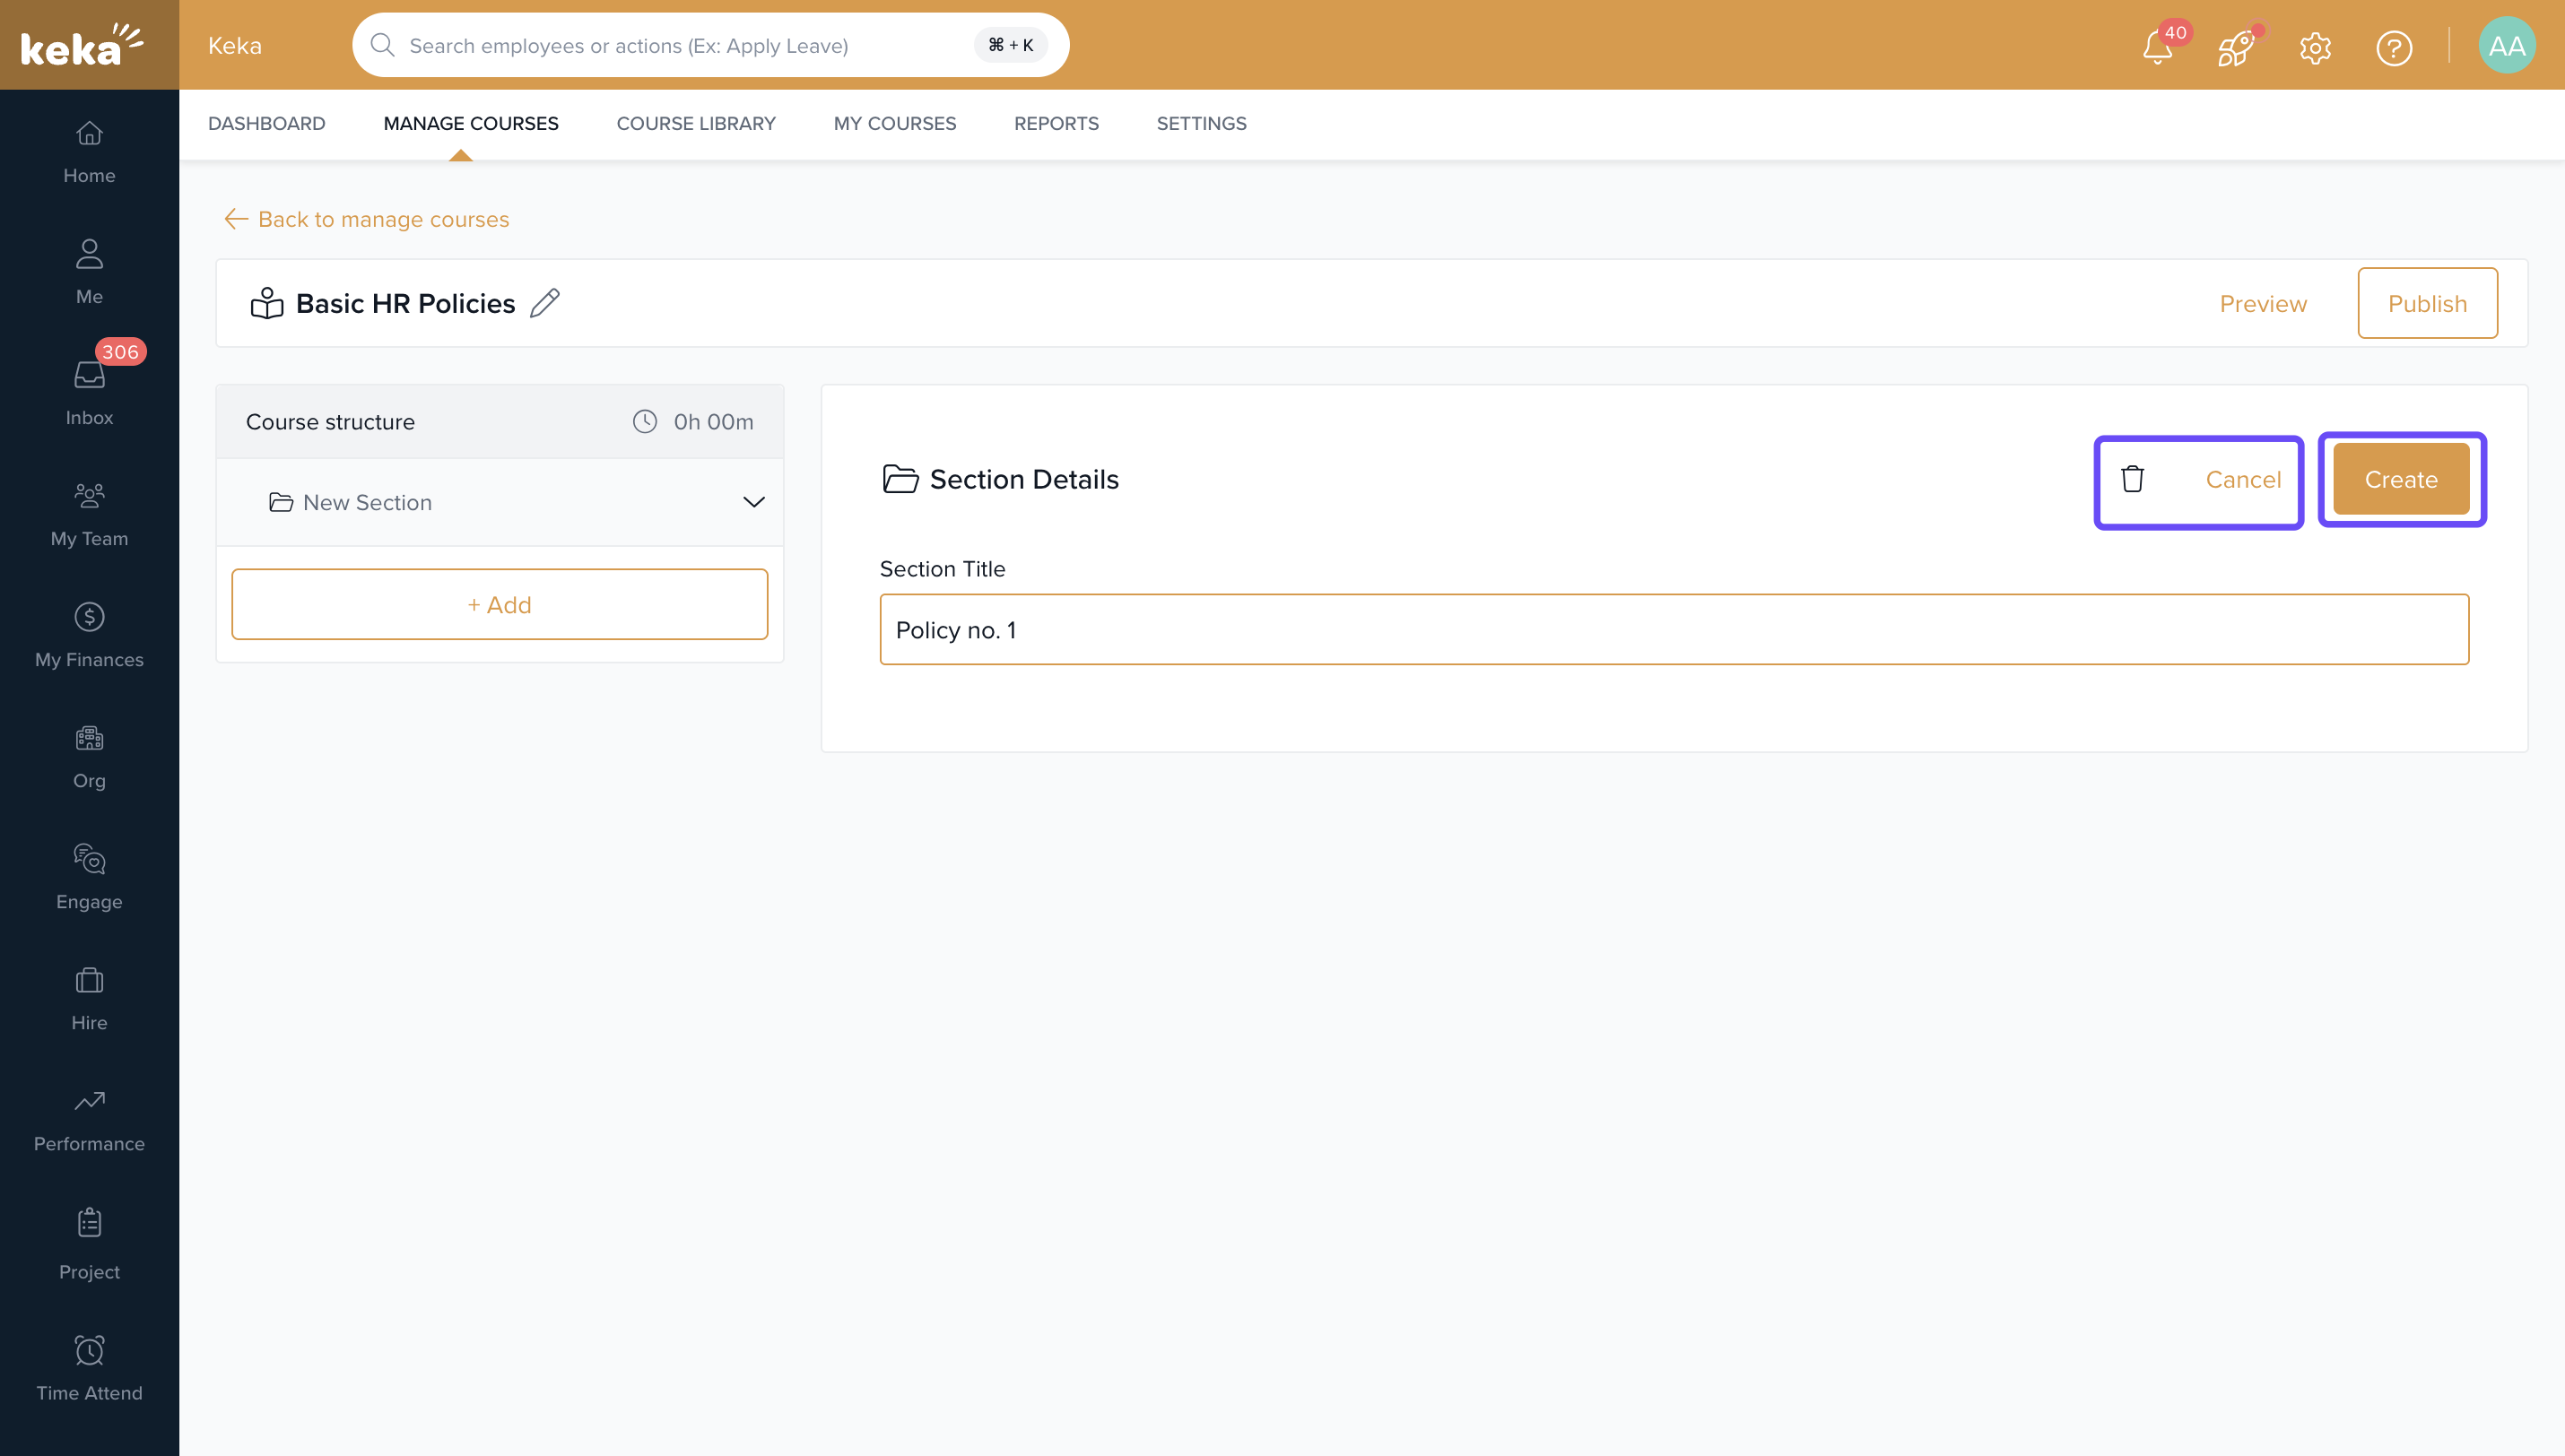
After entering the course builder page, click on the Section button.
Enter a Section Title and click Create.
If you change your mind, click Cancel or the Delete icon to remove the section.
Adding Content to the Course
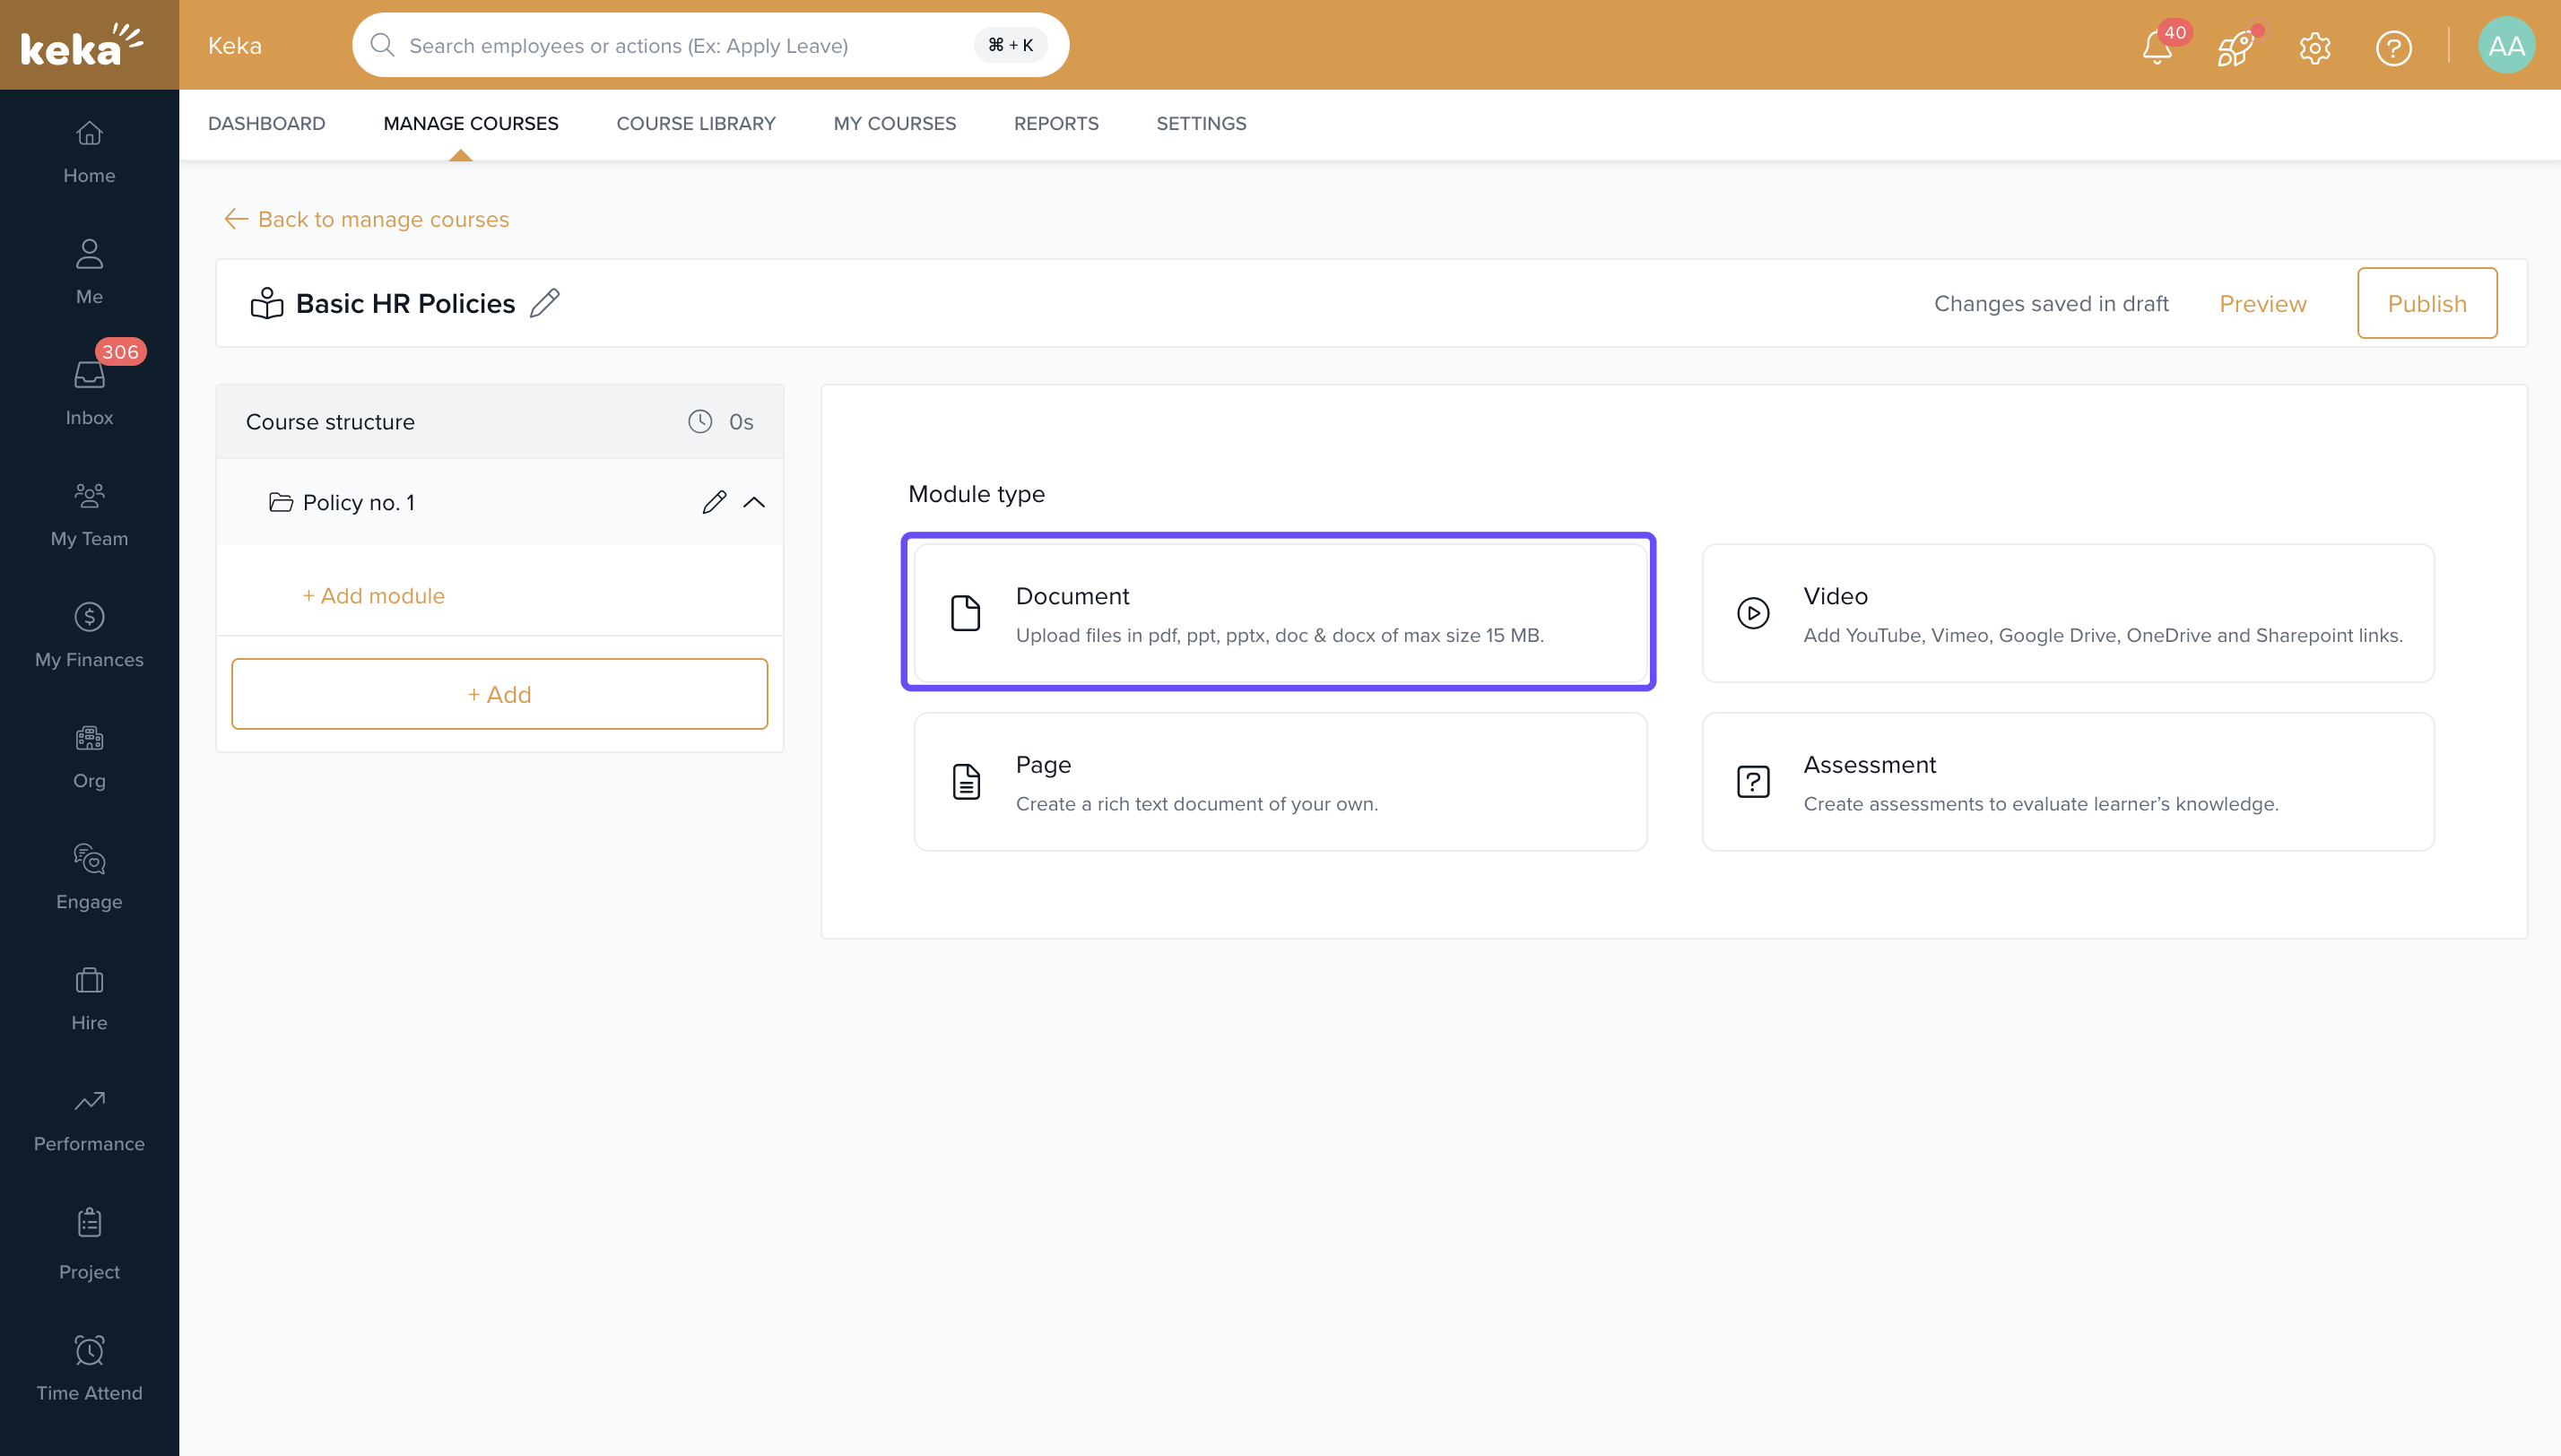
Keka Learn supports four types of content formats for your courses:
- Documents : You can upload documents in the following formats:
-
.pdf
.doc
.docx
.pptx
.ppt
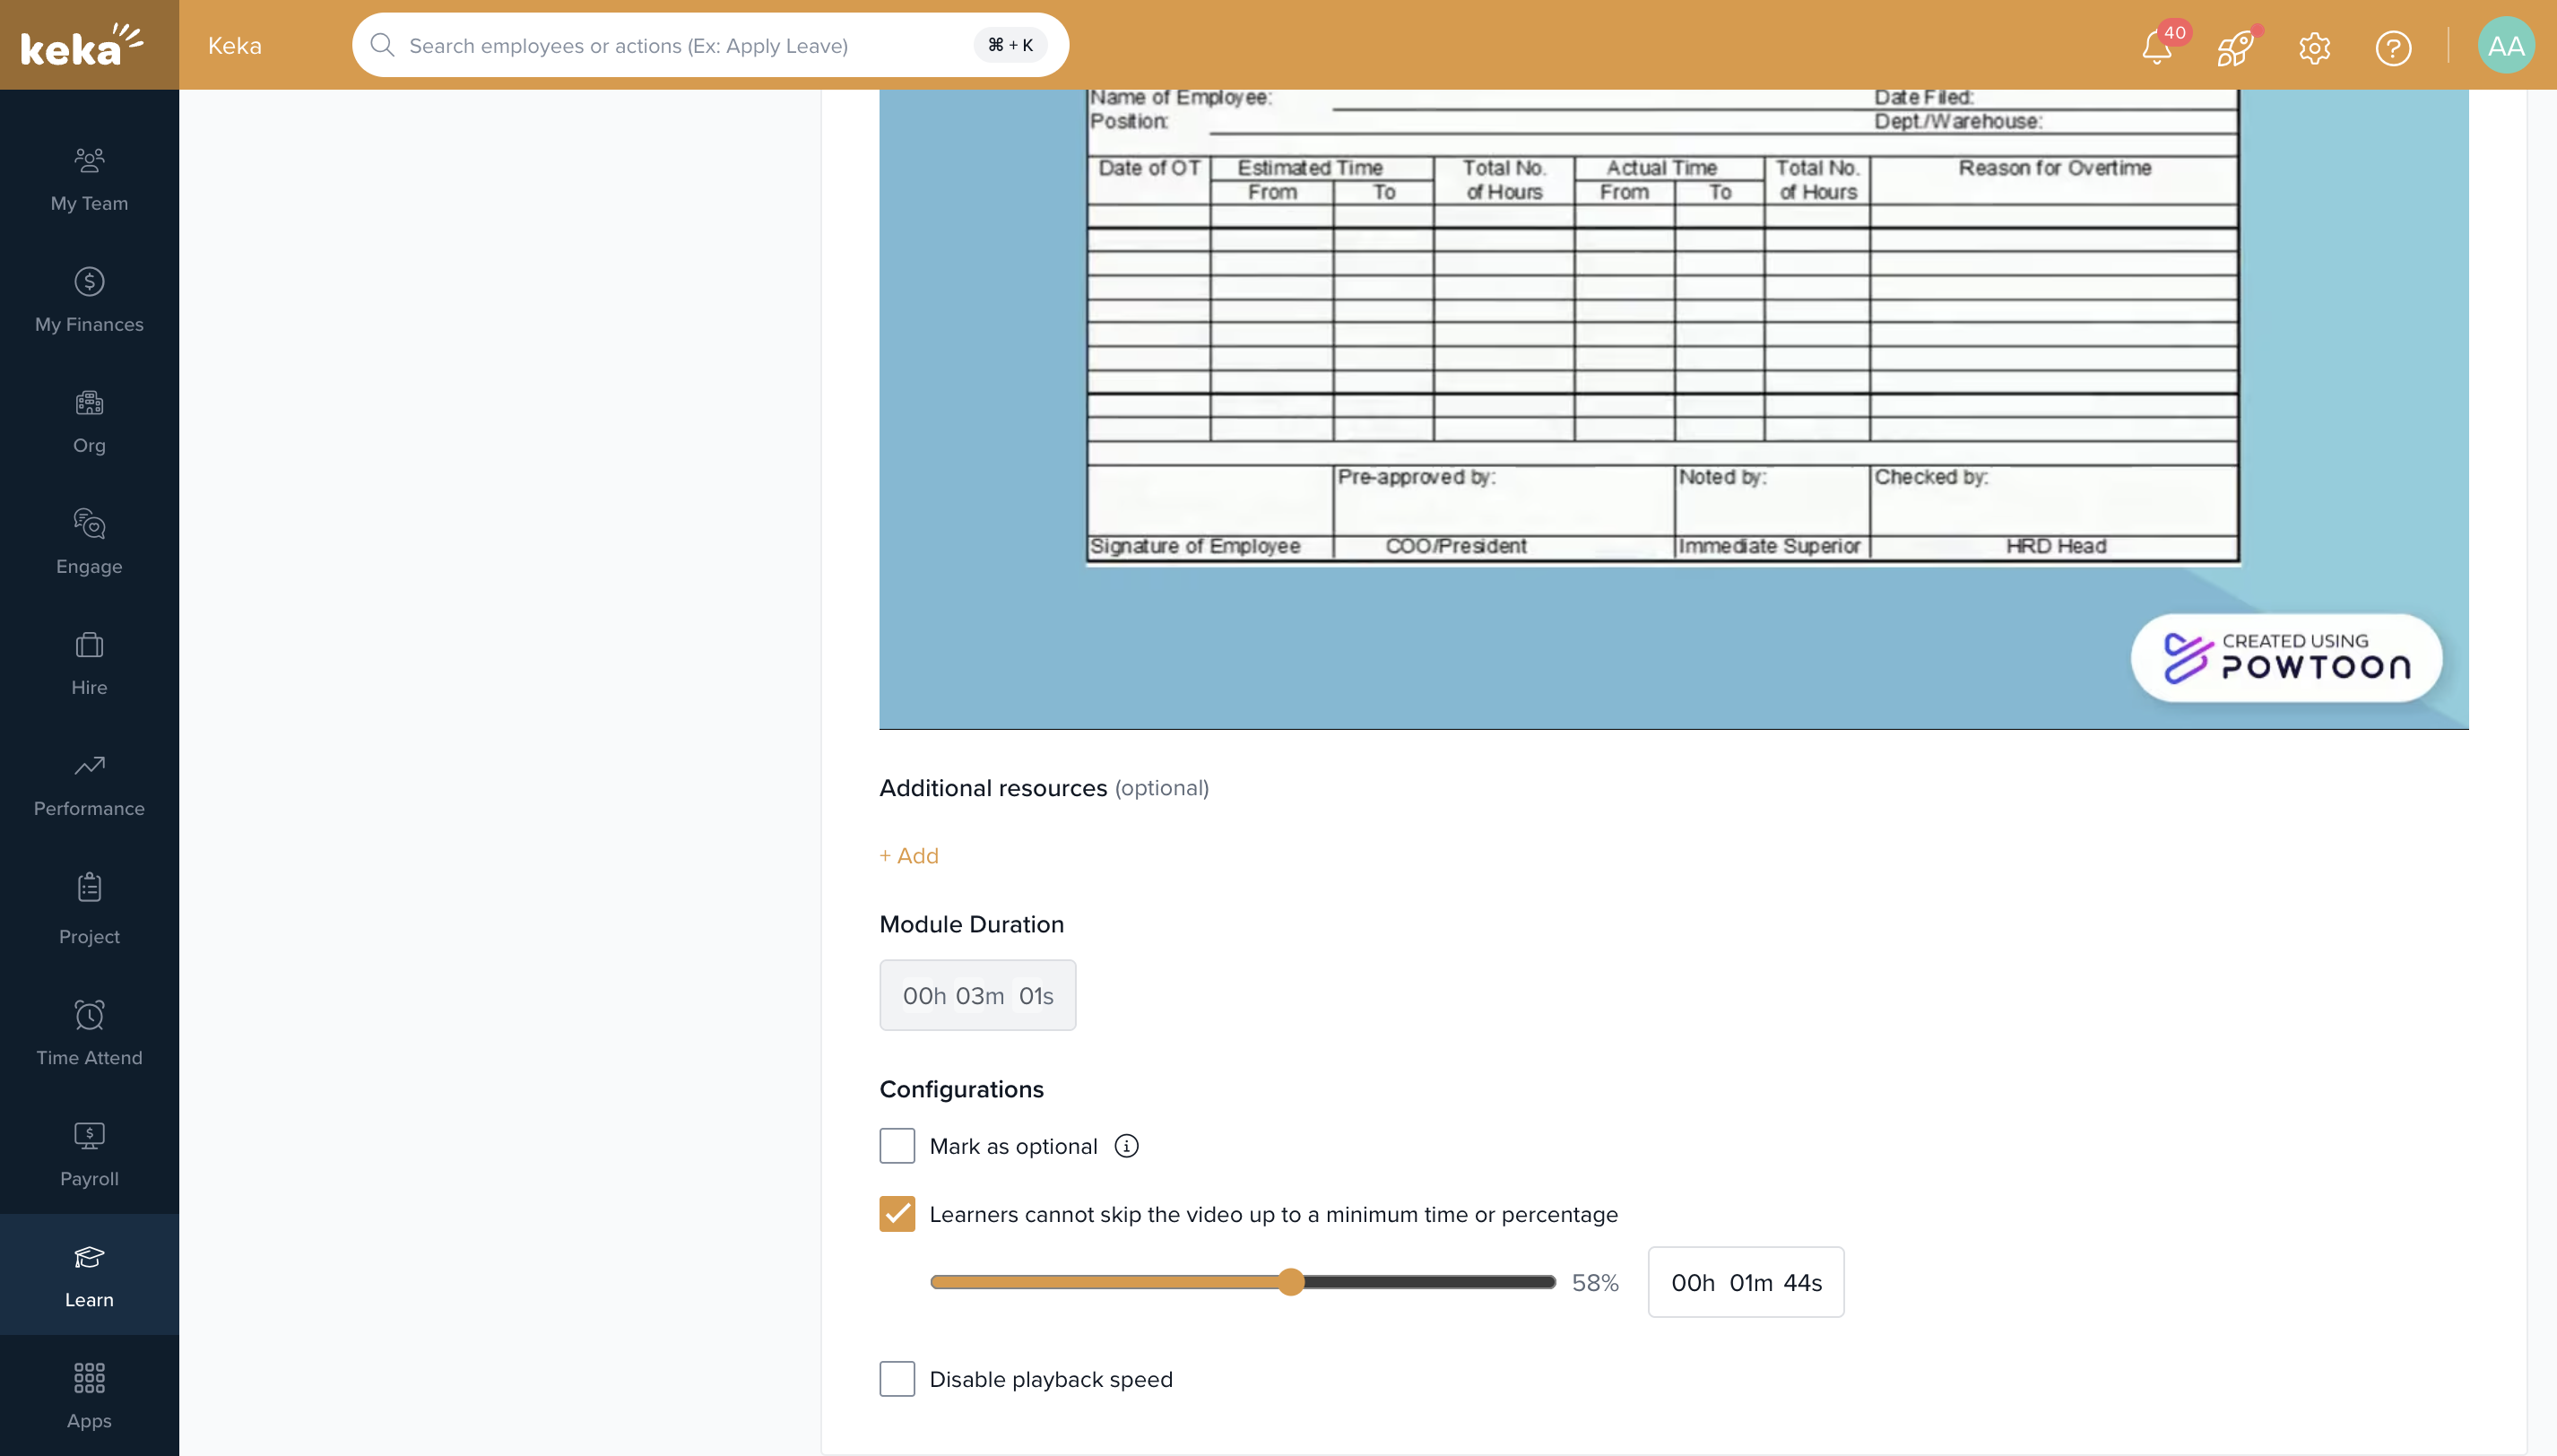
Videos : Embed videos from YouTube, Vimeo, Google Drive, or OneDrive. You can control whether learners can skip the video by setting a minimum viewing duration.
Rich Text Content : You can add rich text directly to the course using Keka Learn’s built-in text editor. You can also enable text-to-speech functionality, allowing learners to listen to the content.
Quizzes : Create quizzes with single select or multiple select questions to assess your learners. You can also score quizzes and set the number of attempts allowed.
Adding A Document to Your Course
To add a document, follow these steps:
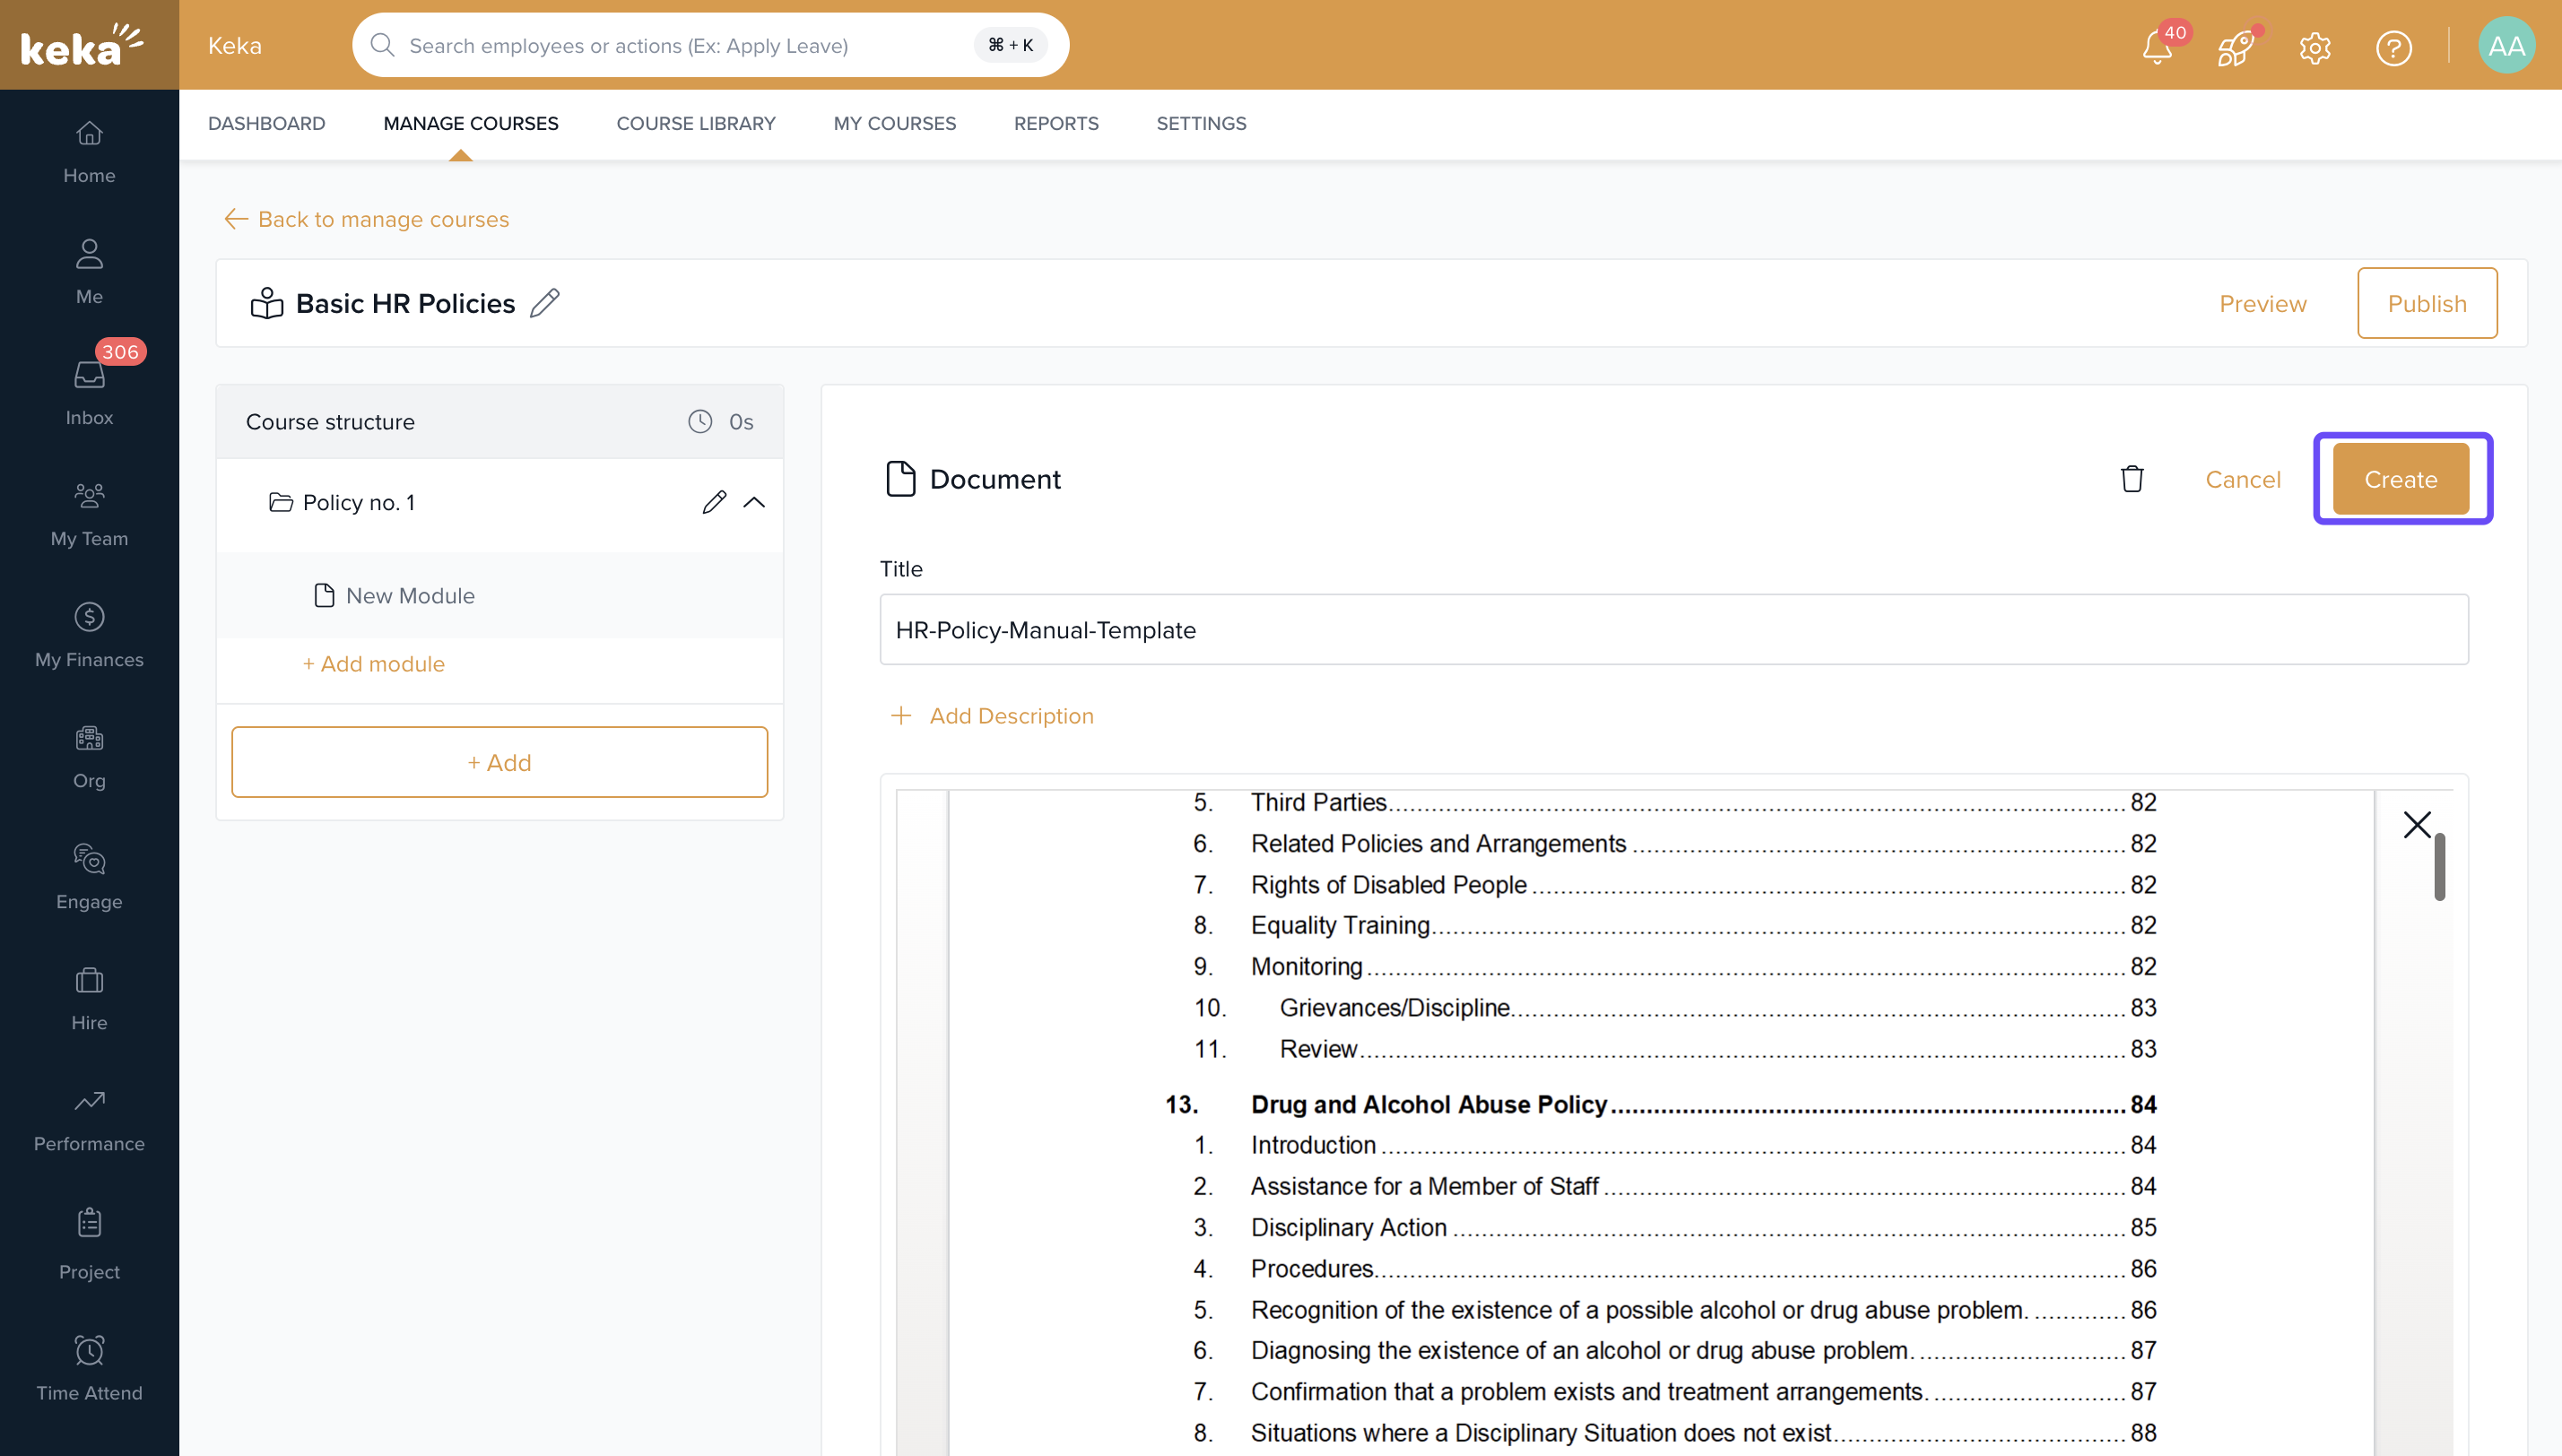
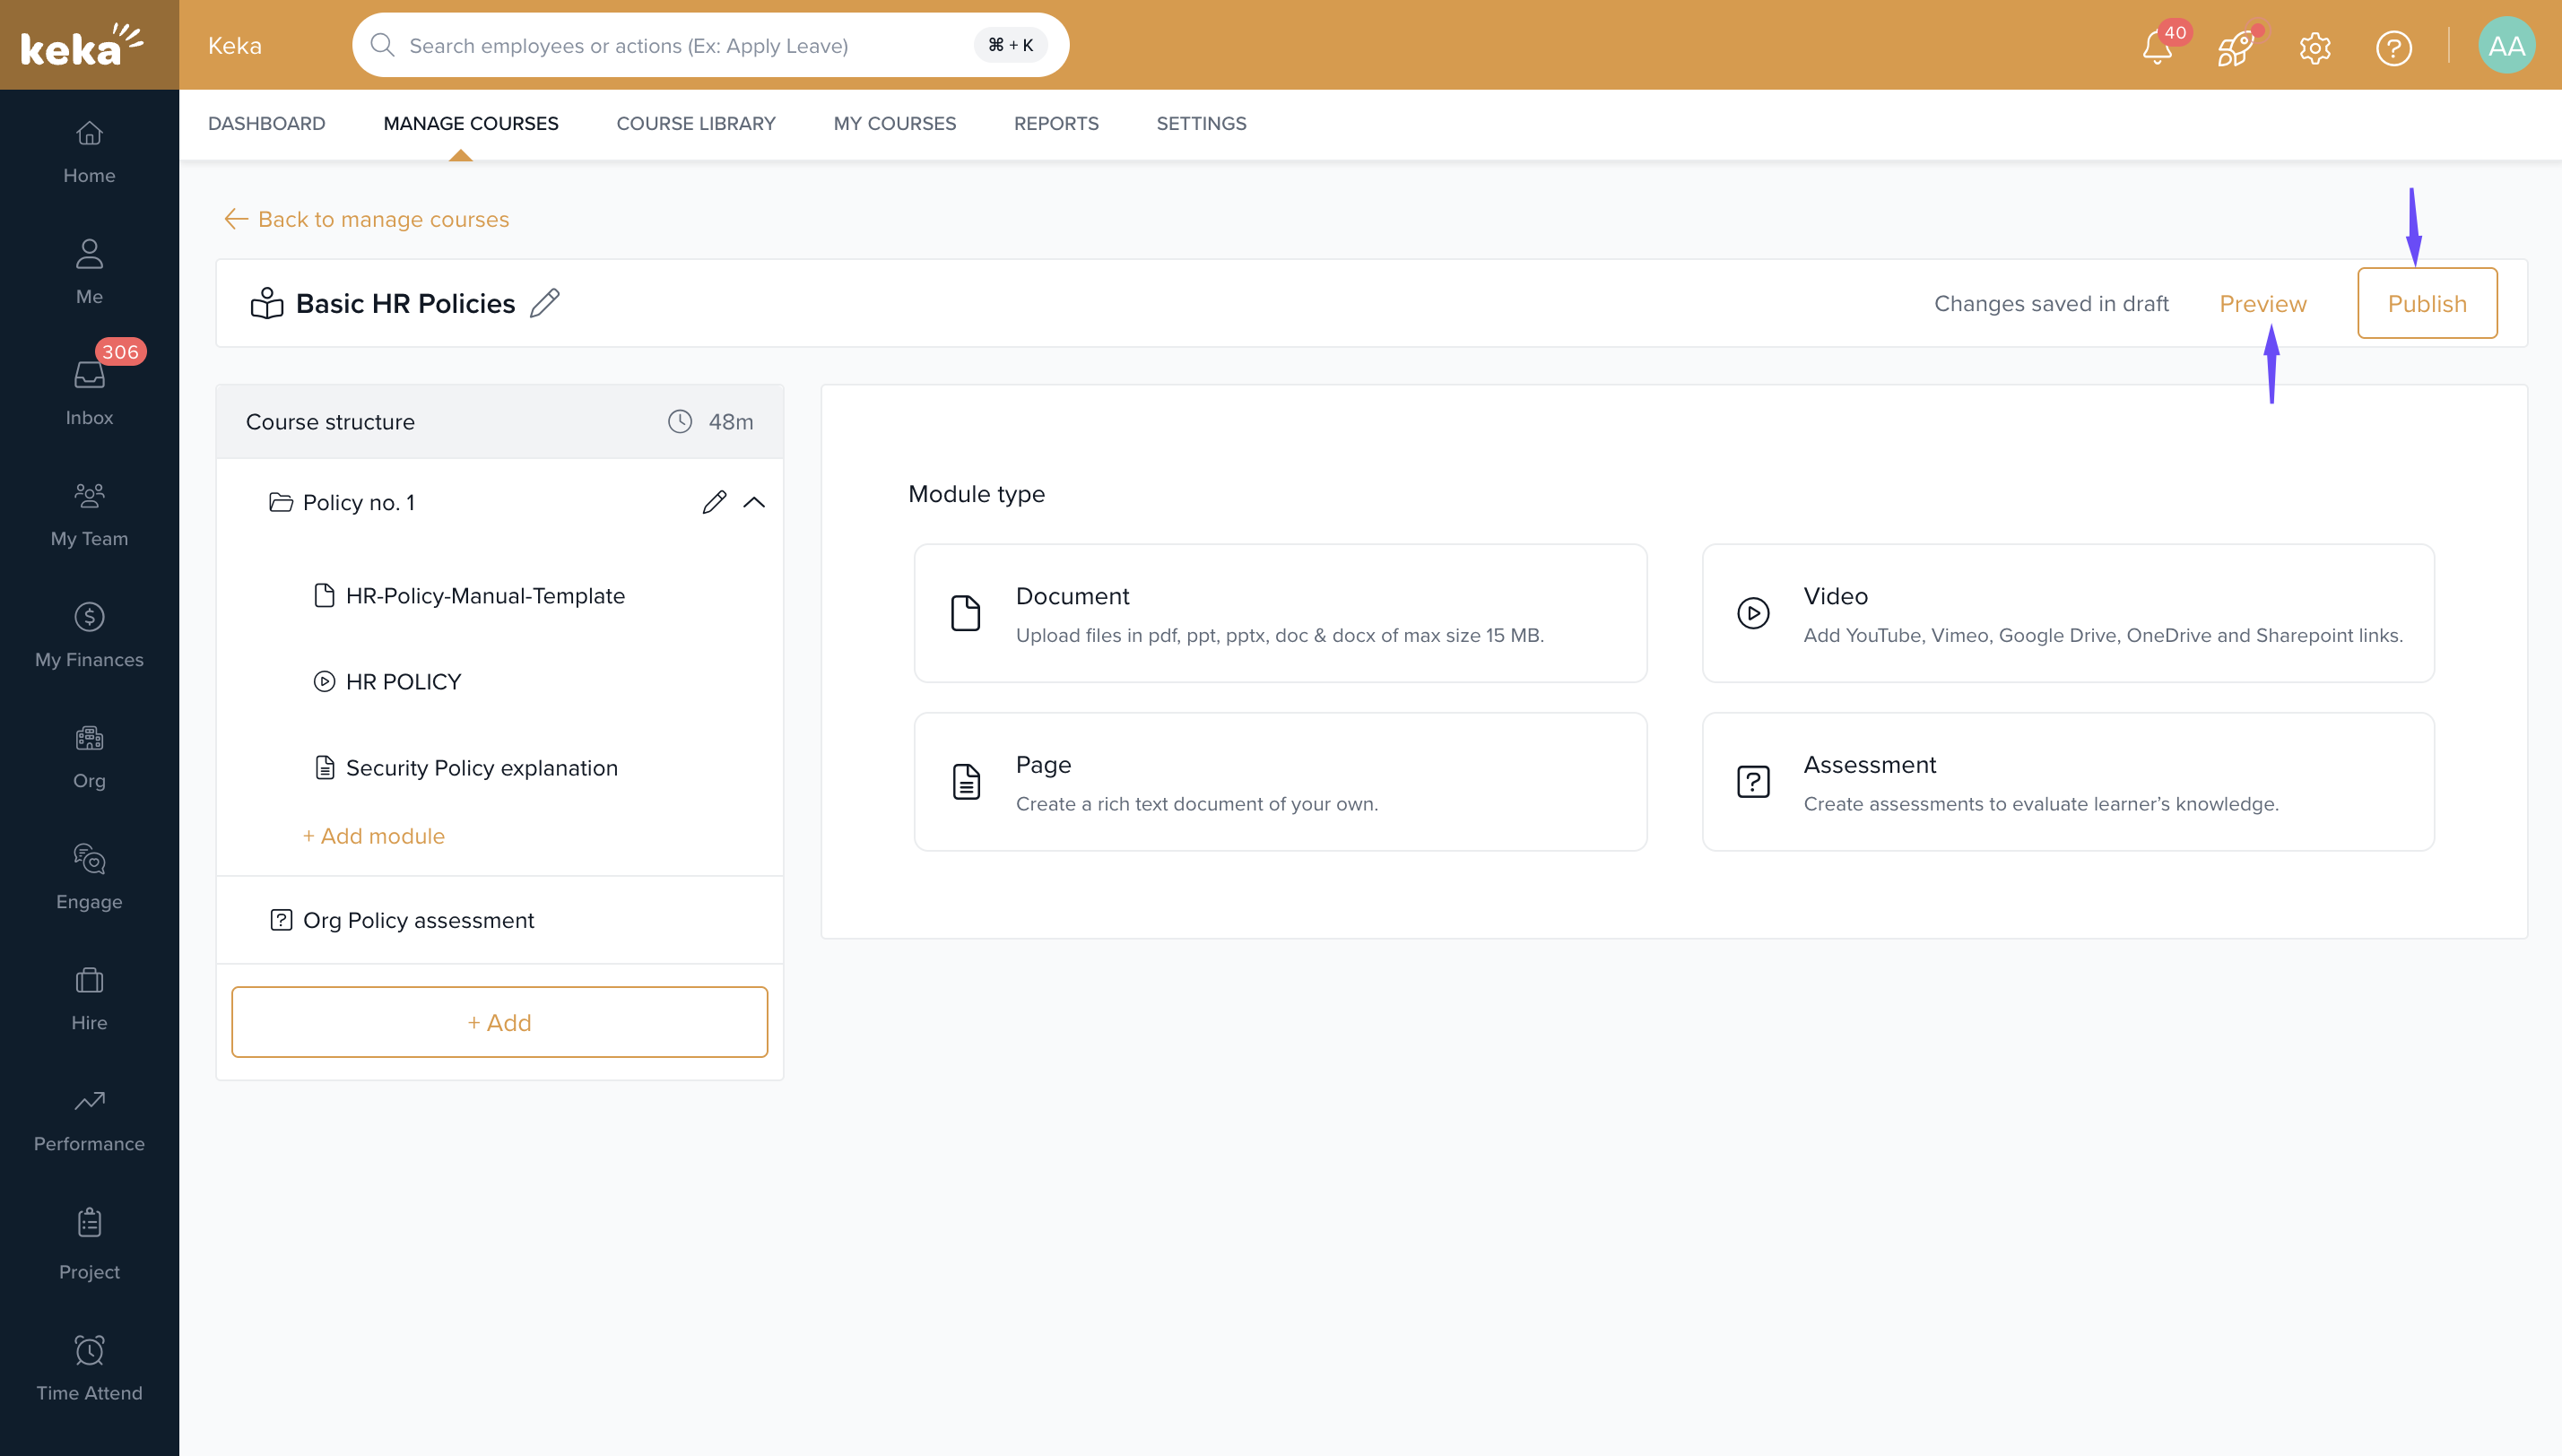
Click on the Document option.
In the next screen, click on the Browse hyperlink to upload the document or drag and drop the file.
Enter a Name and Description for the document.
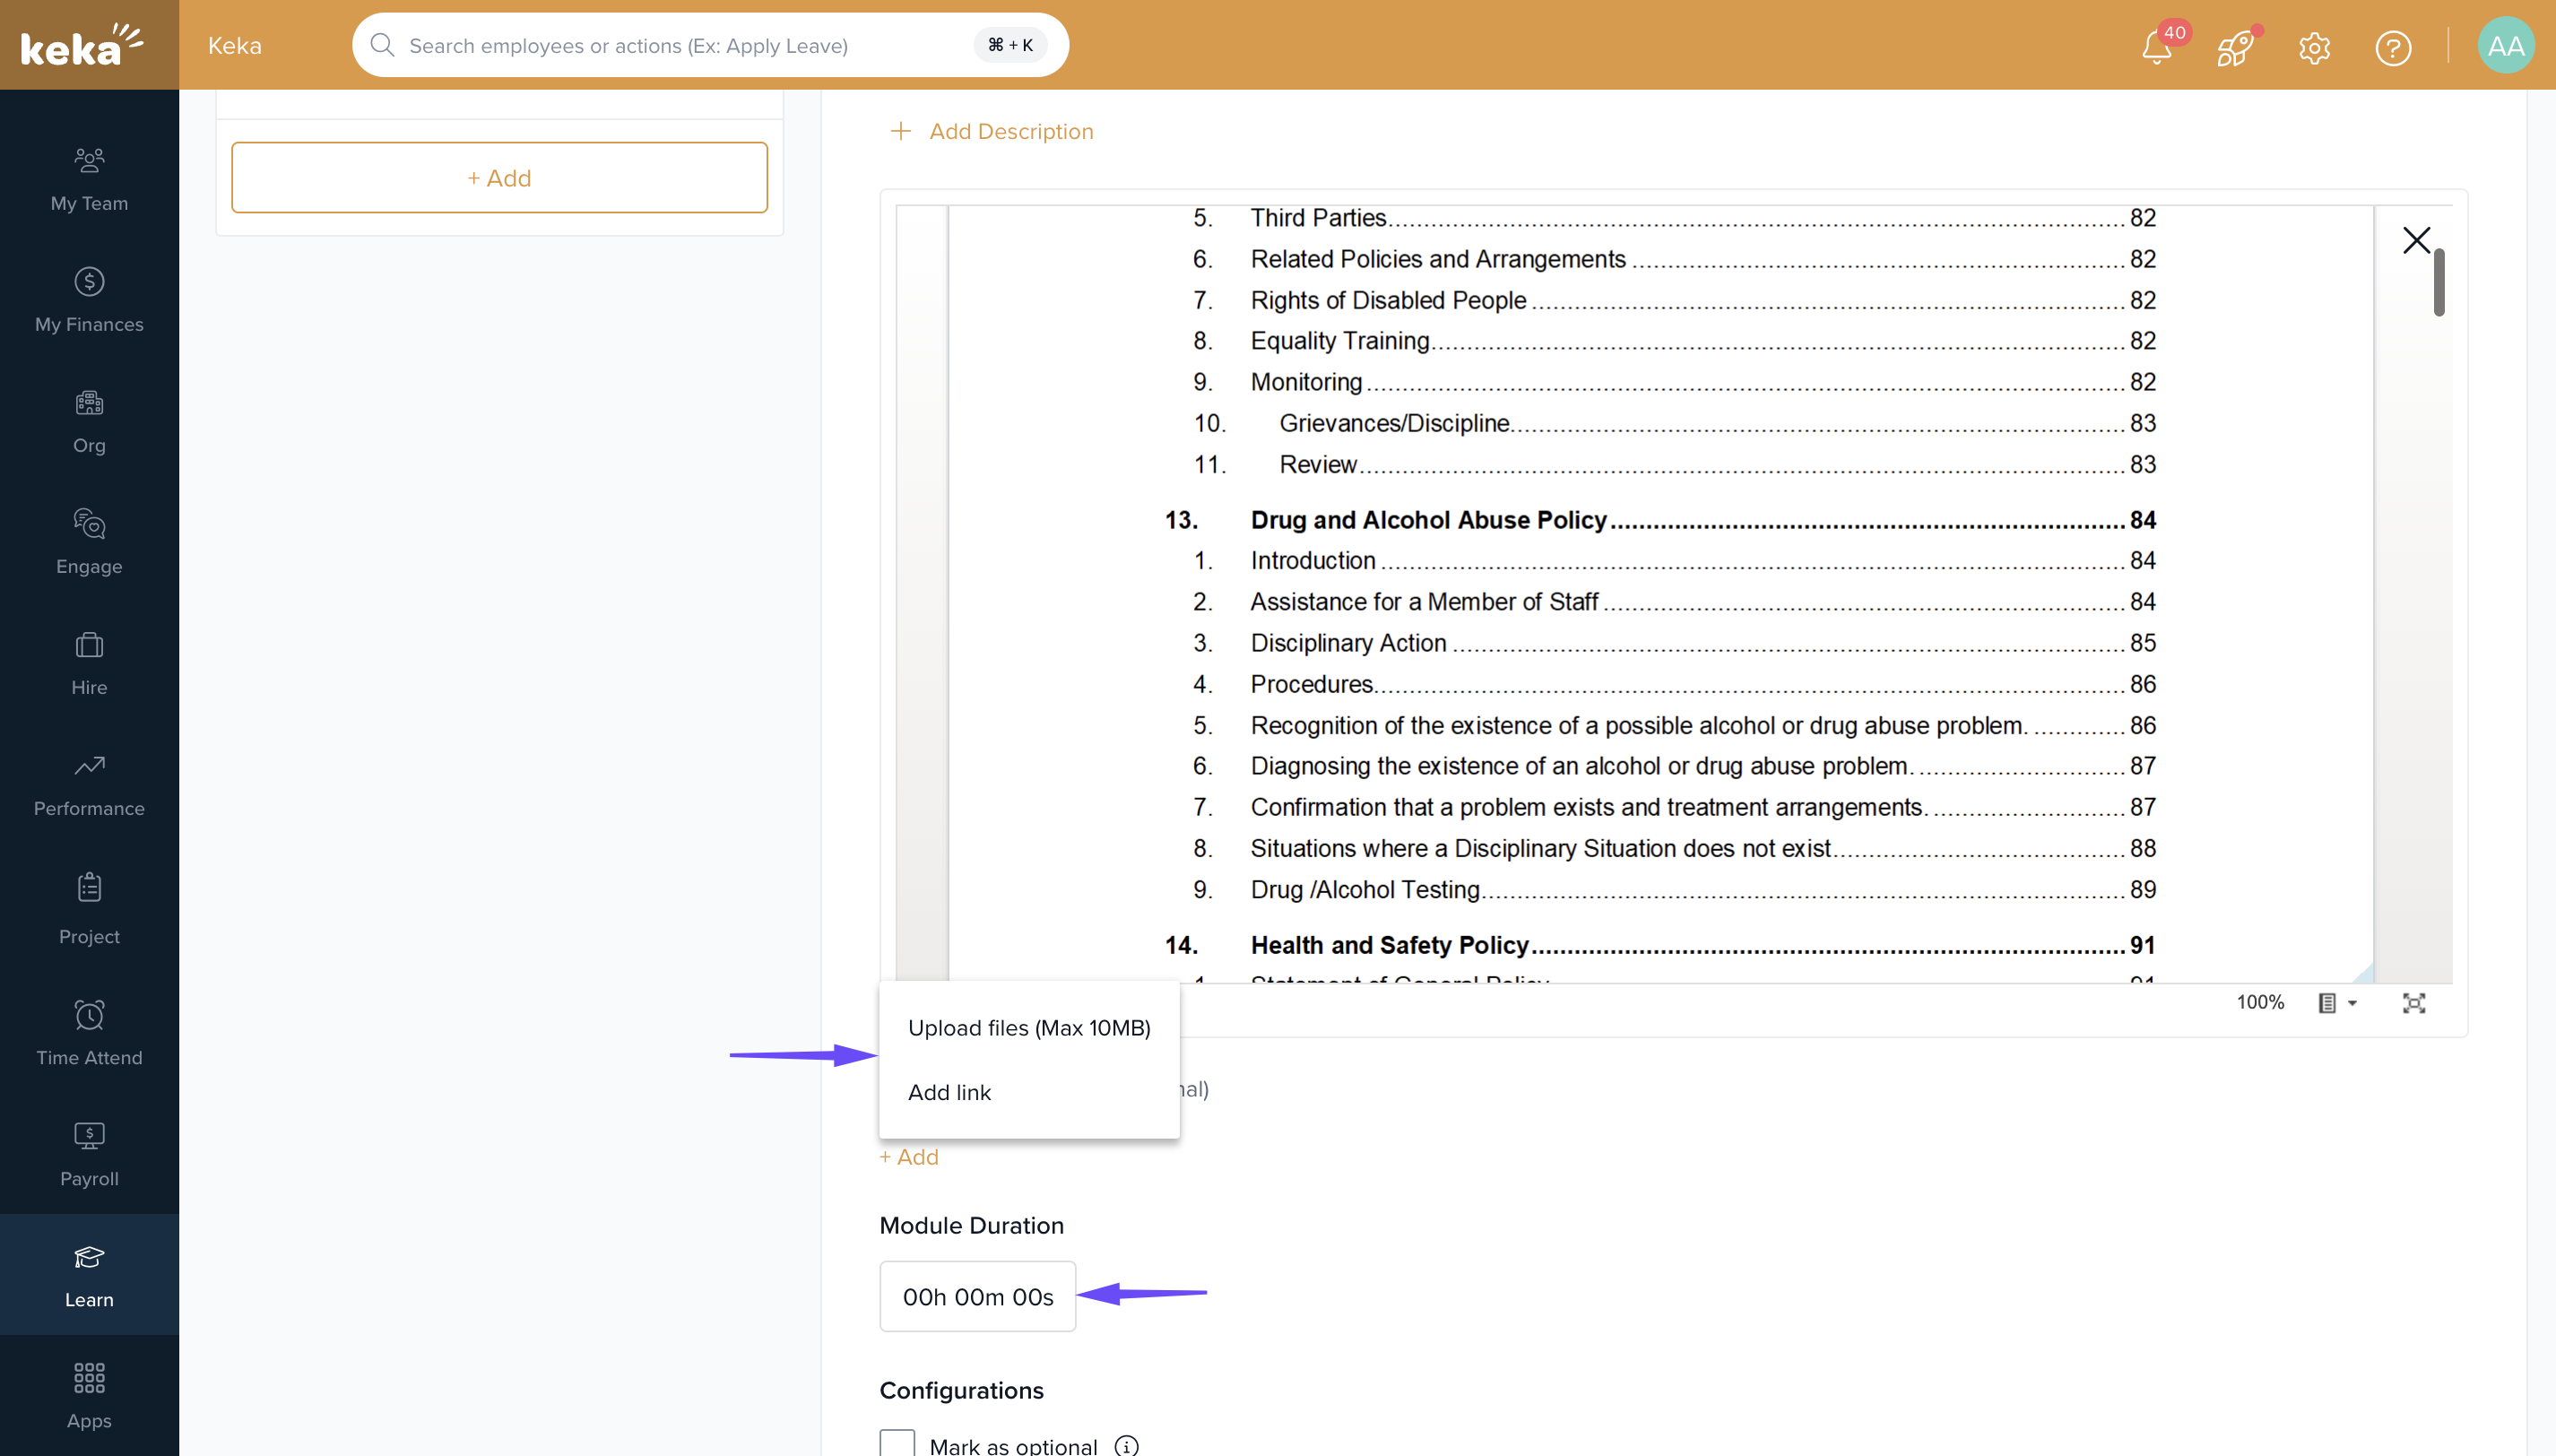
You can add additional resources and Content Duration (e.g., how long learners should spend on this content). File Size Limit: Documents can be up to 15 MB.
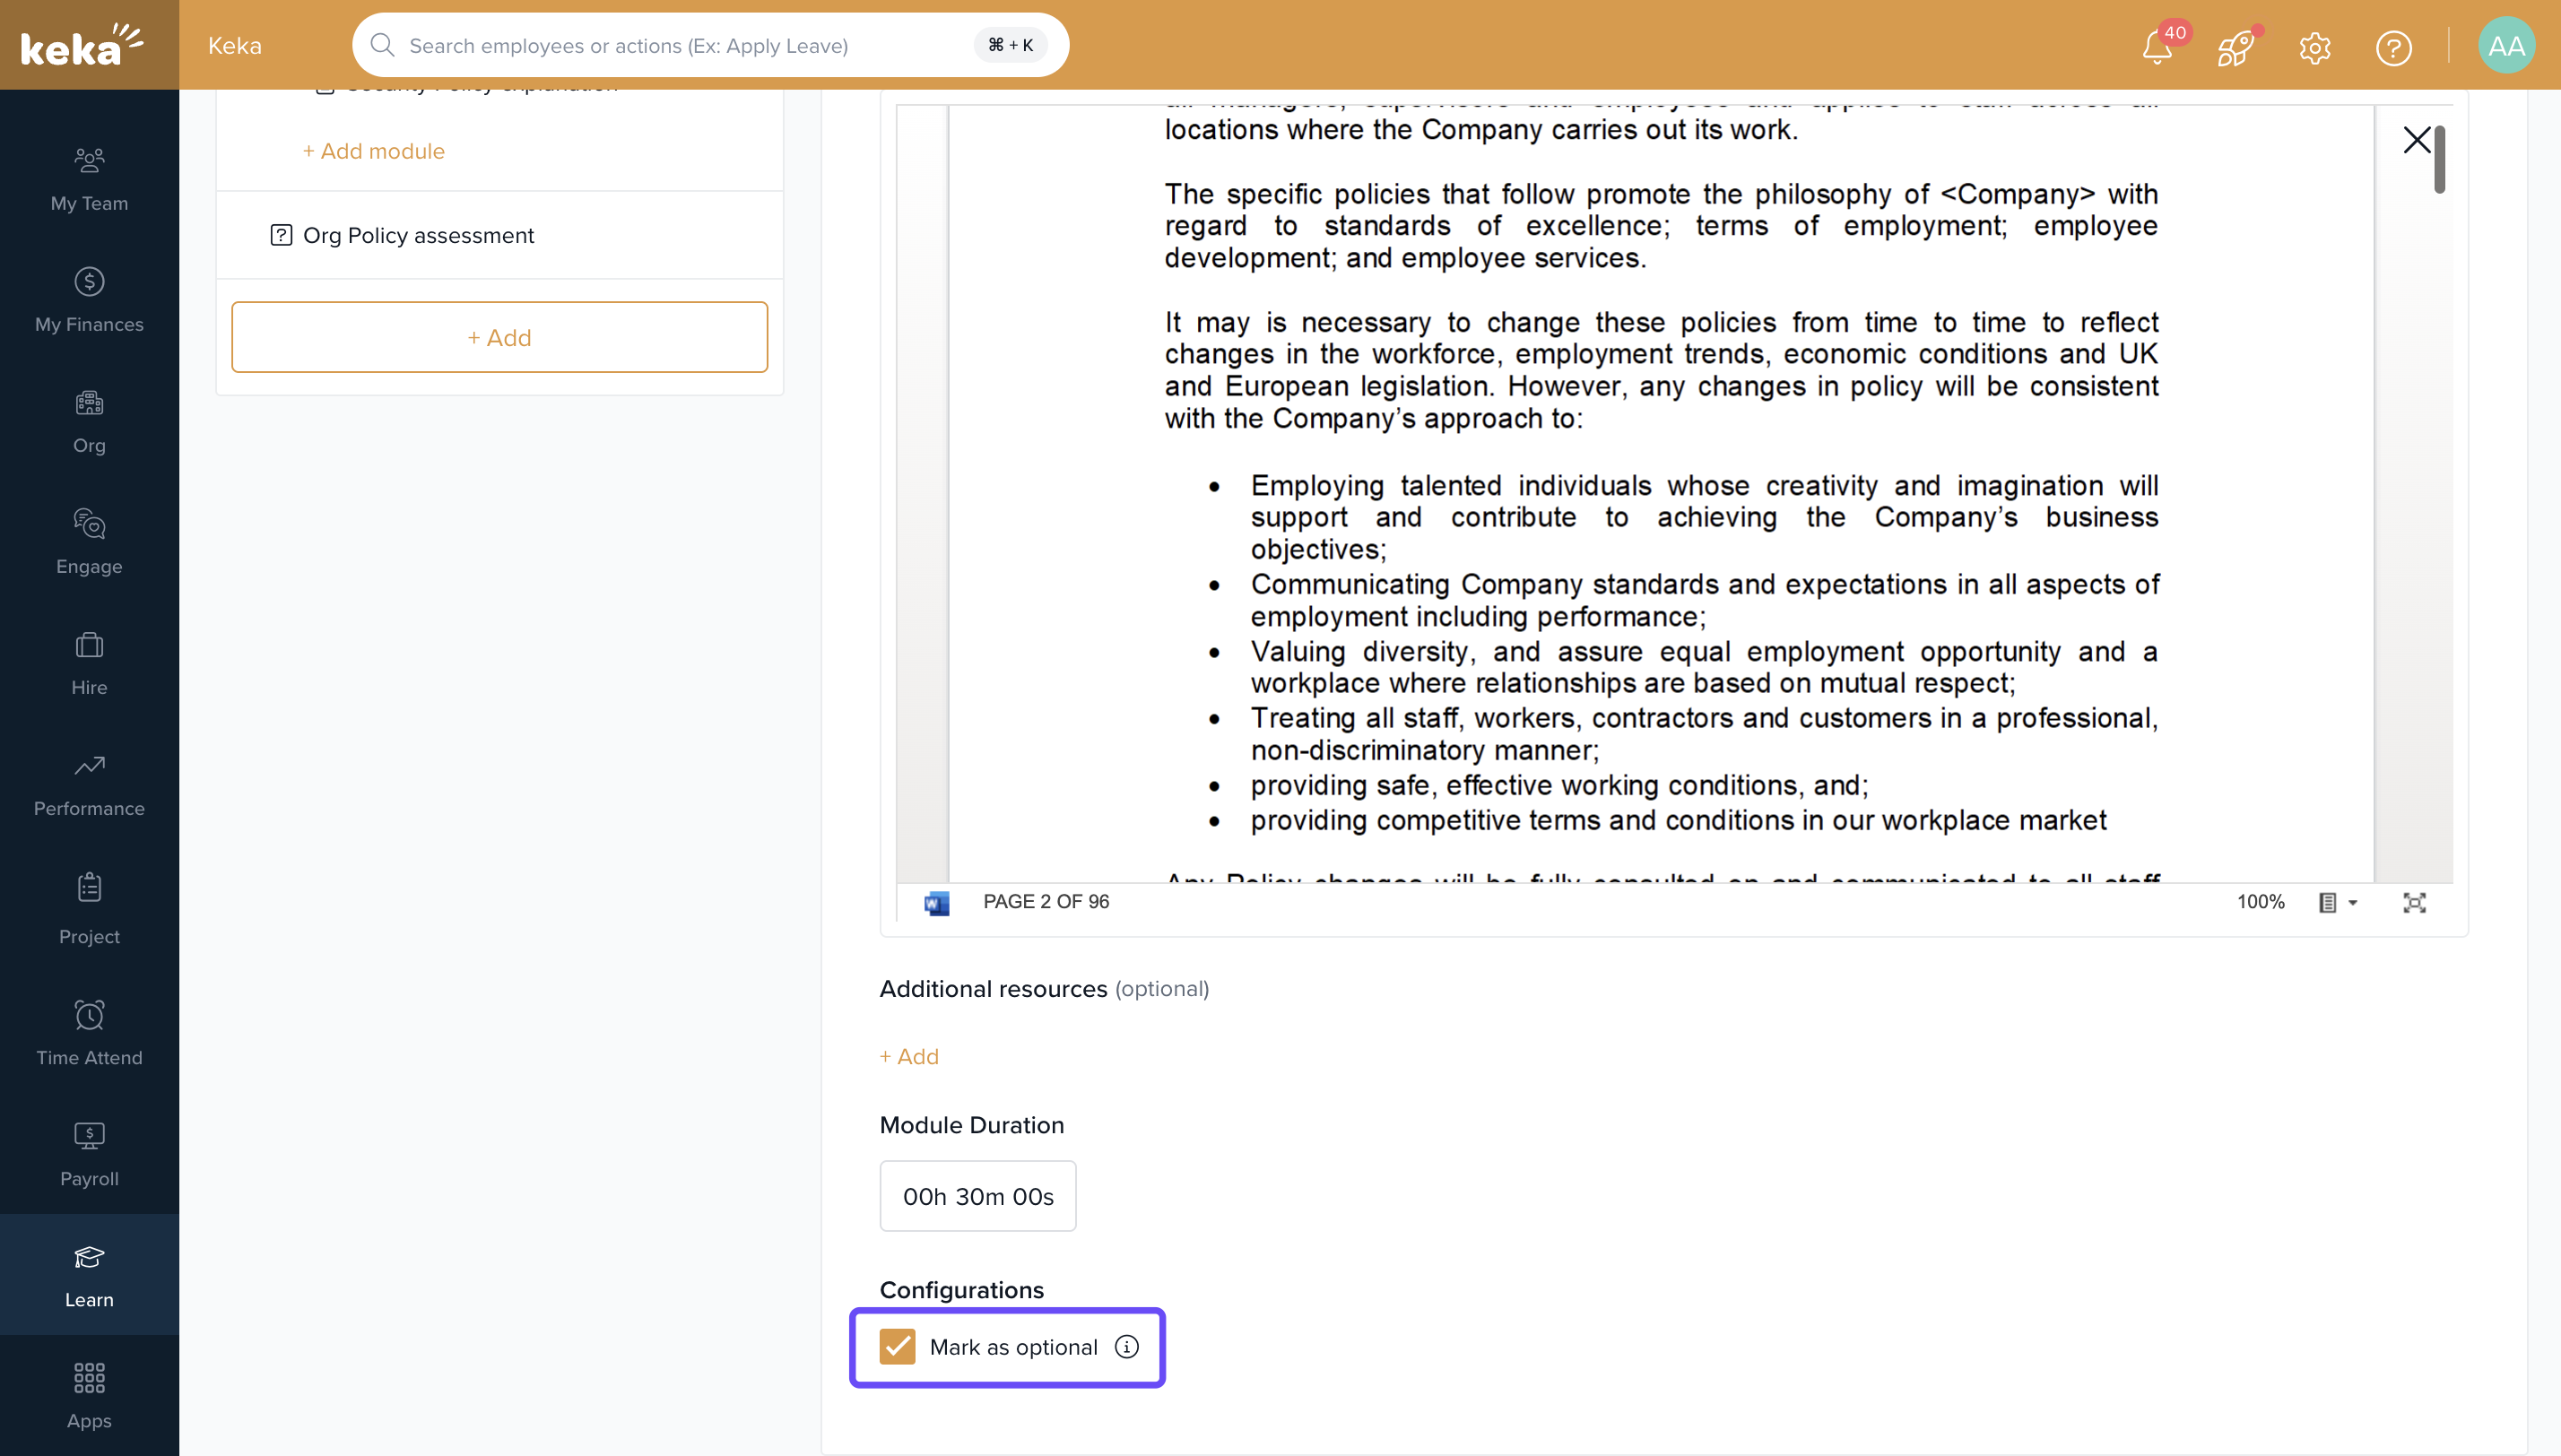
Mark the module as optional if needed .
- Set the minimum duration to ensure that learners do not skip the module.
Click Create to add the document to the course.
Adding a Video to Your Course Content
To embed a video from YouTube, Vimeo, or other platforms:
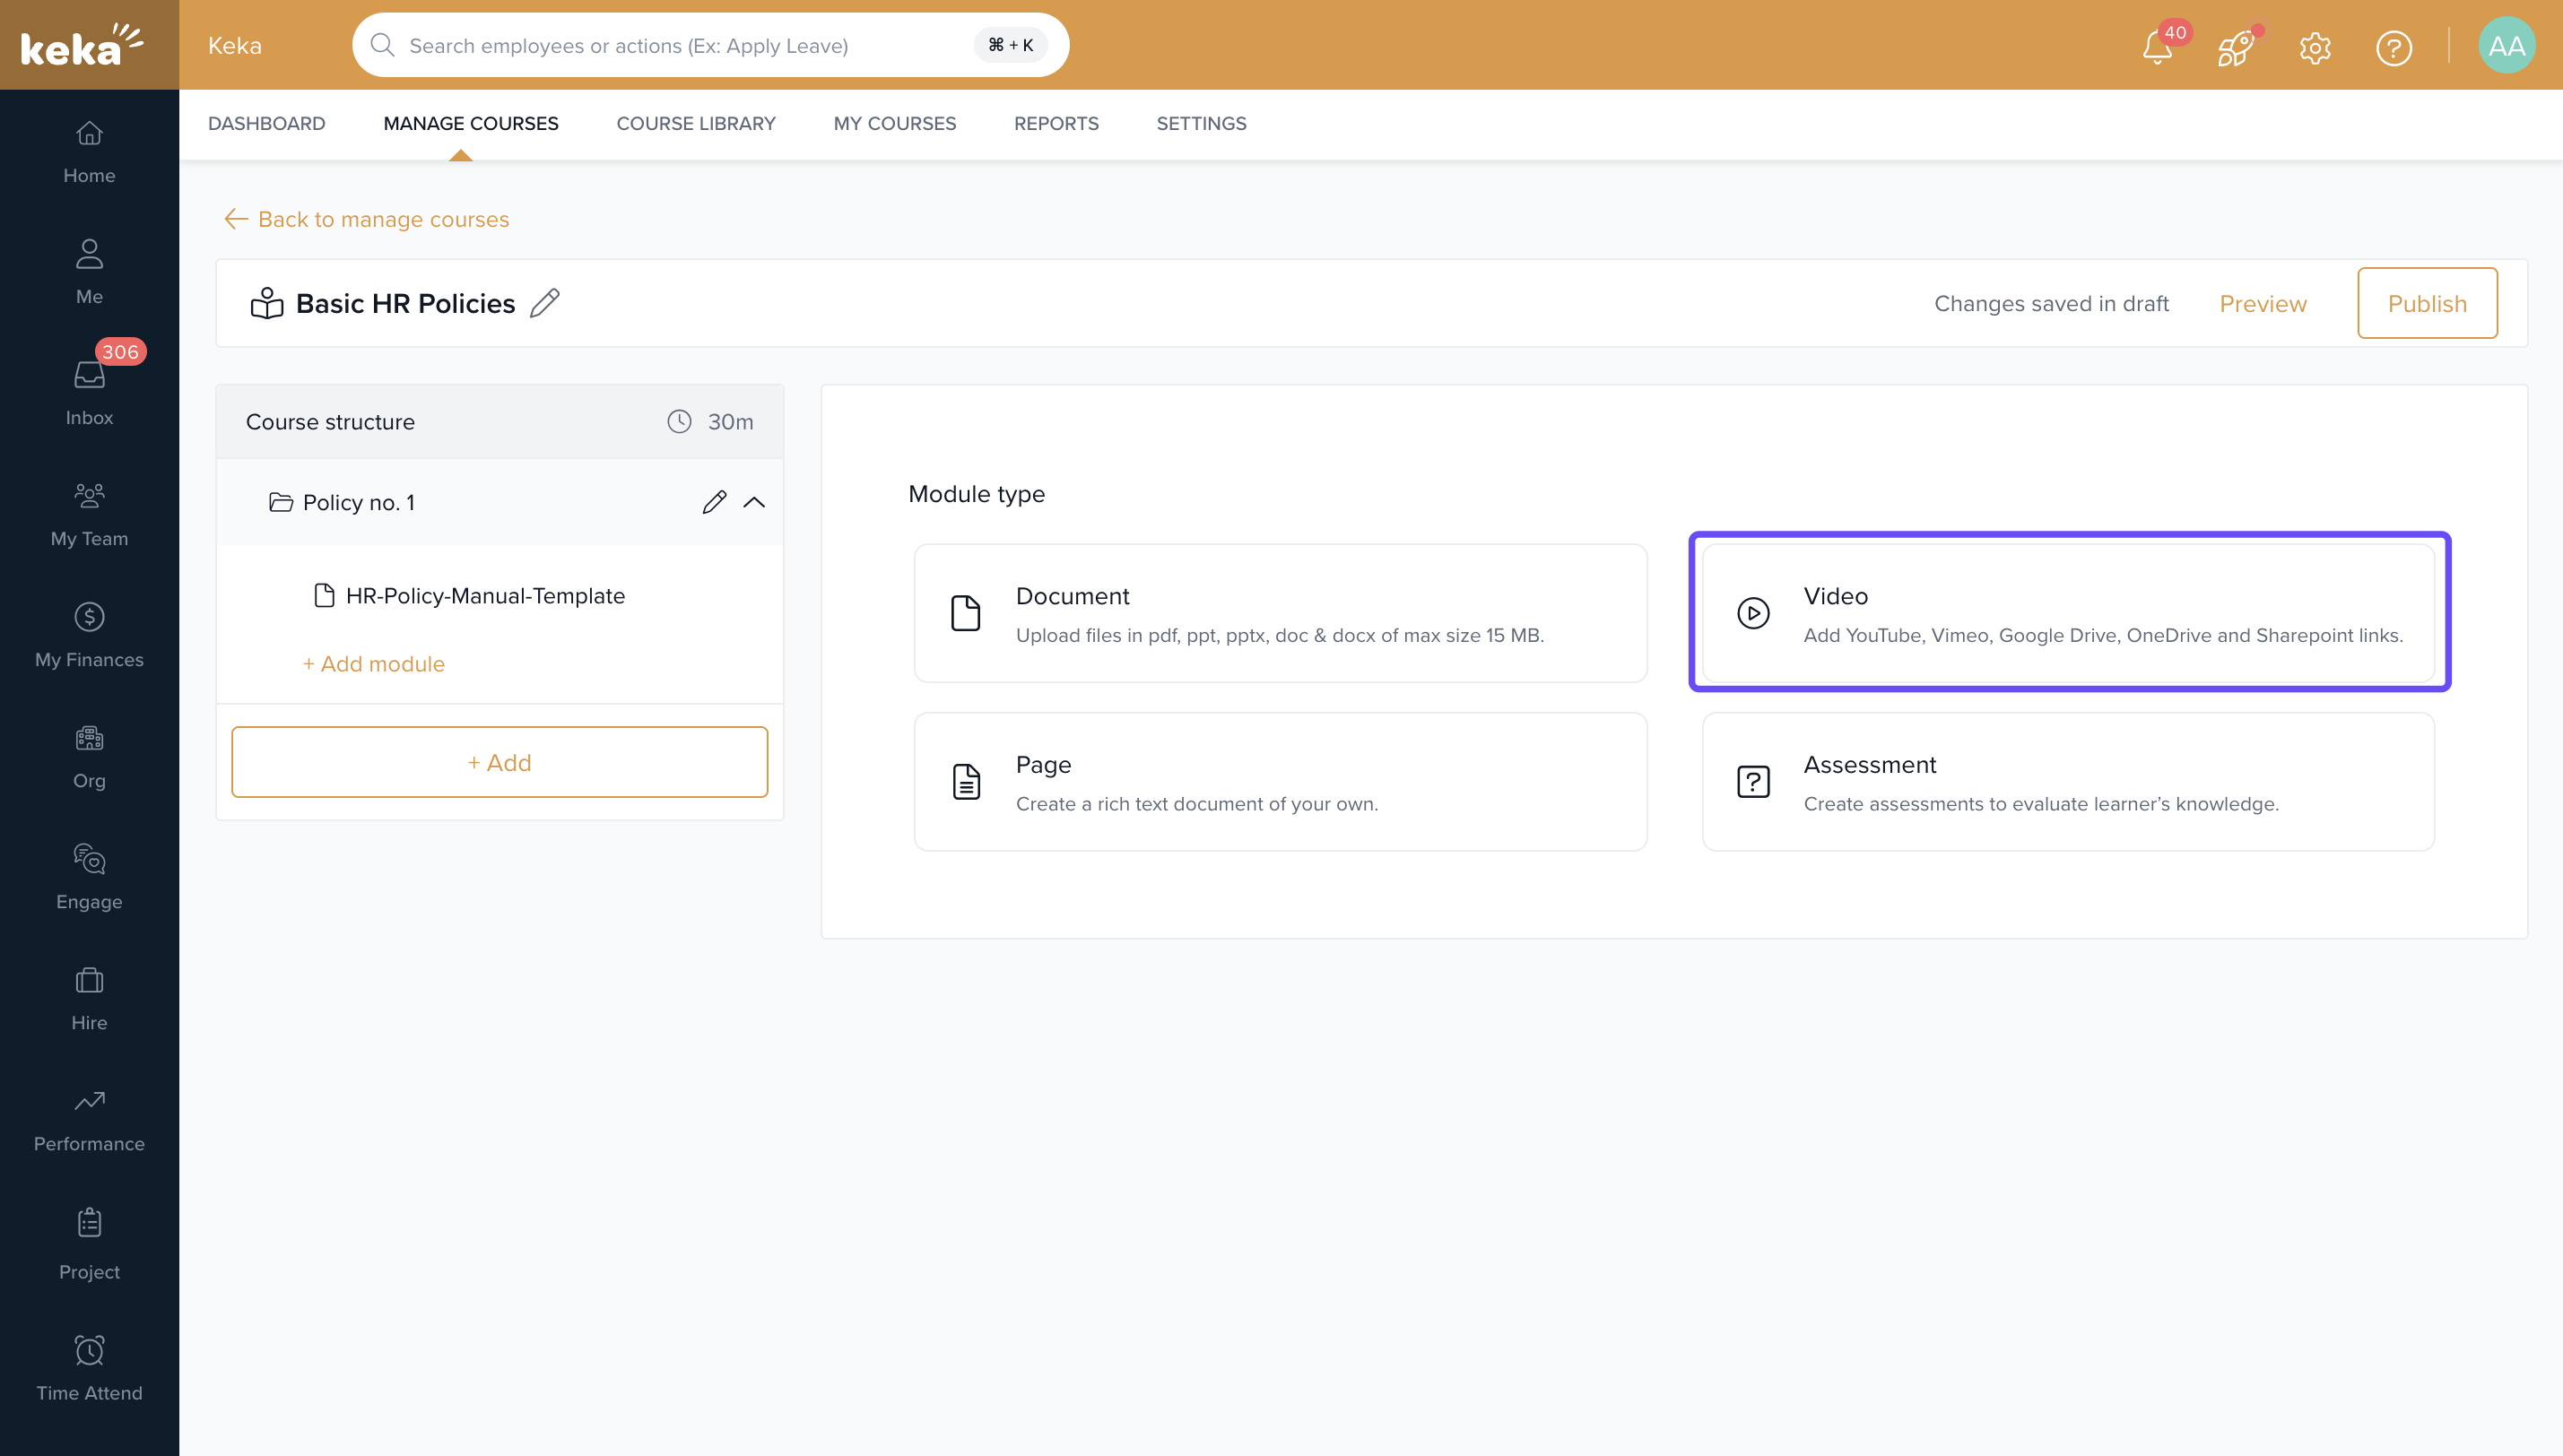
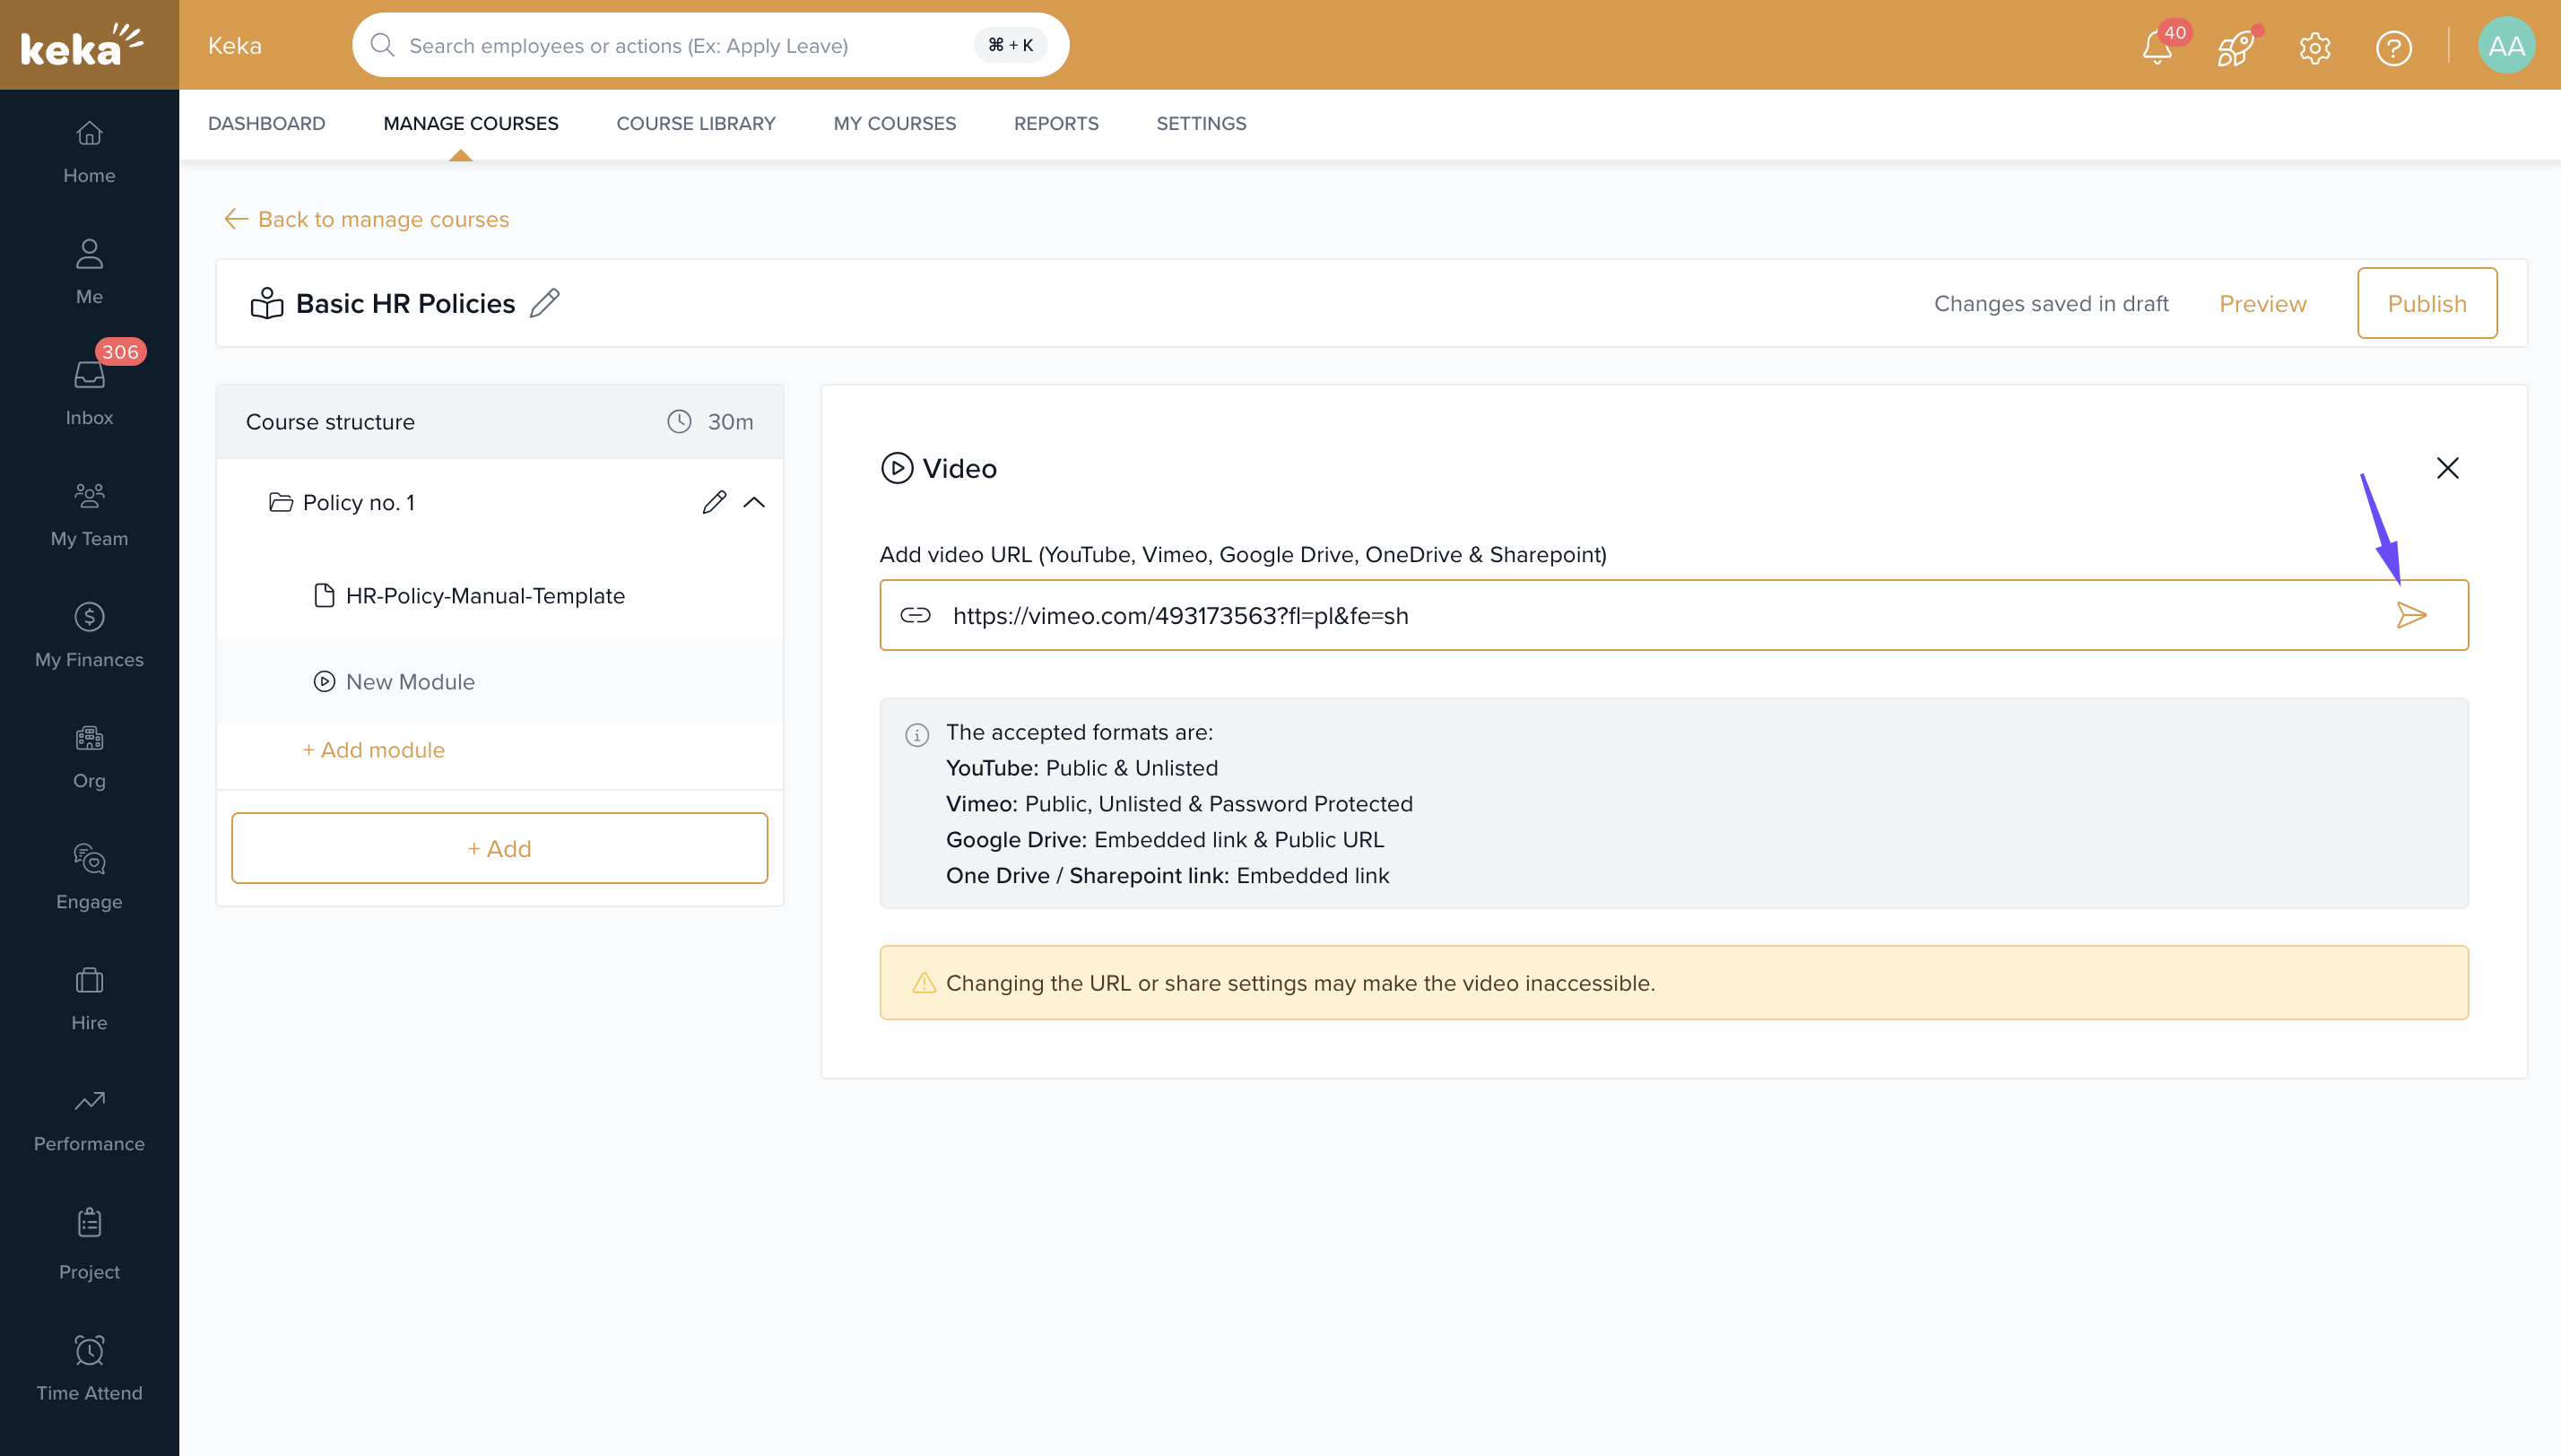
Select the Video content option.
Paste the video URL in the textbox and click Add.
Provide a Title and Description for the video.
Set the minimum viewing duration to prevent learners from skipping the video before a certain time.
Optionally, enable the "Learners cannot skip the video" feature and set a percentage-based duration for stricter control.
Once done, click Create.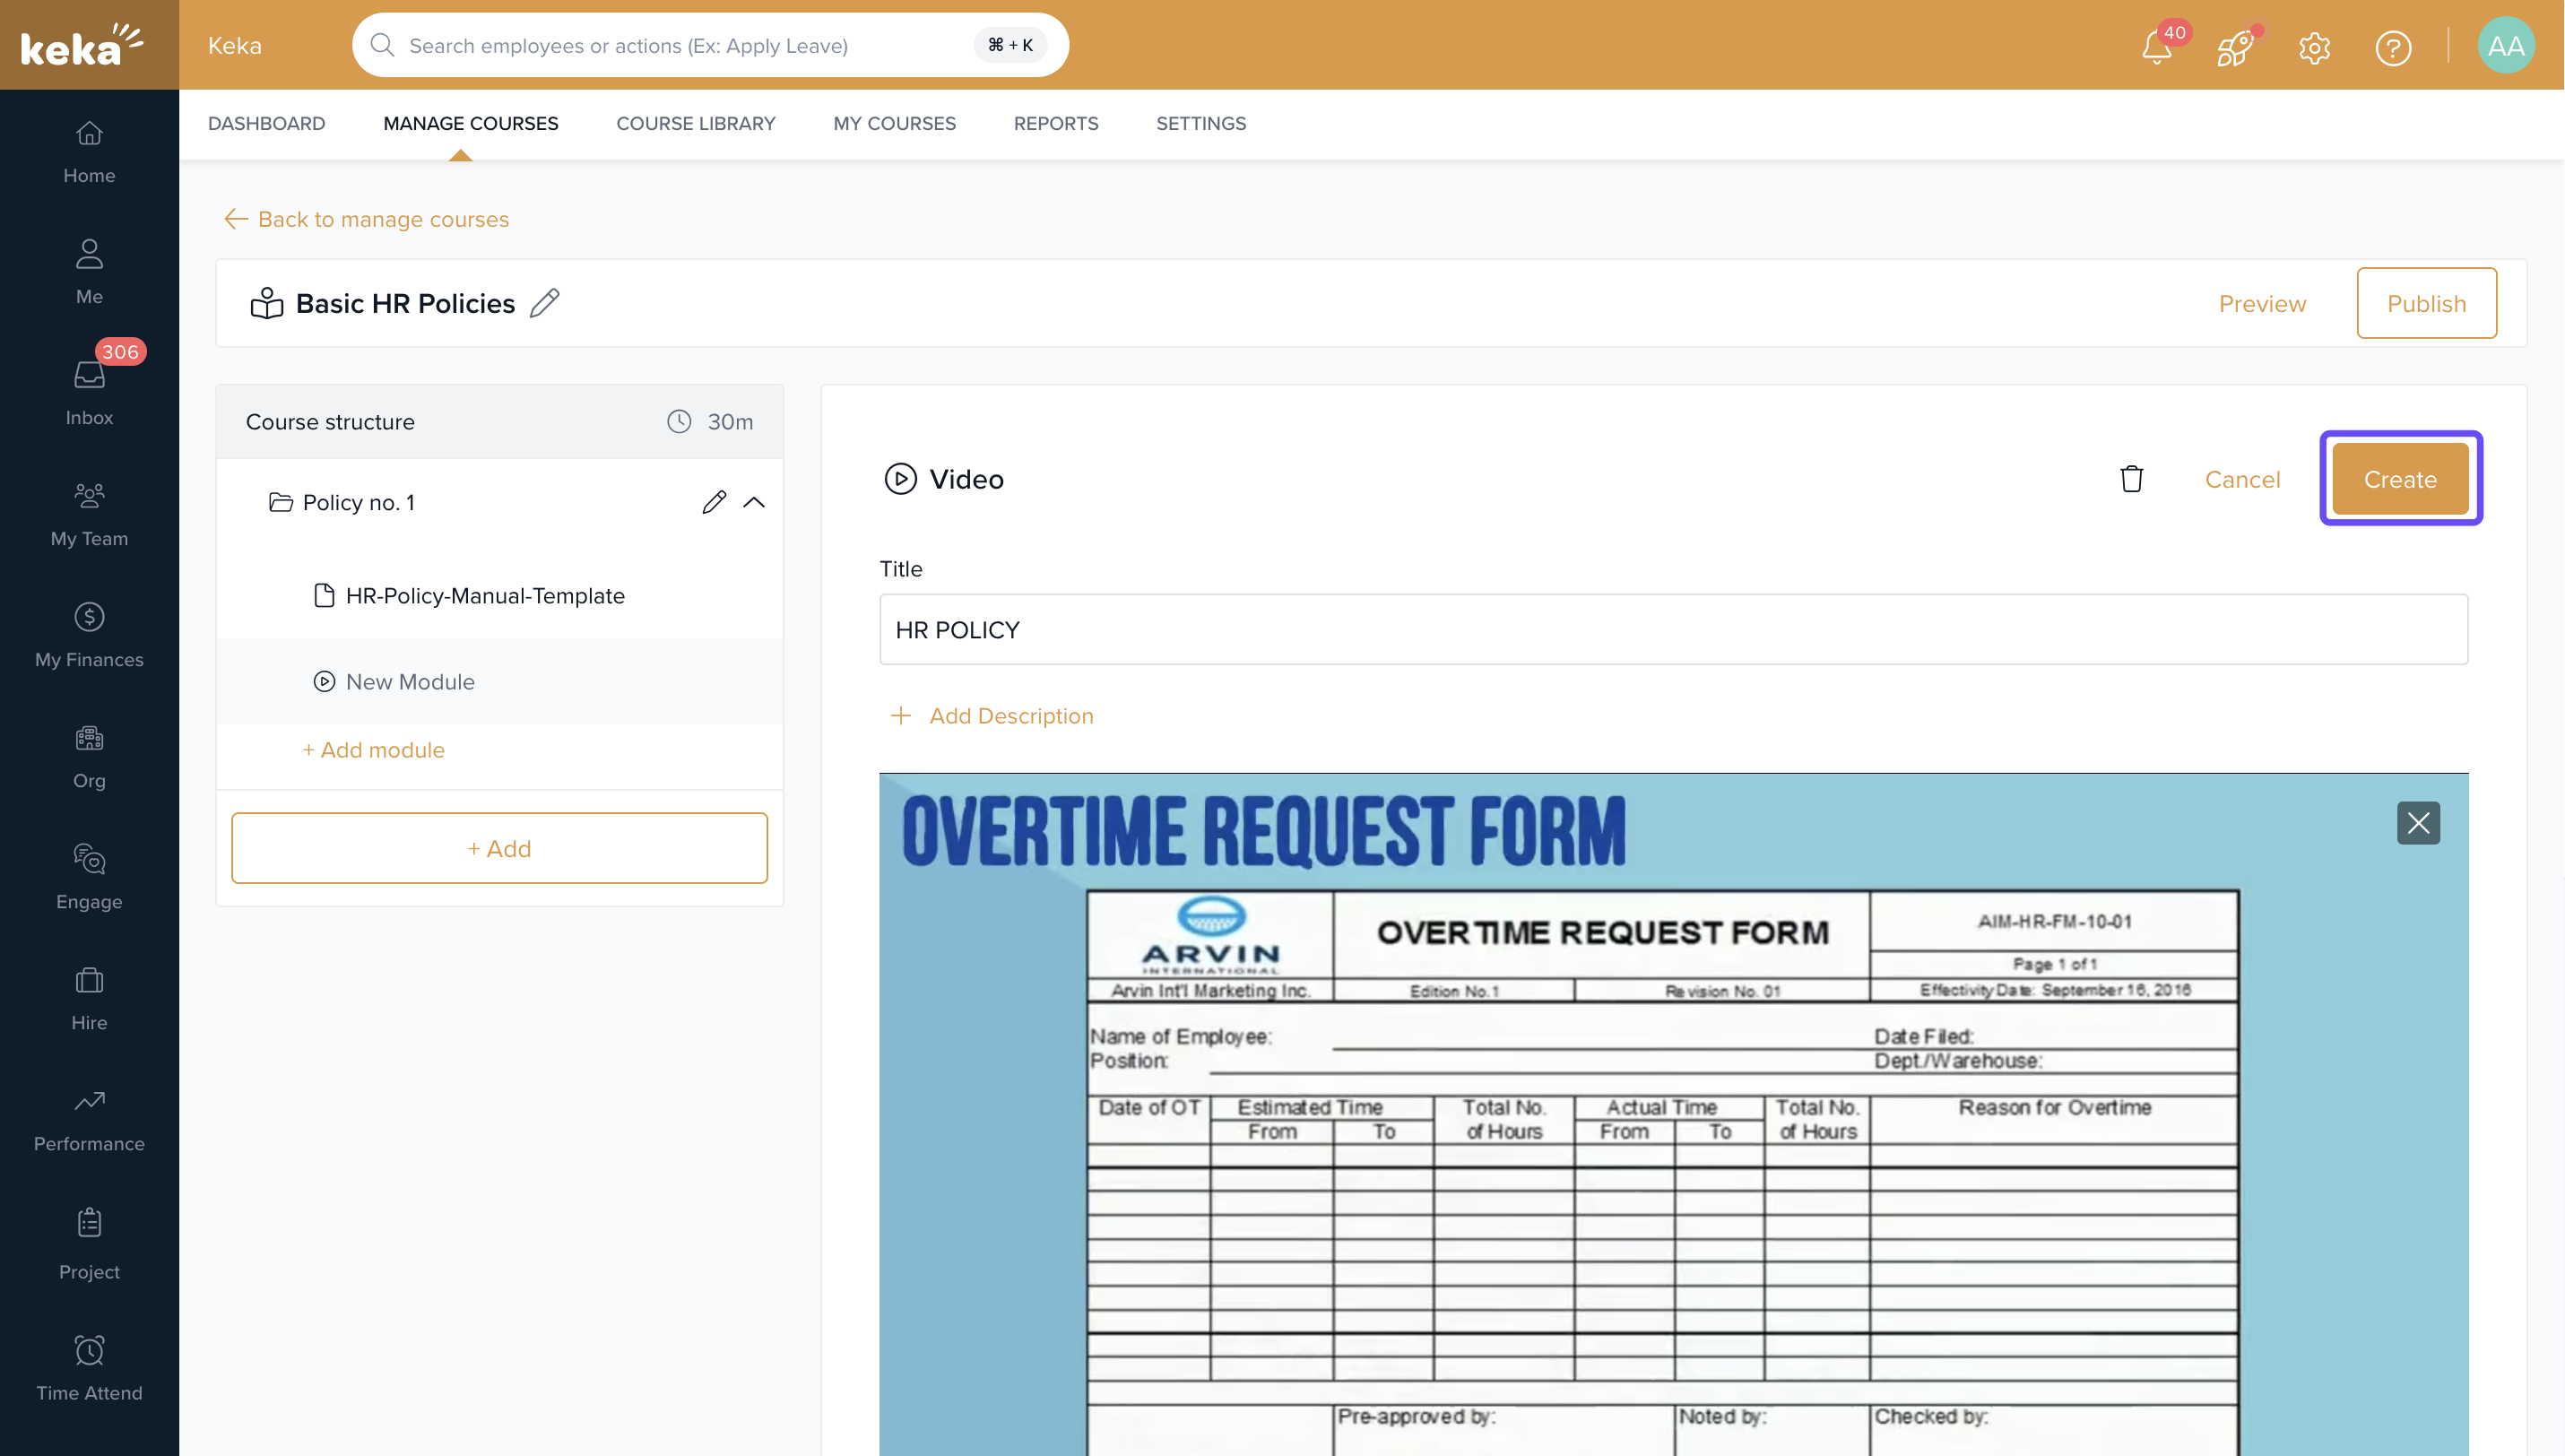
Adding Text Content to Your Course
For text content:
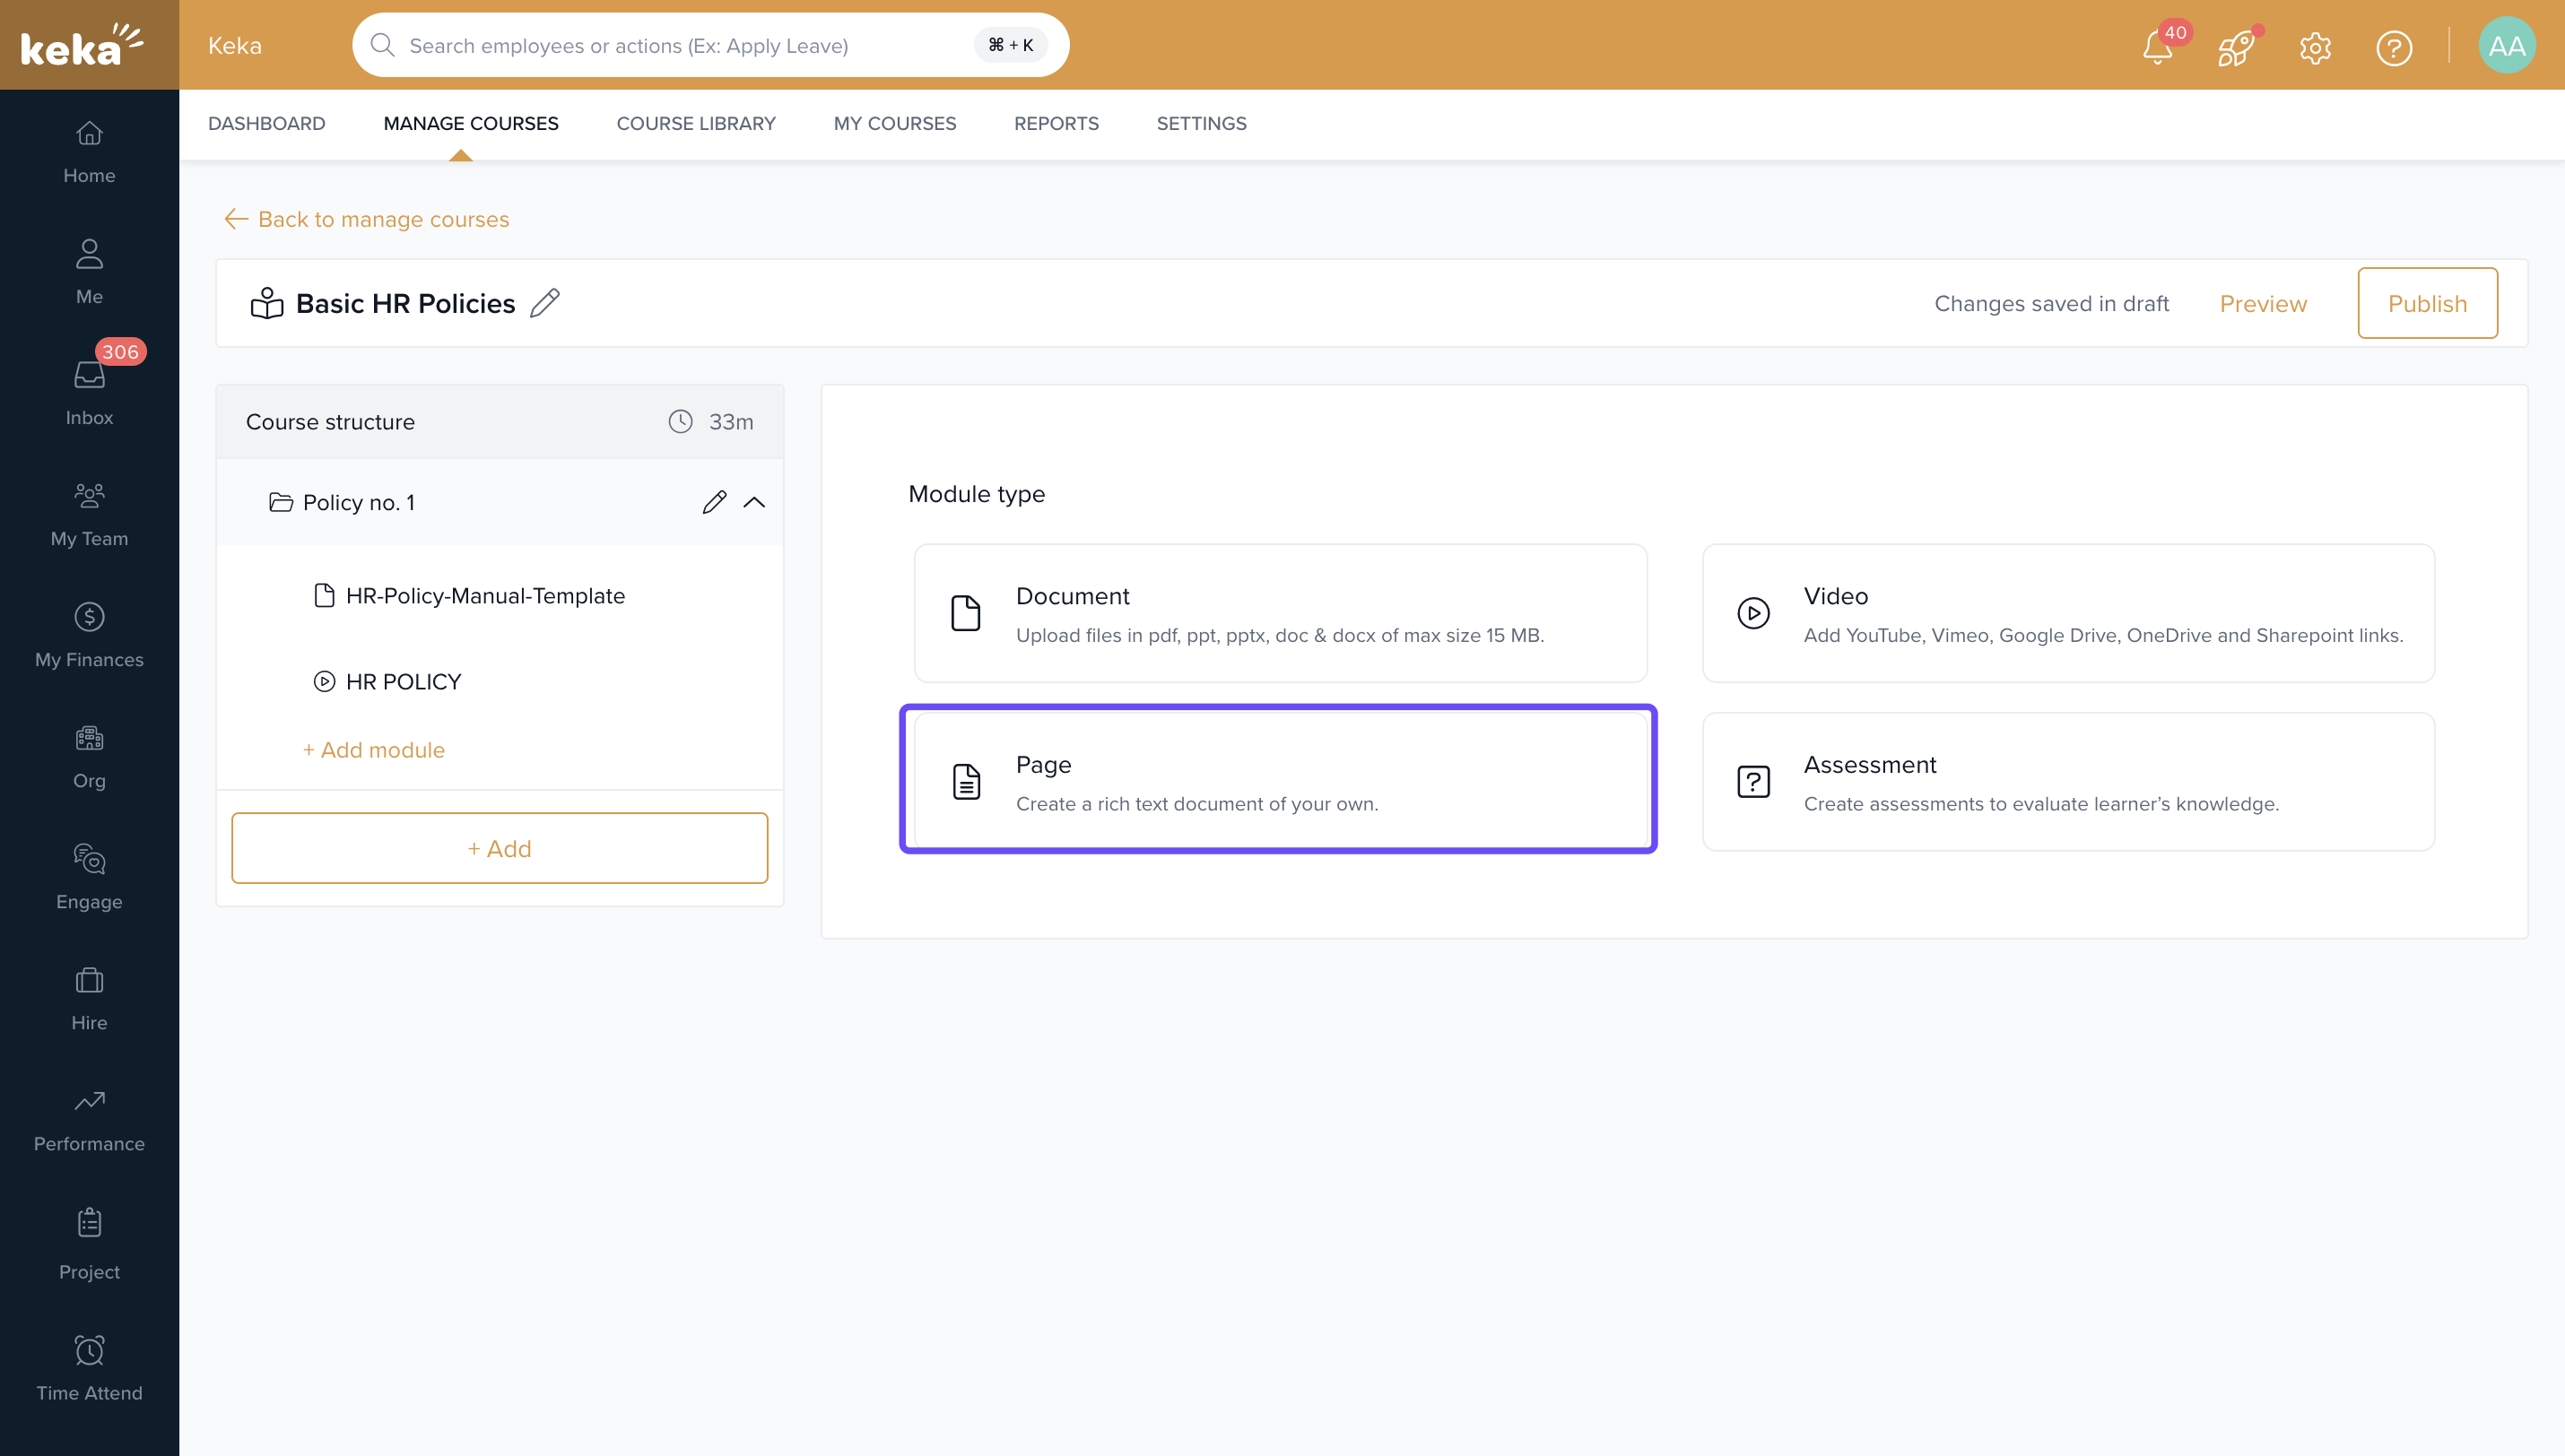
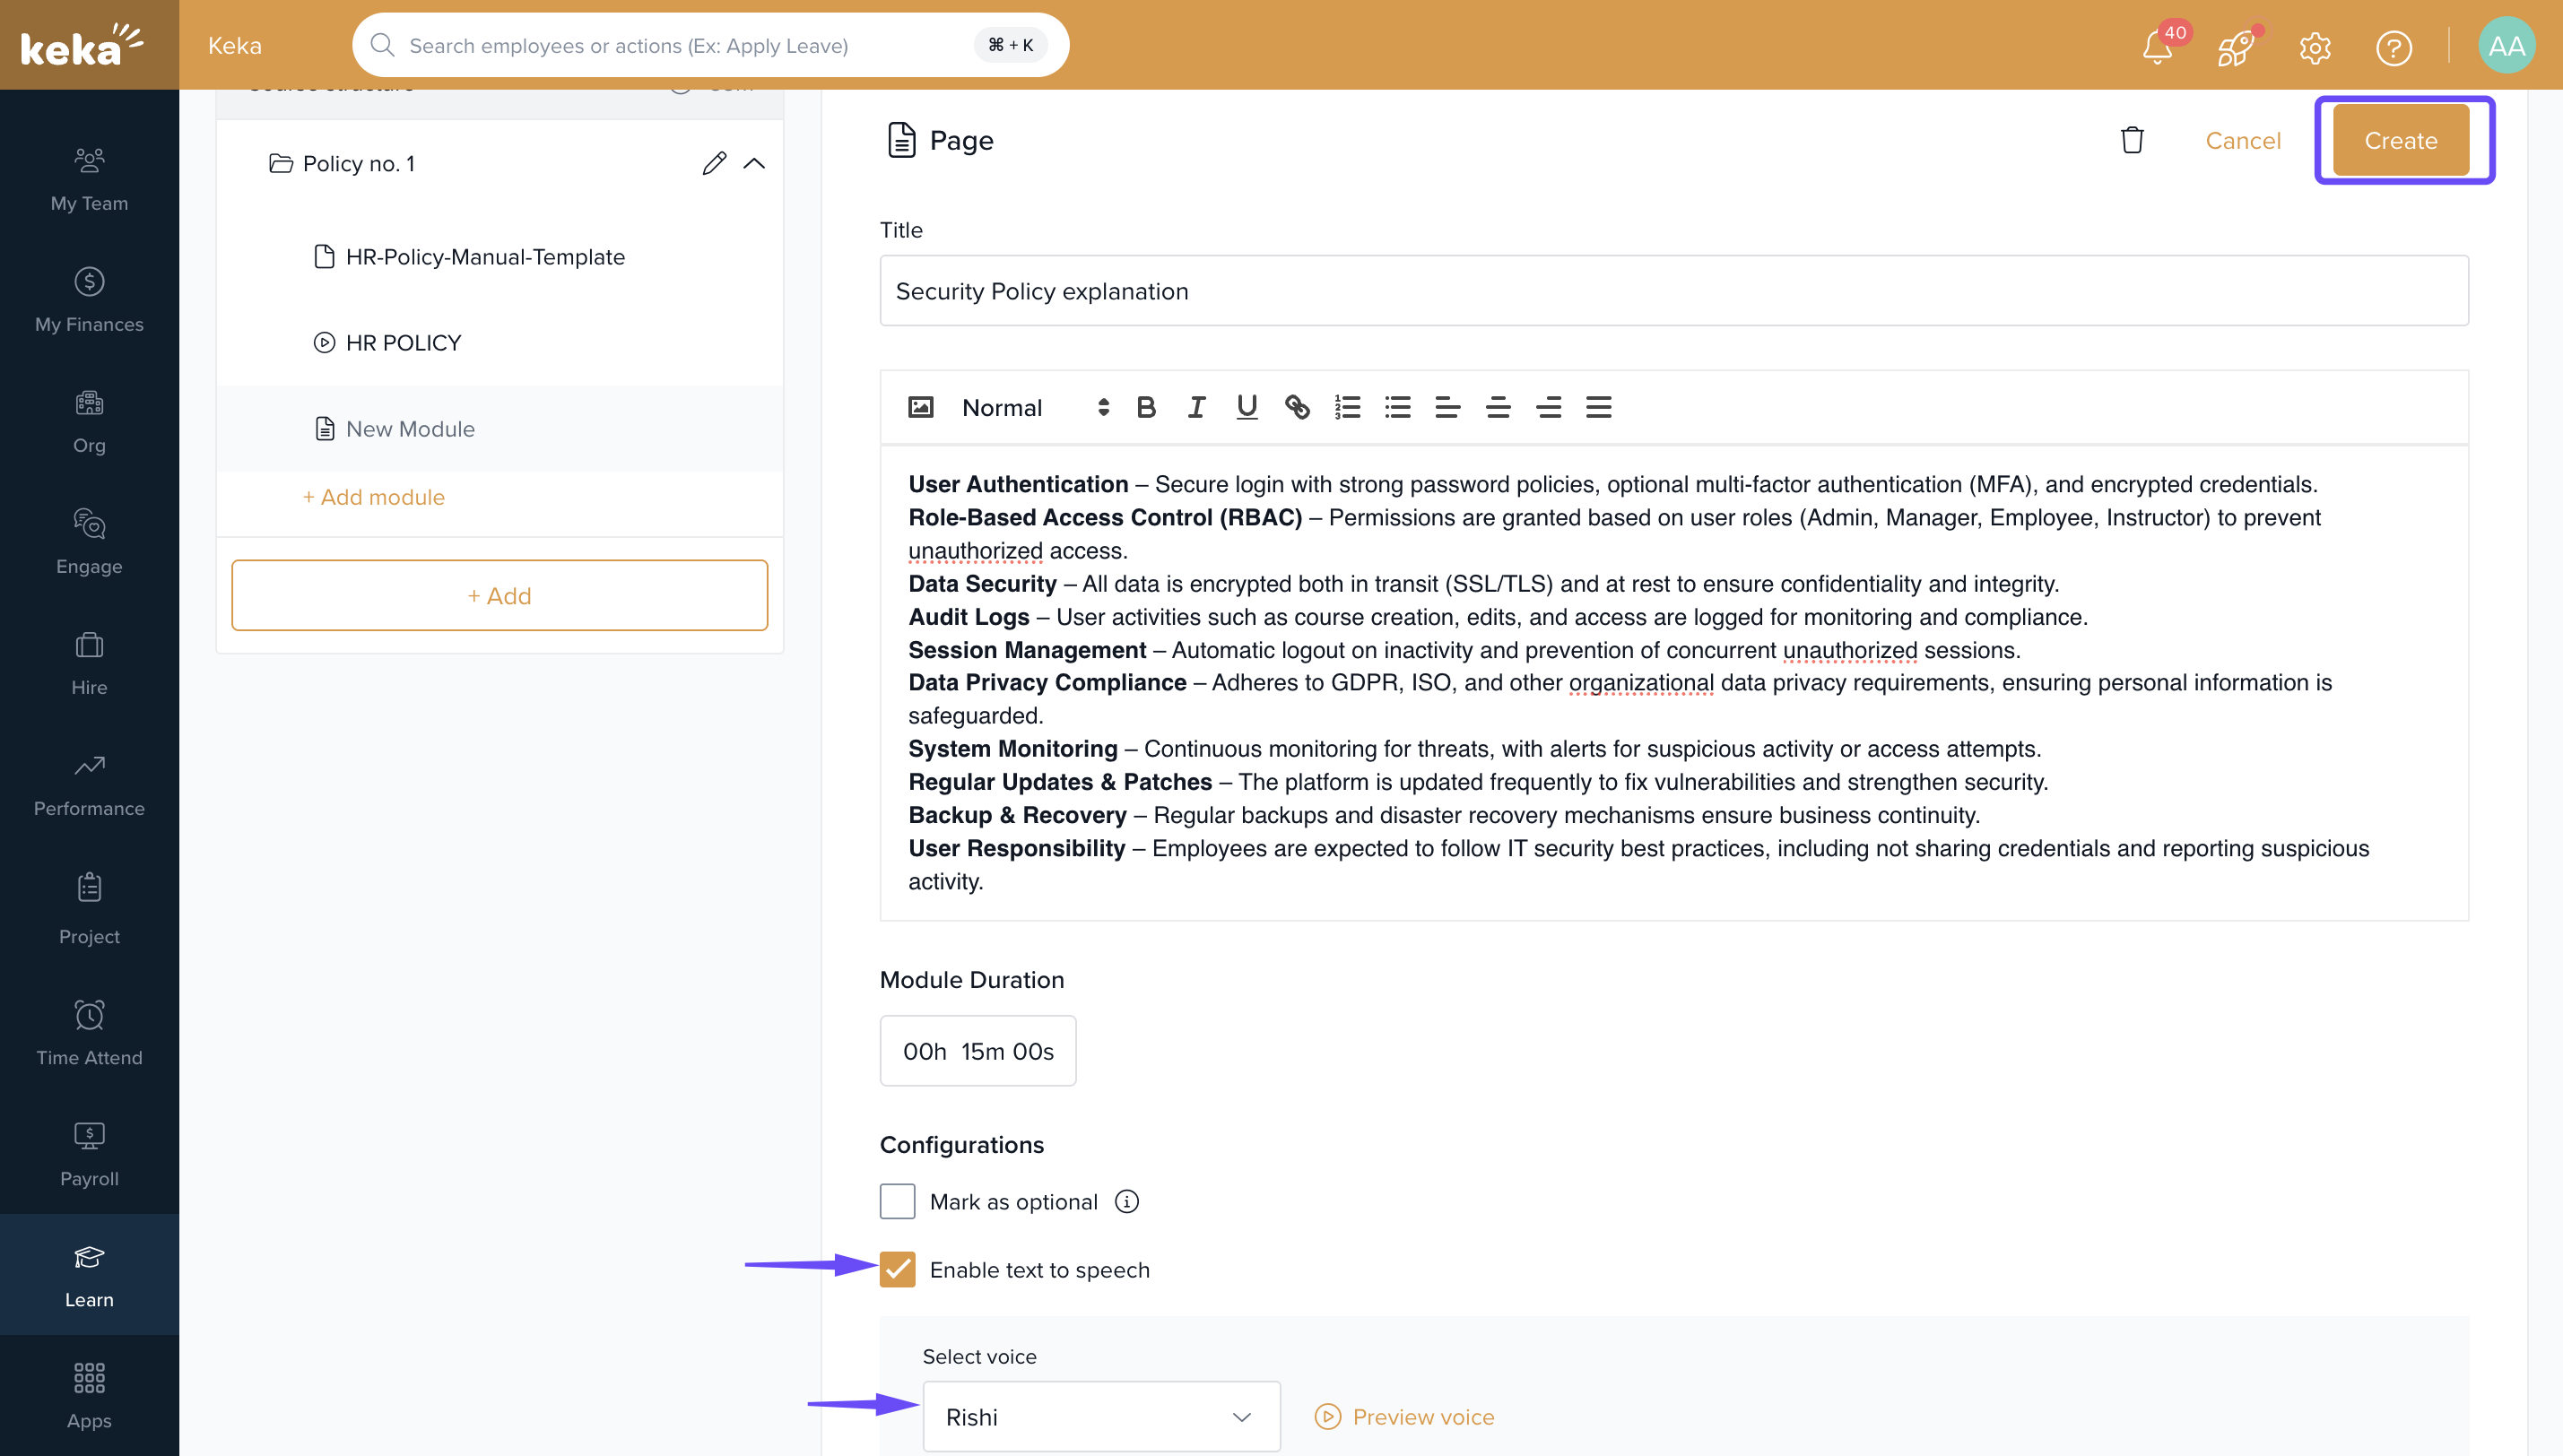
Select the Page content option.
Enter a Title and Content in the text editor.
Set a Content Duration to indicate how long it should take learners to go through the page.
Mark the module as optional if needed .
- Set the minimum duration to ensure that learners do not skip the module.
- You can also enable text-to-speech functionality, allowing learners to listen to the content.
Click Create when finished.
Adding Assessments to Your Course
To add assessment:
Select the Assessment option.
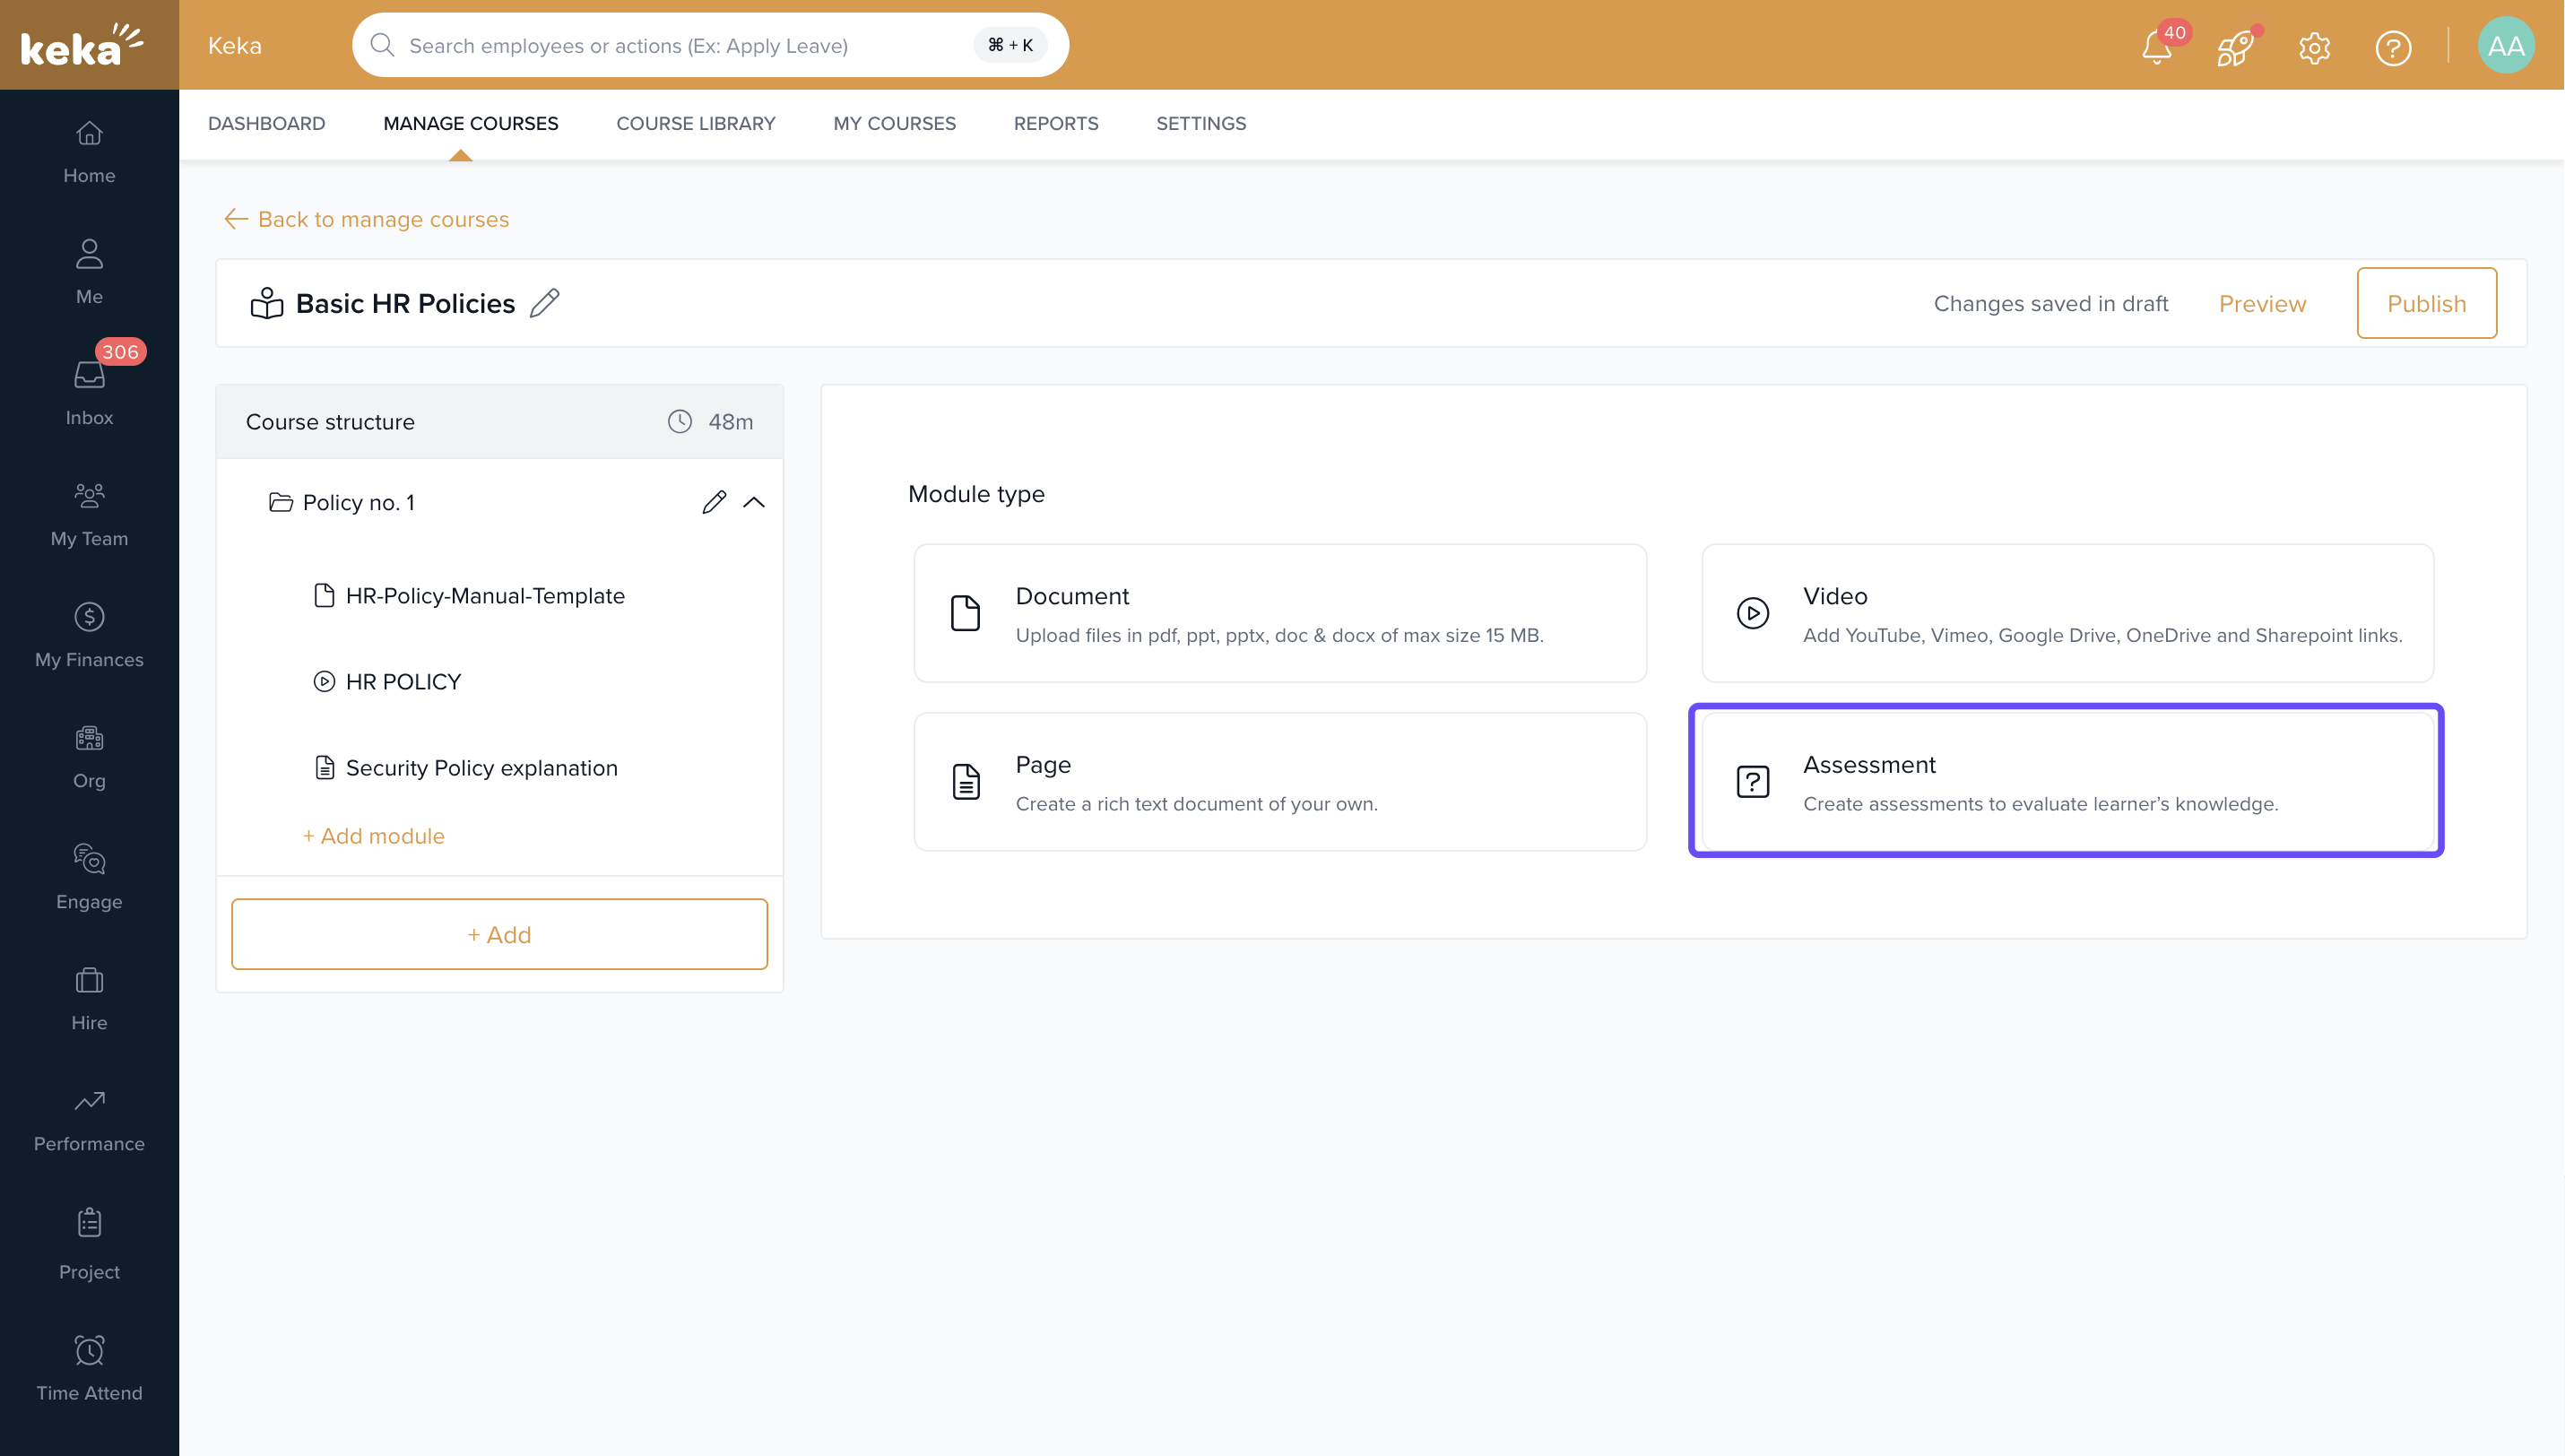
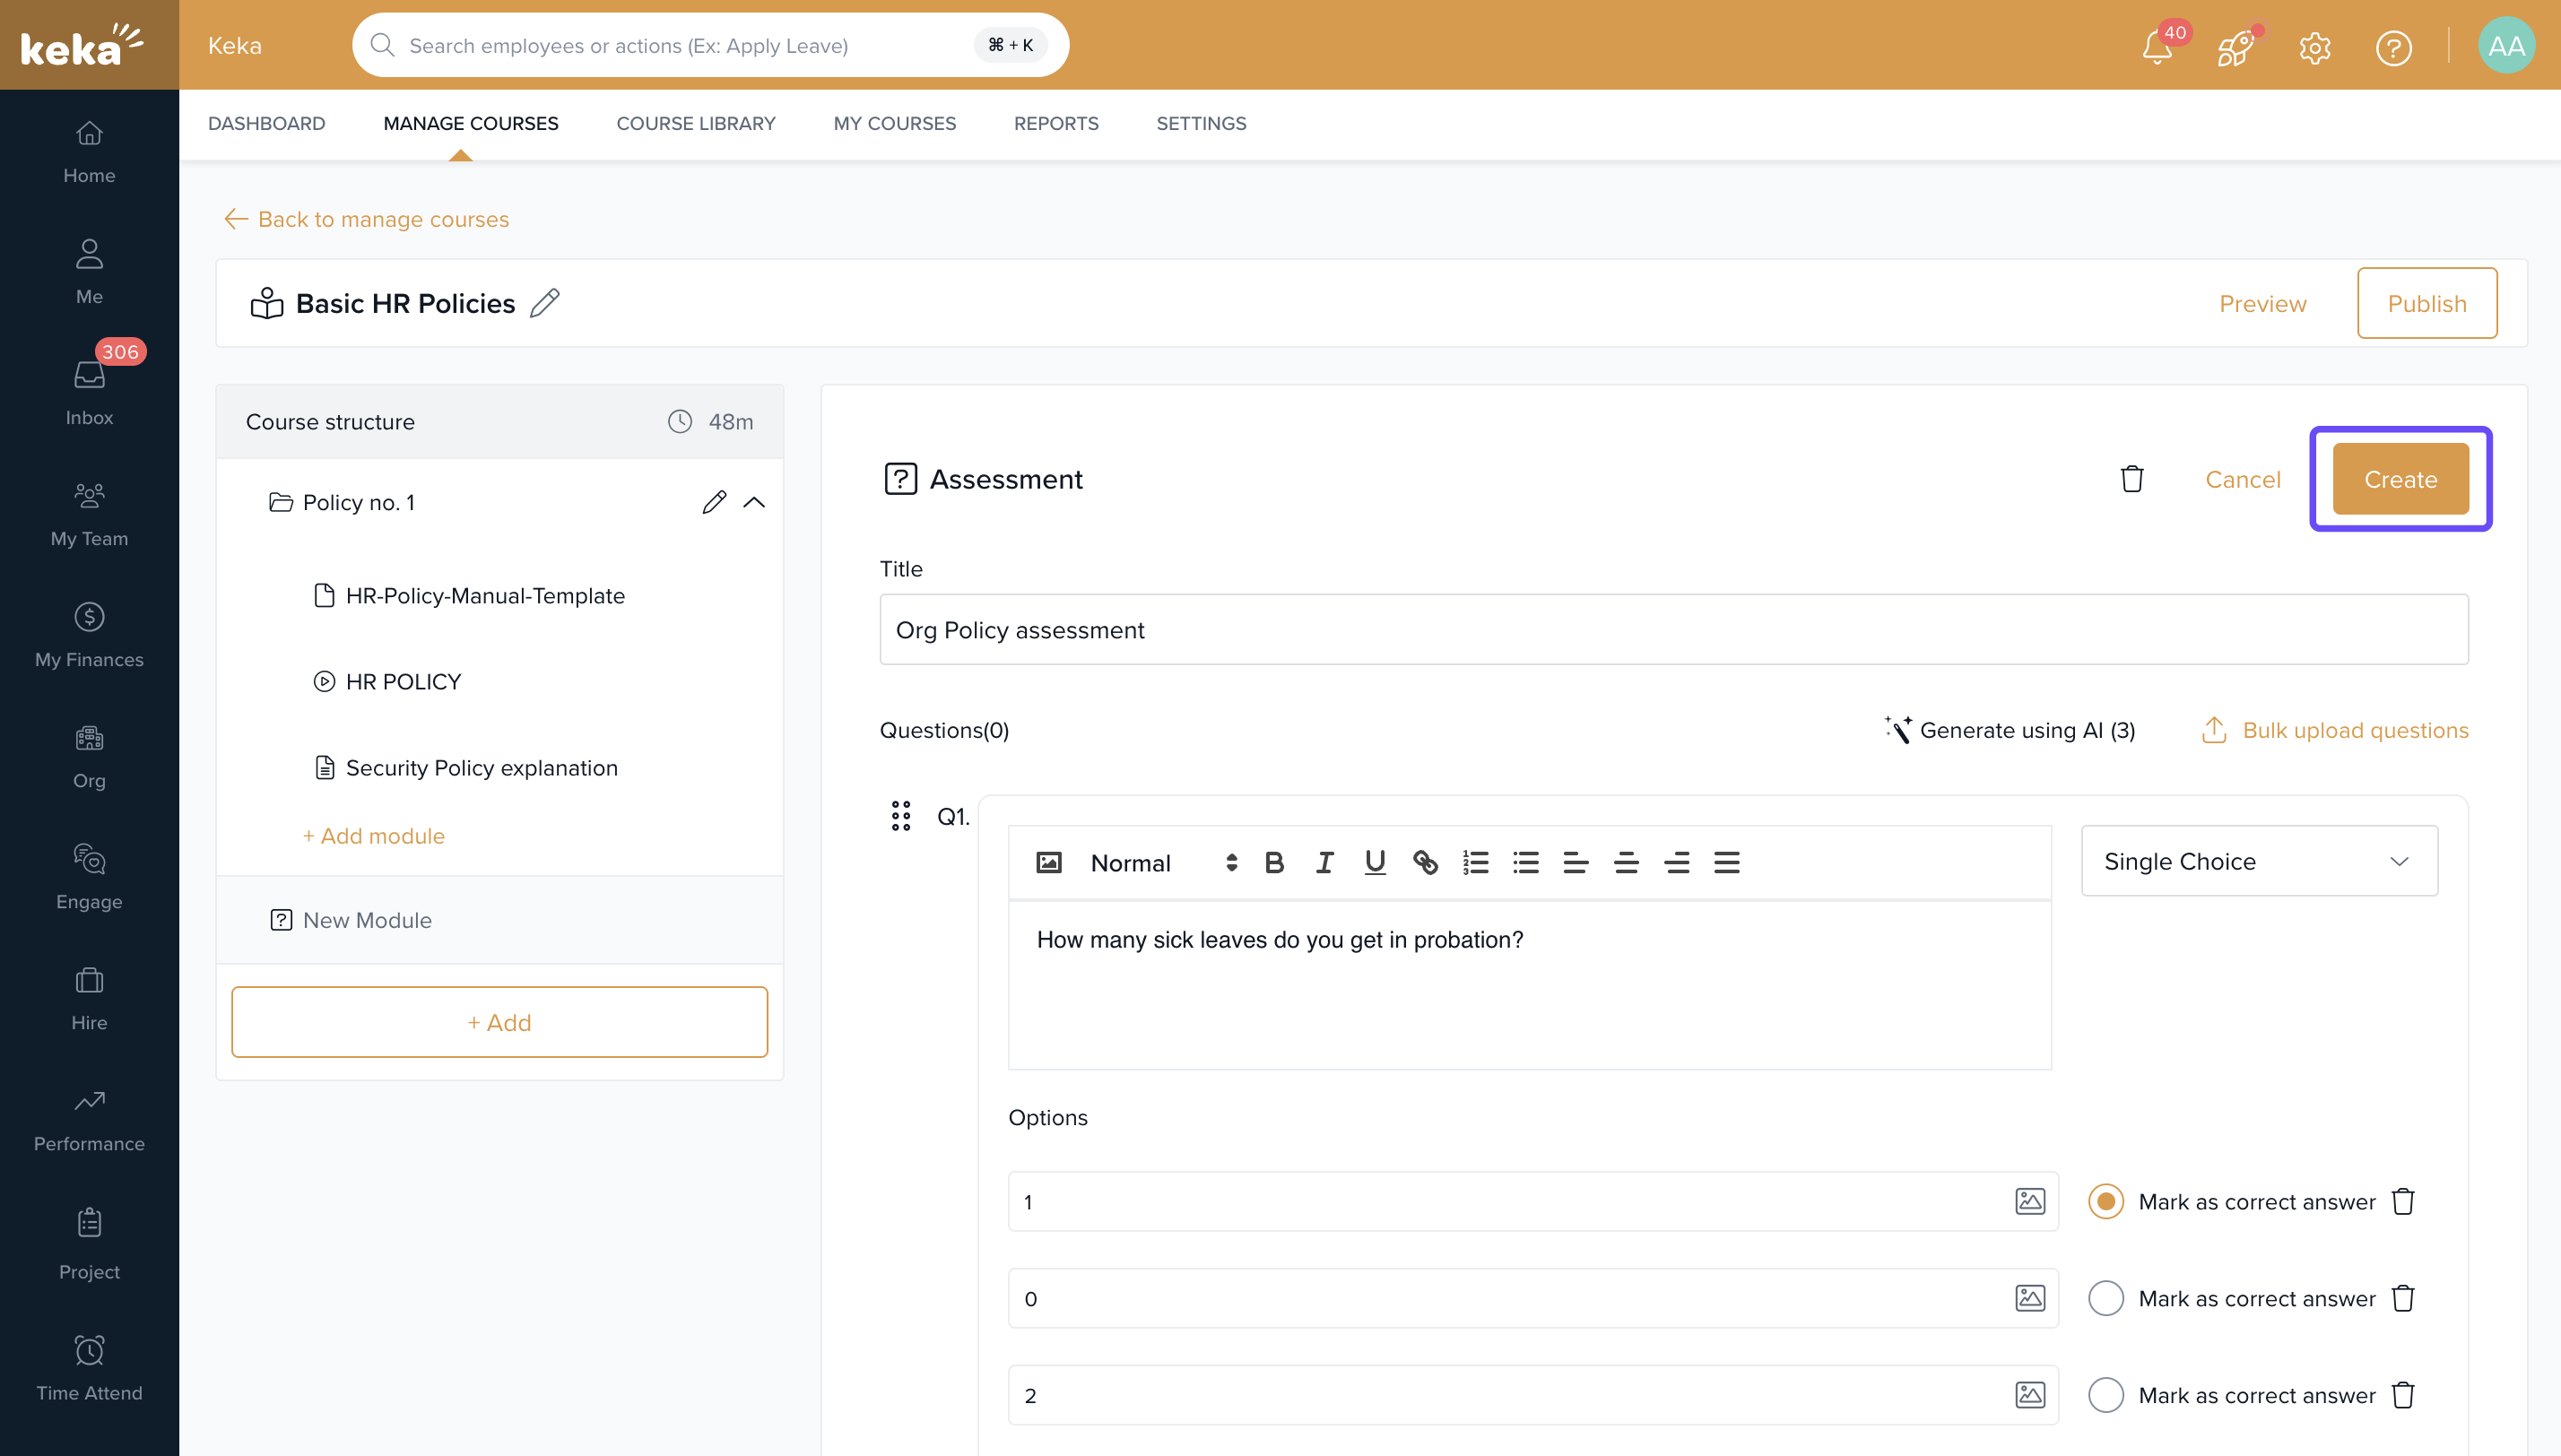
Add a Title for the assessment.
Add questions by typing them into the text box. Choose between single or multiple select answers.
Use the +Add Option hyperlink to add more answer choices.
Mark the correct answer by selecting the radio button next to the correct option.
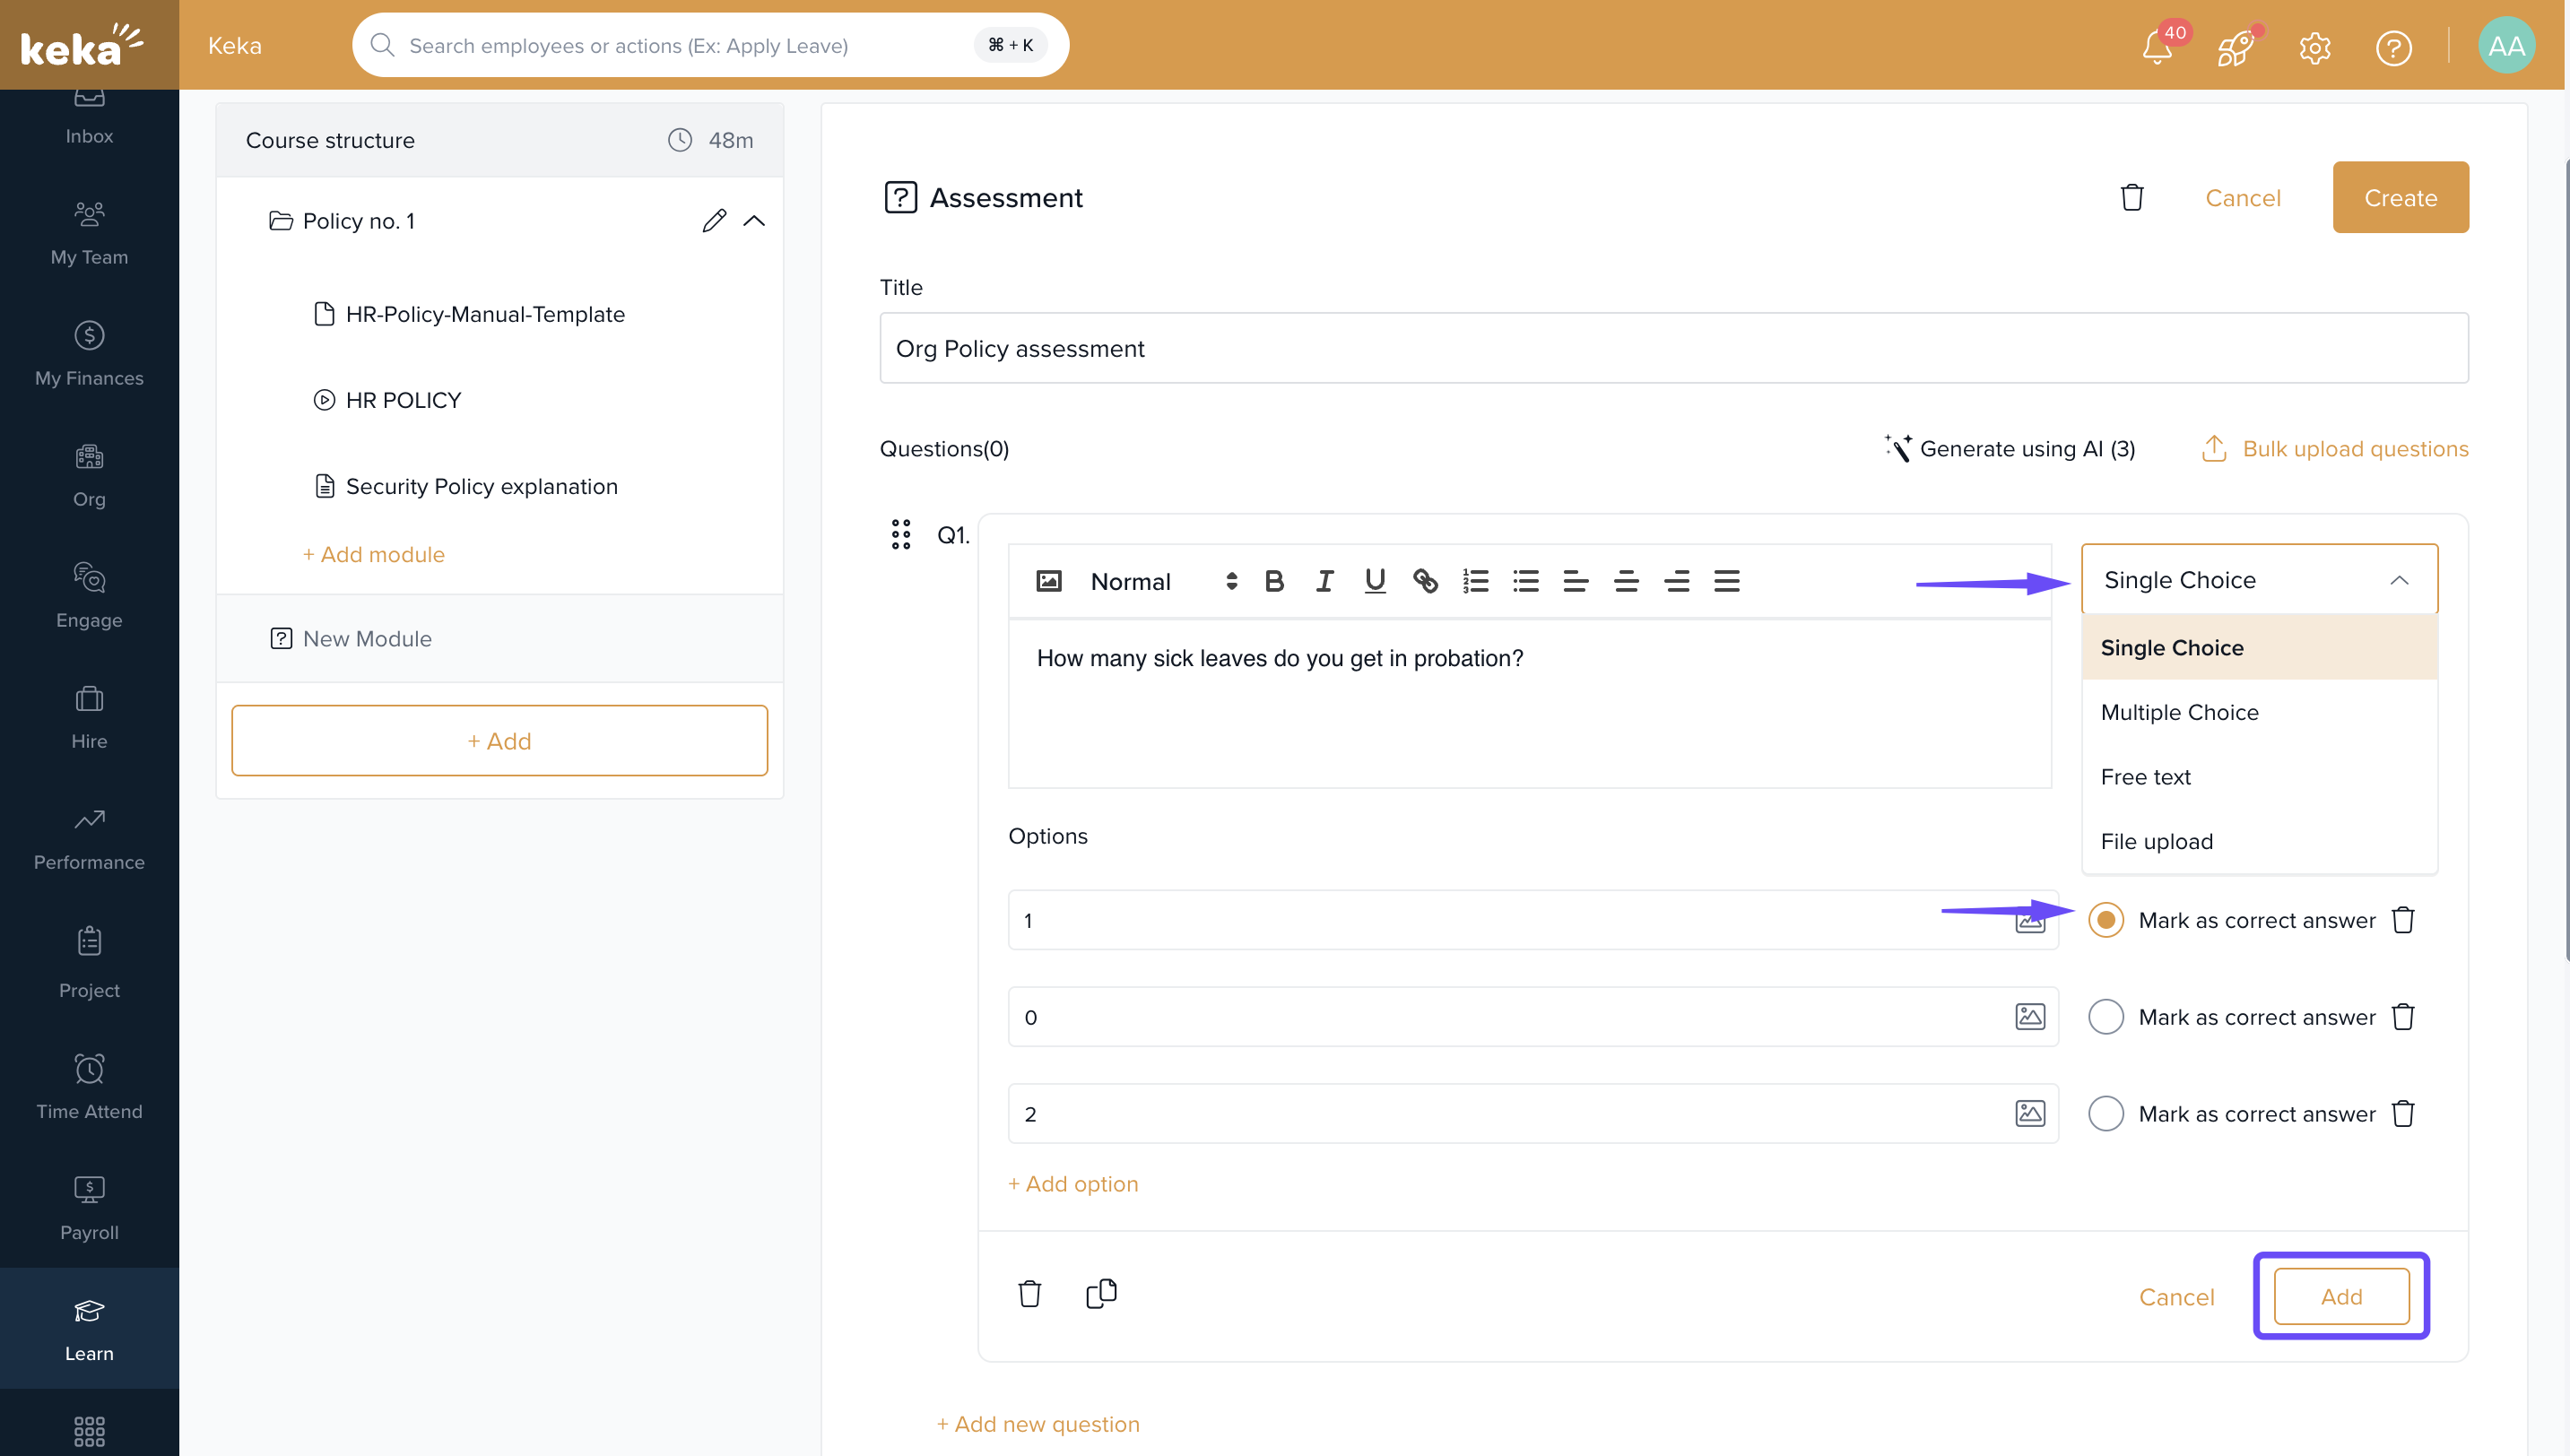
Bulk Uploading Questions
You can also upload questions in bulk by downloading an Excel sheet, filling it out, and uploading it back to the platform.

Assessment Configuration Options:
Disable copy/paste : Prevent learners from copying or pasting content during the assessment.
- Randomize Questions: Change the order of questions for each attempt.
Shuffle Options: Shuffle answer choices.
Enable Score: Enable scoring and define the passing grade.
Enable timer : Define a time limit for the assessment.
-
Disable assessment revisit : Prevent learners from returning to the assessment after submission.
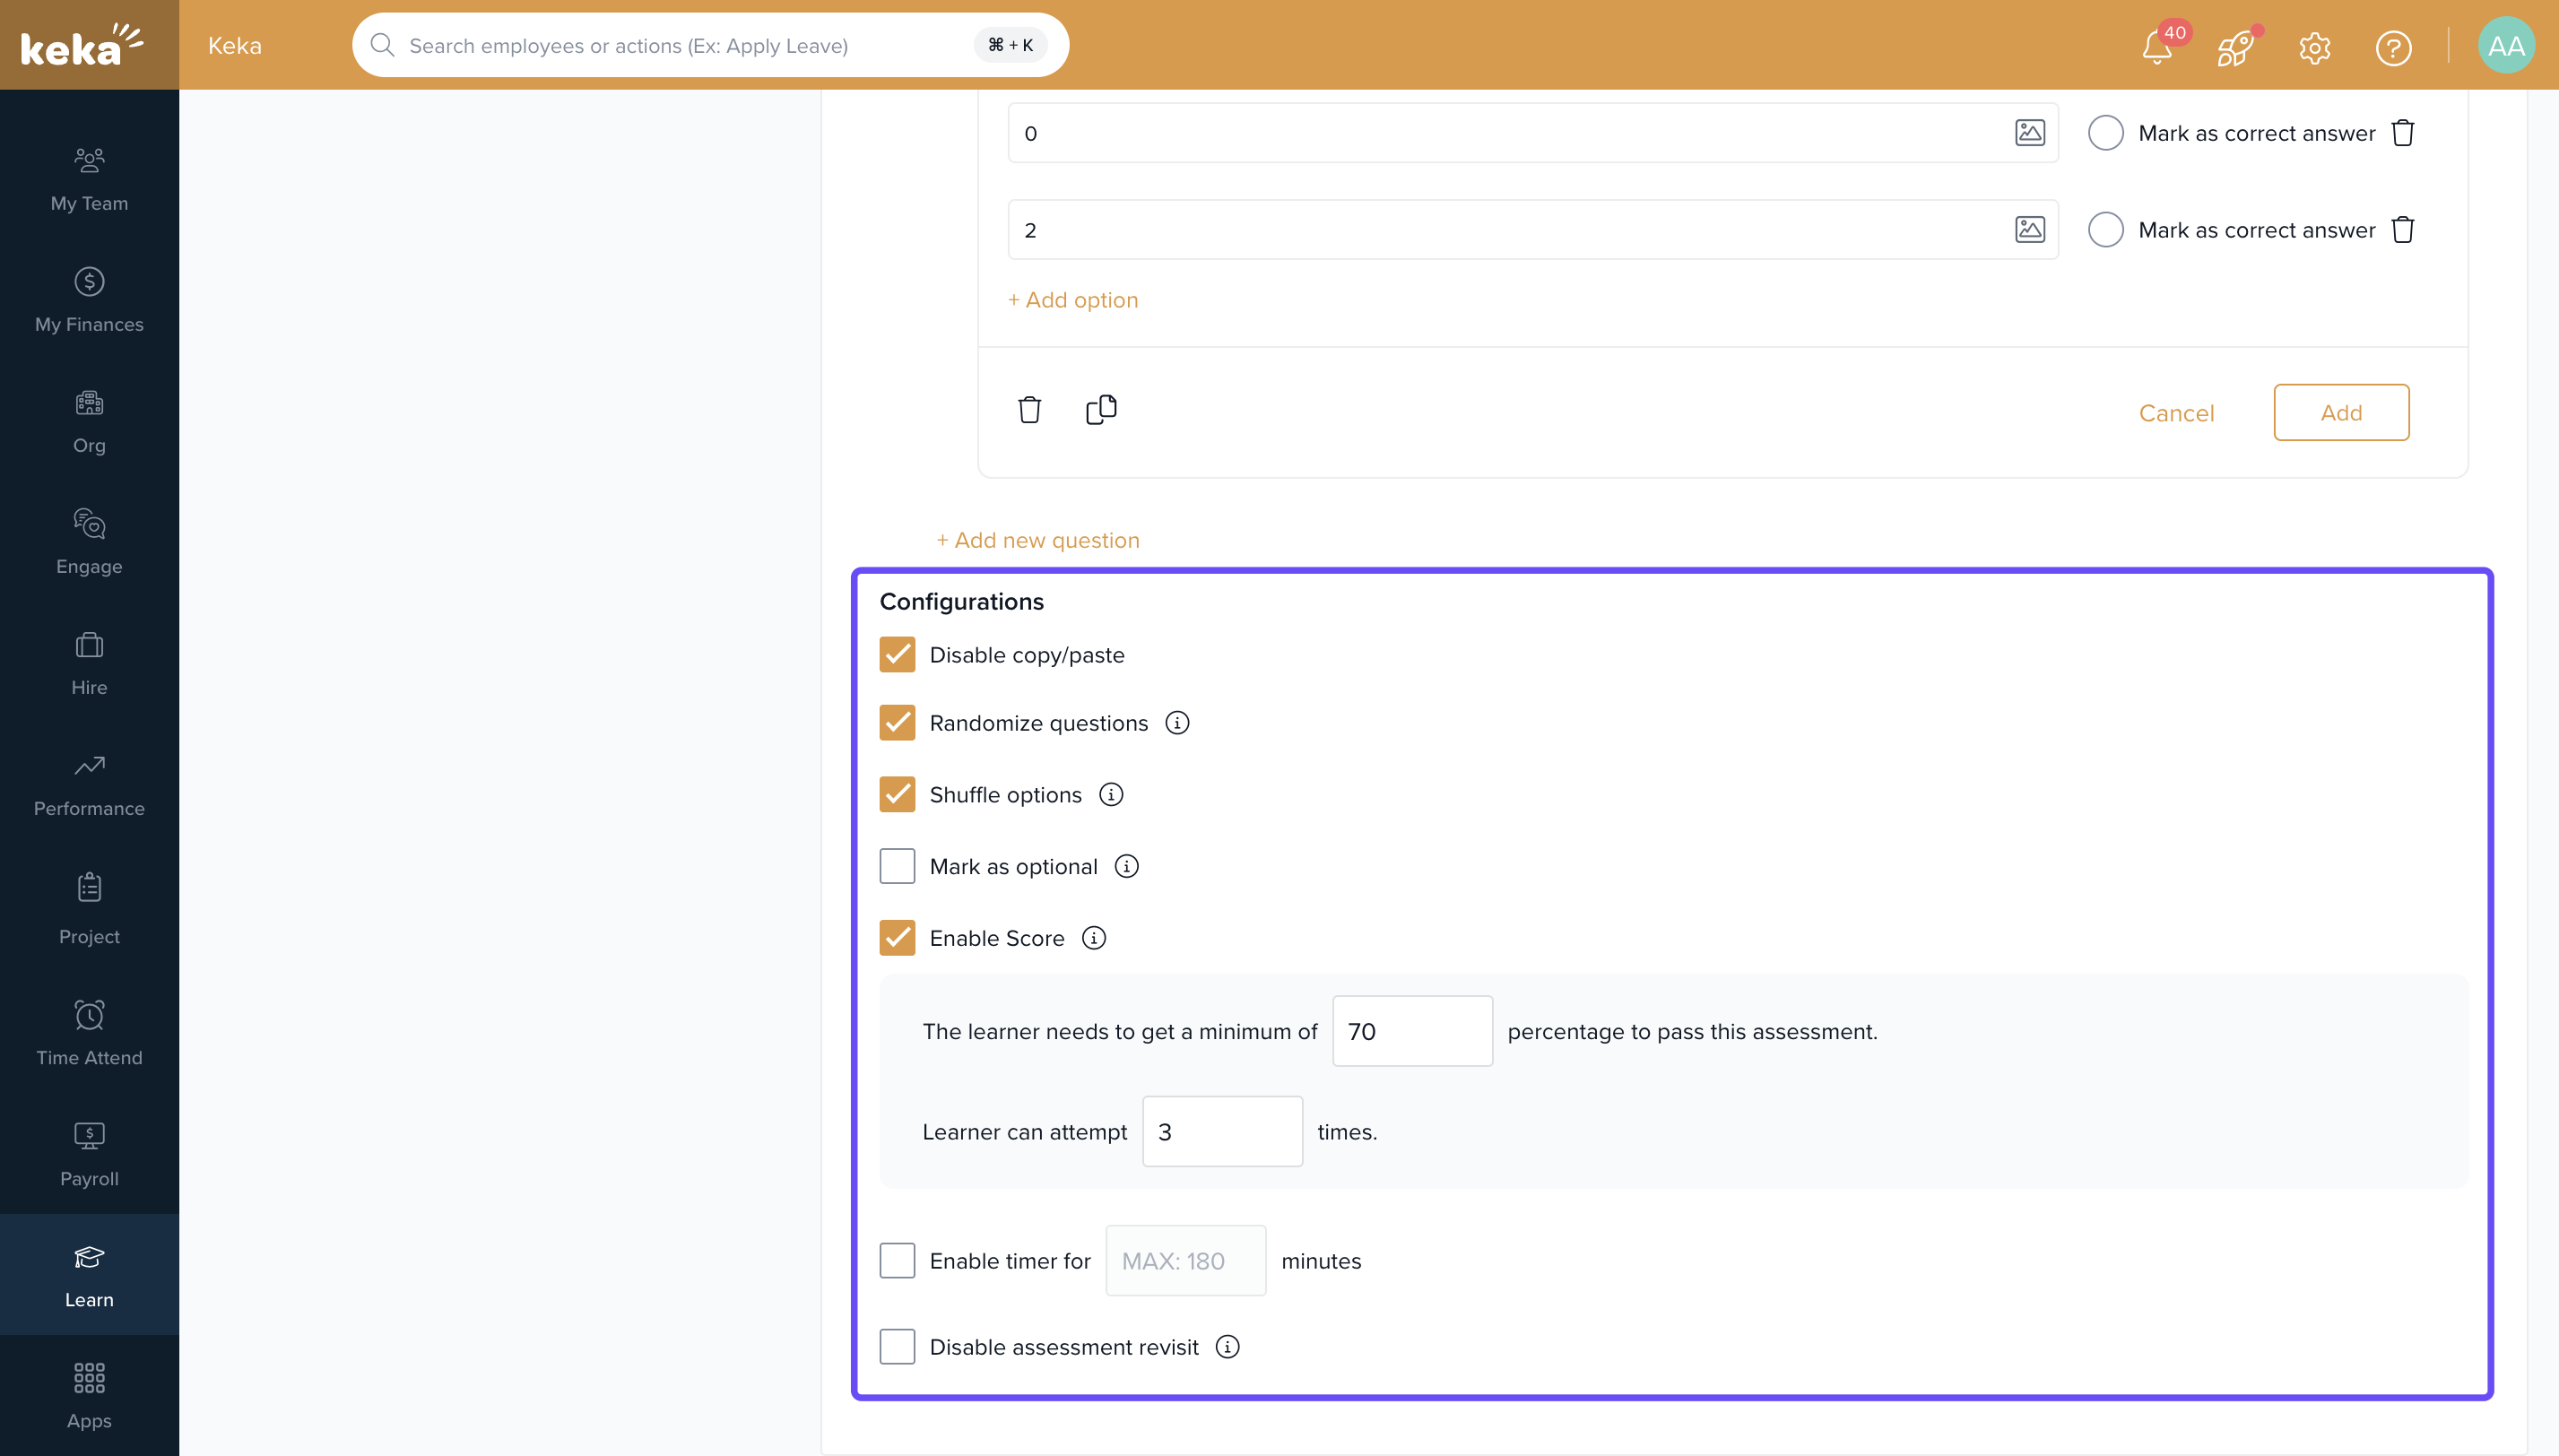
Click Create once your quiz is ready.
Marking Content as Optional
You can mark some content as optional:
Check the Mark as Optional box at the bottom of the content page.
Optional content won’t count towards the course completion. The course completion will still show as 100% even if learners skip optional content.
Note: A course must have at least one mandatory lesson.
Saving and Publishing Your Course
Once you’ve added all content, you can either preview or publish your course:
Click Preview to see how the course will appear to learners.
Once satisfied, click Publish to make the course live.
You can also add skills, categories, and set the course duration.
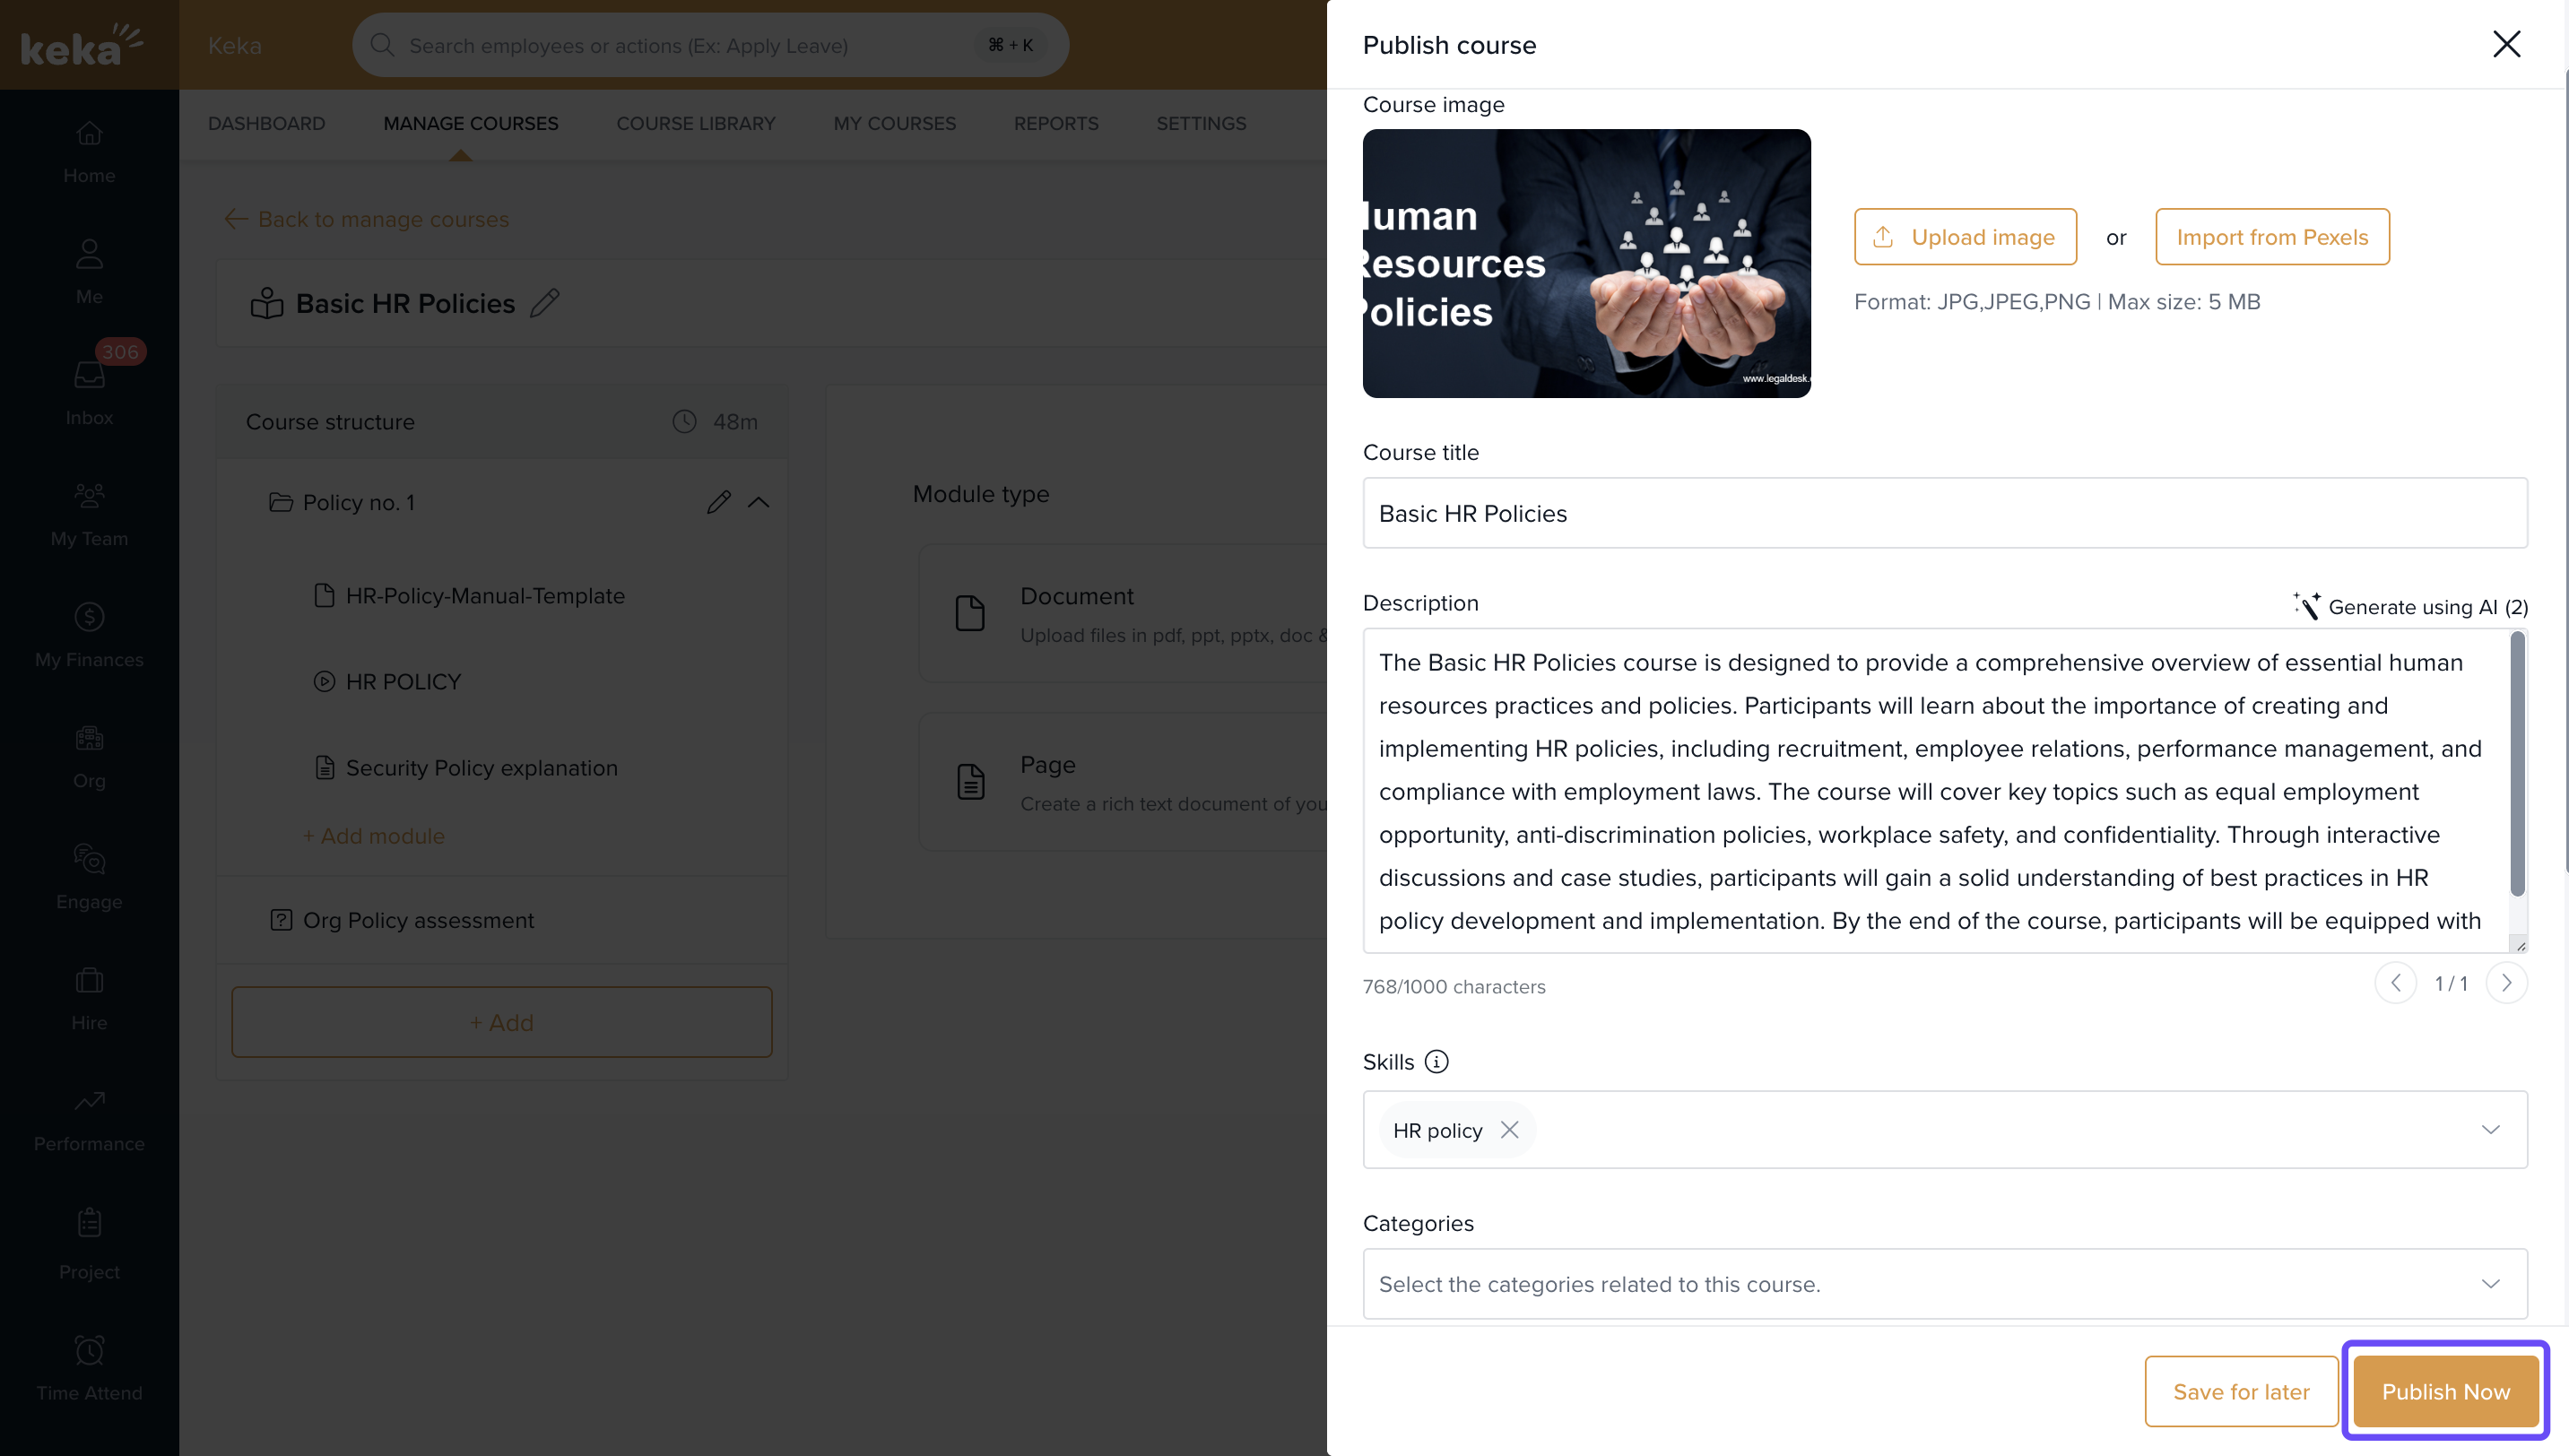
Add a course manager who can manage enrollments , evaluations and reminds related to the course.
Set the course visibility and advance settings accordingly.
Enable course reassignment and set the duration to reassign learners repeatedly on specified intervals.
Choose Save for Later to save the course as a draft or Publish Now to make it available immediately.
Note : Whenever a new course is published, eligible learners will be notified via app notifications or email.
Comments
0 comments
Please sign in to leave a comment.