Introduction
Organizations often offer employees the option to get a loan from the organization for their personal needs. On the Keka HR Portal, you can define loan policies and categories that determine how the various loan options work, how the employee can apply for a loan and how the approval and repayment work.
Table of Contents :
Configuring loan categories
You have the option to define various loan categories that can help you define the different types of loans that you can offer to employees. Let us look at how you can define various loan categories.
1. Go to Payroll → Loans tab → Policies & Settings → Loan Categories.
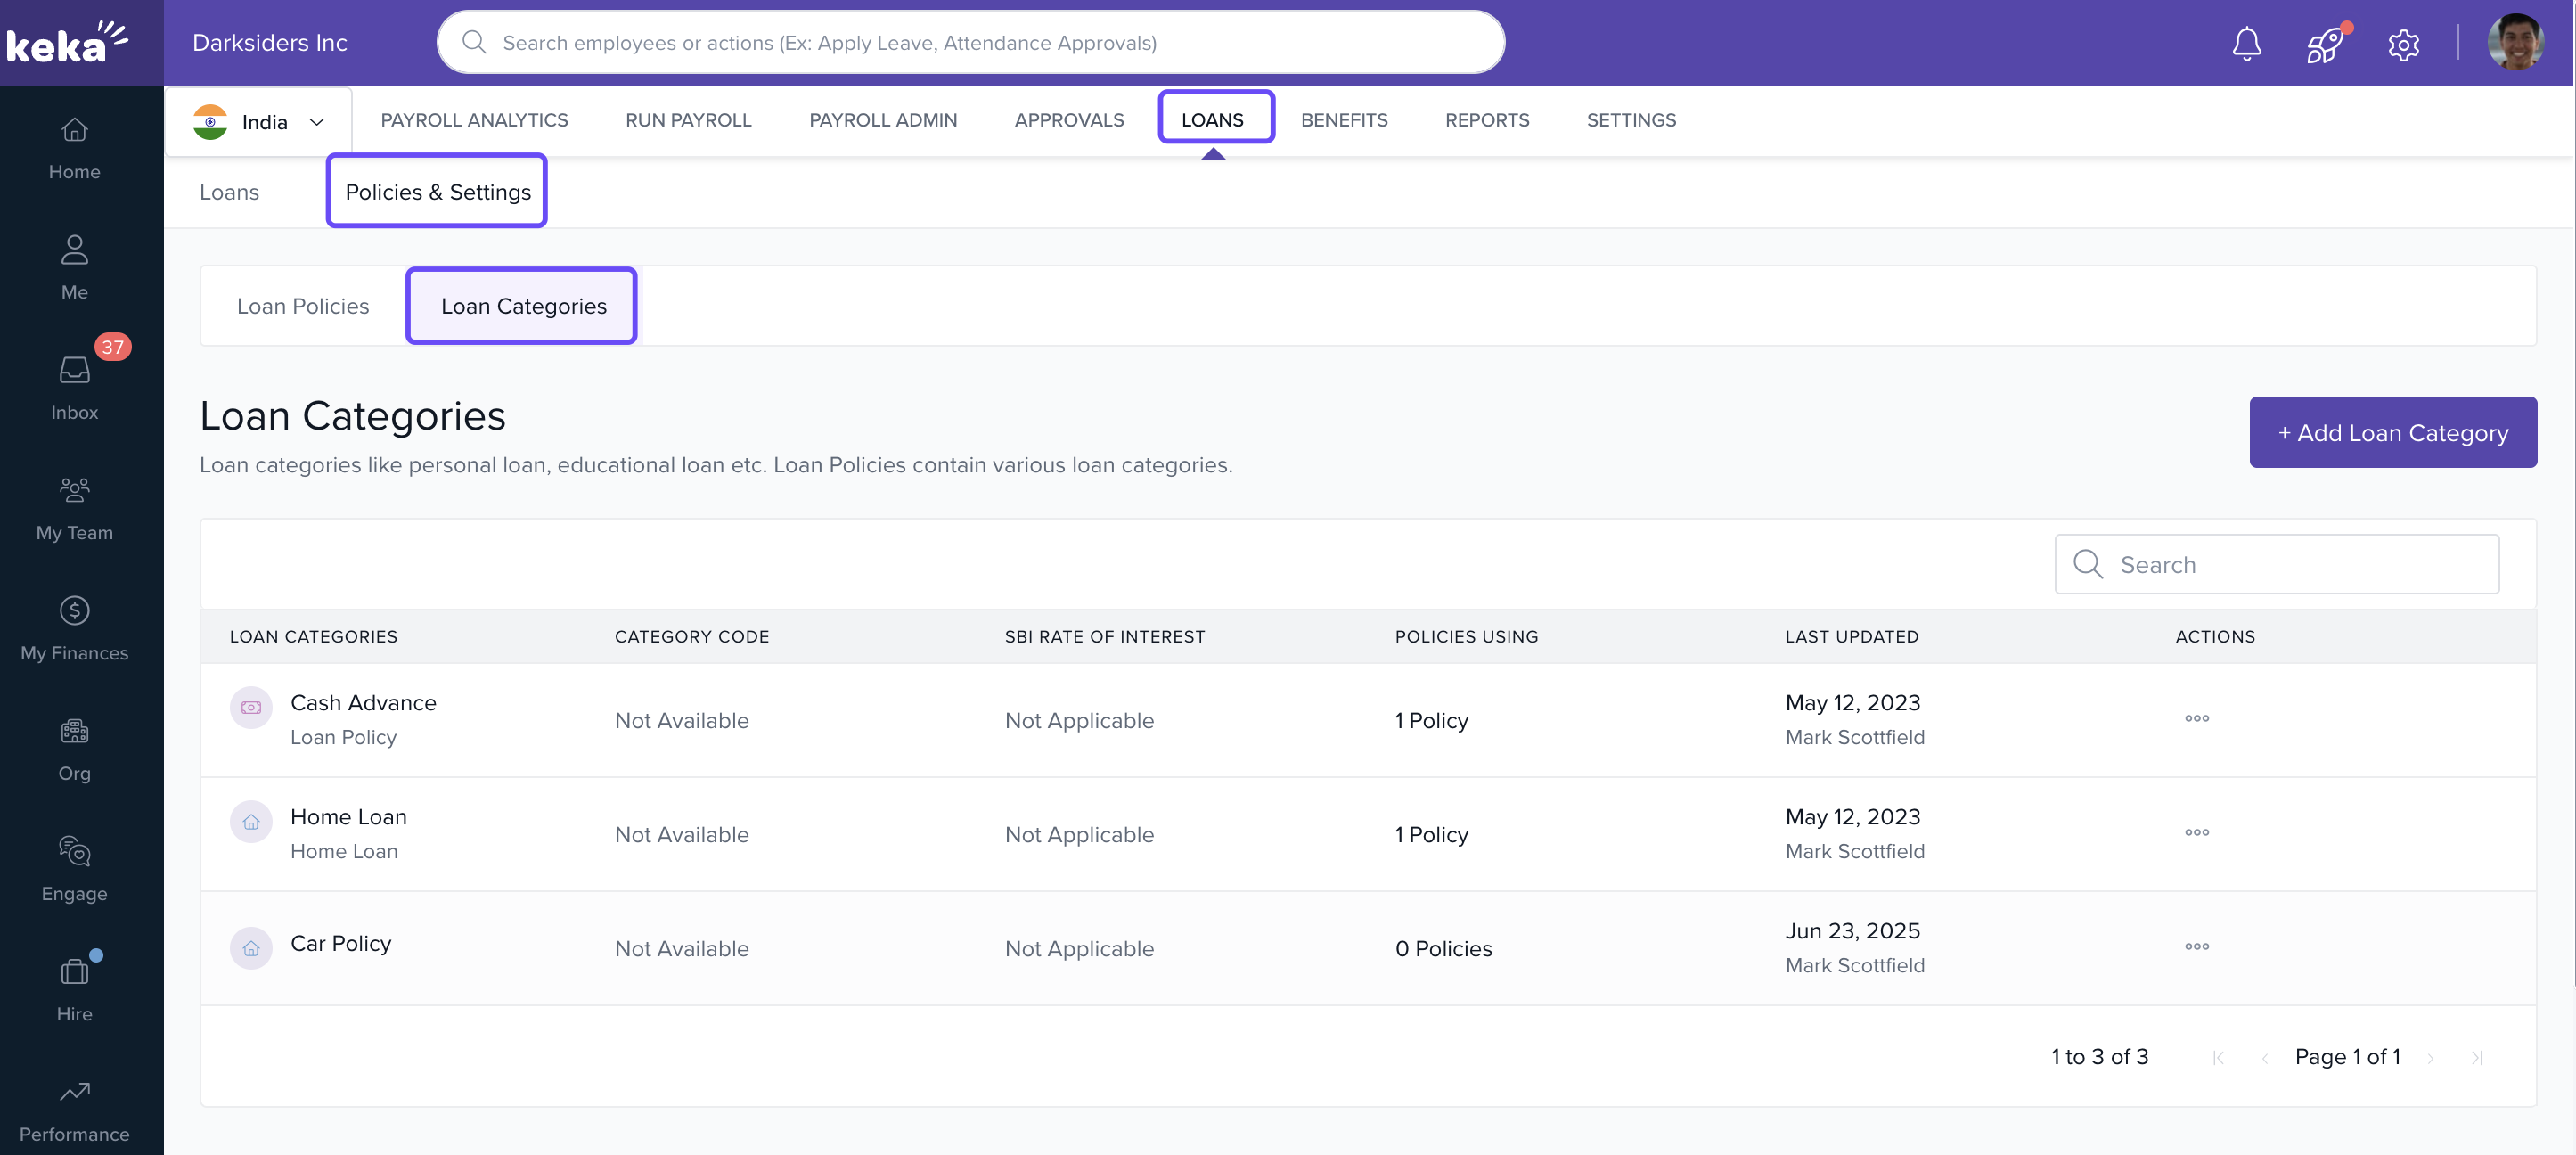
2. To add a new category, click Add Loan Category.

3. Enter Category Name, pick an Icon, Colour, and write a Description.
4. Optionally select Show Loan Description While Applying Loan so employees can see descriptions during application.
5. If the loan is interest‑free or concessional, select Consider for taxability under interest free/concessional loan prerequisite. Then:
- Enter the rate of interest that a similar loan from SBI (State Bank of India) charges.
- Set the year from which that rate applies.
6. Click Save.

7. To delete a loan category, find it in the list, click the three‑dots for that row → Delete, then confirm.
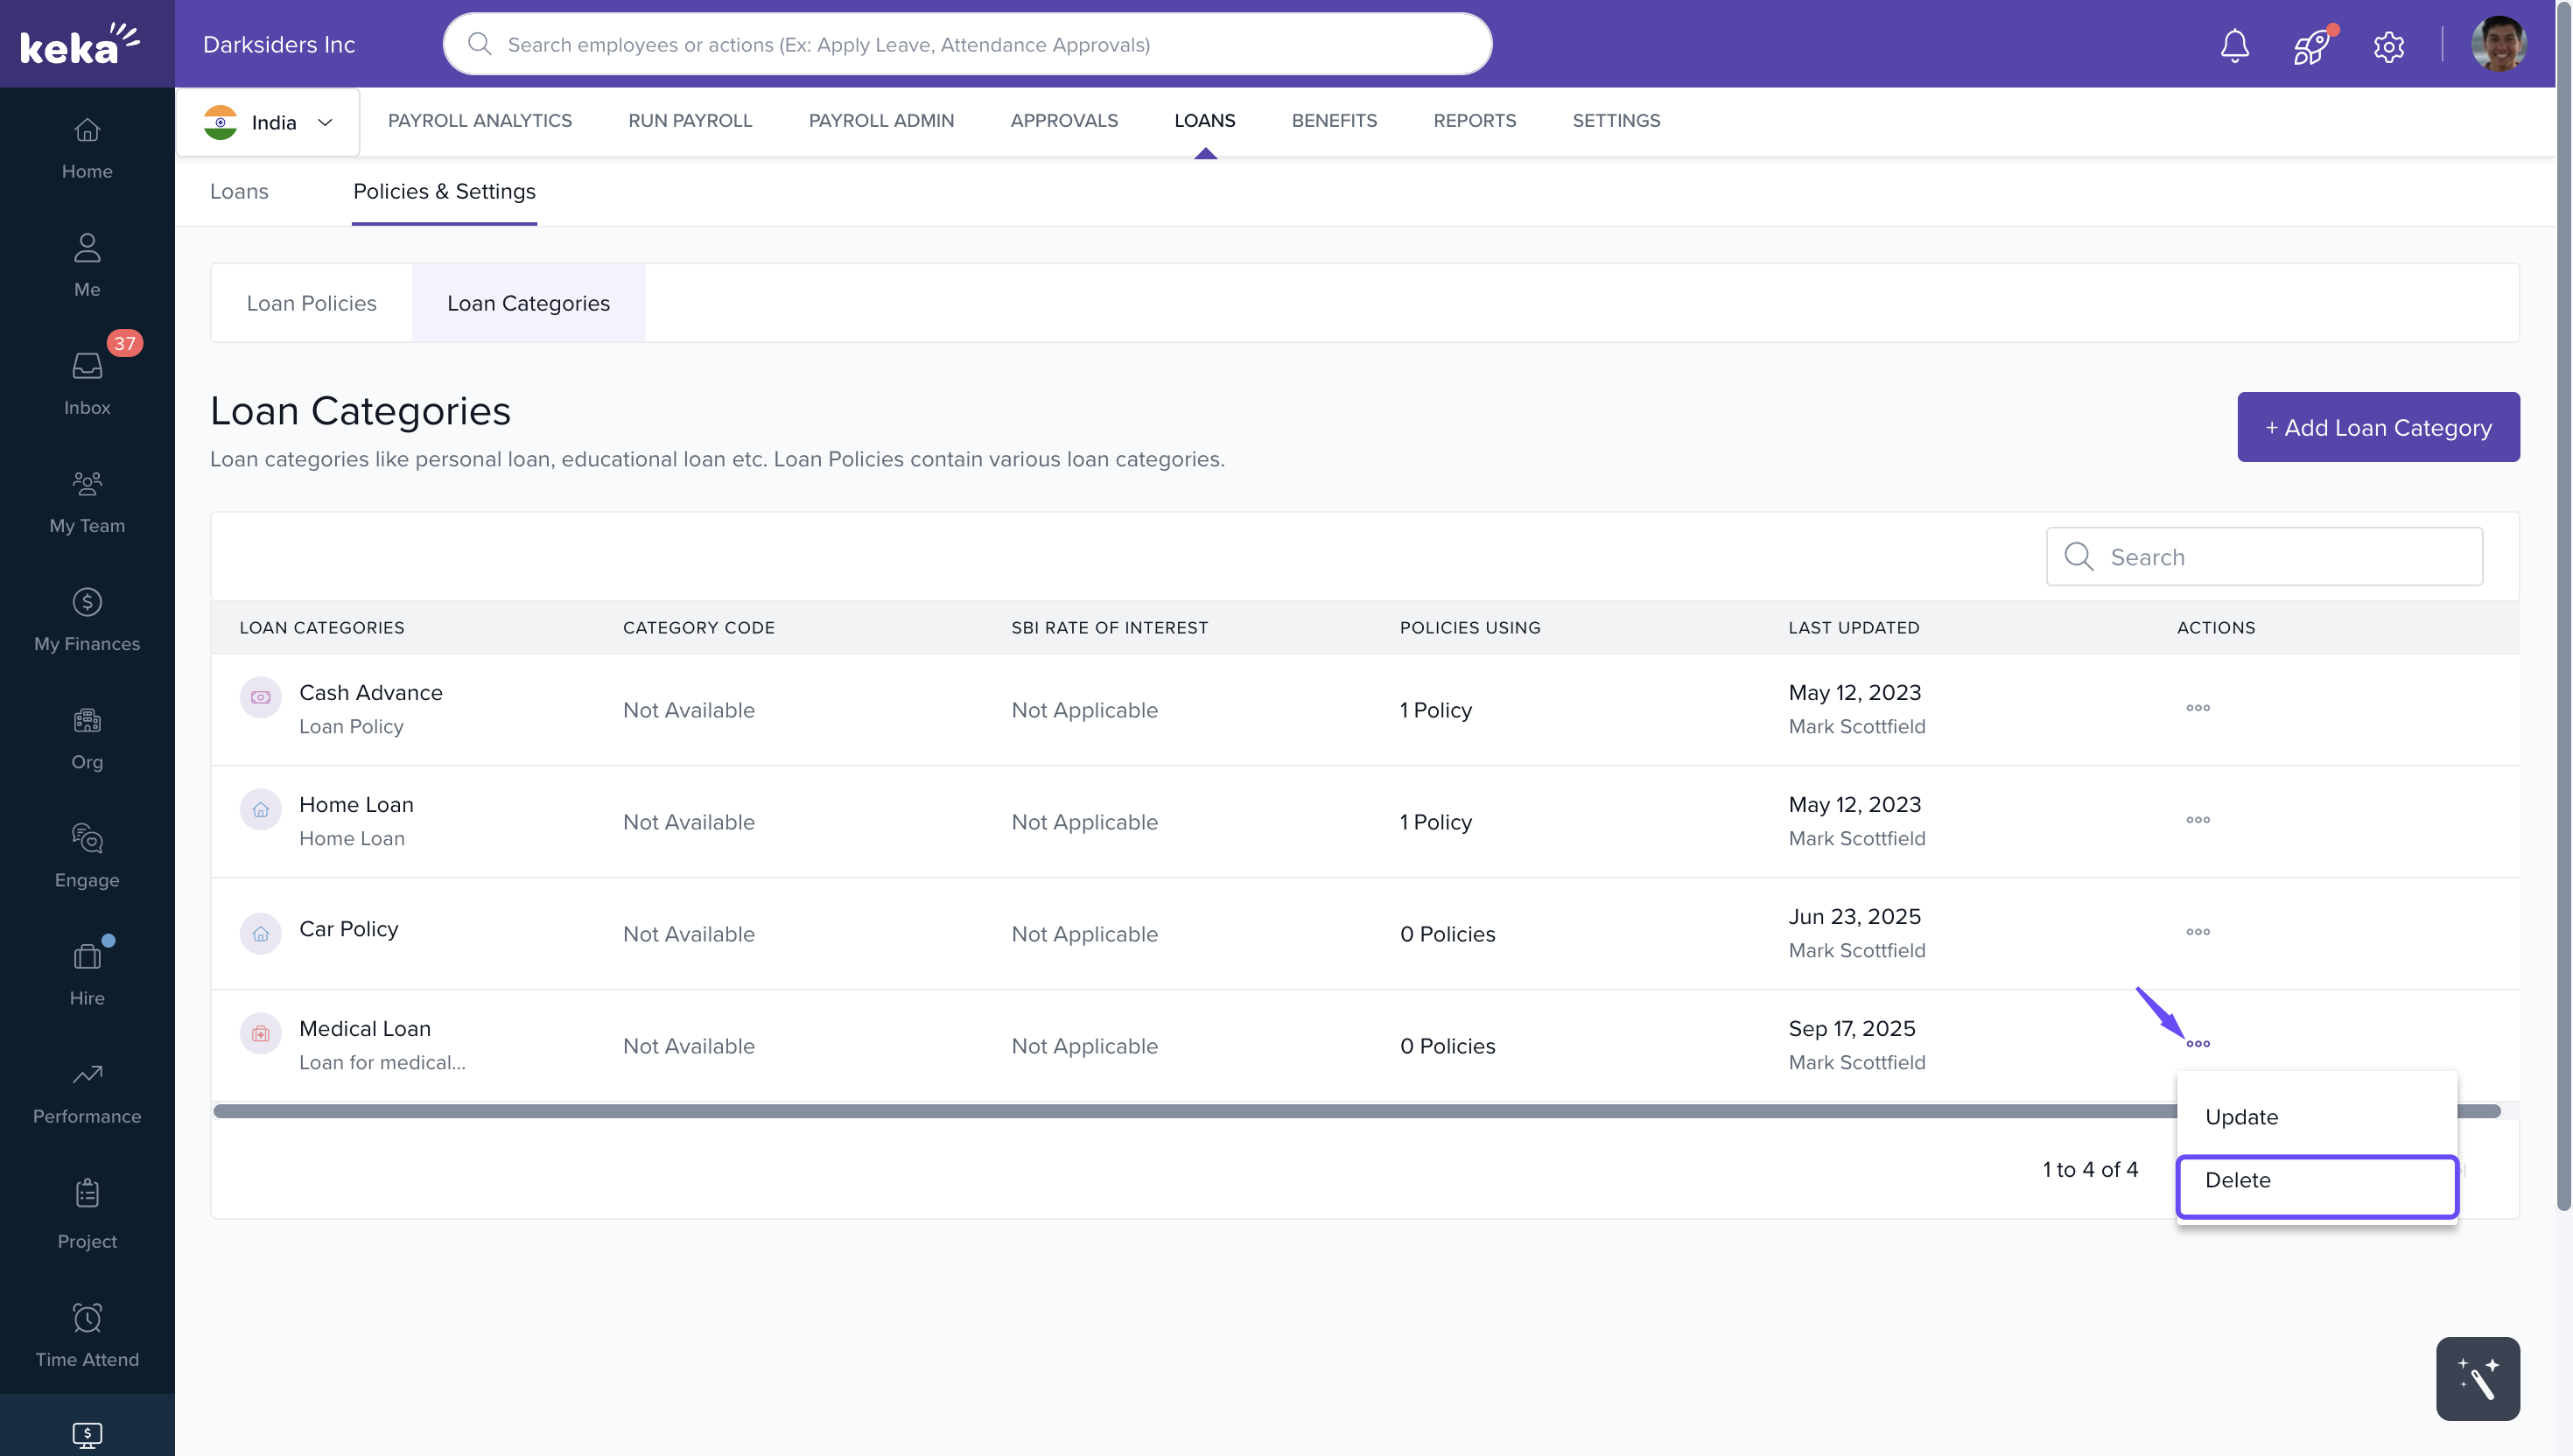
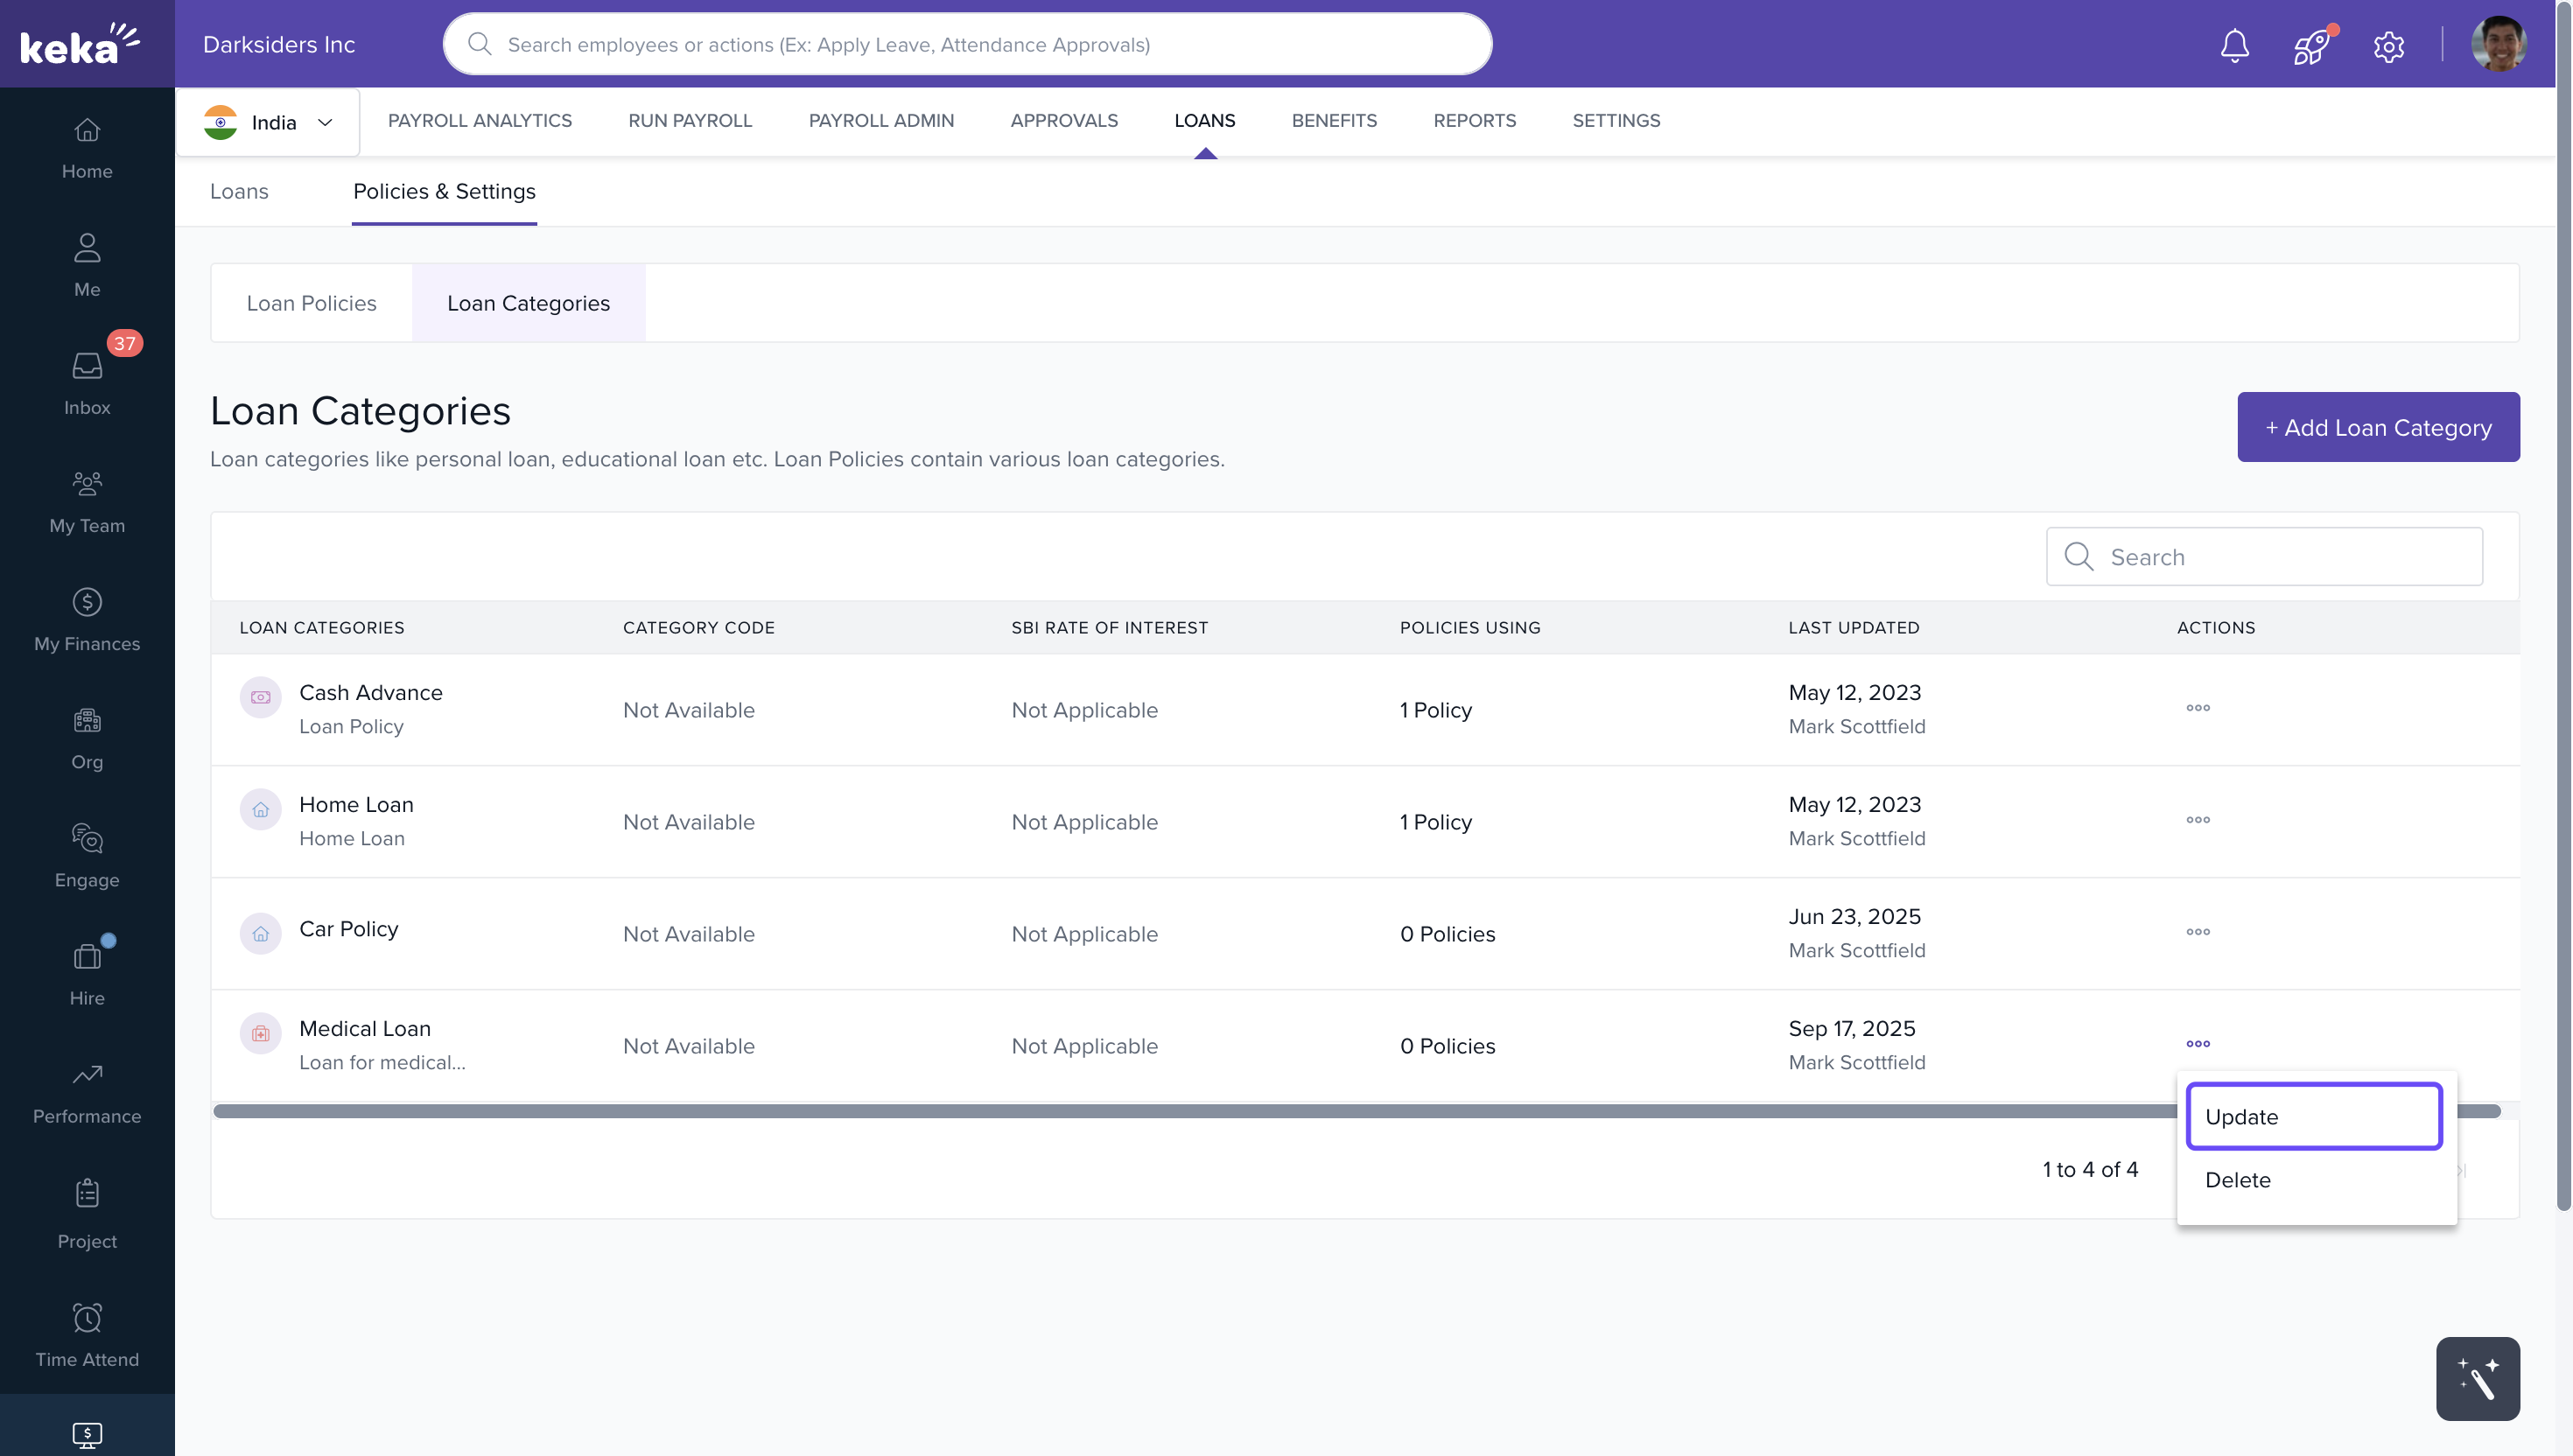
8. To edit a category, use the three‑dots → Update, make changes, then Update again.
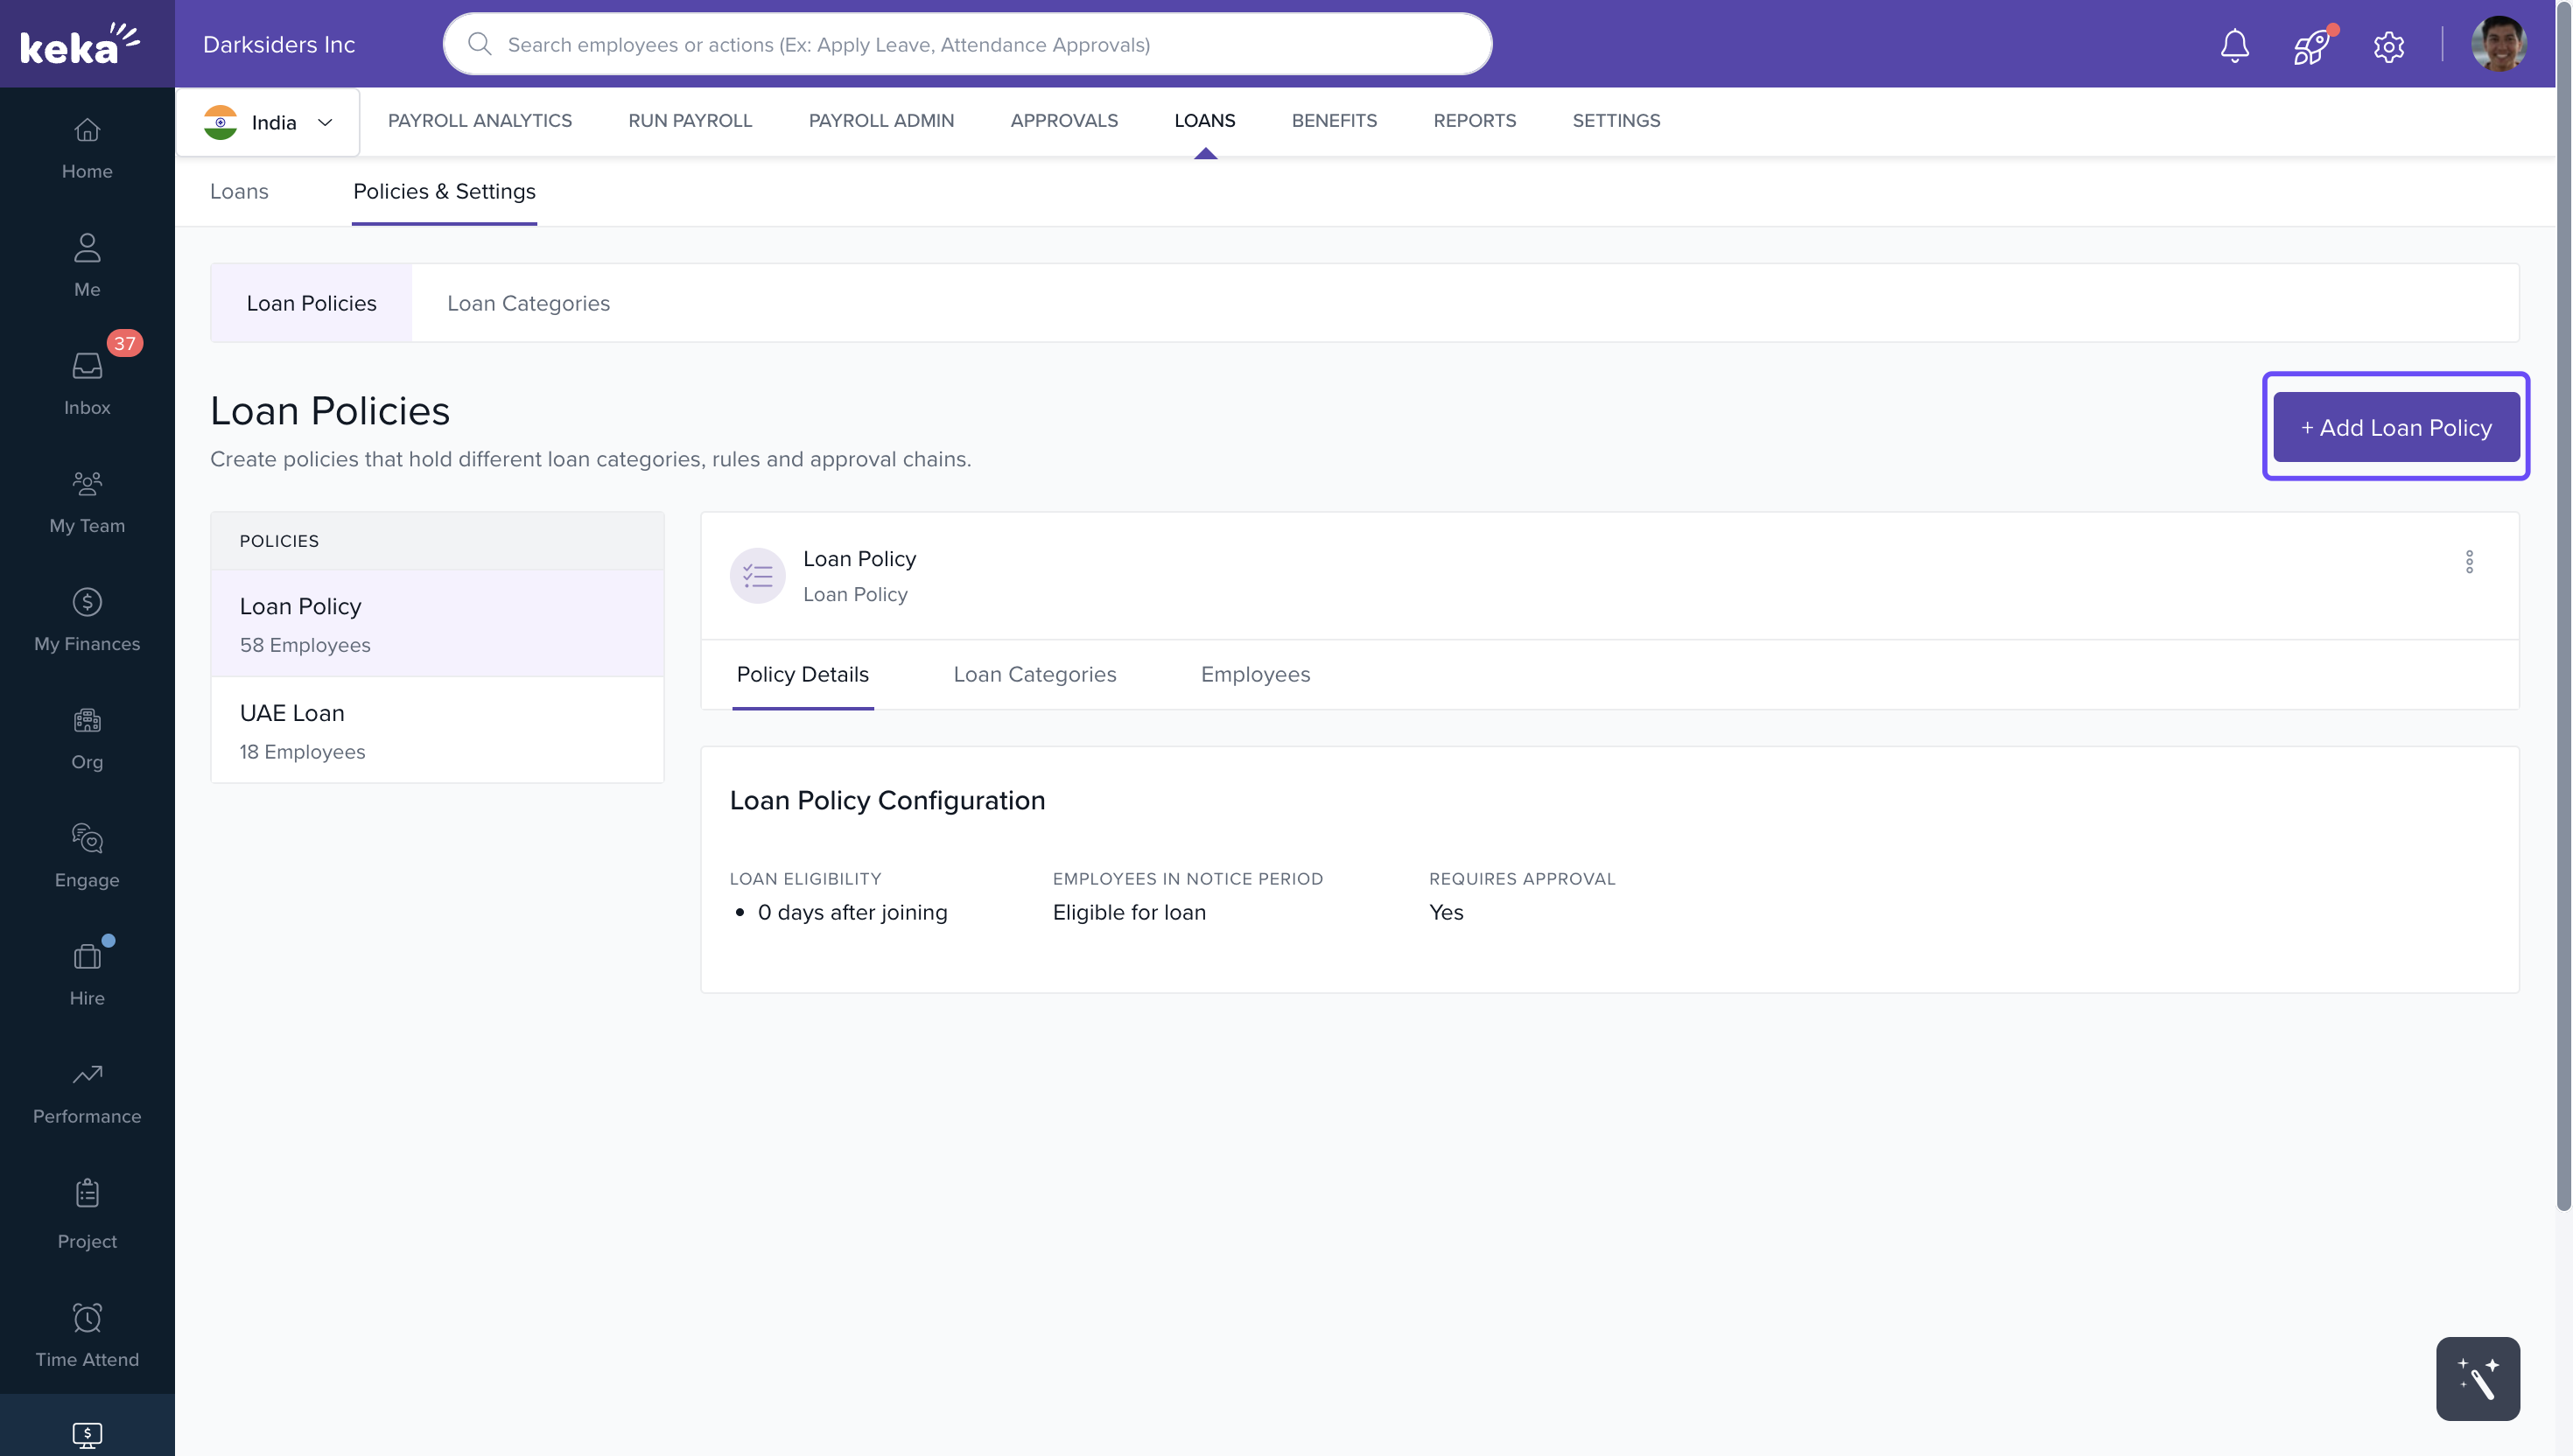
Configure and Create Loan Policies
Loan policies determine which employees are eligible, which categories apply under them, how the repayment works, what rules govern each category, etc.
Creating a New Loan Policy
1. Navigate: Payroll → Loans → Policies & Settings → Loan Policies.
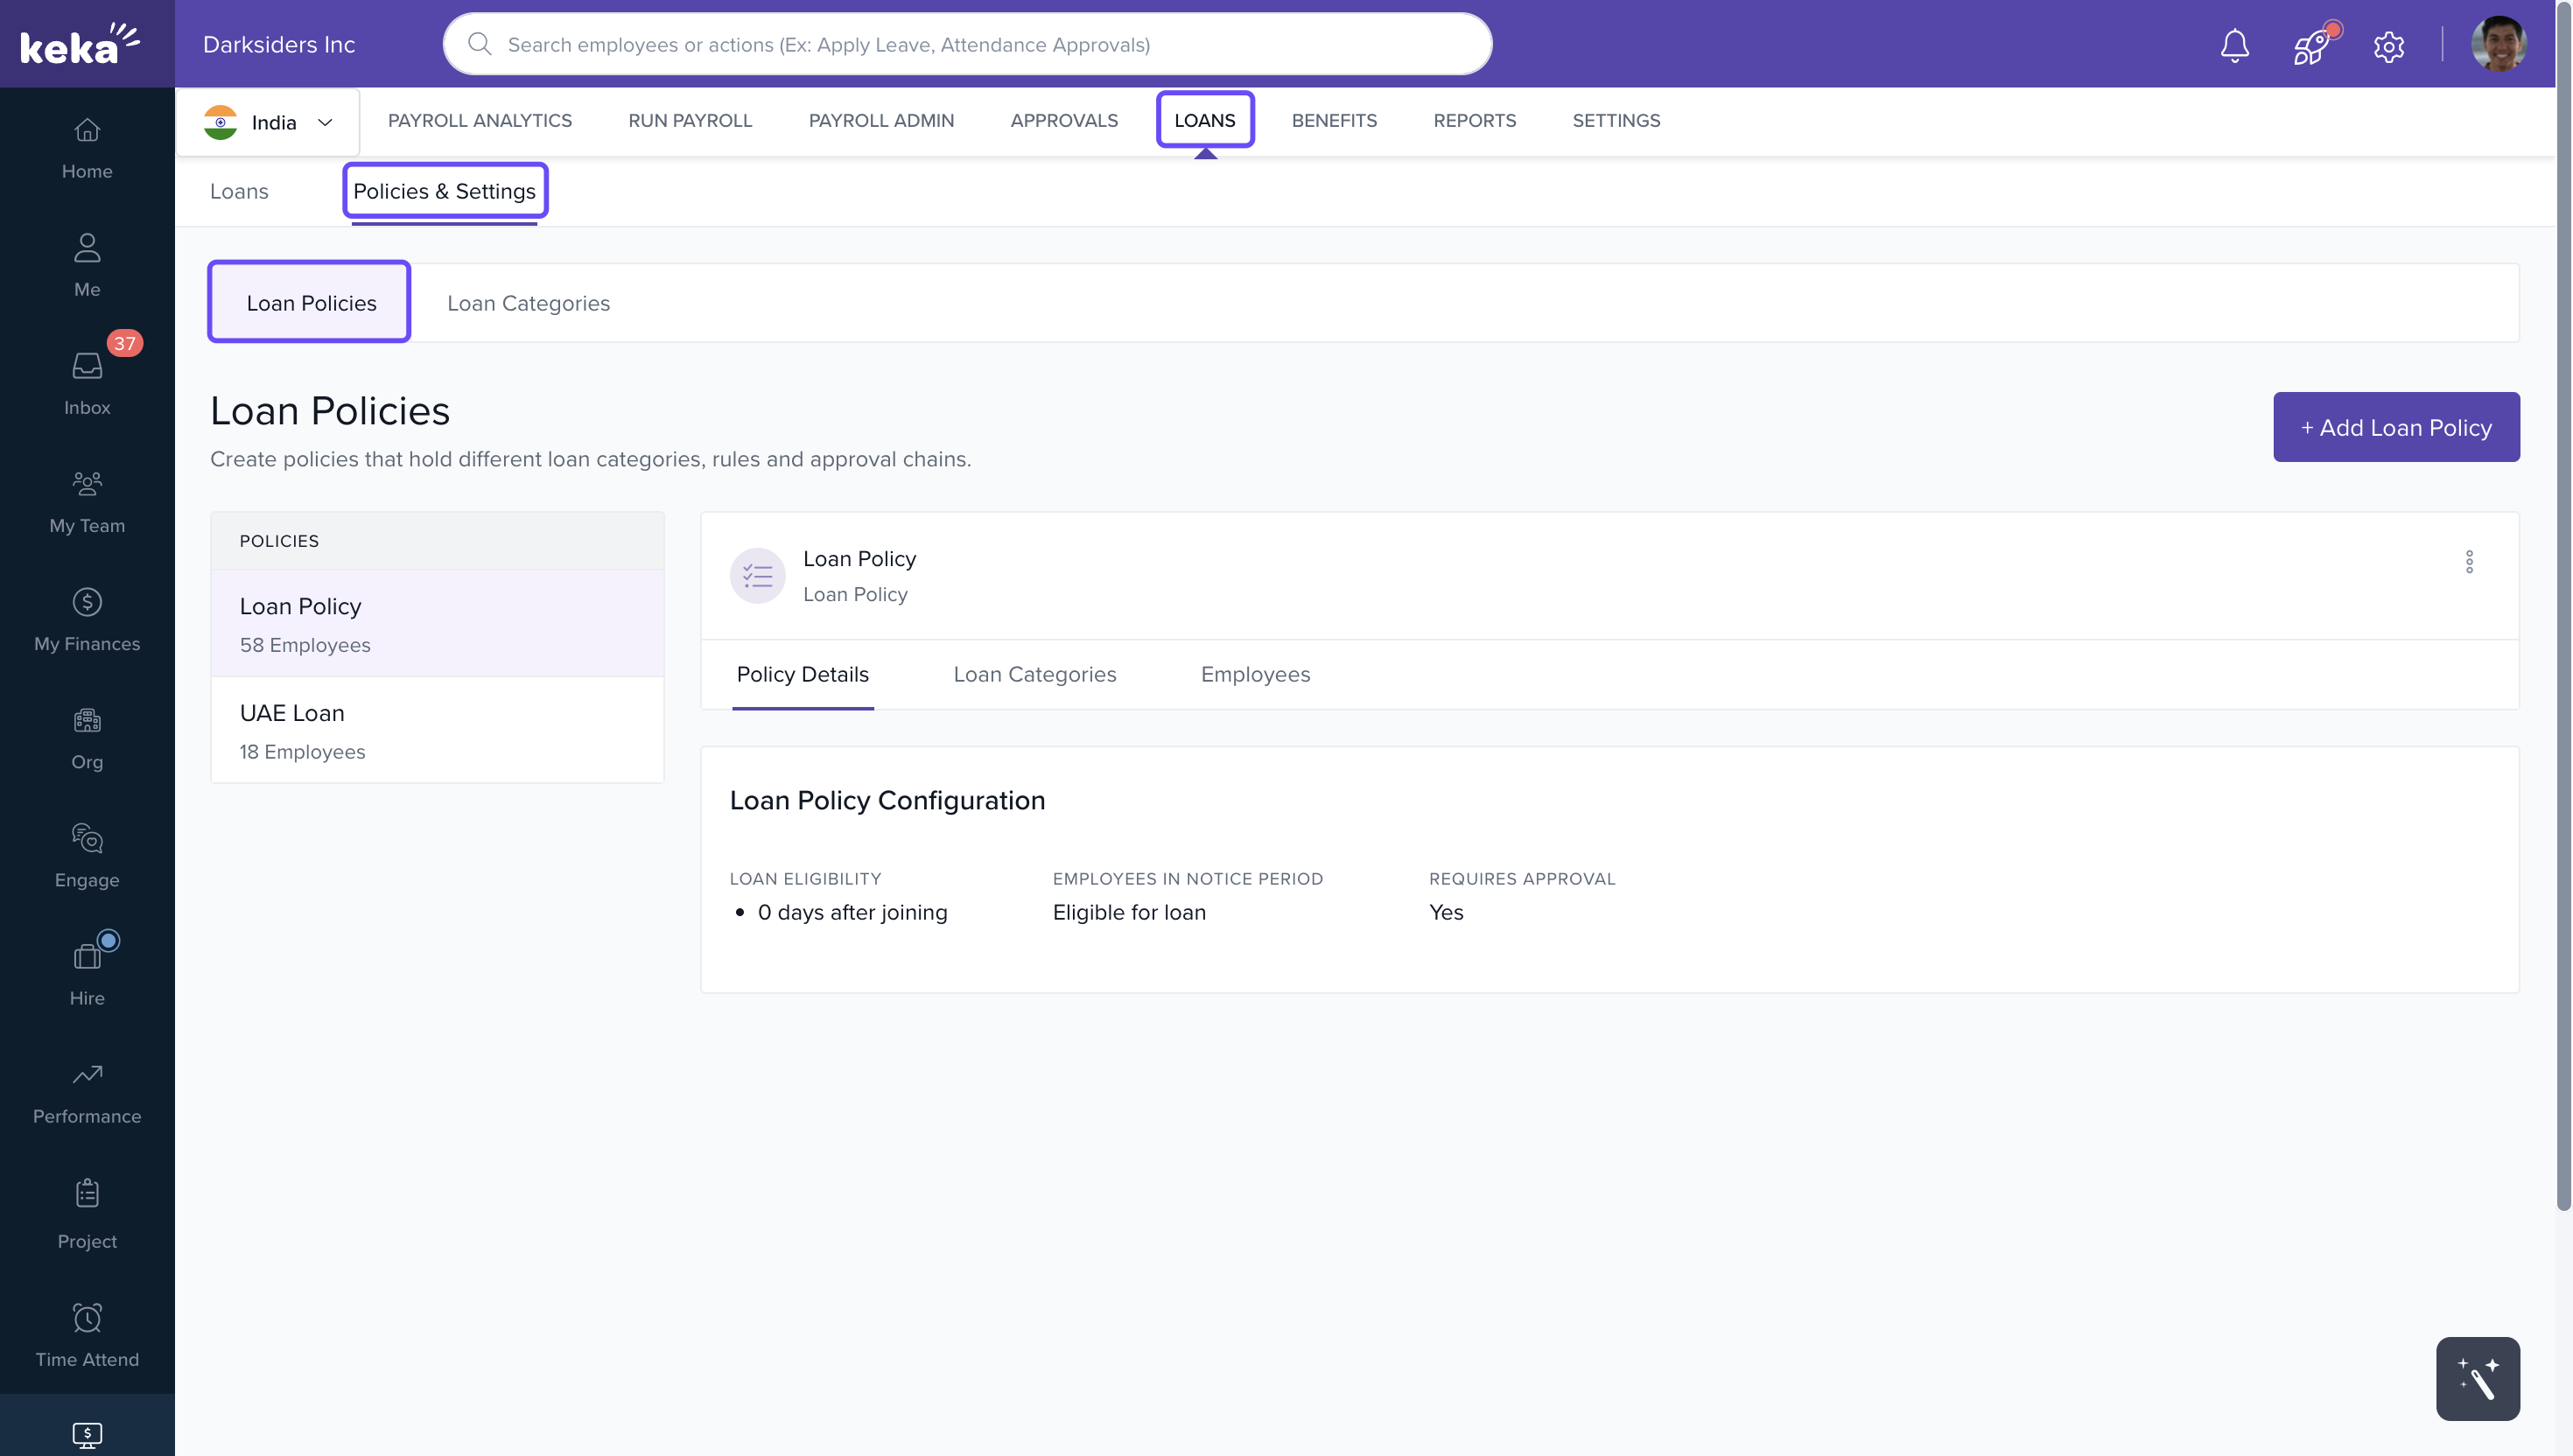
2. Click + Add Loan Policy.
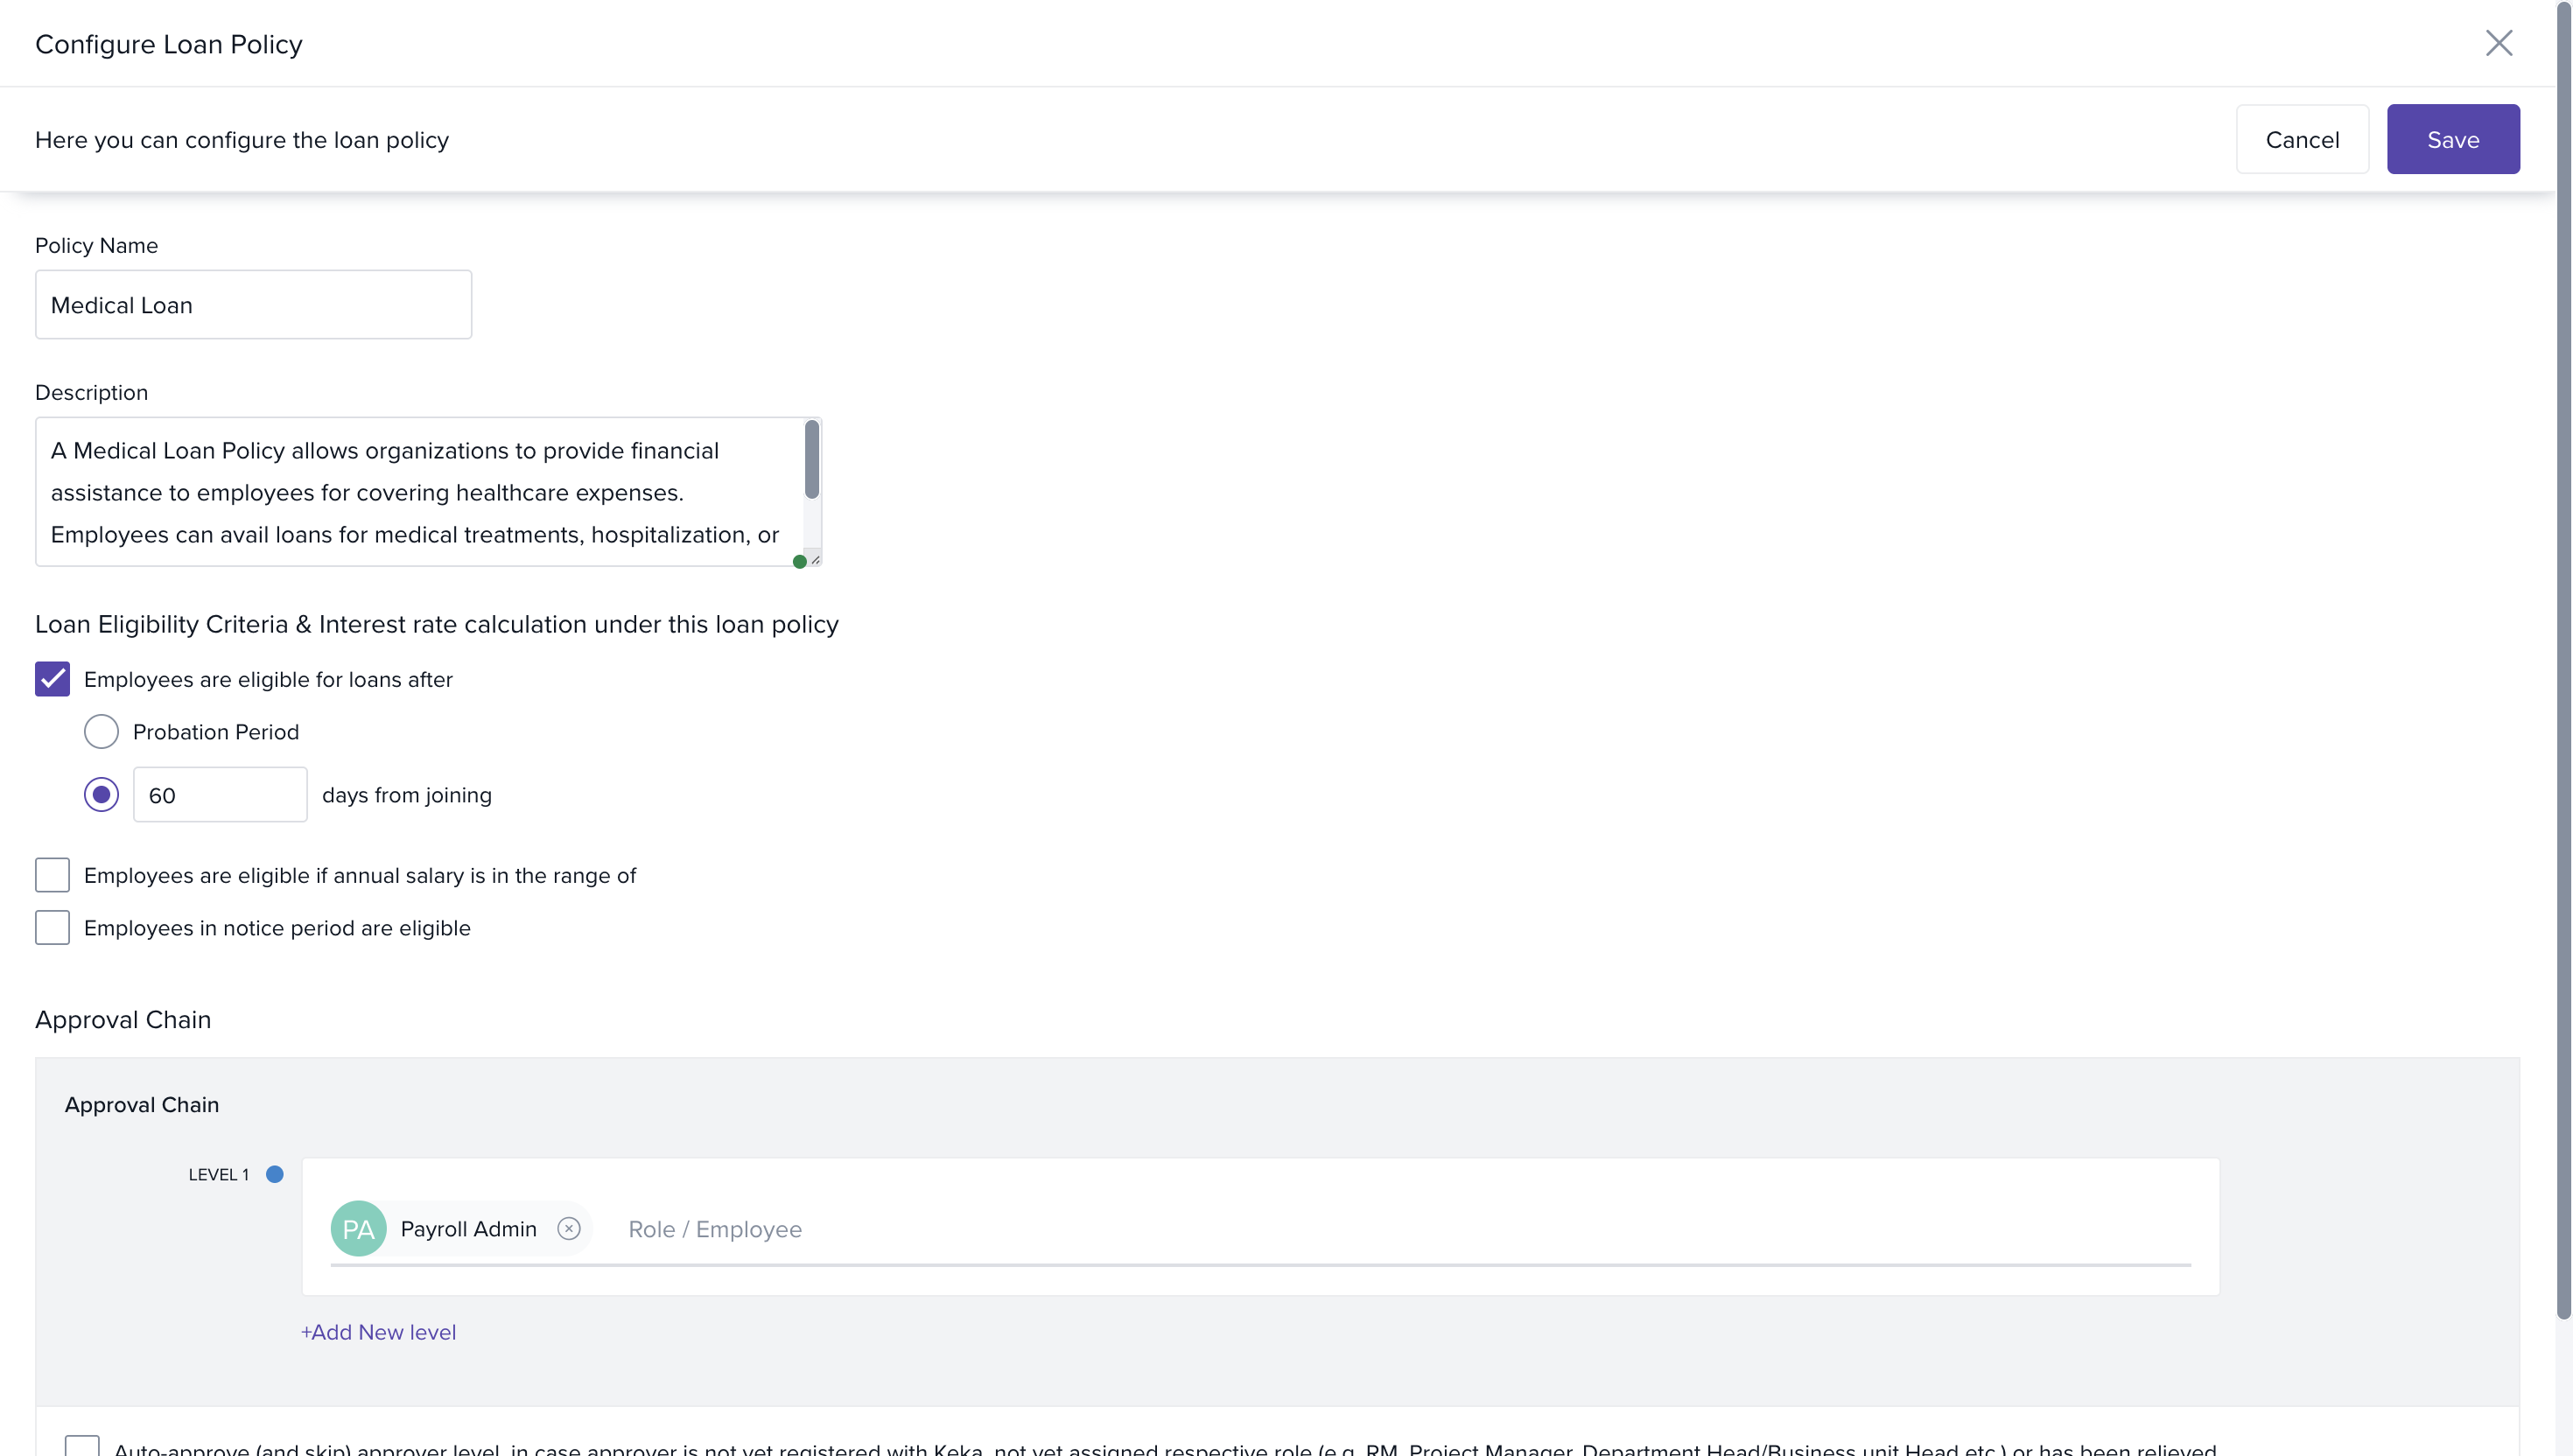
3. In the Configure Loan Policy window:
-
Enter Policy Name and Description.
-
Define eligibility criteria:
-
Employees become eligible after they complete a probation period or after N days from joining.
-
Further filter by annual salary (enter a salary range).
-
Decide whether employees in notice period are eligible.
-
-
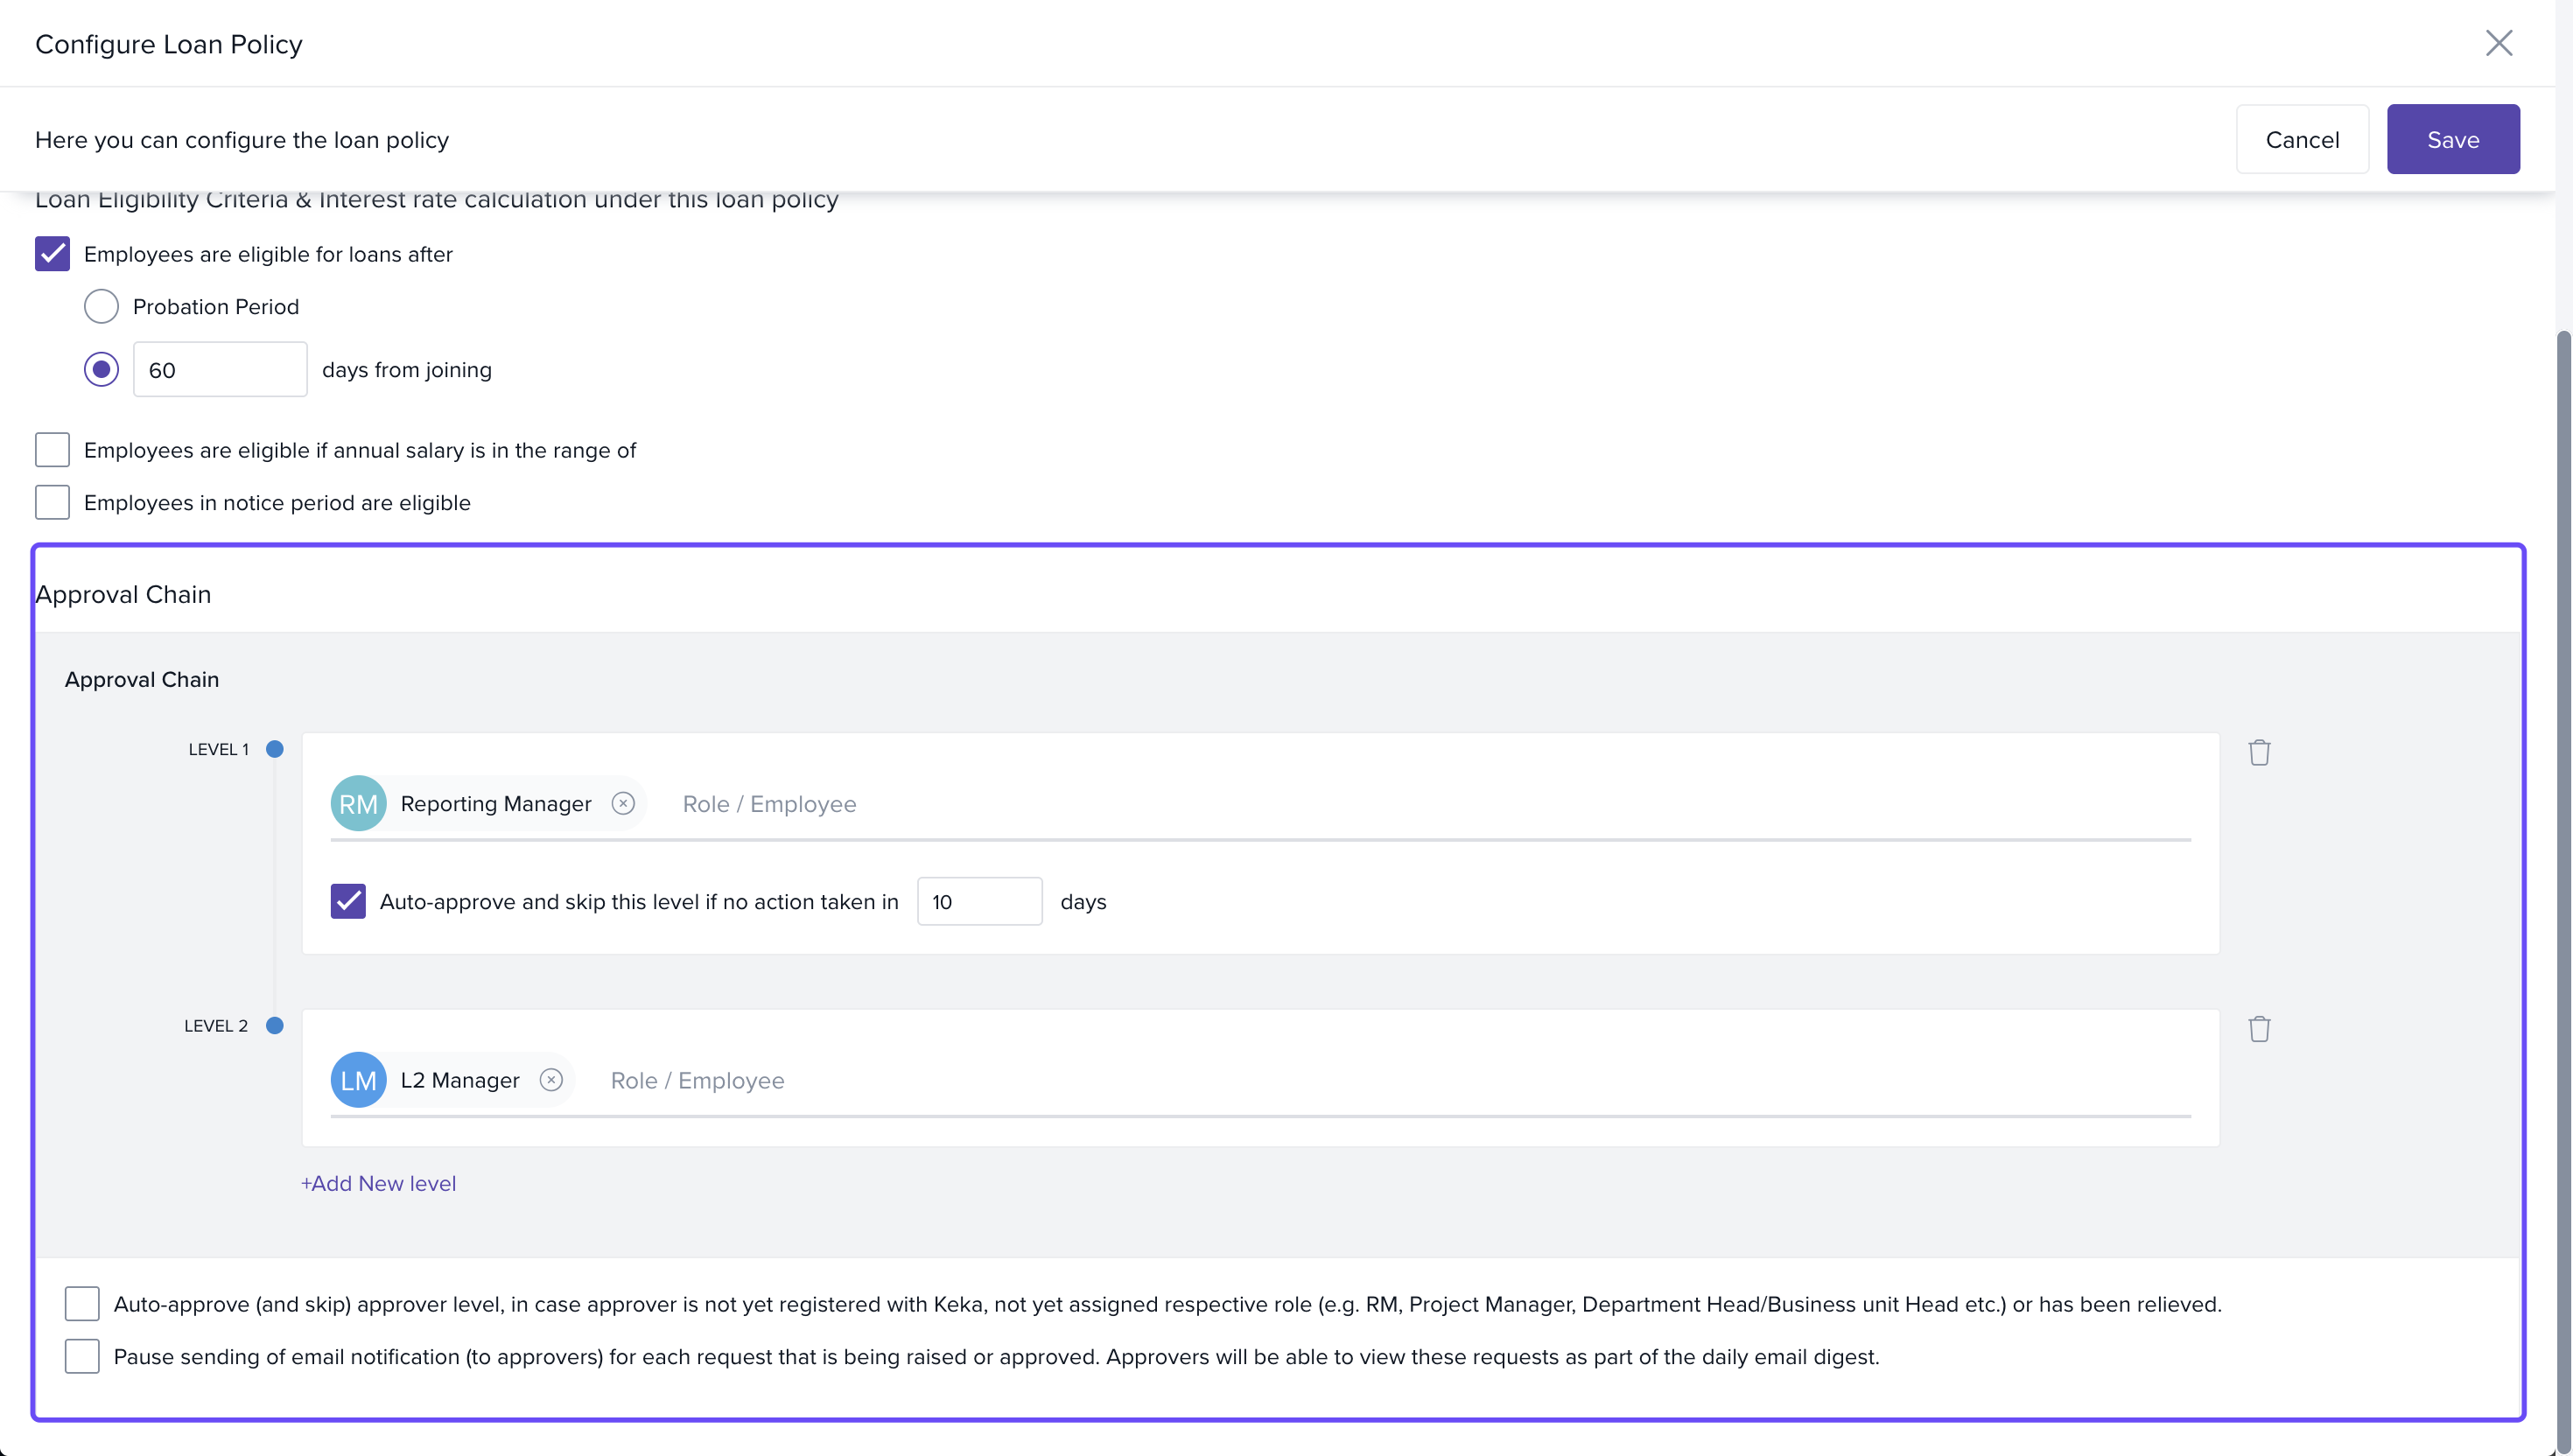
Set the approval chain:
-
Choose who approves (roles), number of approval levels.
-
Optionally, set an auto‑approval / skip rule if no action is taken in “X” days.
-
Also: auto‐approve if the approver role is vacant / unassigned / employee has left.
-
Optionally pause email notifications to approvers; requests show instead in daily digest.
-
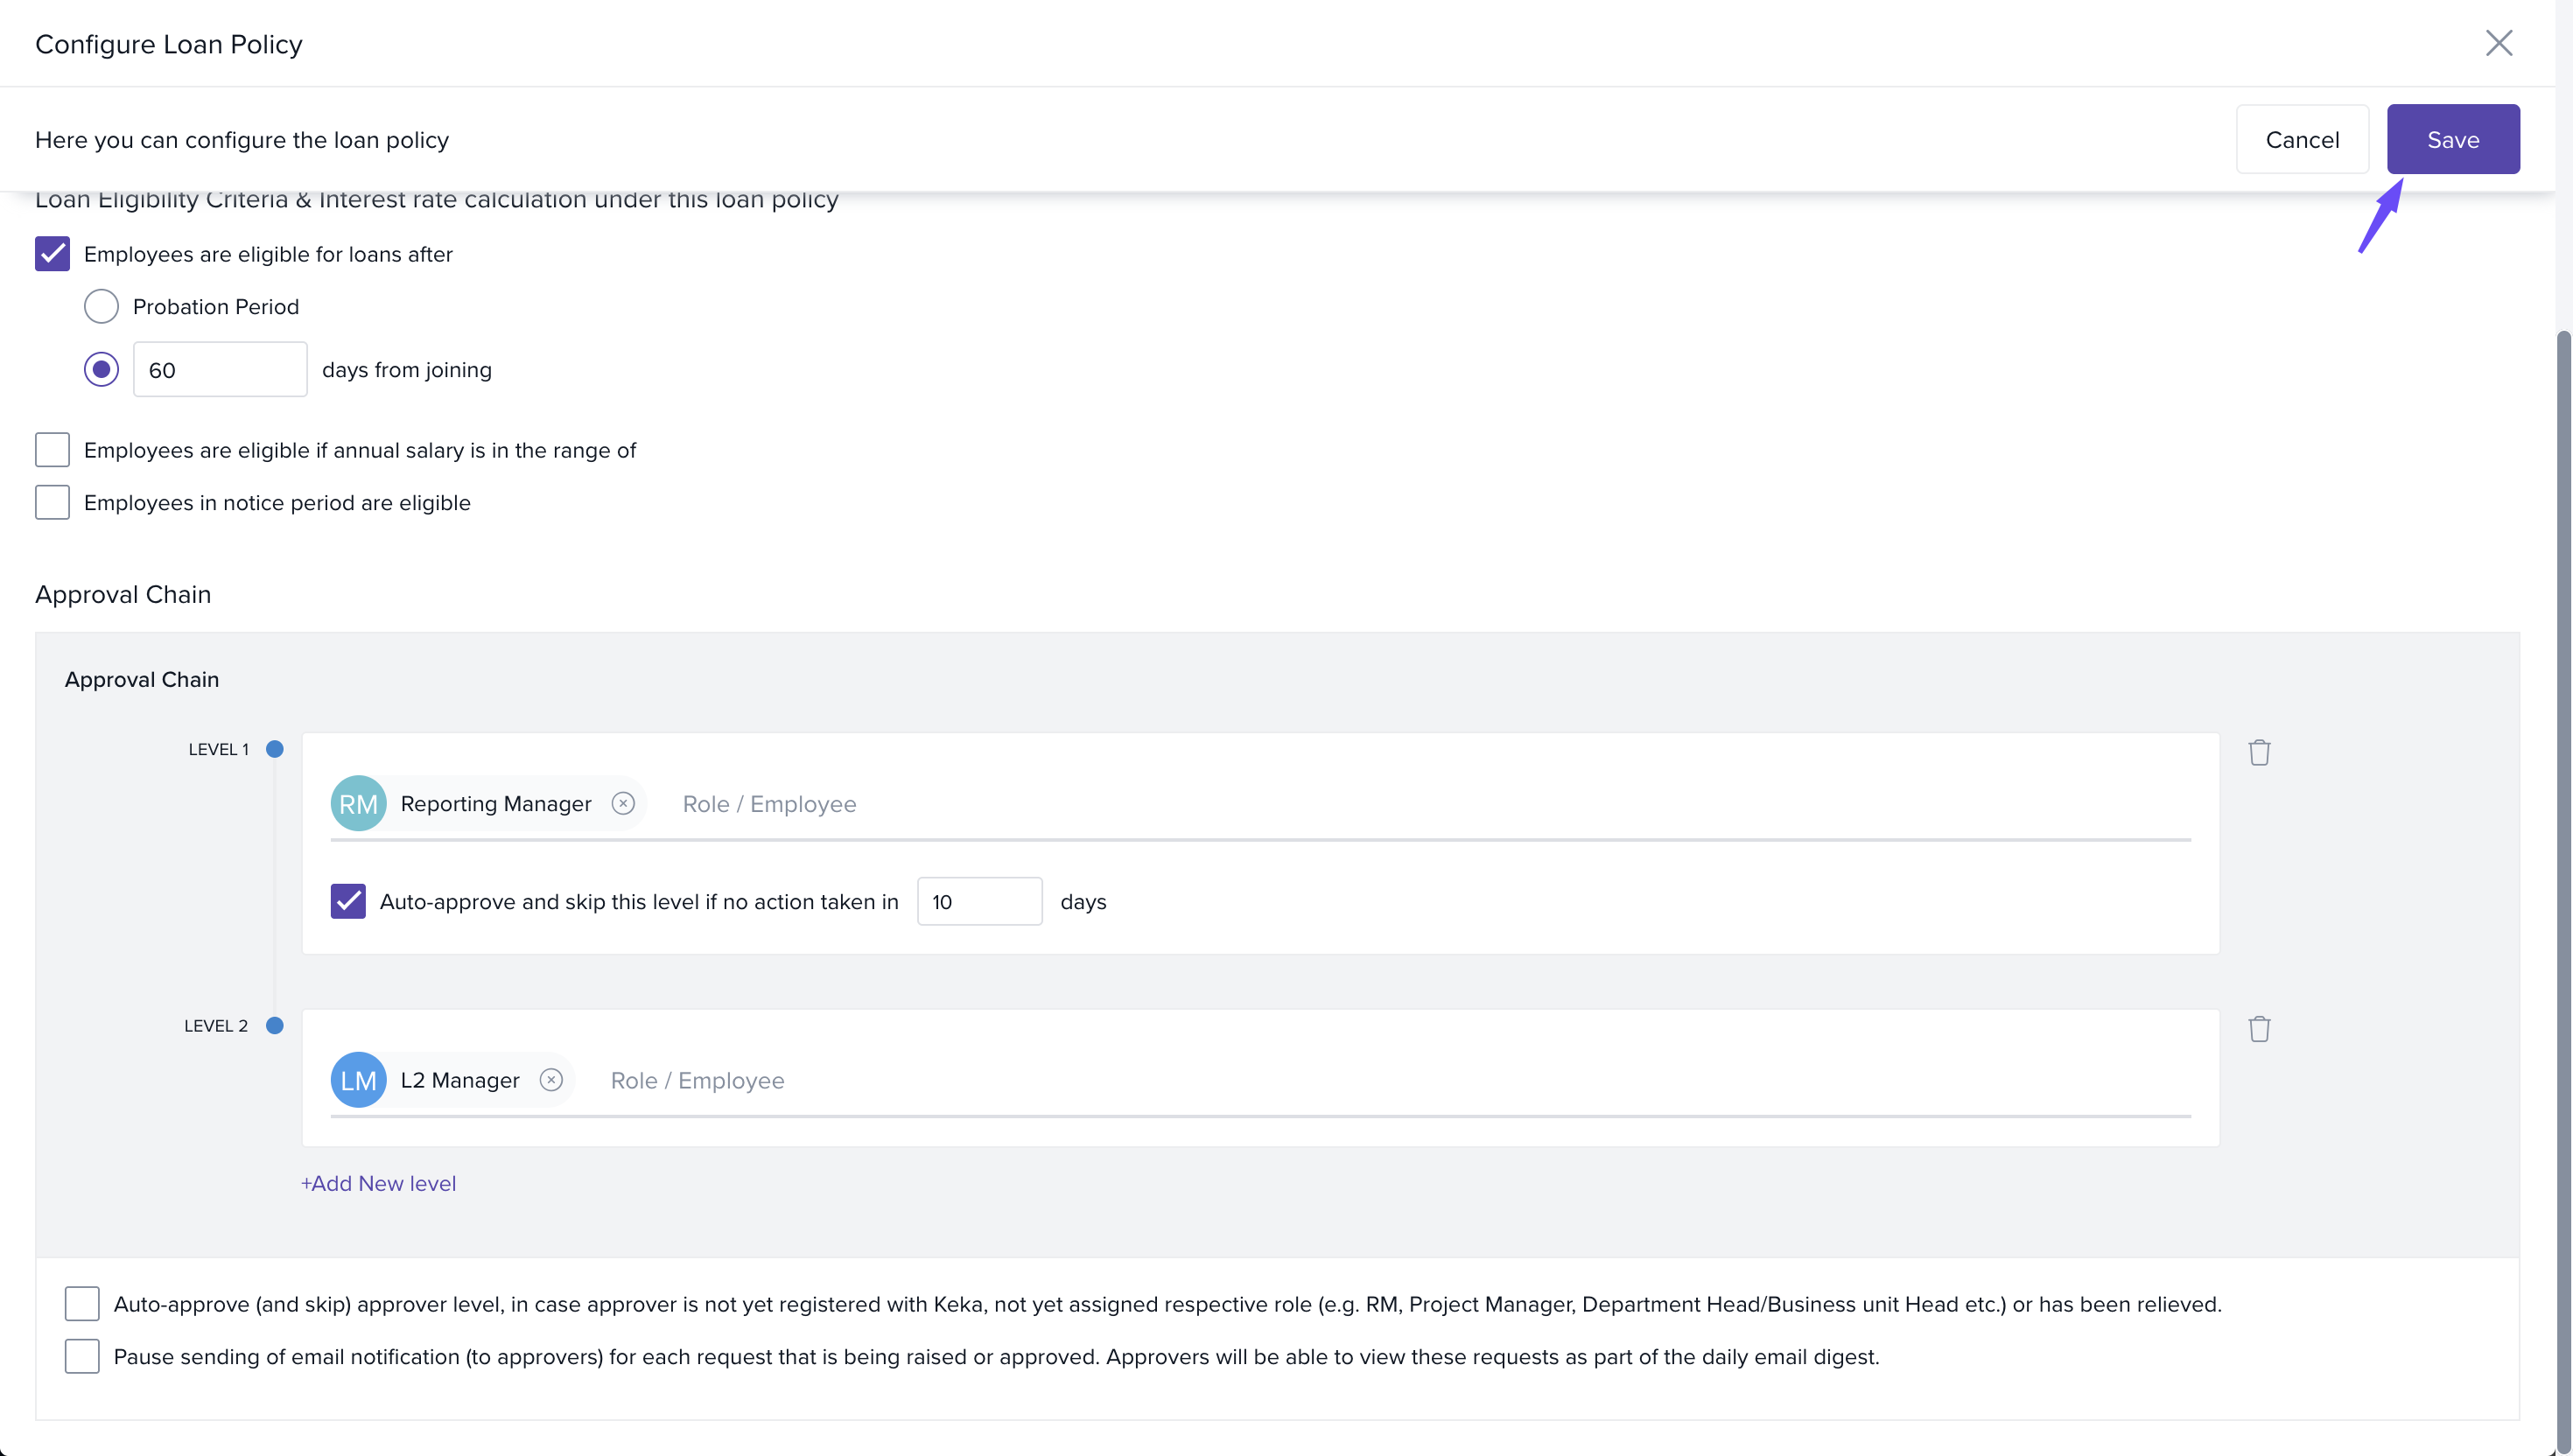
4. Click Save.
Assigning Categories to a Policy & Setting Rules
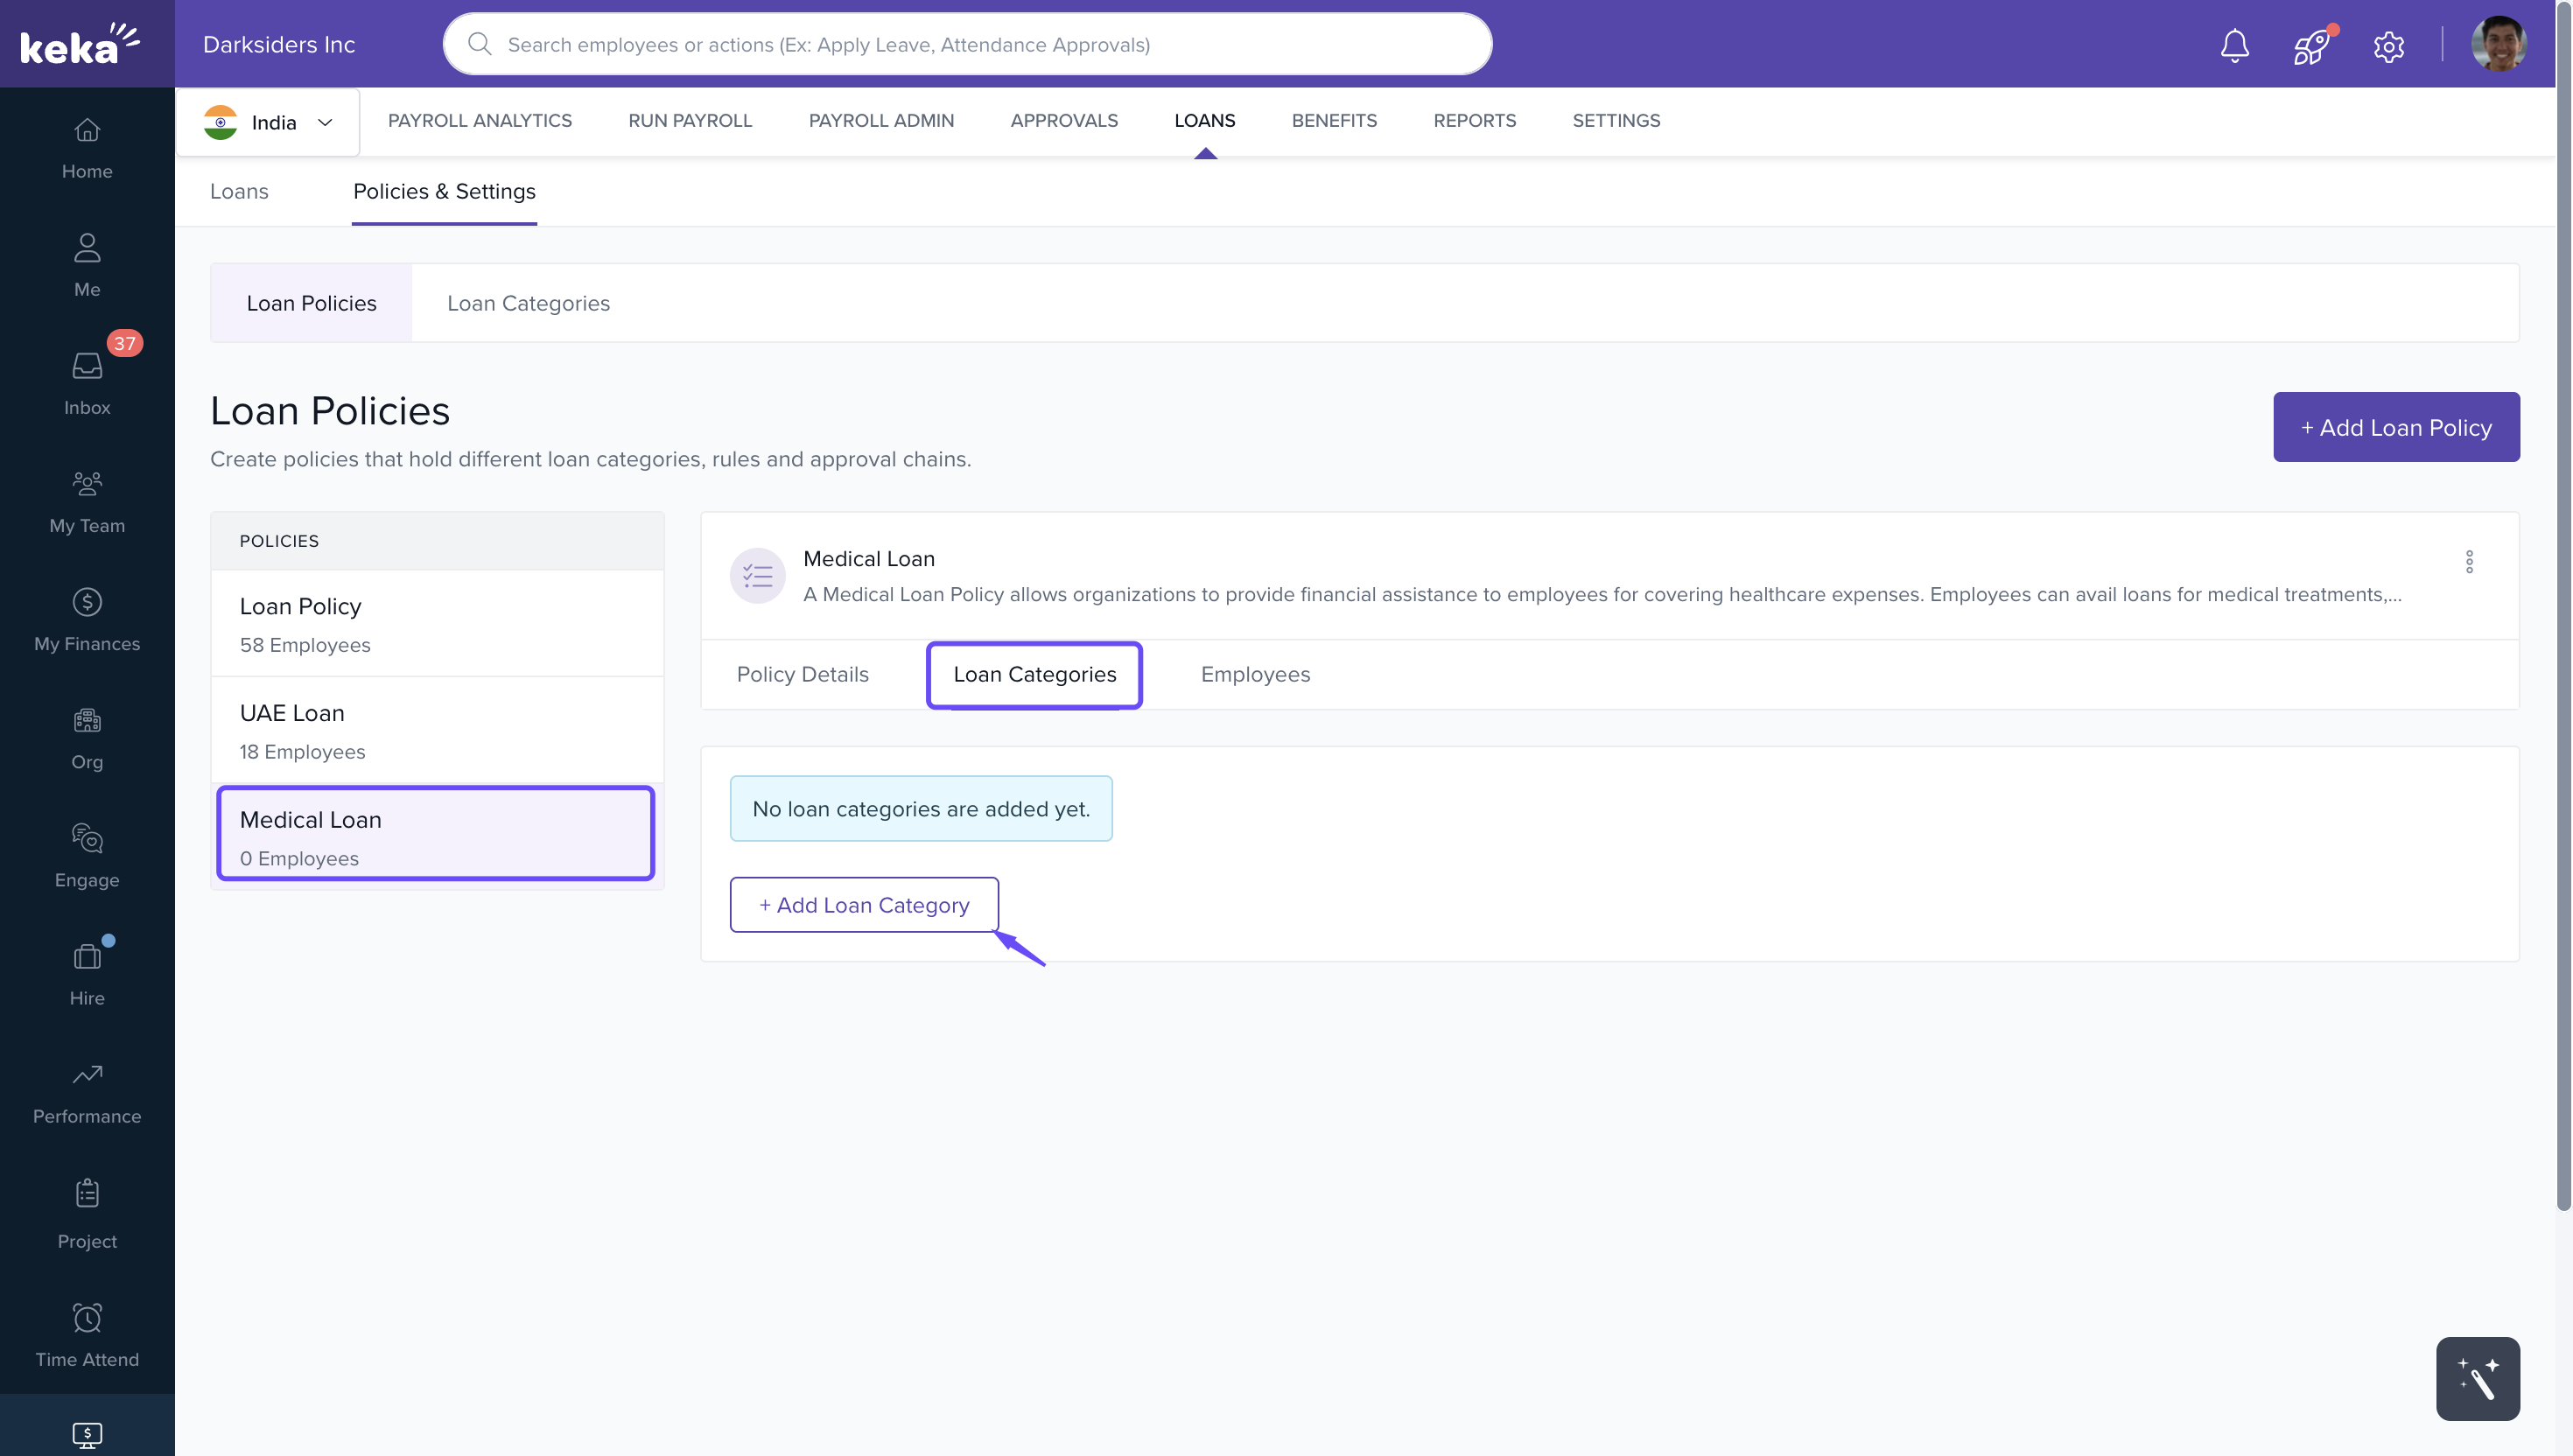
1. On the Loan Policies page, open the policy you want to edit.
2. Go to the Loan Categories tab
3. Click + Add Loan Category to include categories that were previously created.
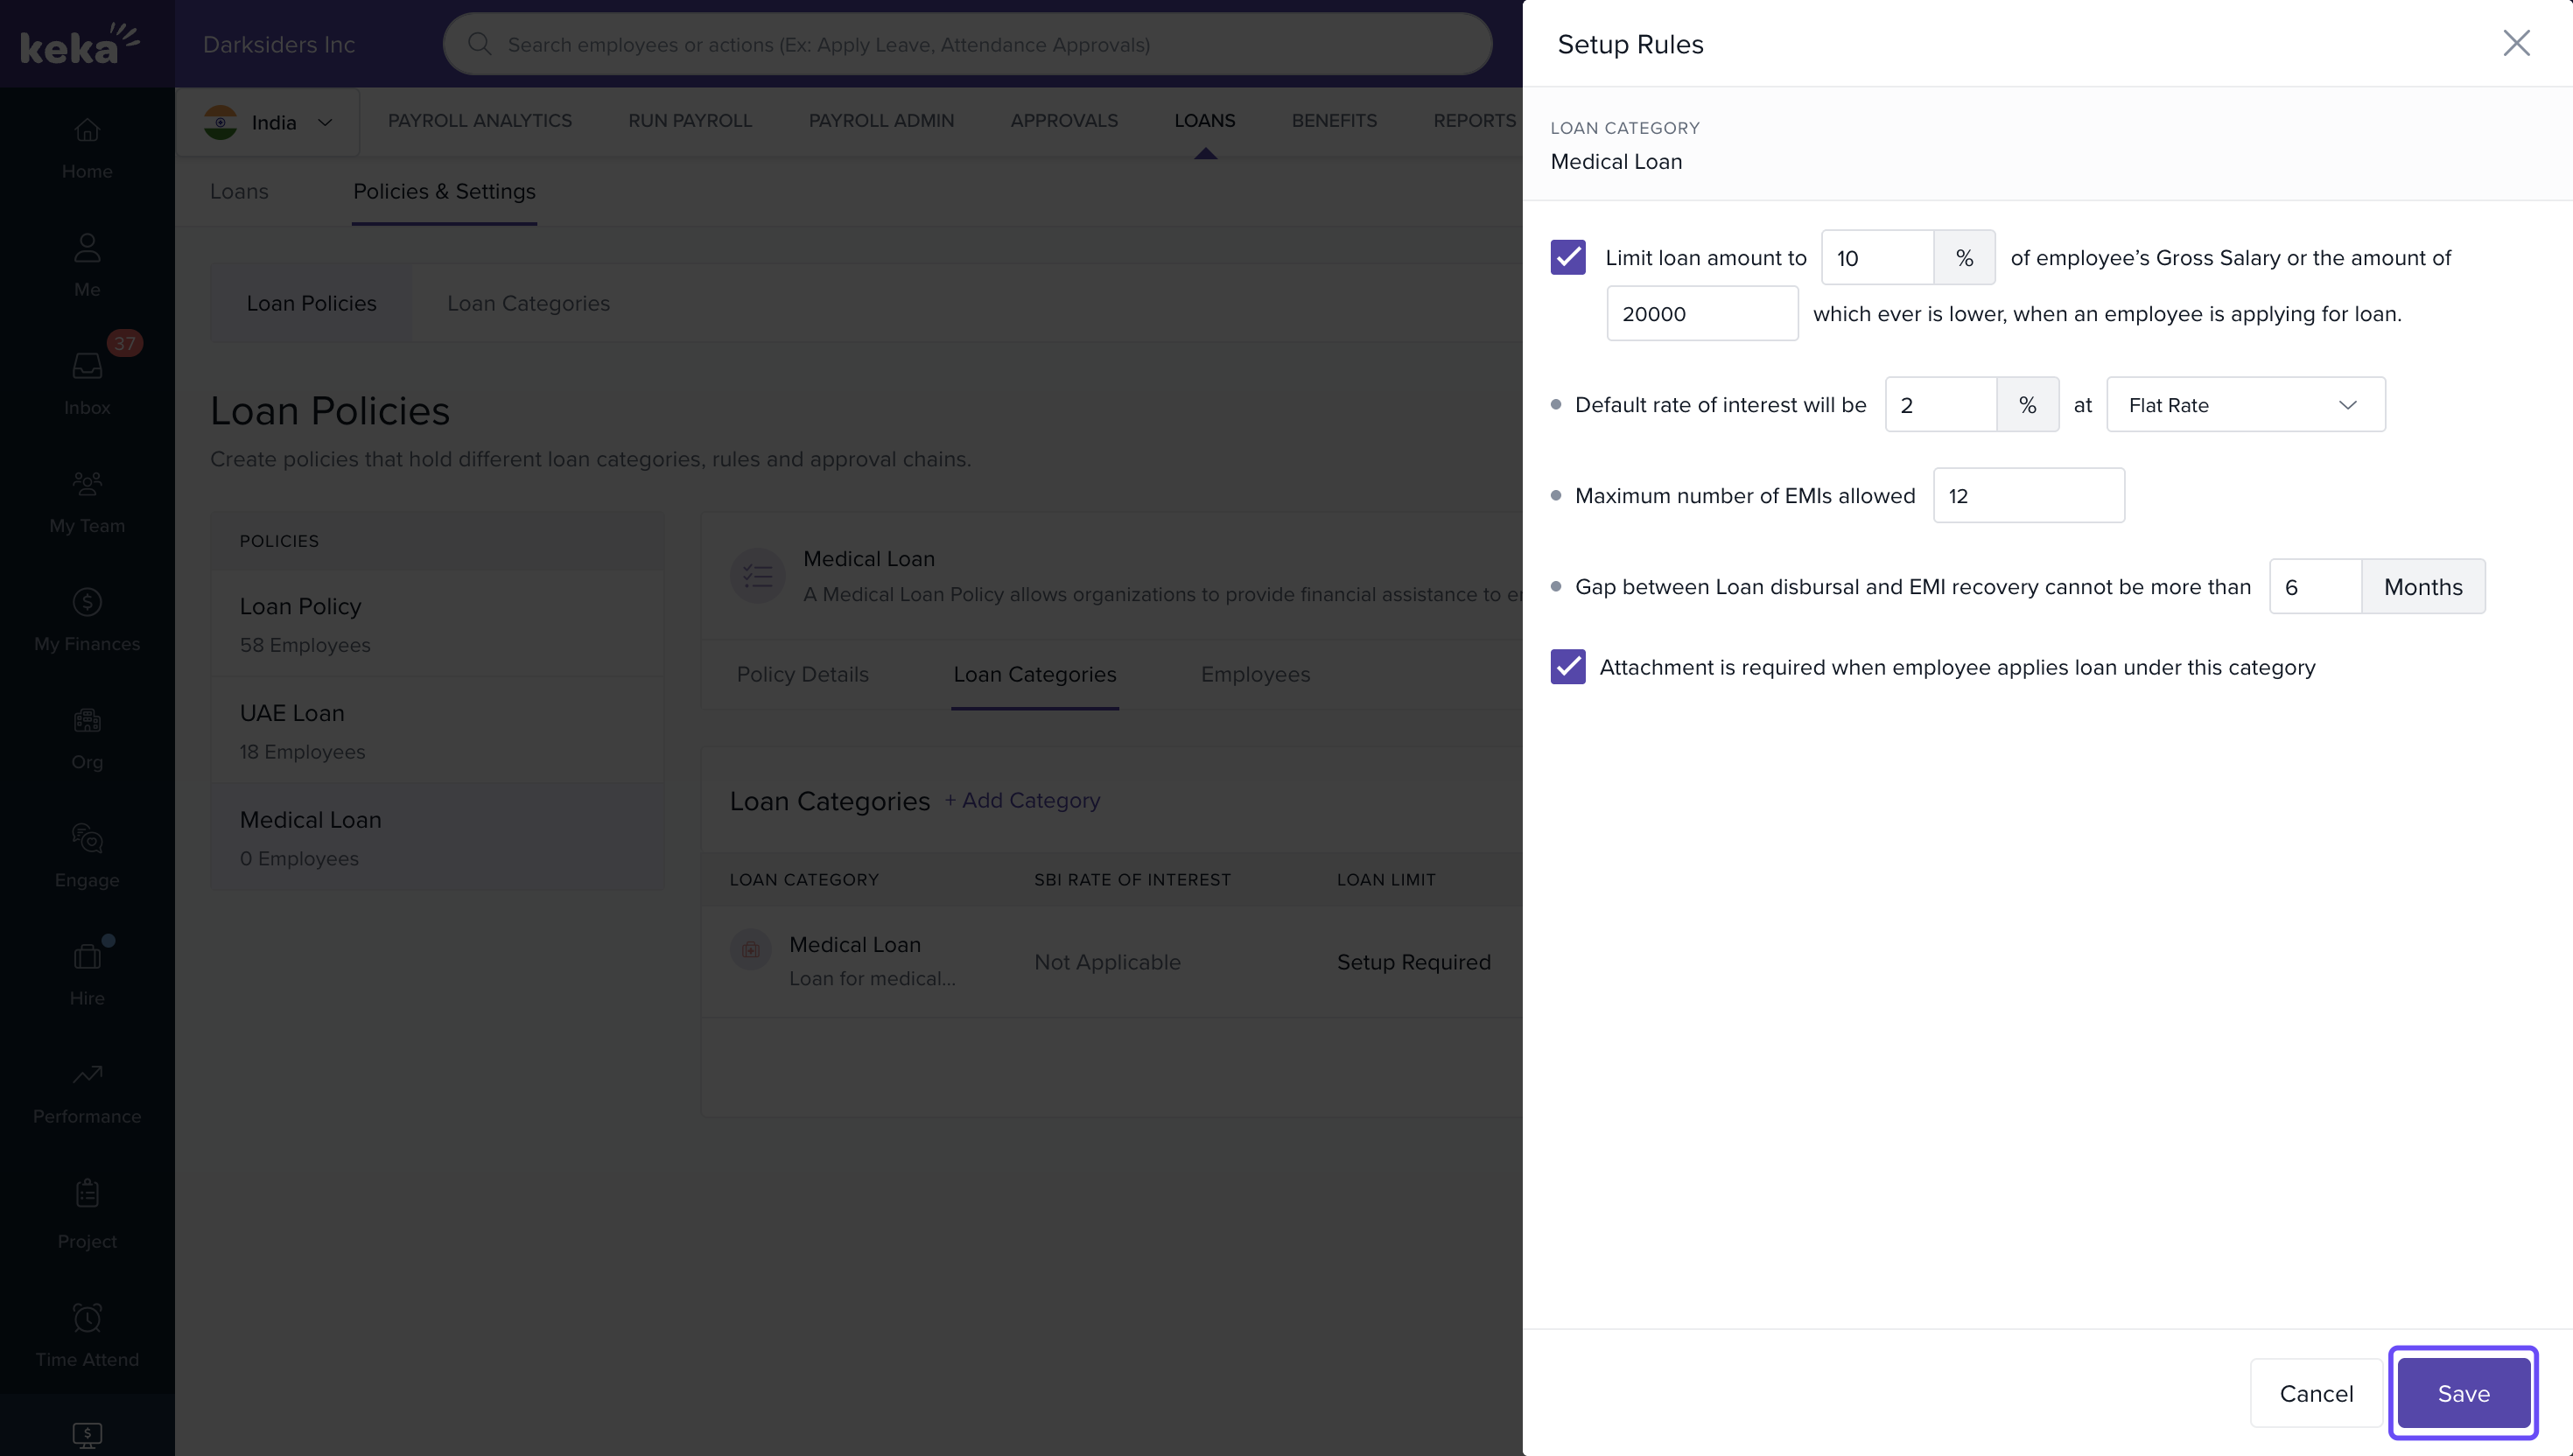
4. After adding, click Setup Rules for each category to define:
- Default interest rate (flat or reducing)
- Maximum number of EMIs (installments)
- When EMIs begin (period after disbursement)
- Limits on loan amount: e.g. fixed monetary cap or a % of annual salary (or choose lower of both).
- Whether employees must provide attachment(s) or proof with their loan application.
5. Save the rules.
Update or Delete Rules / Categories from Policy
-
To edit rules, use the three‑dots next to a loan category in the policy → Update Rules.
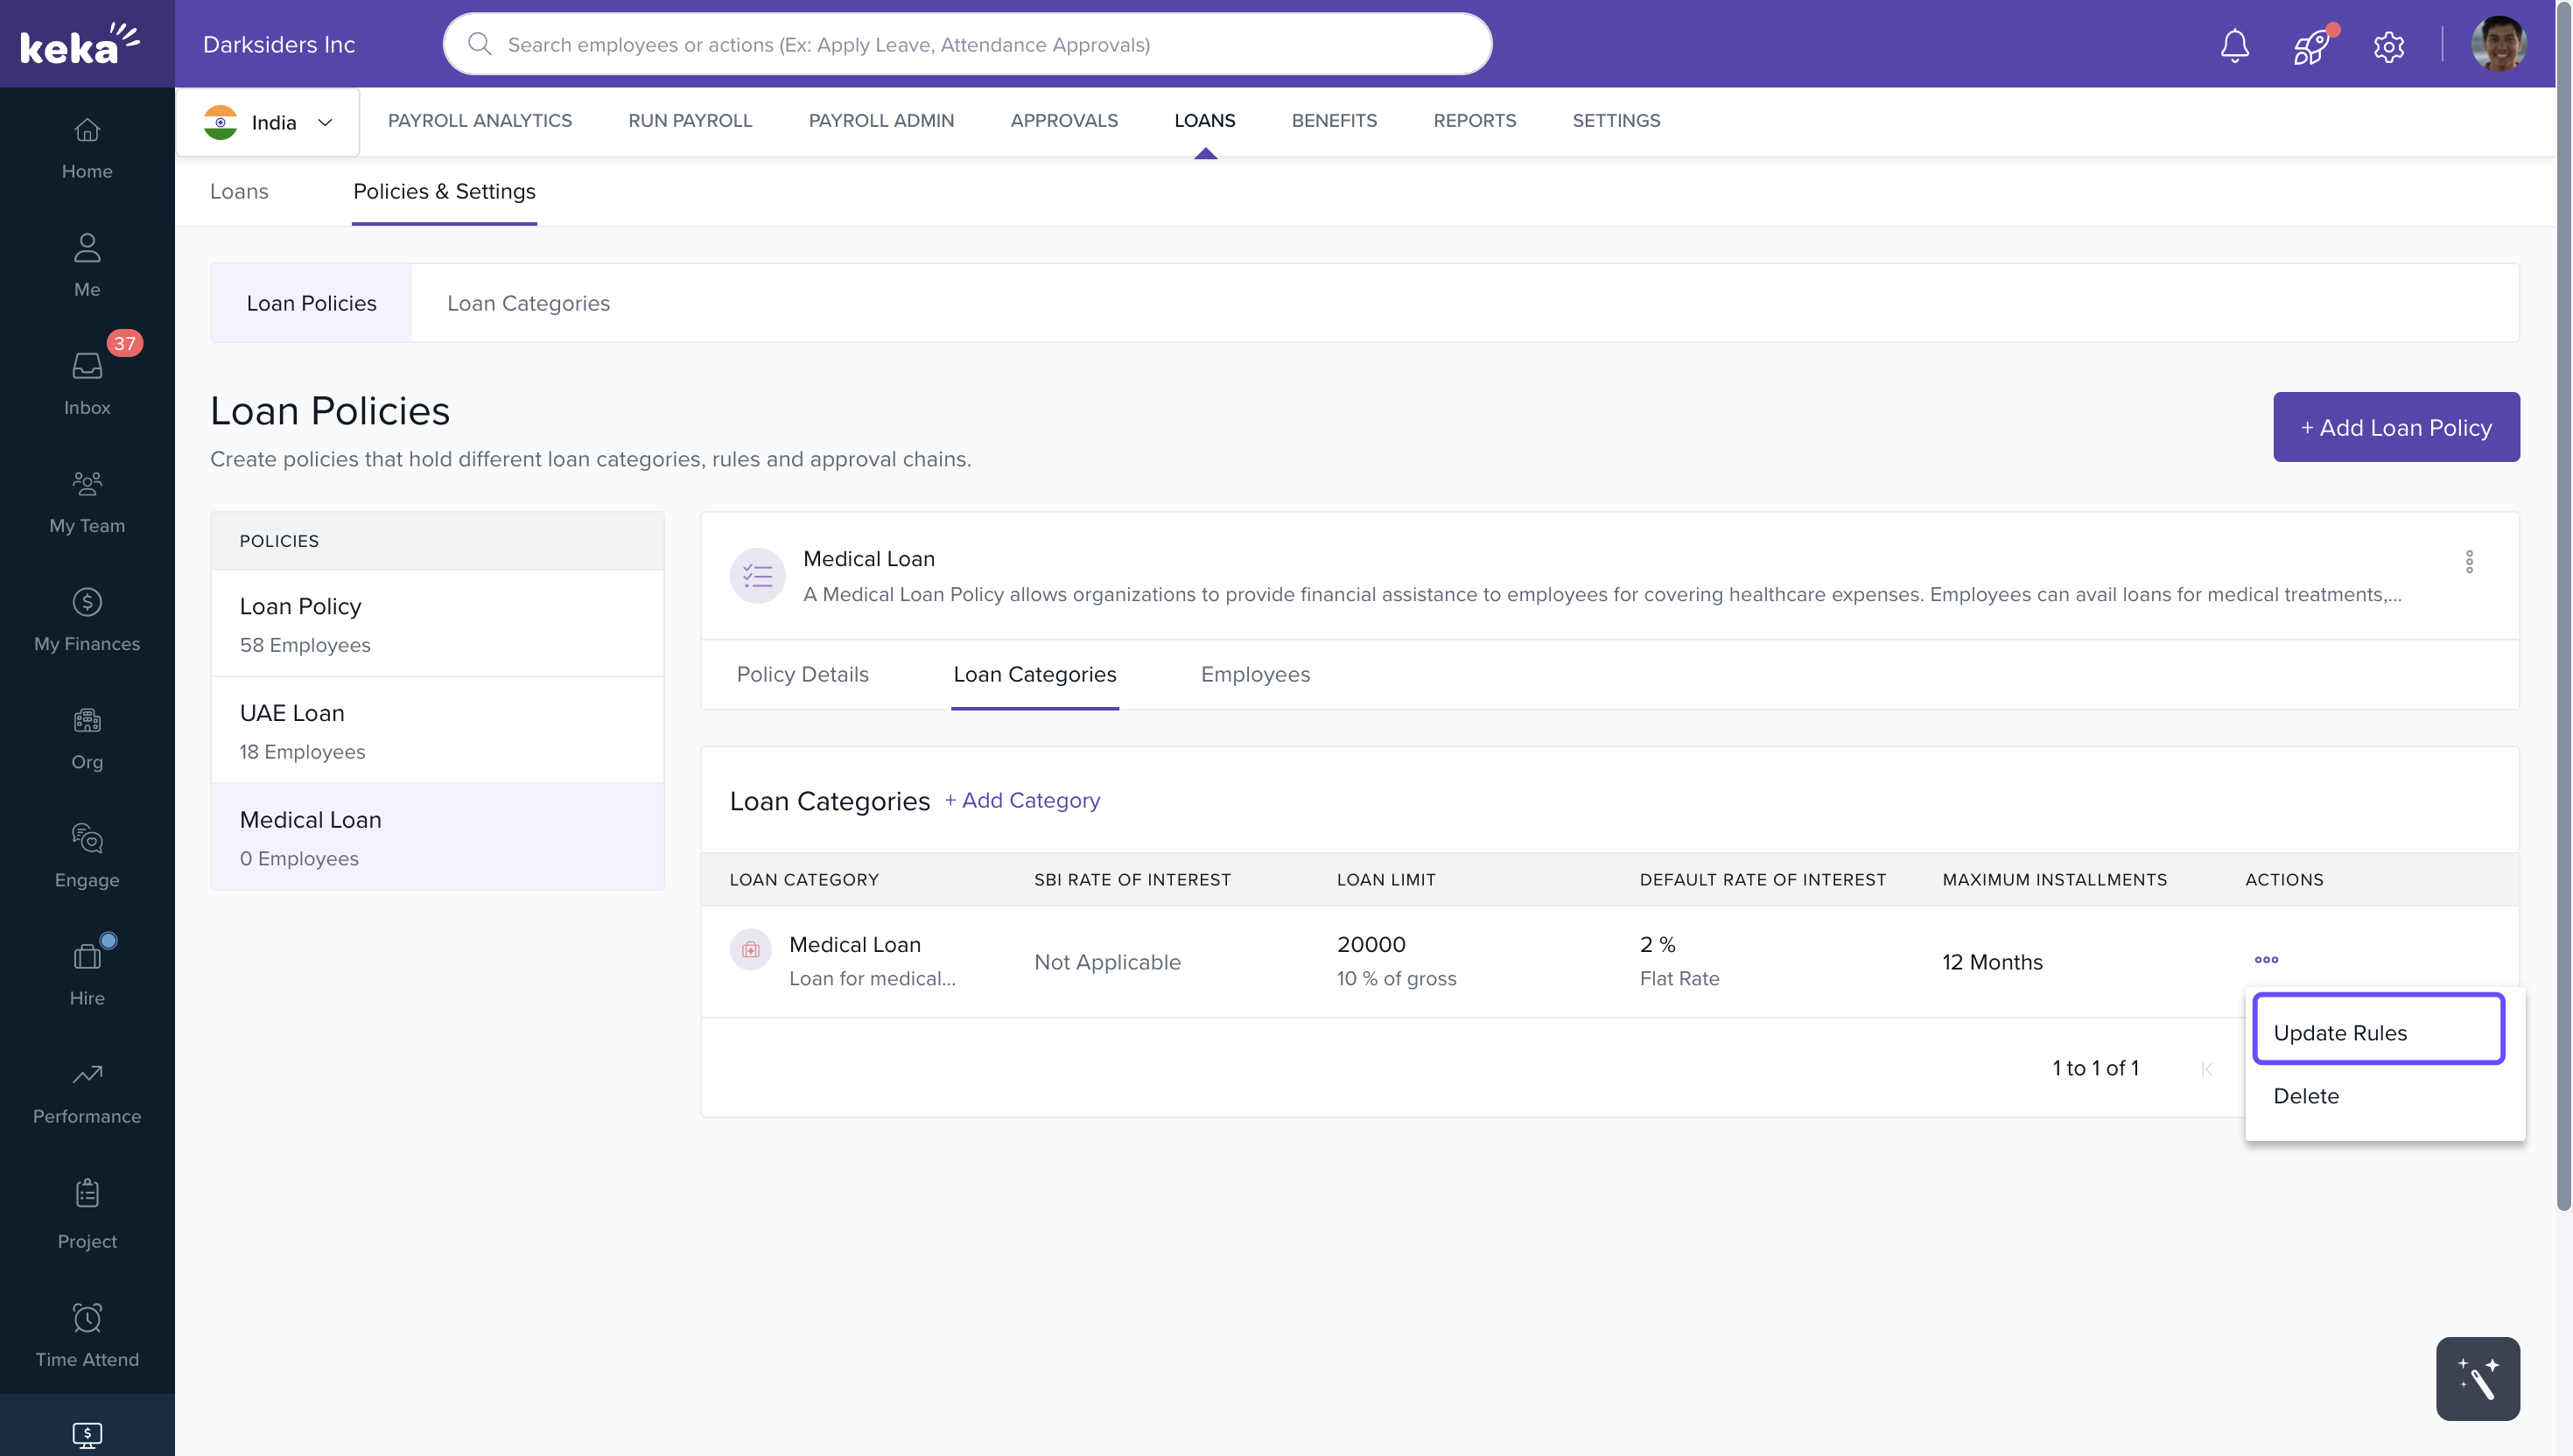
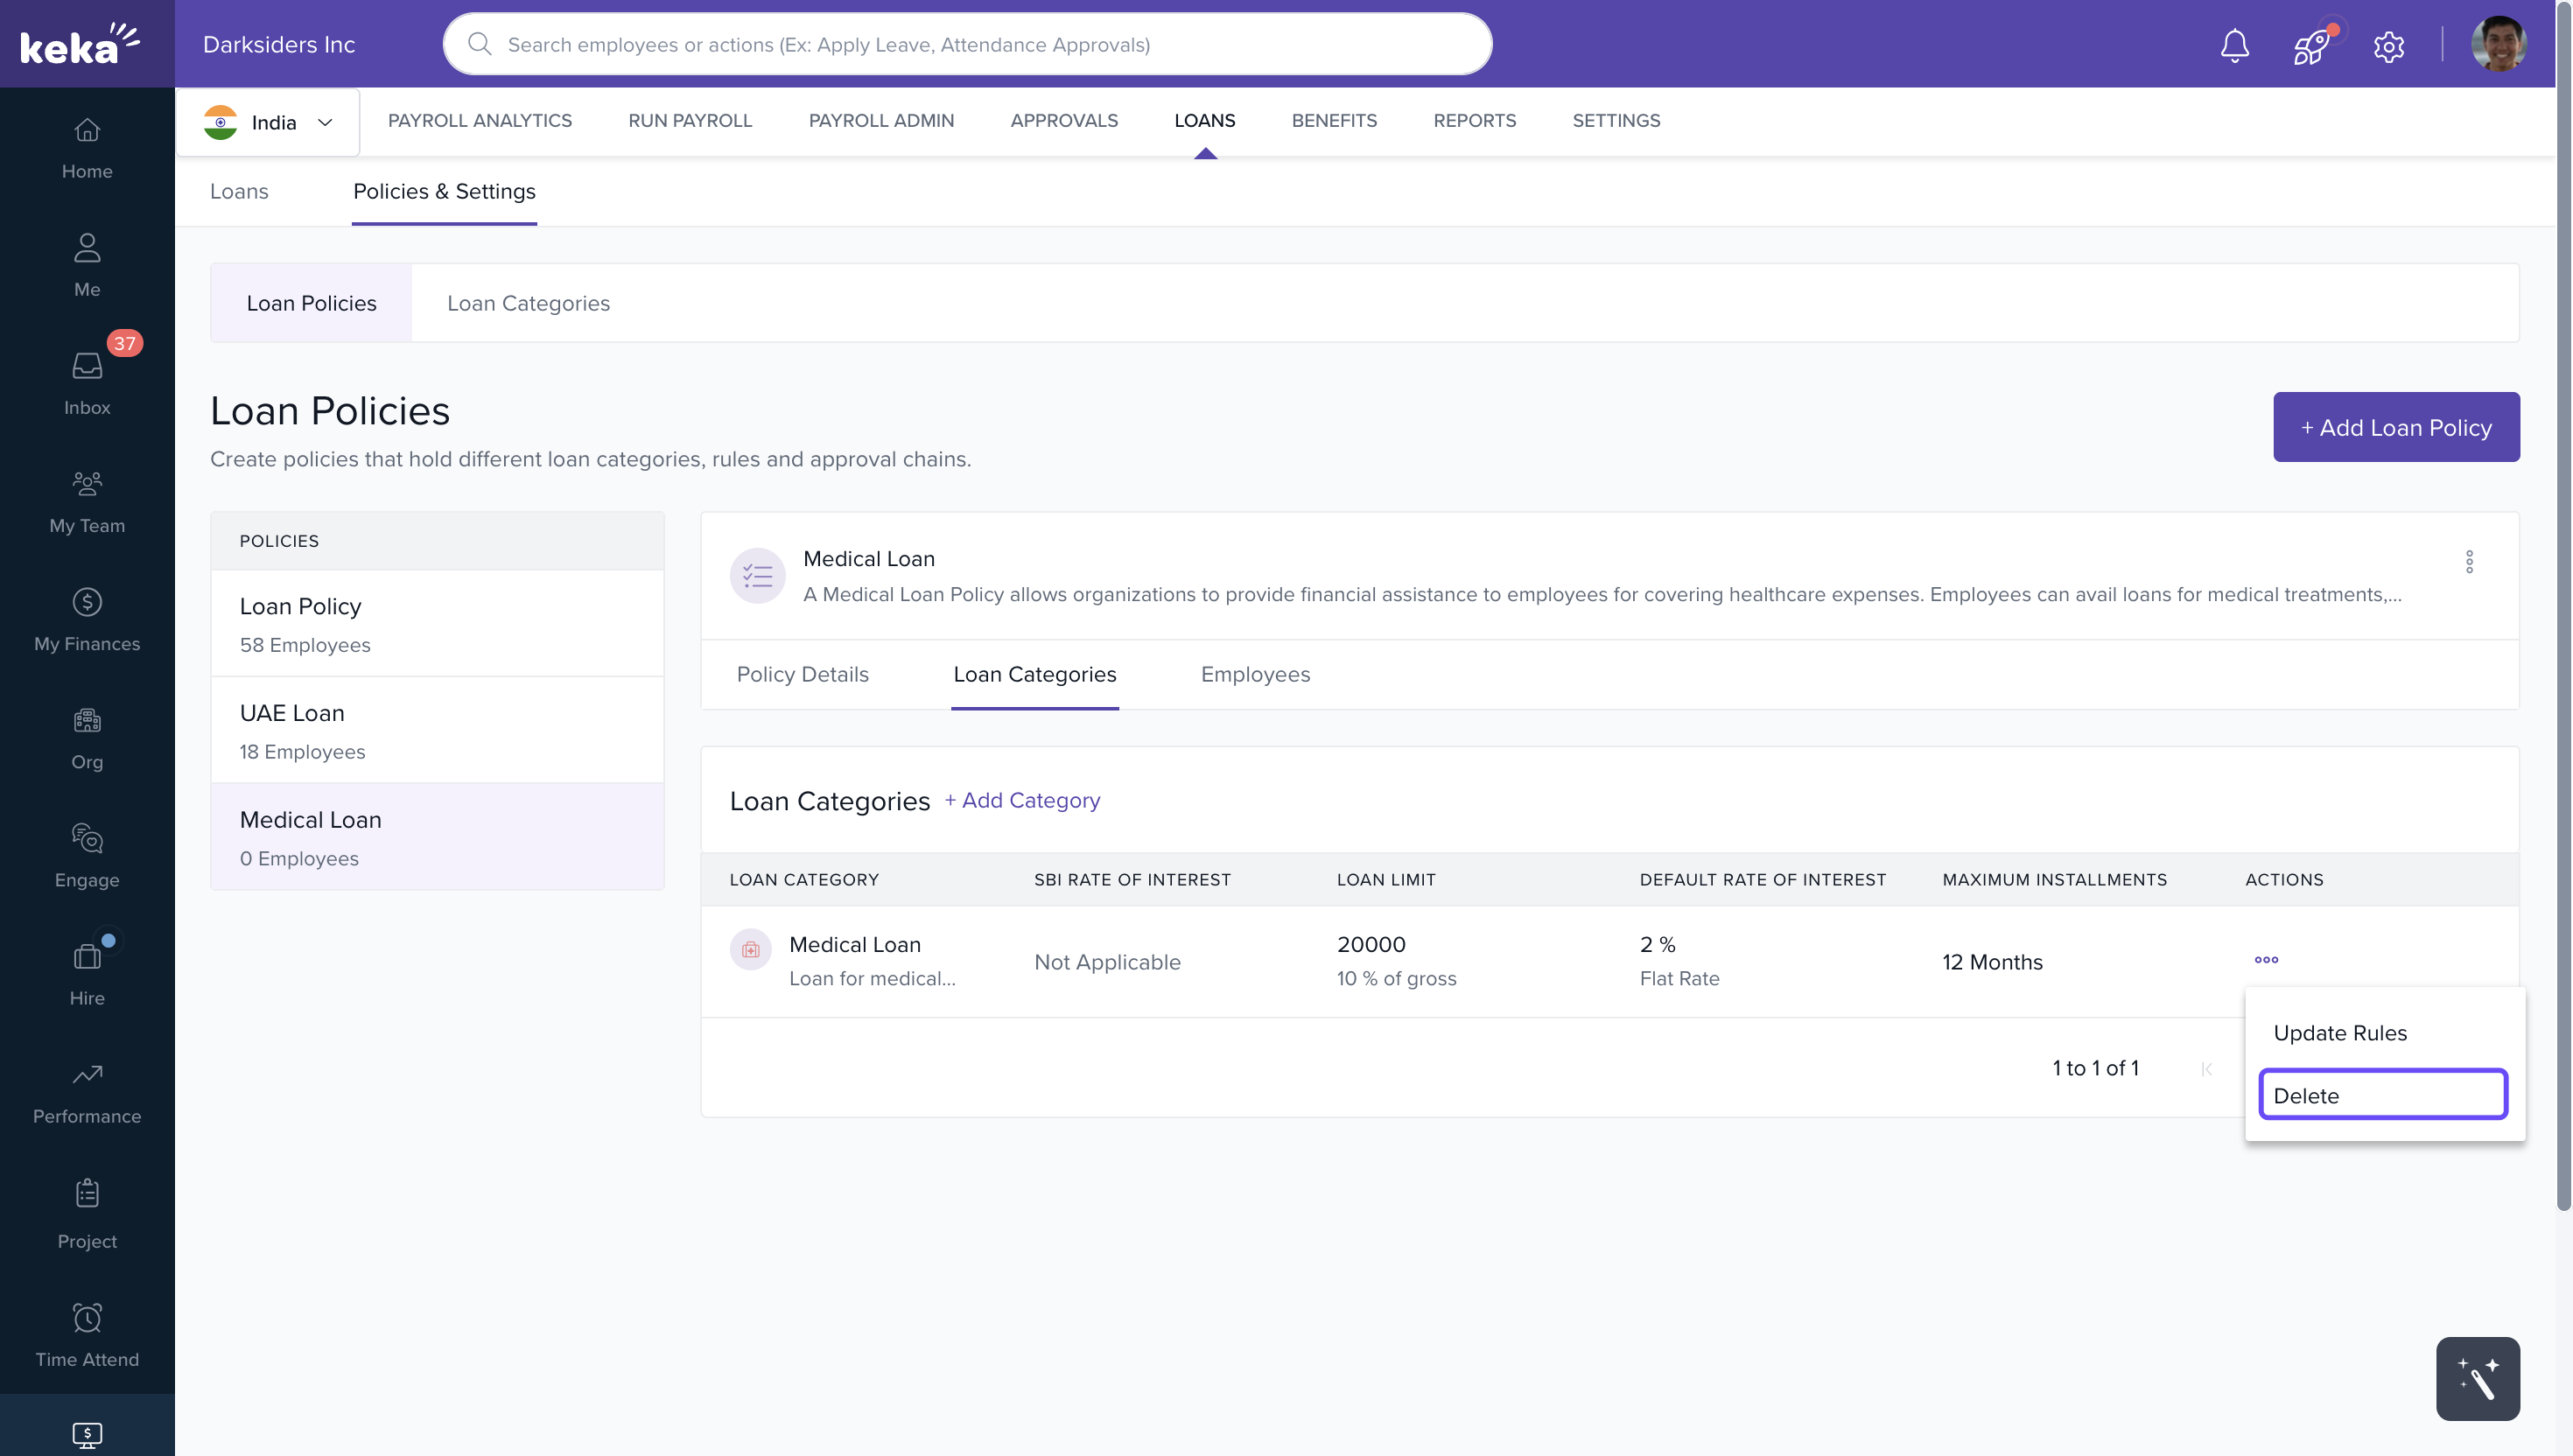
-
To remove a category from a policy, likewise select Delete from the three‑dots.
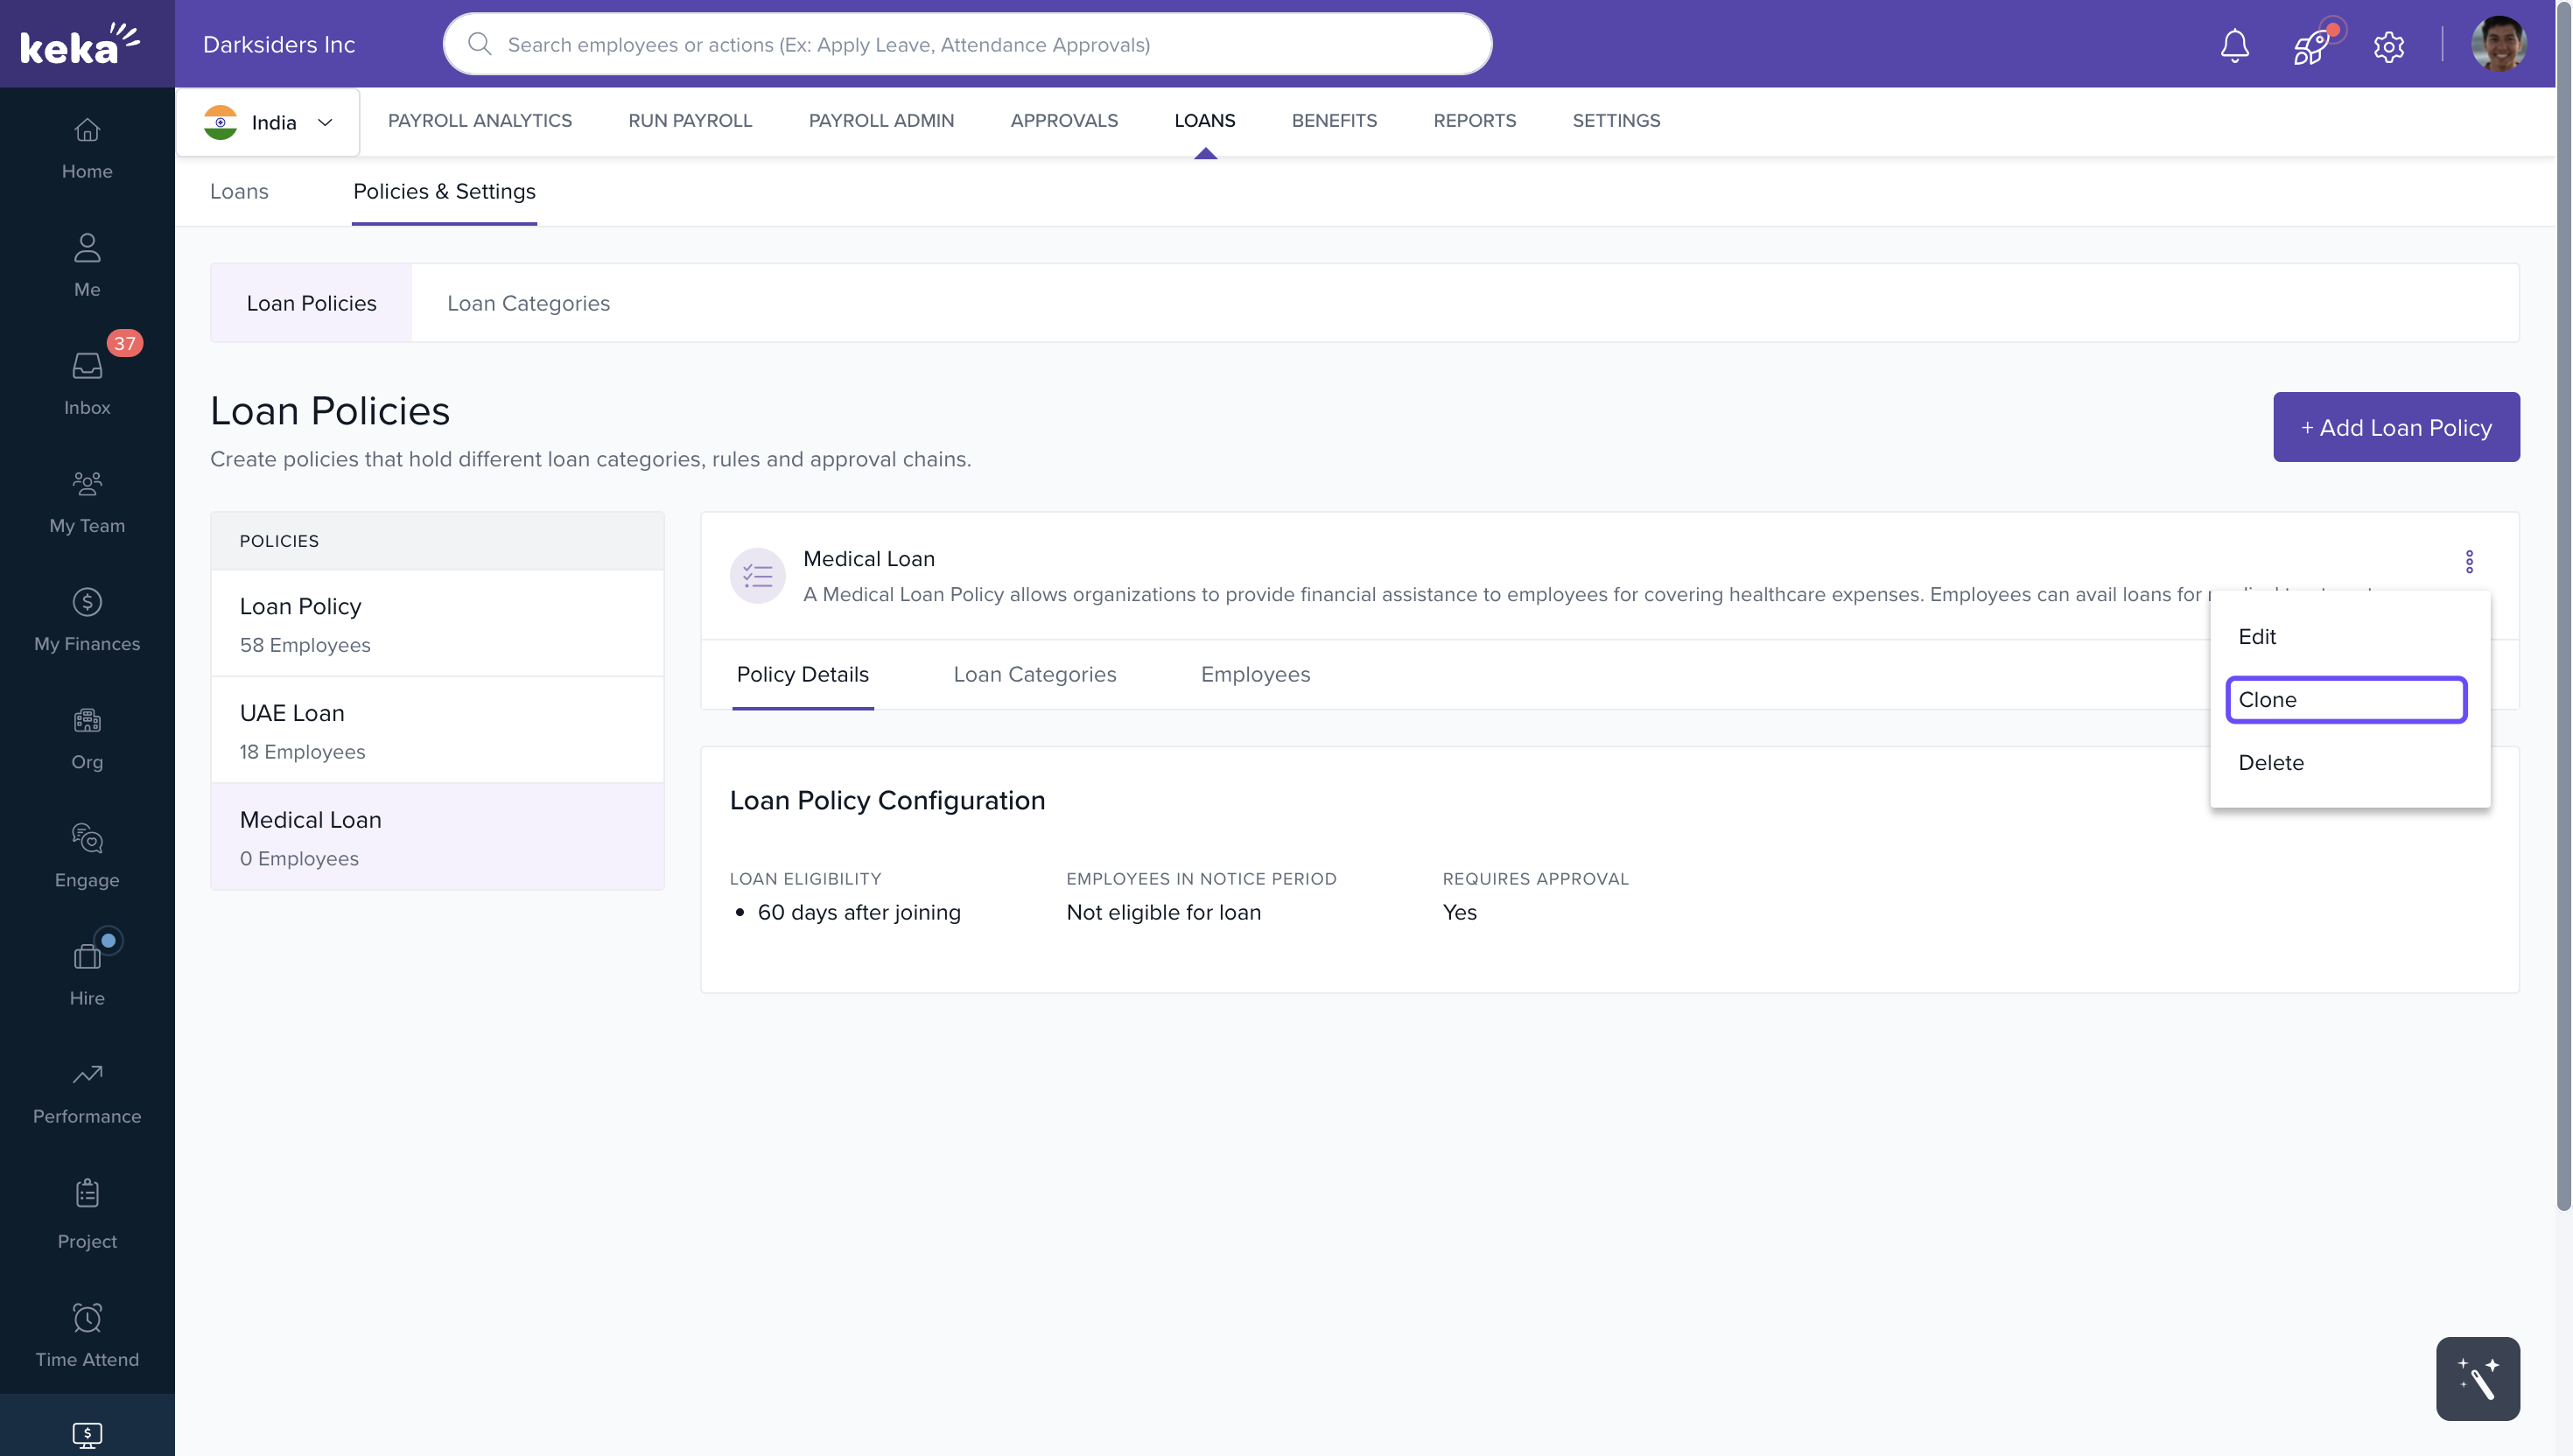
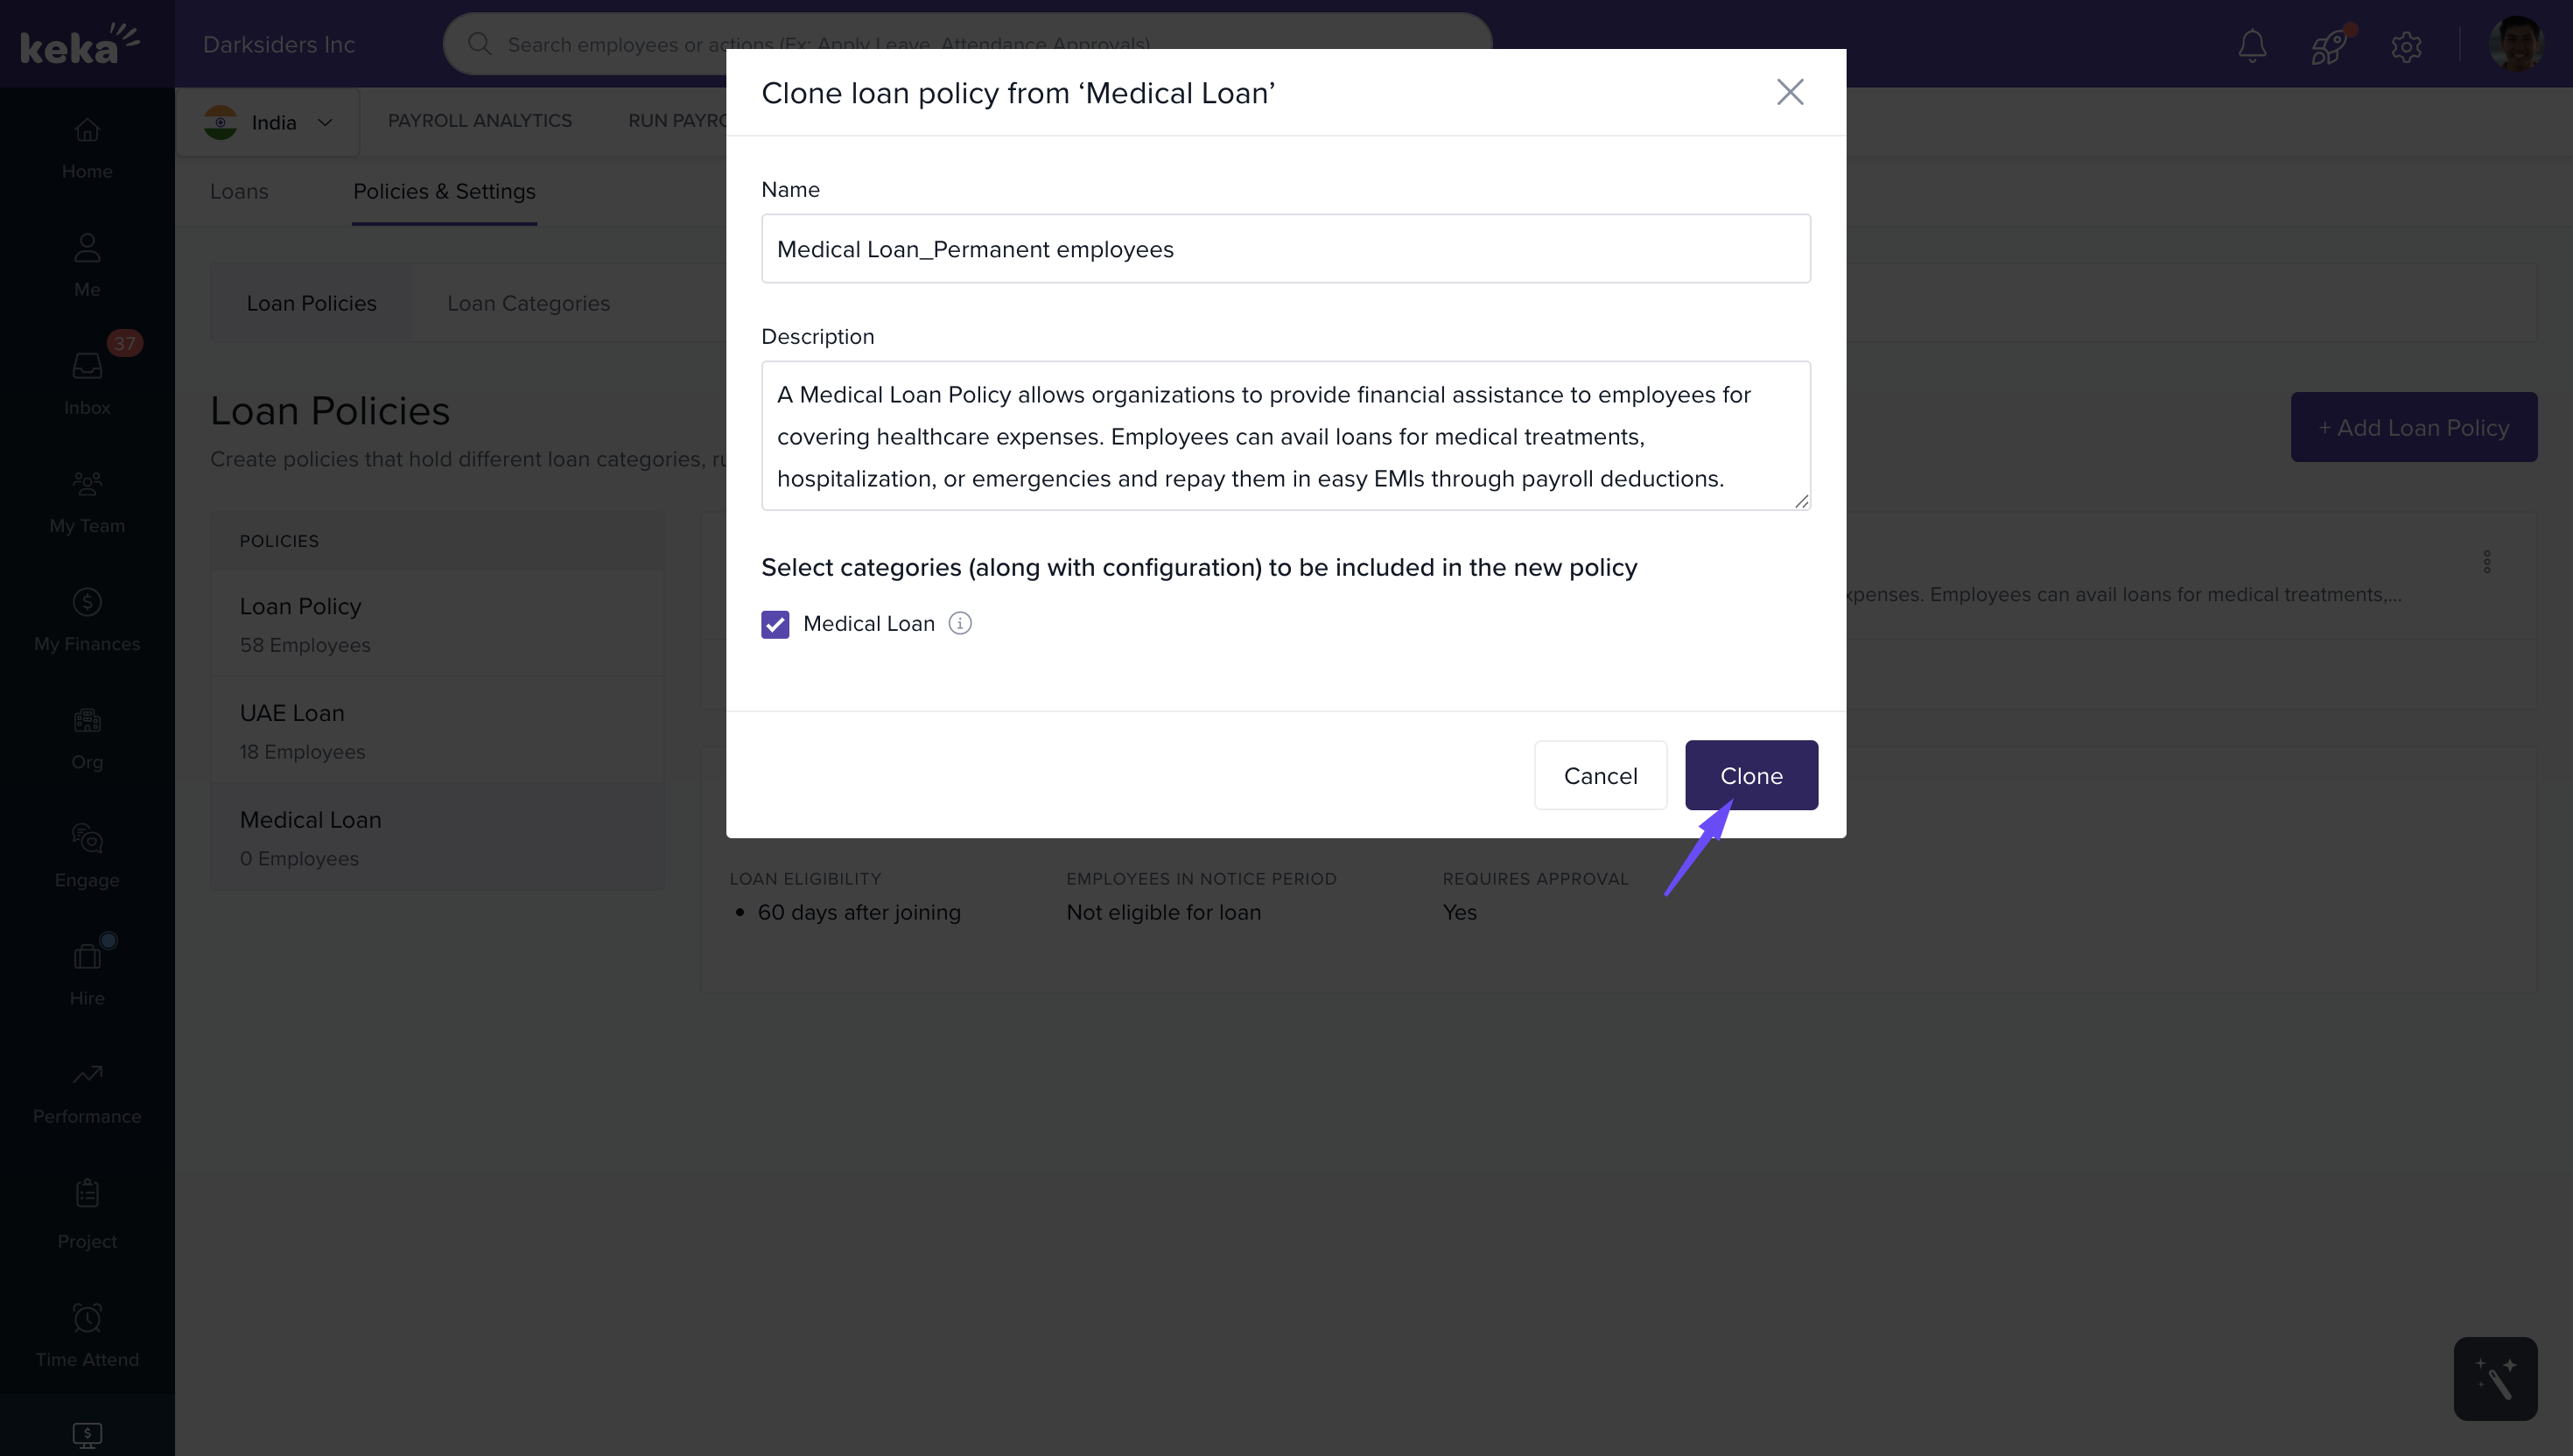
Clone an Existing Loan Policy
To save time creating similar policies:
1. Click the three‑dots → Clone.
2. In the cloning dialog, enter a new name, optionally change description, select which loan categories and rule settings to carry over or adjust.
3. Click Clone to finish.
And that's all about managing loan categories and loan policies. If you’d like to learn more about Category-Wise Loan EMI in Payroll, click here
Comments
0 comments
Please sign in to leave a comment.