Keka has enhanced the Digital ID Card feature to provide a better user experience and more flexibility.
This guide walks you through how to manage ID Card settings so you can take full advantage of the new options.
Keka has enhanced the Digital ID Card feature to improve your user experience and provide greater flexibility. This guide is designed to walk you through managing the ID Card settings effectively, helping you maximize the new functionalities.
Accessing ID Card Settings:
To view or modify your organization’s Digital ID Card settings:
From the Keka homepage, click Org in the left navigation menu.
Select Employees.
Go to Settings.
Click ID Card to open the configuration panel.
From here, you can view, edit, and personalize how Digital ID Cards appear in your organization.
Enabling/Disabling Digital ID Cards:
Control whether Digital ID Cards are available for your employees:
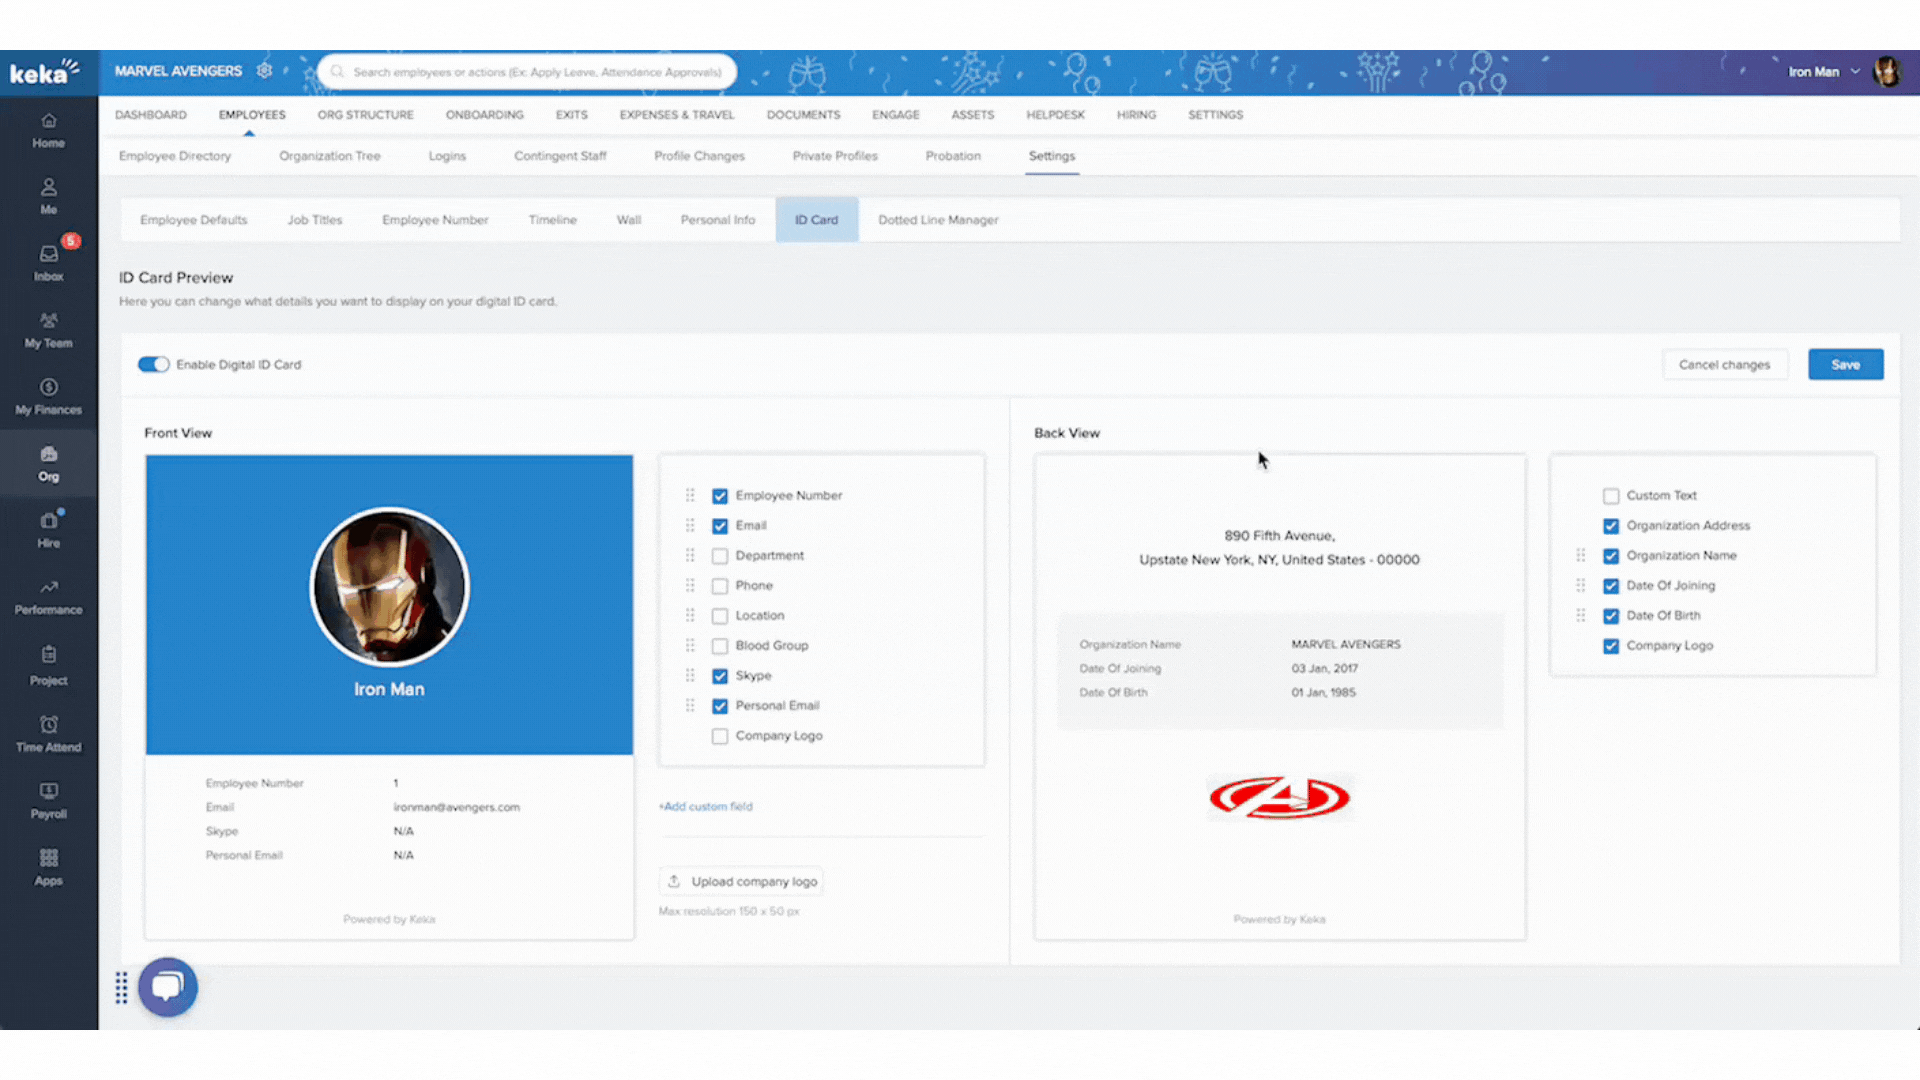
Click Edit Settings in the ID Card configuration.
Use the toggle switch to enable or disable Digital ID Cards.
Click Save to confirm your selection.
Tip: Disabling Digital ID Cards hides them for all users until re-enabled.
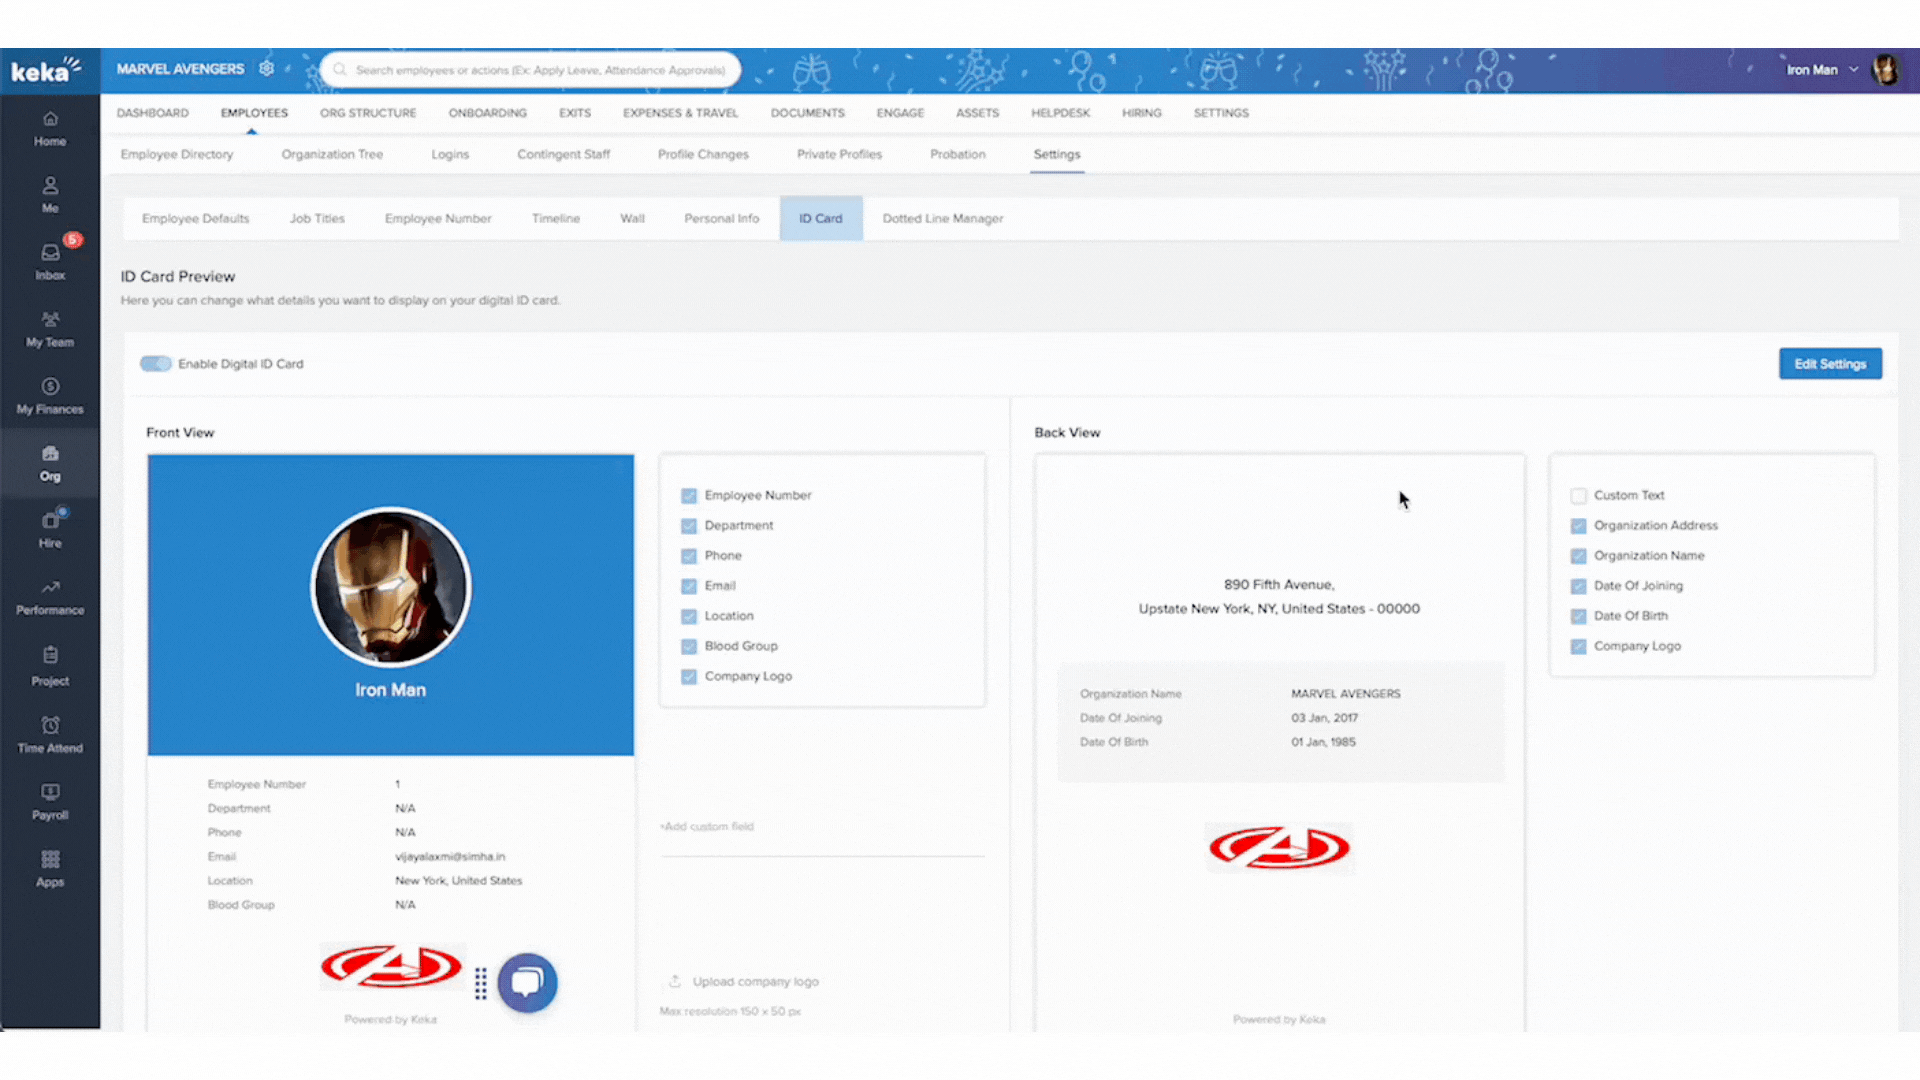
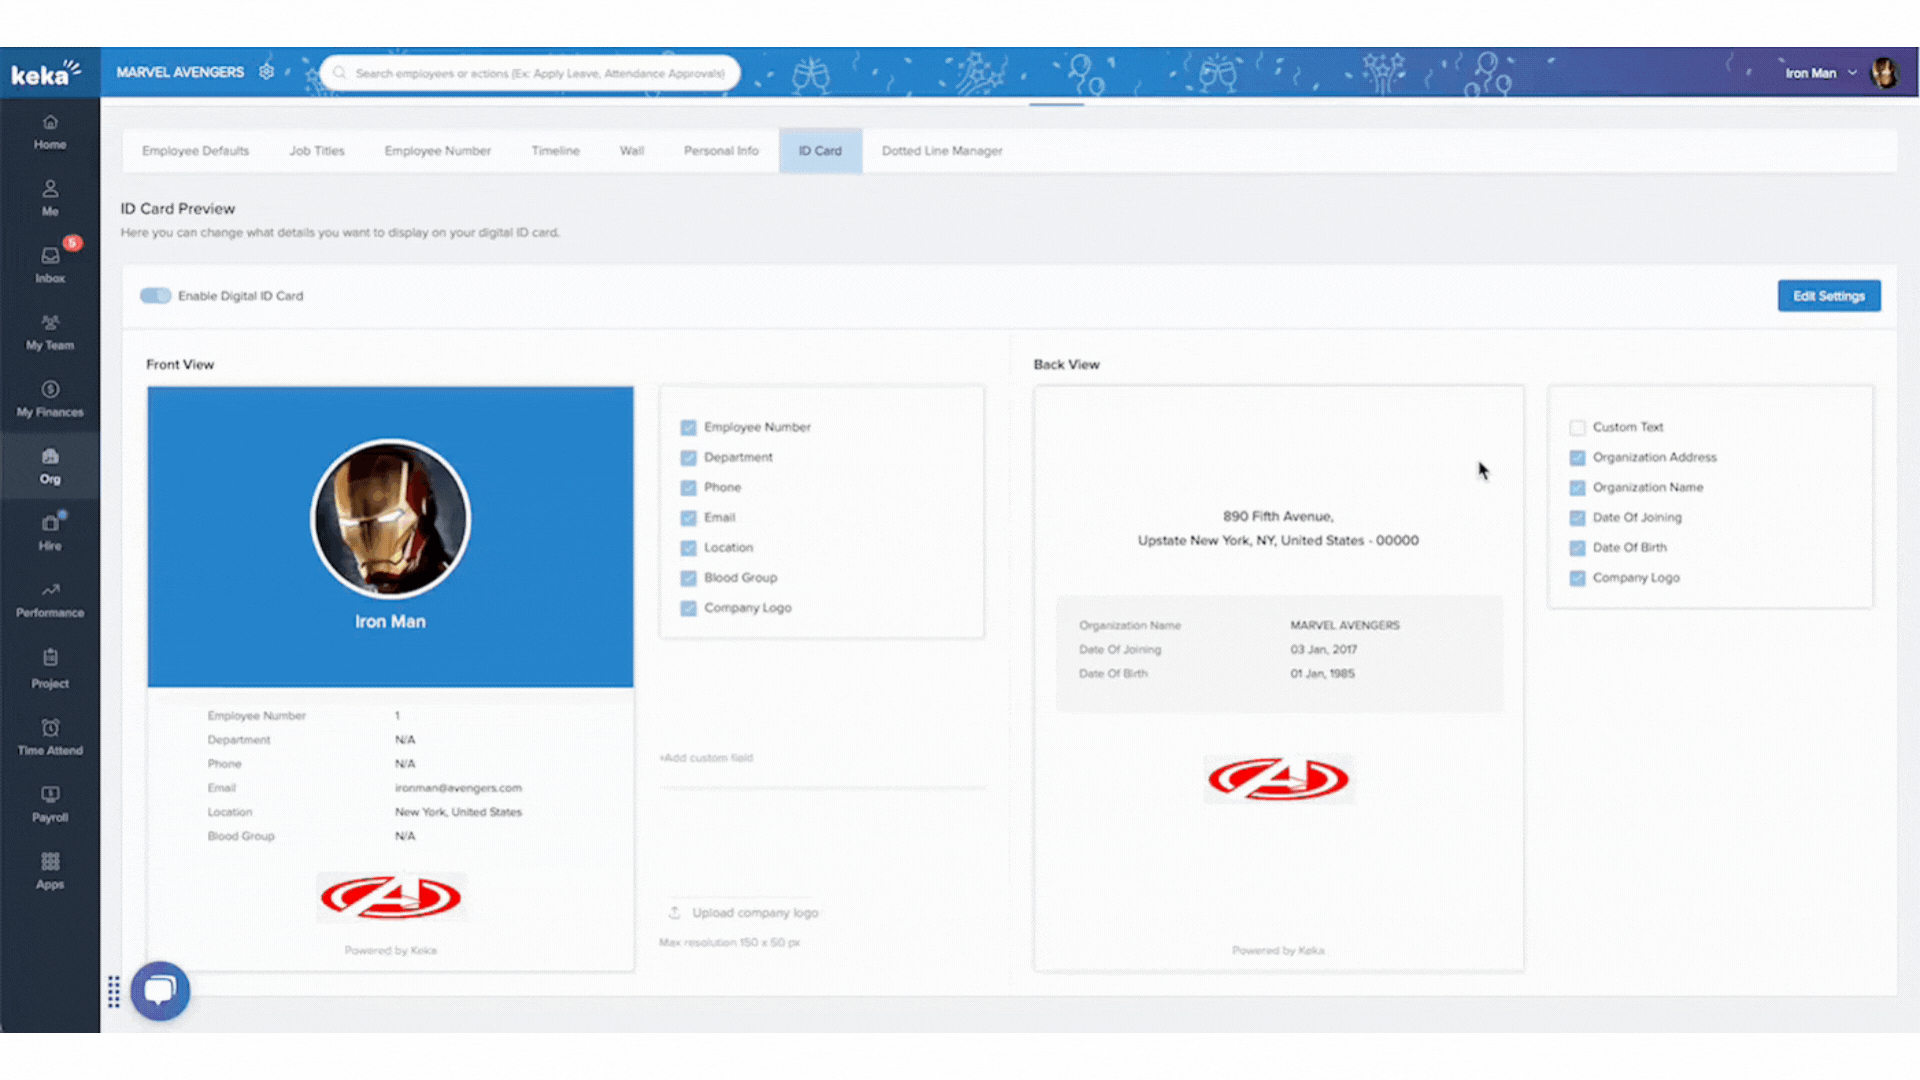
Customizing ID Card Fields:
You can decide what information appears on the front and back of each employee’s ID Card.
Check or uncheck fields like Employee Number, Department, or Email to include or remove them.
Use the drag handle (six dots) to rearrange fields in your preferred order.
This customization helps you design cards that match your organization’s format and branding.
Adding Custom Fields
Need to include extra details? You can add up to two custom fields to the ID Card.
Click + Add Custom Field.
Choose from the list of predefined field options.
Click Save to apply.
Note: Custom fields allow additional identifiers like internal codes or project tags.
 Updating Company Logo:
To update the company logo displayed on the ID Card:
Click Upload Company Logo.
Choose the image file you want to upload.
Follow Keka’s size guideline — maximum resolution: 150 × 50 px.
Your logo appears on all employee ID Cards once uploaded.
Adding Custom Text on the Back of the ID Card
Add a personal touch or essential instructions to the back of your ID Cards.
Enable the Custom Text option.
Type your message for example, a company motto or security instructions.
By default, the text reads:
“Glad to have you with us! Time to achieve great things together.”To modify it, click the pencil icon and edit the content.
Once you’ve made all your adjustments:
Review your selections.
Click Save to confirm and apply updates.
All changes take effect immediately across the organization’s Digital ID Cards.
Managing ID Card settings in Keka is simple and highly customizable. With just a few clicks, you can personalize employee ID Cards to reflect your organization’s style and values.
If you need further assistance, contact Keka Support.
Comments
0 comments
Please sign in to leave a comment.