If you're new to Keka and need to add job details for all employees at once, or if you’re updating employee job details after a restructuring, bulk-importing is the ideal solution. You can quickly add or update key job-related information, such as legal entity, business unit, job title, department, location, reporting manager, dotted line manager, policies, and shift timings, all at once using an Excel file. This streamlined approach removes the hassle of manual updates for each employee.
Who can import employee job details?
Only Global Administrators can bulk import or update employee job details in Keka. This ensures secure and controlled access to sensitive employee data.
Where can you import the job details from?
You can import job details from either of the following two locations in Keka:
1. From Global settings
2. From the quick links section on the Org Dashboard.
1. Data Import option from global settings
Click Global Settings from the top menu.
Go to Data Import.
Under the Employee category, select Employee Job Details.
Click Import New Data.
2. Data import from the quick links section on the org dashboard
Go to Org from the left menu.
In the Dashboard tab, locate the Bulk Operations section.
Click Import Employee Job Details.
Both paths lead you to the Import Employee Job Details page.
Import Process
Step 1: Download the Excel Template
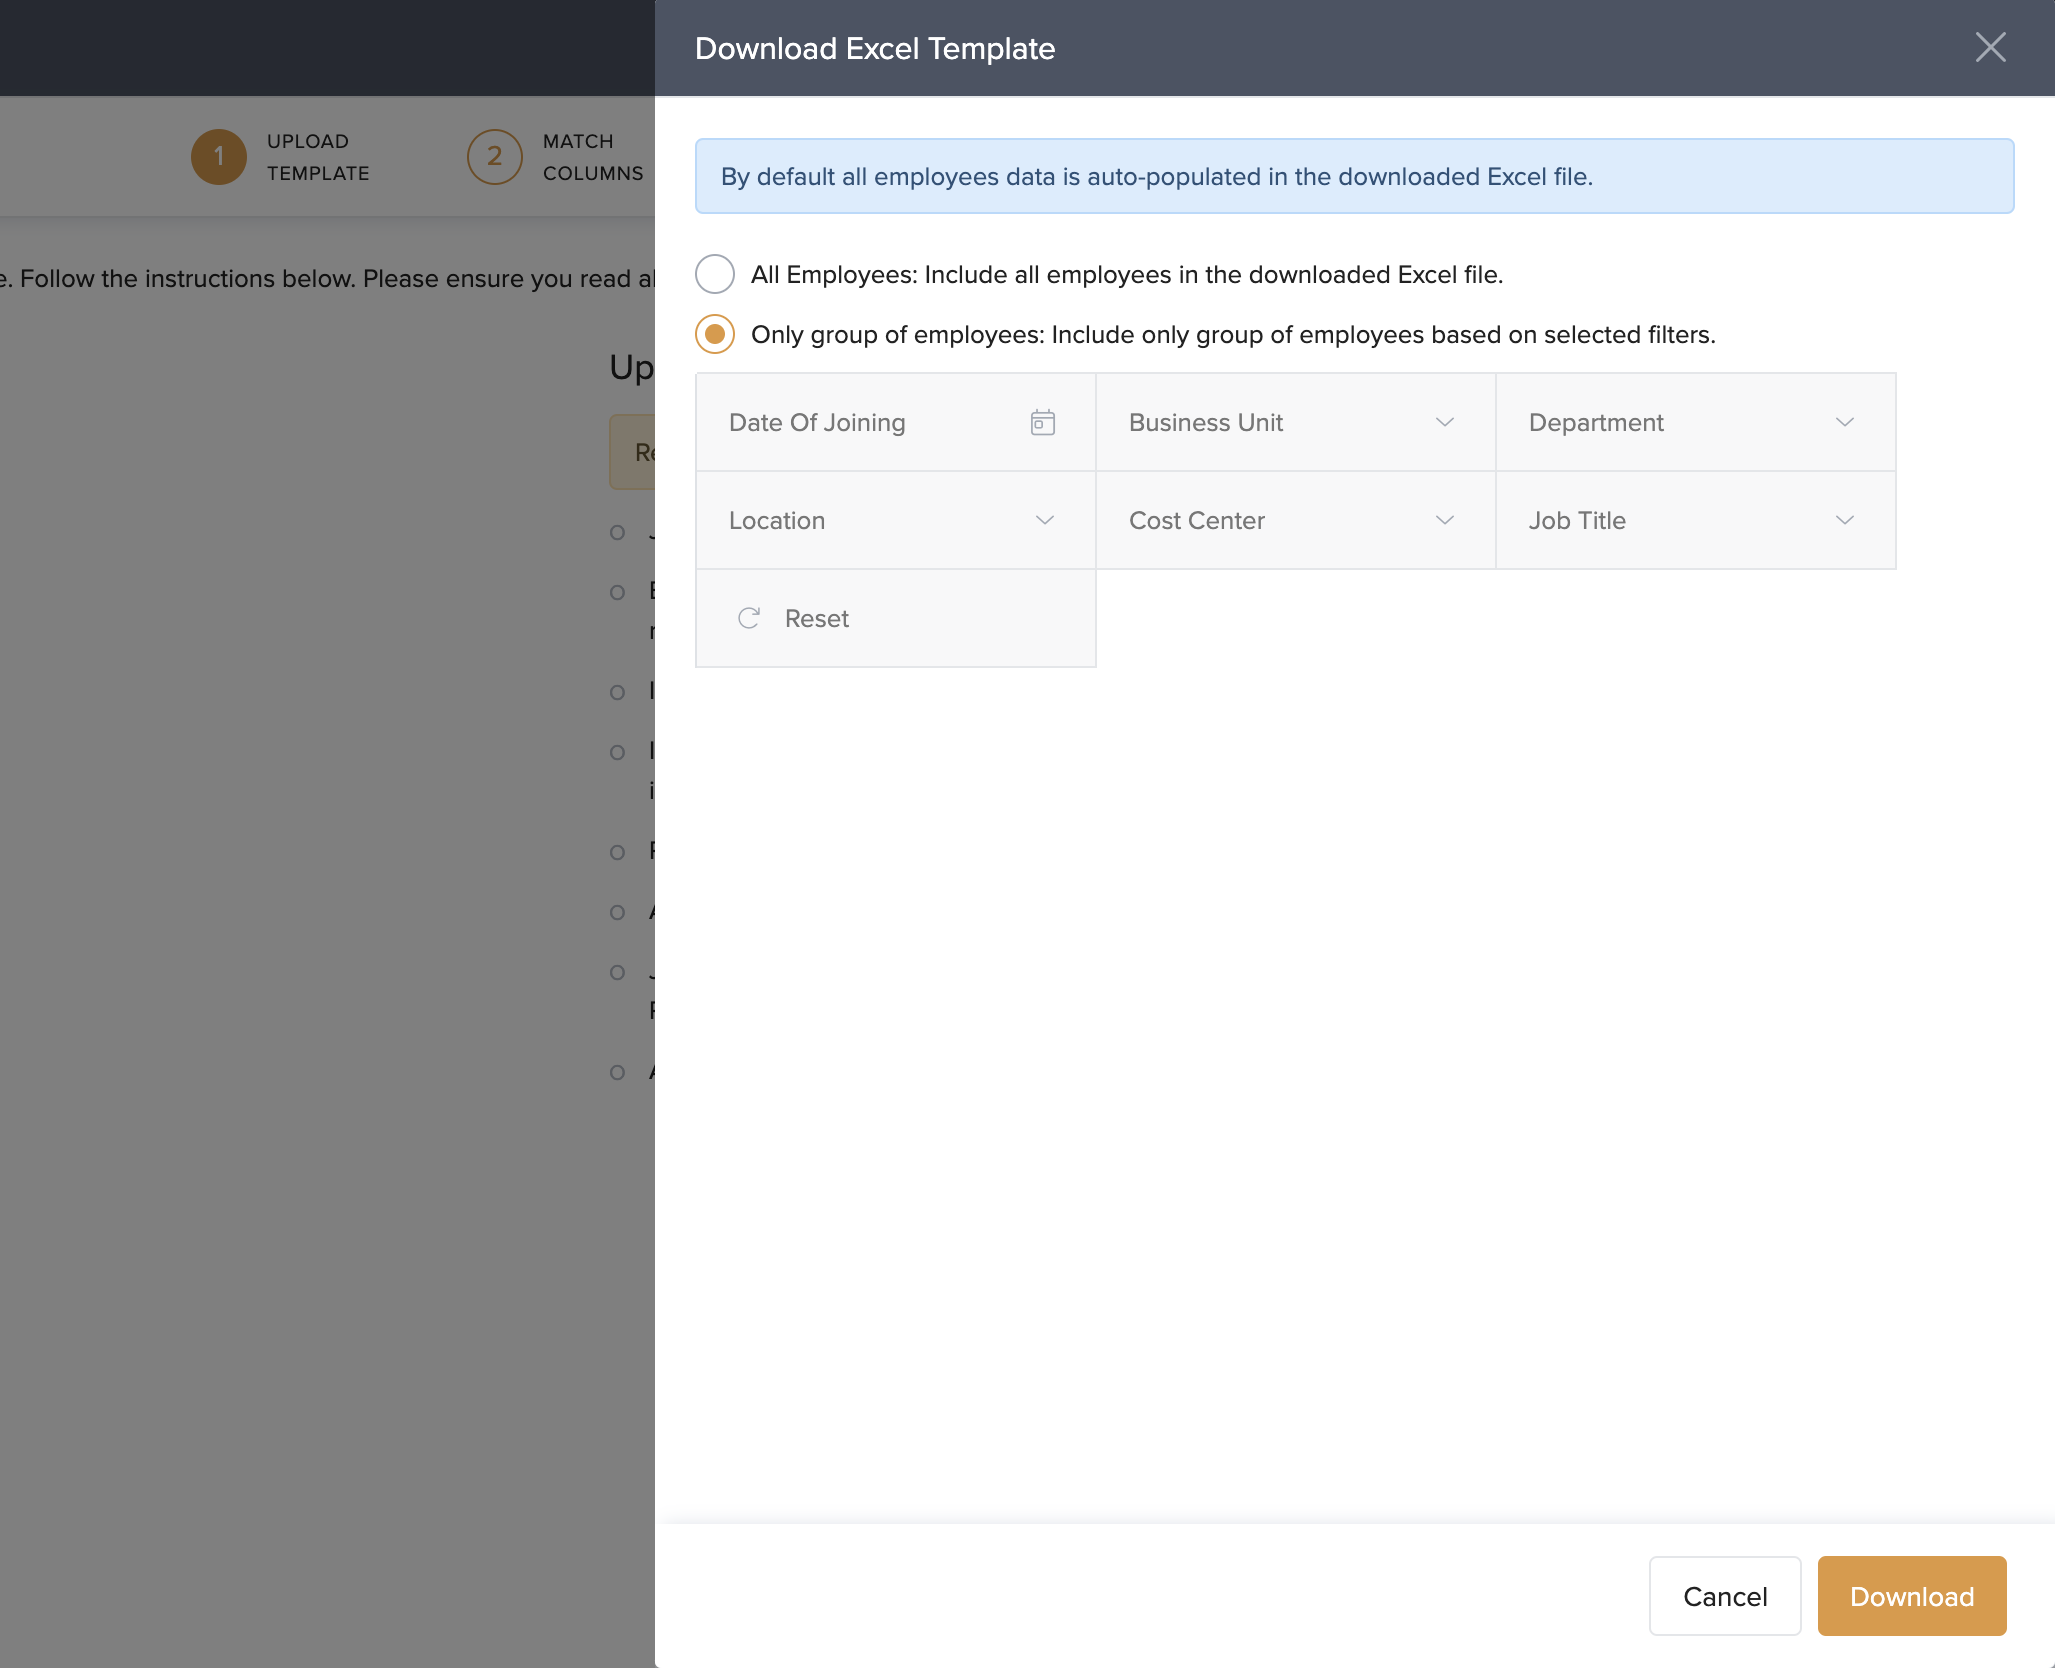
On the Import Employee Job Details page, select the country and click Download the Excel Template.
2. Choose one of the following:
All Employees – to download data for everyone in your organization.
Only group of employees – to download a filtered list.
You can filter employees by:
Date of Joining
Business Unit
Department
Location
Cost Center
Job Title
The Excel file will contain job data for the selected group of employees.
Step 2: Fill in Job Details
Open the Excel file and fill in or update the job-related information. Columns marked in red are mandatory and must not be left blank.
If the information already exists in the system, it will be updated.
If it’s new, the system will add the data from your Excel sheet.

Step 3: Upload the Excel File
Back on the Import Employee Job Details page, click Upload Excel File.
Select your file. You’ll be directed to the Match Columns screen.
Ensure each column in your Excel file matches the appropriate field in Keka.
Click Continue to go to the Preview Data screen.
If there are any errors in your file, they’ll appear here.
Fix them in the Excel file and re-upload it.
Once all errors are resolved, click Complete.
In the confirmation popup, click Confirm.
Notes, Tips, and Warnings
Important: Columns marked in red in the Excel sheet are mandatory. Leaving them blank will prevent the file from being uploaded.
Note: You can only update or add data. This process does not delete any existing information.
Let us know if you found this article helpful!
Comments
0 comments
Please sign in to leave a comment.