In this article we will discuss about how to automate your Form 24Q filings through Keka.
The scope of this feature is to have the ability to file 24Q returns every quarter automatically rather than you generating 24Q return files, downloading the ZIP file and uploading it into your e-filing portal manually.
TDS compliance (24Q) has two parts to it, they are:
- Monthly TDS Payment (7th of every month)
- Quarterly Filing of 24Q
As a part of automating the compliances for the organization, TDS return filing which happens at the end of every quarter is one of the most important compliances where the tax deduction and employee income will be reported to the government.
Until now on Keka, we supported the generation of 24Q, but you had to add challans manually, generate return files, fix the errors if any, download the relevant compliance files from Keka, and upload them to your income tax e-filing portal every quarter.
The individual handling the compliance of a company has to keep track of the dates for compliance and ensure that they complete the filing on their respective website before the due date.
This is a time-consuming and repetitive process that all organizations have to undertake on a frequent basis.
In order to minimize the manual effort from your end, we have created an automated procedure to generate 24Q files on your behalf!
Let us now take a look at how to initiate this automation -
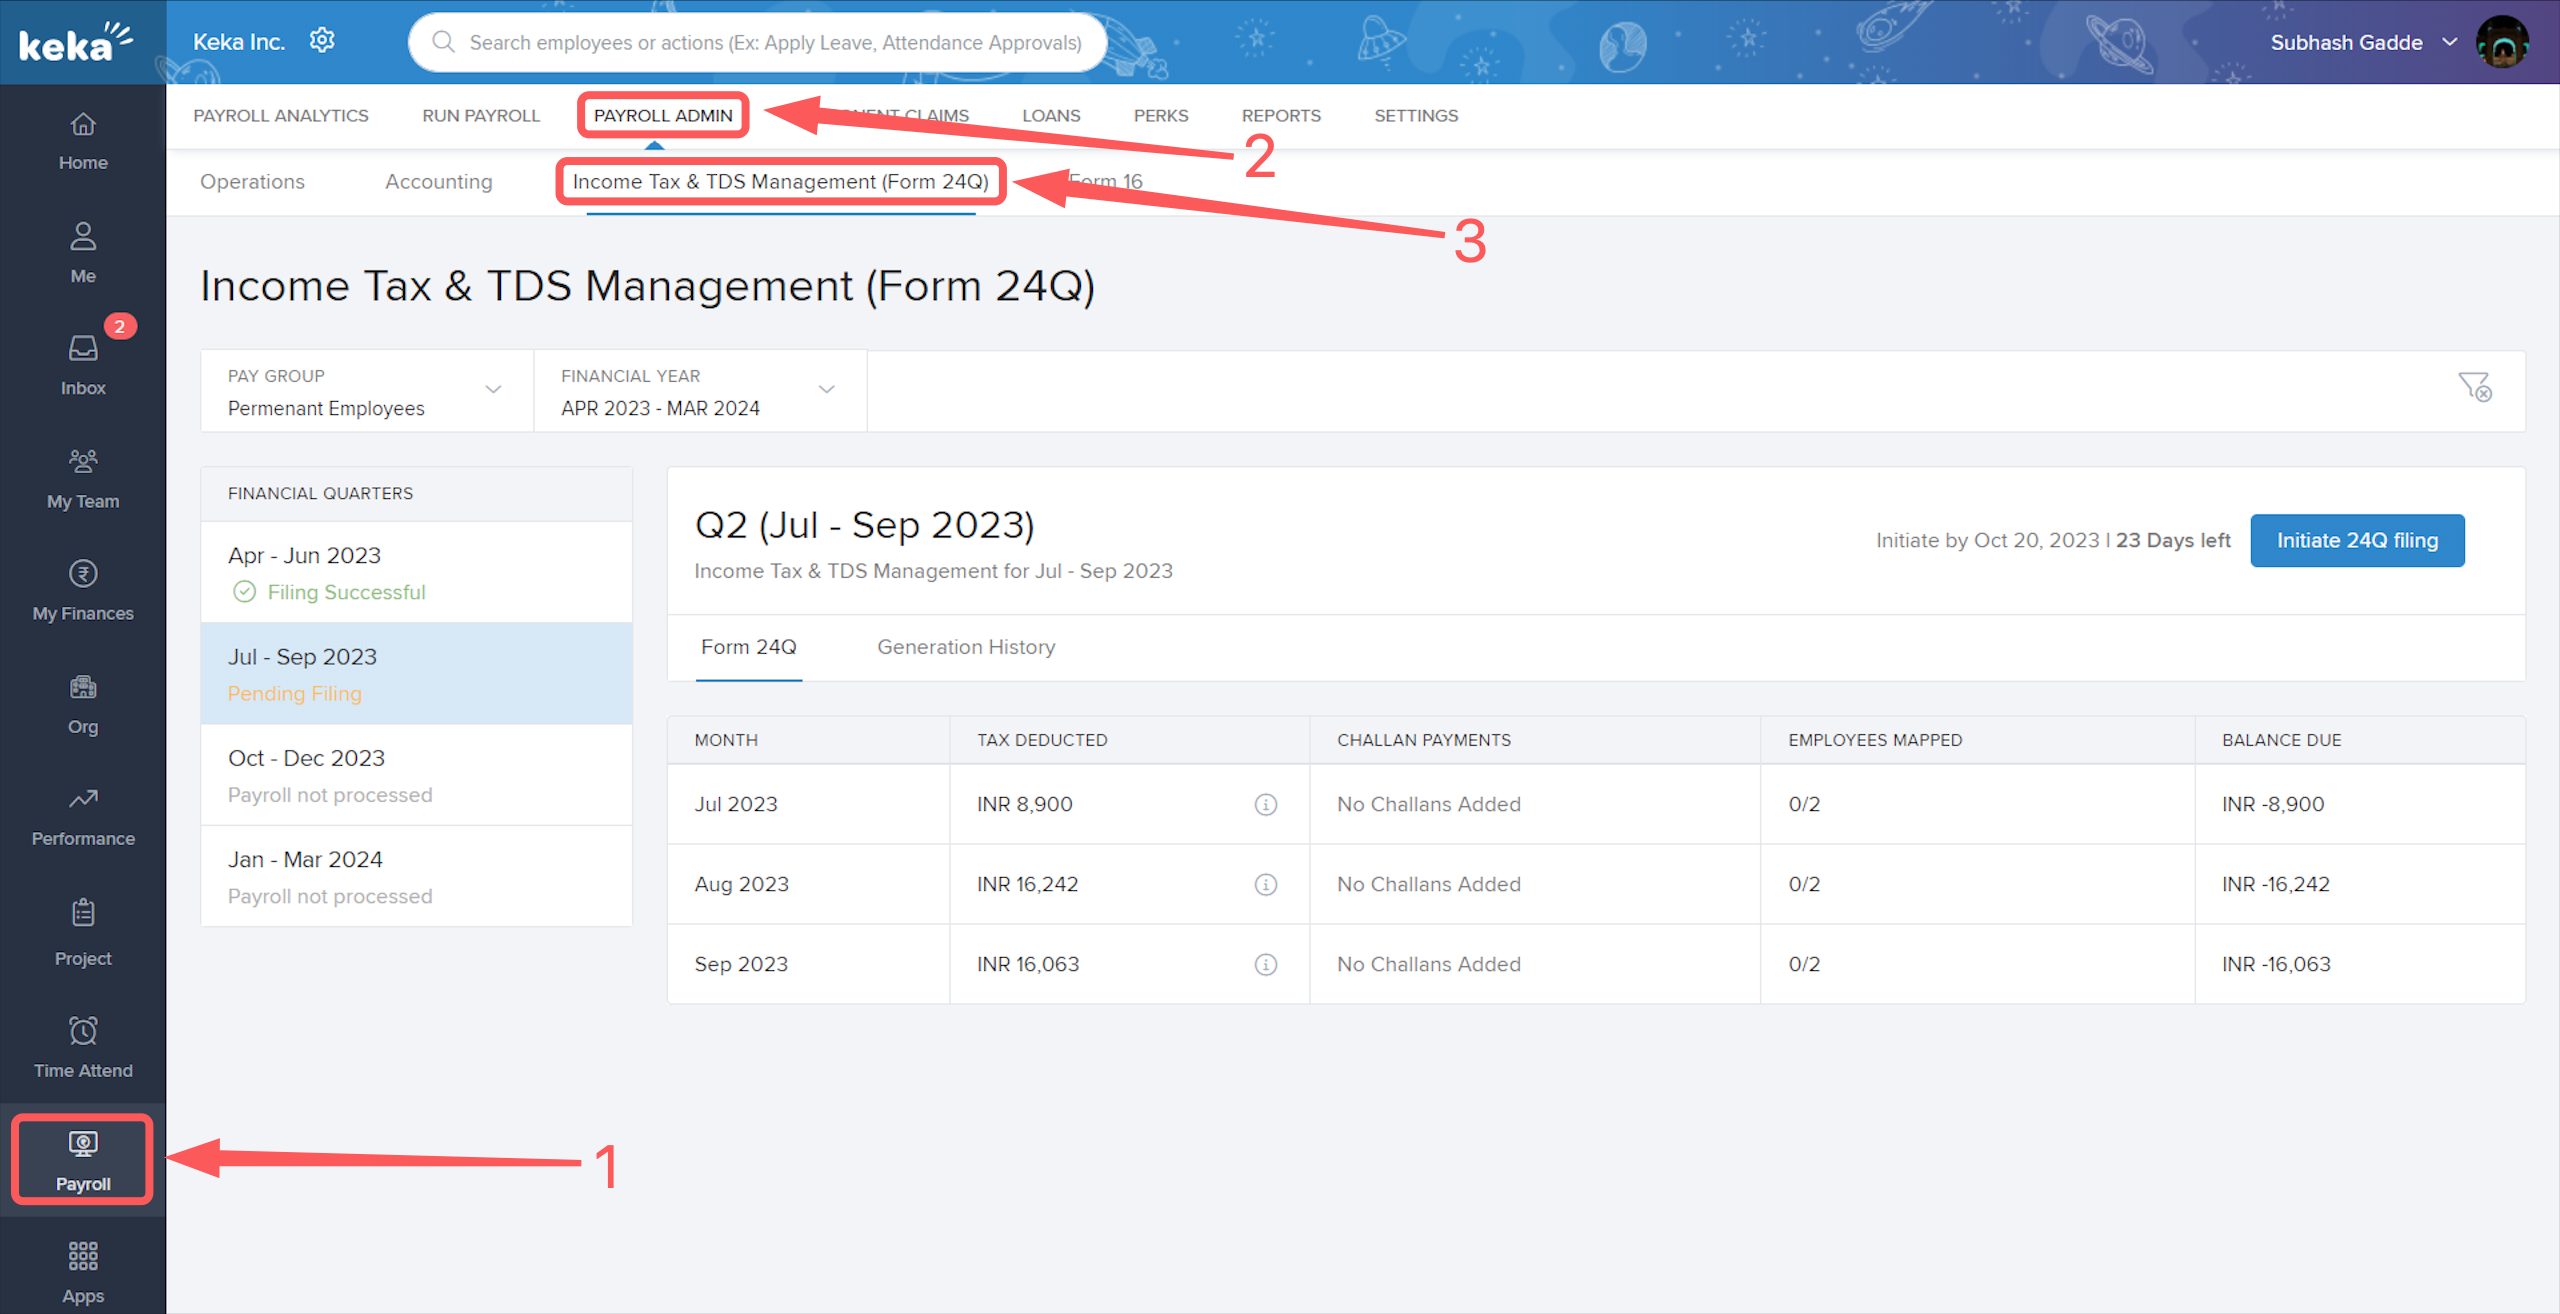
Go to the Payroll (1) section, click on Payroll Admin (2), then select Income Tax & TDS Management (Form 24Q) (3).
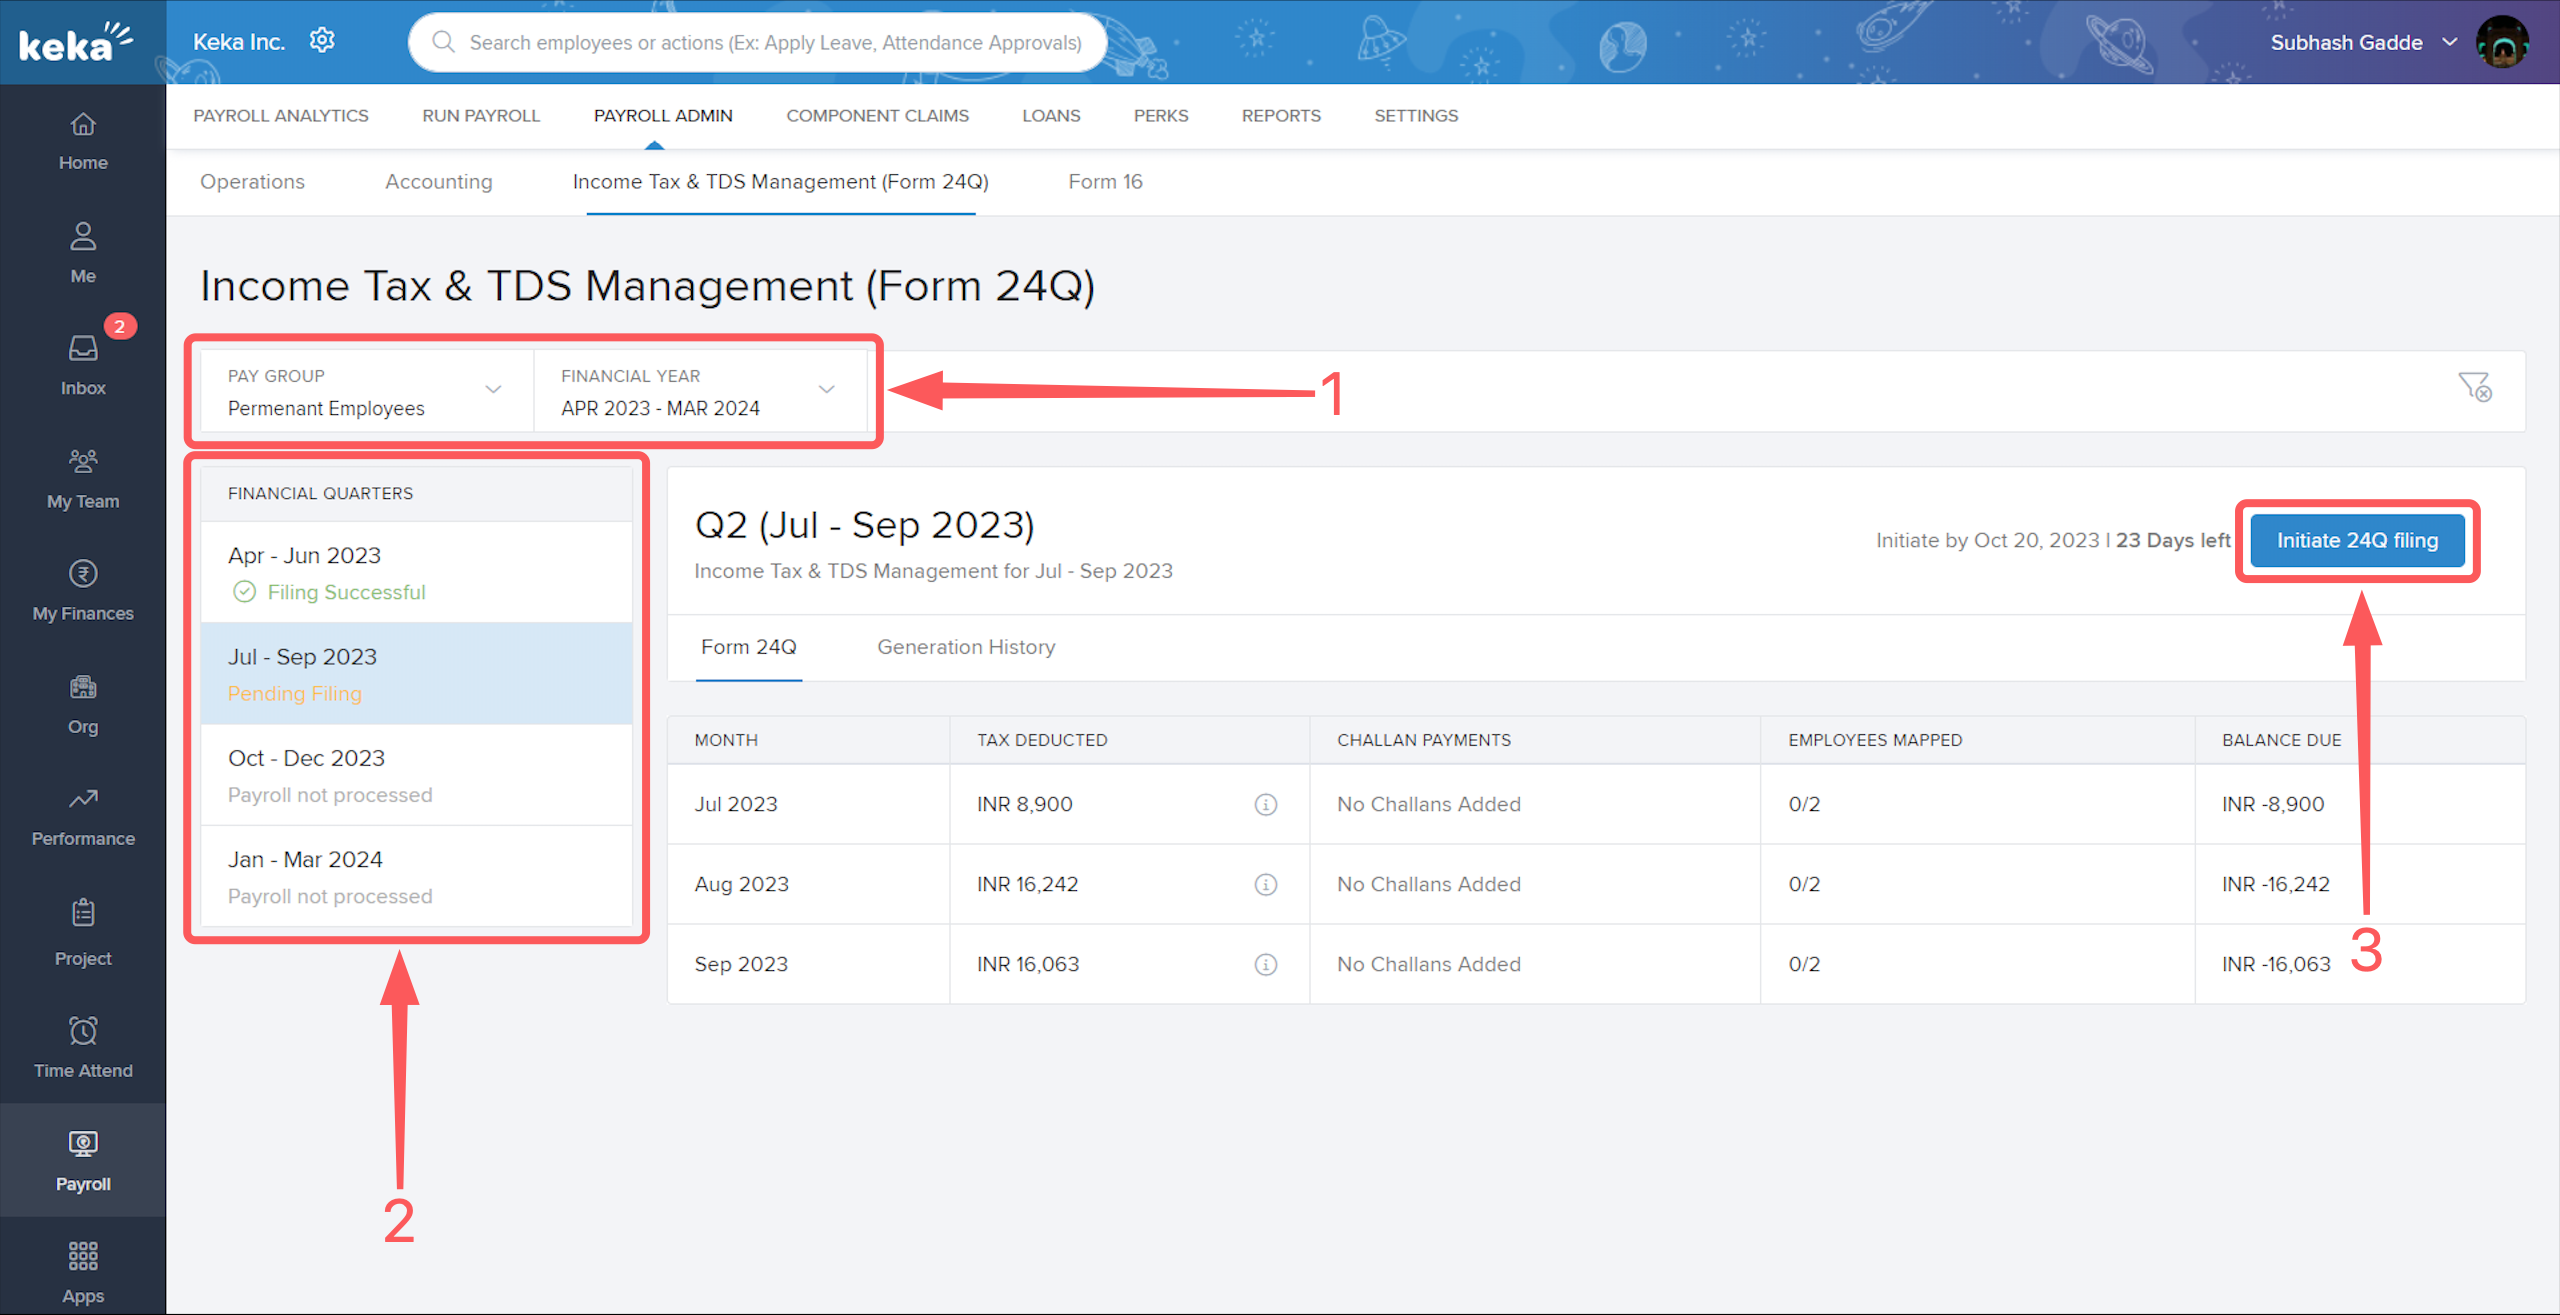
If you have multiple pay groups, then at the top of the page you will see the option to select the desired pay group (1) and also the financial year (1).
After this, you will have to select the desired quarter (2) of the particular financial year you wish to initiate 24Q filing for and then click on Initiate 24Q filing (3).
You can view the due date and the number of days left to initiate your 24Q filing for a particular quarter next to the Initiate 24Q filing�(3) button.
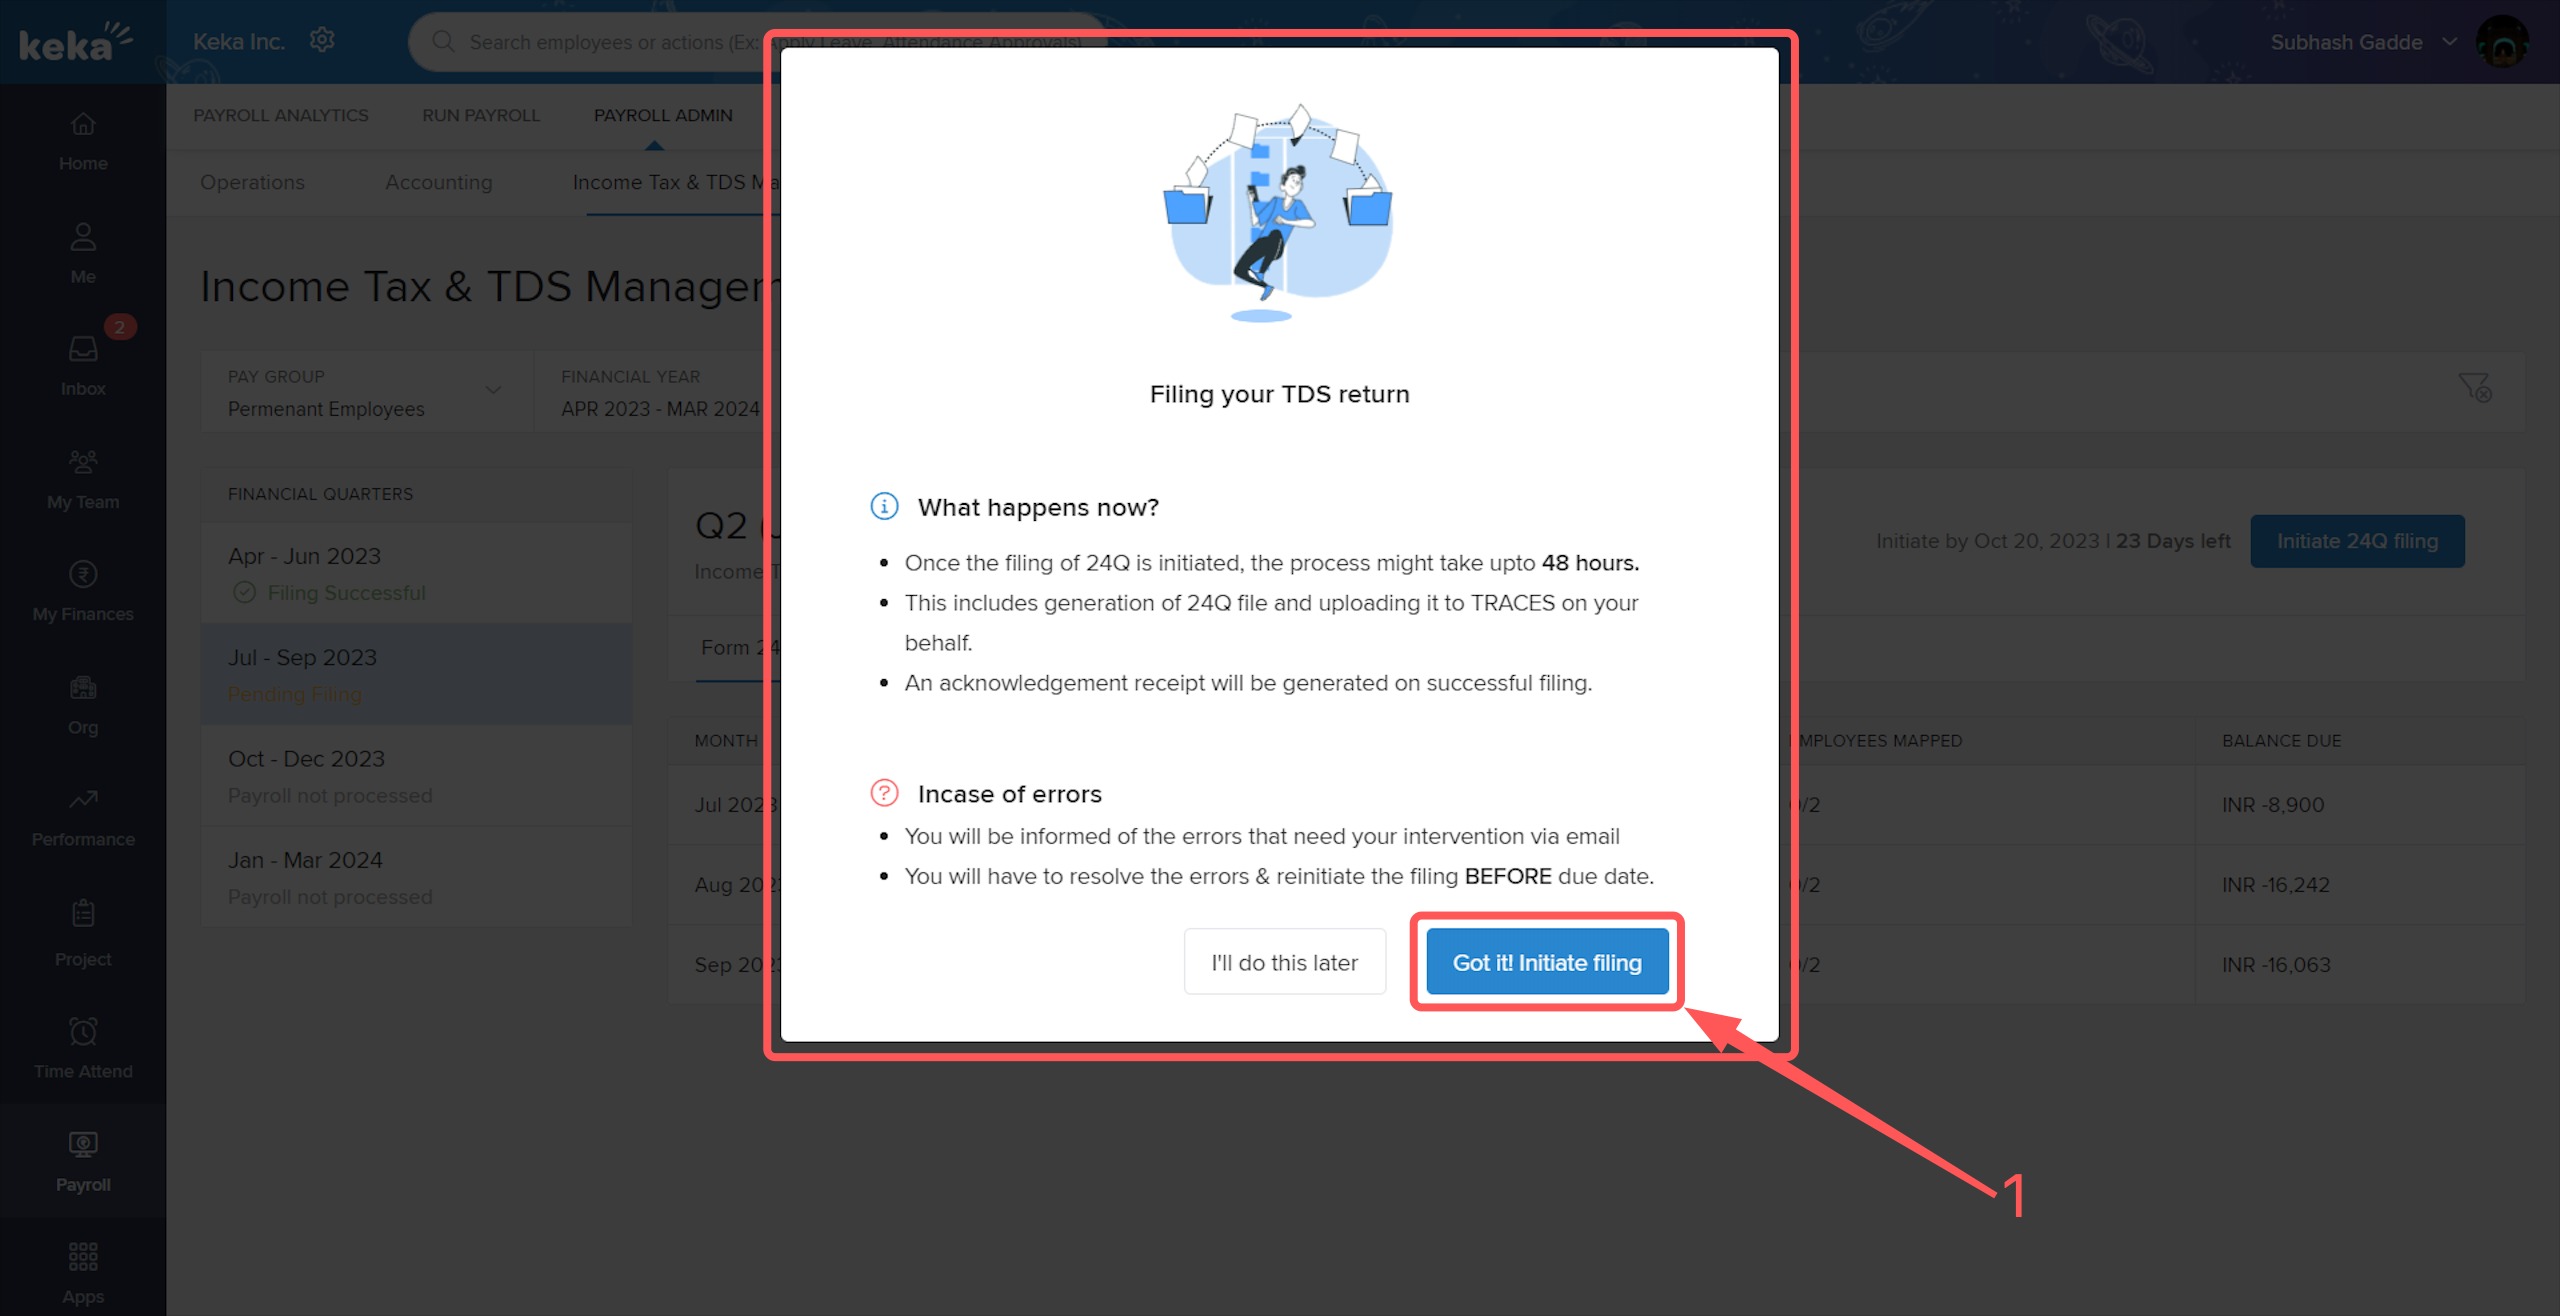
An overlay window will pop-up giving you some additional details, kindly go through the same and then click on Got it! Initiate filing (1).
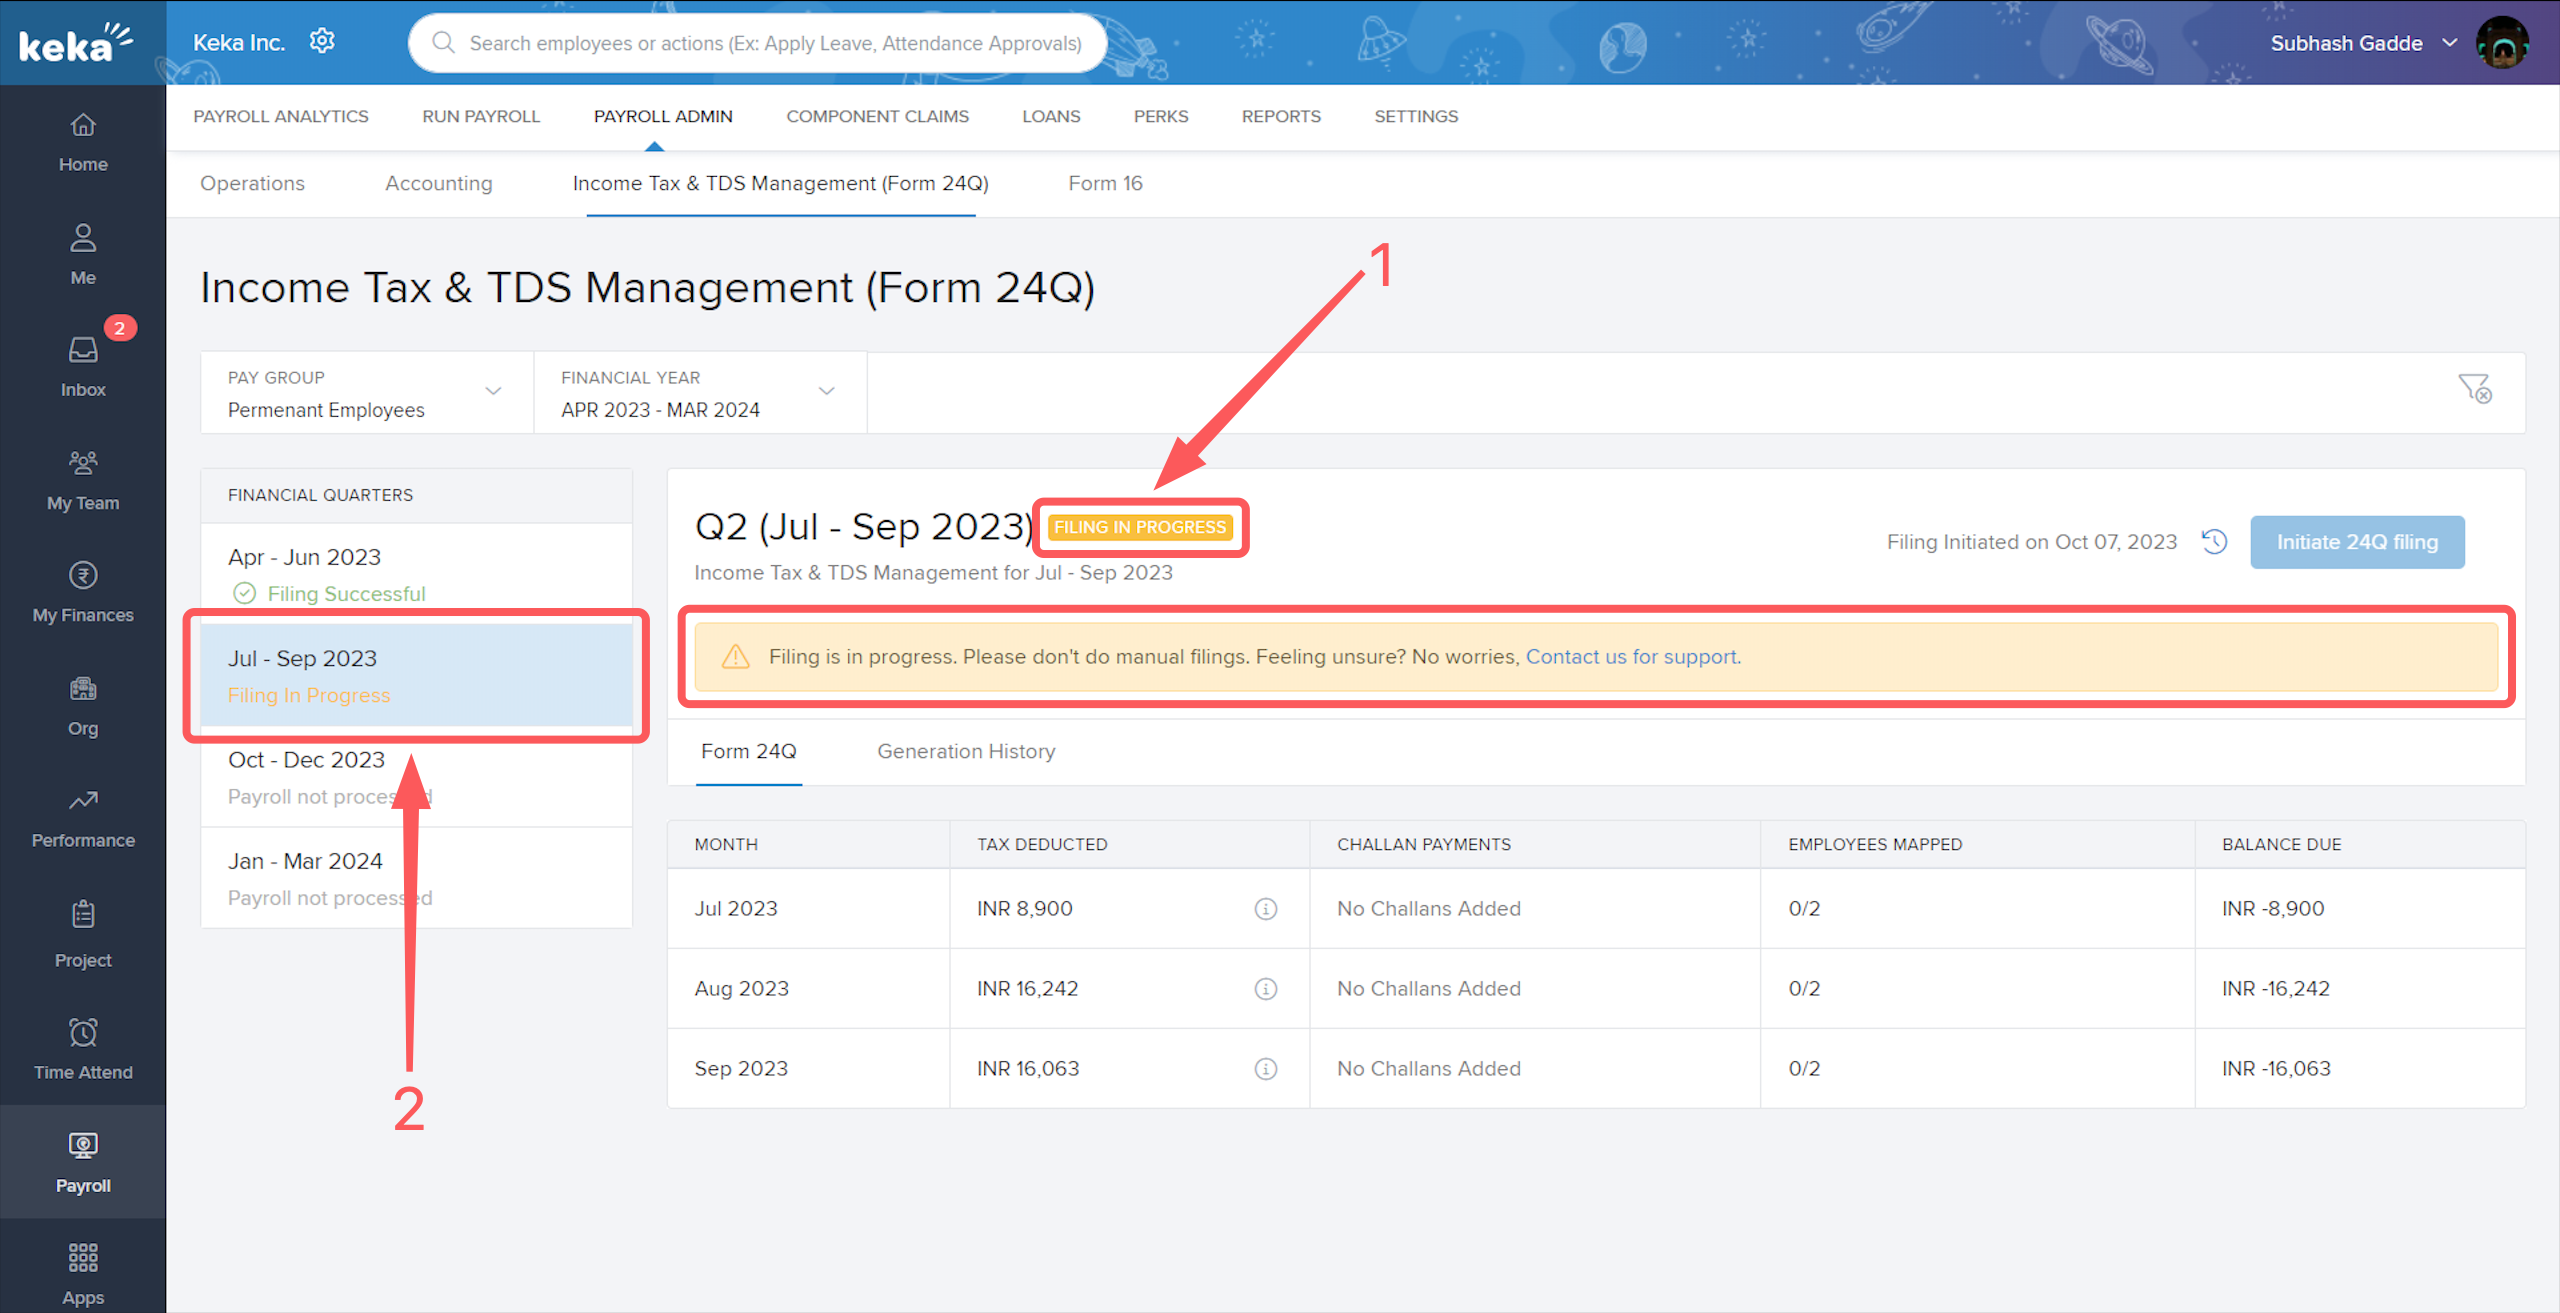
Now, you will see a Filing In Progress (1) notification at the top along with a notice below it stating Filing is in progress. Please don't do manual filings. A Filing In Progress notification will also appear under the respective quarter for which the filing has just been initiated.
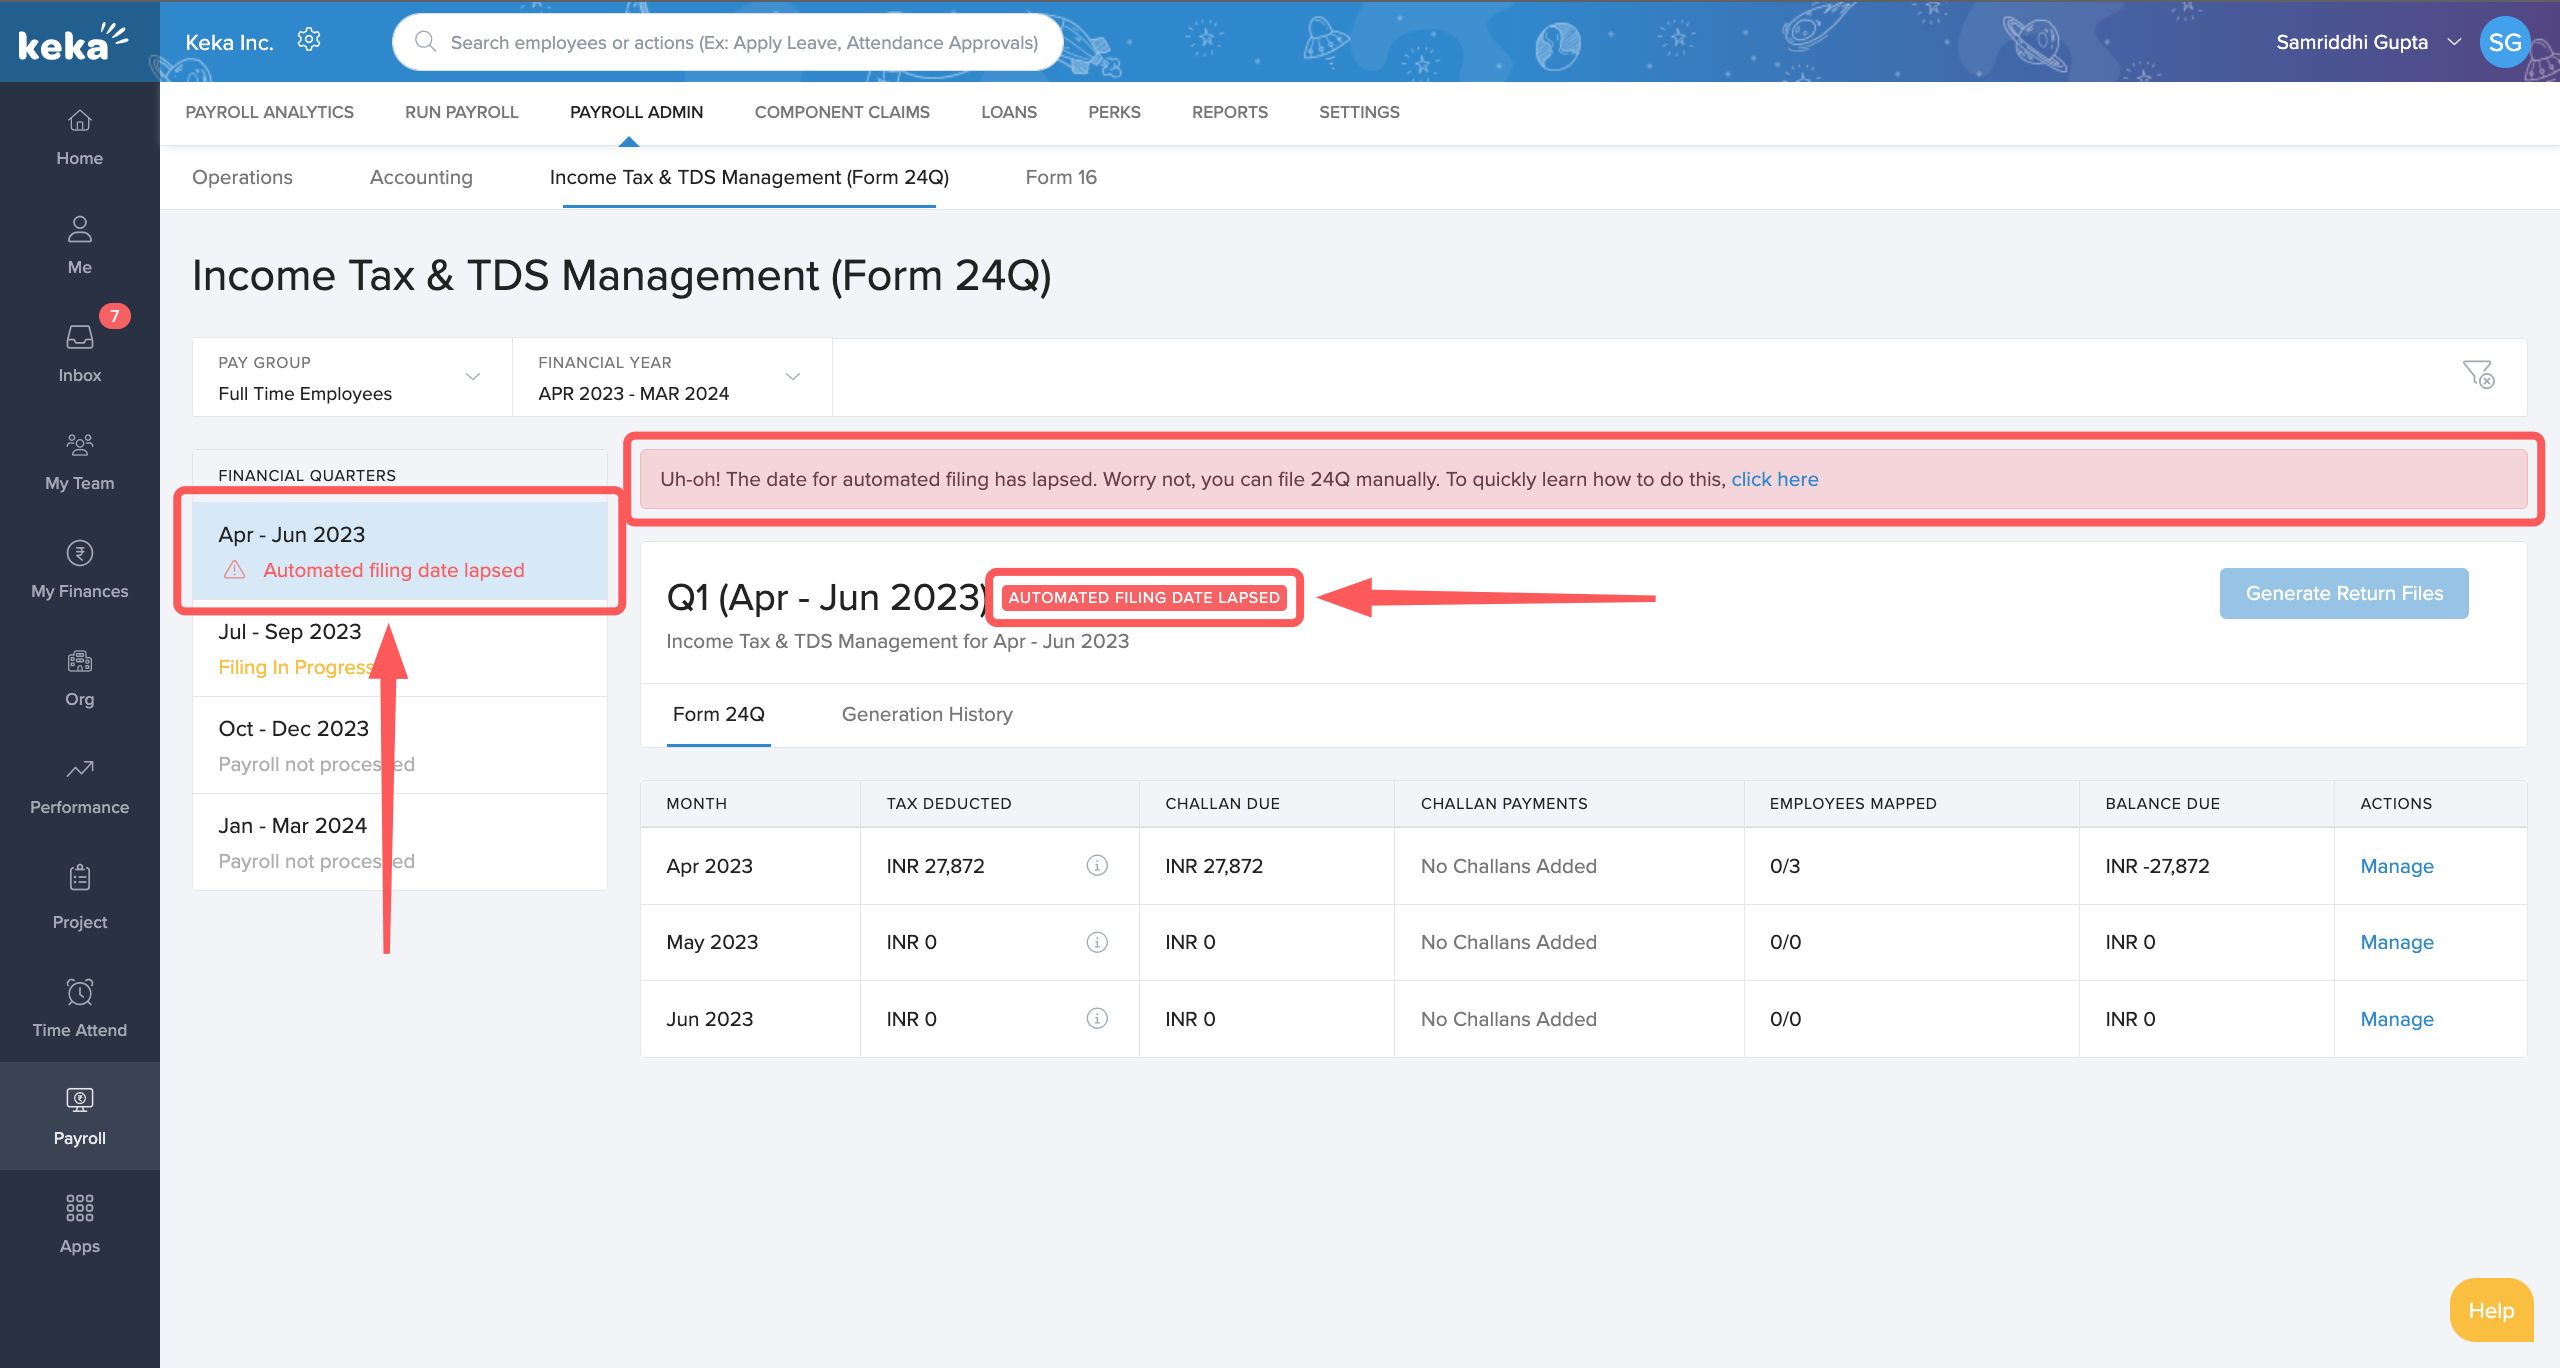
There might be scenarios where the due date for initiating 24Q filing lapses, in such cases, you will see a notification for that particular financial quarter stating Automated Filing Date Lapsed along with a notice asking you to manually file your 24Q for that respective quarter.
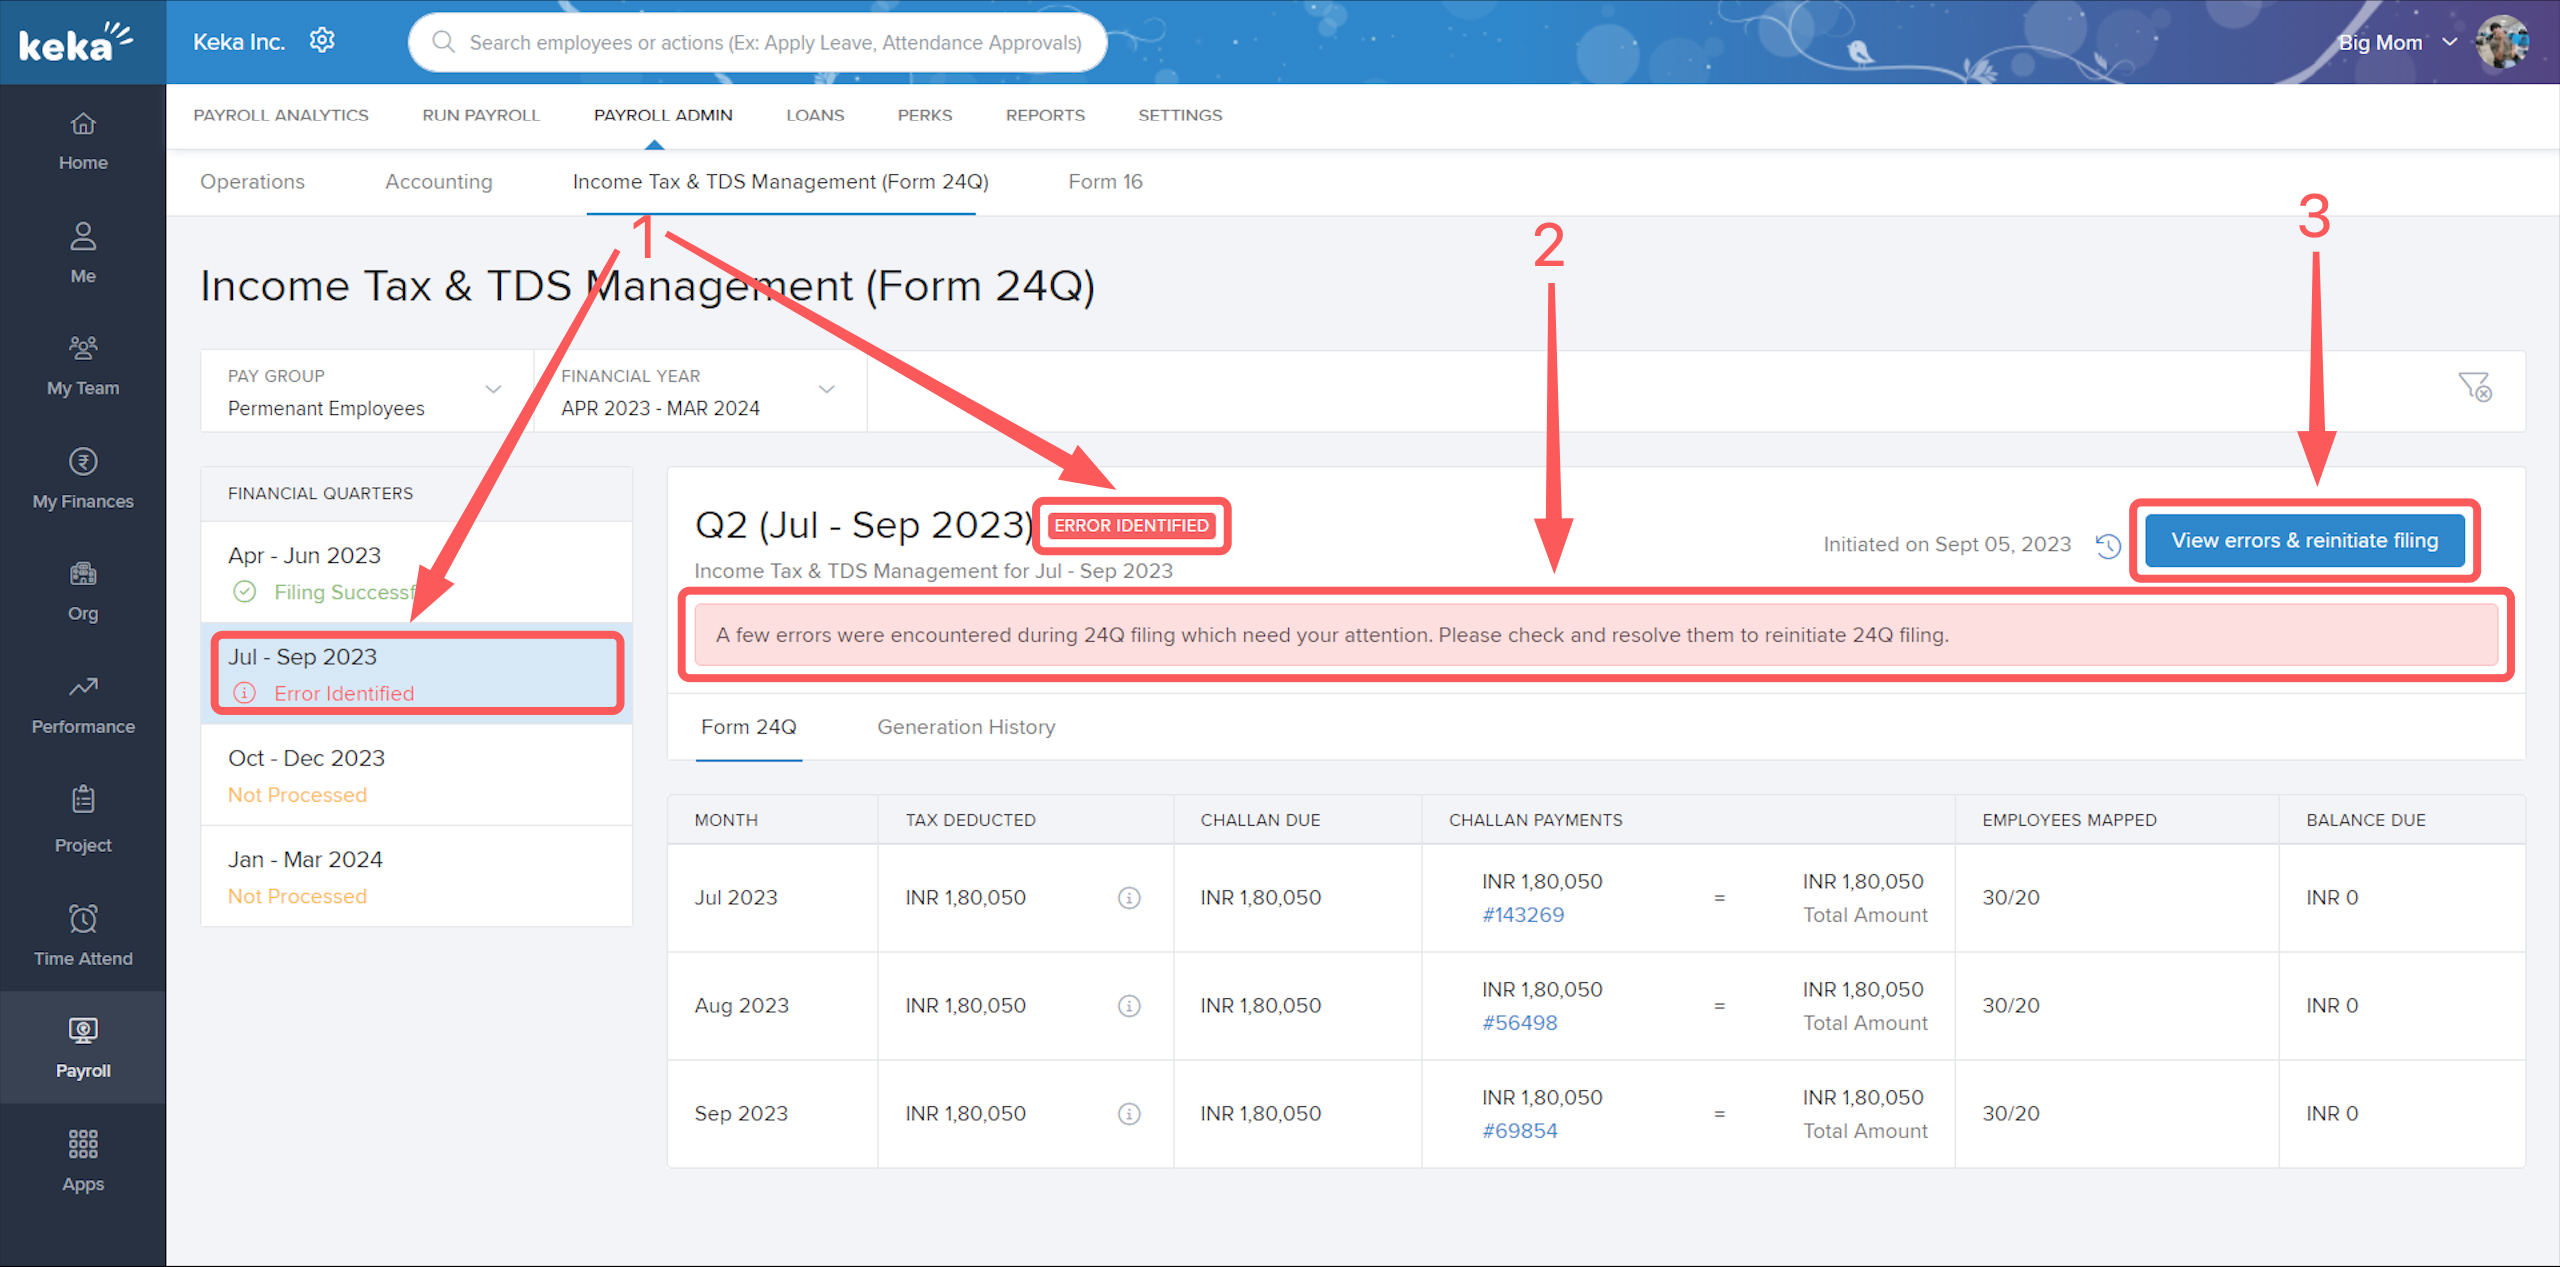
If there are errors identified after you initiate filing, then, you will see the following screen with an Error Identified (1) notification for that particular quarter. You will also see a message stating that errors have been found (2), asking you to resolve the errors, and then reinitiate filing by clicking on the View errors & reinitiate filing (3) button.
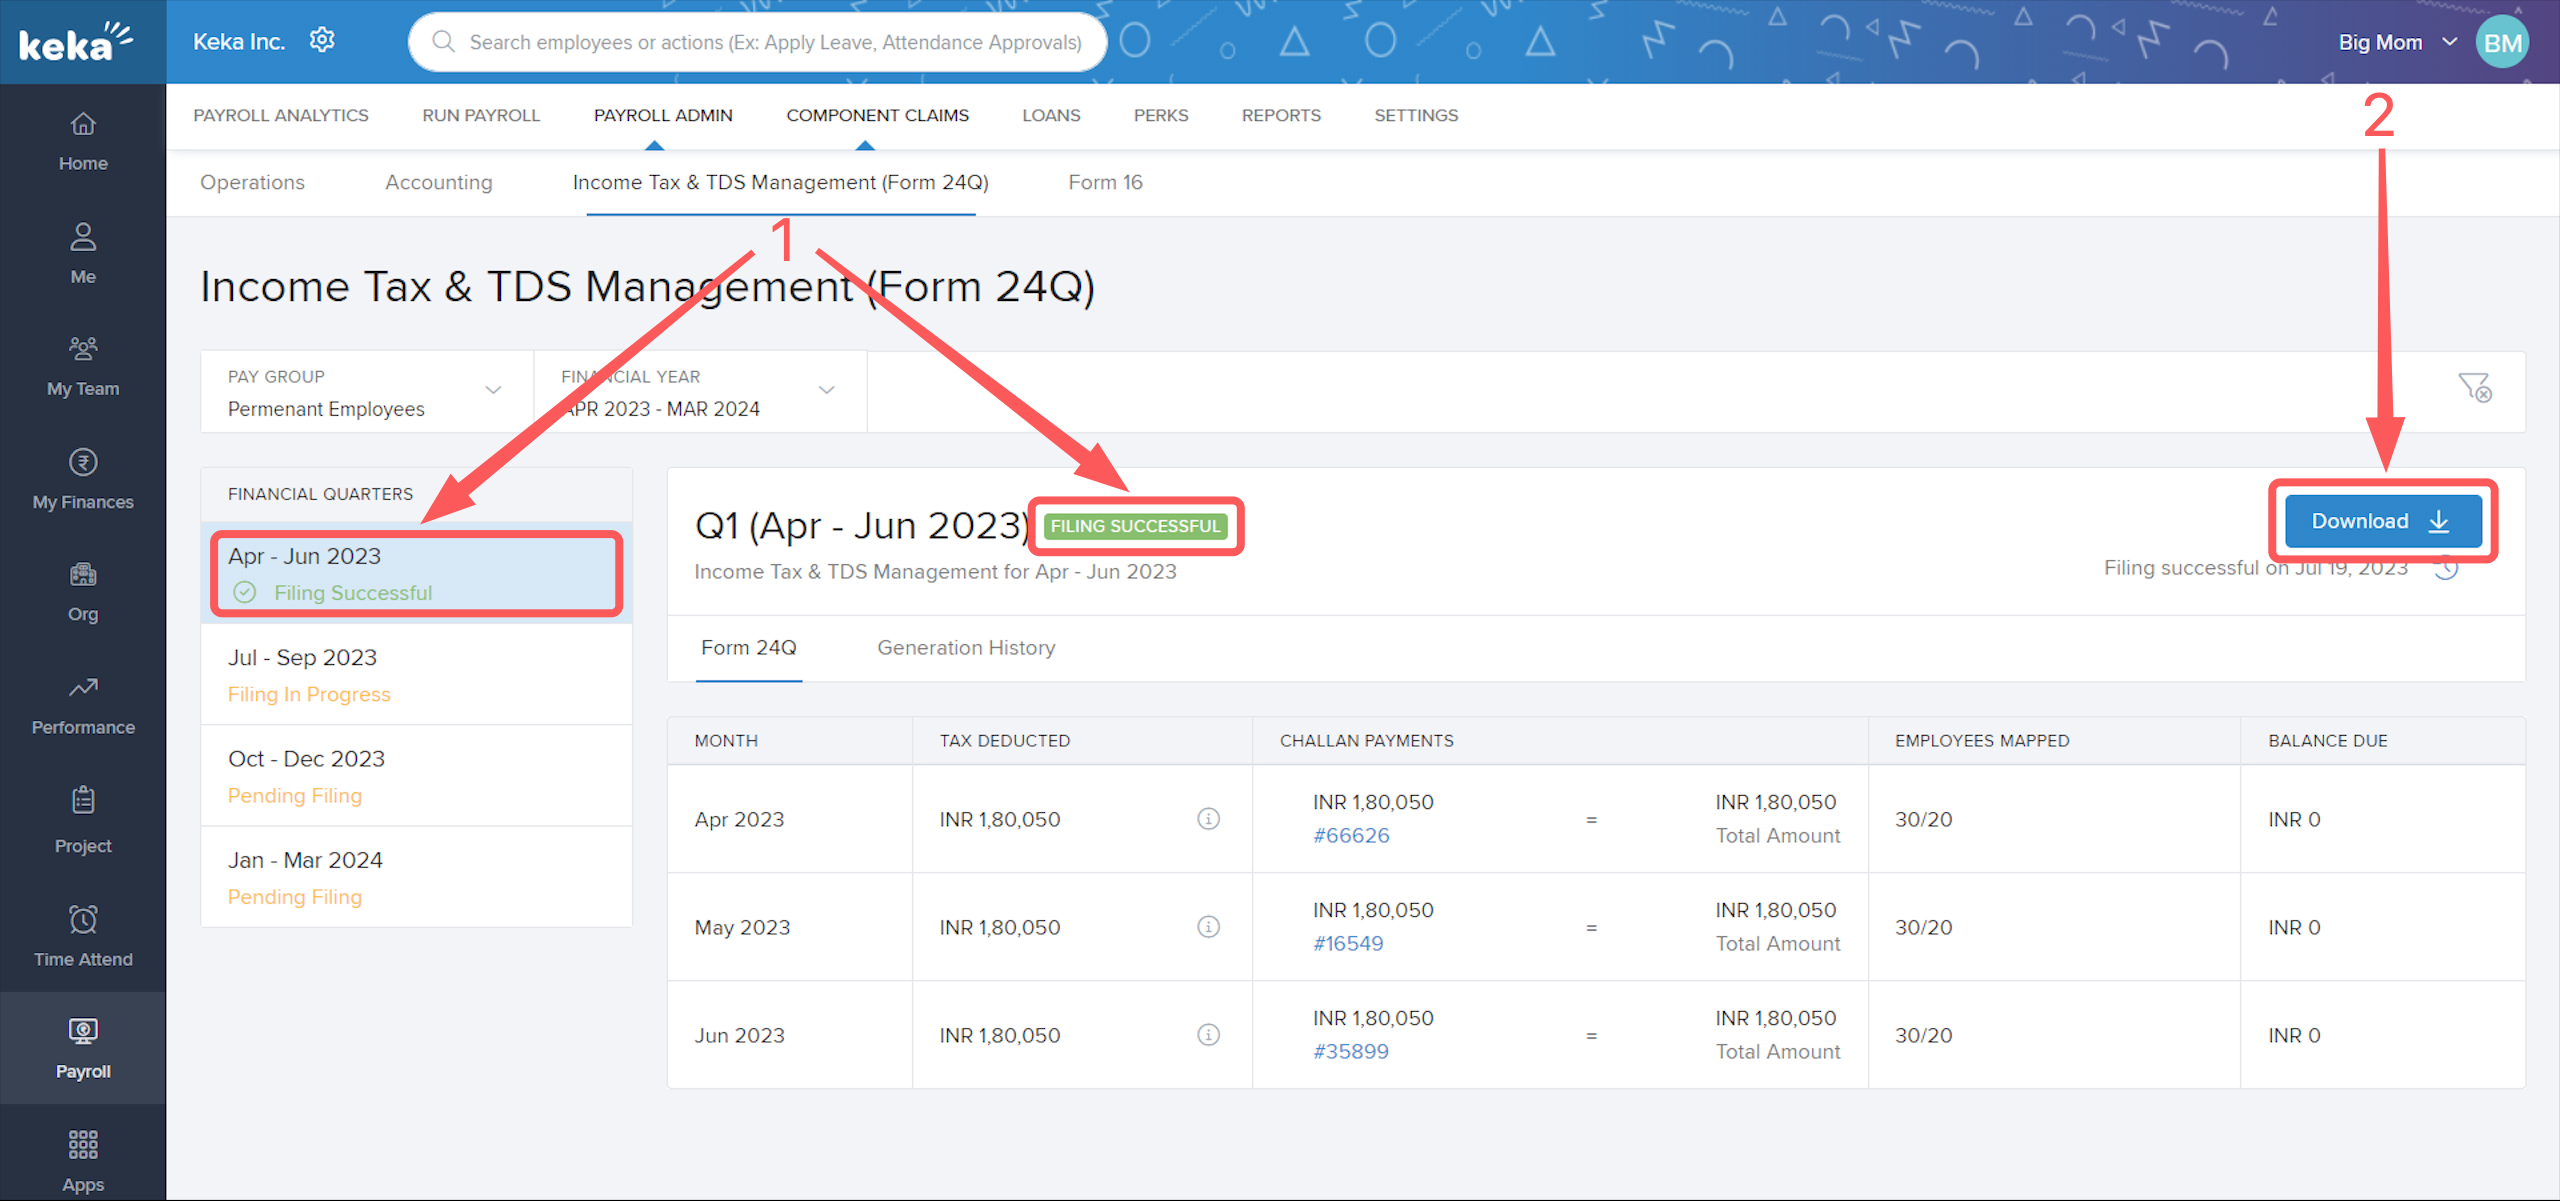
When the filing is successful, you will get the notification Filing Successful (1). Additionally, you have the option to Download (2) the report.
And that is it! You are all done!
We hope you now have a good understanding of how to initiate Form 24Q automation for your organization. For any queries please get in touch with one of our product experts!
Comments
0 comments
Please sign in to leave a comment.