Overview
This article guides you through managing opportunities in Keka PSA—from updating opportunity details and adjusting stages to converting a successful opportunity into a project. It helps teams track sales progress, maintain opportunity data, and streamline the handoff to delivery teams.
Who can do this?
- PSA Admins
- Global Admins
- Project Admins or custom roles with opportunity management access
Pre-requisites
- Opportunities must be created before they can be updated or converted.
- A client or prospect must be linked to the opportunity during creation.
- Only users with the correct role permissions can convert opportunities into projects.
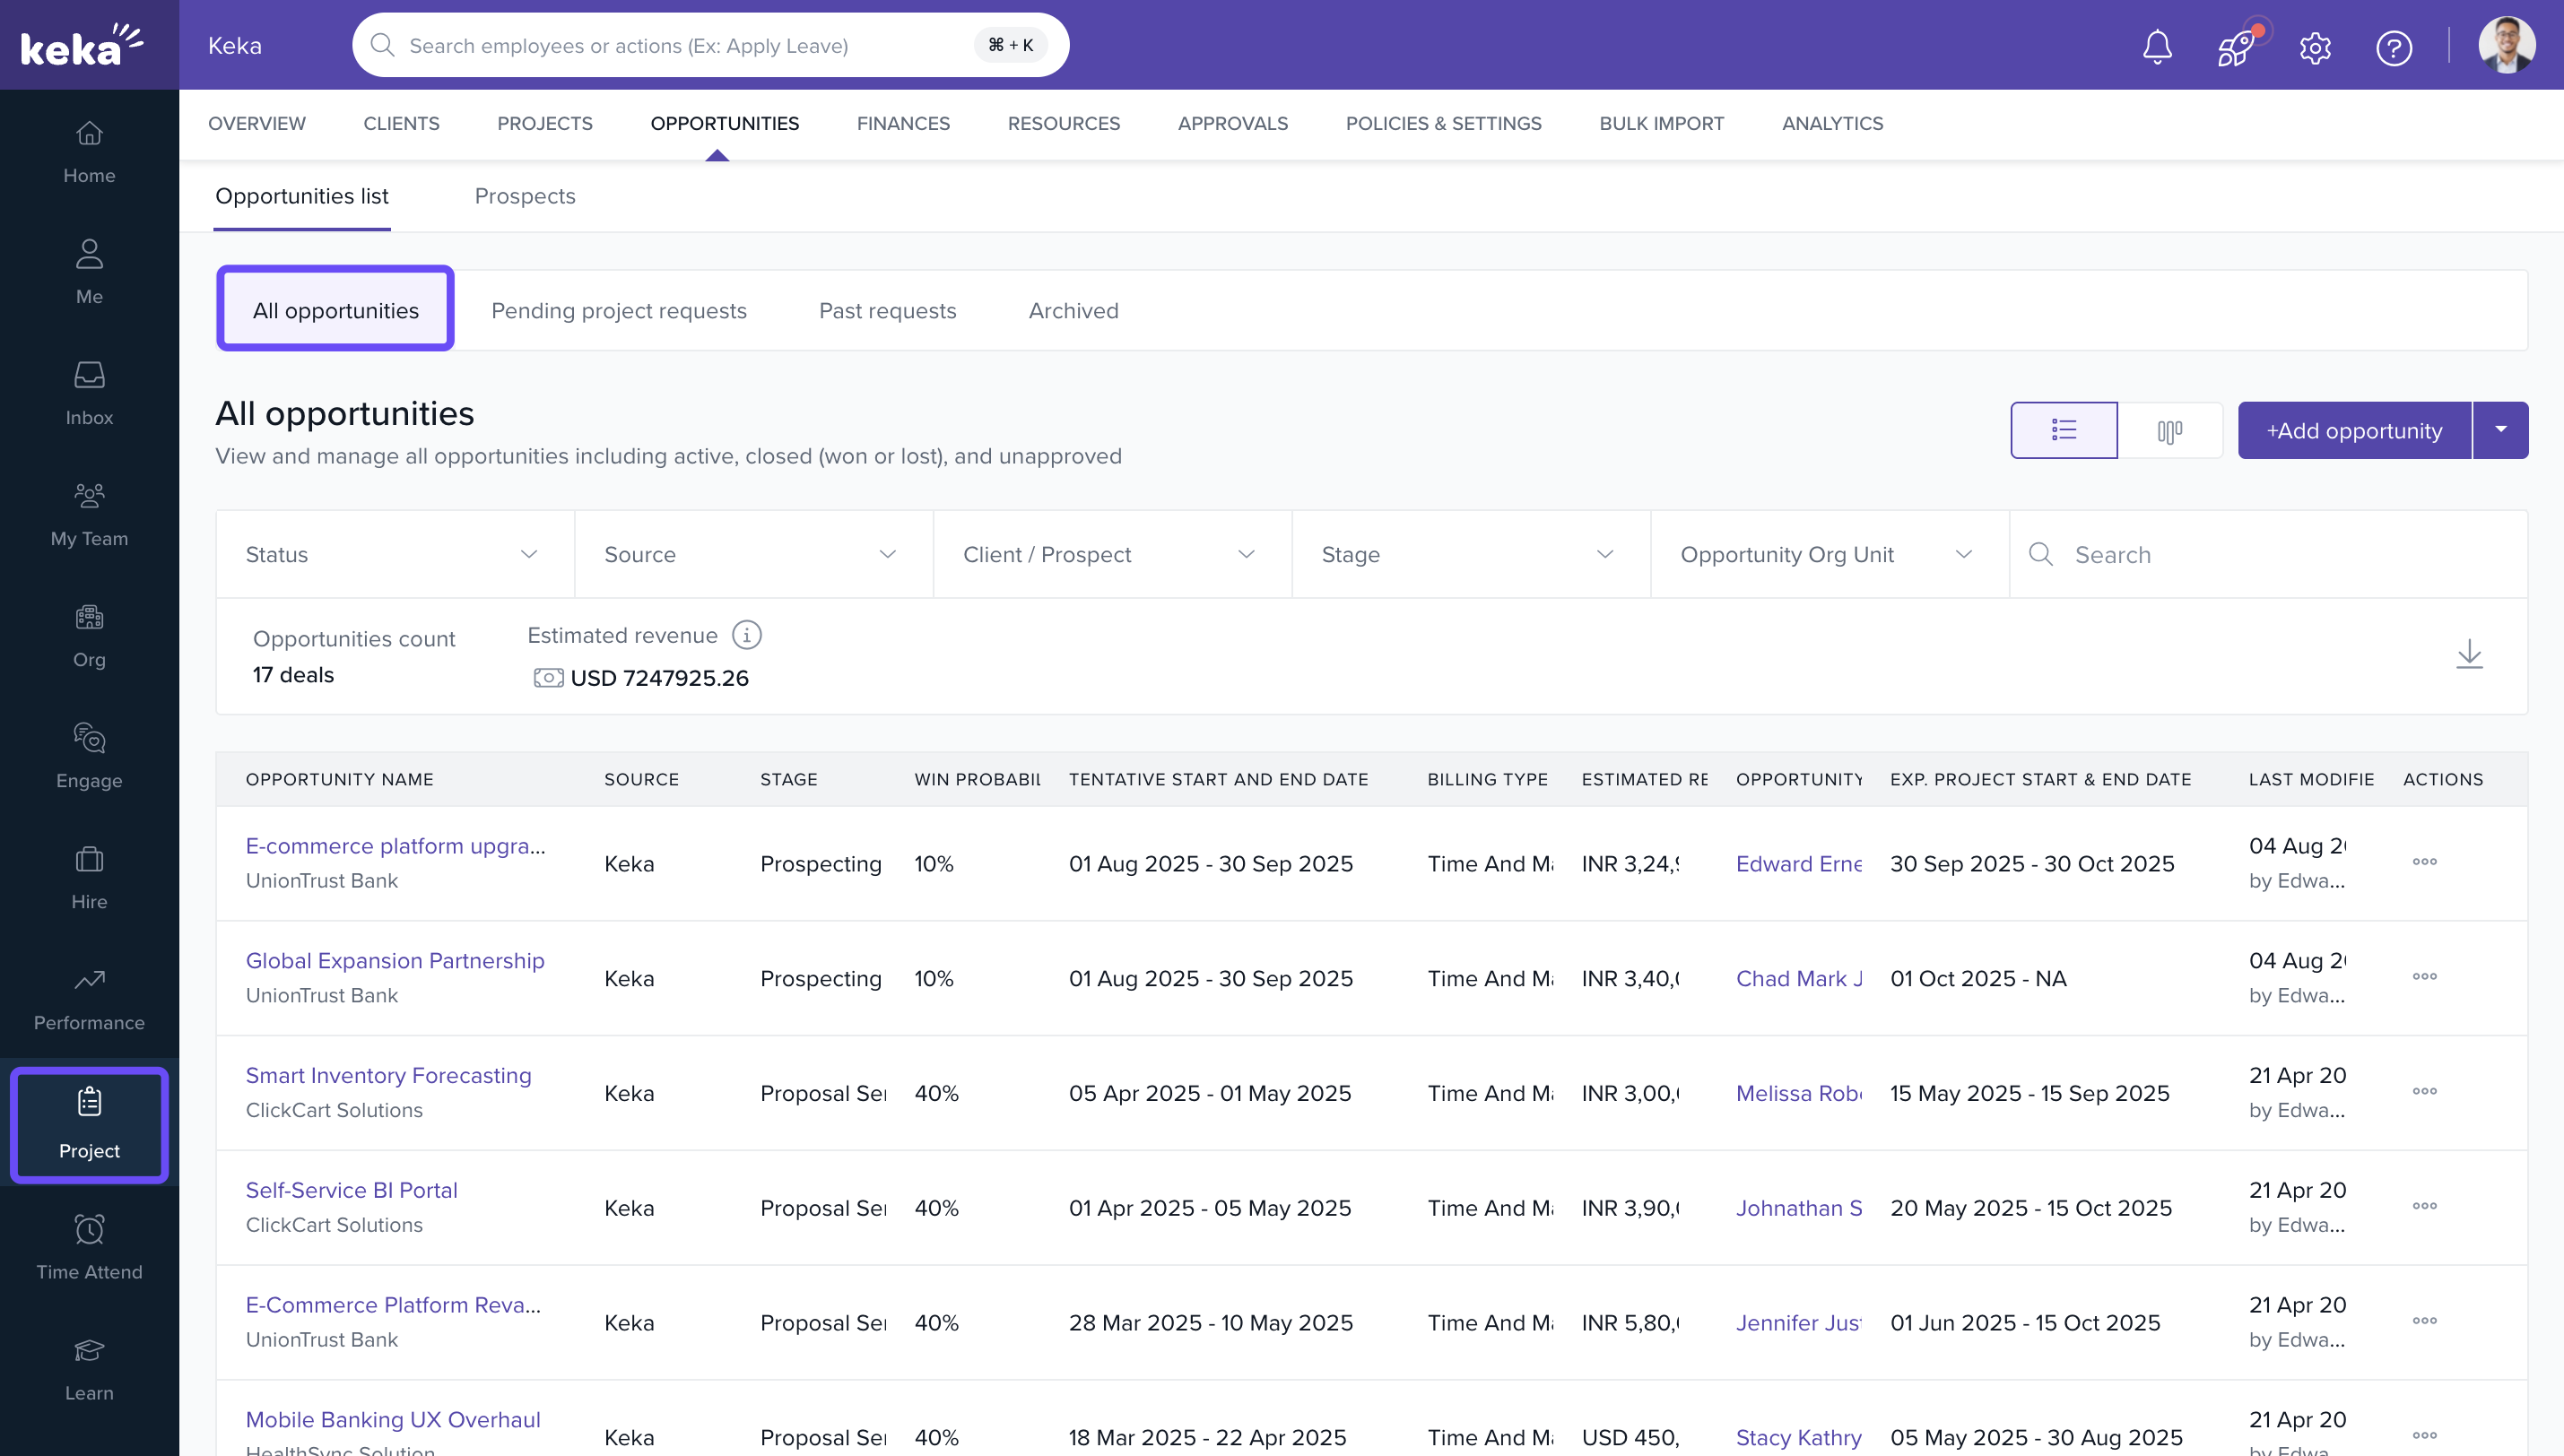
Updating an opportunity
- Go to Projects → Opportunities and open the Opportunities List.
- Select the opportunity to open the Opportunity Details page.
- Add context in Notes, review the Activity Timeline, and manage Files as needed.
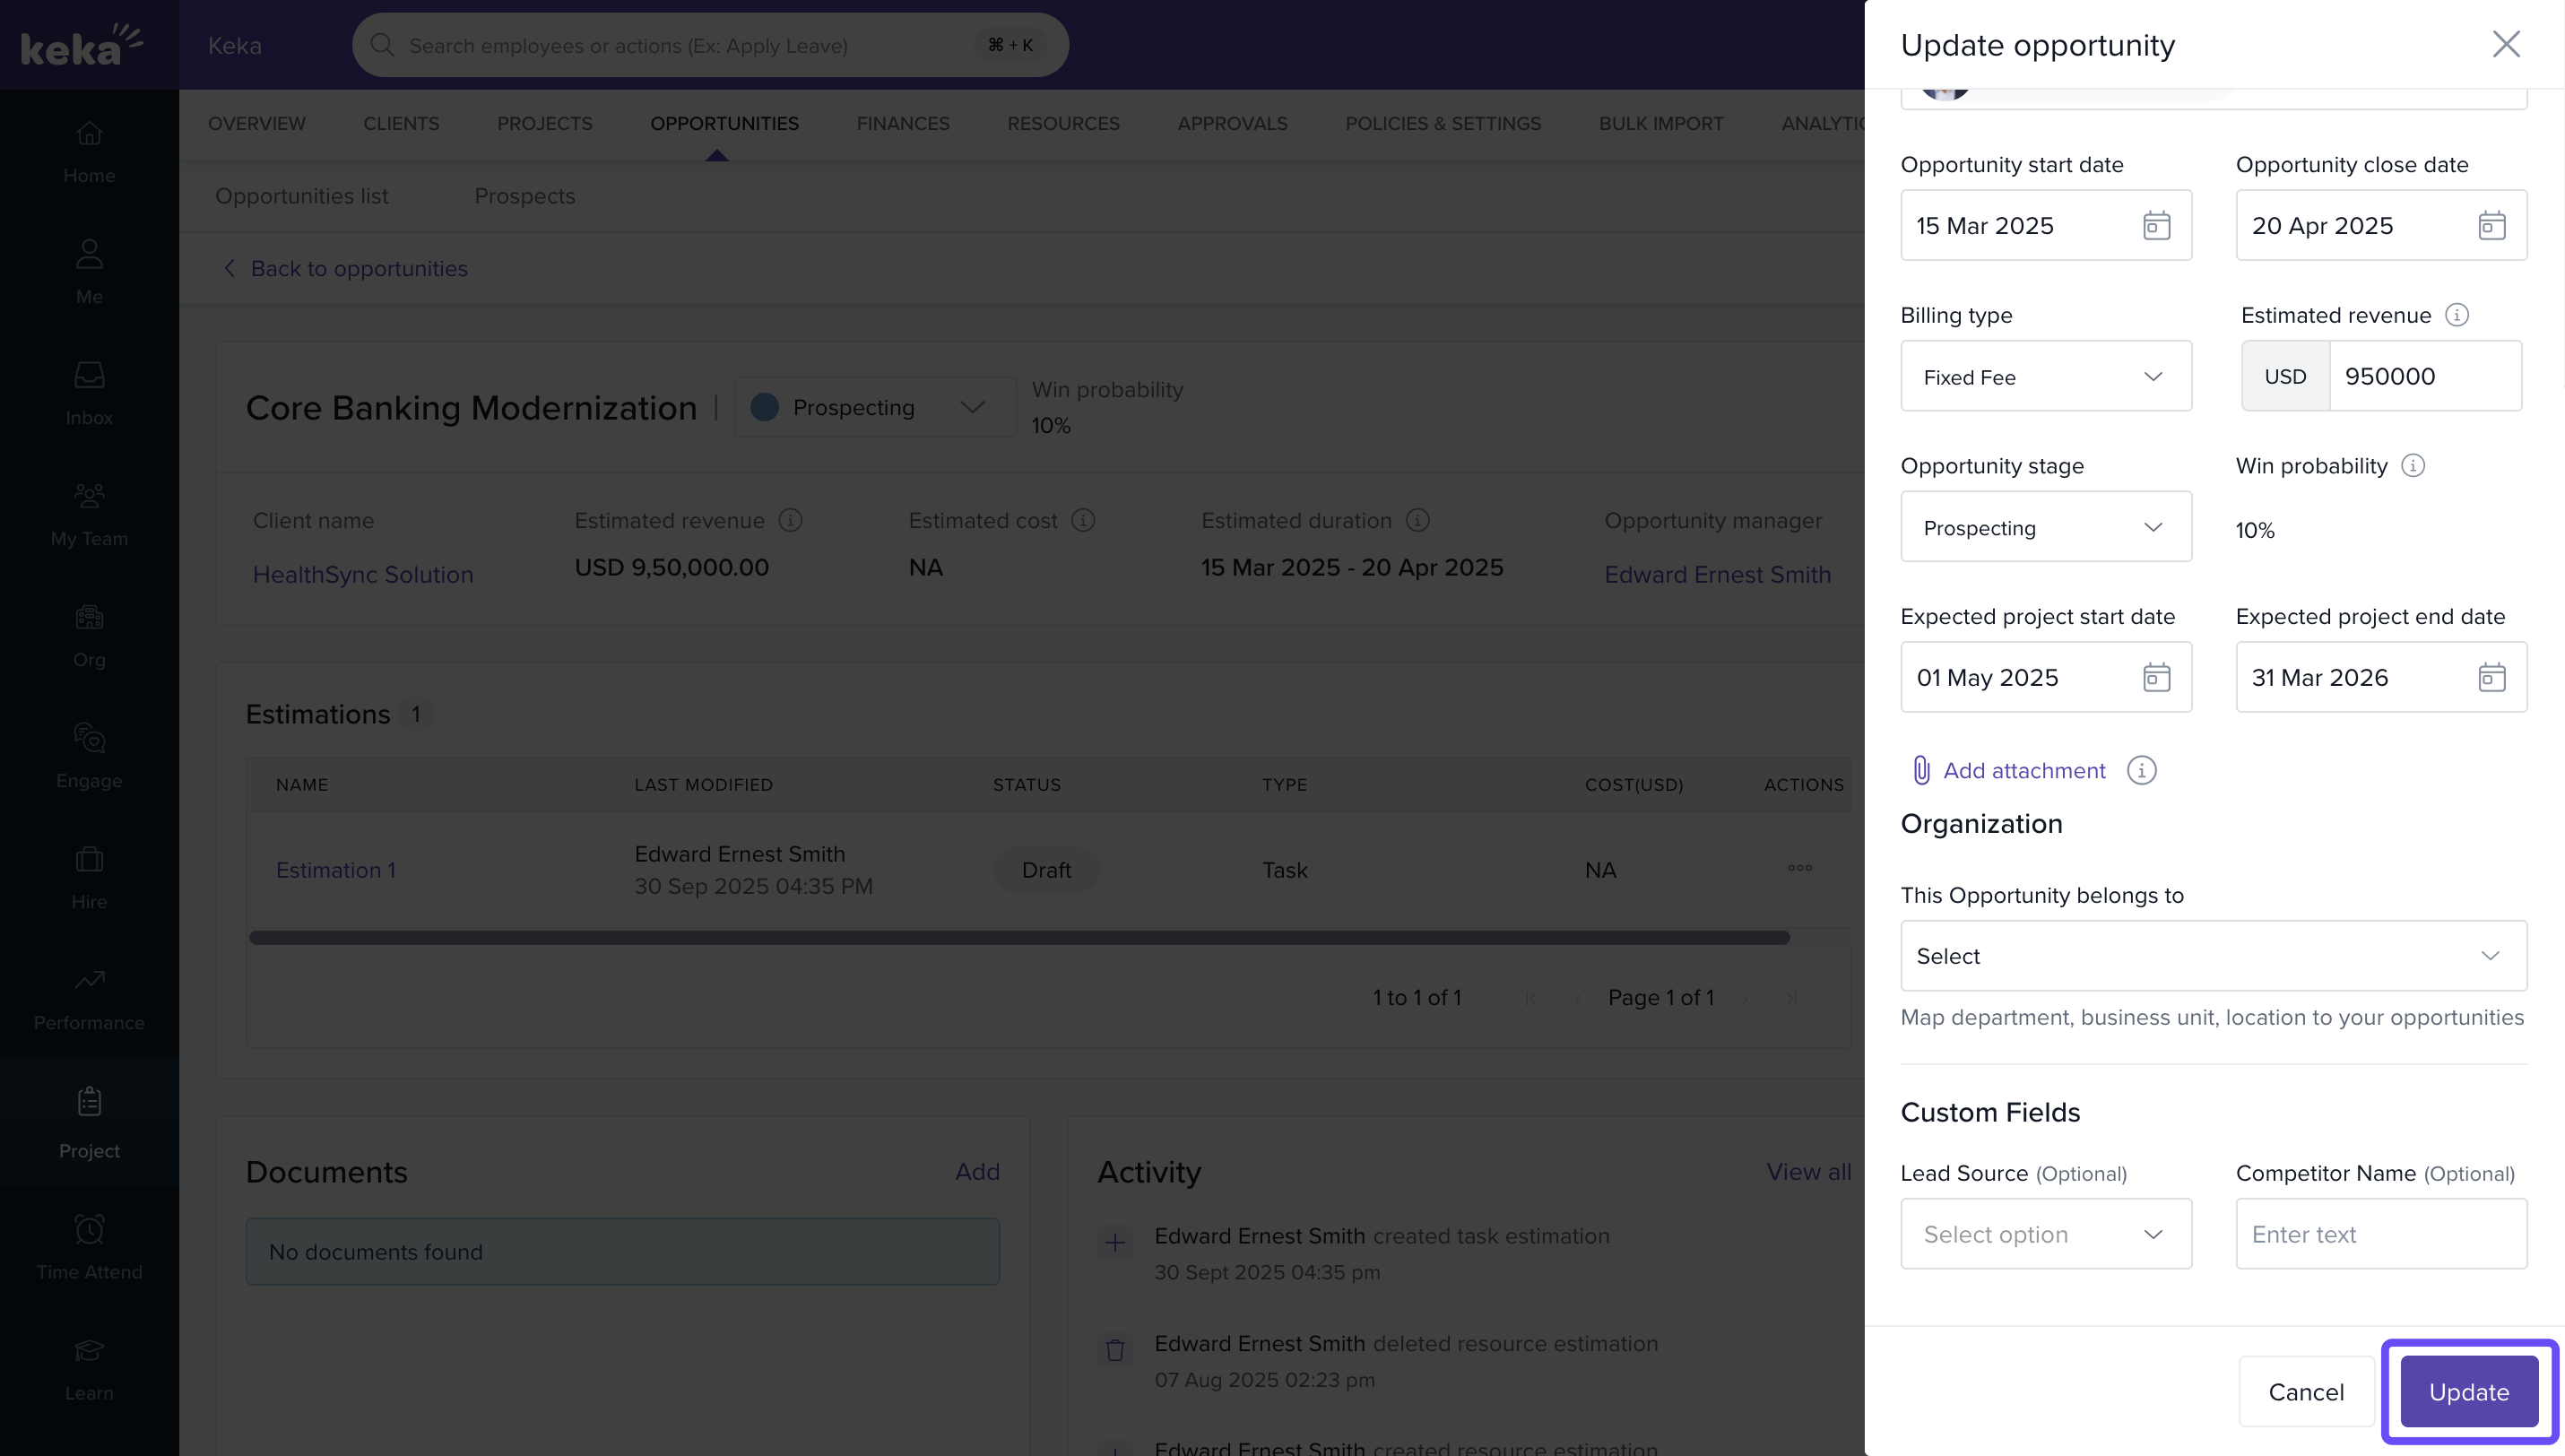
- Click the three-dot menu → Update.

- Edit required fields (e.g., amount, probability, expected close date, owner) and click Update to save.
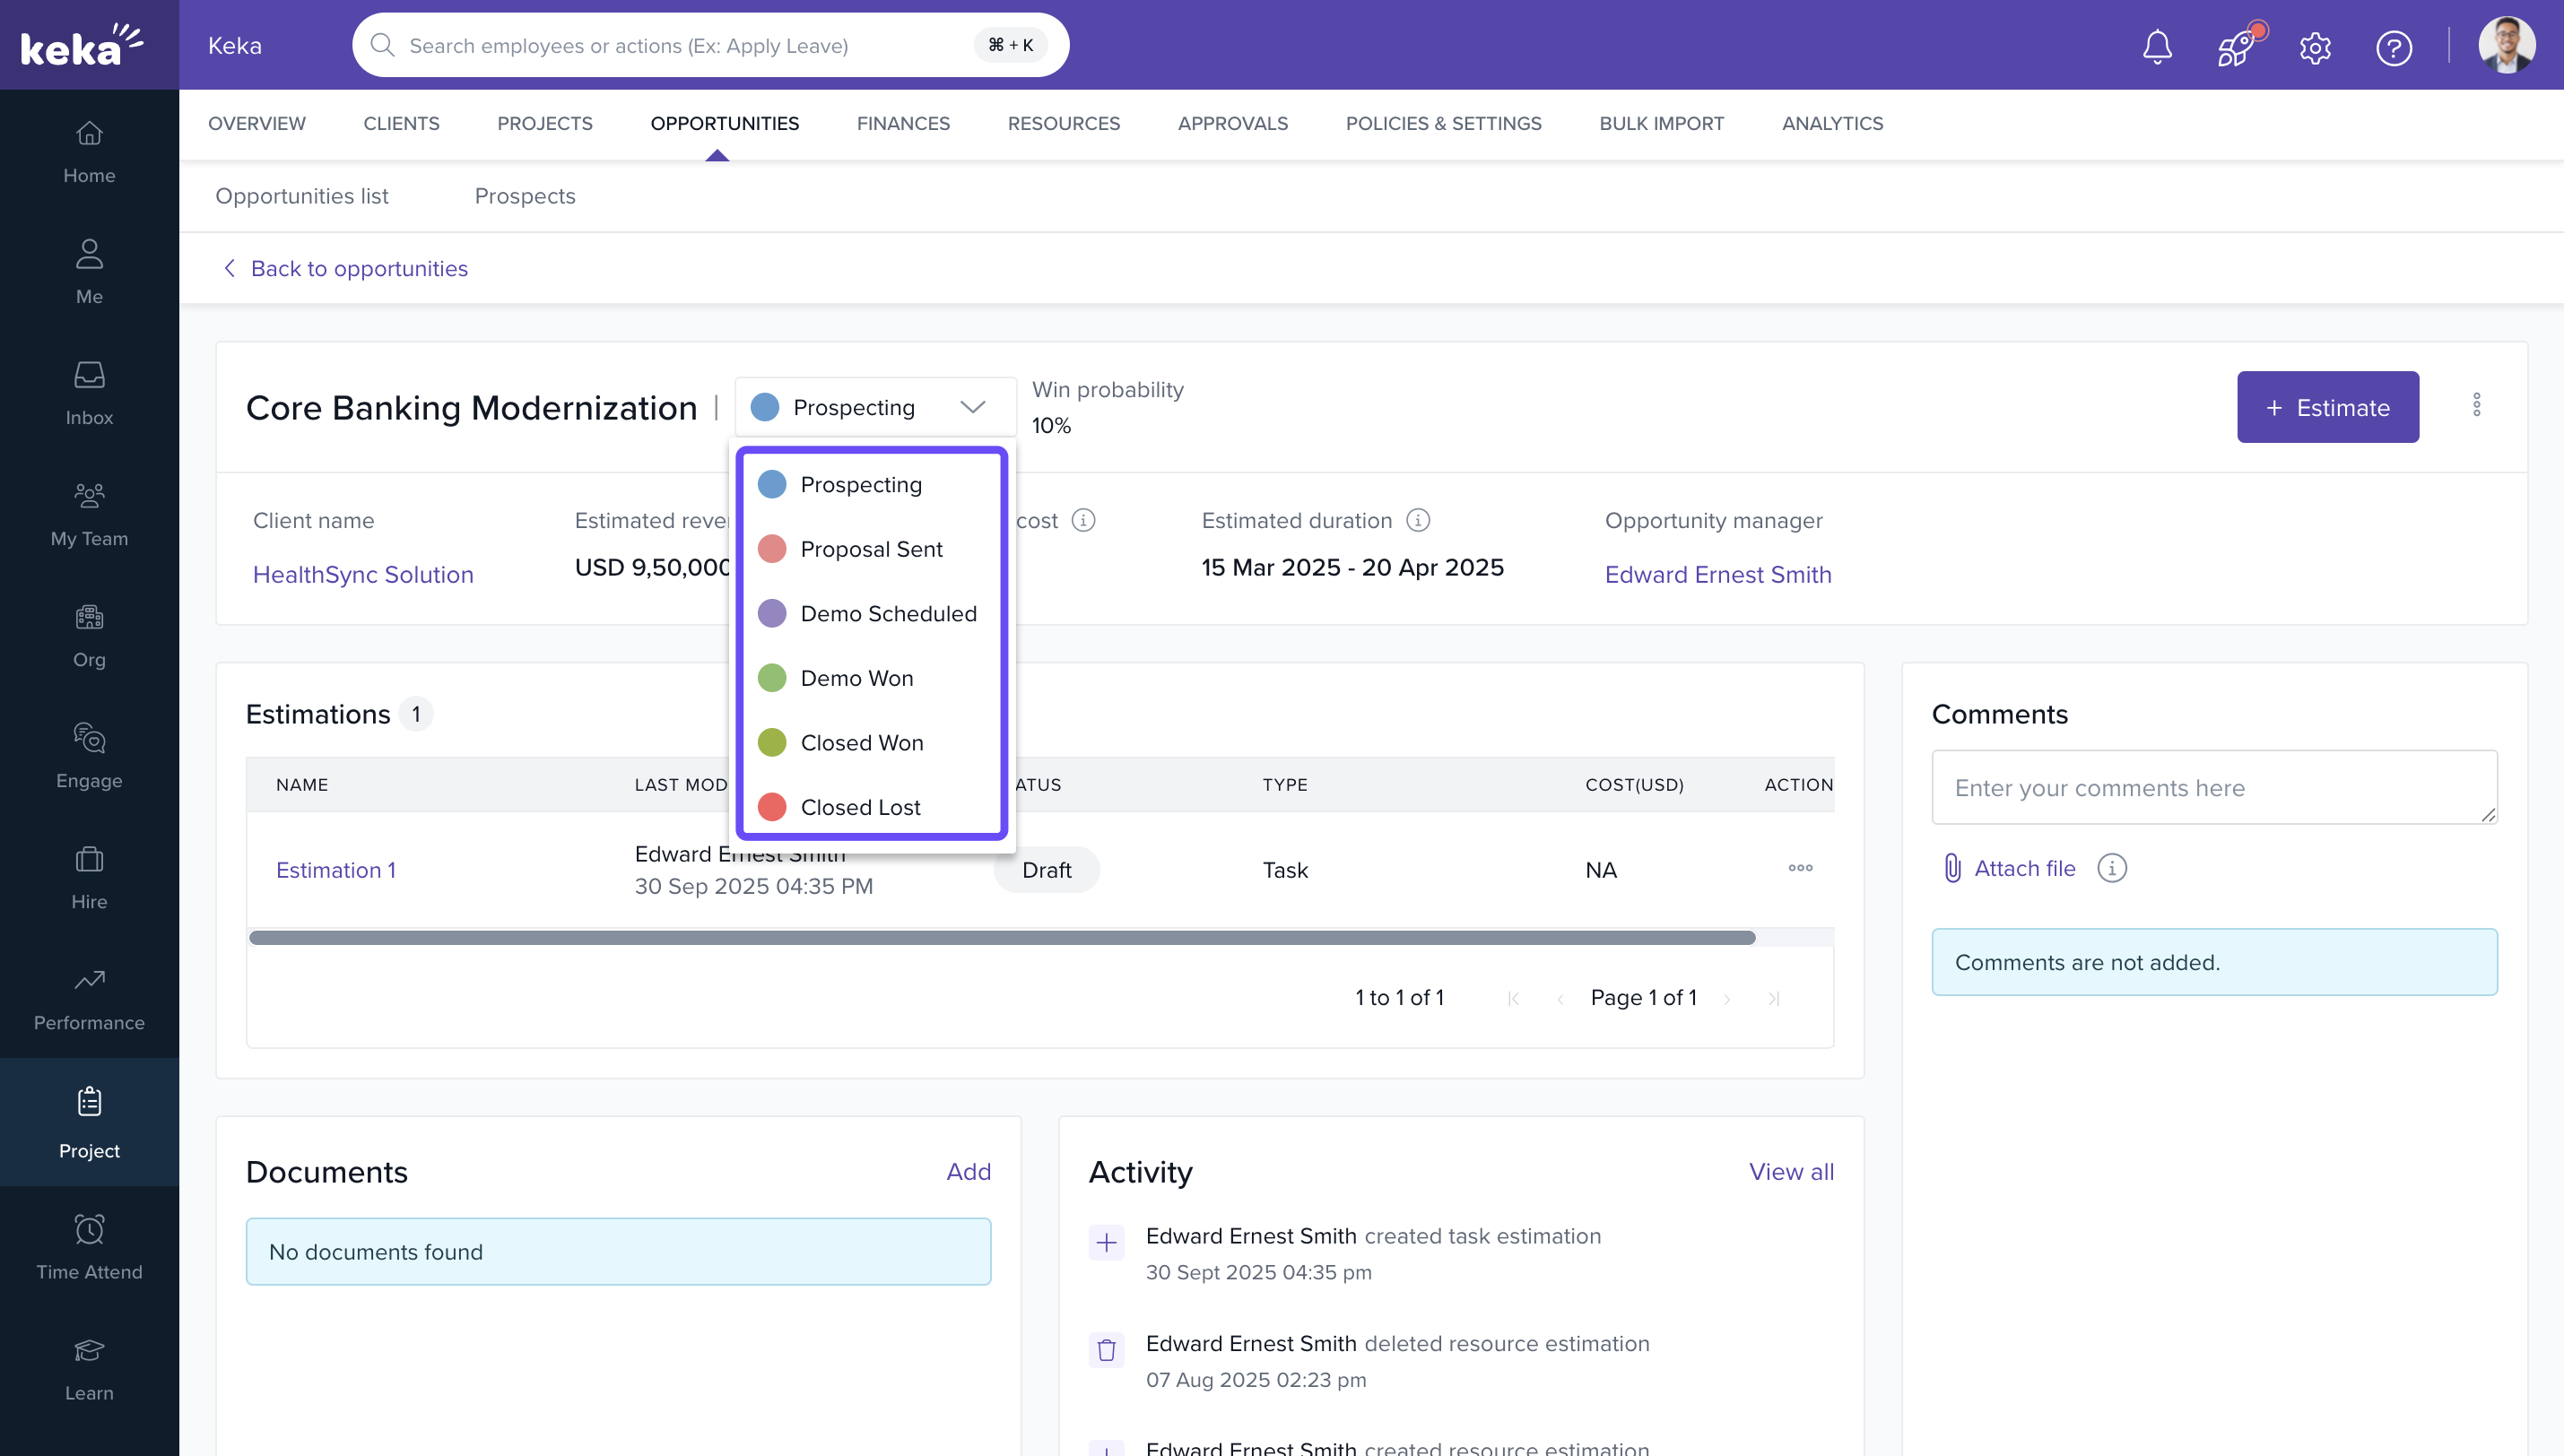
Modifying opportunity stages
- From Opportunity Details, change the stage via three-dot menu → Update or the colored stage tag under the name.
- Alternatively, use Kanban view and drag the card to the target stage.
- When set to Closed Won:
- The record appears under Closed and Pending Approval.
- An approval request is created in Pending Requests.
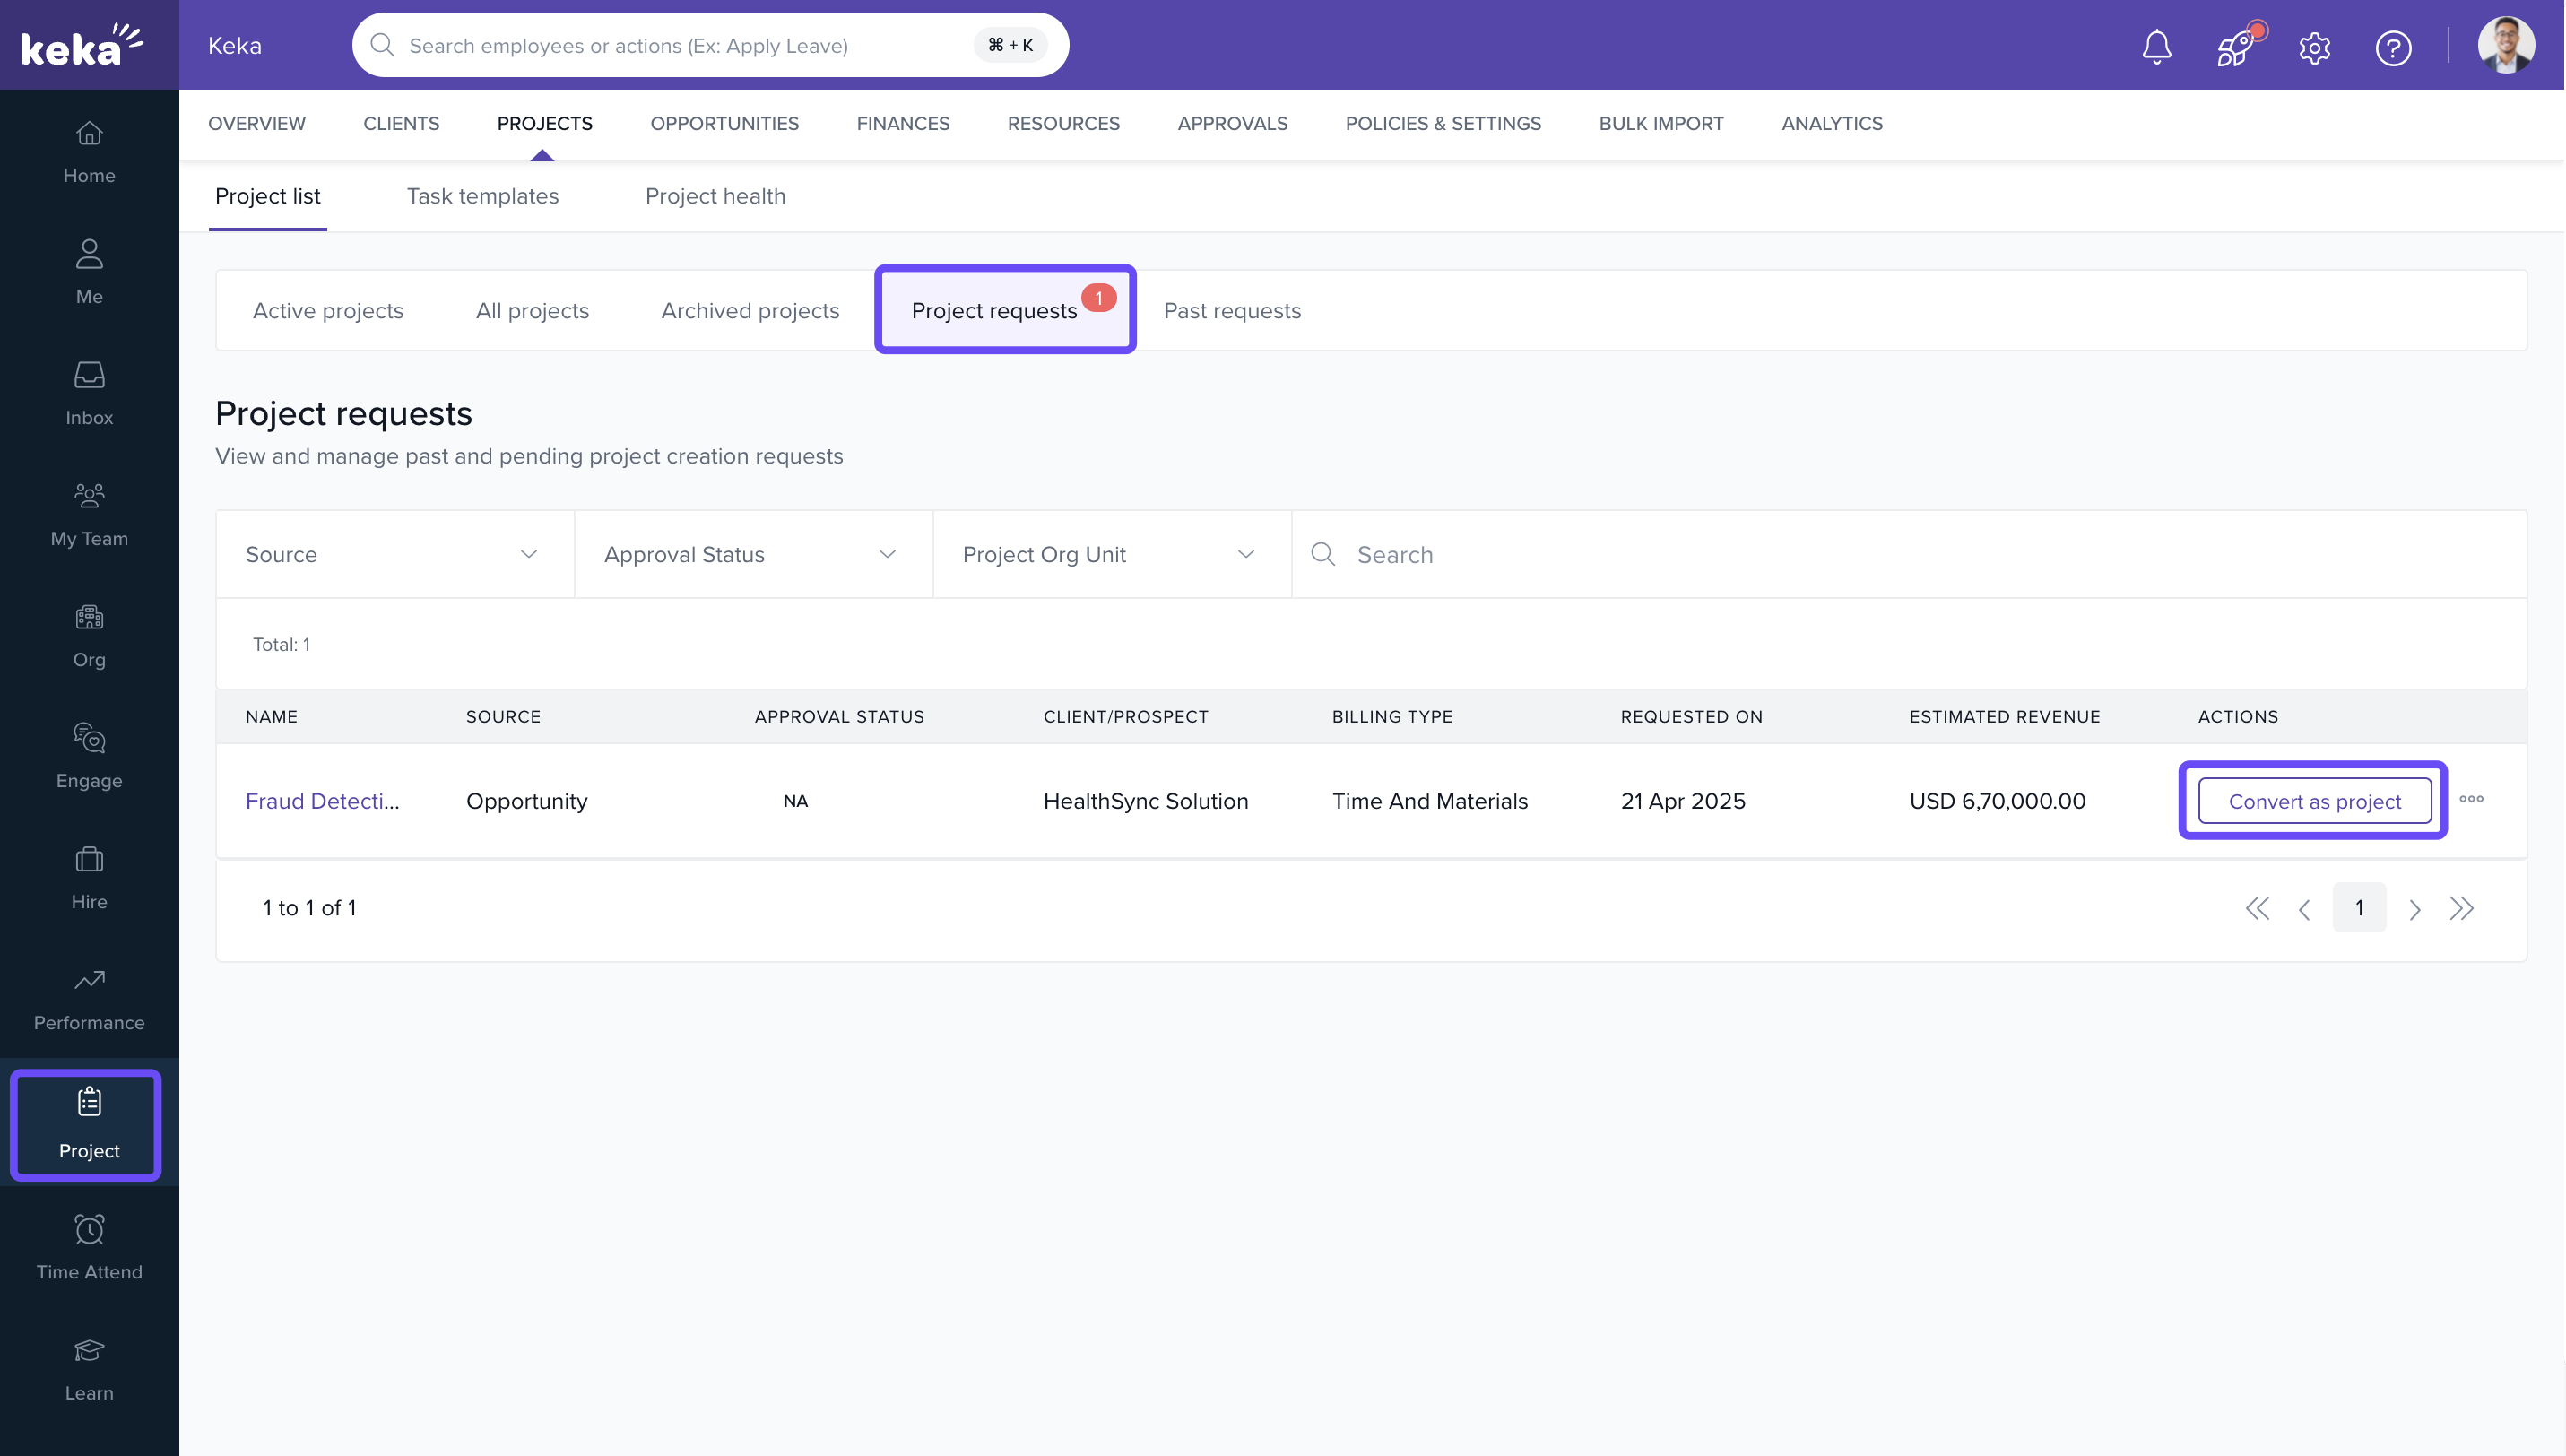
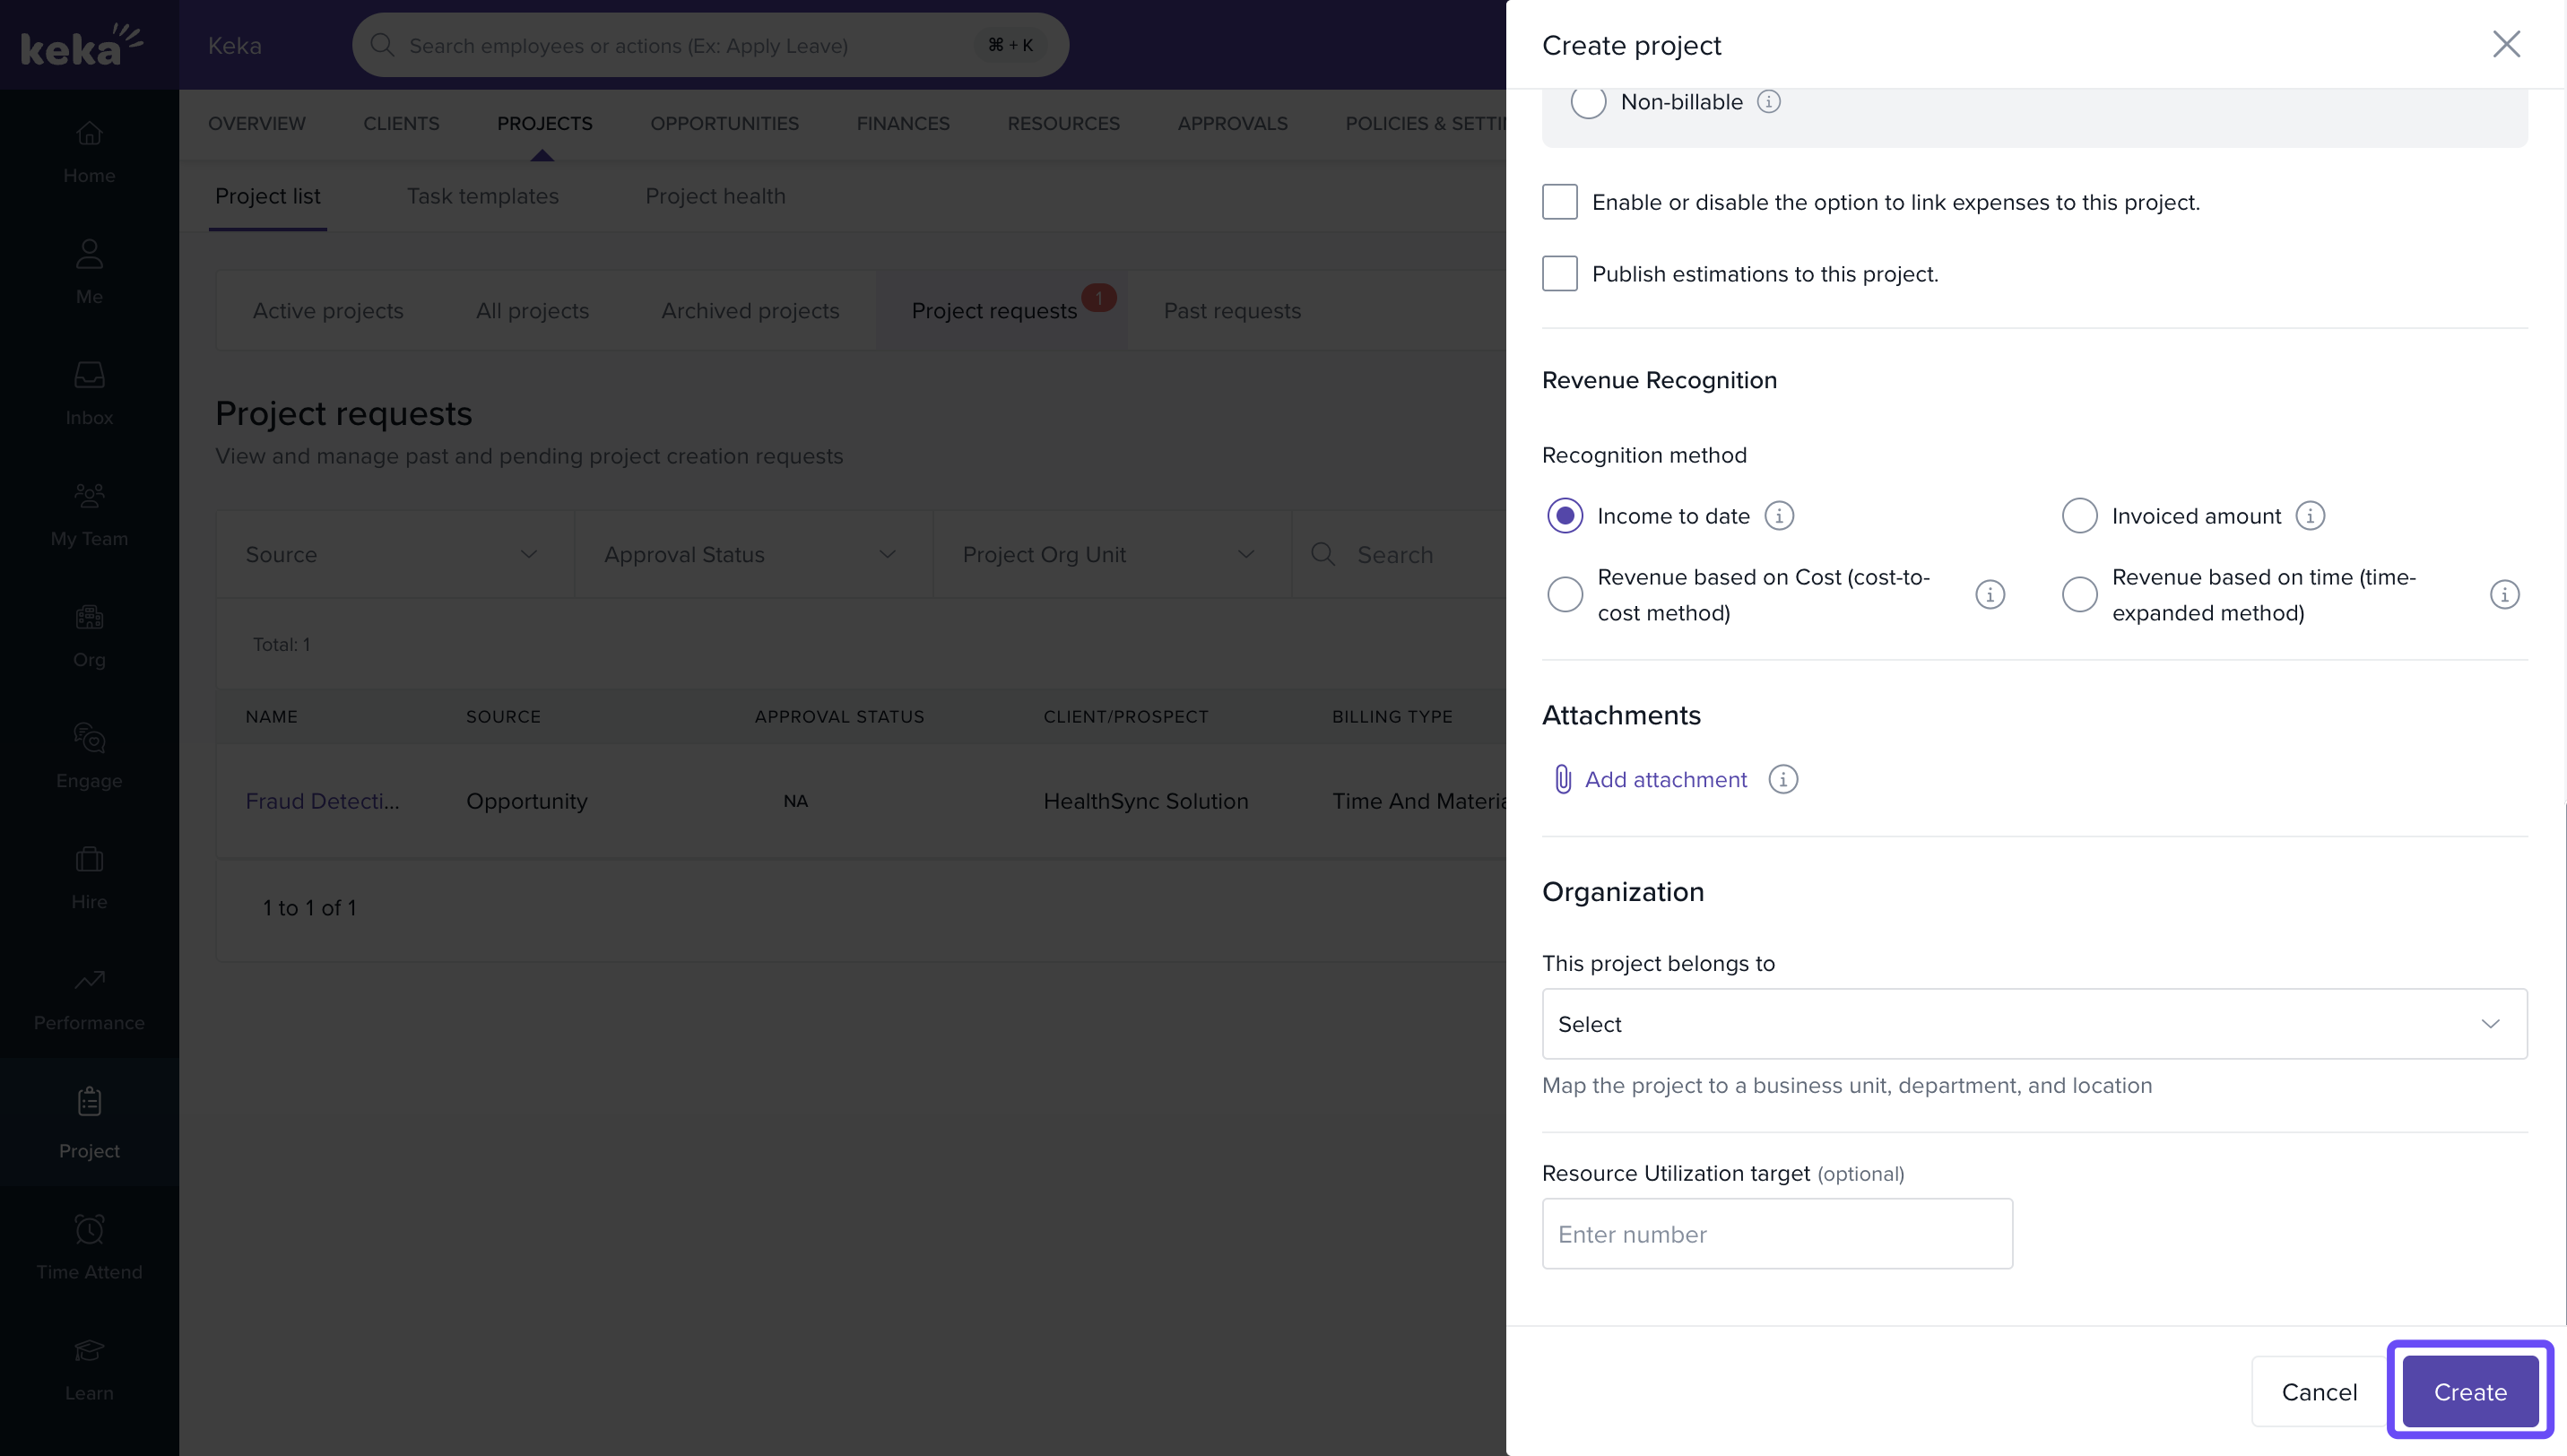
Converting an opportunity to a project
- Navigate to Projects → Project List → Project Requests.
- In Pending Requests, select the relevant opportunity.
- Click Convert to Project (or Decline to reject).
- If linked to an existing client, review the pre-filled Create Project form:
- Project Name, Description, Client, Start/End Dates
- Project Code, Project Manager, Billing Type
- Attach supporting documents if needed
- Click Create to finalize.
Converting an opportunity under a prospect
- Complete Client Details first:
- Client Name, Client Code, Client Manager
- Base Country, Billing Address
- (Optional) Description
- Complete Project Details:
- Project Name, Code, Status, Project Manager
- Start/End Dates
- Enable billing based on timesheets if required
- Select Billing Model and allow expense linking if applicable
- (Optional) Description and documents
- Click Create to generate the client and project in one flow.
How it connects with other modules
- Projects: Closed Won opportunities convert to projects with pre-filled details for quick kickoff.
- Invoices & Billing: Selected billing model during conversion drives downstream invoicing logic.
- Files/Docs: Attachments remain accessible for delivery teams post-conversion.
- Approvals: Governance via Pending Approvals before project creation.
FAQs
Q: Can I change the client or prospect linked to an opportunity after creation?
A: No. Once linked, the client or prospect cannot be changed.
Q: Can I attach new files after creating the opportunity?
A: Yes. Use the Files section within the opportunity to upload or manage attachments.
Q: What happens if I update the stage to Closed Lost?
A: The opportunity is archived under Closed and is not sent for approval.
Q: Can I auto-assign a project code when converting?
A: No. Enter it manually or follow your internal convention.
Troubleshooting
- Stage changed but not visible in Pending Requests: Ensure the stage is Closed Won and you have approval visibility.
- Cannot convert to project: Verify conversion permissions and that the opportunity is in an eligible stage.
- Missing pre-filled fields during conversion: Confirm the opportunity is linked to an existing client; prospects require client creation first.
- Approval stuck in Pending: Check approver configuration; re-trigger after validating mandatory fields.
Comments
0 comments
Please sign in to leave a comment.