Introduction
The Tickets section in the Helpdesk module gives admins complete control over employee issues. You can view, assign, edit, or close tickets efficiently—all within one central interface. Learn how to access the Tickets tab, work through open and closed tickets, and perform both individual and bulk actions with ease.
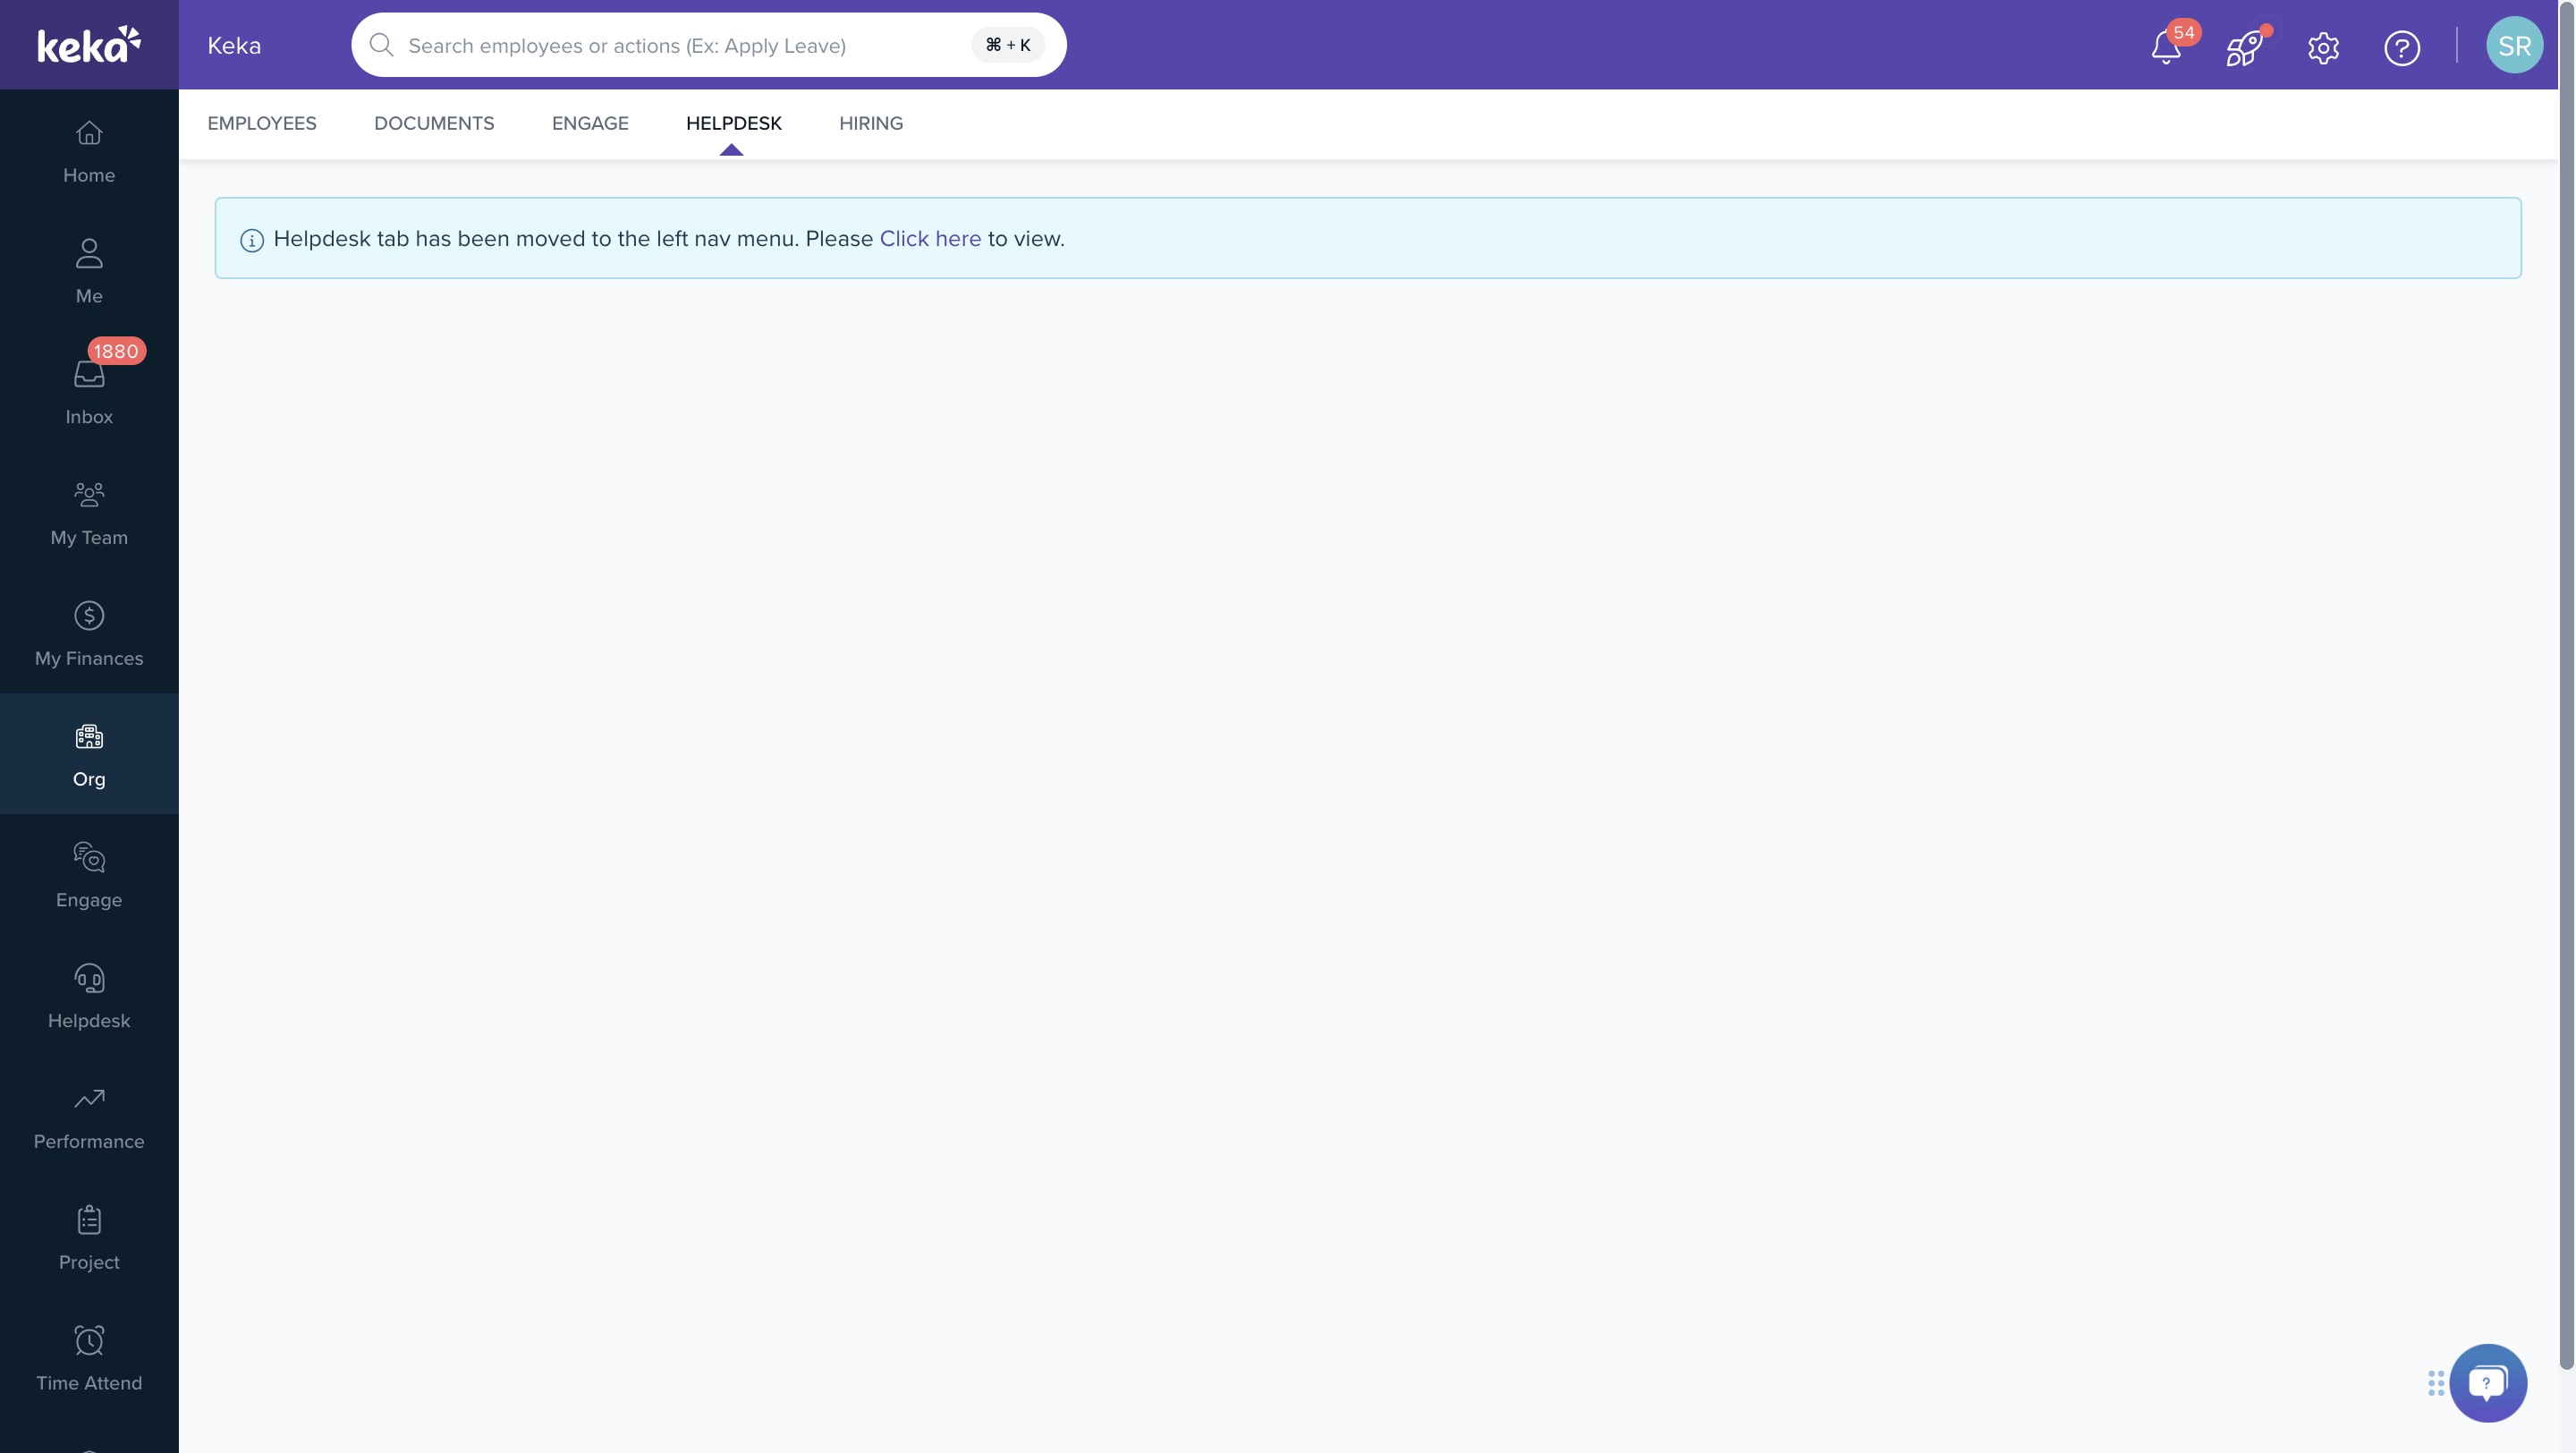
Accessing Helpdesk Tickets
Click Helpdesk in the main left navigation menu.
Select the Tickets tab to view and manage tickets.
If you open Helpdesk from the earlier Org location, a banner appears to direct you to the Helpdesk option in the left navigation.
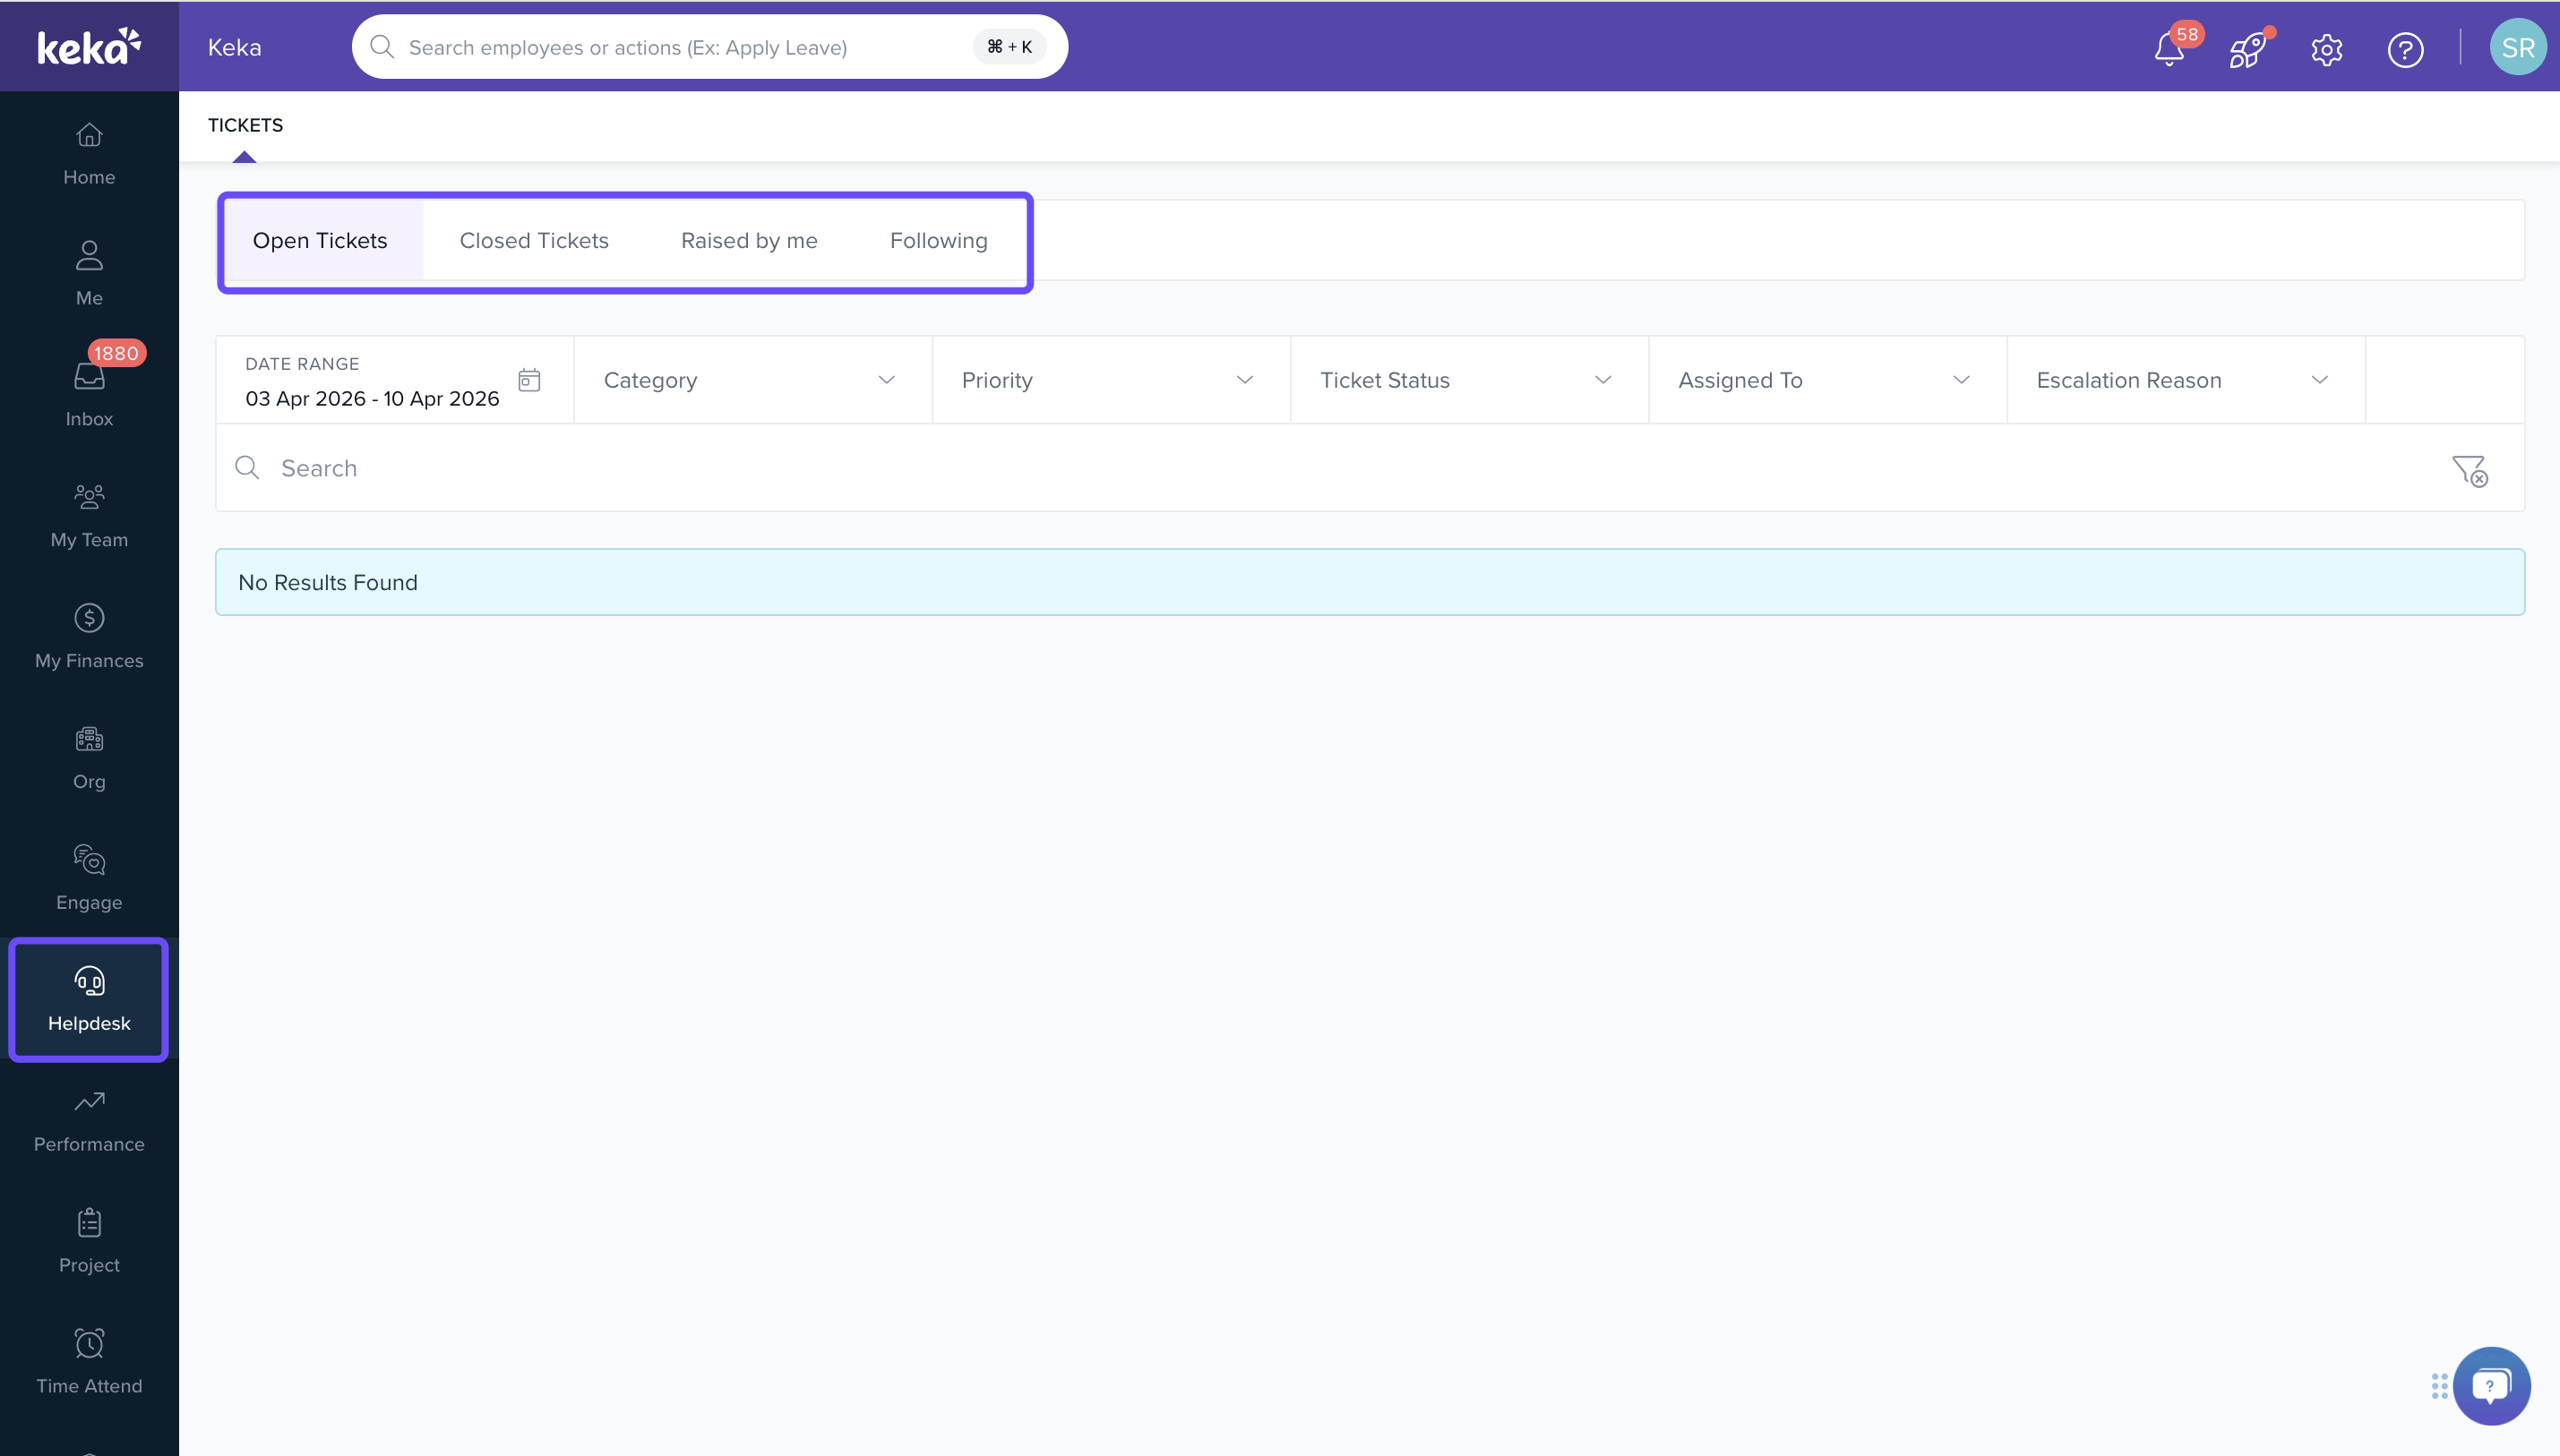
Open Tickets
This tab lists all tickets that are not yet resolved.
Use the filters and search bar to quickly find specific tickets.
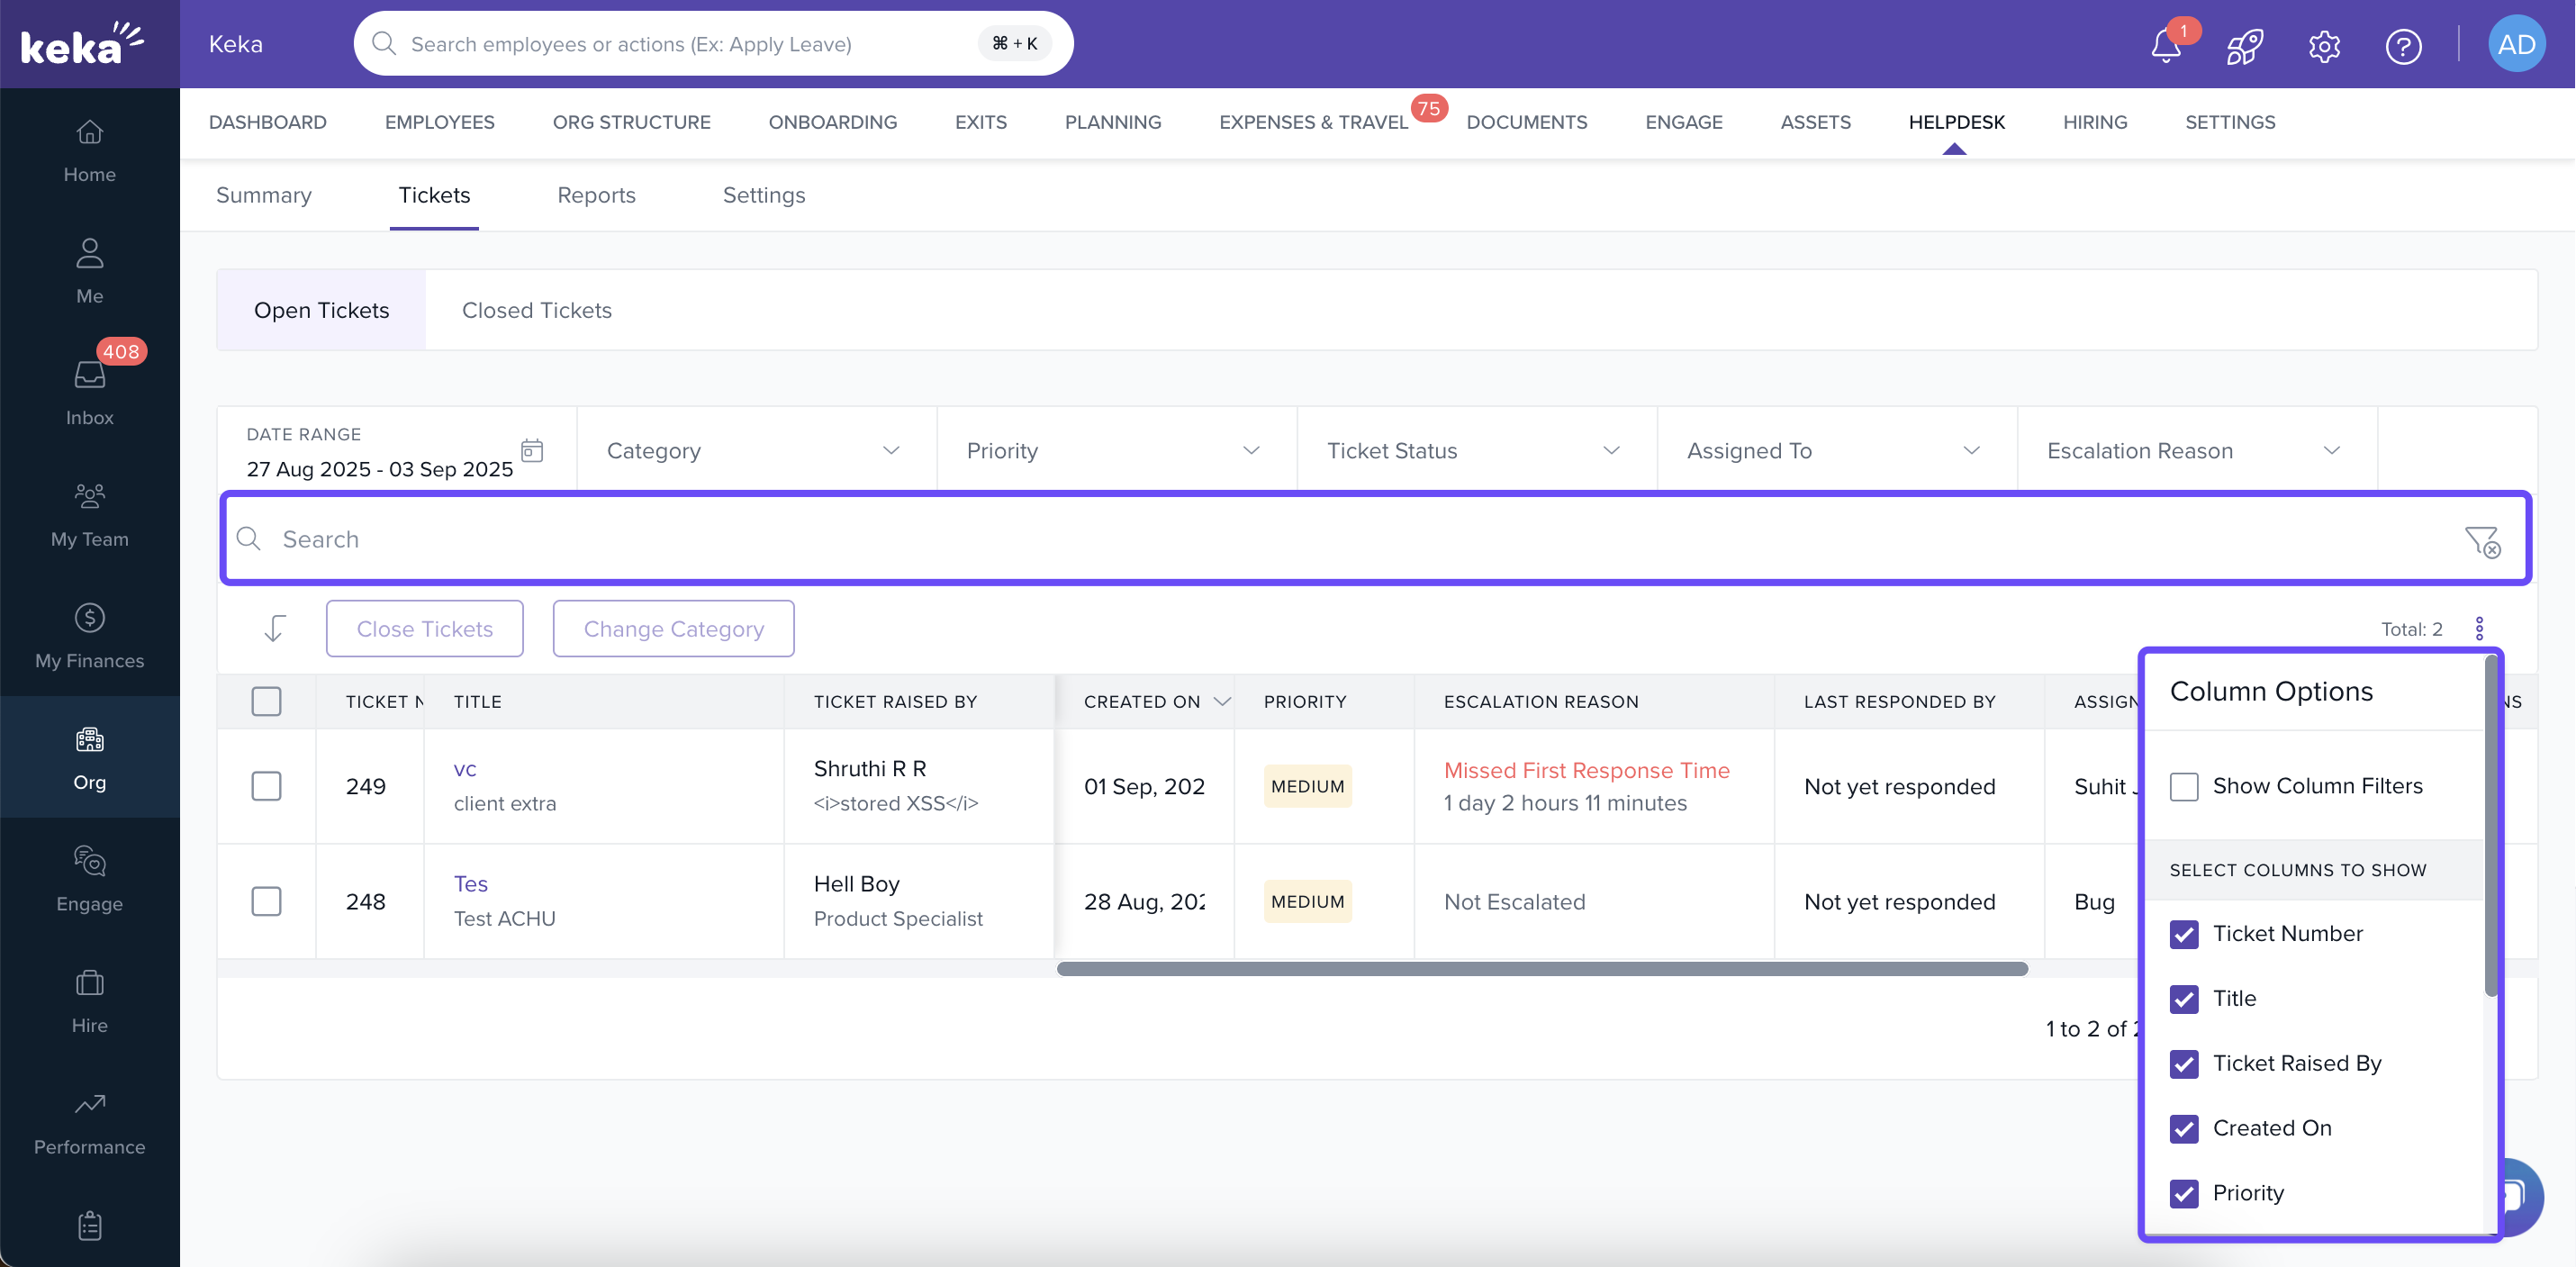
Click the three-dot dropdown (below filters) to sort columns by various attributes.
-
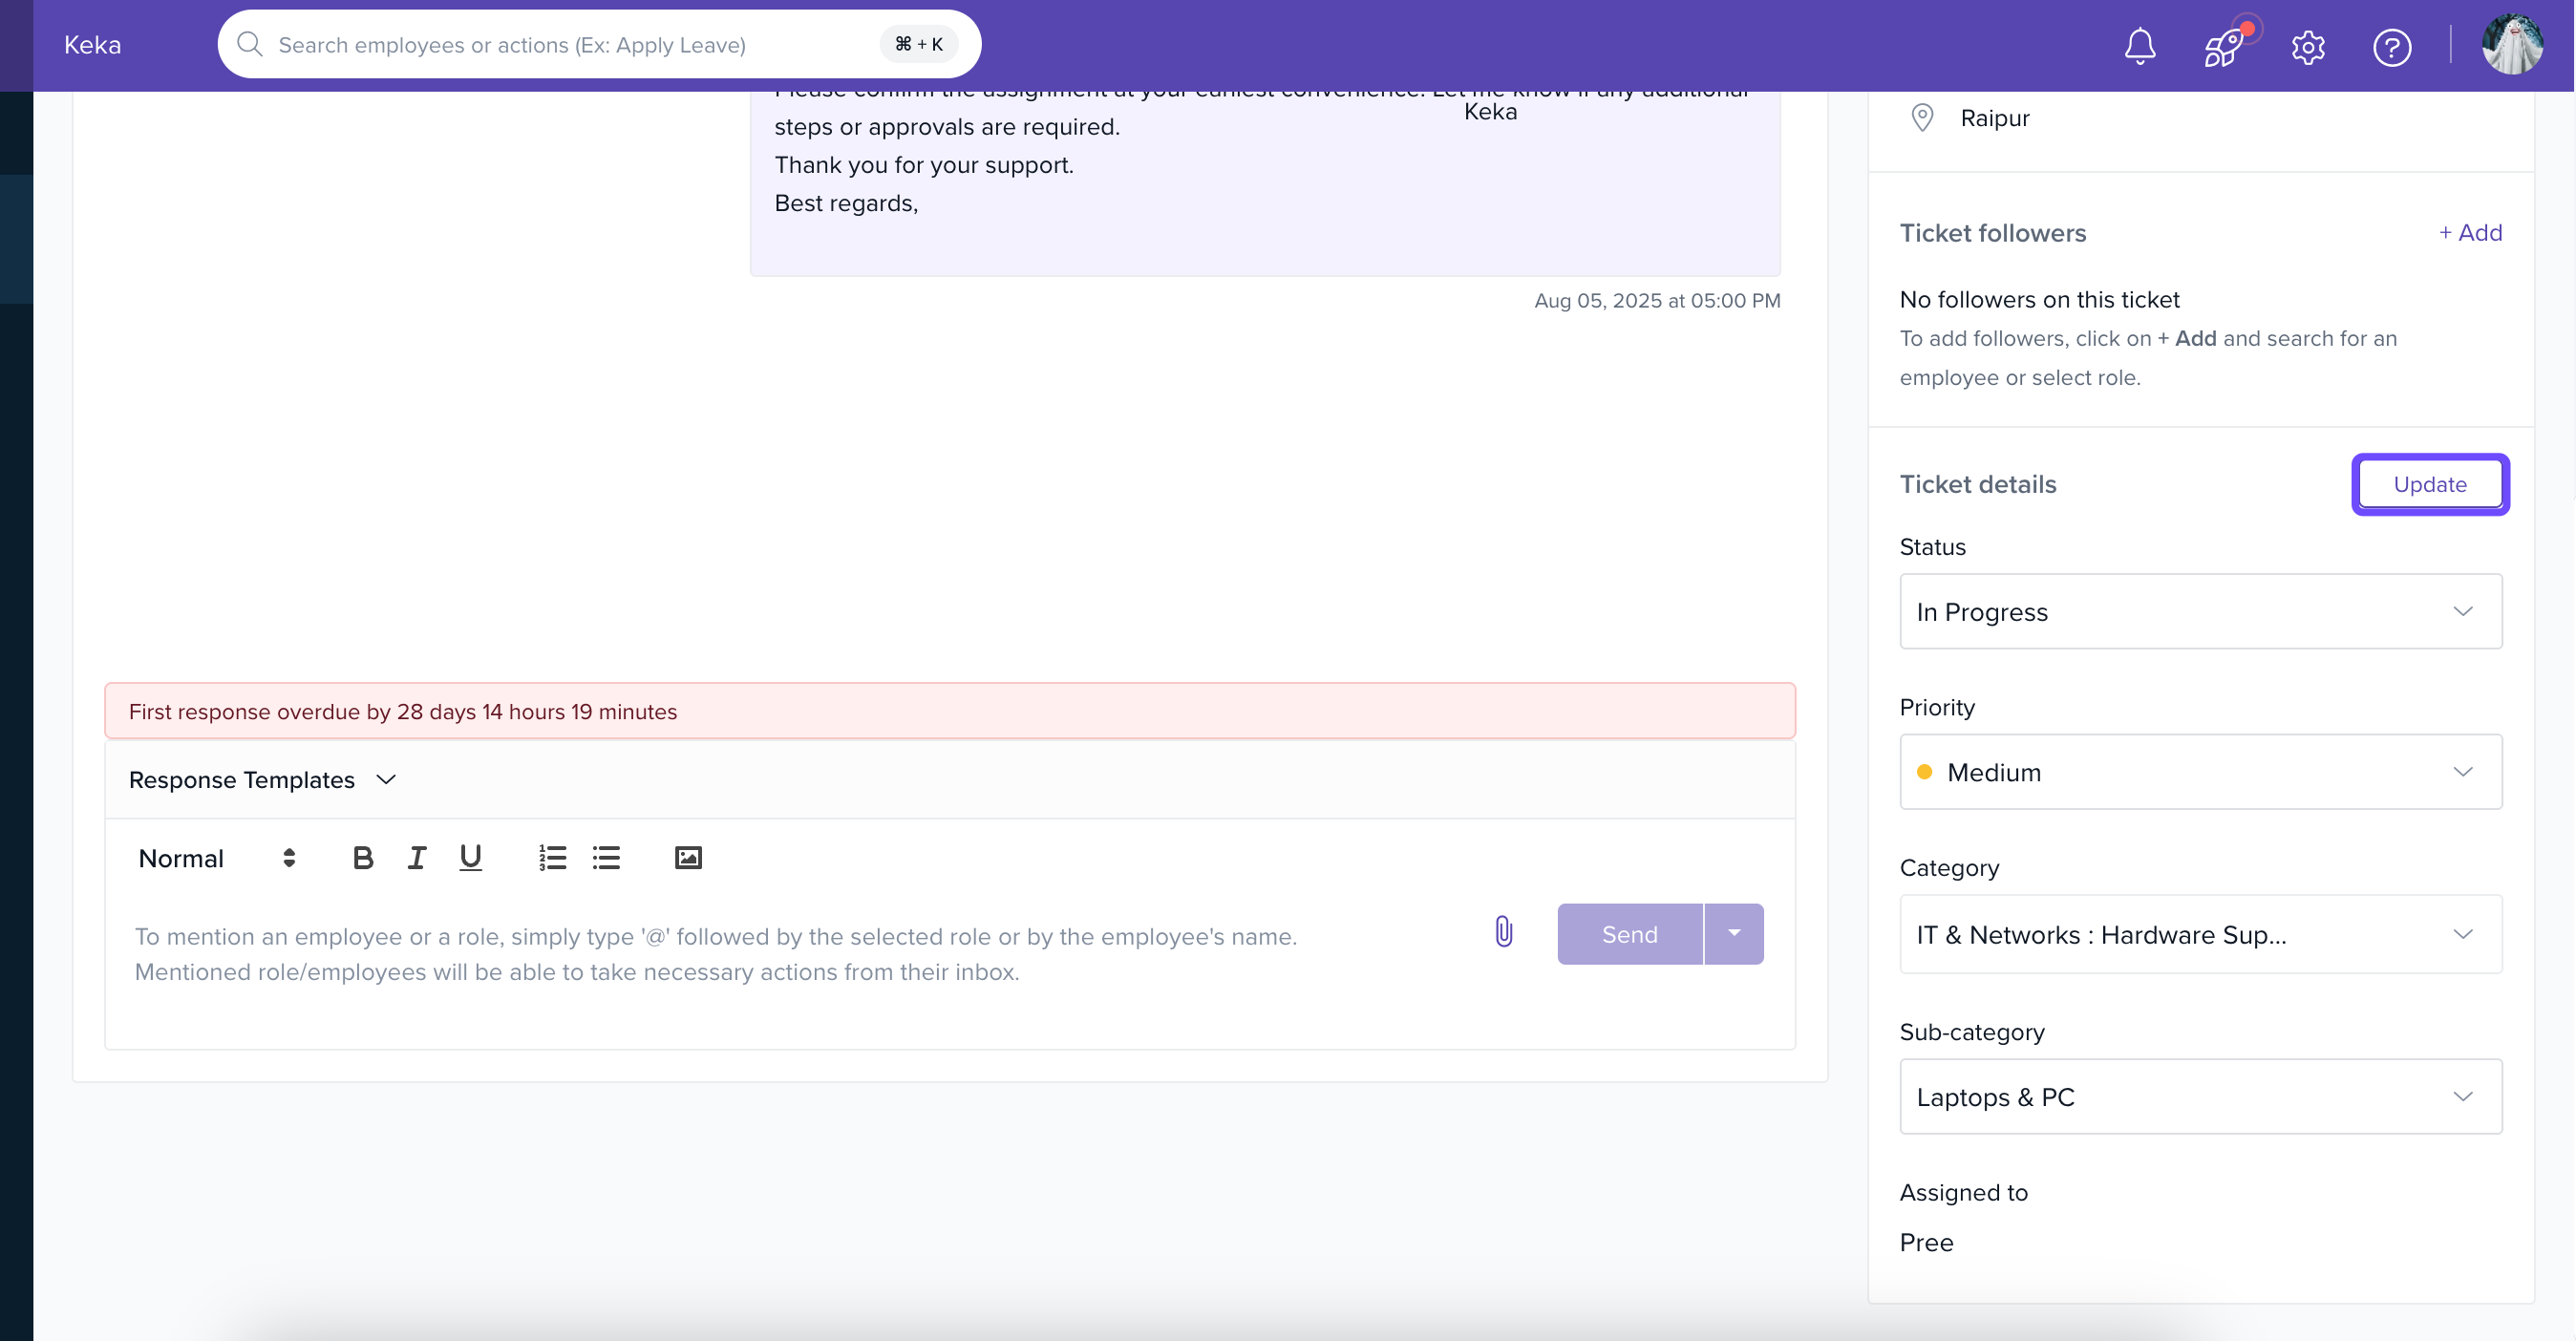
Click on any ticket to open the Ticket Details view. From there, you can edit:
Add Followers
Category and Sub-Category
Assigned To
Priority and Ticket Status
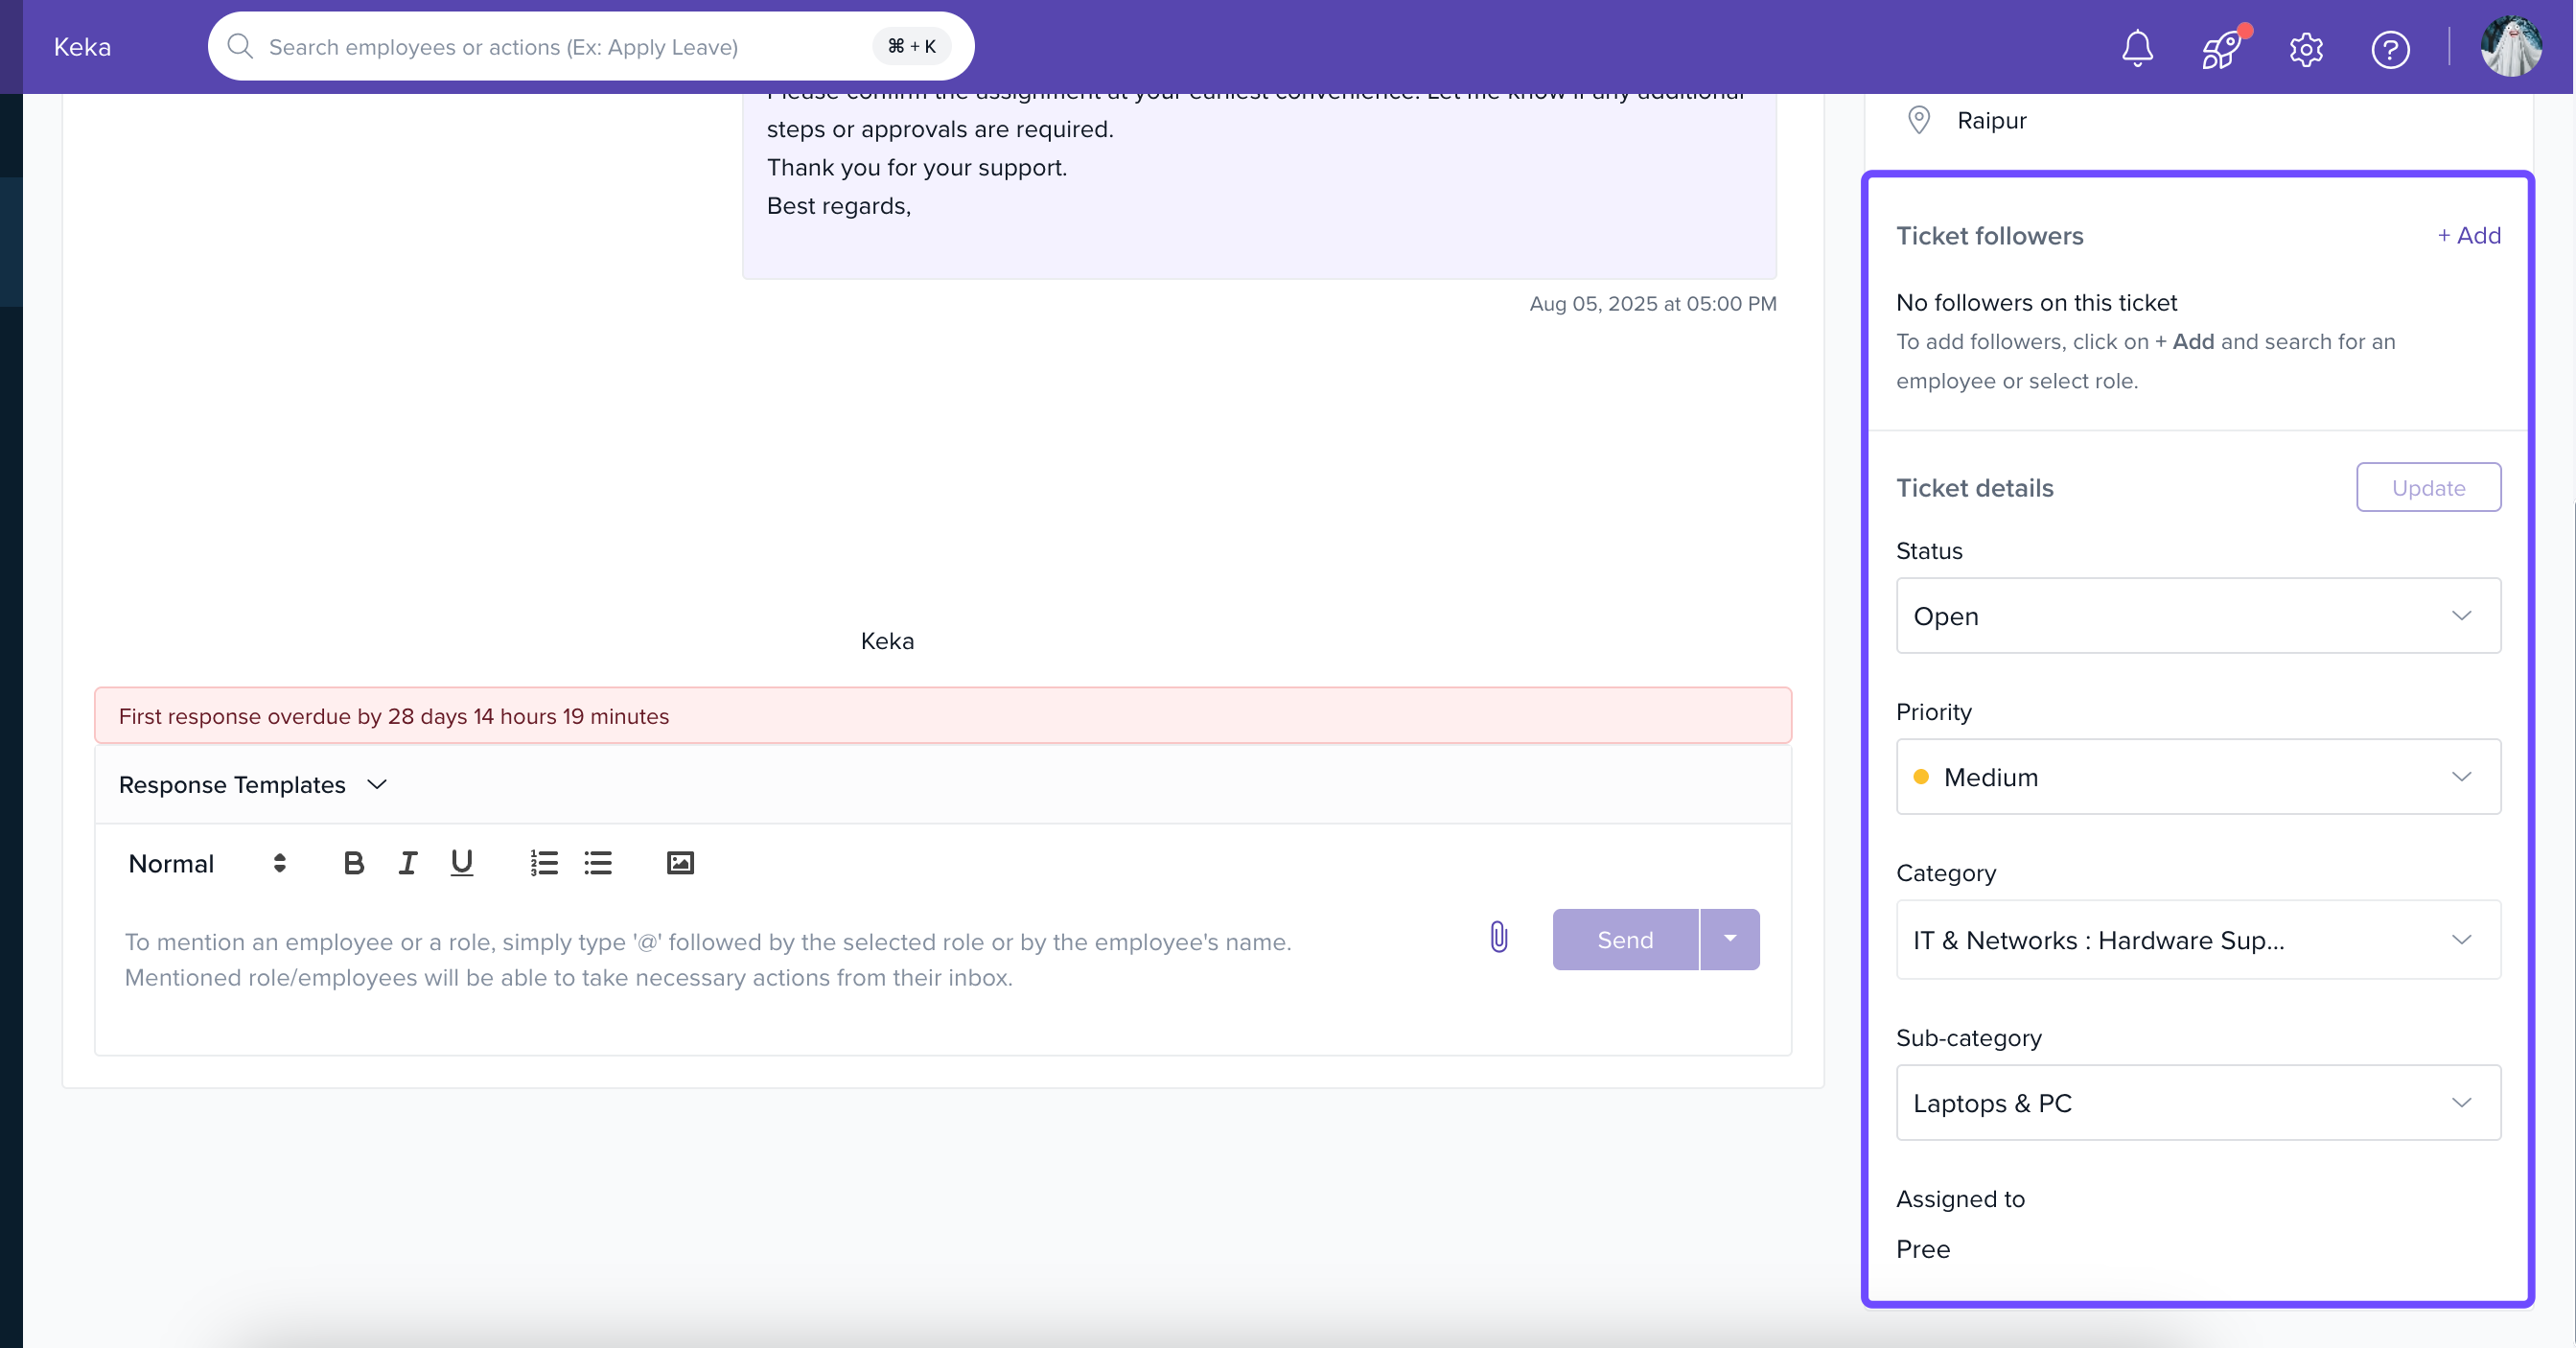
Click Update after making changes.
-
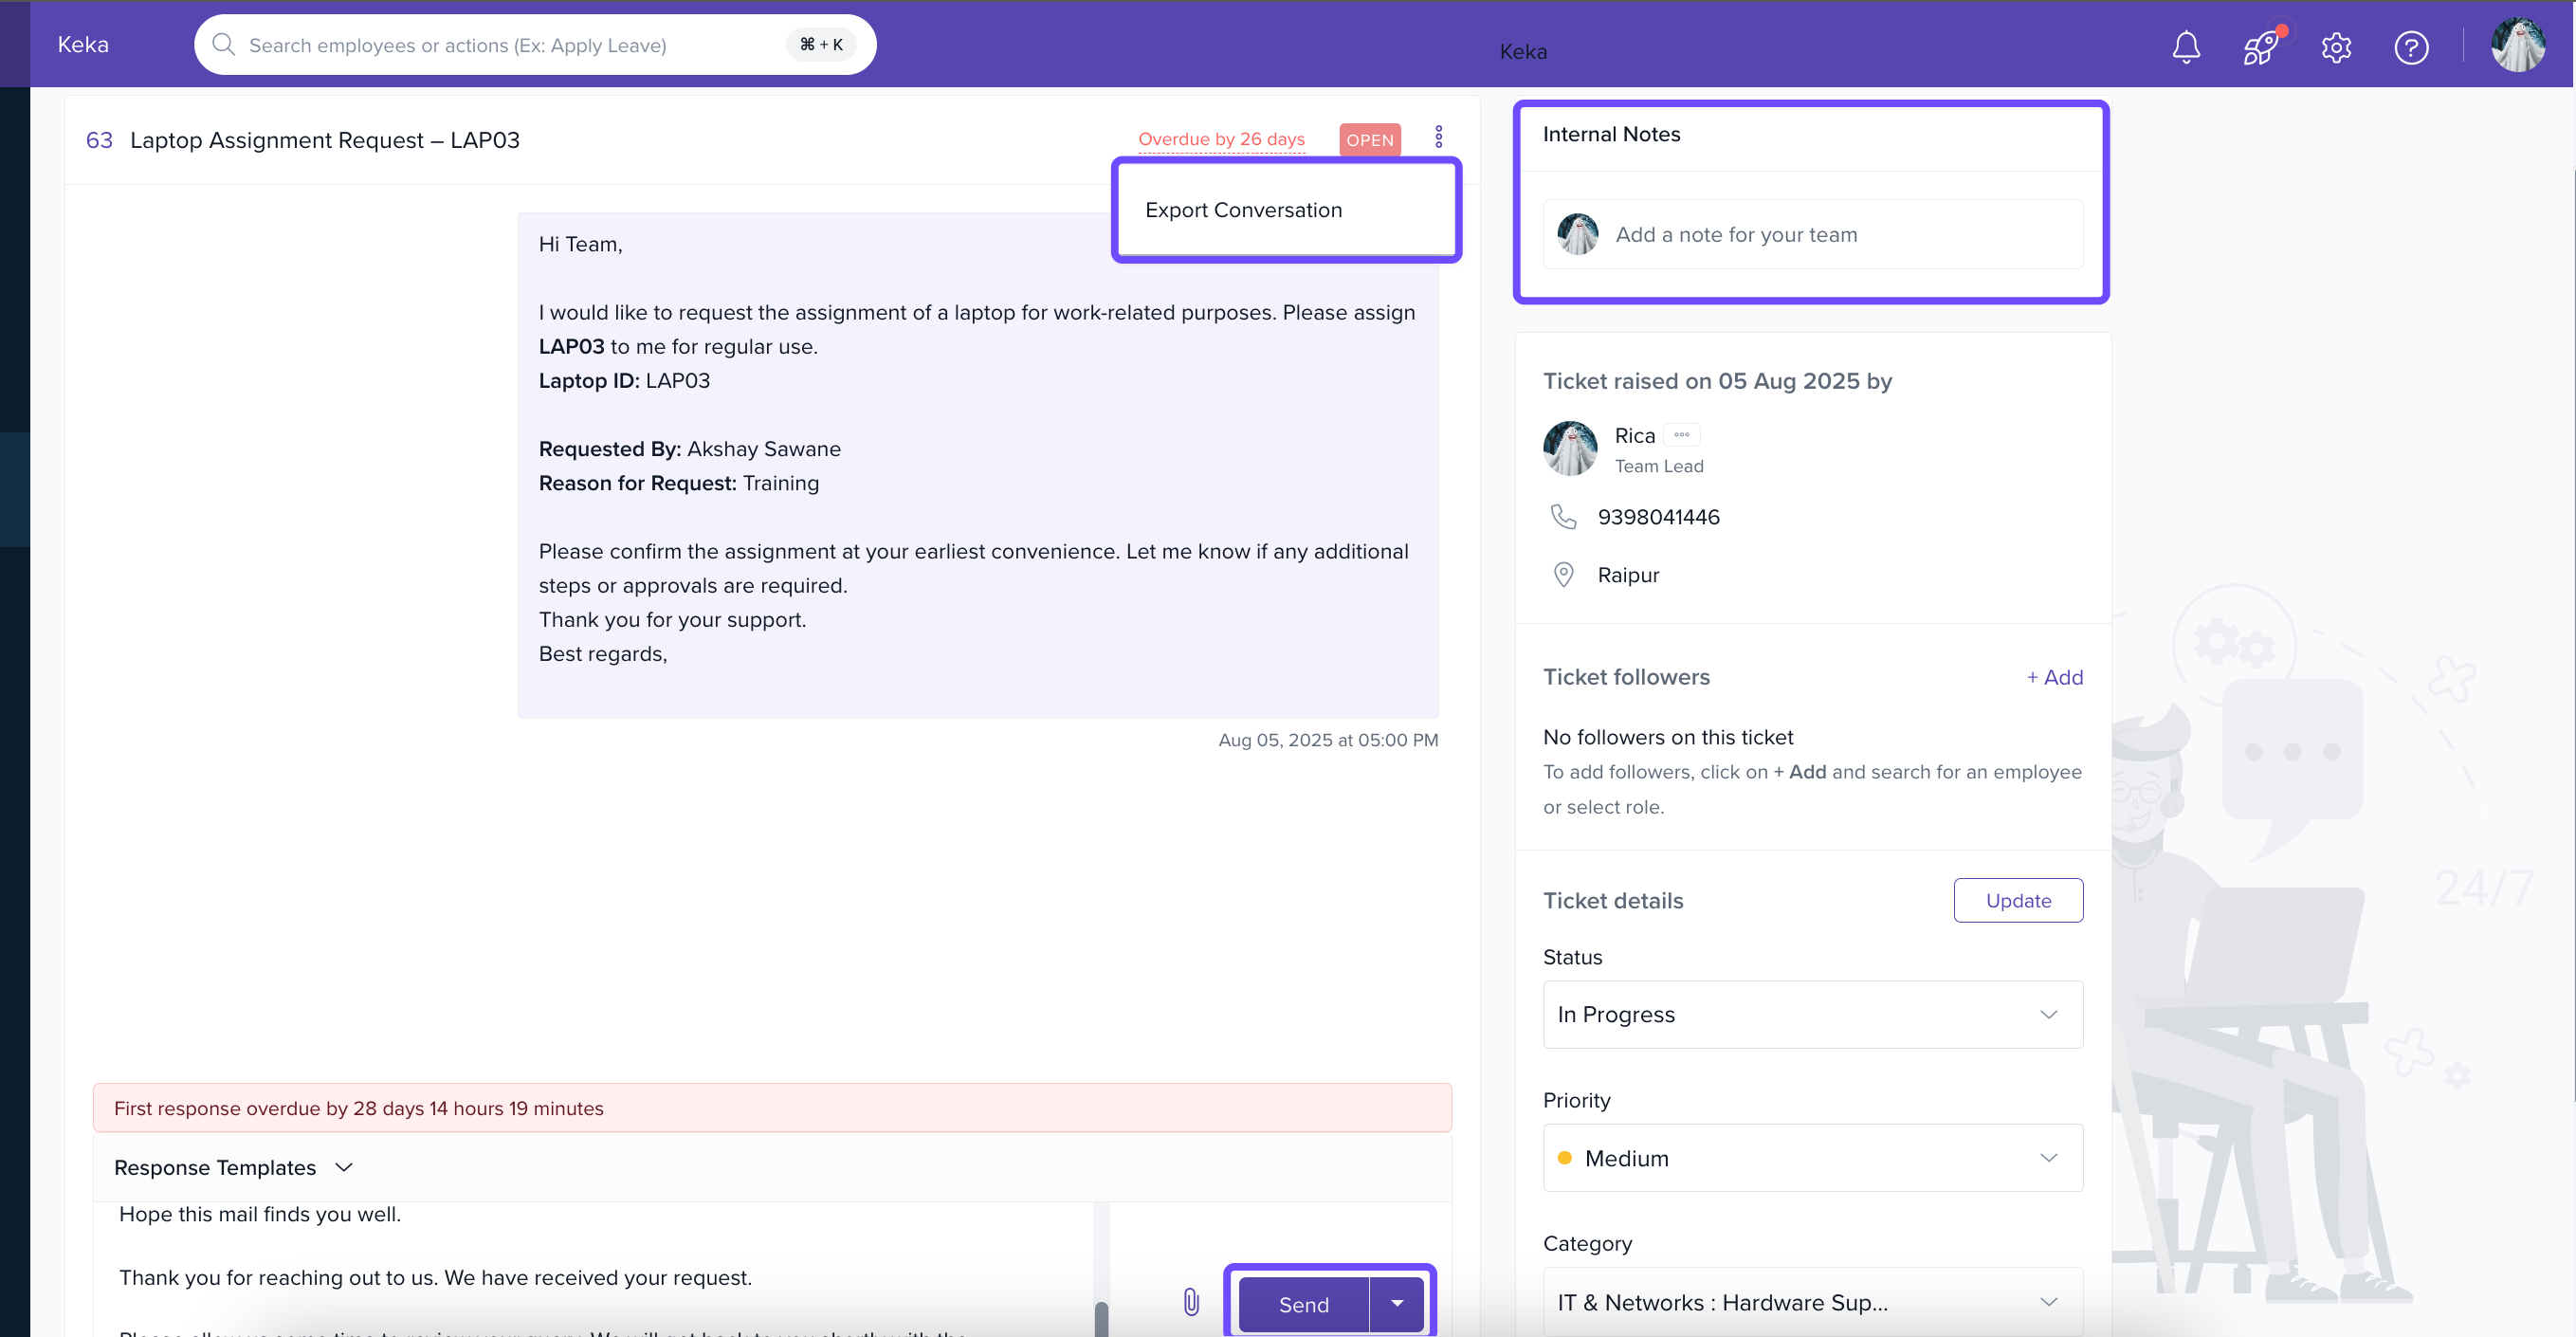
Use the three-dot menu within the ticket view to Export Conversation. You can also:
Add a Note
Upload a Document, tagging employees as needed
Send the message and then Close the Ticket using the down arrow next to Send.
Alternatively, use the three-dot Actions menu next to each ticket in the list to Edit or Close it.
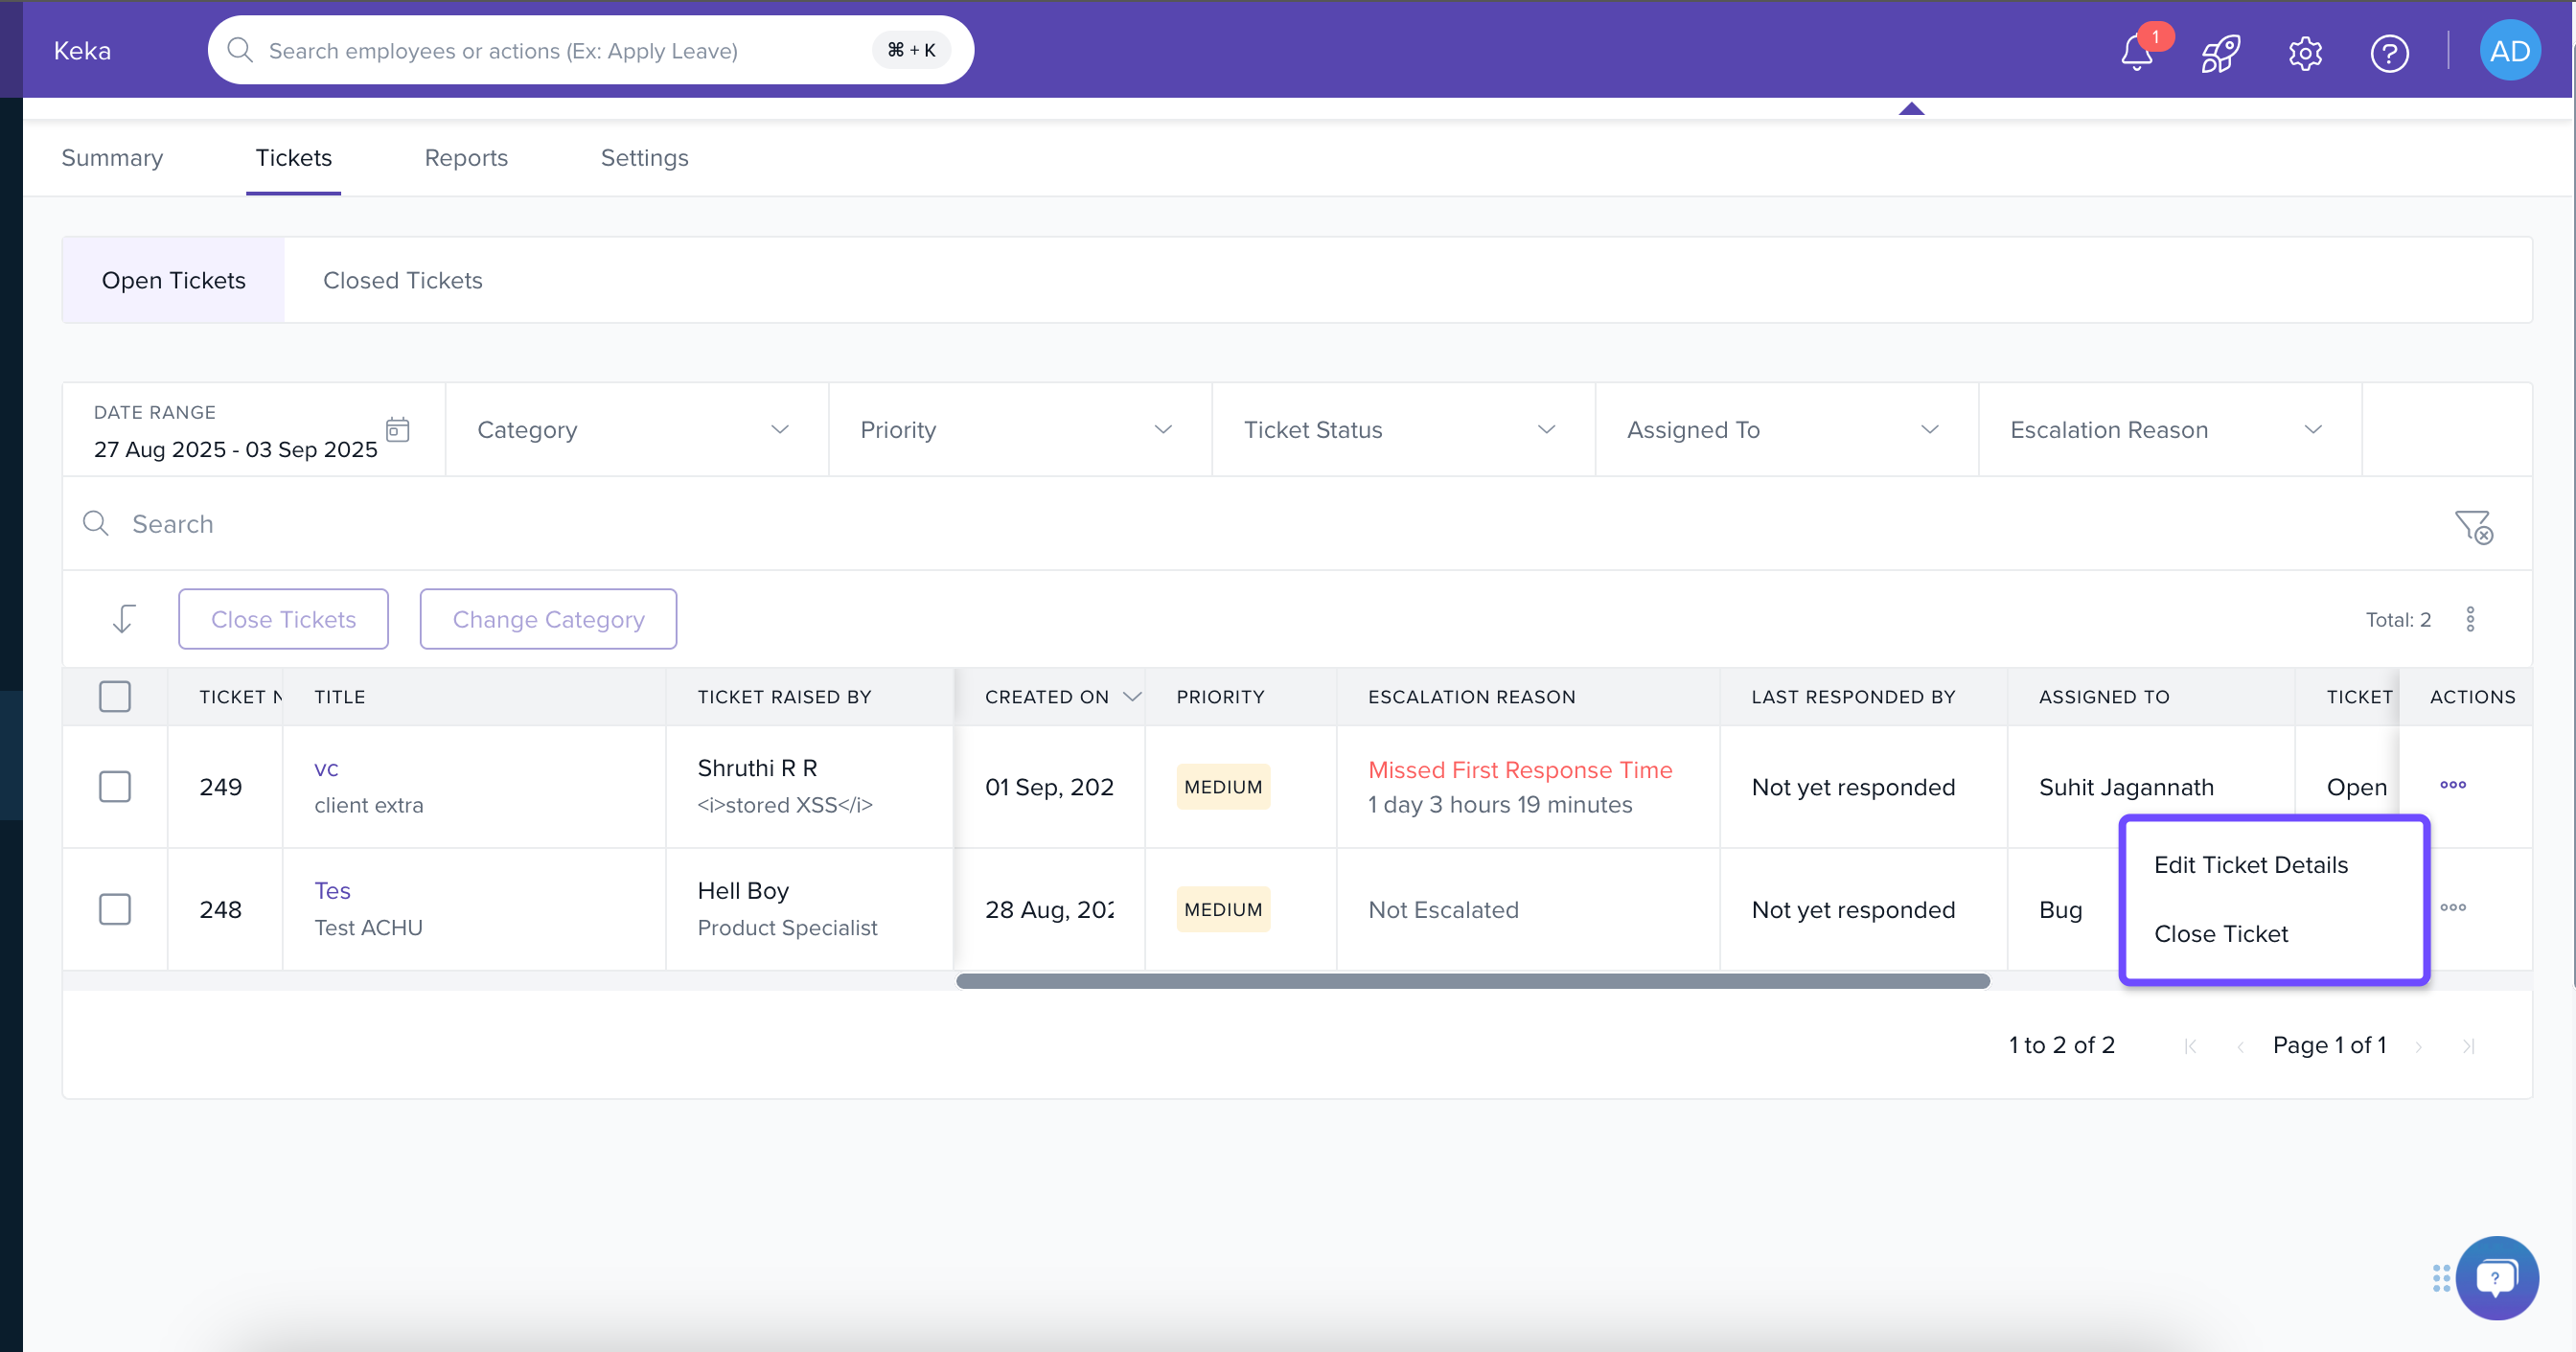
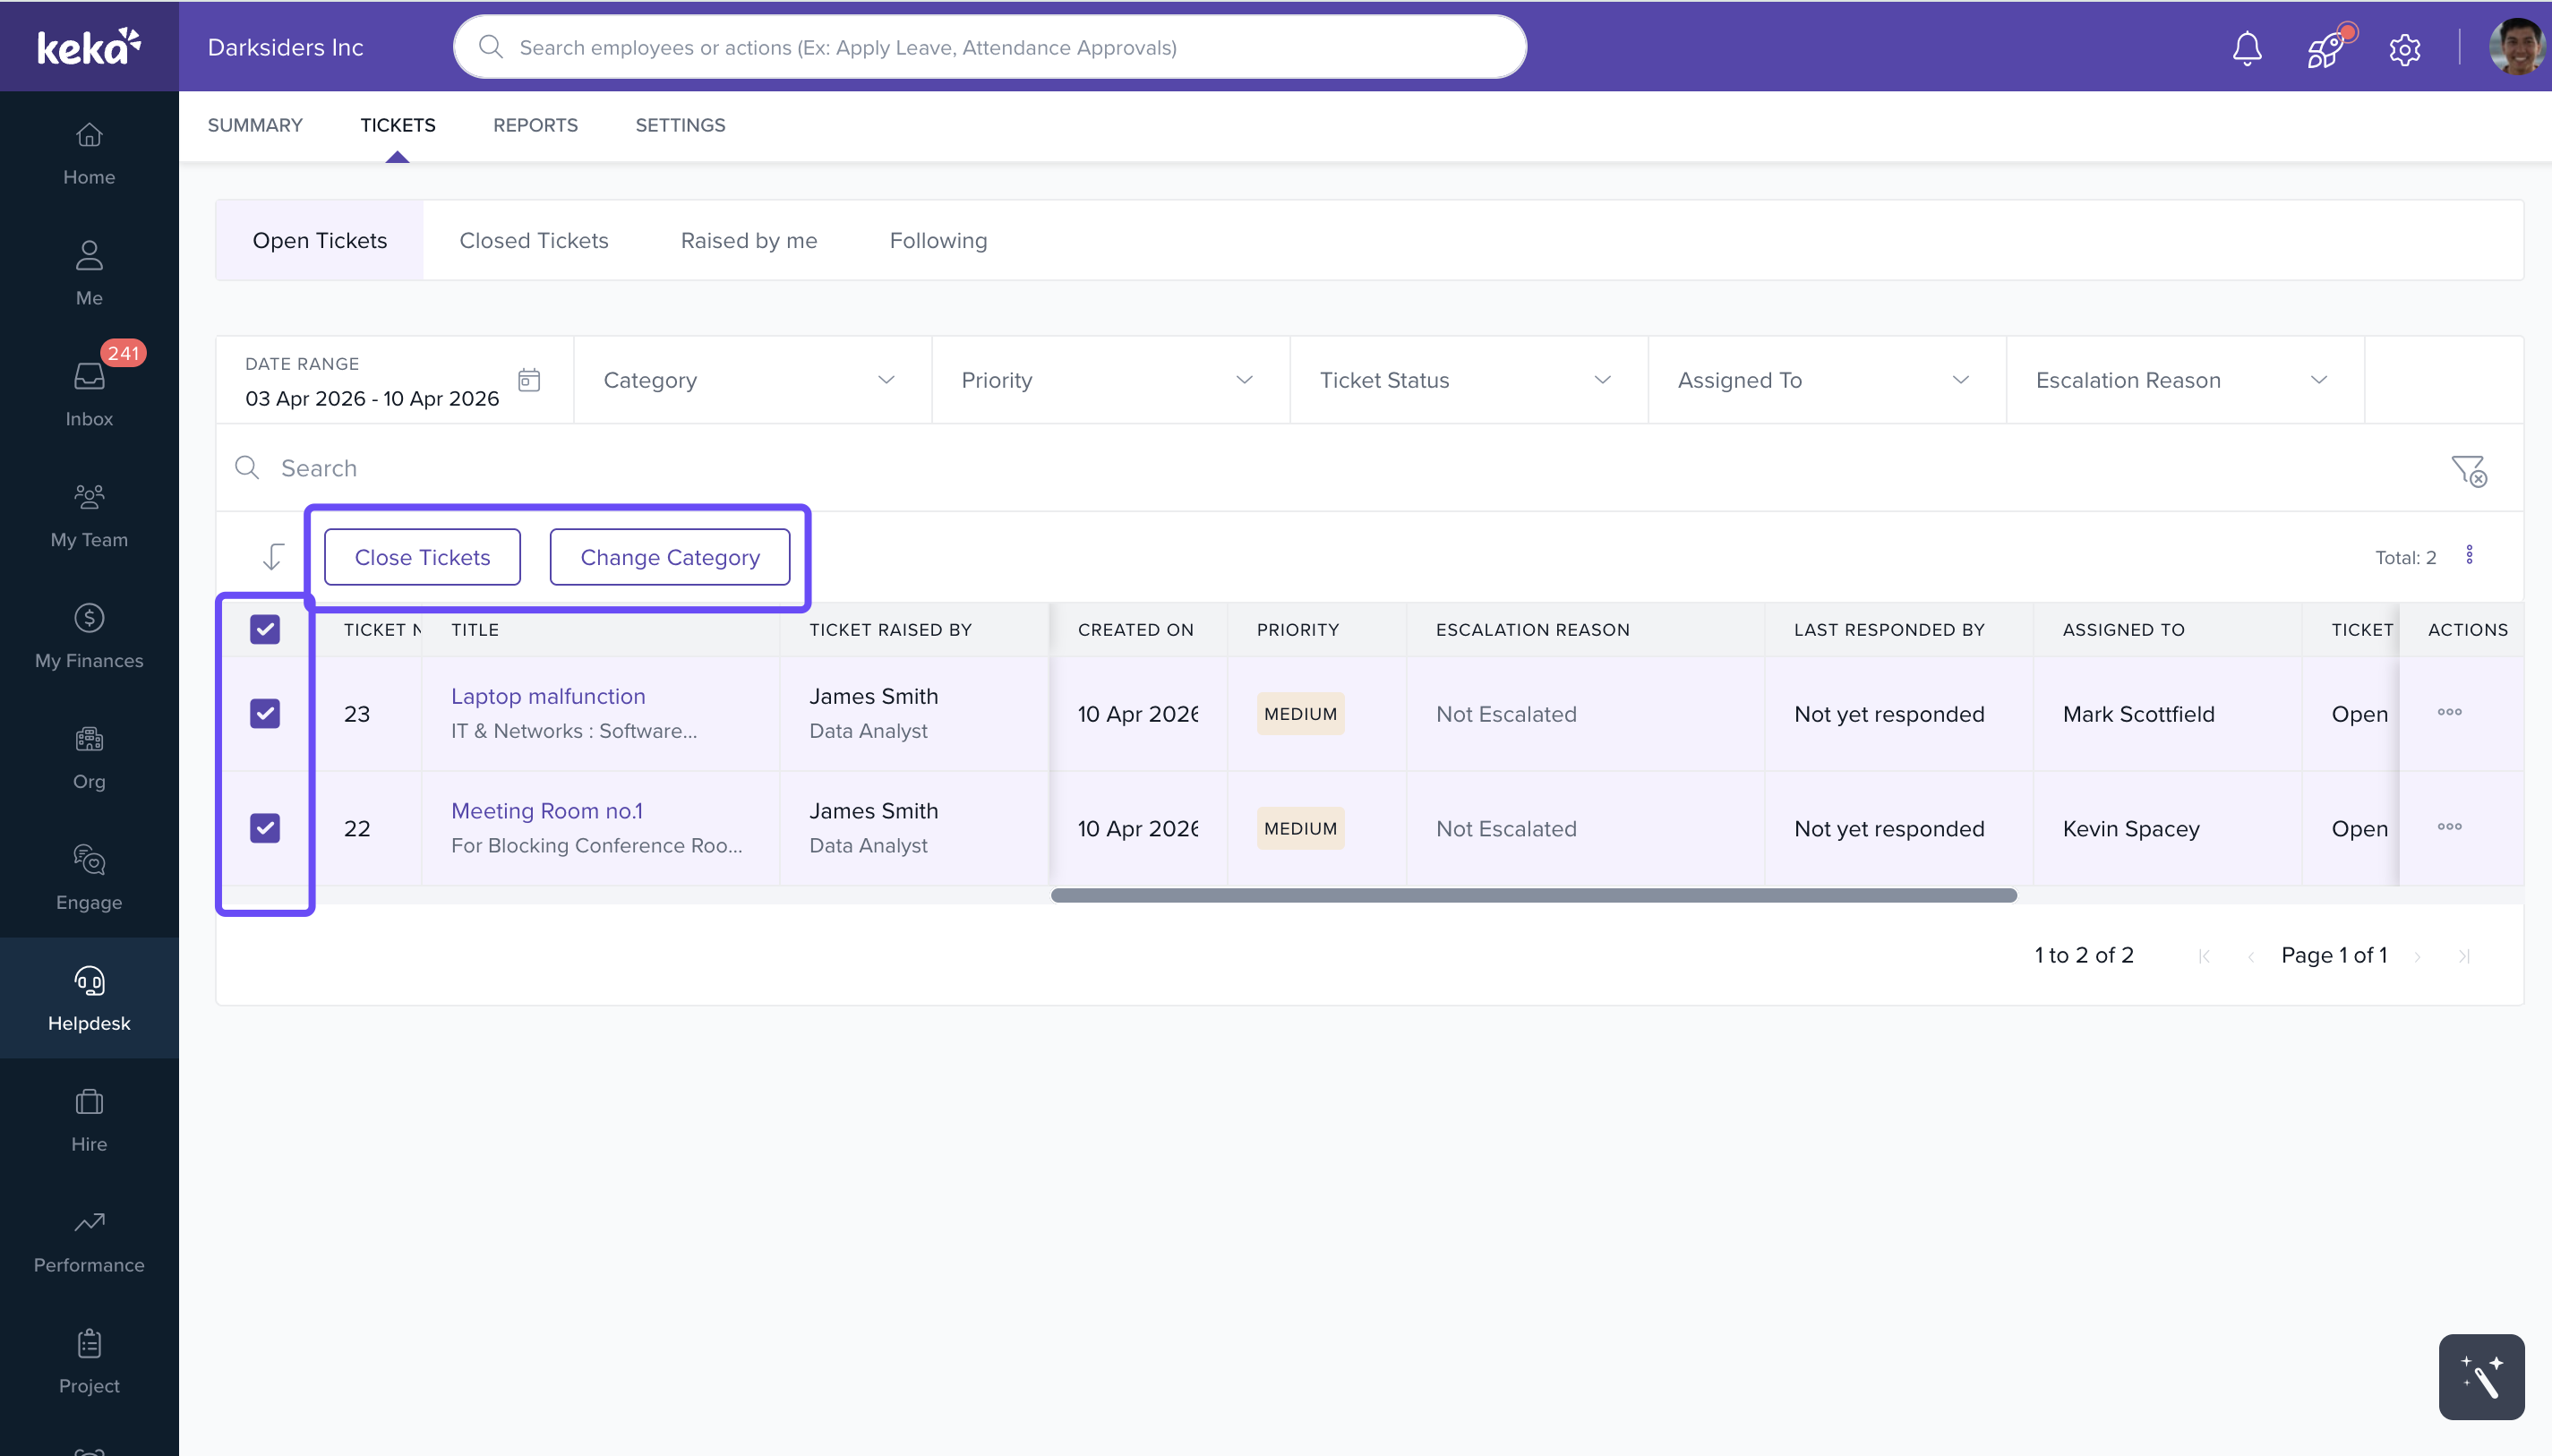
To handle multiple tickets at once, select them in bulk and click the options to Close them or Change Category.
 Closed Tickets
This tab holds all tickets marked as resolved.
Review past ticket interactions and details here.
To reopen a ticket, click on it and use the Reopen option at the bottom. The ticket will move back to the Open Tickets tab.
Want to fine-tune how tickets are categorized or how responses are organized? Check out the Managing Helpdesk Settings article next.
Comments
0 comments
Please sign in to leave a comment.