Adding a Custom BGV Vendor:
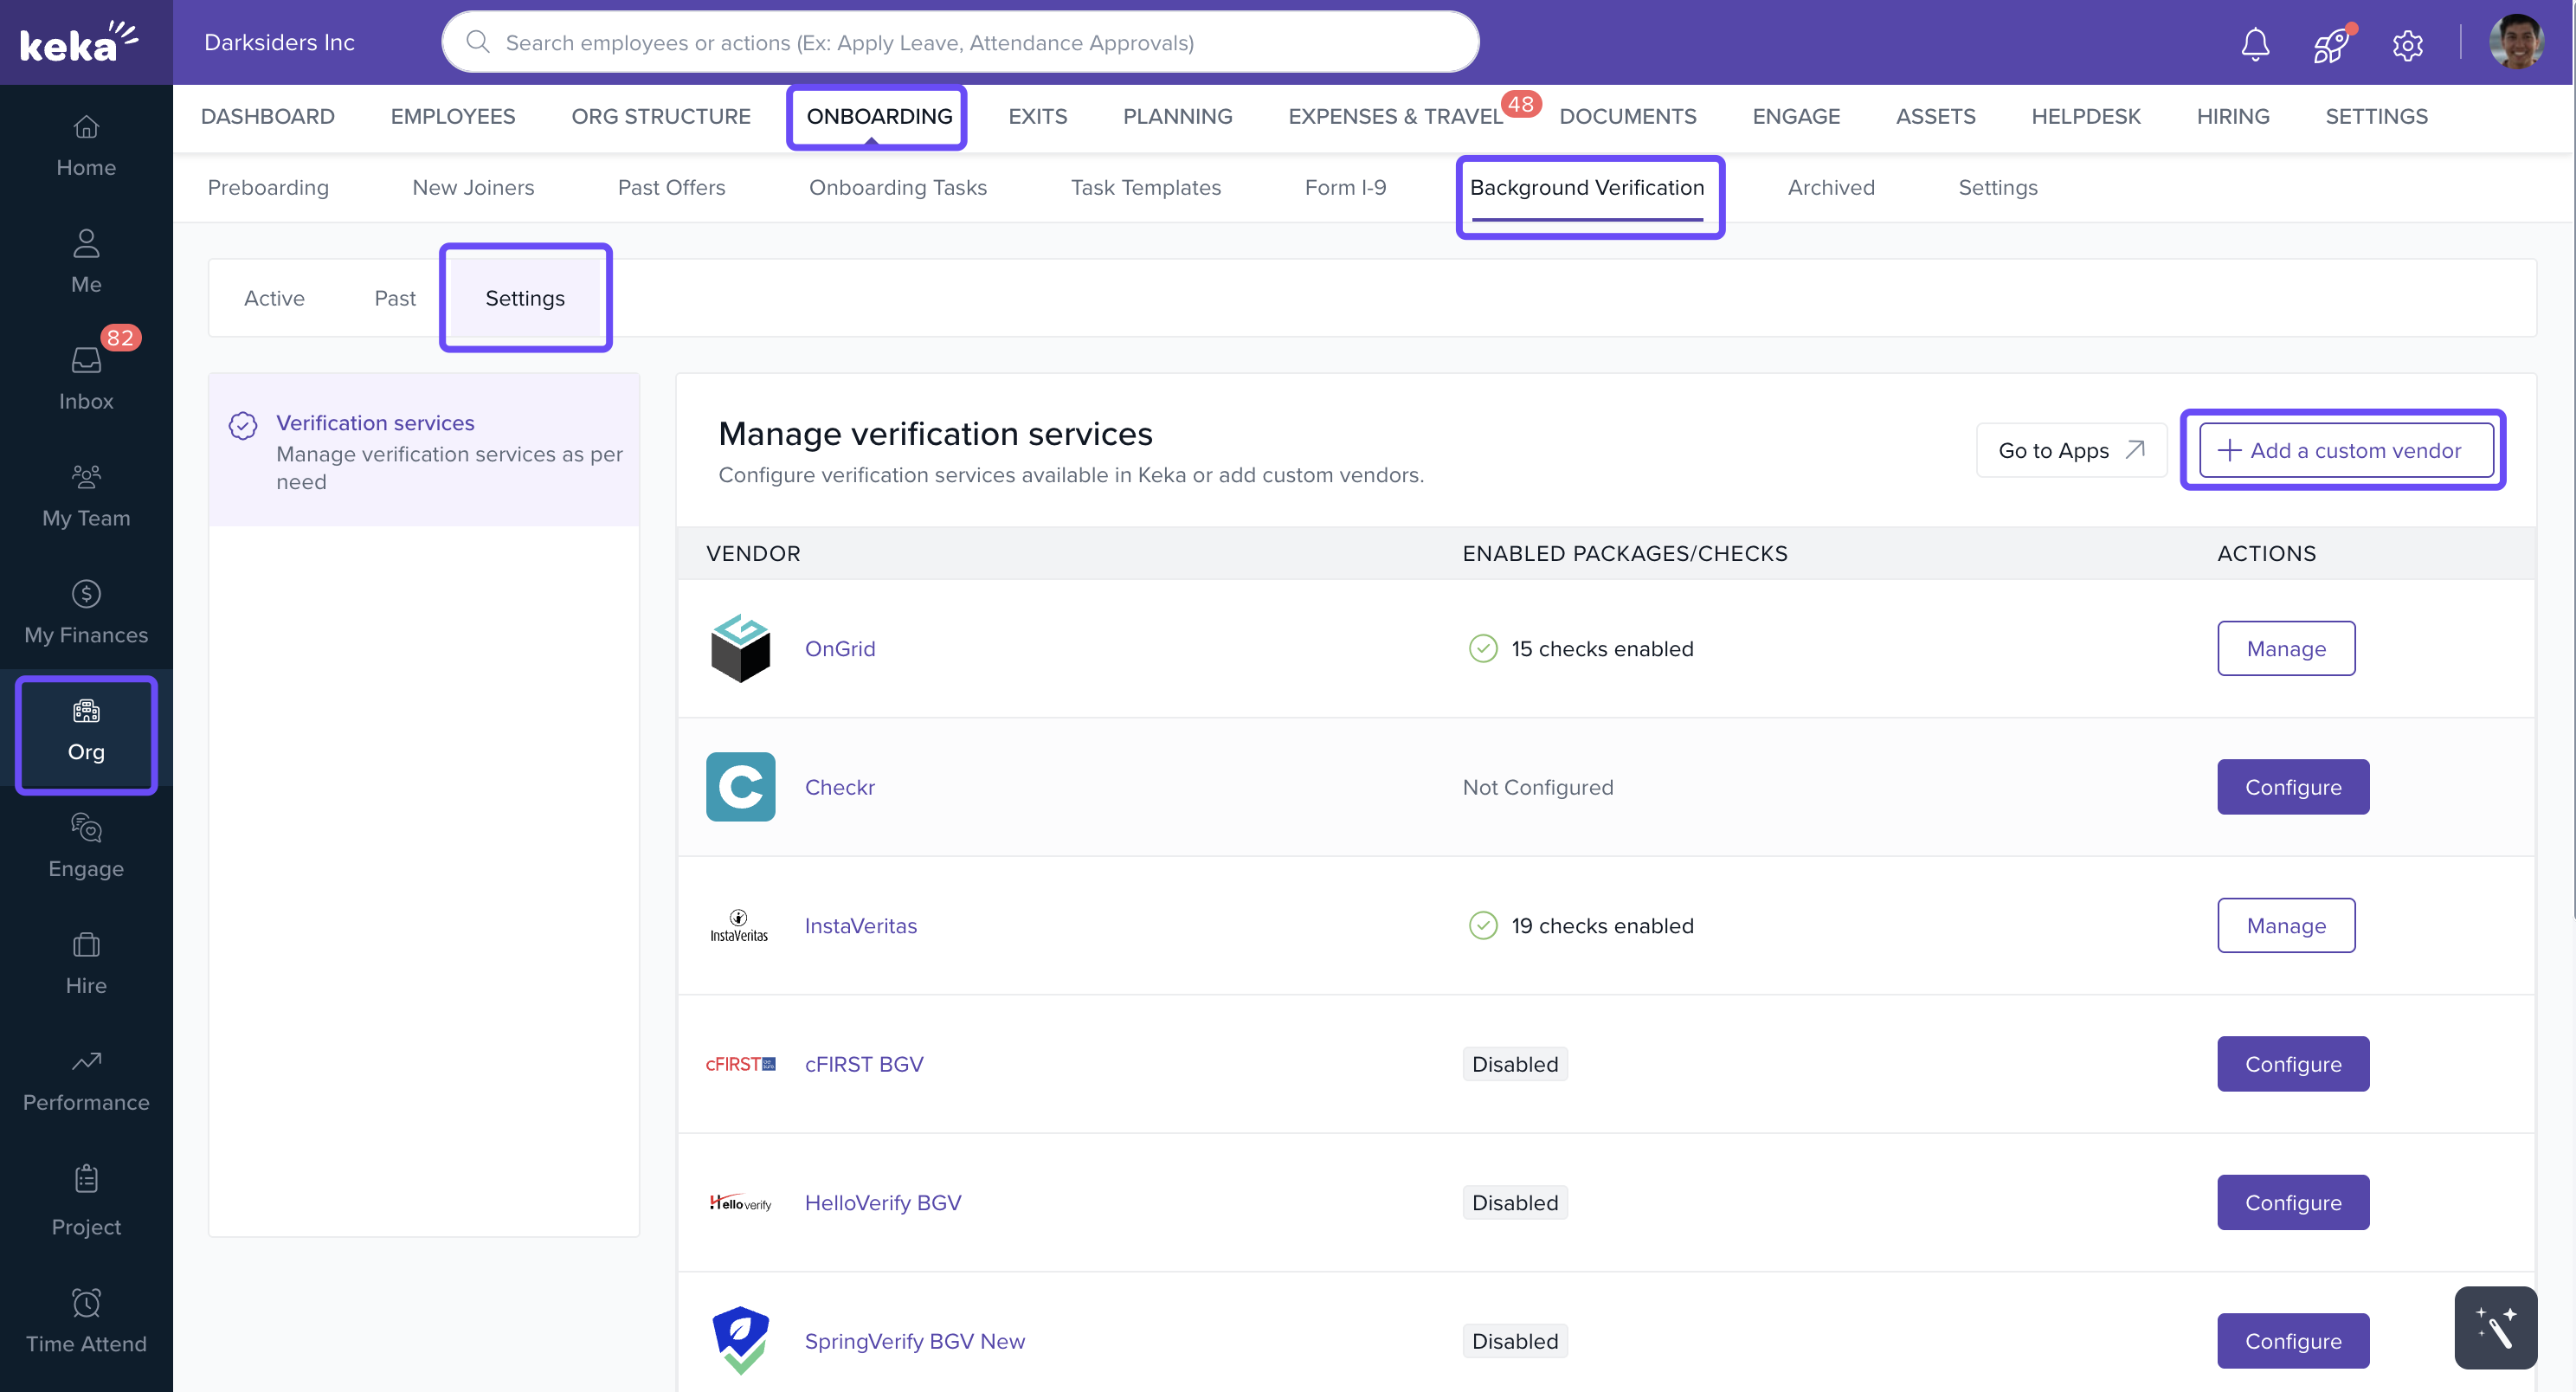
Navigate to Org > Onboarding > Background Verification > Settings.
Click + Add a Custom BGV Vendor.
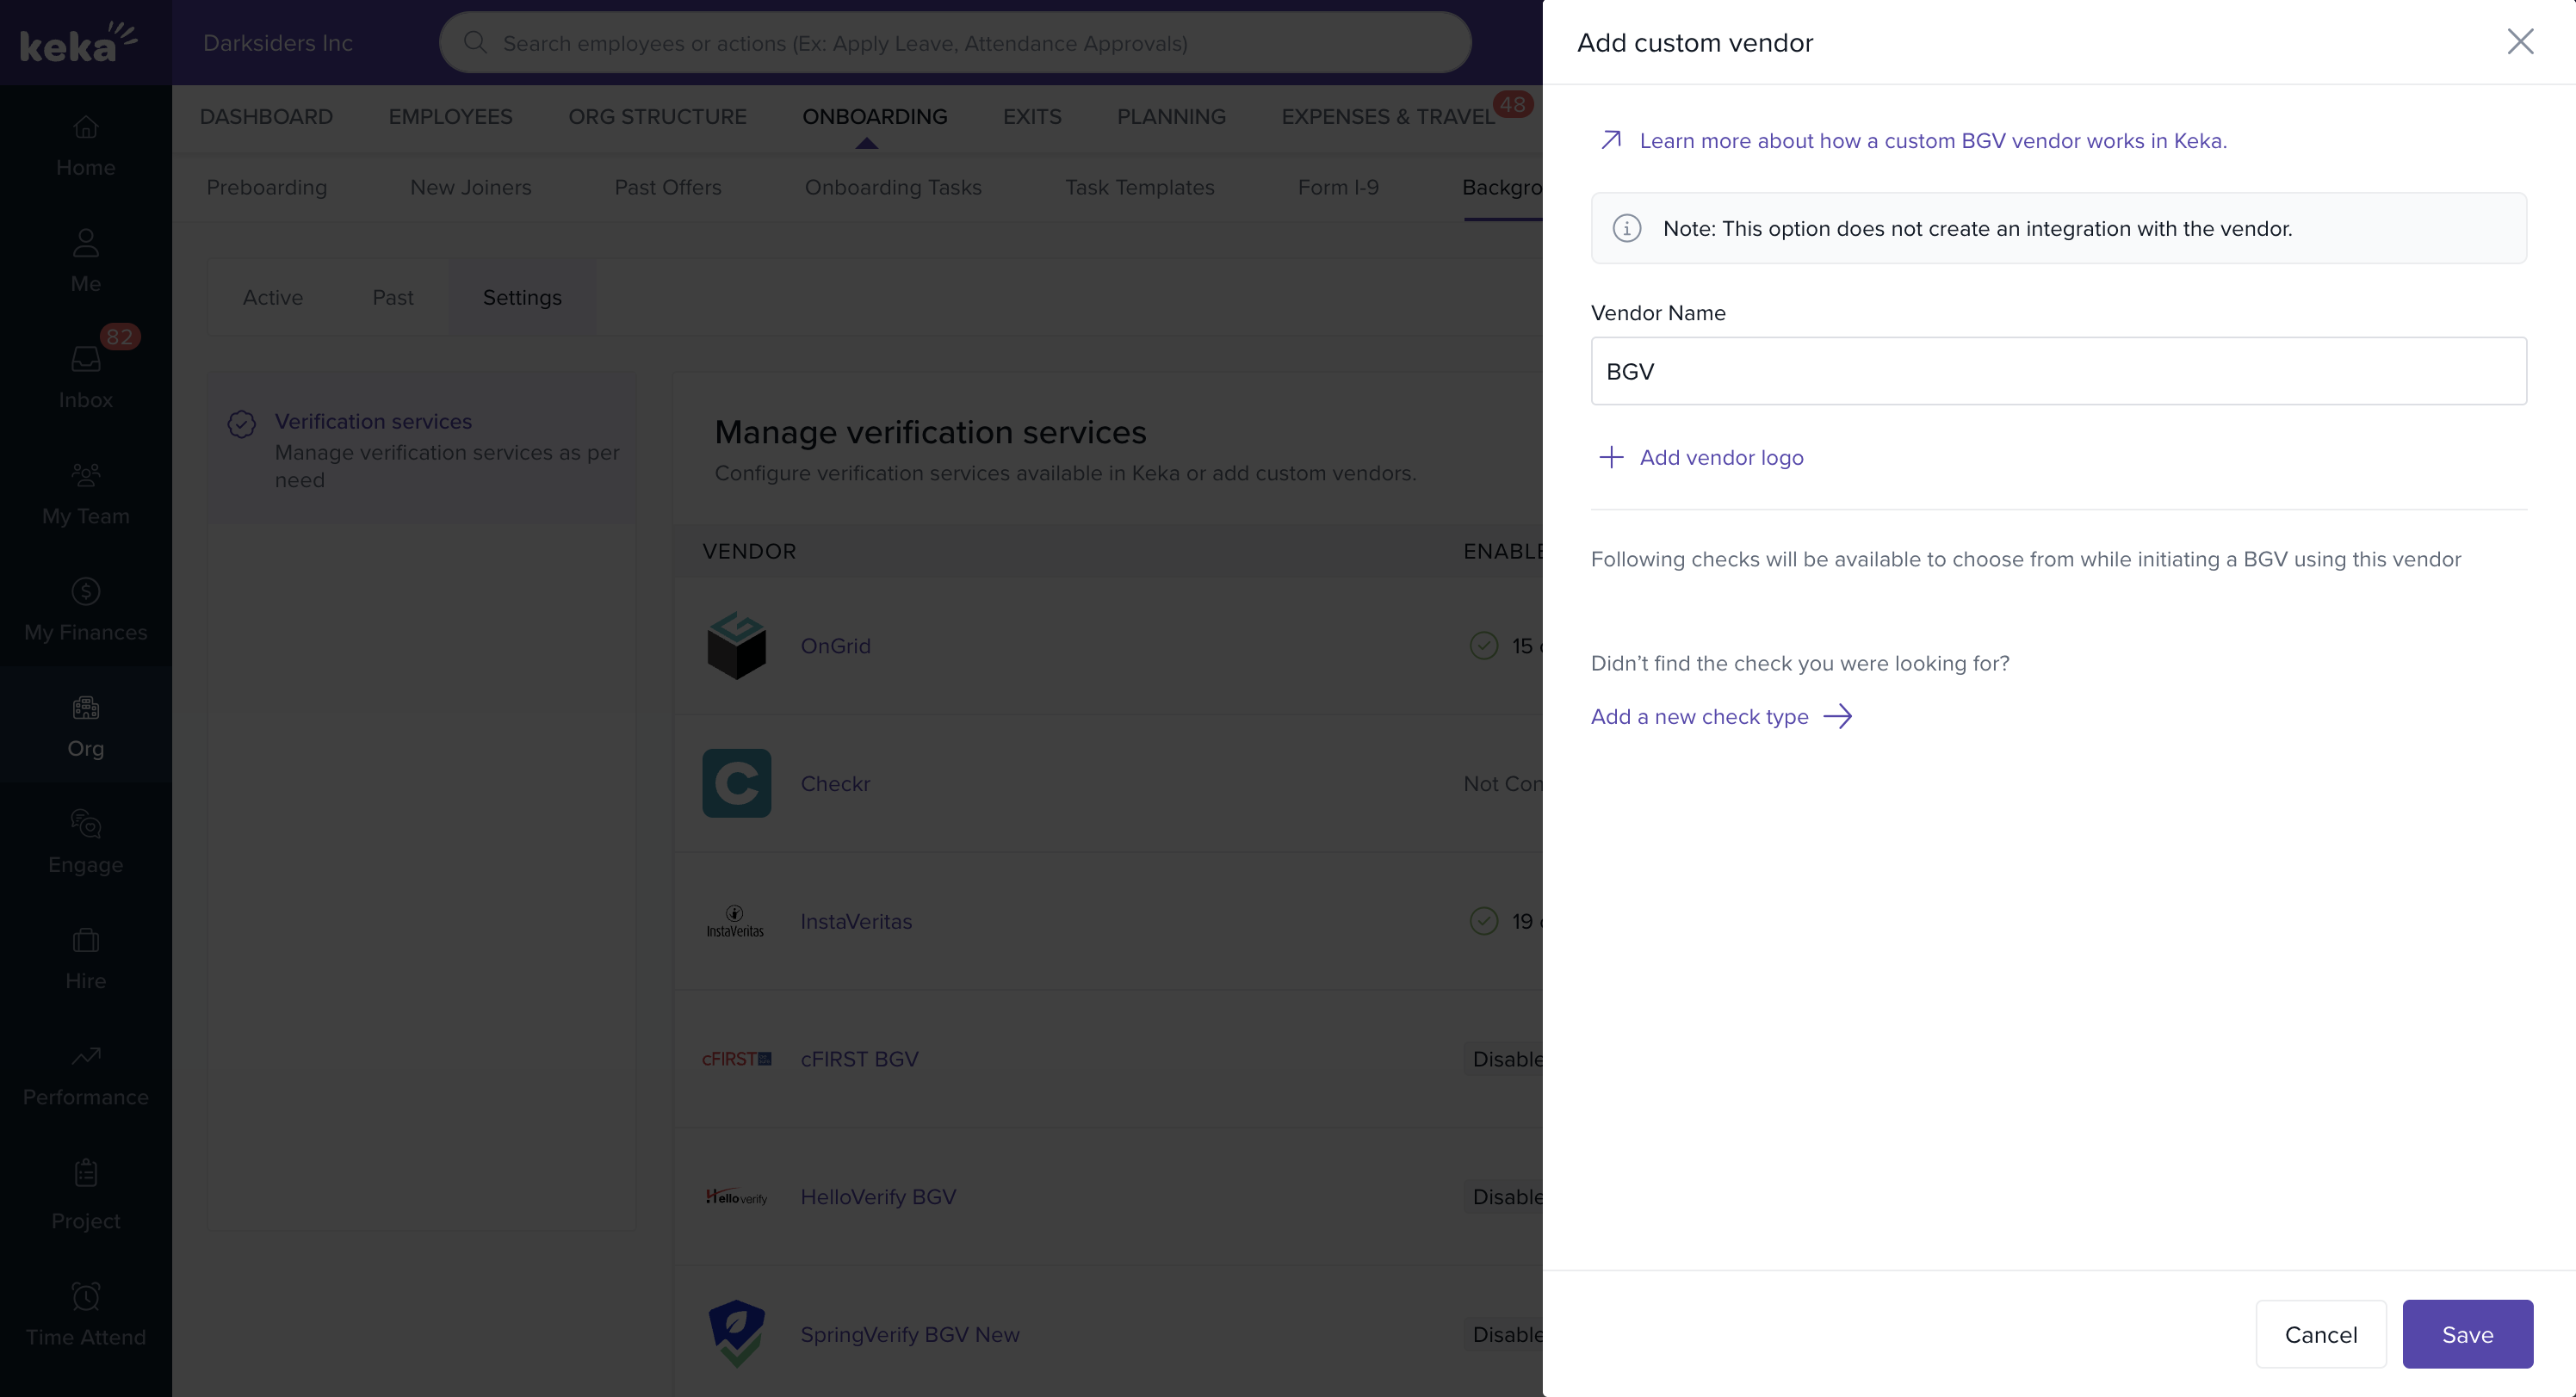
In the Add Custom Vendor window:
Enter the Vendor Name.
Upload a Vendor Logo.
Review the list of available background checks.
Add missing checks, if required.
Click Save to finalize the setup.
Starting a BGV using a Custom BGV vendor
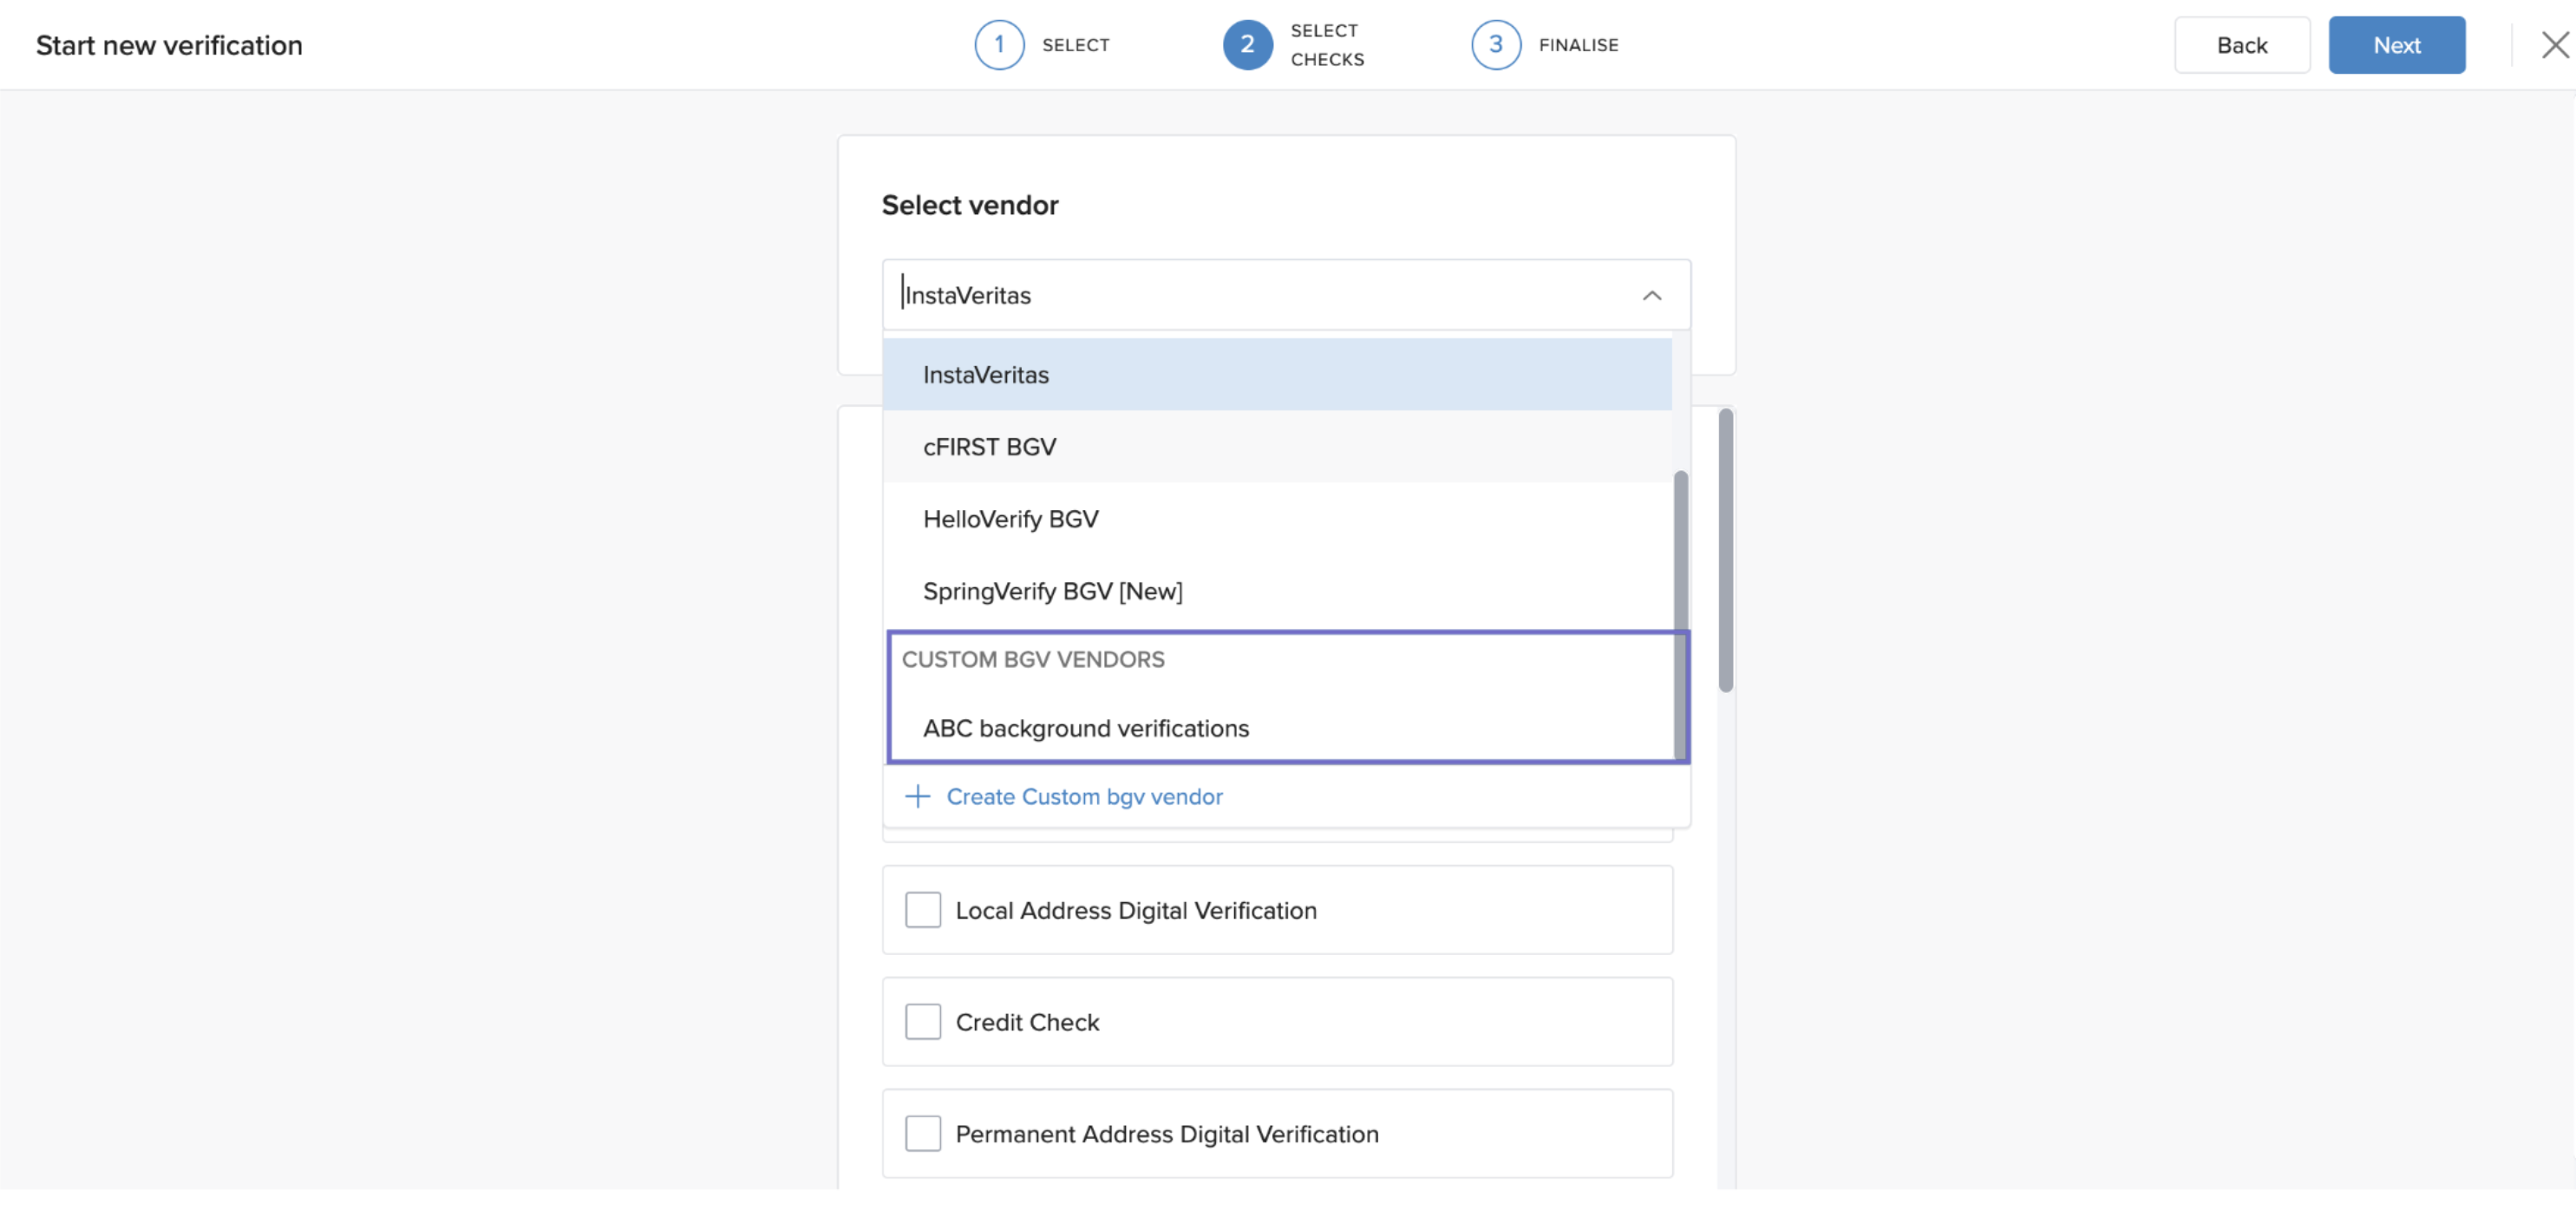
- Select the employee or candidate for verification.
- From the vendor options, choose your custom BGV vendor.
- Once initiated, the candidate’s status updates to “Custom BGV initiated.”
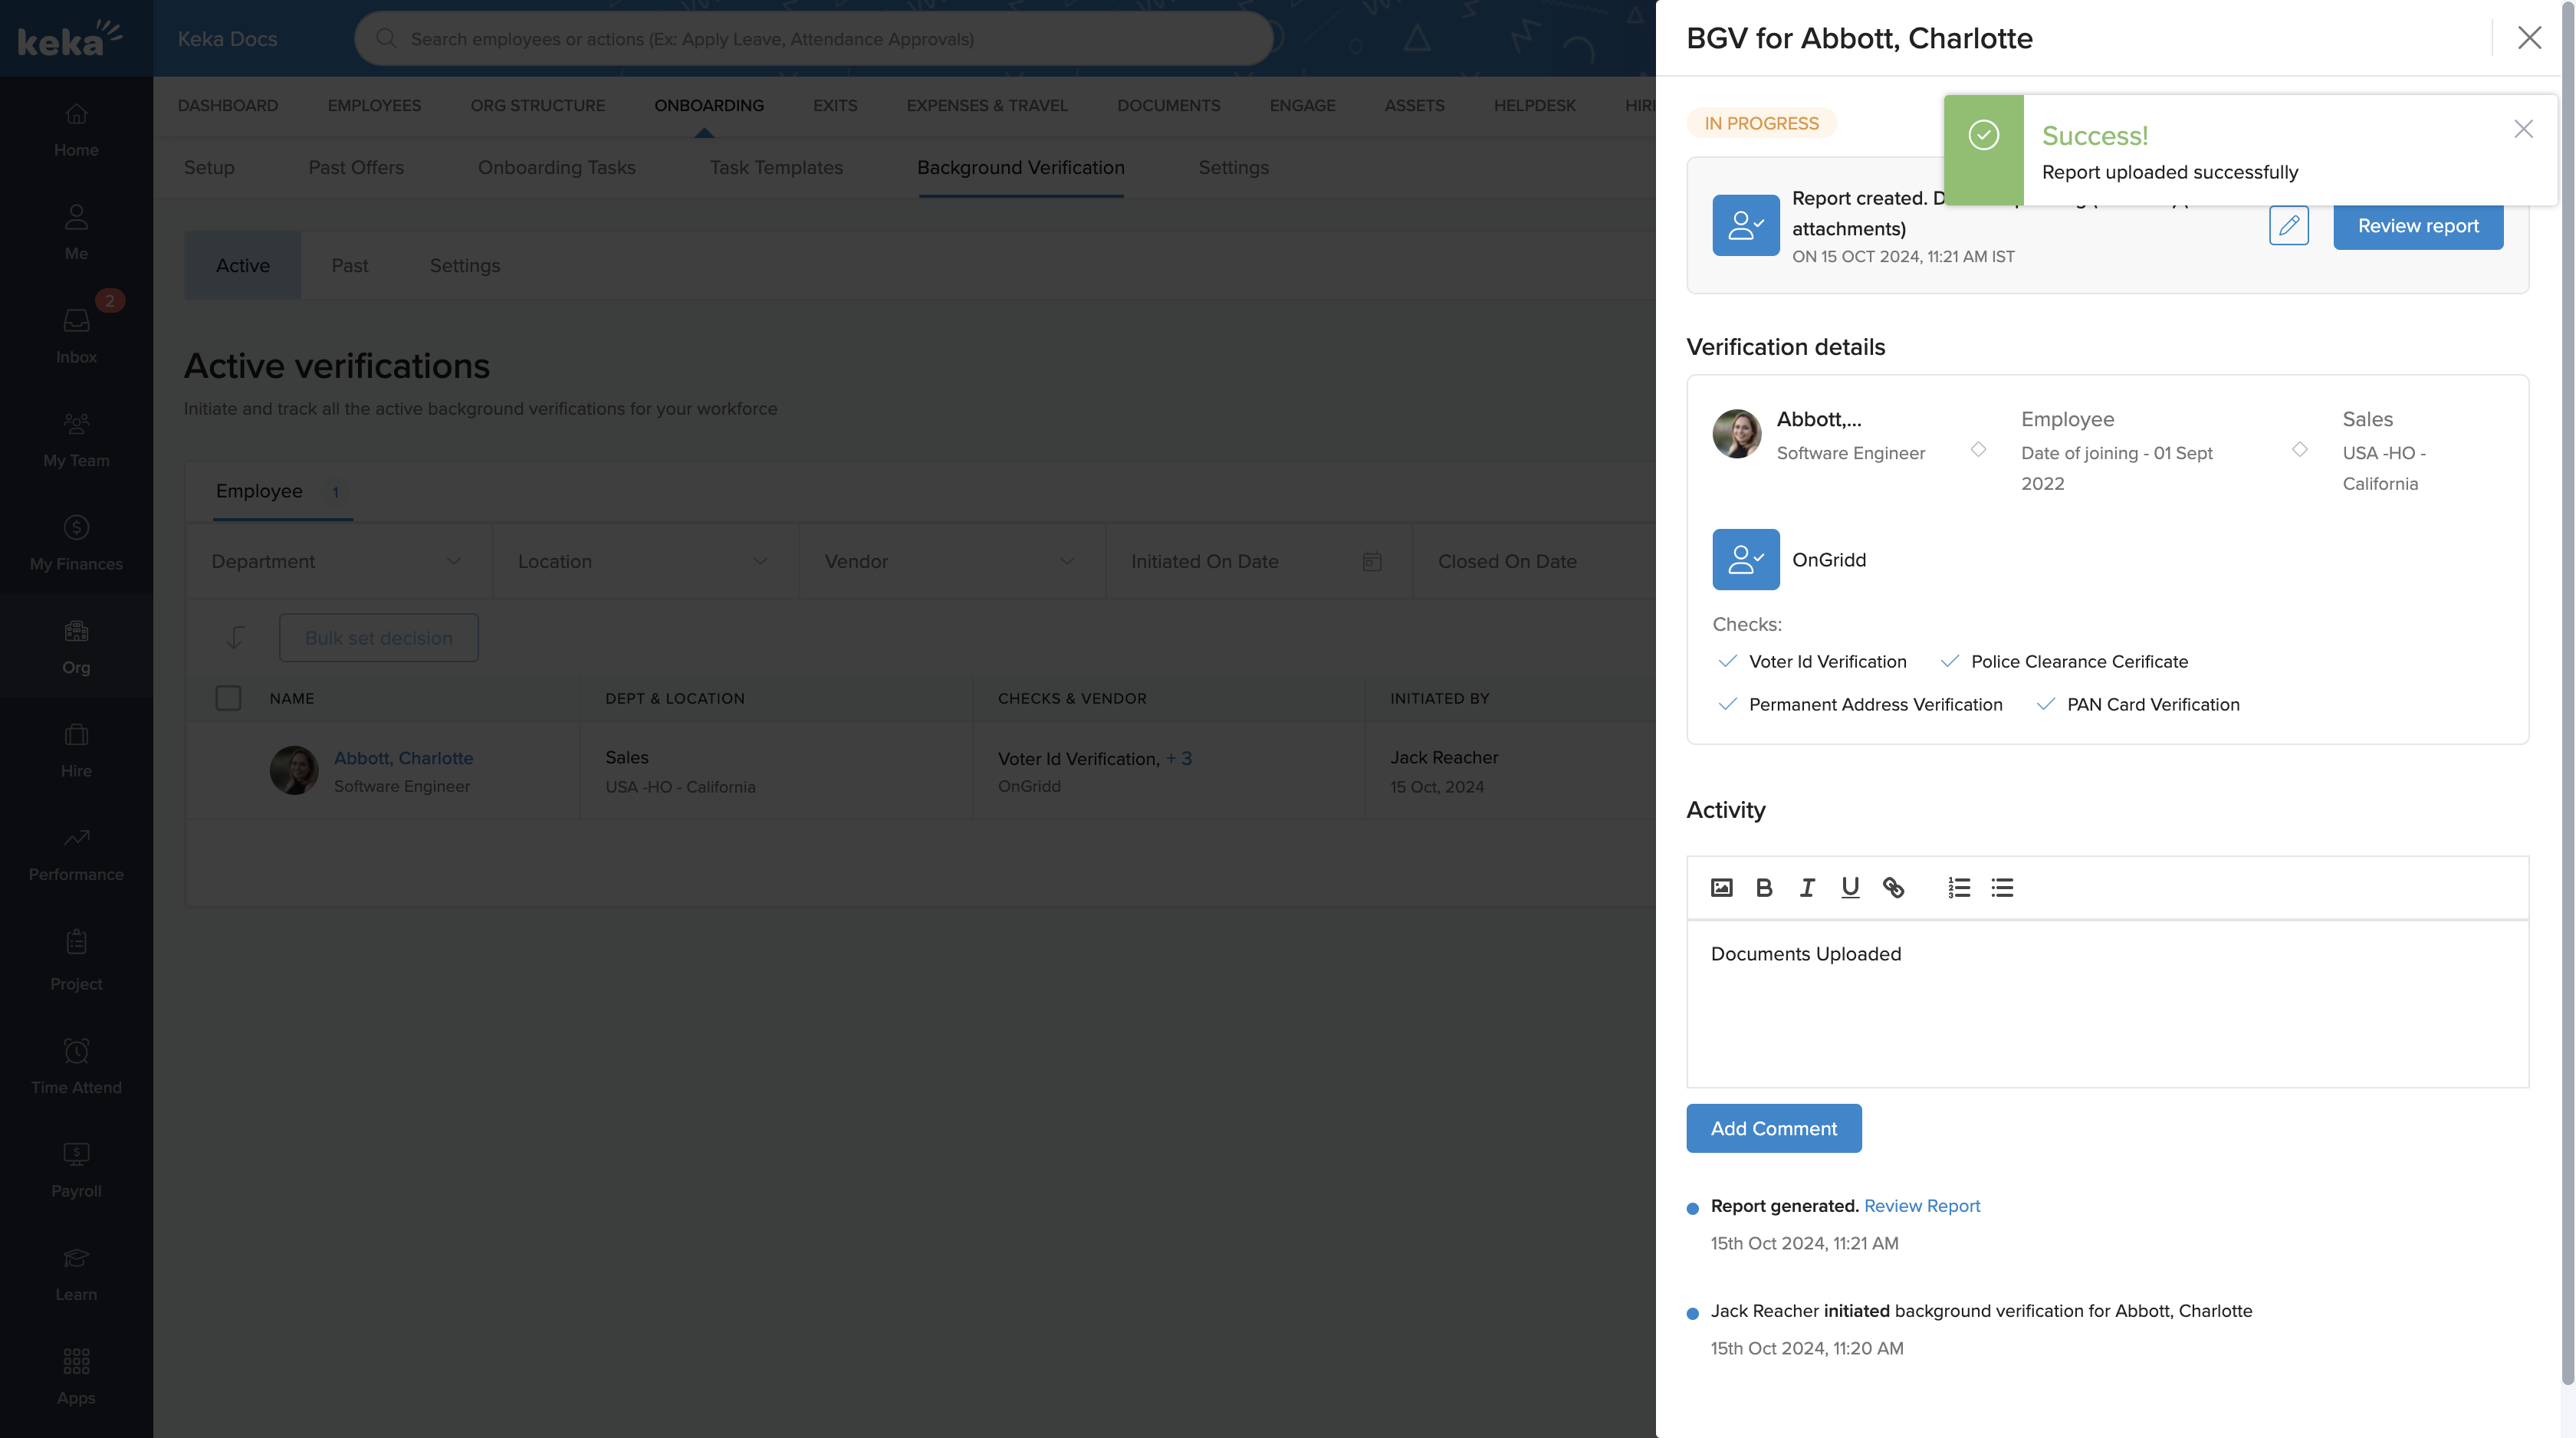
 When the vendor provides a background verification report:
Click Import Report.
Upload the report documents (e.g., PDFs, scanned files).
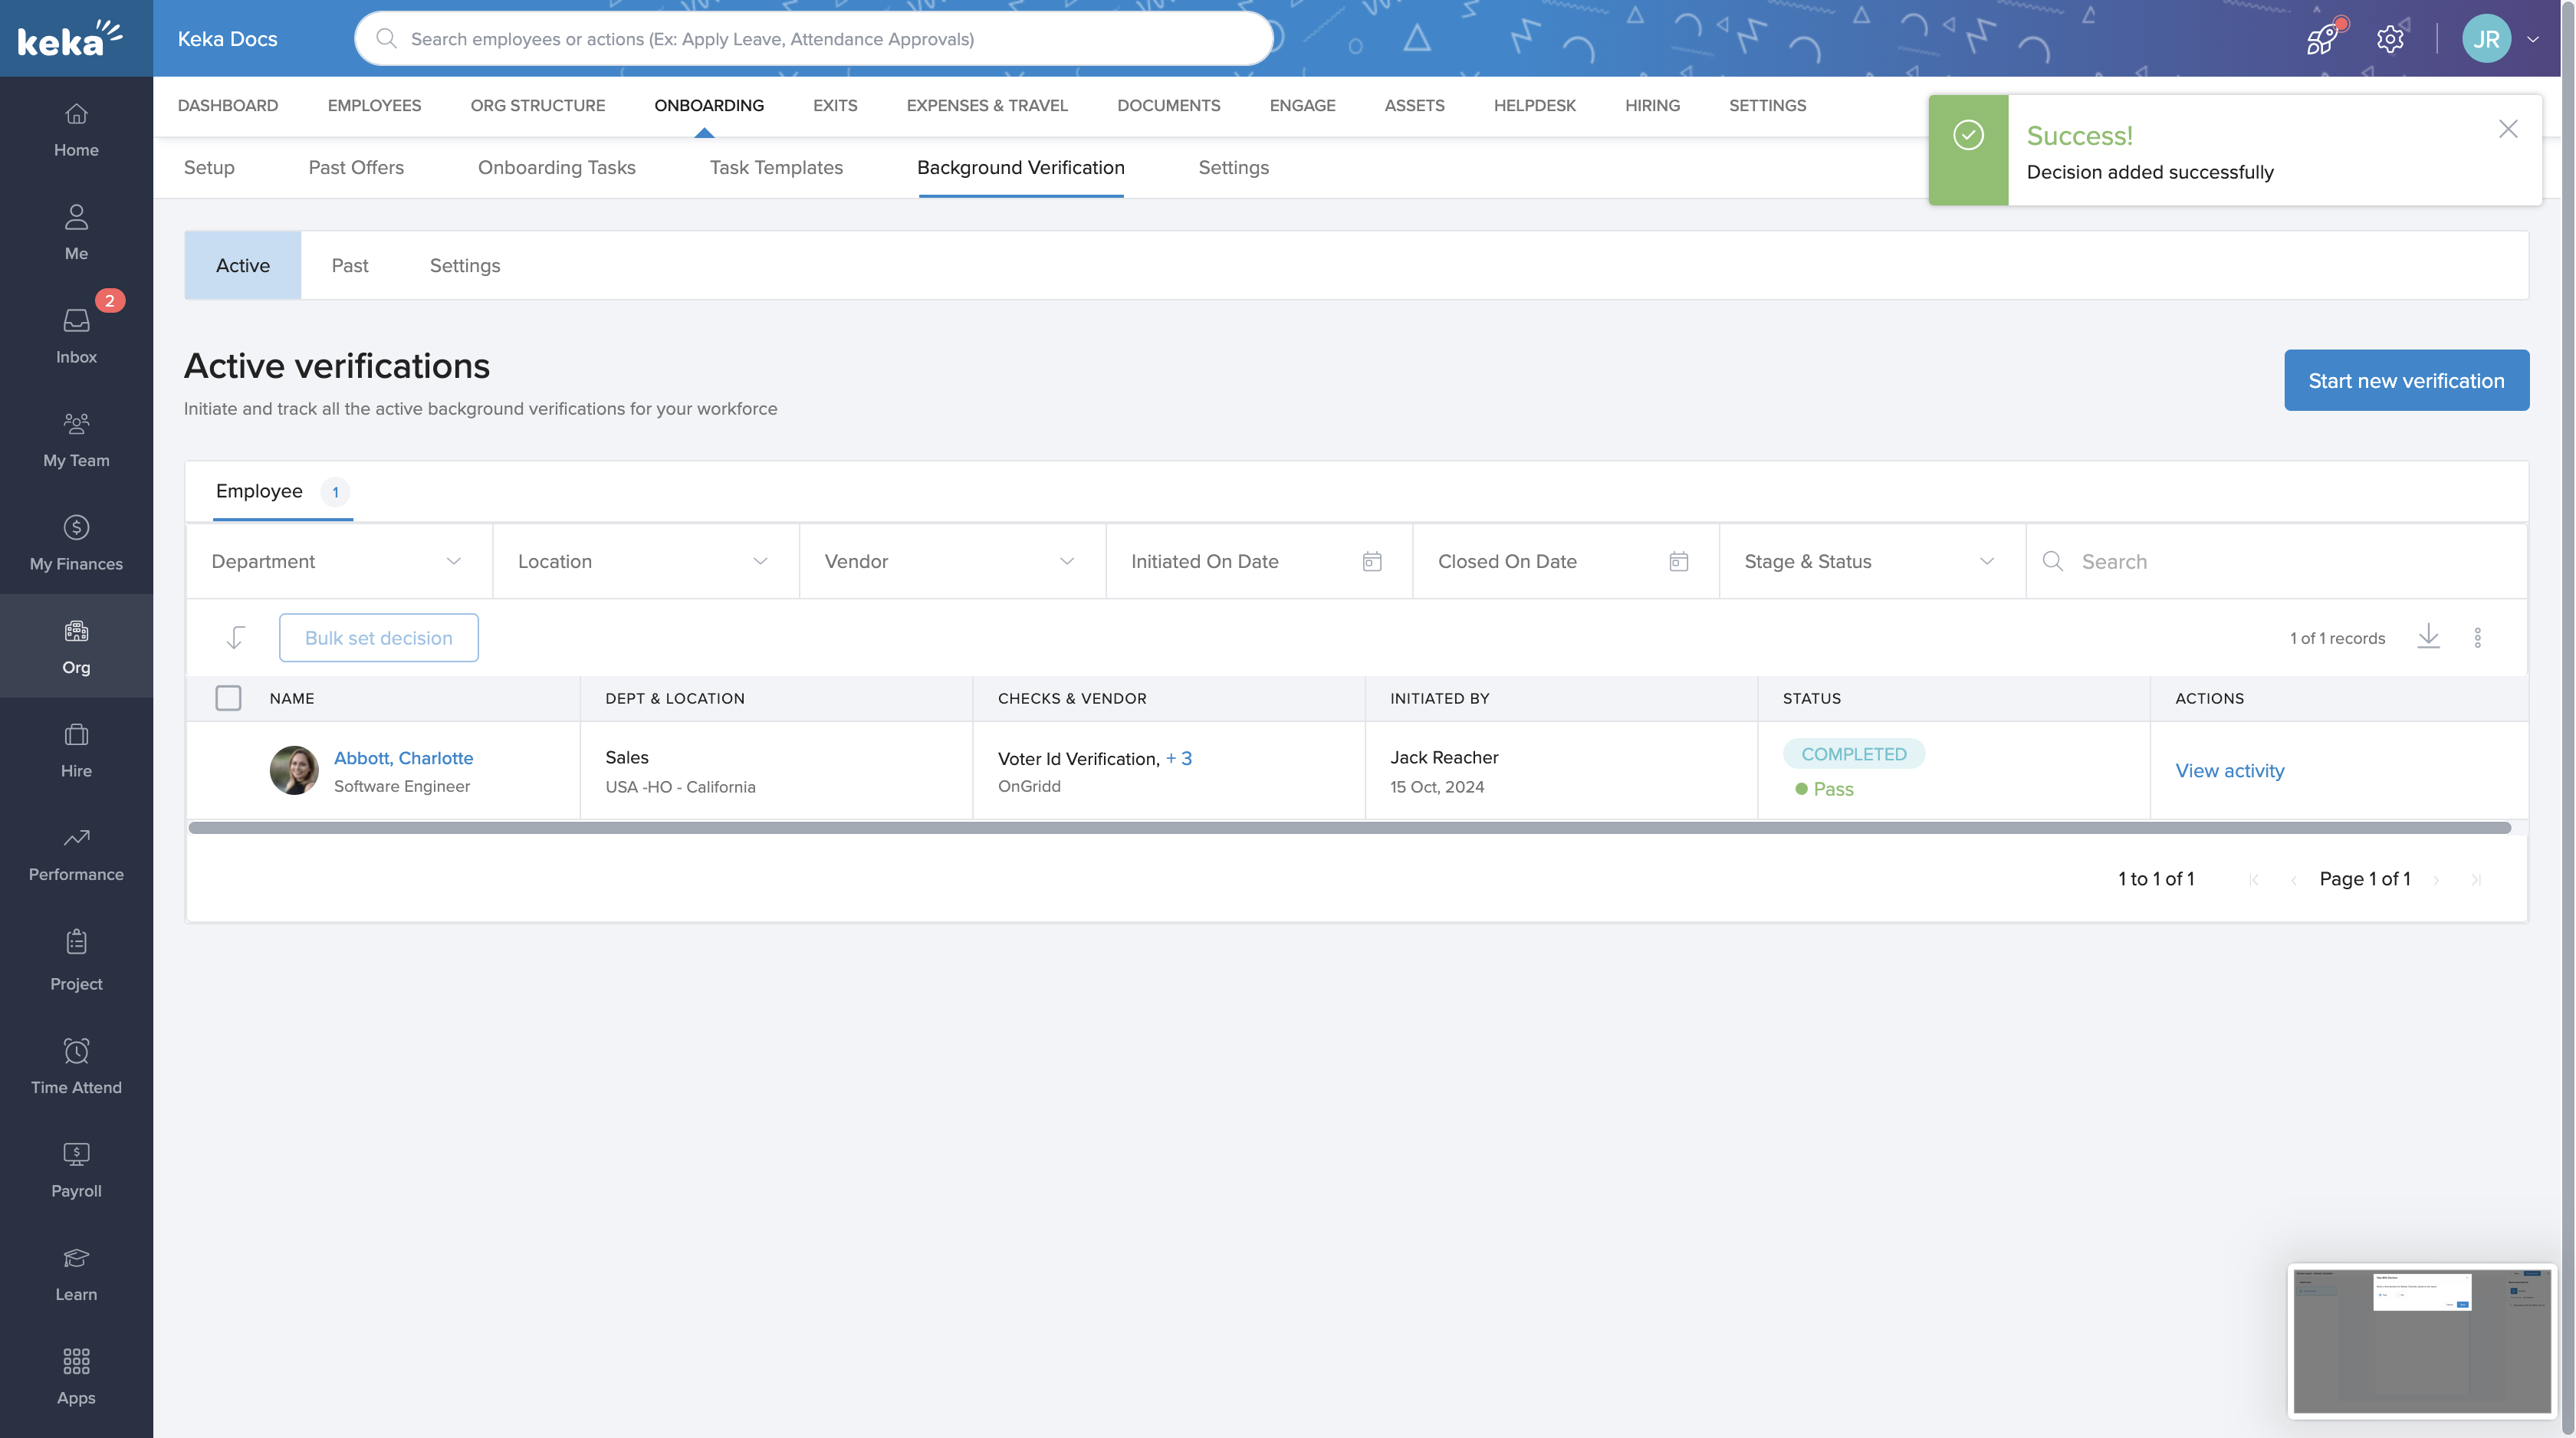
Managing Verification Outcomes
After importing the report:
Review the uploaded details.
Select an outcome:
Pass – Candidate cleared the background verification.
Fail – Candidate did not meet the verification criteria.

This decision is stored in the candidate’s records for future reference.
With Custom BGV Vendors in Keka, you can extend flexibility beyond built-in integrations, ensuring smooth handling of all background verification processes—whether through partners like Ongrid and SpringVerify or your own preferred vendor.
Comments
0 comments
Please sign in to leave a comment.