TABLE OF CONTENTS
- Introduction
- View options
- Leave overview
- Leave approvals
- Penalized leave
- Past leave requests
- Encashment requests
- Reports
Introduction
Effective management of team members' time off—such as vacations, sick leave, and other absences—is crucial for team managers. Understanding each member's leave balance, available leave types, and company policies is essential for smooth team operations and fair workload distribution.
This guide introduces you to Keka's leave management features, including Leave Approvals, Penalized Leave, Encashment Requests, and detailed reporting tools like Team Leave Requests and Team Leave Balances. These tools are designed to help you efficiently manage your team's leave requests, penalizations, and encashment queries, ensuring operational continuity and team morale.
In this article, we will discuss all the features available in this section. Please note that not all features may be visible to you as their visibility depends on your organization's policies.
To get started, go to My Team (1) and select the Leave (2) tab.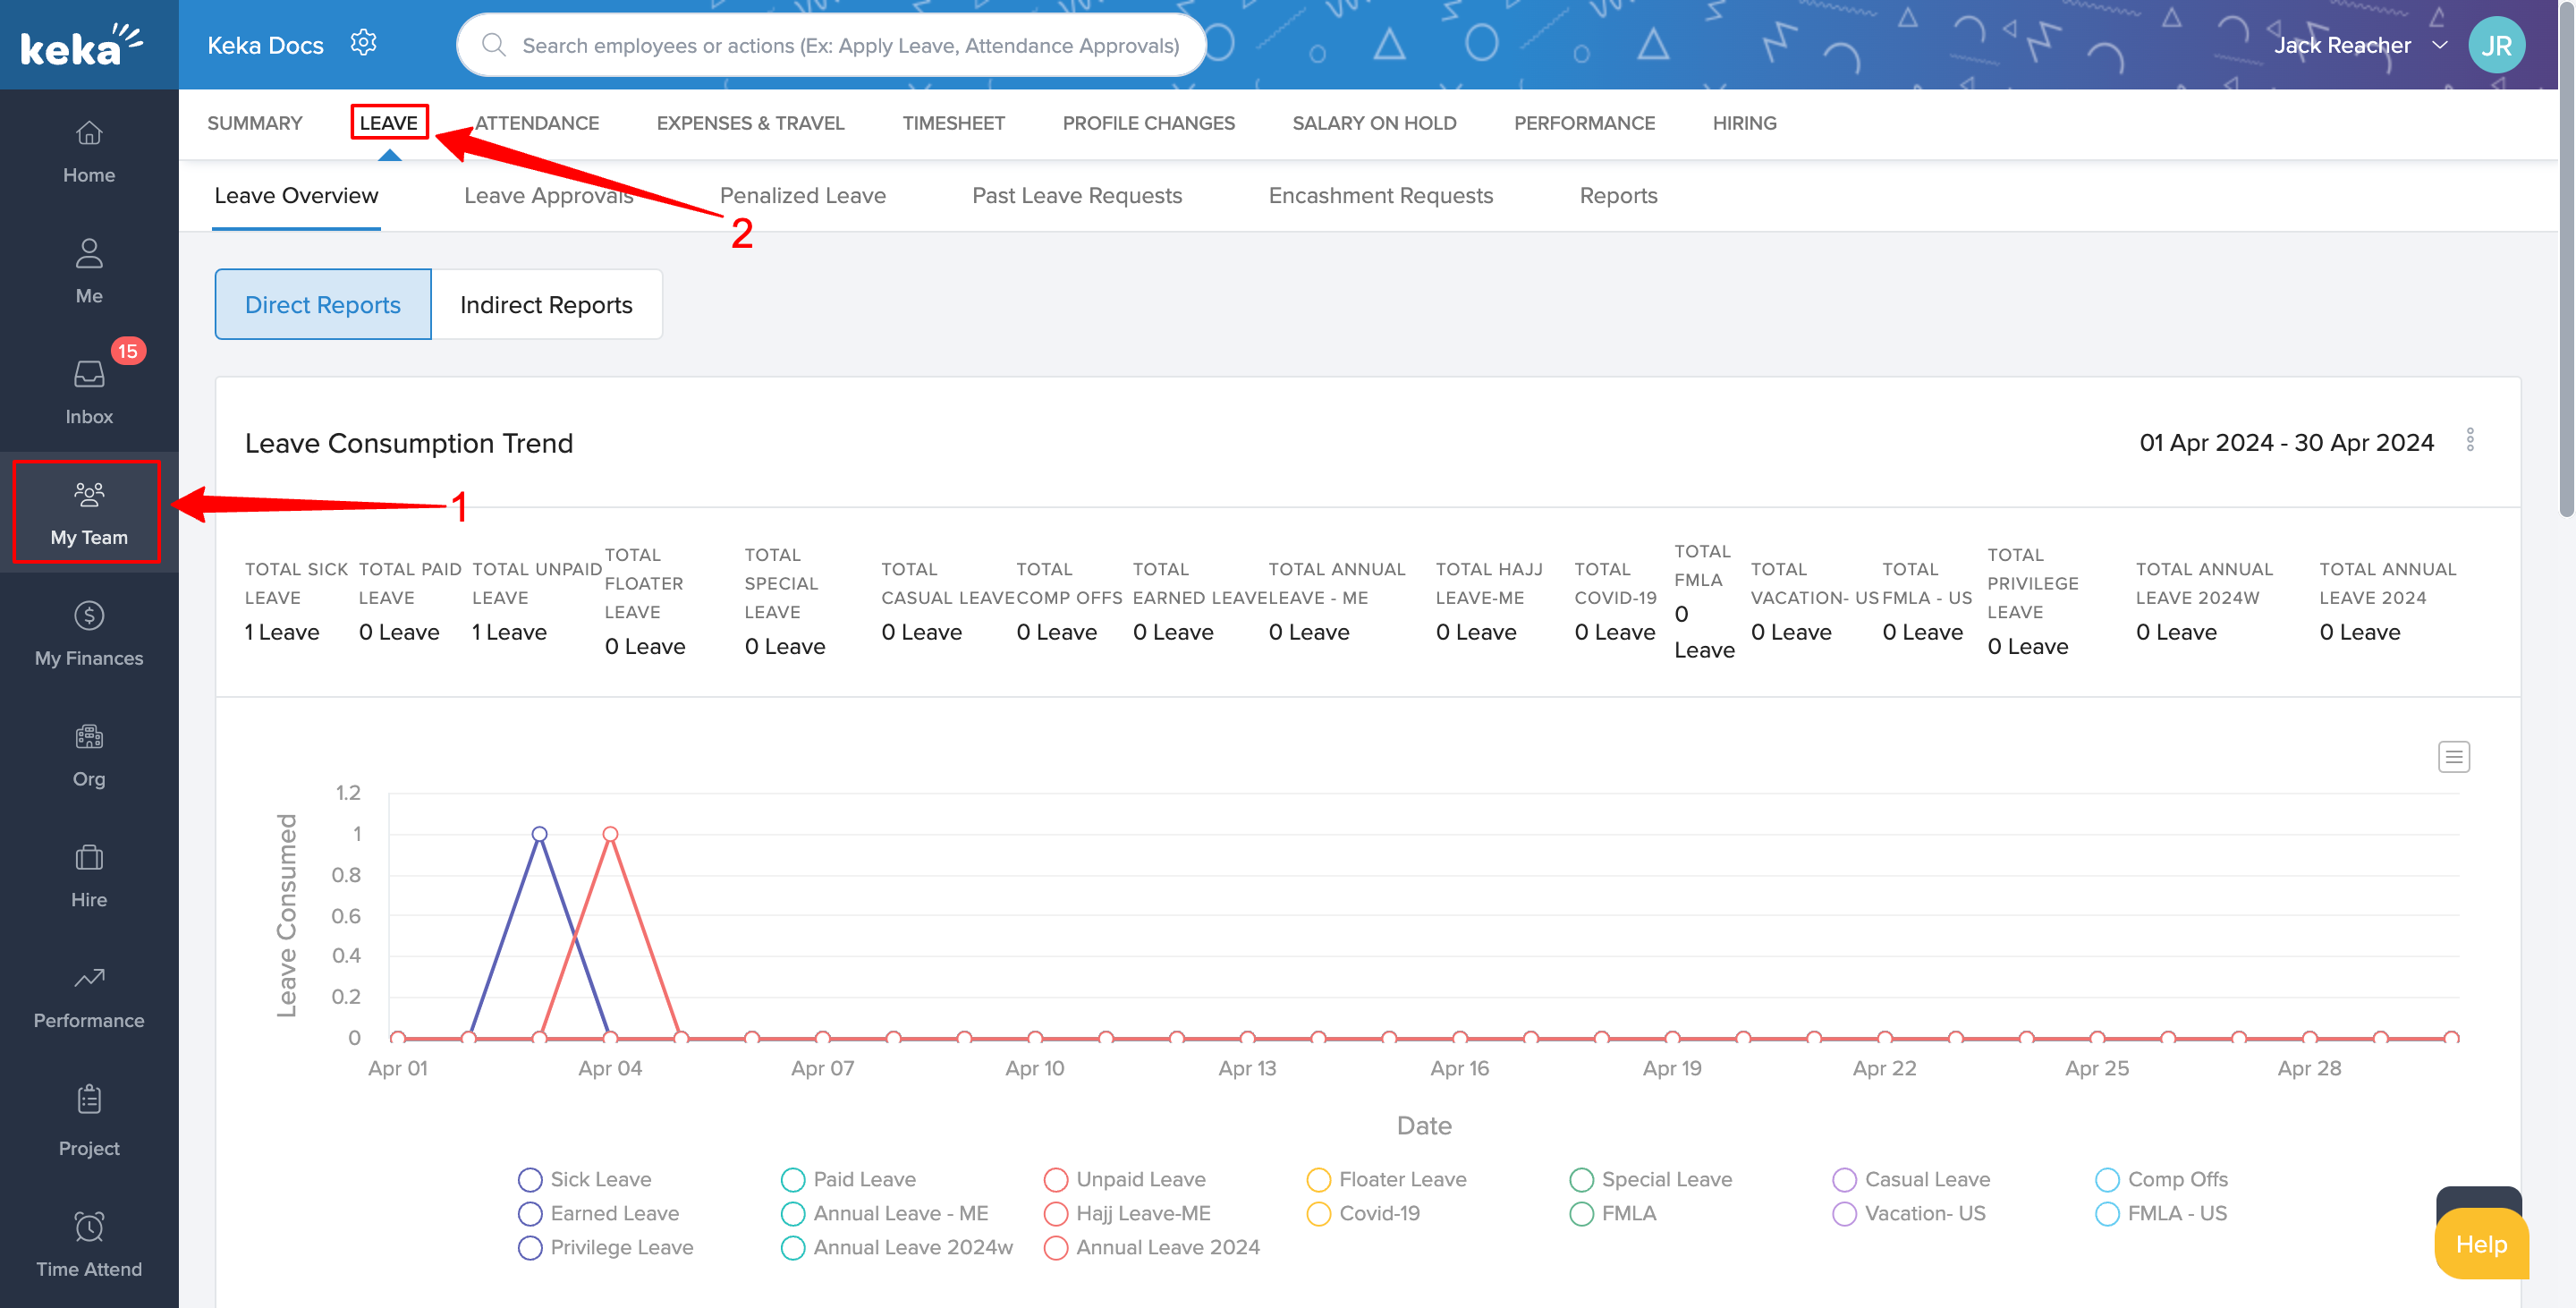
View options
All sections except Reports may be divided under two titles like, Direct Reports and Indirect Reports. Use the Department Drop-Down (1) to select your department/business unit.
Direct Reports (1) refers to the employees who directly report to you and the Indirect Reports (2) refers to those who report to the manager under you.

Leave overview
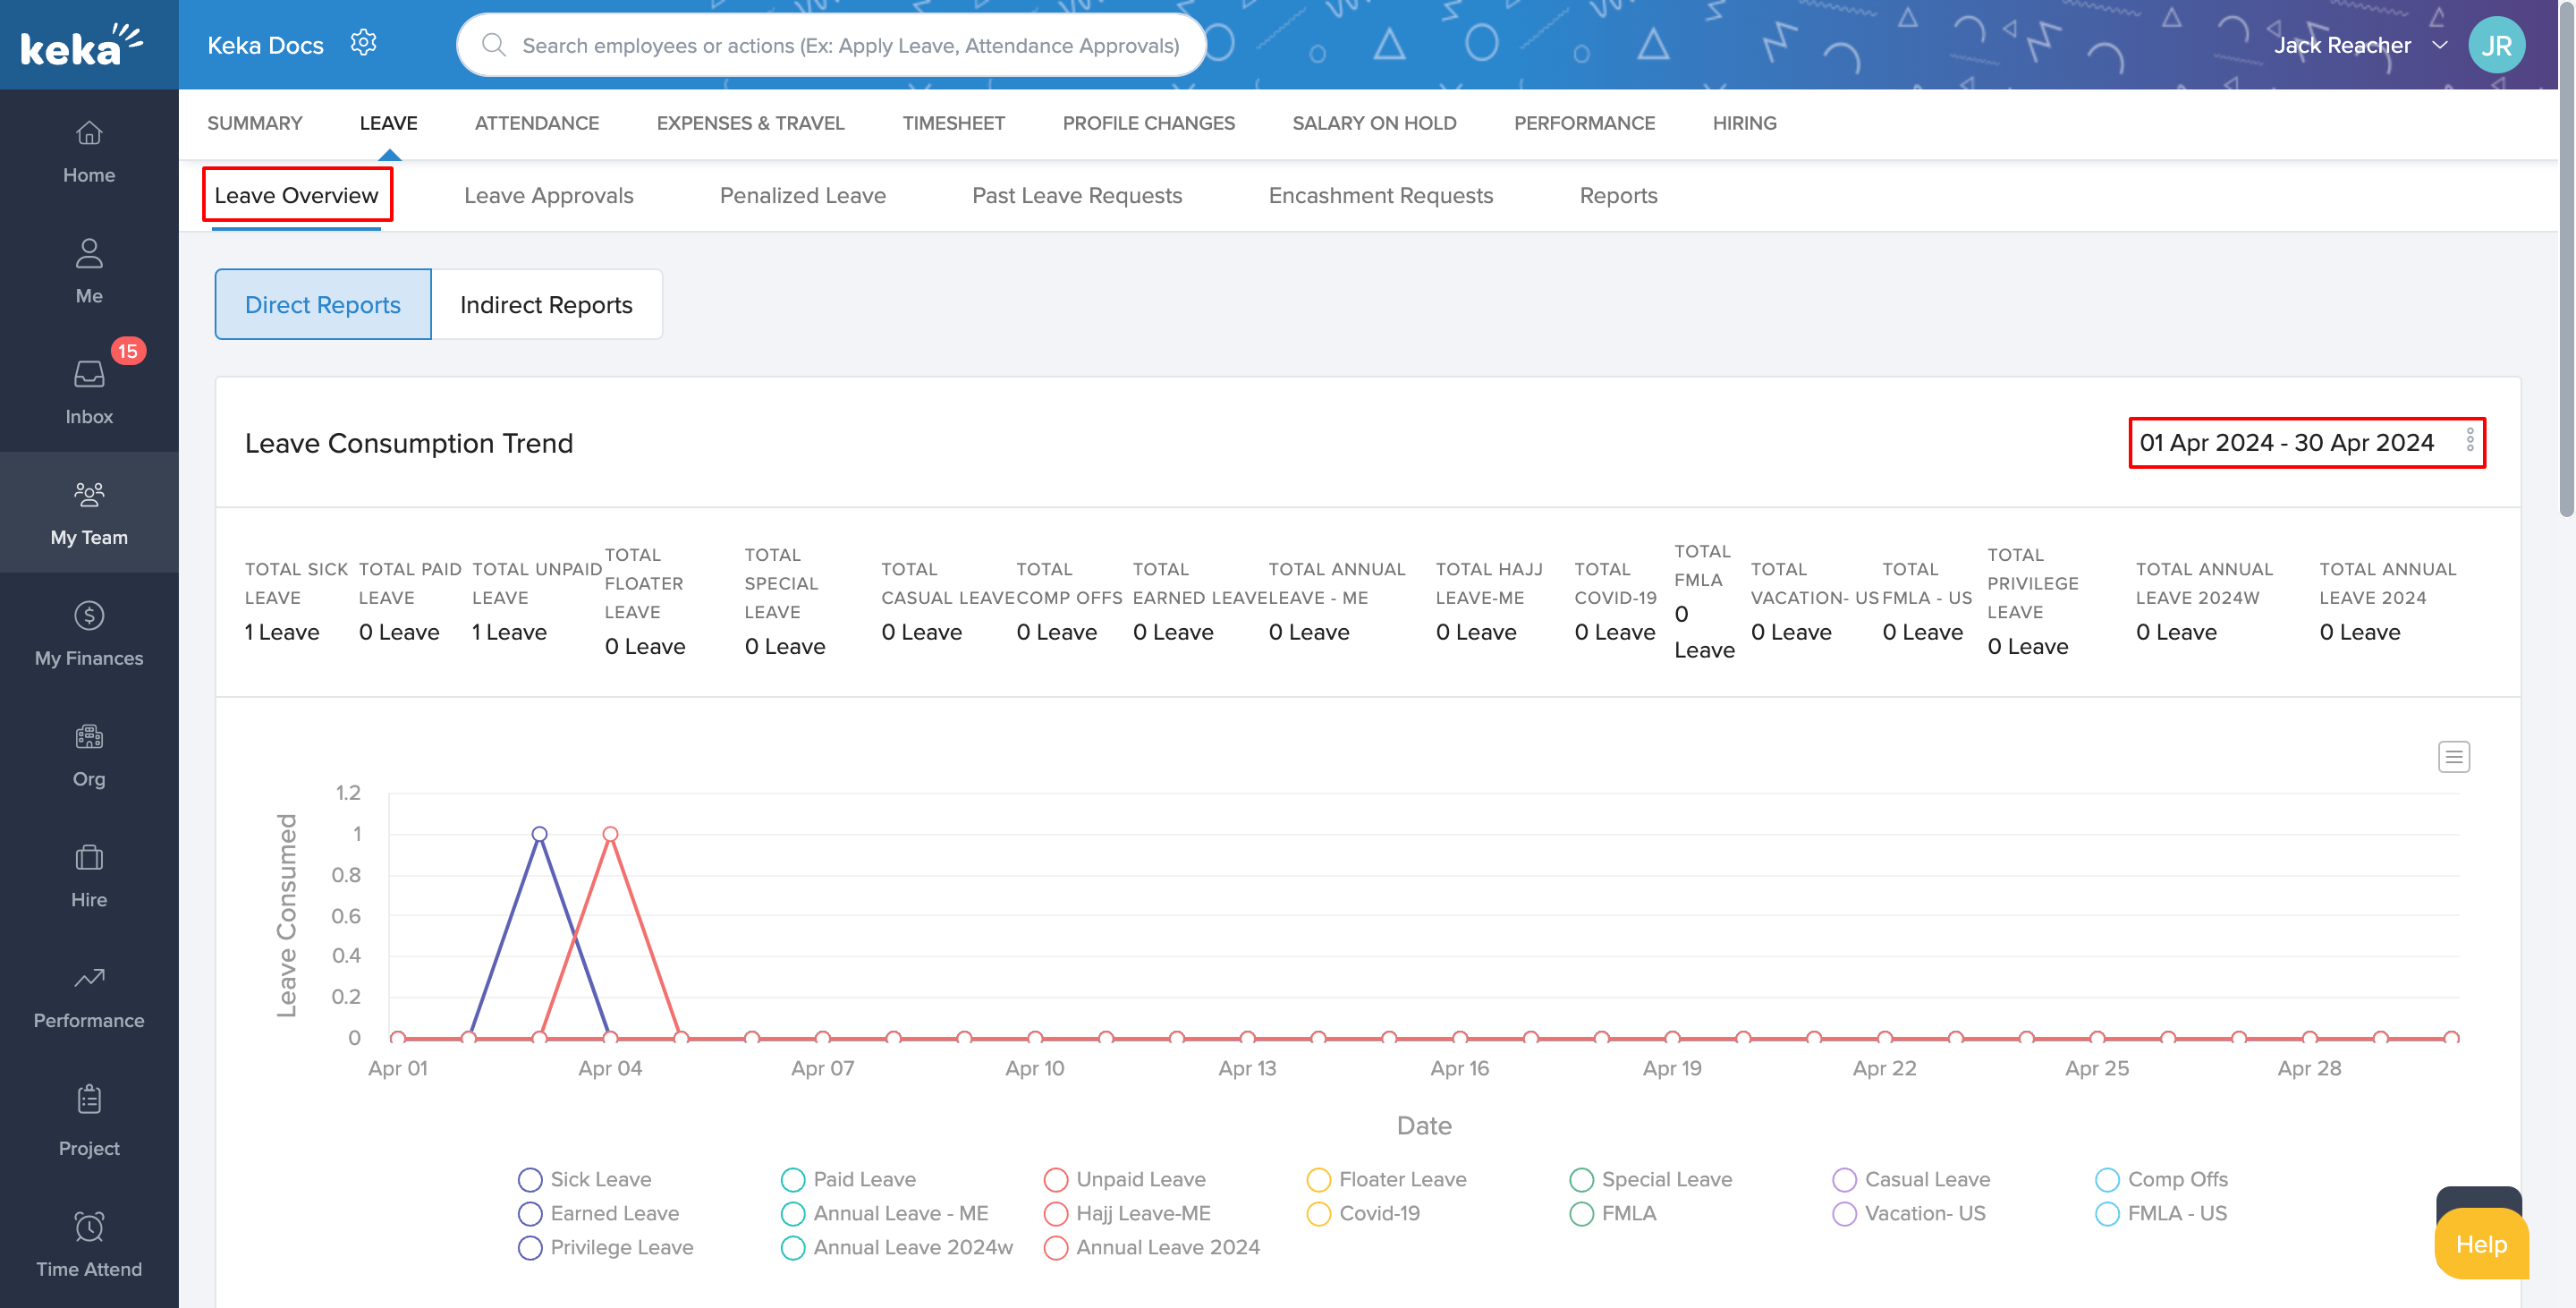
The Leave Overview section provides a detailed view of your team's leave entitlements, usage, and related details, including available leaves, past leave history, and approval status.
You can click on the 3 Dots to find time ranges you can choose from and leave details for your team will be presented to you in the form of an intuitive graph.
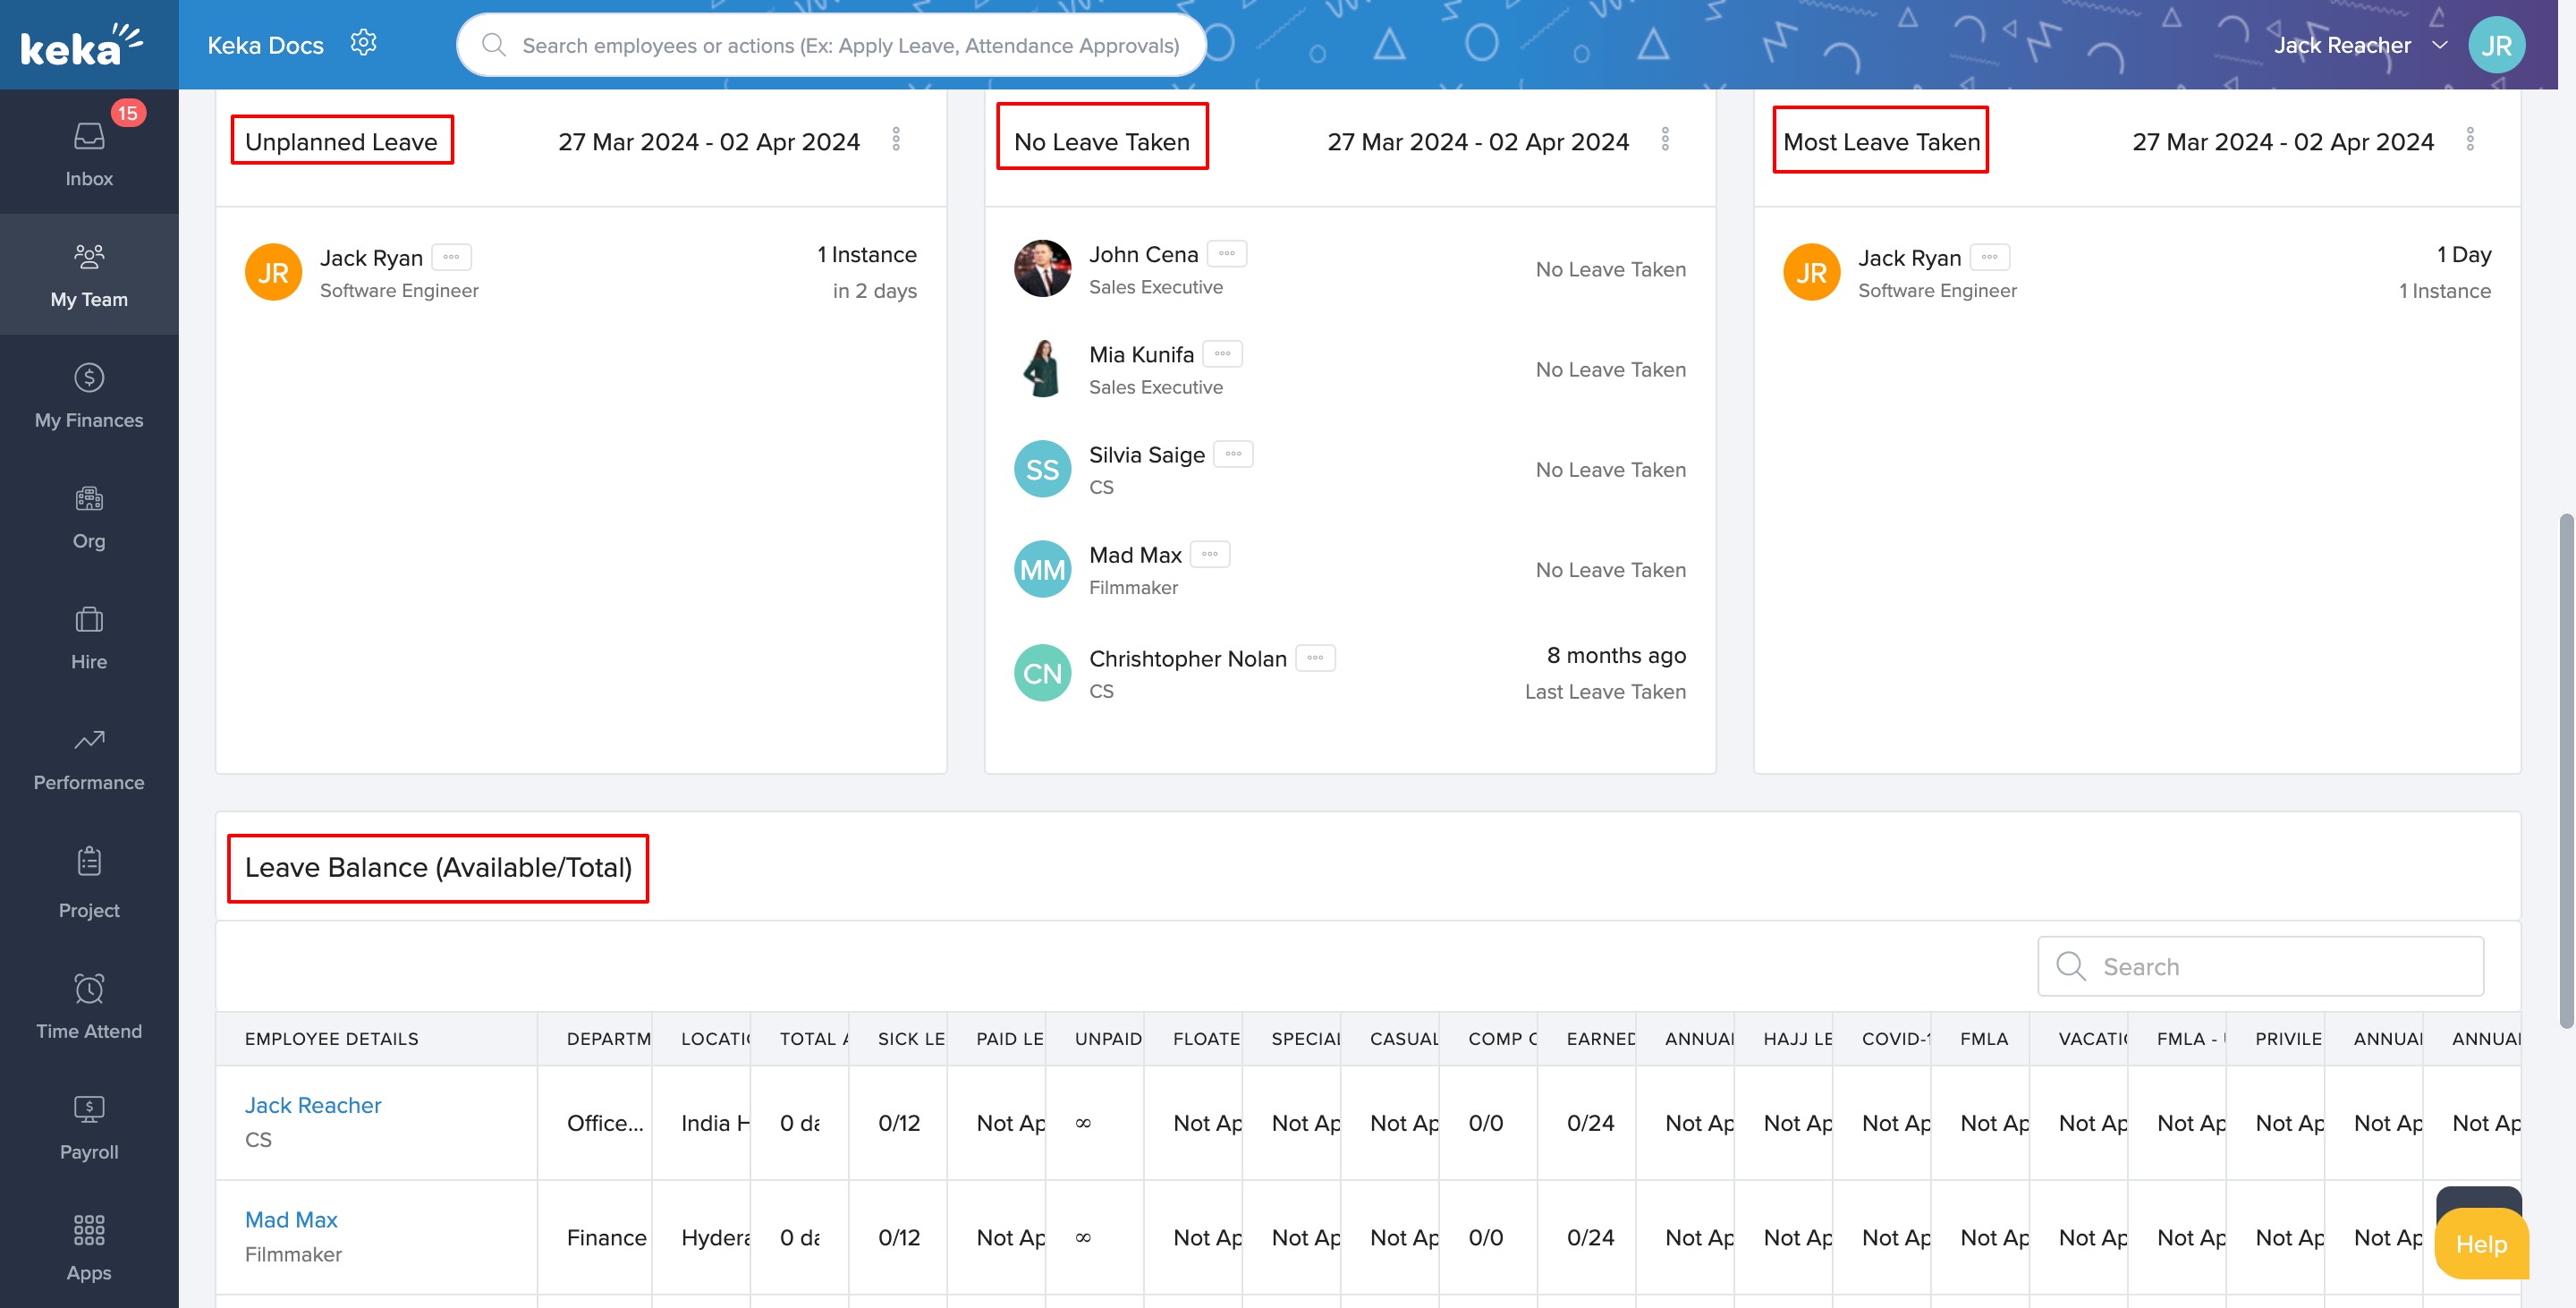
Scroll down to see who all have taken Unplanned Leave, those who have not availed any leave at all and also those who have consumed the highest number of leave. You can customize the date range by clicking on the 3 Dots.
Under Leave Balance (Available/Total), you can find a list of all employees in your team along with details about their leave.
Leave approvals
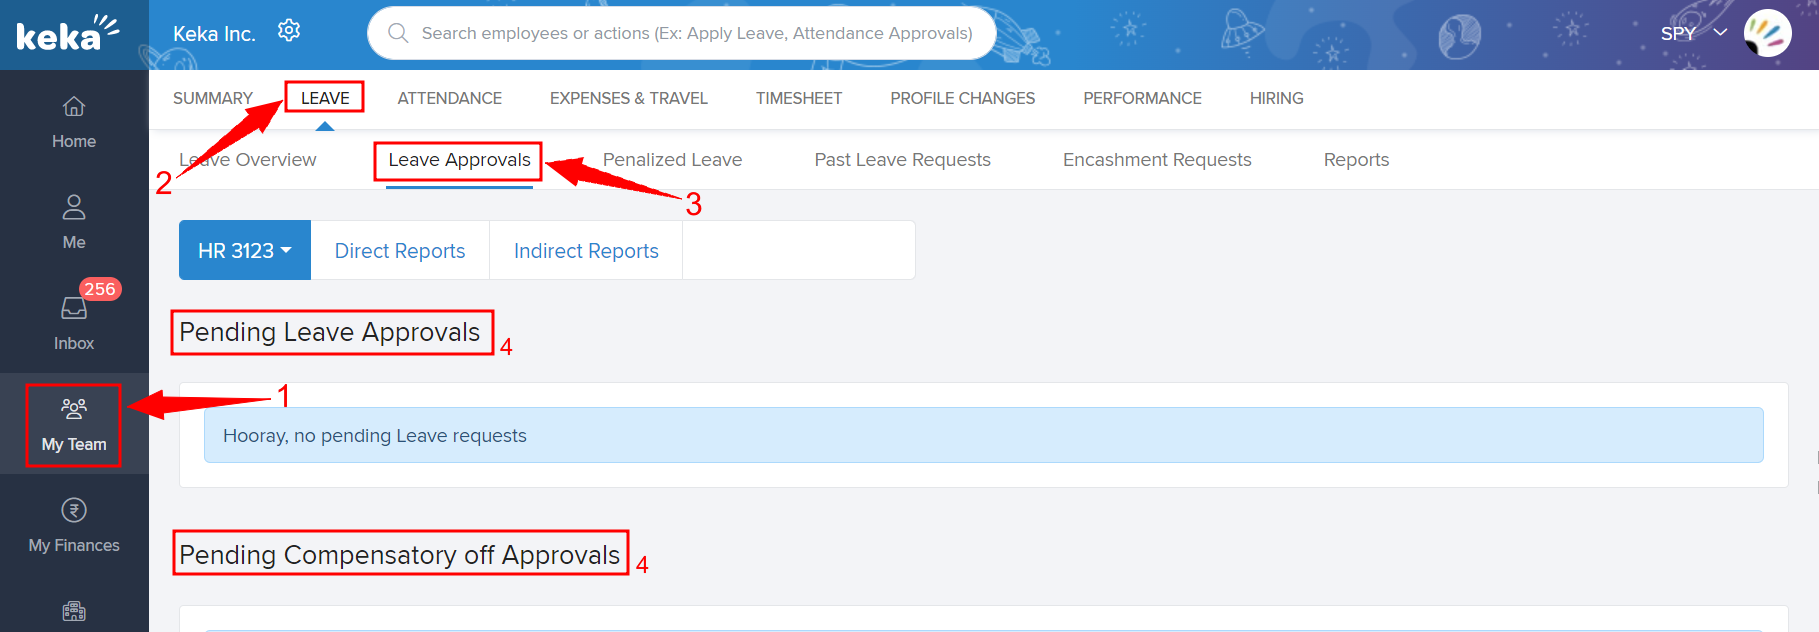
The Leave Approvals page is divided into two sections: Pending Leave Approvals and Pending Compensatory off Approvals.
You can find the status of each leave request, such as pending, approved, or rejected, and the approval workflow, including the names of the approvers and the order in which they need to approve the request. The section allows you to add comments and notes to leave requests to track the approval process and communicate any additional information.
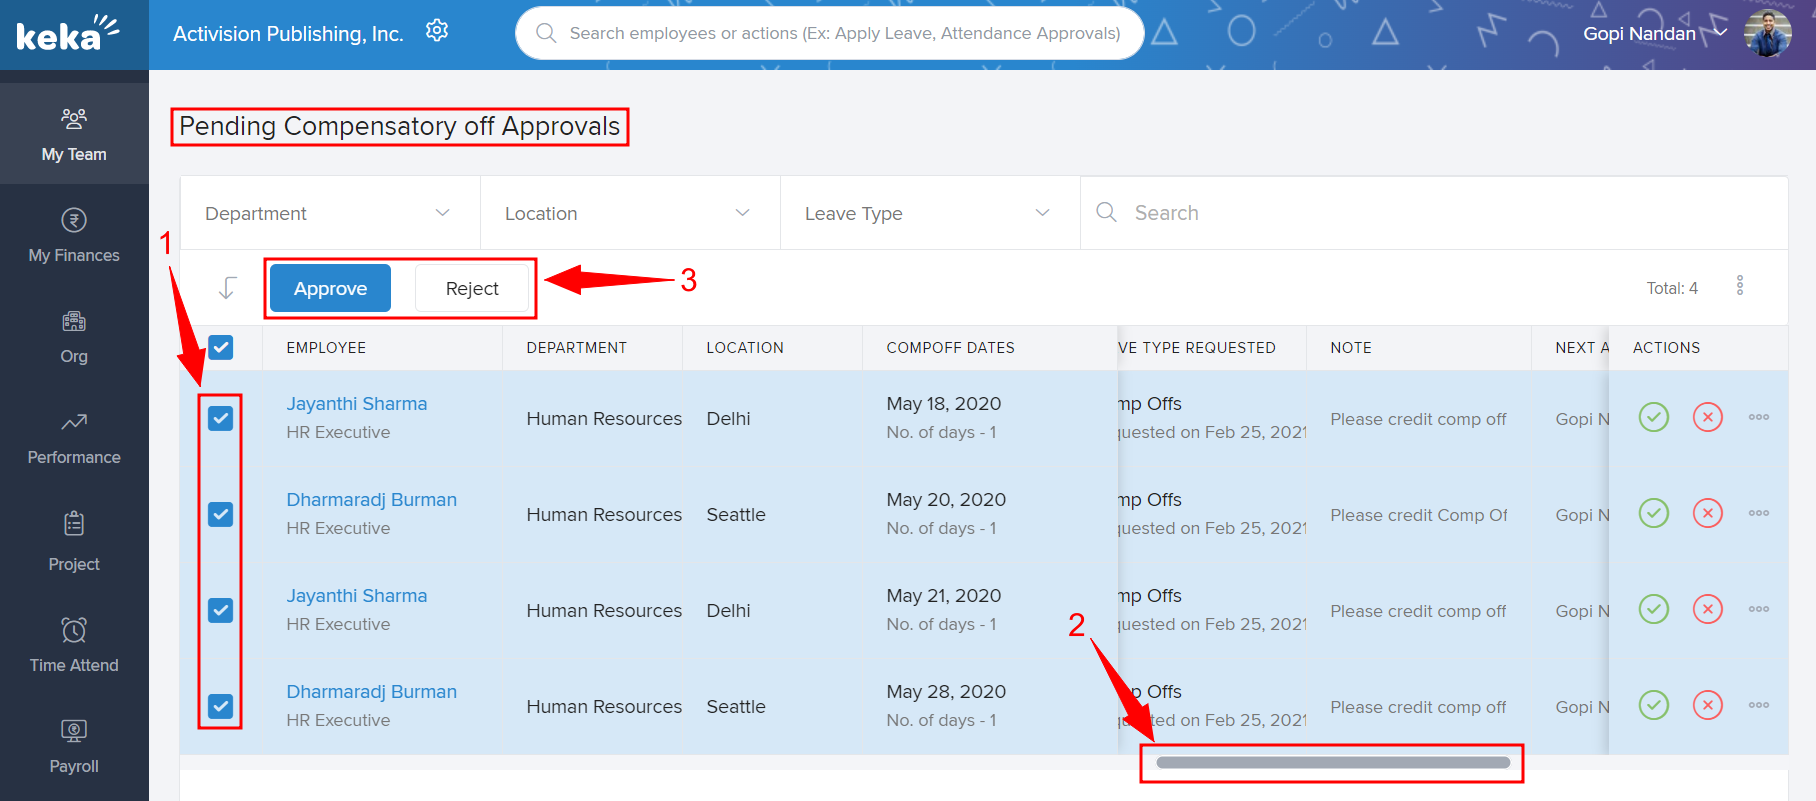
If you want to act upon pending leave/compensatory off approvals in bulk, check the boxes (1) against the names of employees in the Employee column. To find details, reveal all the columns using the Slider (2) at the bottom of the window. After selecting the employees, click on Approve/Reject (3).
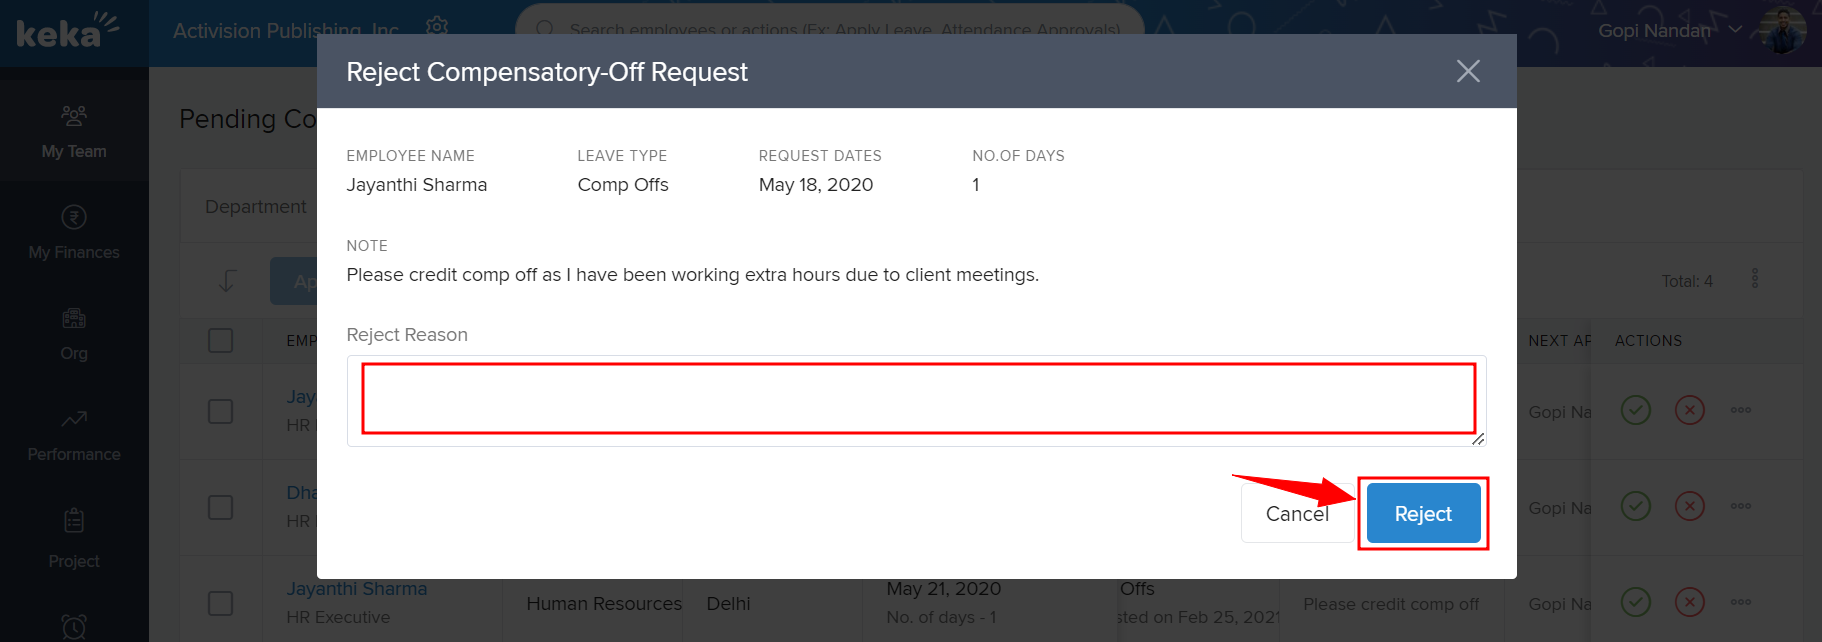
On the overlay window that pops up after clicking Approve/Reject, you can add comments/reasons and confirm the approval/rejection.

You can also choose to act upon individual requests. For this, find the employee’s name in the Employee column and then click on the Check/Tick mark under Actions to approve/reject.
On the overlay window that pops up, click Confirm. On the overlay window that pops up after clicking Check/Tick (approve/reject), you can add comments/reasons and confirm the approval/rejection.
To add comments on the approval/rejection, click on the 3 Dots under Actions and then click Add Comment. On the overlay window that pops up, you can add your comment.

Penalized leave
Penalized Leave refers to the deduction of an employee's leave balance. This could be a disciplinary action against any violation of company policies. The violations include unauthorized absences, late arrivals, or other instances of misconduct. The exact details of how penalized leave works may vary depending on company policies and HR procedures.
To track penalized leave and act upon them, navigate to My Team. In the Leave tab, go to Penalized Leave.
Use the Calendar Icon to choose a date range. There are drop-down menus against section titles like Department, Location, Leave Type Deducted, etc., which you can use to filter the list.
If you want to cancel the penalization of many employees in bulk, check the boxes against the names under Employee. Then, click on the Cancel Penalty button.
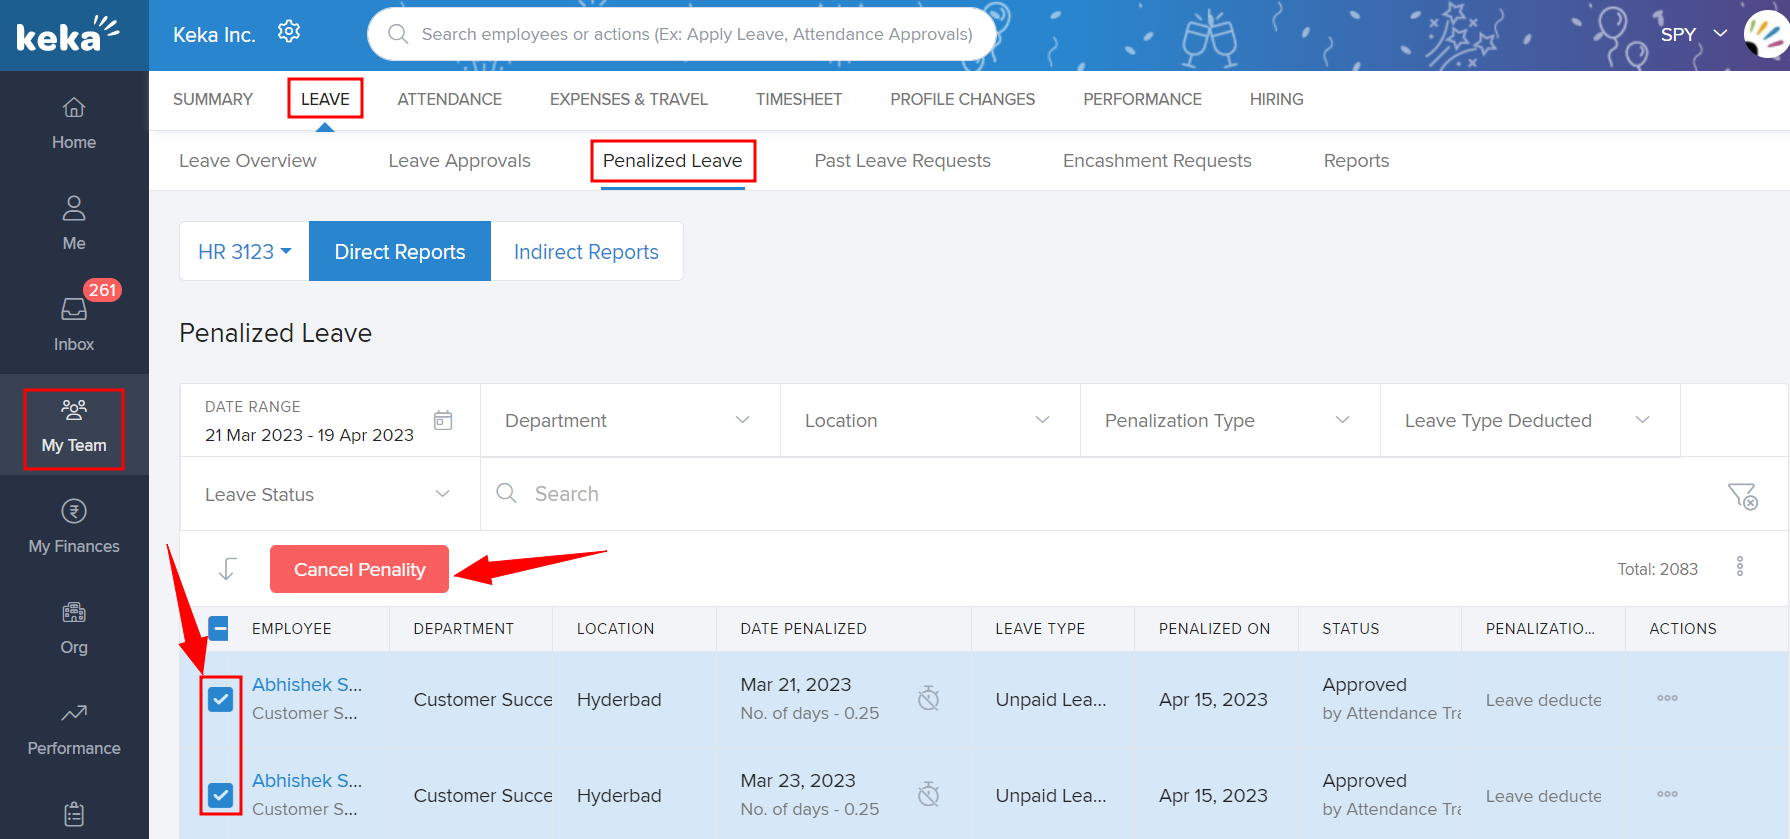 On
On
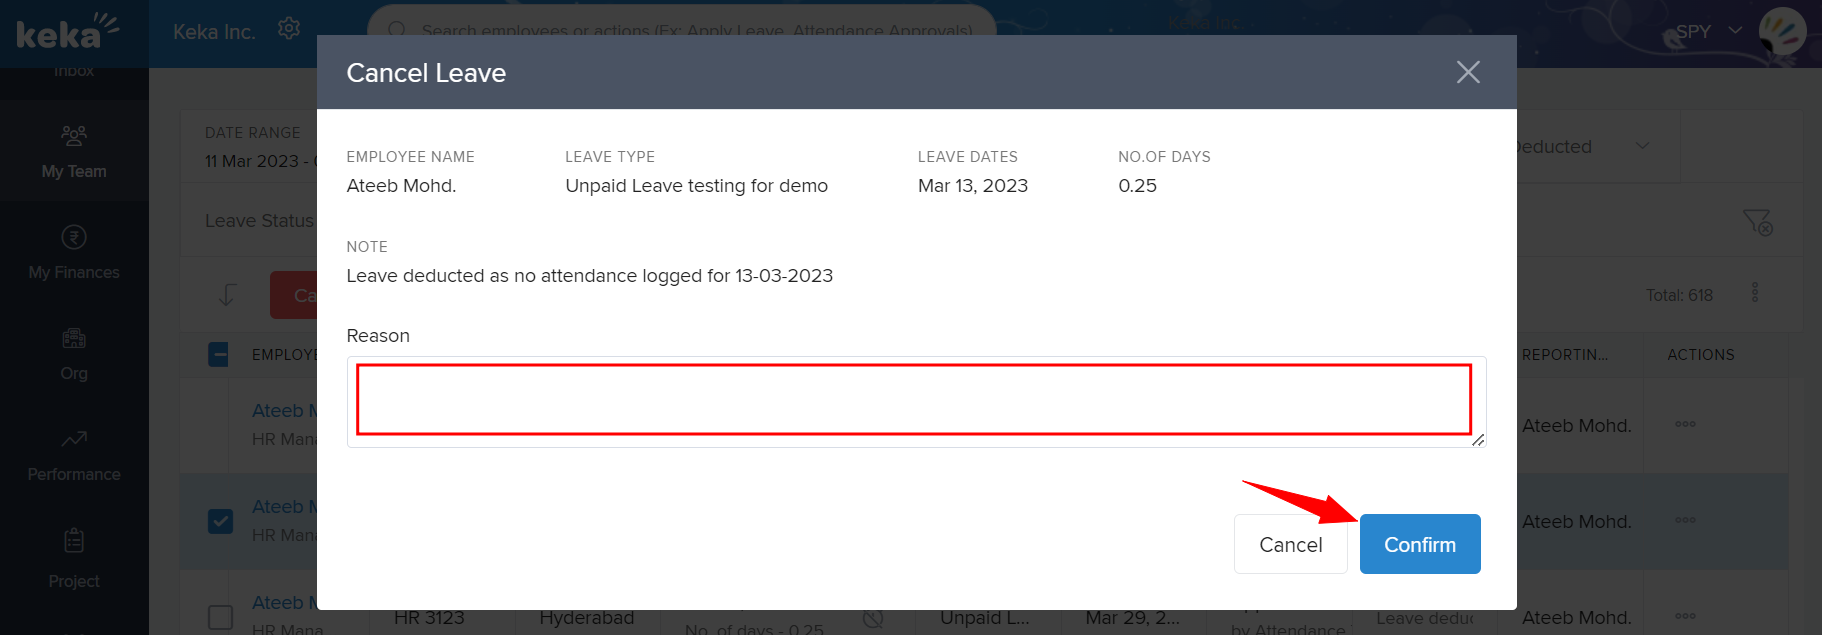
clicking the Cancel Penalty button, an overlay window will pop up. Here, type in your reason for the decision and then click Confirm.
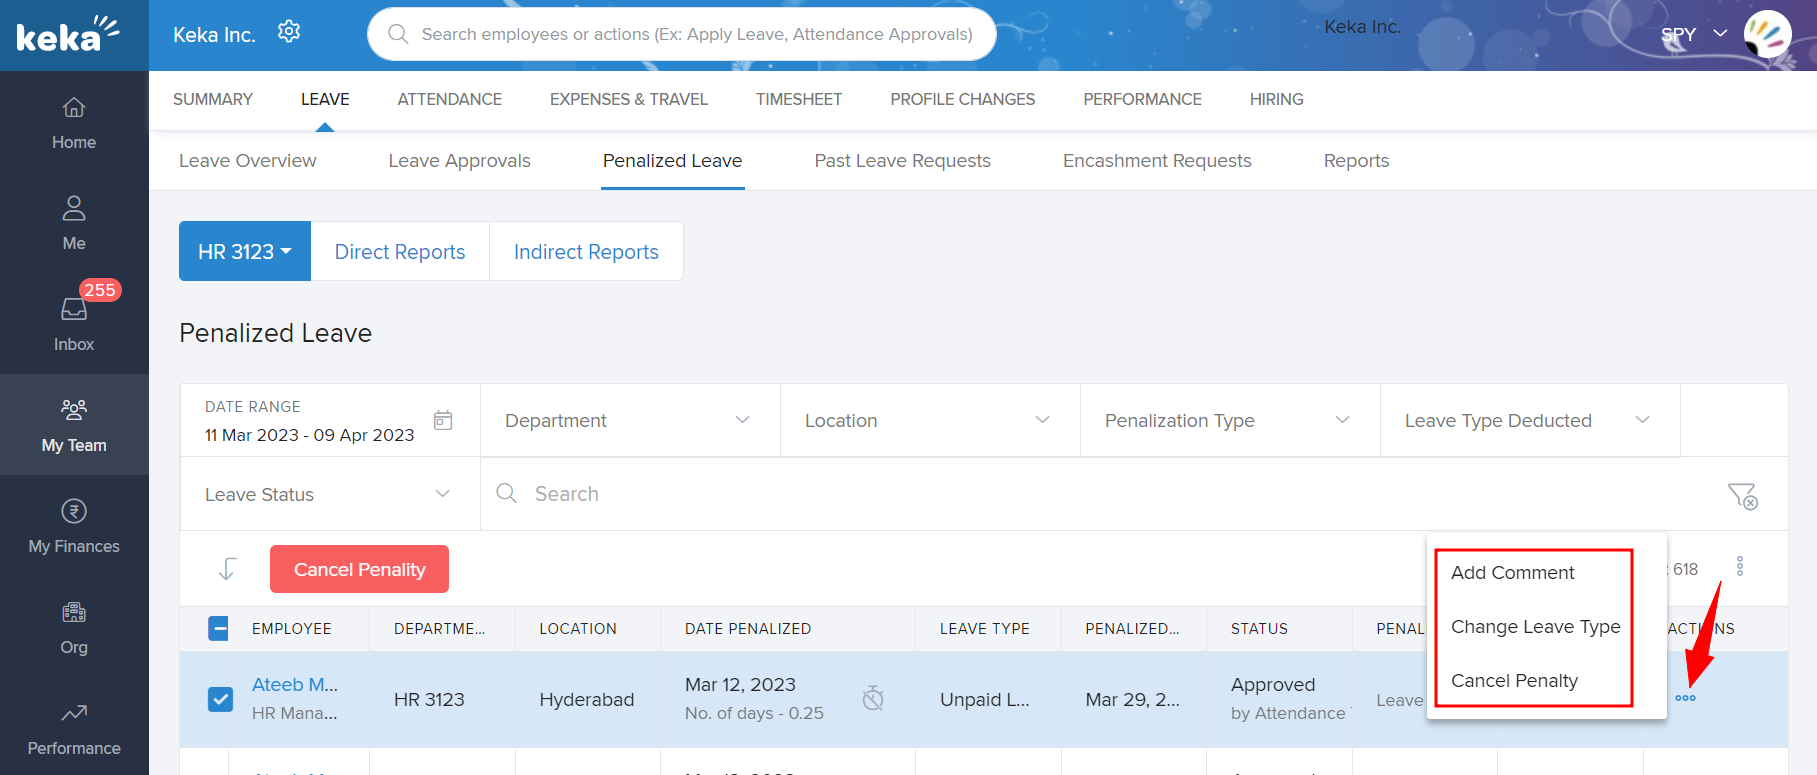
For more options (Add Comment, Change Leave Type and Cancel Penalty), click on the 3 Dots and then on the required options.
Note that, this way you can only perform actions on individual employees.
On the overlay window, you can enter appropriate details pertaining to penalization/cancellation/change of leave type etc. or add reasons/comments and then confirm the action.
Past leave requests
The section Past Leave Requests includes information about an employee's absence from work in the past, including the dates of absence, the type of leave taken (e.g. annual leave, sick leave, maternity leave), the reason for the leave, and the status of the application. It can also include any attachments or documents submitted as proof for the leave taken.
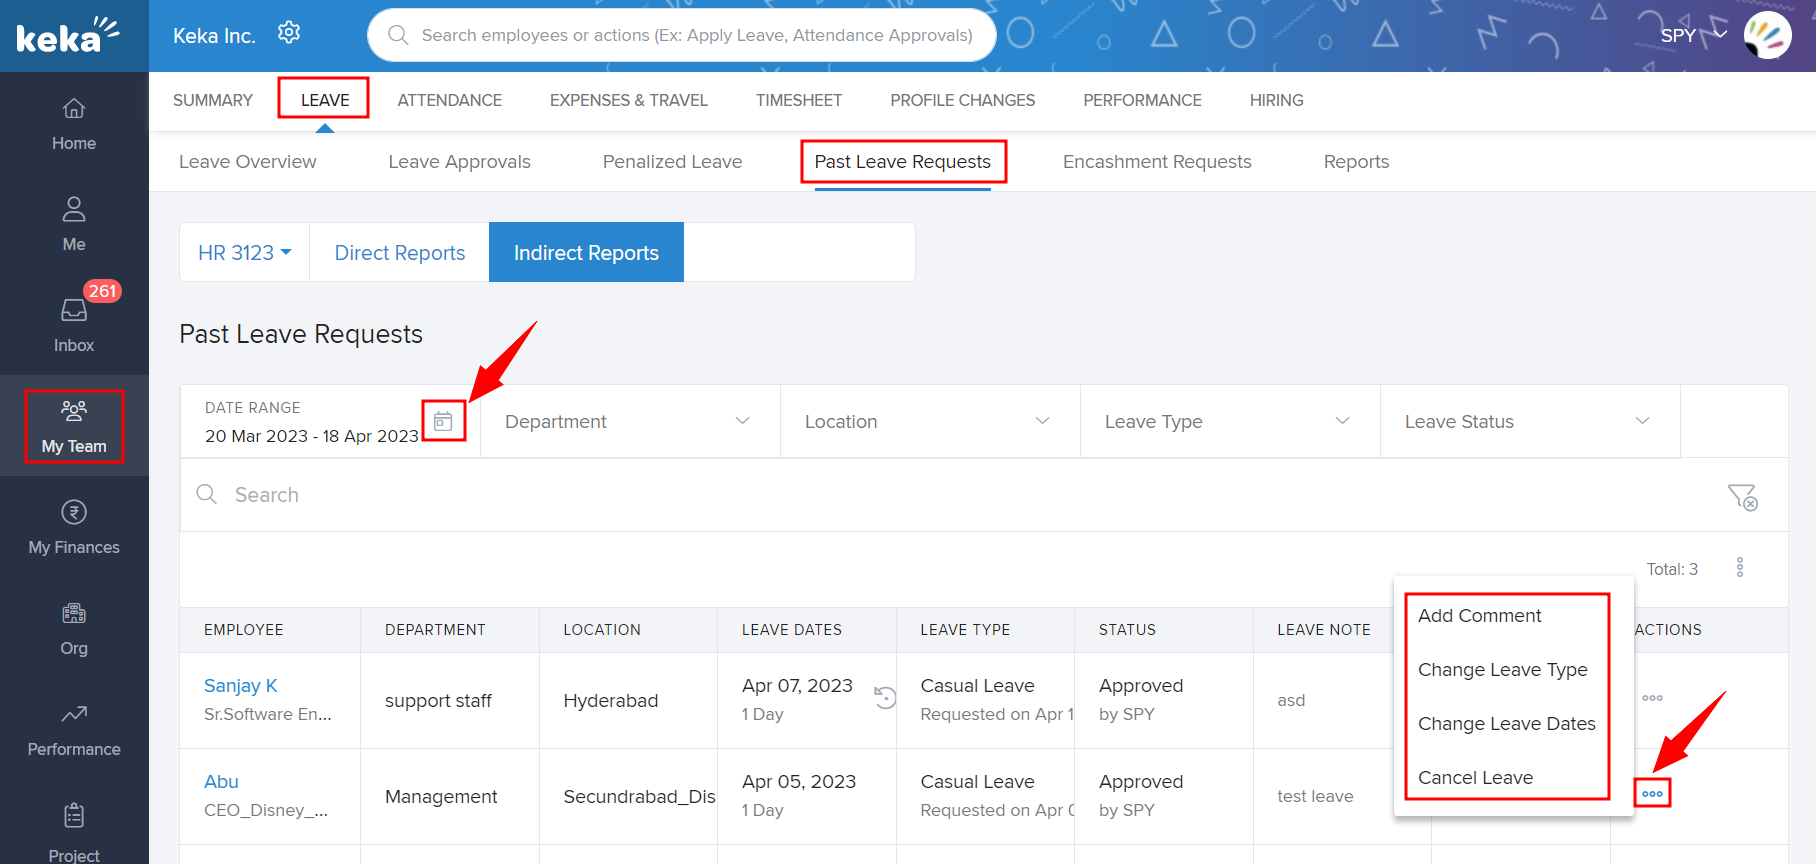
To track the history of leave requests made by your direct or indirect reports, navigate to My Team and then the Leave tab within this, go to Past Leave Requests.
Under Past Leave Requests, choose a date range by clicking on the calendar icon. Then, find out the name of the employee and click on the 3 Dots. Click on any of the options to perform more actions like cancelling the leave, adding comments etc.
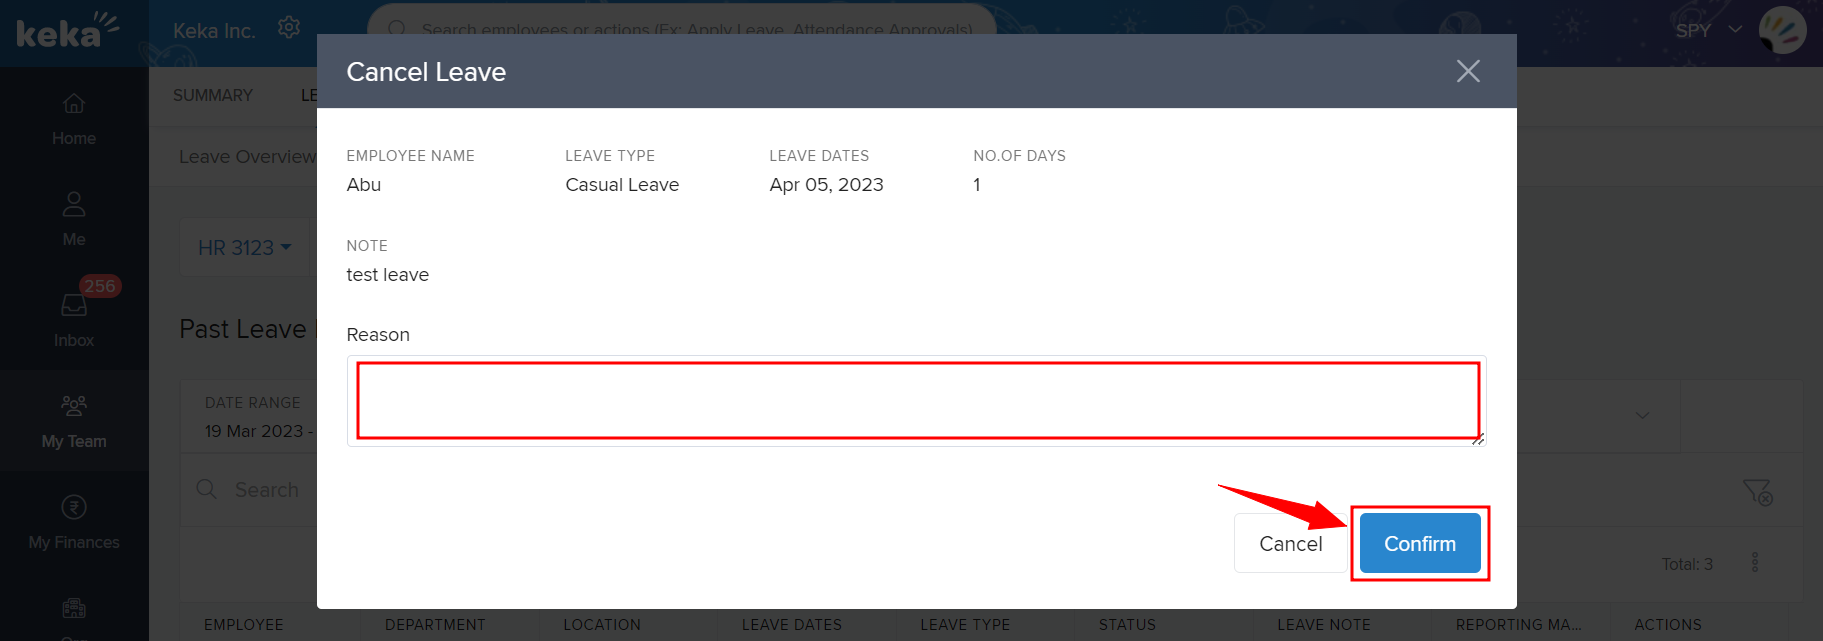
On clicking on the options, you will have an overlay window popping up where you can enter the details etc. and proceed.
Encashment requests
Labour laws entitle every salaried person a certain number of paid leave every year. The number of such leave varies across organizations subject to their leave policies and HR procedures. Sometimes, employees may not use this leave and in that case, their employer owes them payments against the same. Leave encashment is the act of exchanging unused paid leave of an employee for money.
To track encashment requests and act upon them, navigate to My Team >> Leave >> Encashment Requests.
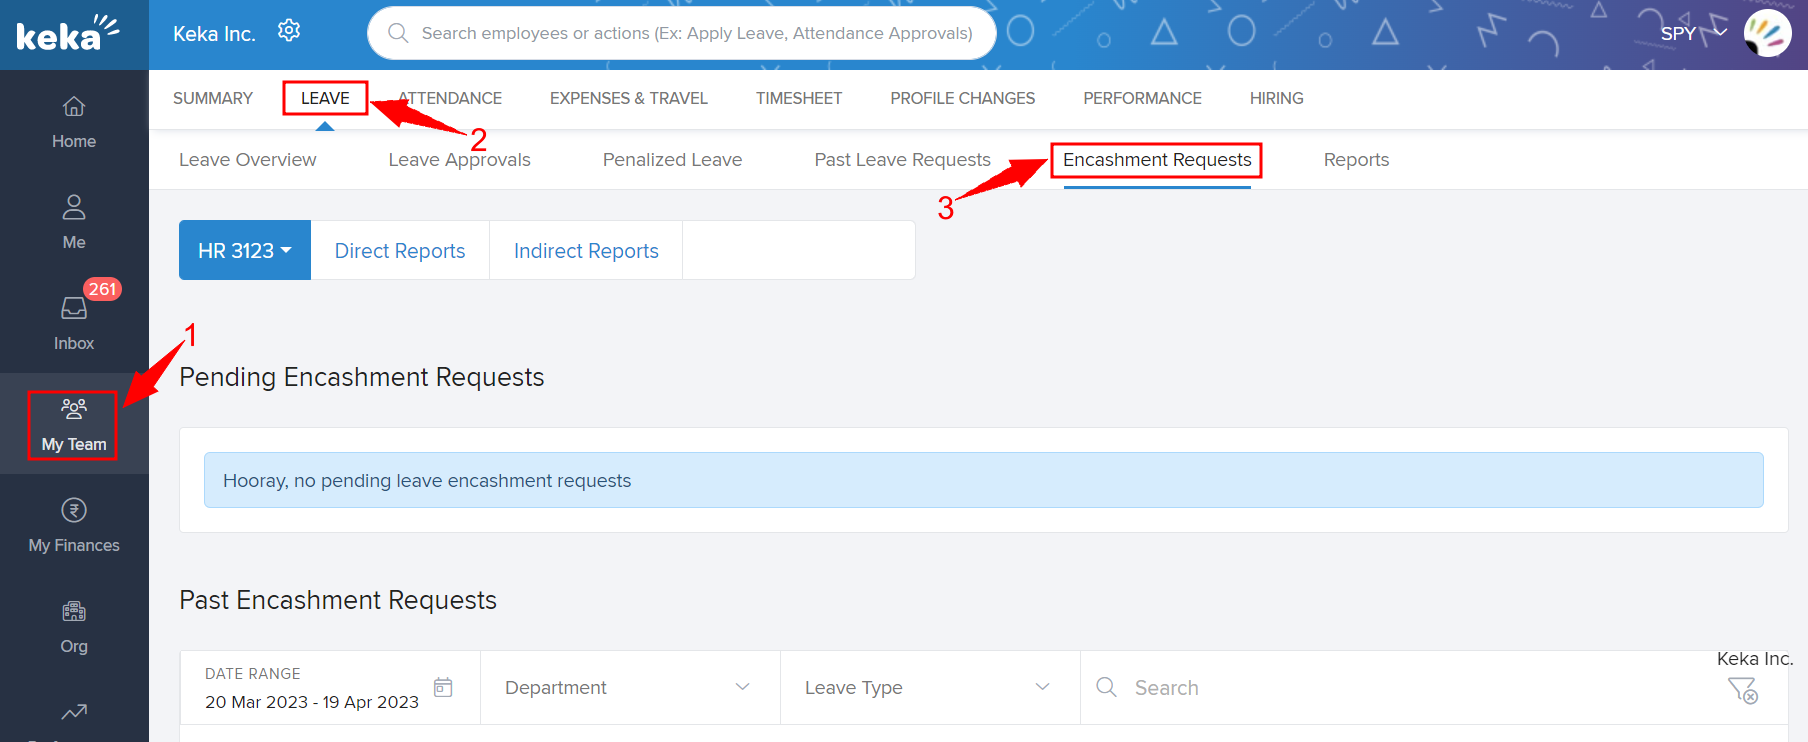
The Pending Encashment Requests section lists down requests that have not been acted upon so far. Meanwhile, the Past Encashment Requests section shows you the history of requests. To act upon pending/past encashment requests, navigate to My Team (1) >> Leave (2) >> Encashment Requests (3) >> Pending Encashment Requests/Past Encashment Requests (4).
To act upon bulk encashment requests, select the employees from the column.
Reports
To find detailed leave reports pertaining to your team, navigate to My Team >> Leave >> Reports >> Leave Reports.
The Reports section contains detailed reports on team leave requests, unplanned leave requests, leave balances, leave consumed etc. To open a report, click on the title like Team Leave Requests.

On clicking any report title, an overlay widow will pop up. Here, use the drop-down menus to select Reporting Tree Type, Date Range, Department etc. Then, click Run and the system will generate the report.

A typical report will look like the following. Remember to use the Slider (1) at the bottom to find all columns. Use the Download (2) button to download the report in an Excel format.

If you have any other queries, check out our FAQ articles or contact our product experts.
Please let us know if you find this article helpful.
