The employee profile section on the Keka portal provides a comprehensive overview of each employee's information and insights. It includes employment particulars such as job title, employee ID, submitted documents, and availed assets. Additionally, it contains information about their education, interests, and hobbies, which helps the team understand the employee beyond their job role.
Let's take a closer look at the different components of the employee profile on Keka and learn how to manage these details.
Table of Contents
Profile overview
Let us look into how you can manage your profile on Keka. First, locate your name at the top right-hand corner of the window. Click on your Name or the drop-down arrow against it and select Profile.
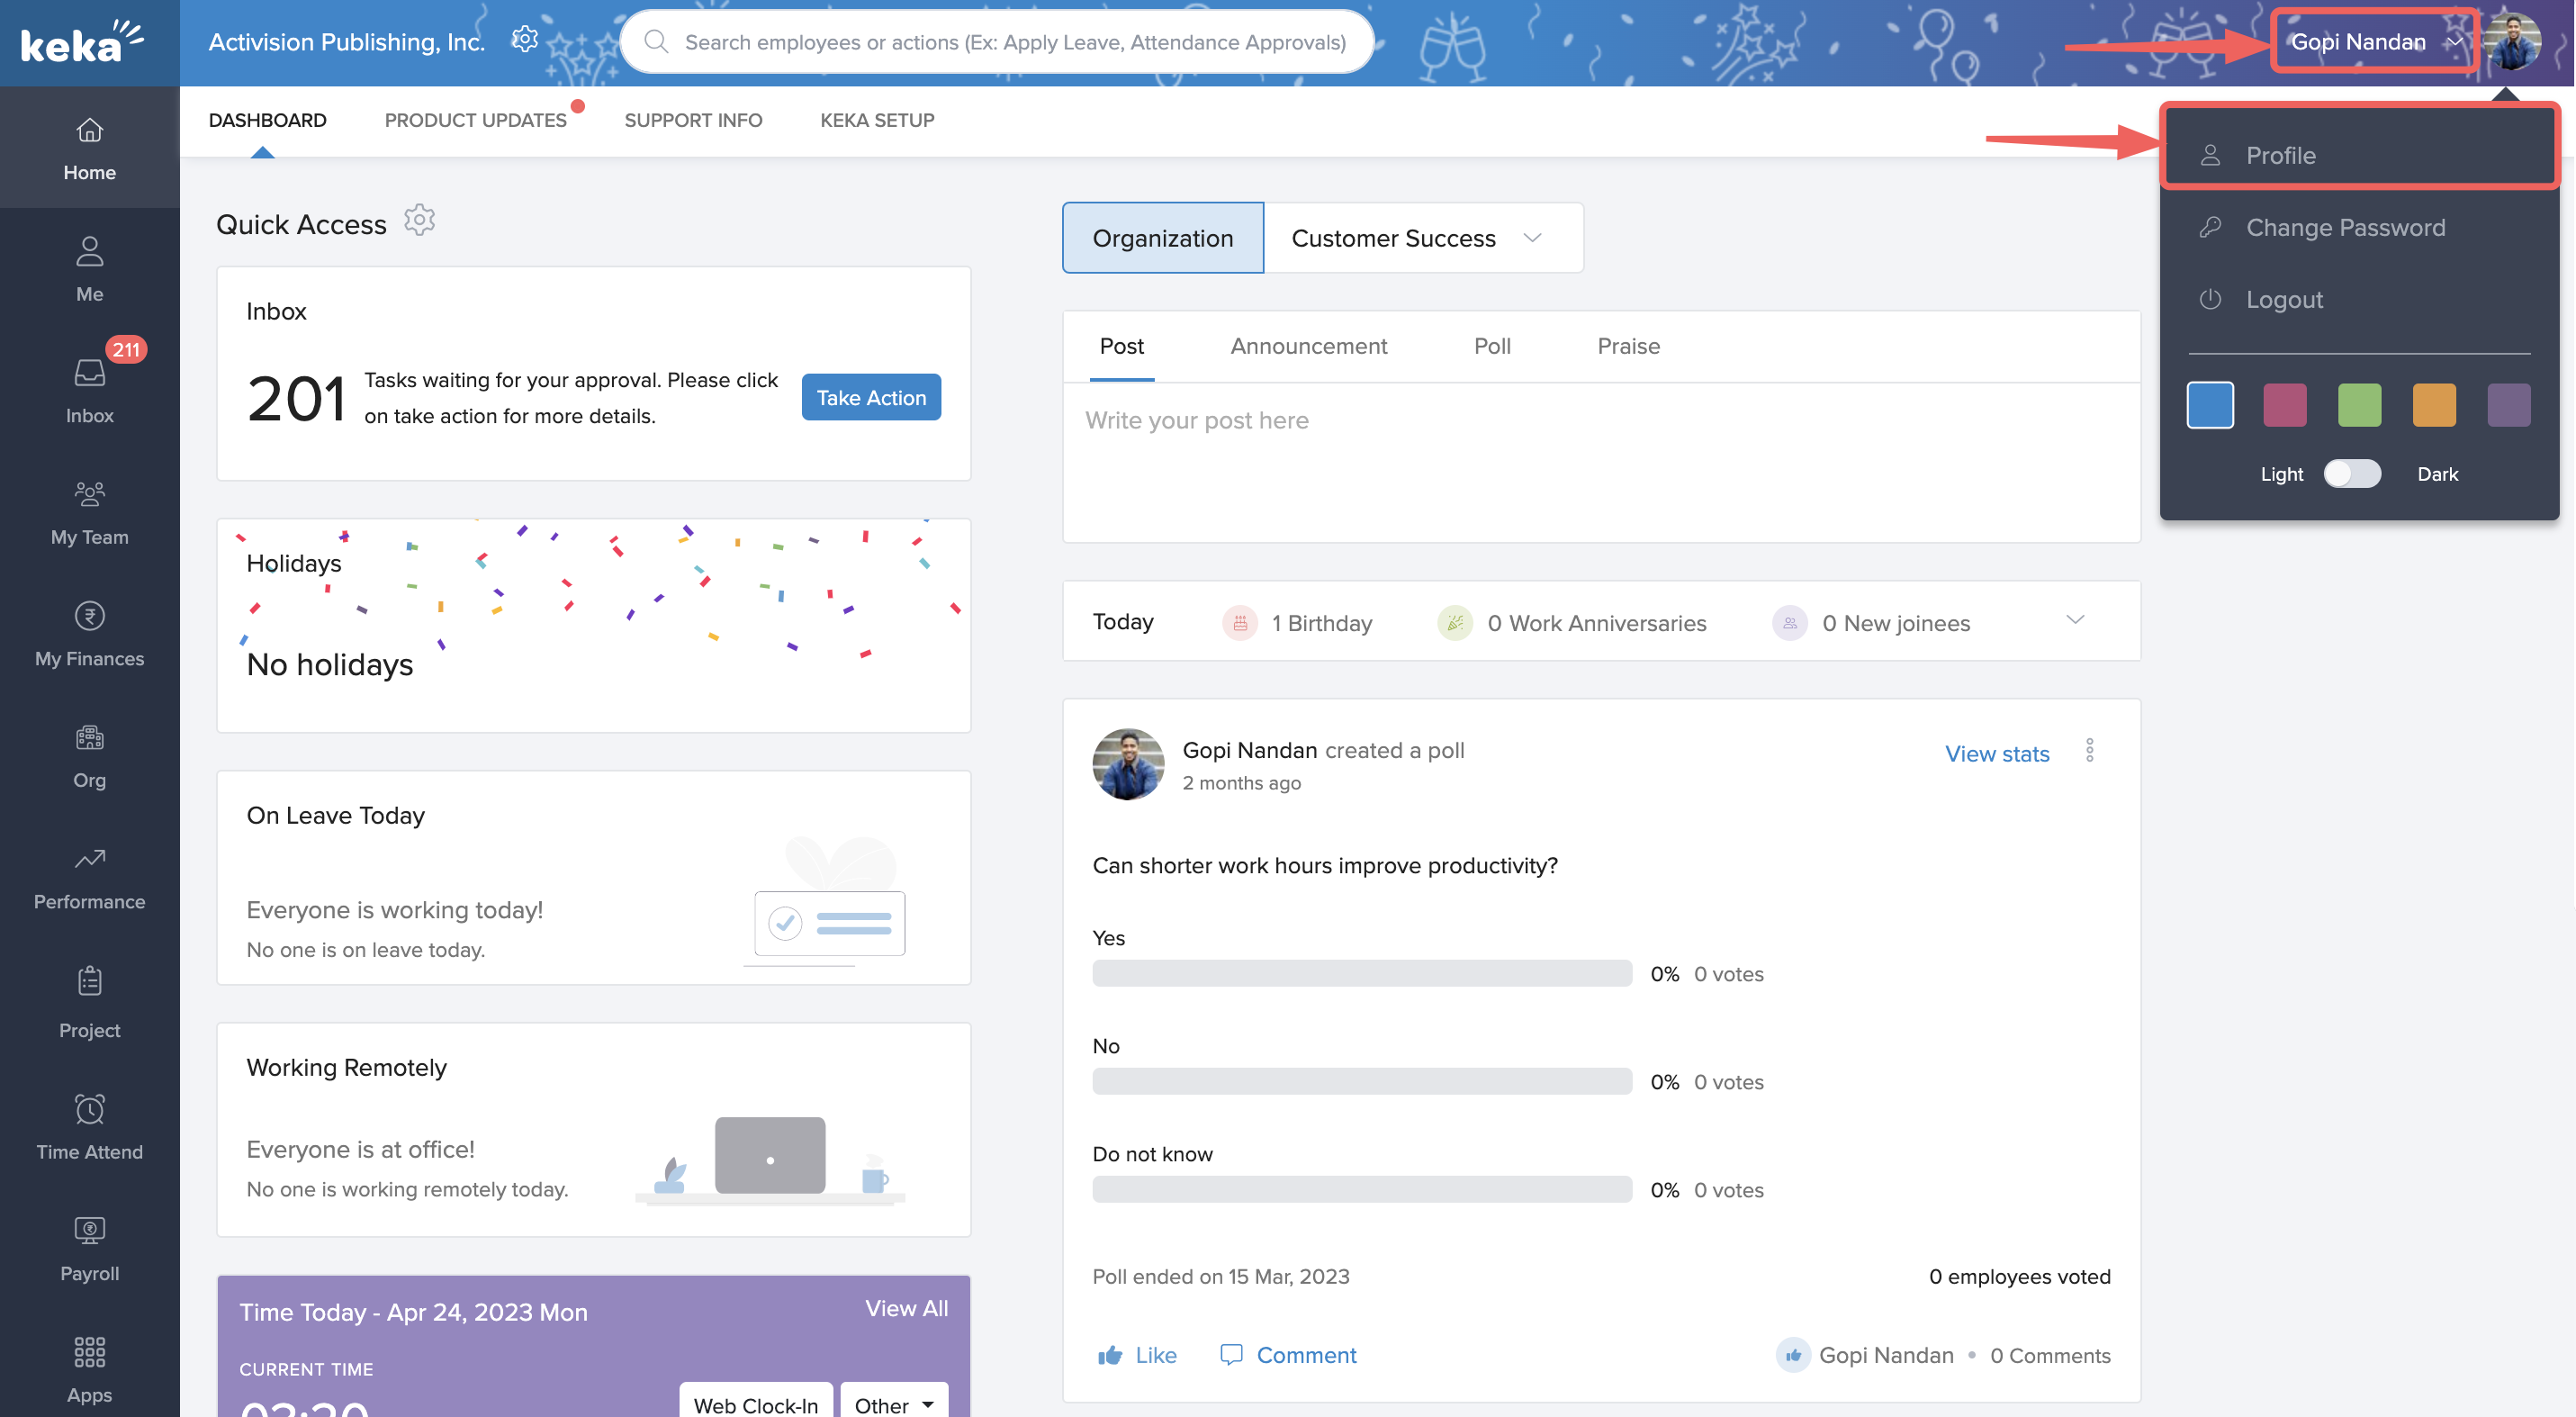
Now you can see your profile. You can click on the profile picture to view it or upload a new picture.
Against your profile picture, the page shows your Name, Location, Official Email ID and downloadable ID card. Below that, you can find your Job title, respective Department and Business unit, the name of your Reporting manager and your unique employee number. If you want to have more details about your reporting manager, click on Reporting to.
Although things like name, location, and official email ID are system defaults, your display name is editable.
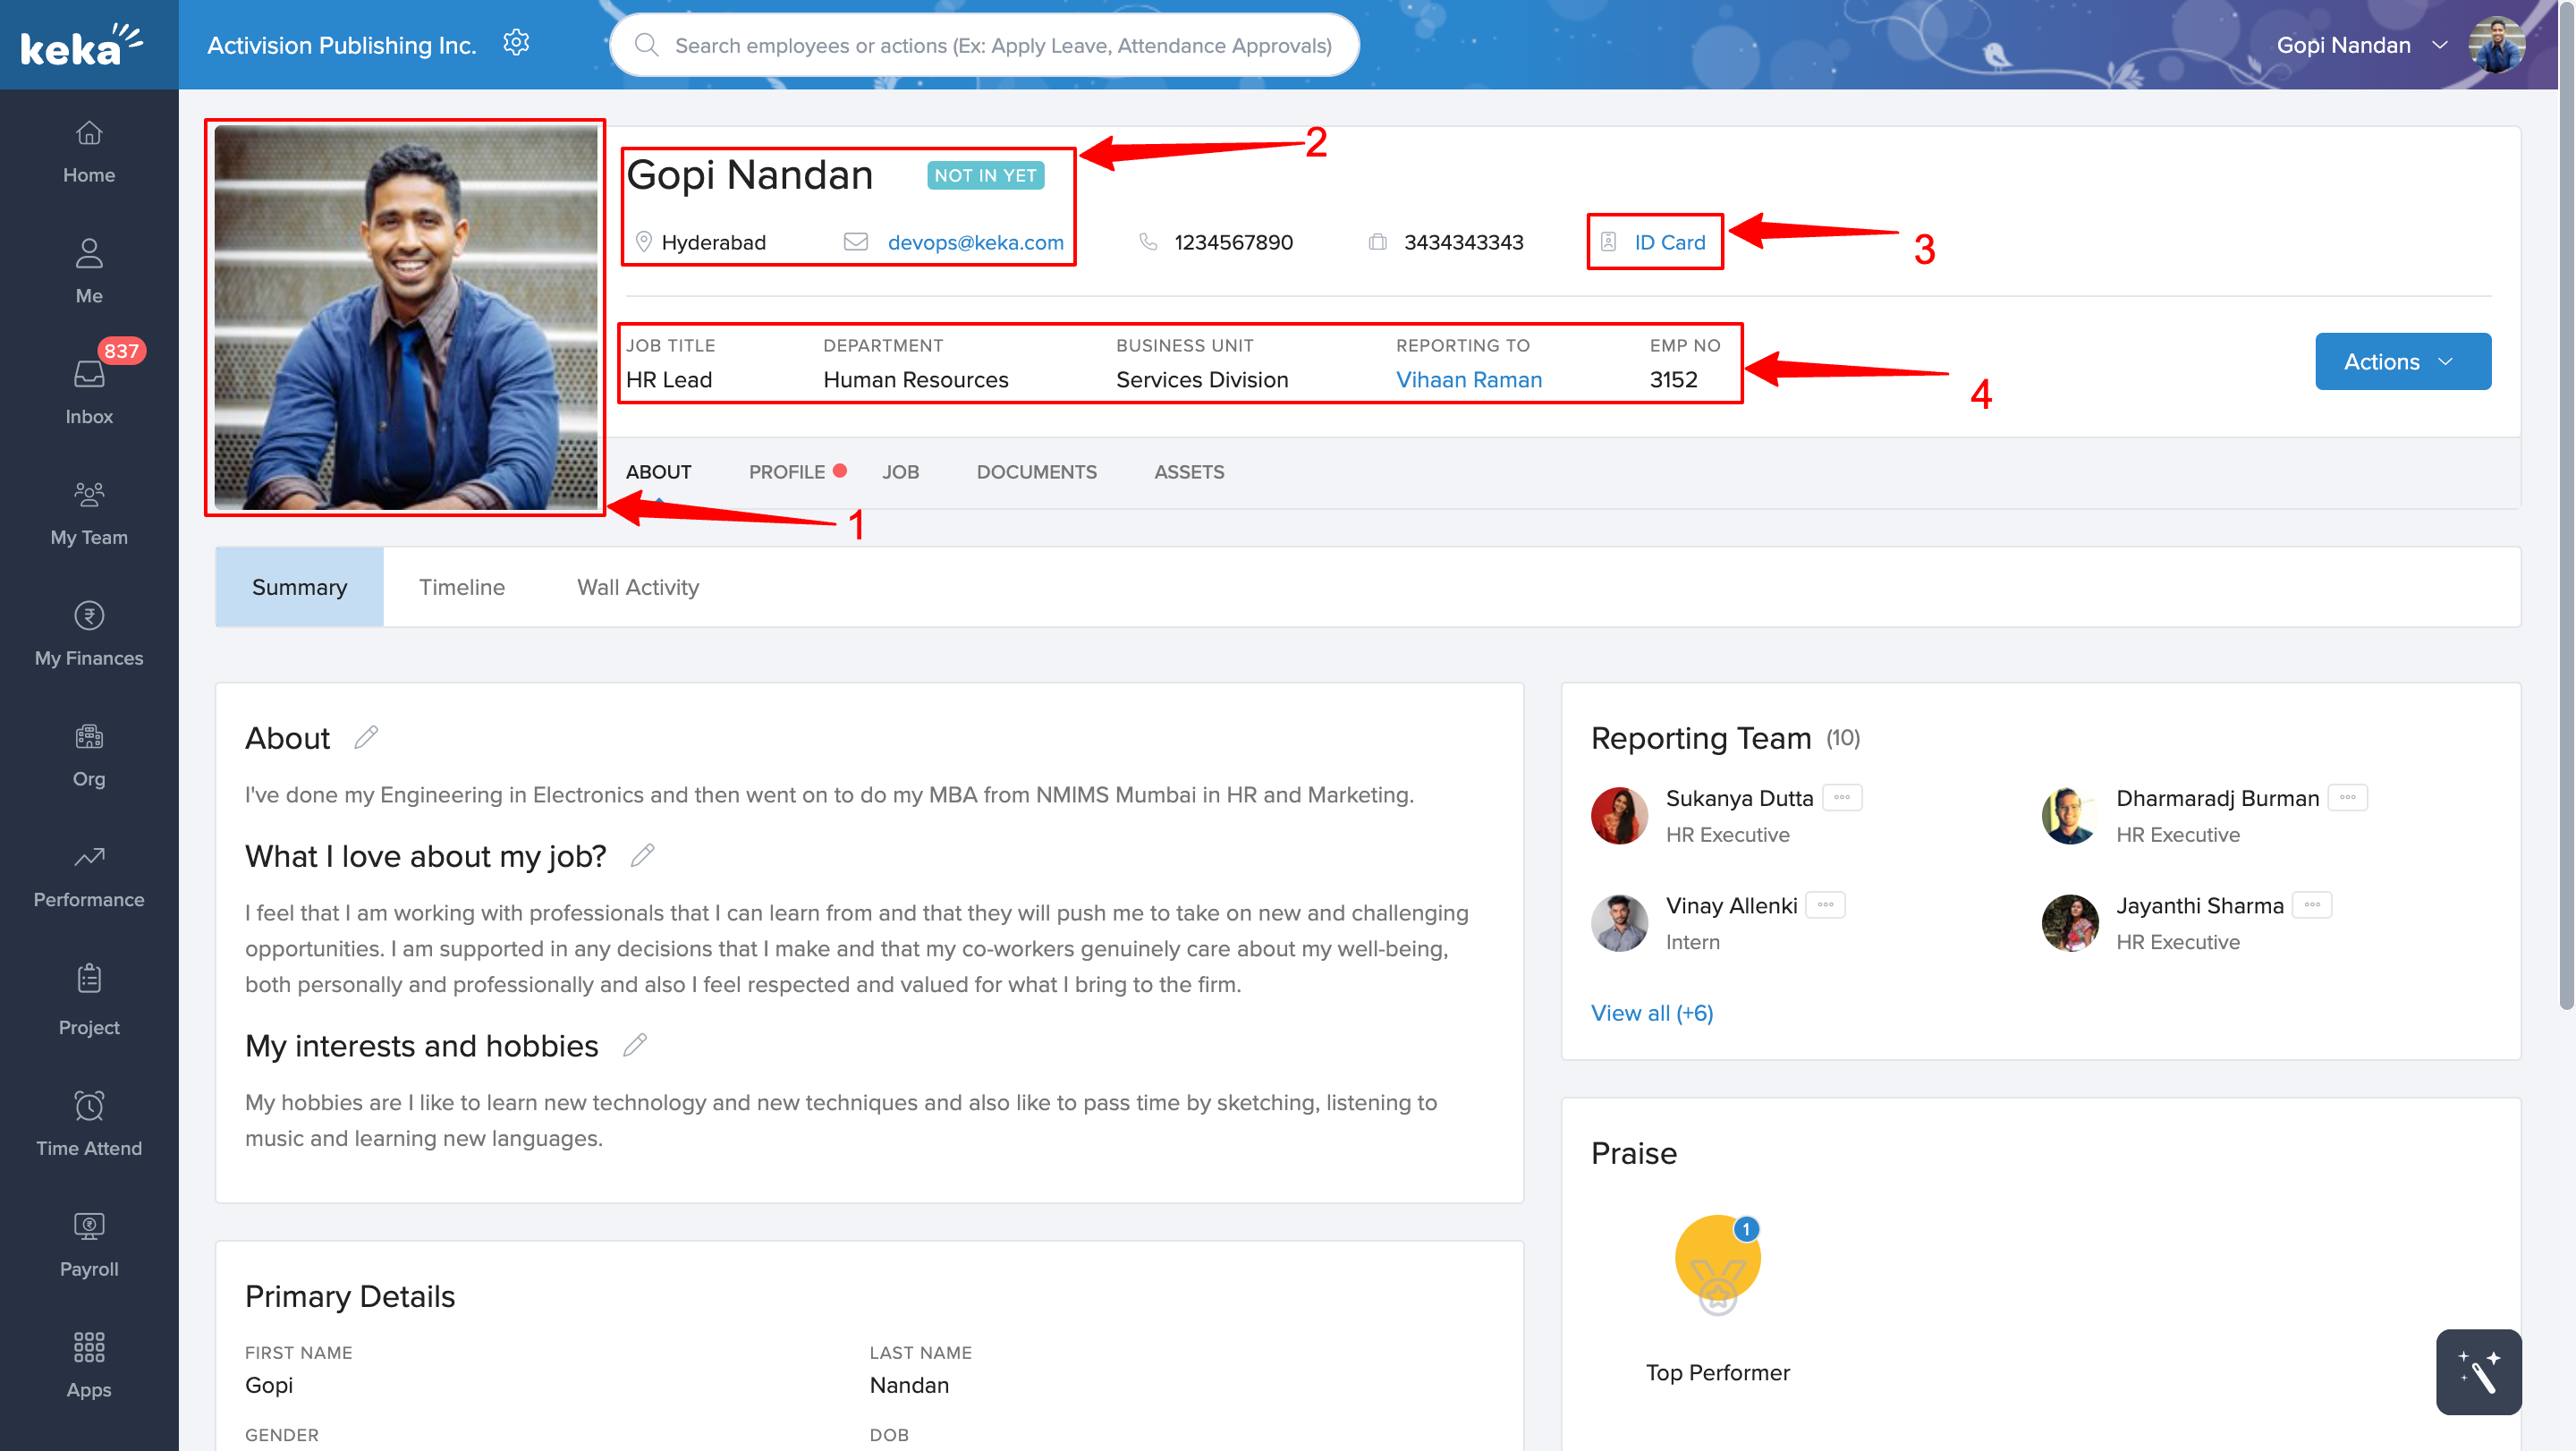
Clicking on ID Card (3) gives you a digital preview of your ID card. The Download ID button at the bottom lets you download it as well. Downloading allows you to print it out when necessary.
Editing the details on your profile
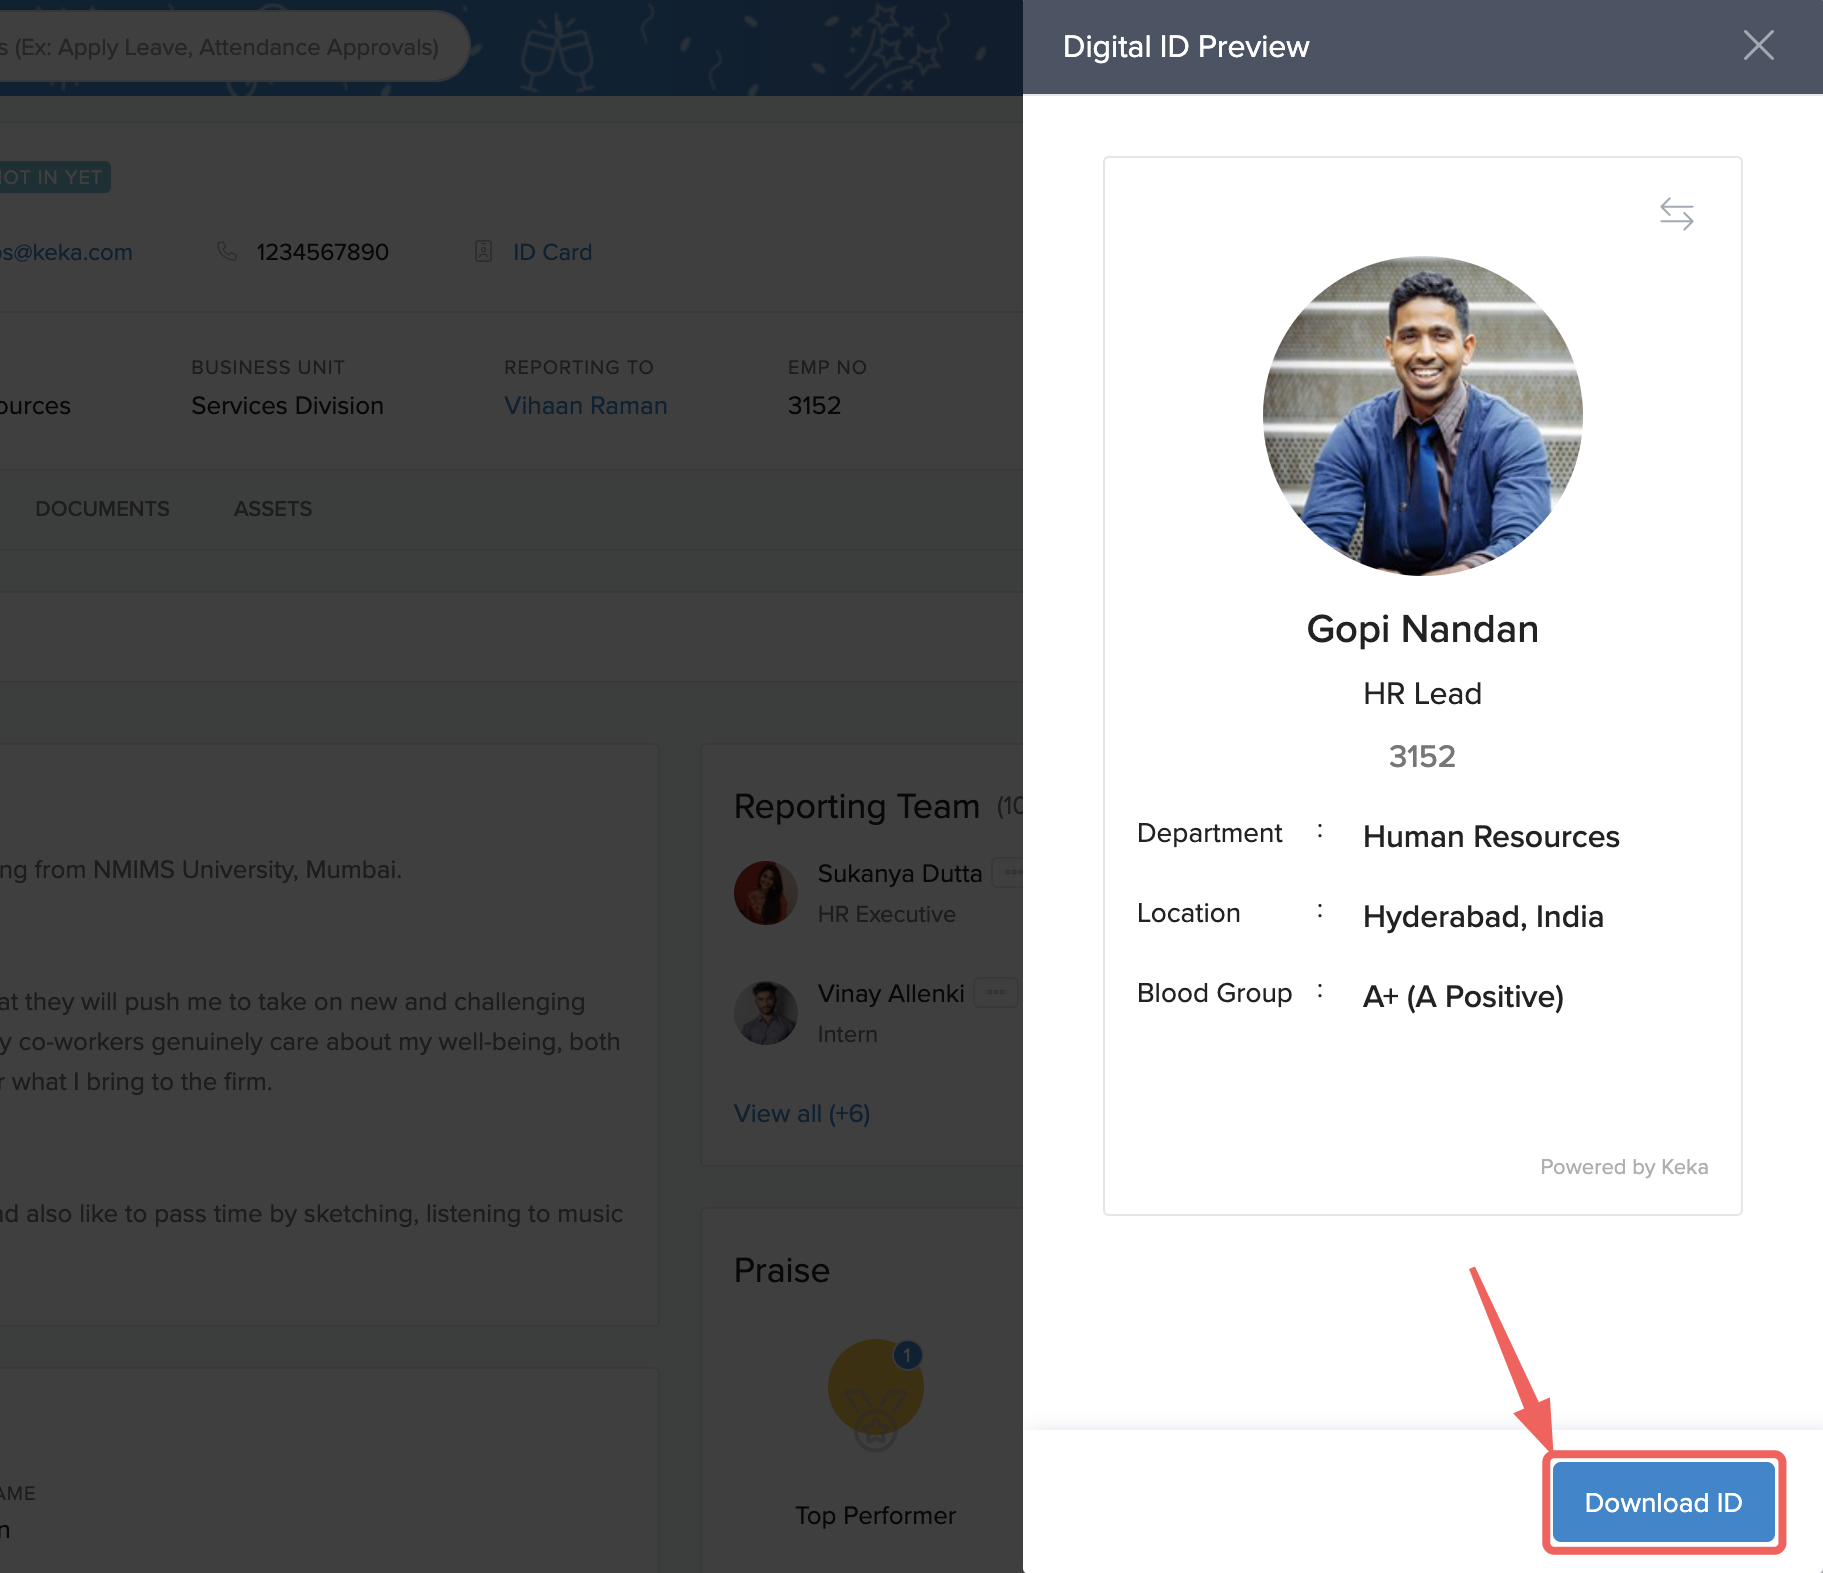
The information at the top of the profile page only gives an overview of the employee. However, there are details available under different sections entitled About, Profile, Job, Documents, and Assets. As a complete profile builds the trust of your employer and that of your colleagues, it is important that you complete it.
About
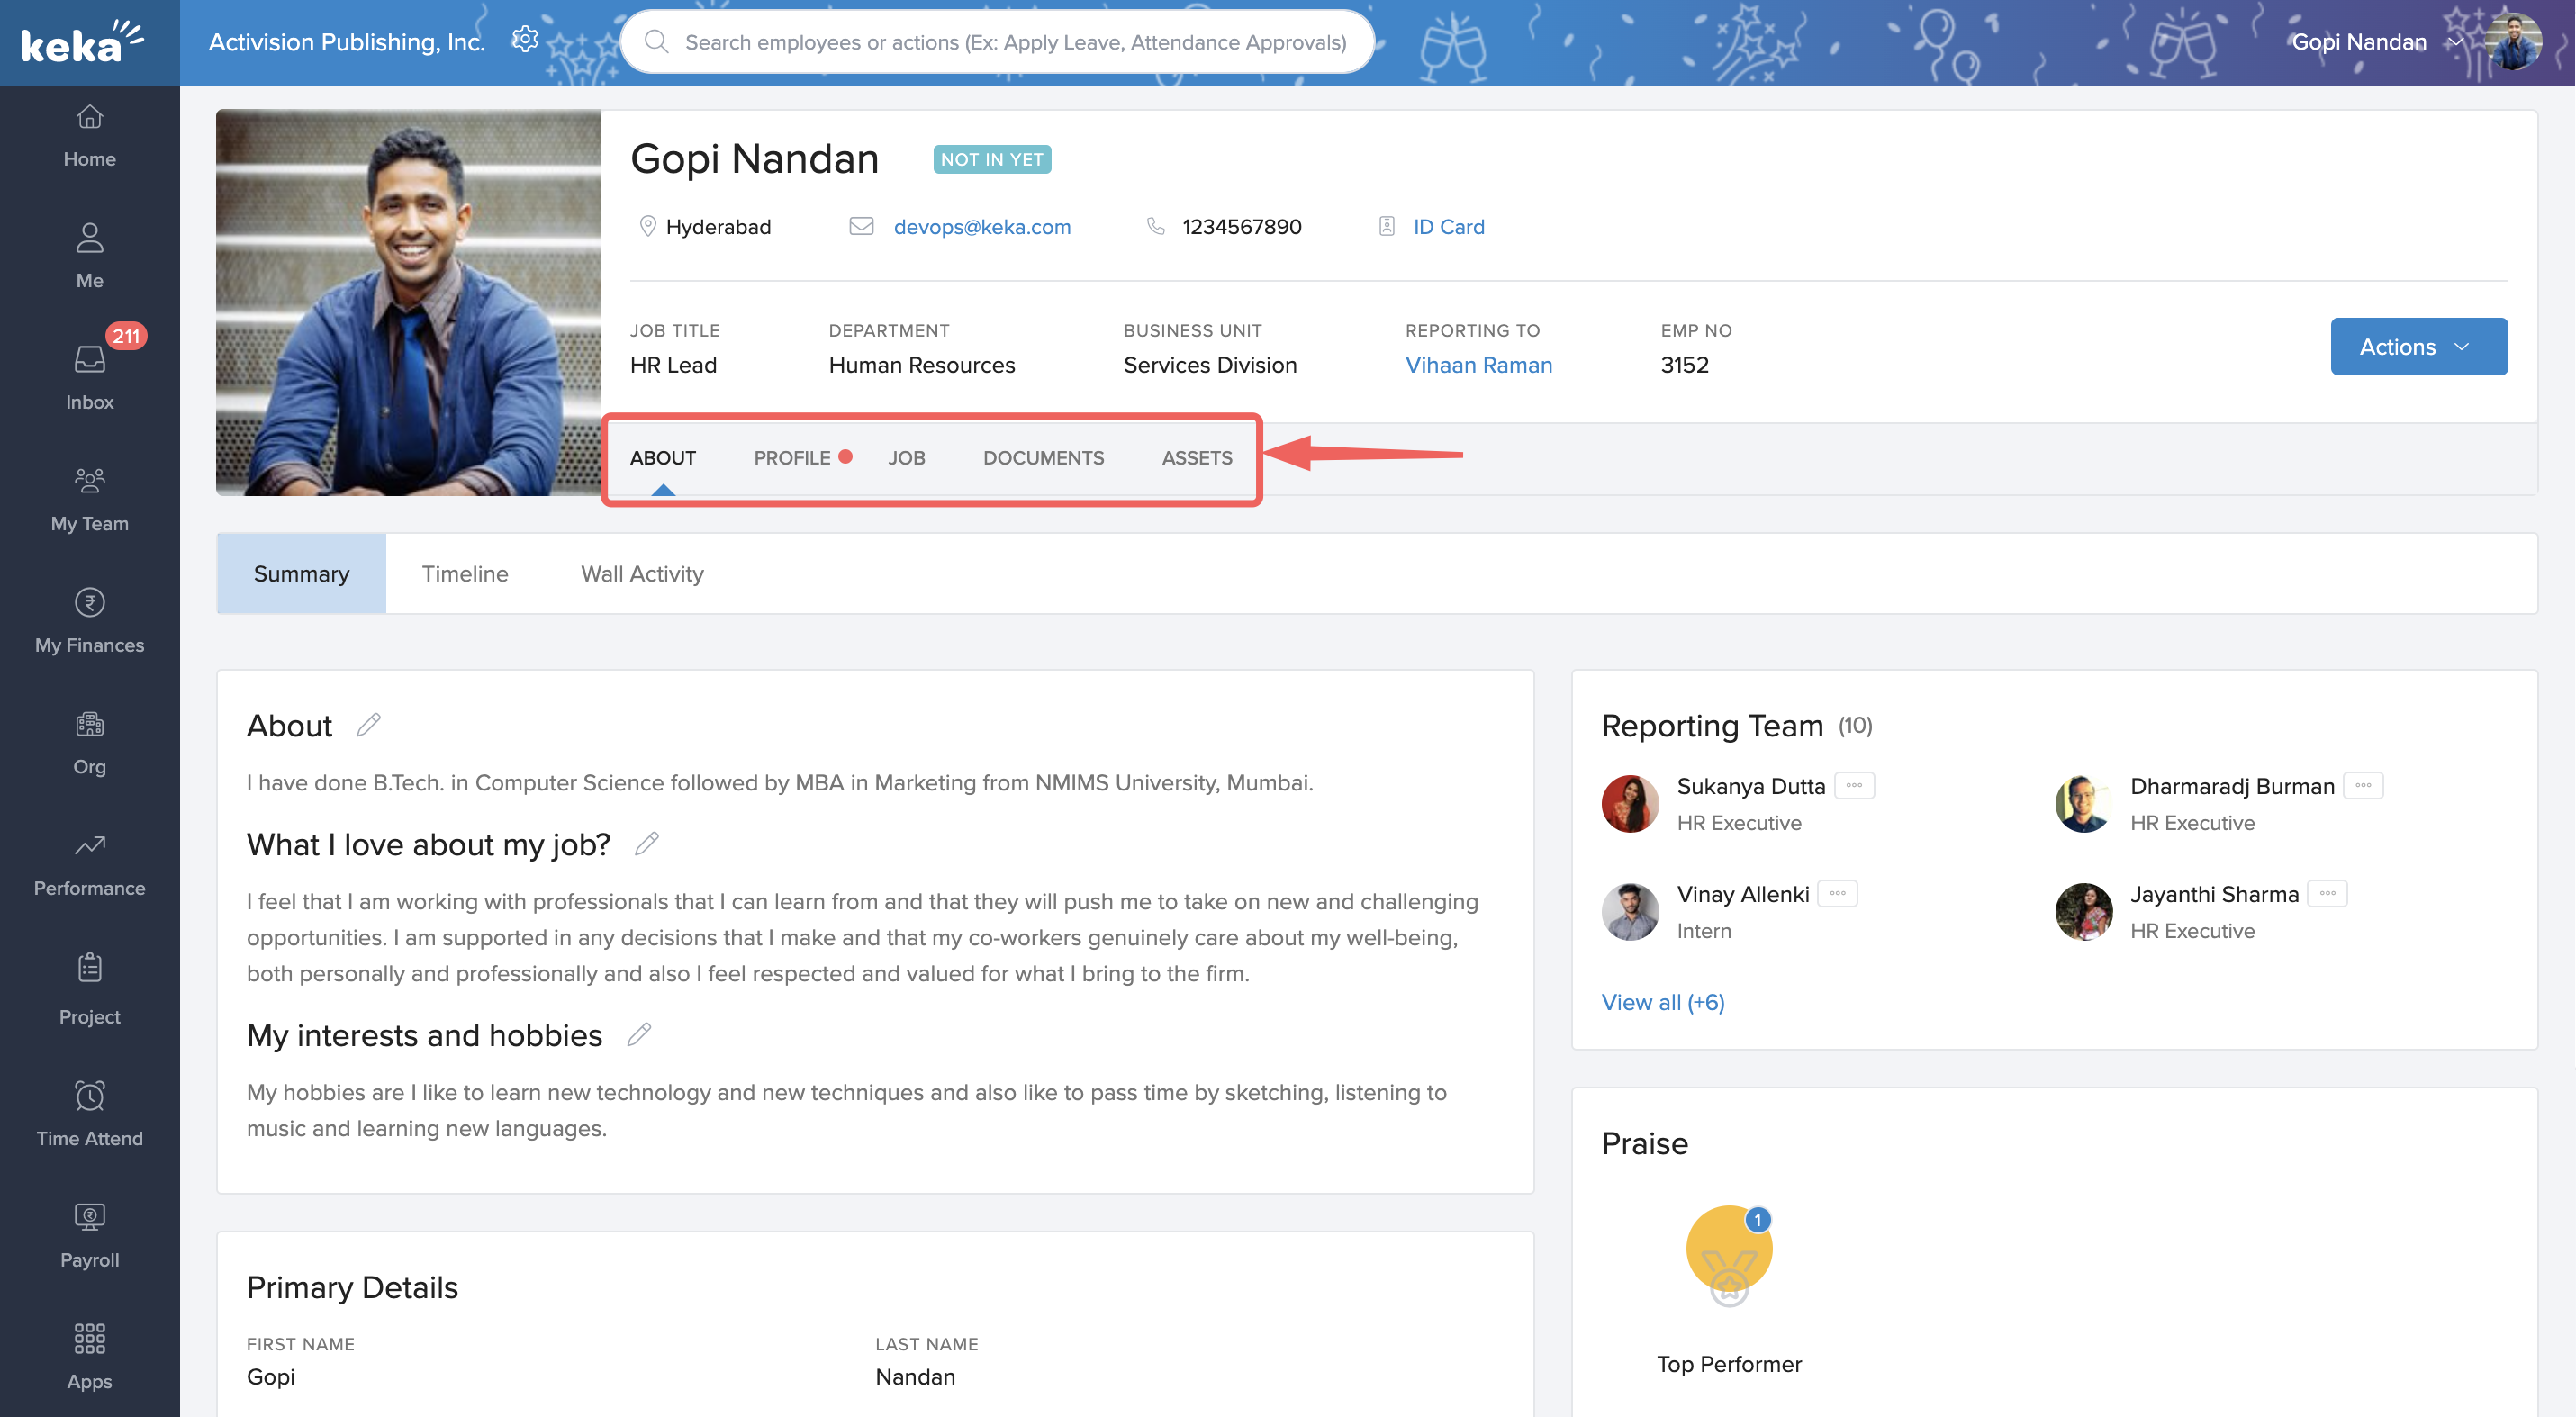
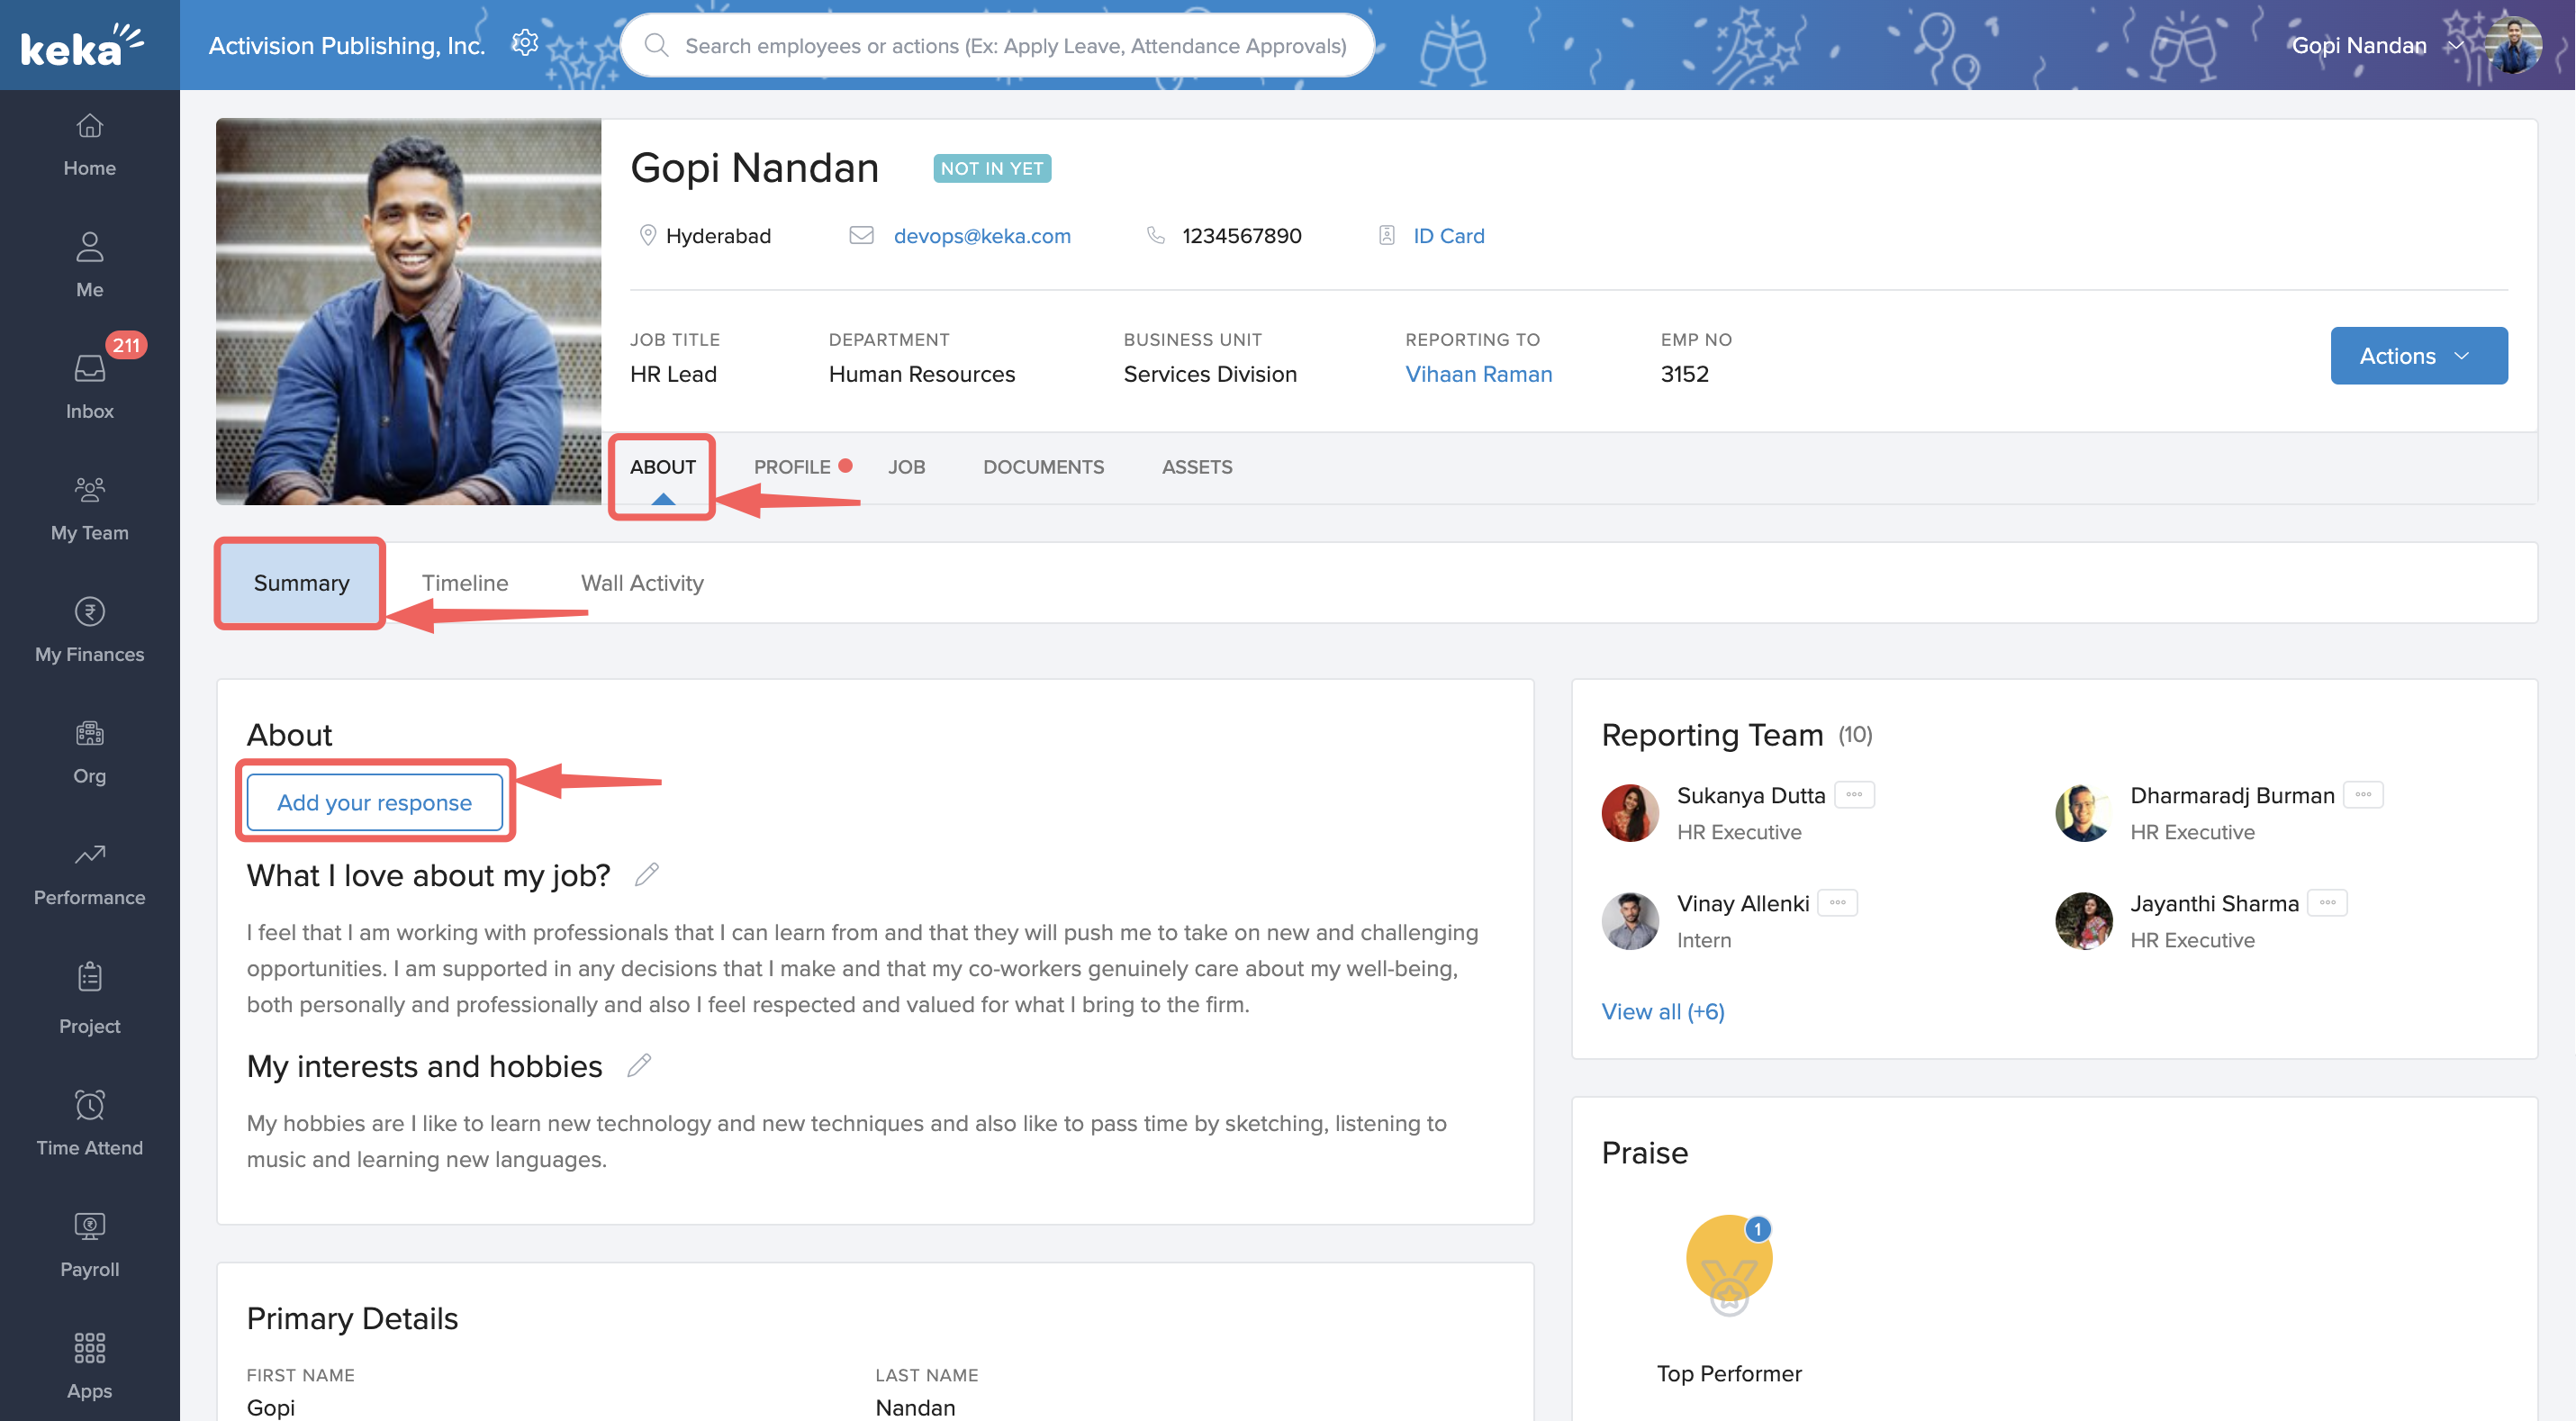
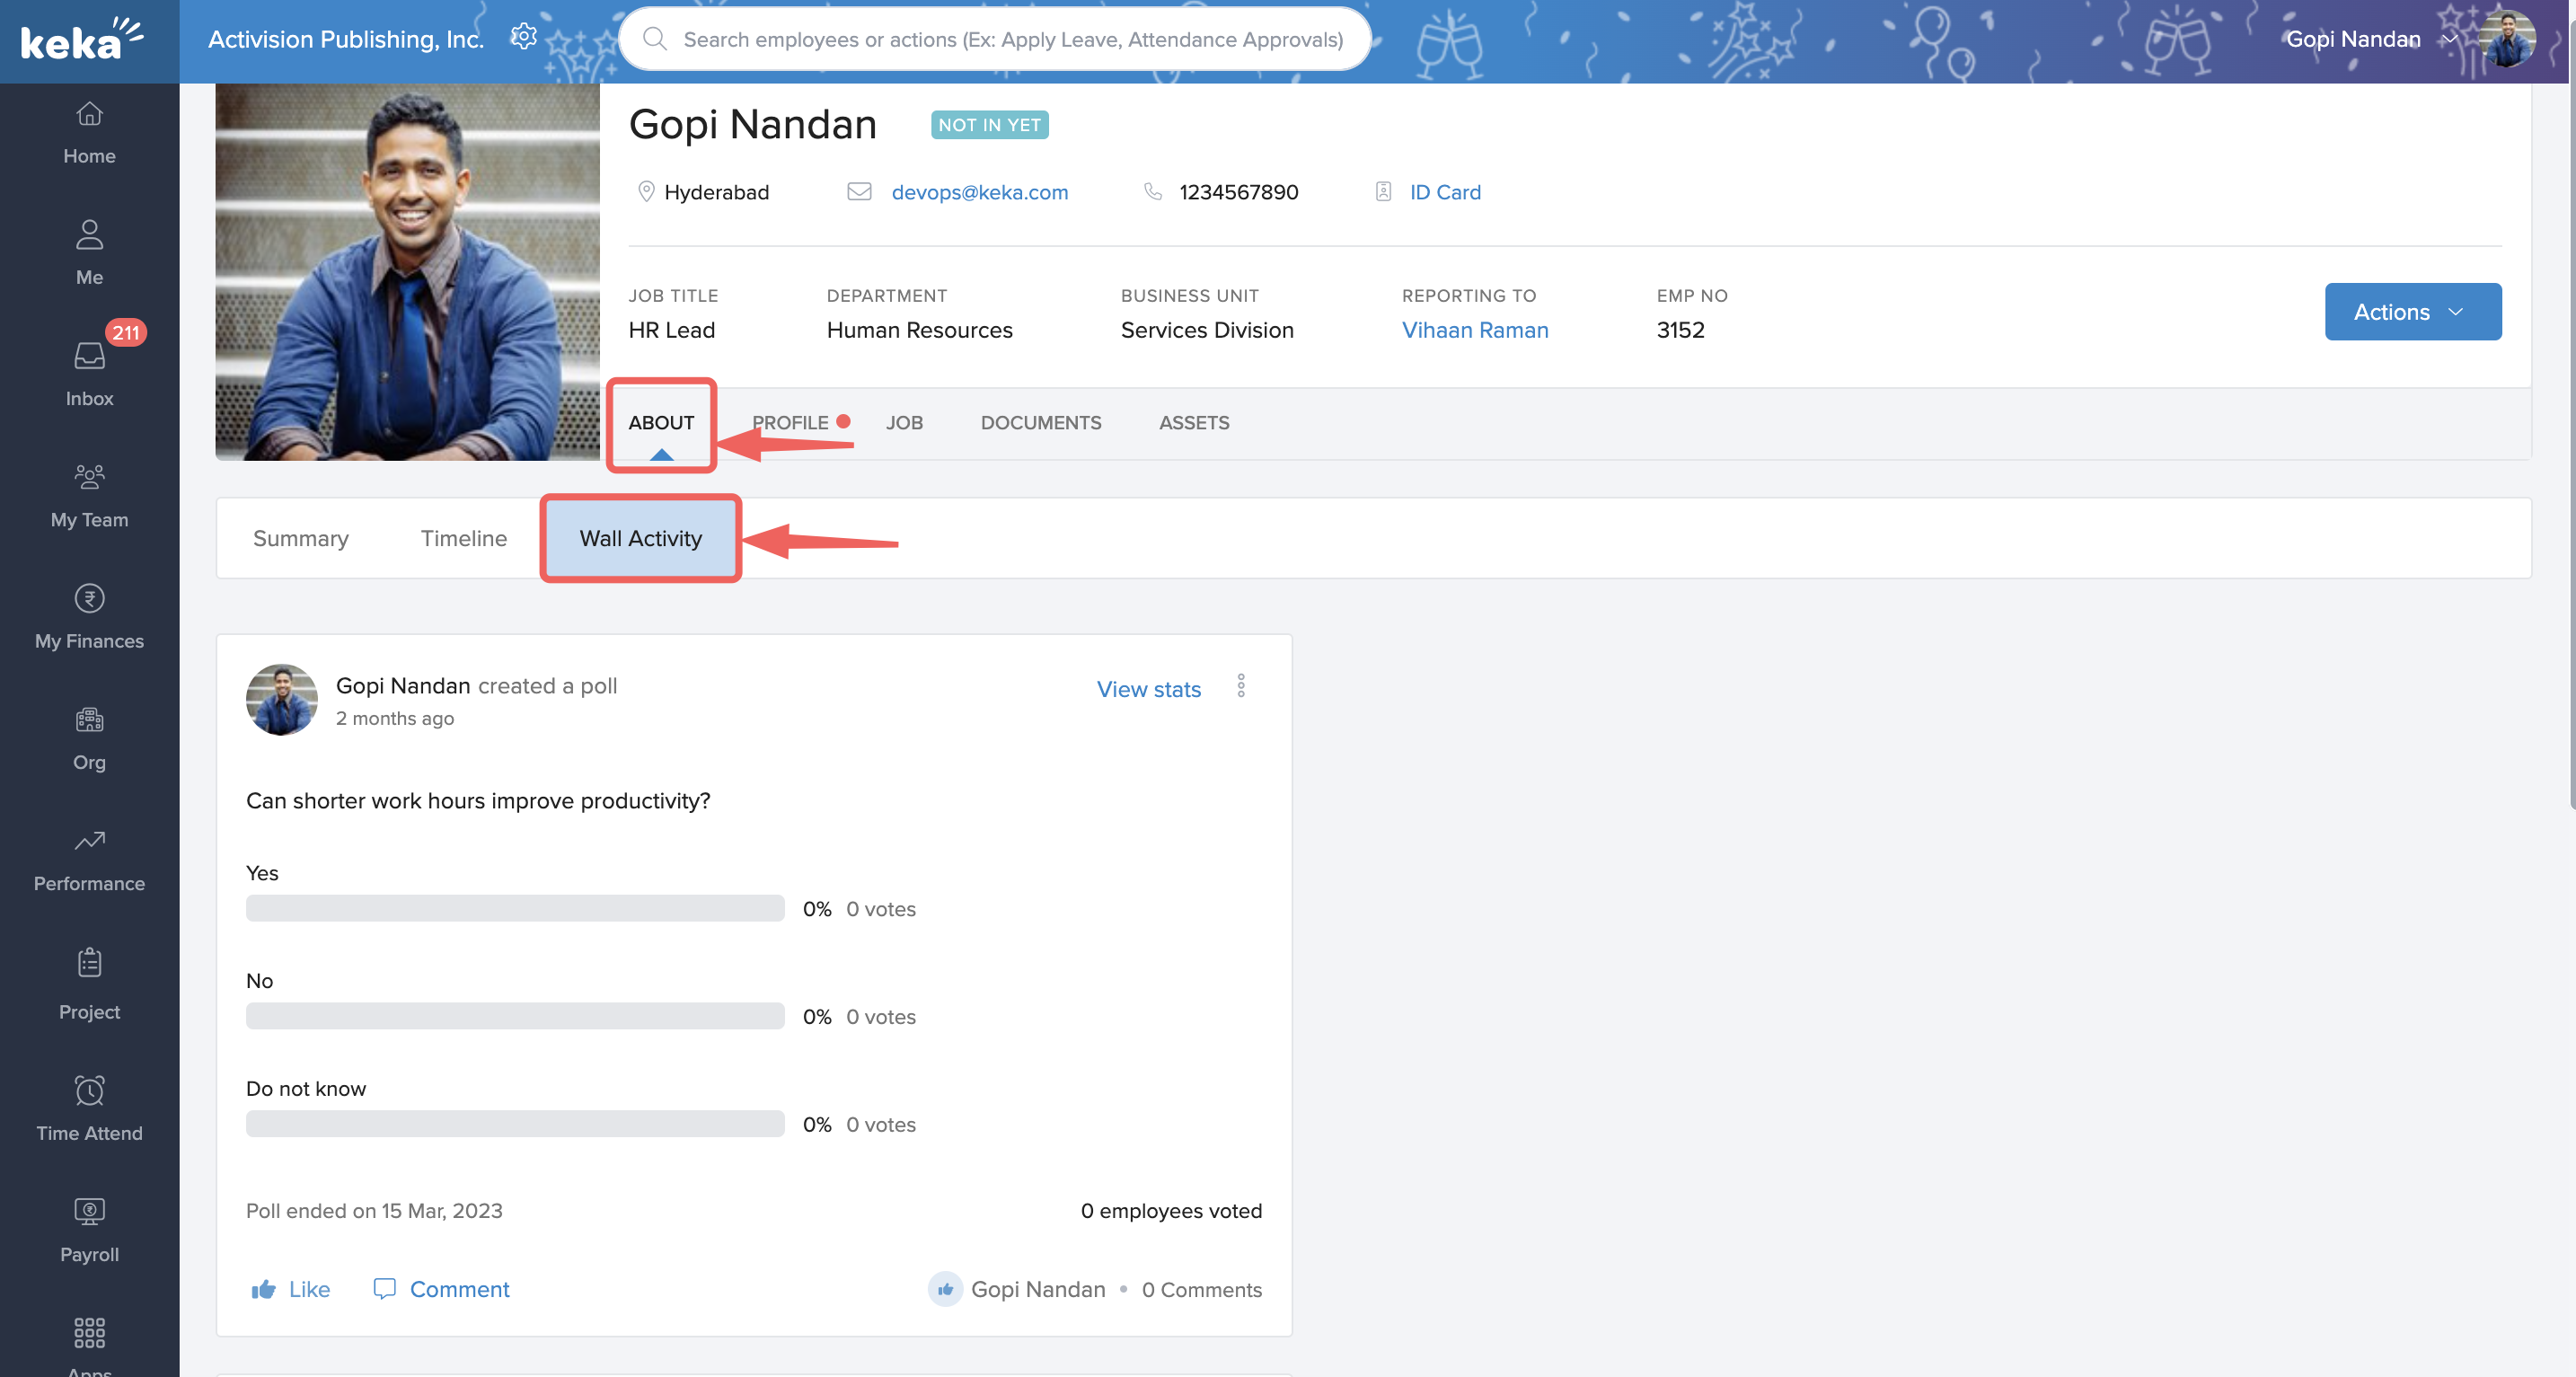
Click on About and then on Summary. There are three sections under it: About, What I love about my job, and My interests and hobbies. These sections allow you to add personal details about yourself, allowing you to paint a more holistic picture of your profile.
To add details here, click on Add Your Response.
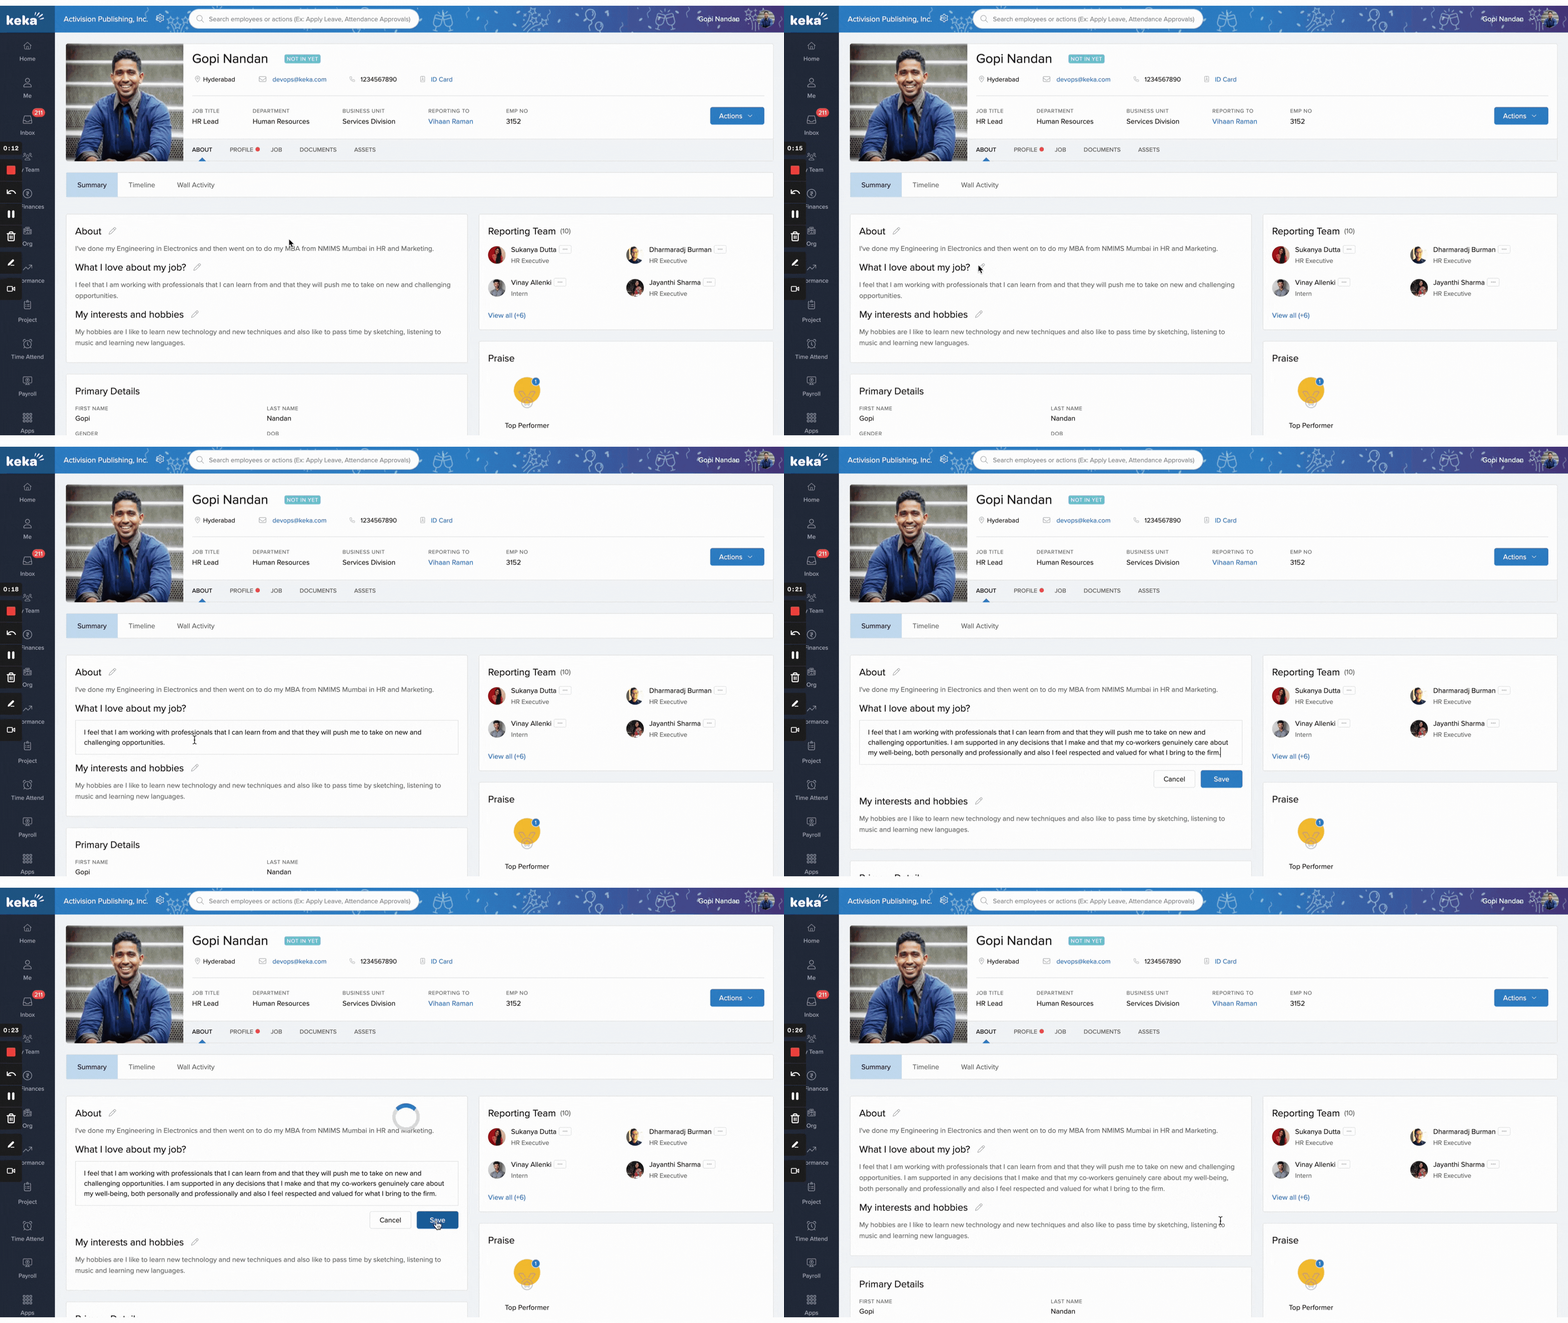
If you have already entered these details and you want to edit the details in any of these sections, click on the Edit icon against any title, type in your thoughts in the space provided, and then click Save.
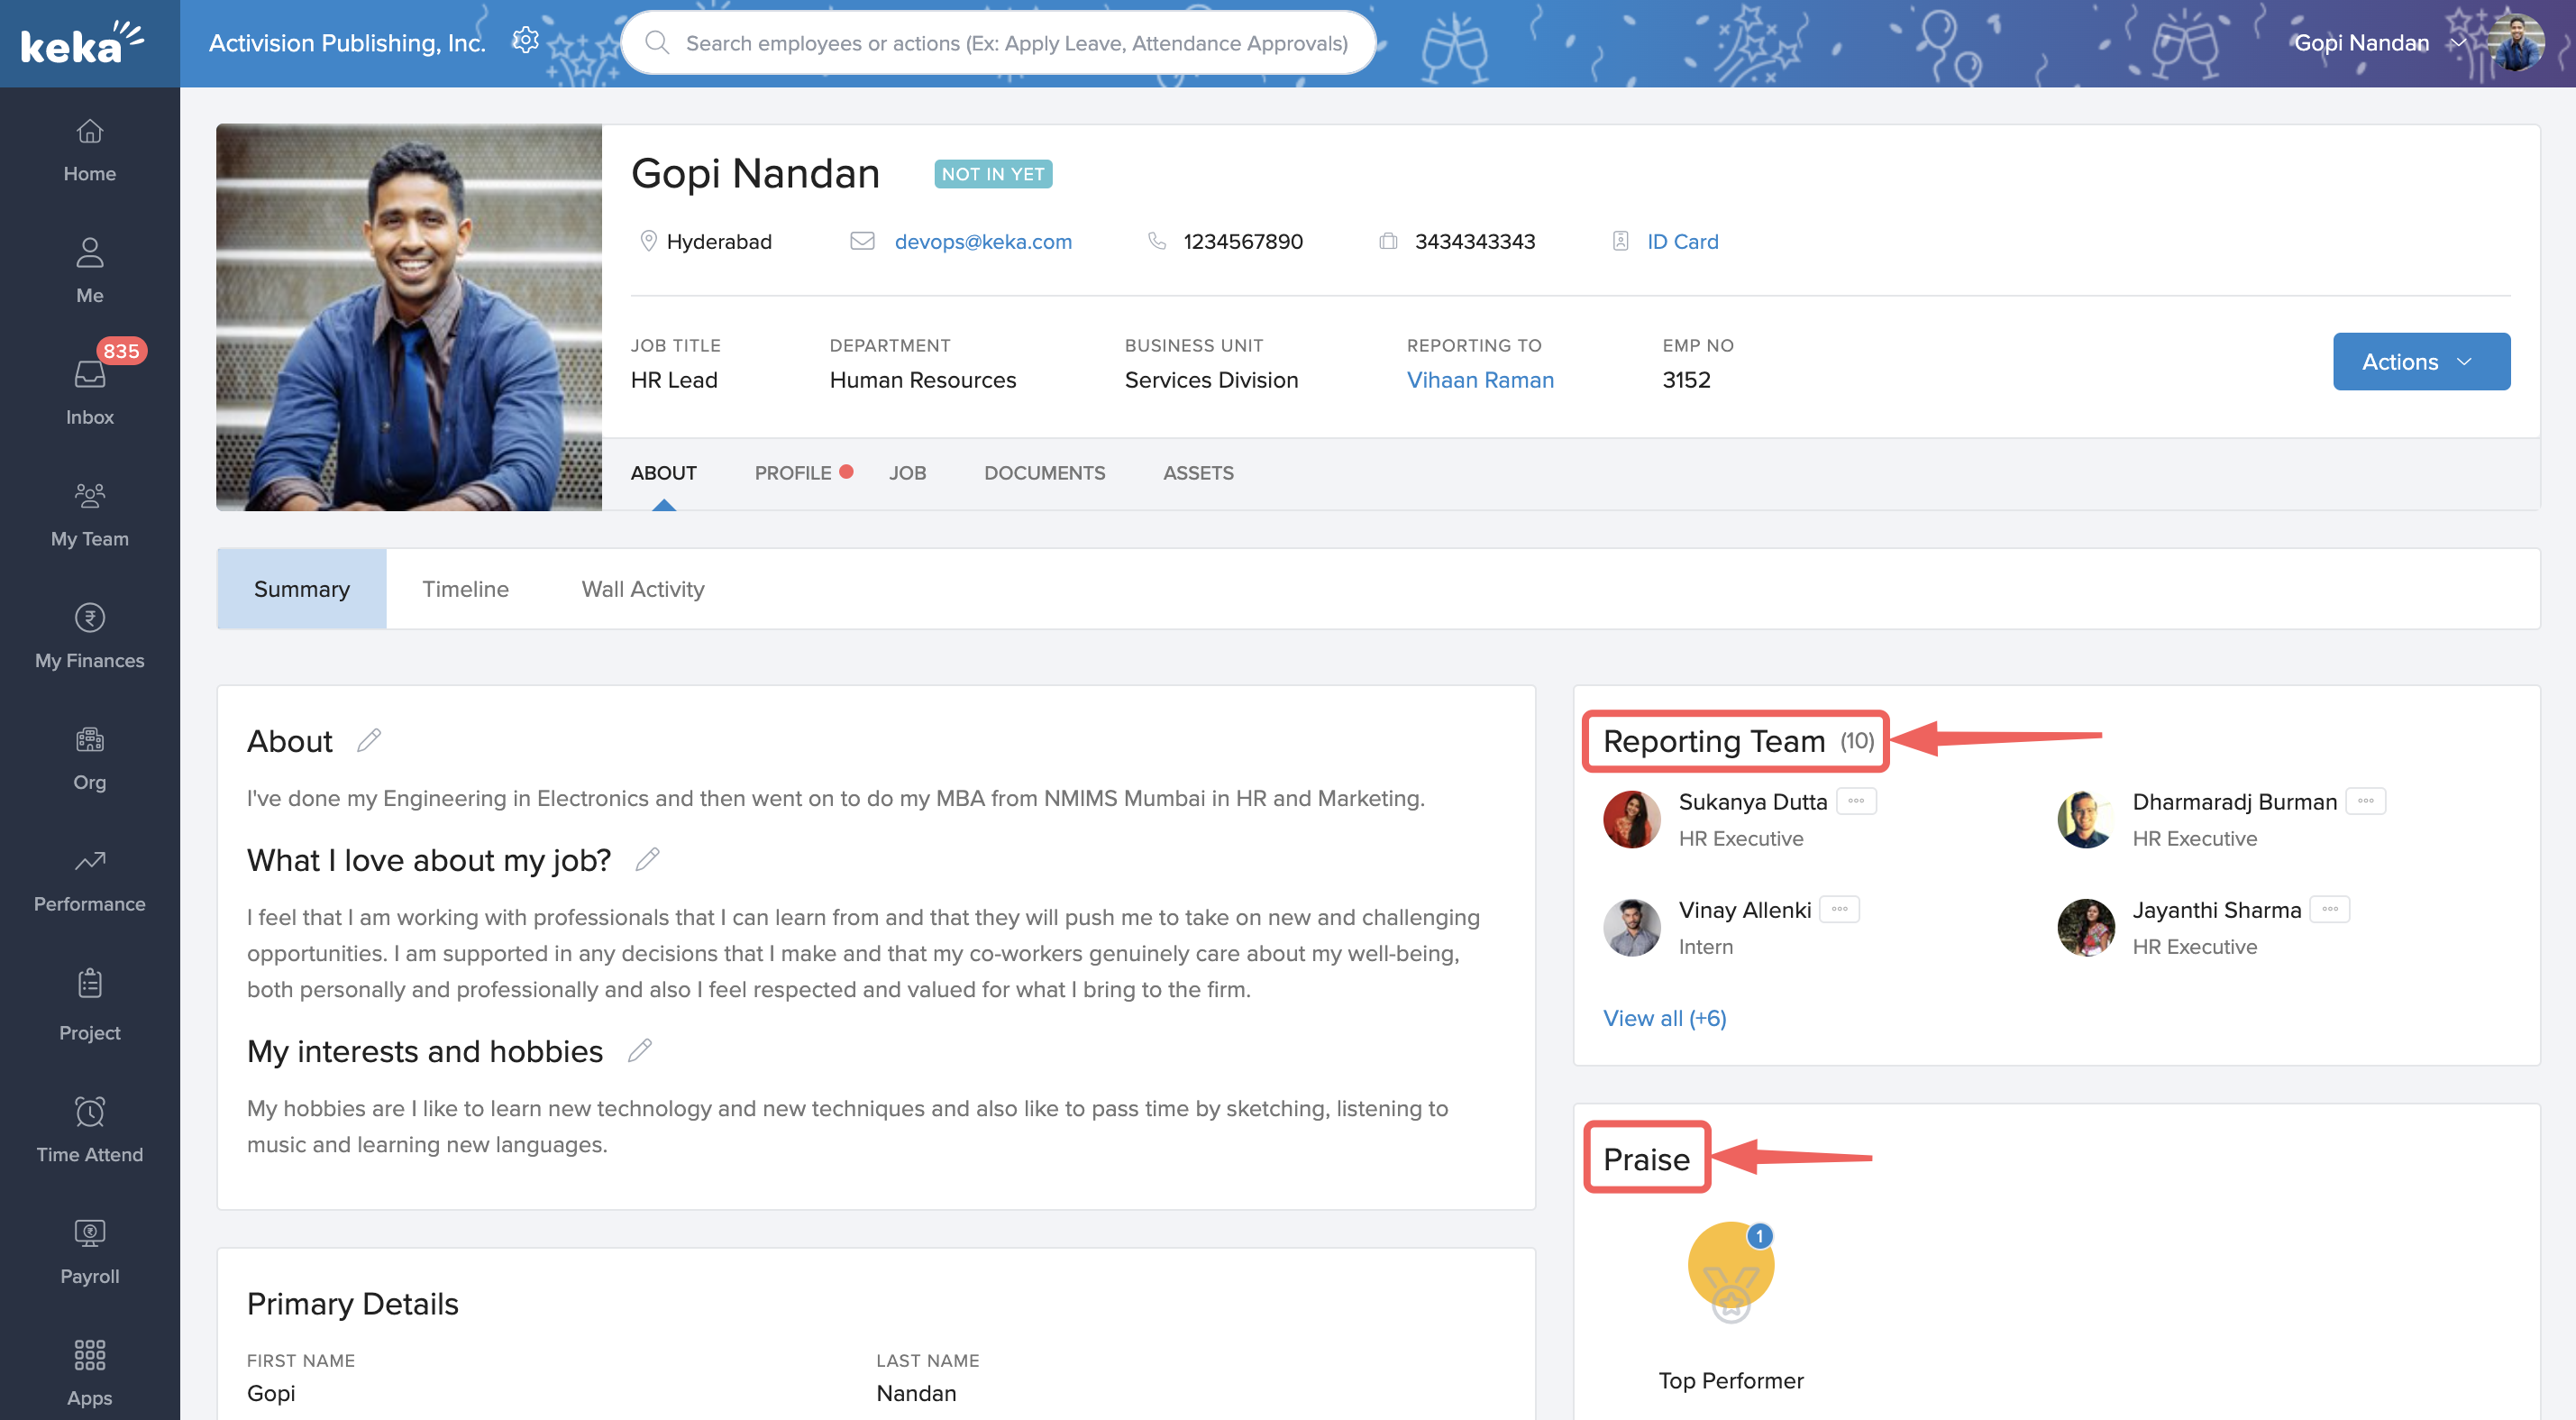
The section Reporting Team lists employees who report to you. You can click on the three dots against their names to learn more about them.
Praise is a feature to recognize and give a shout-out to the top performers. You can see the various praises you've received in this section here.
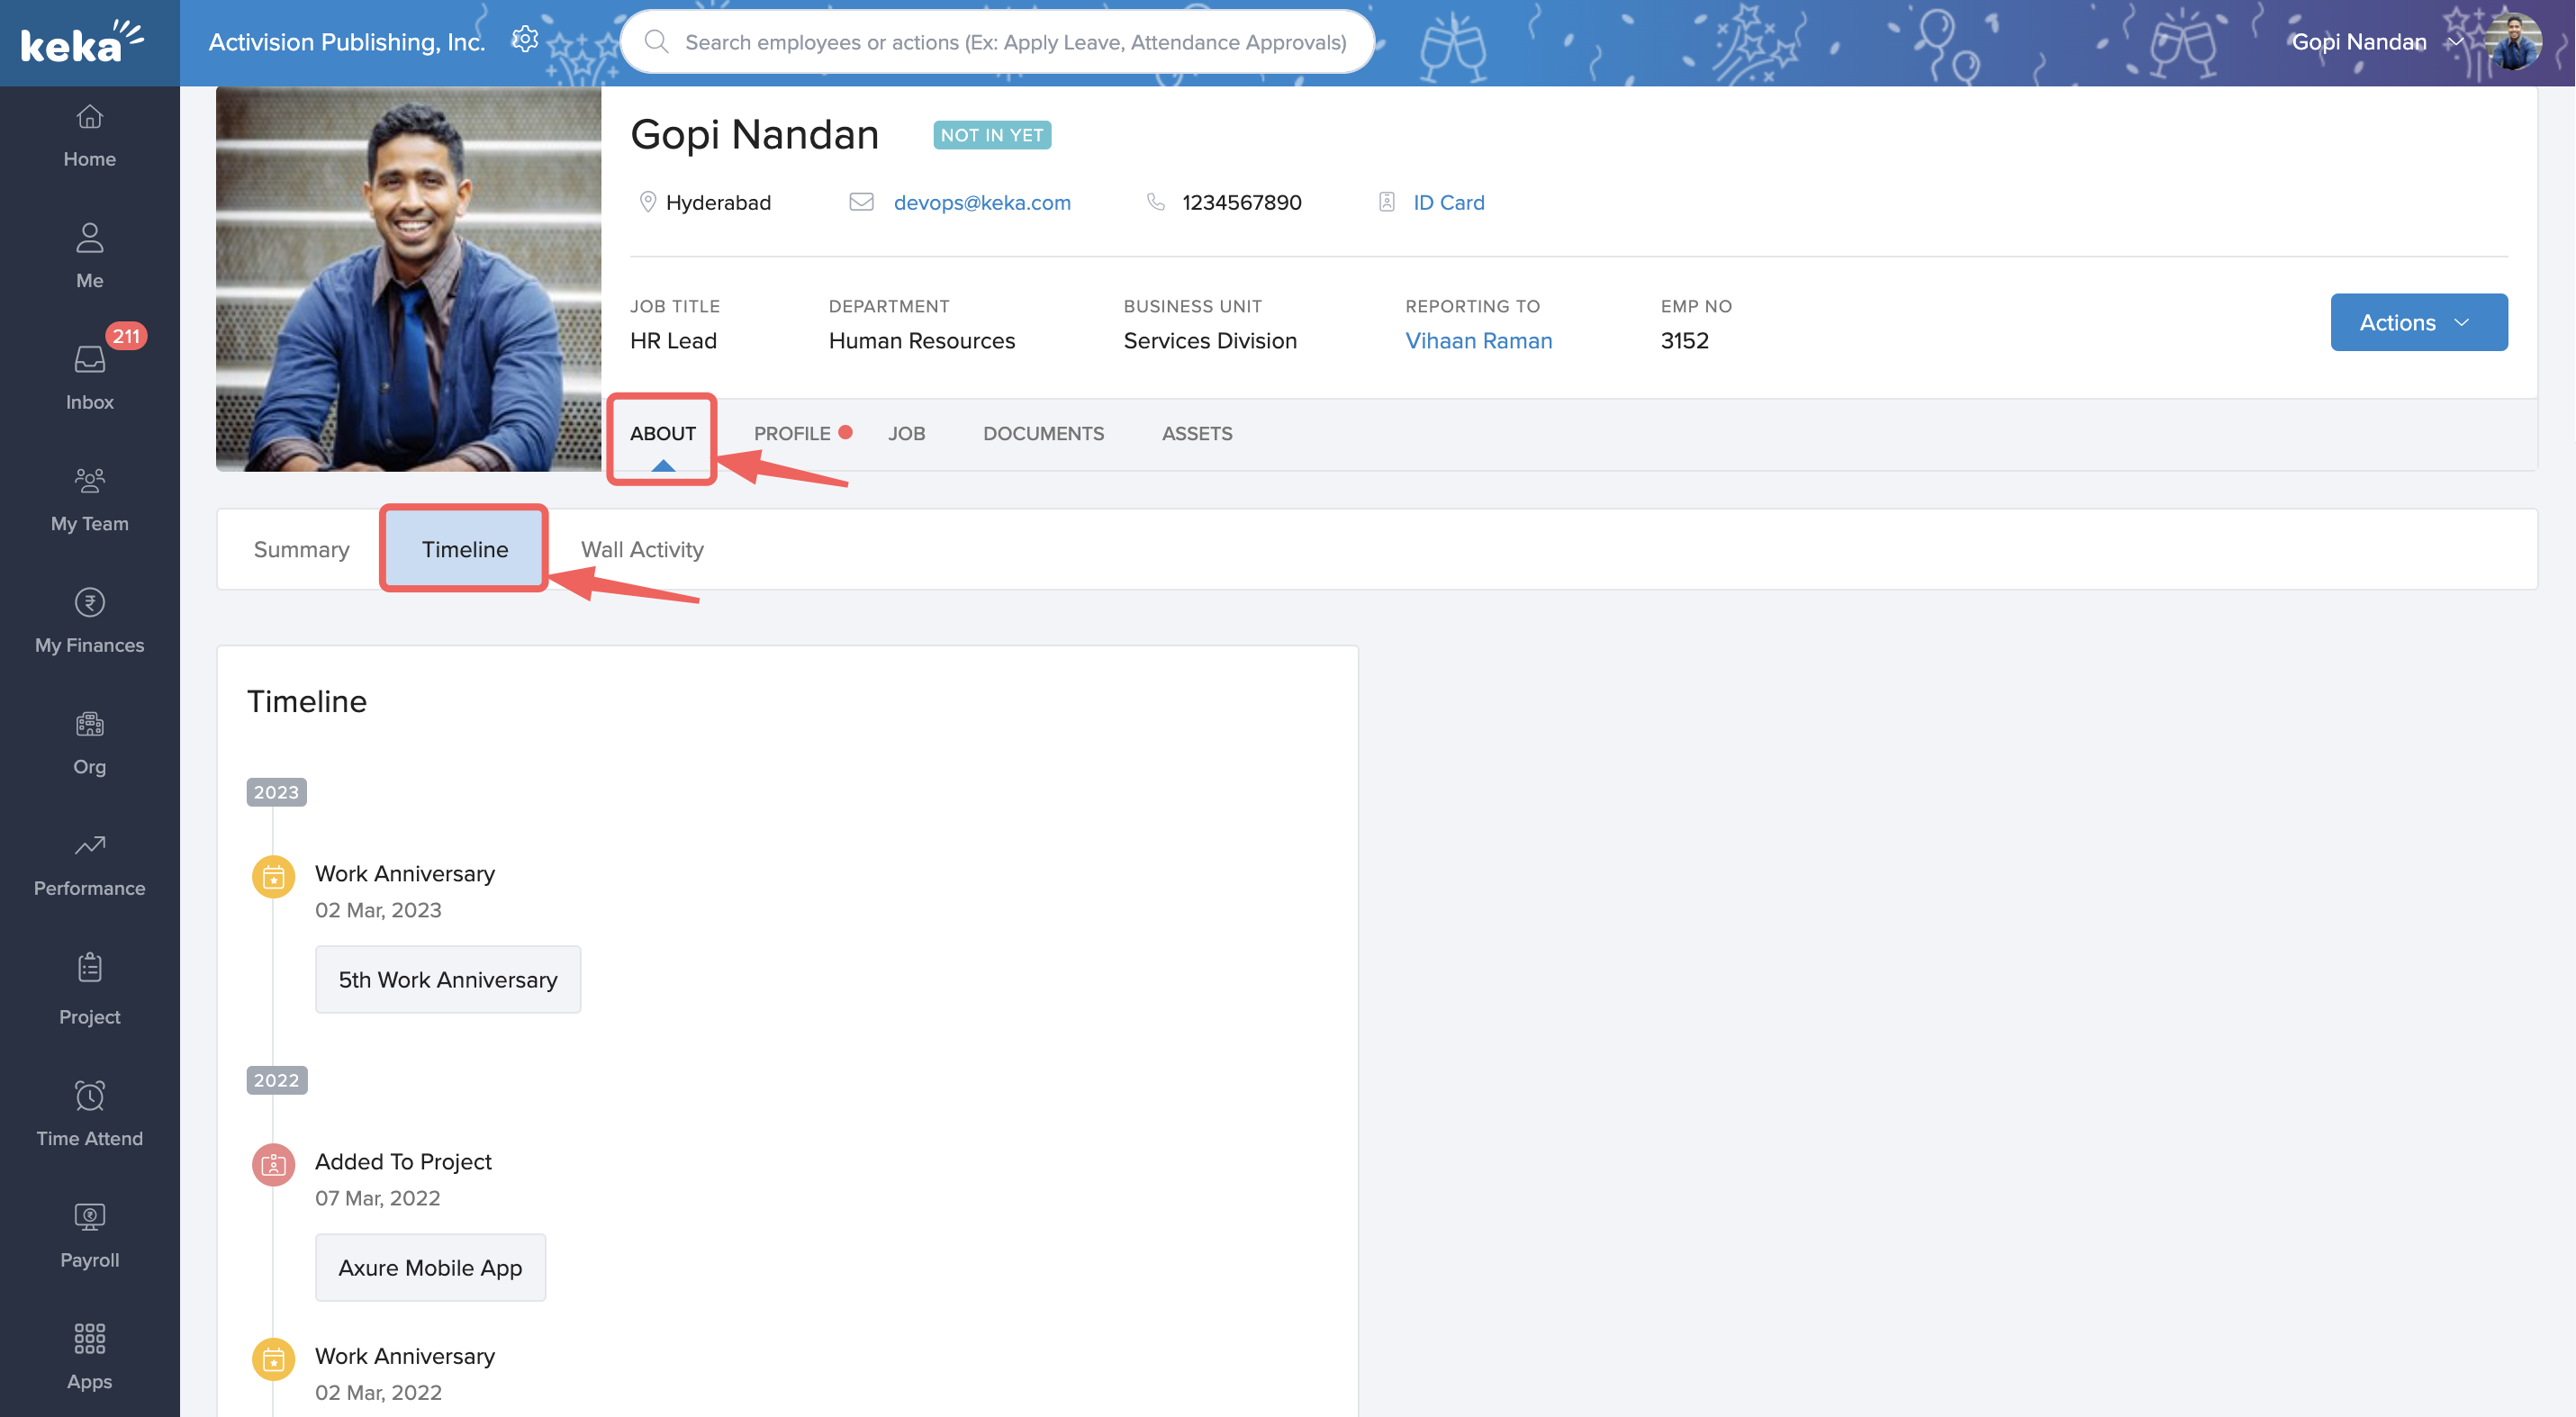
If you want to trace back your journey in the organization, click on About and then on Timeline. This section shows every milestone you have achieved since you joined the organization.
Wall activity under About shows details about your past activities on the Wall. This will include the posts, polls, and announcements you've made on the organization or the department wall.
Profile
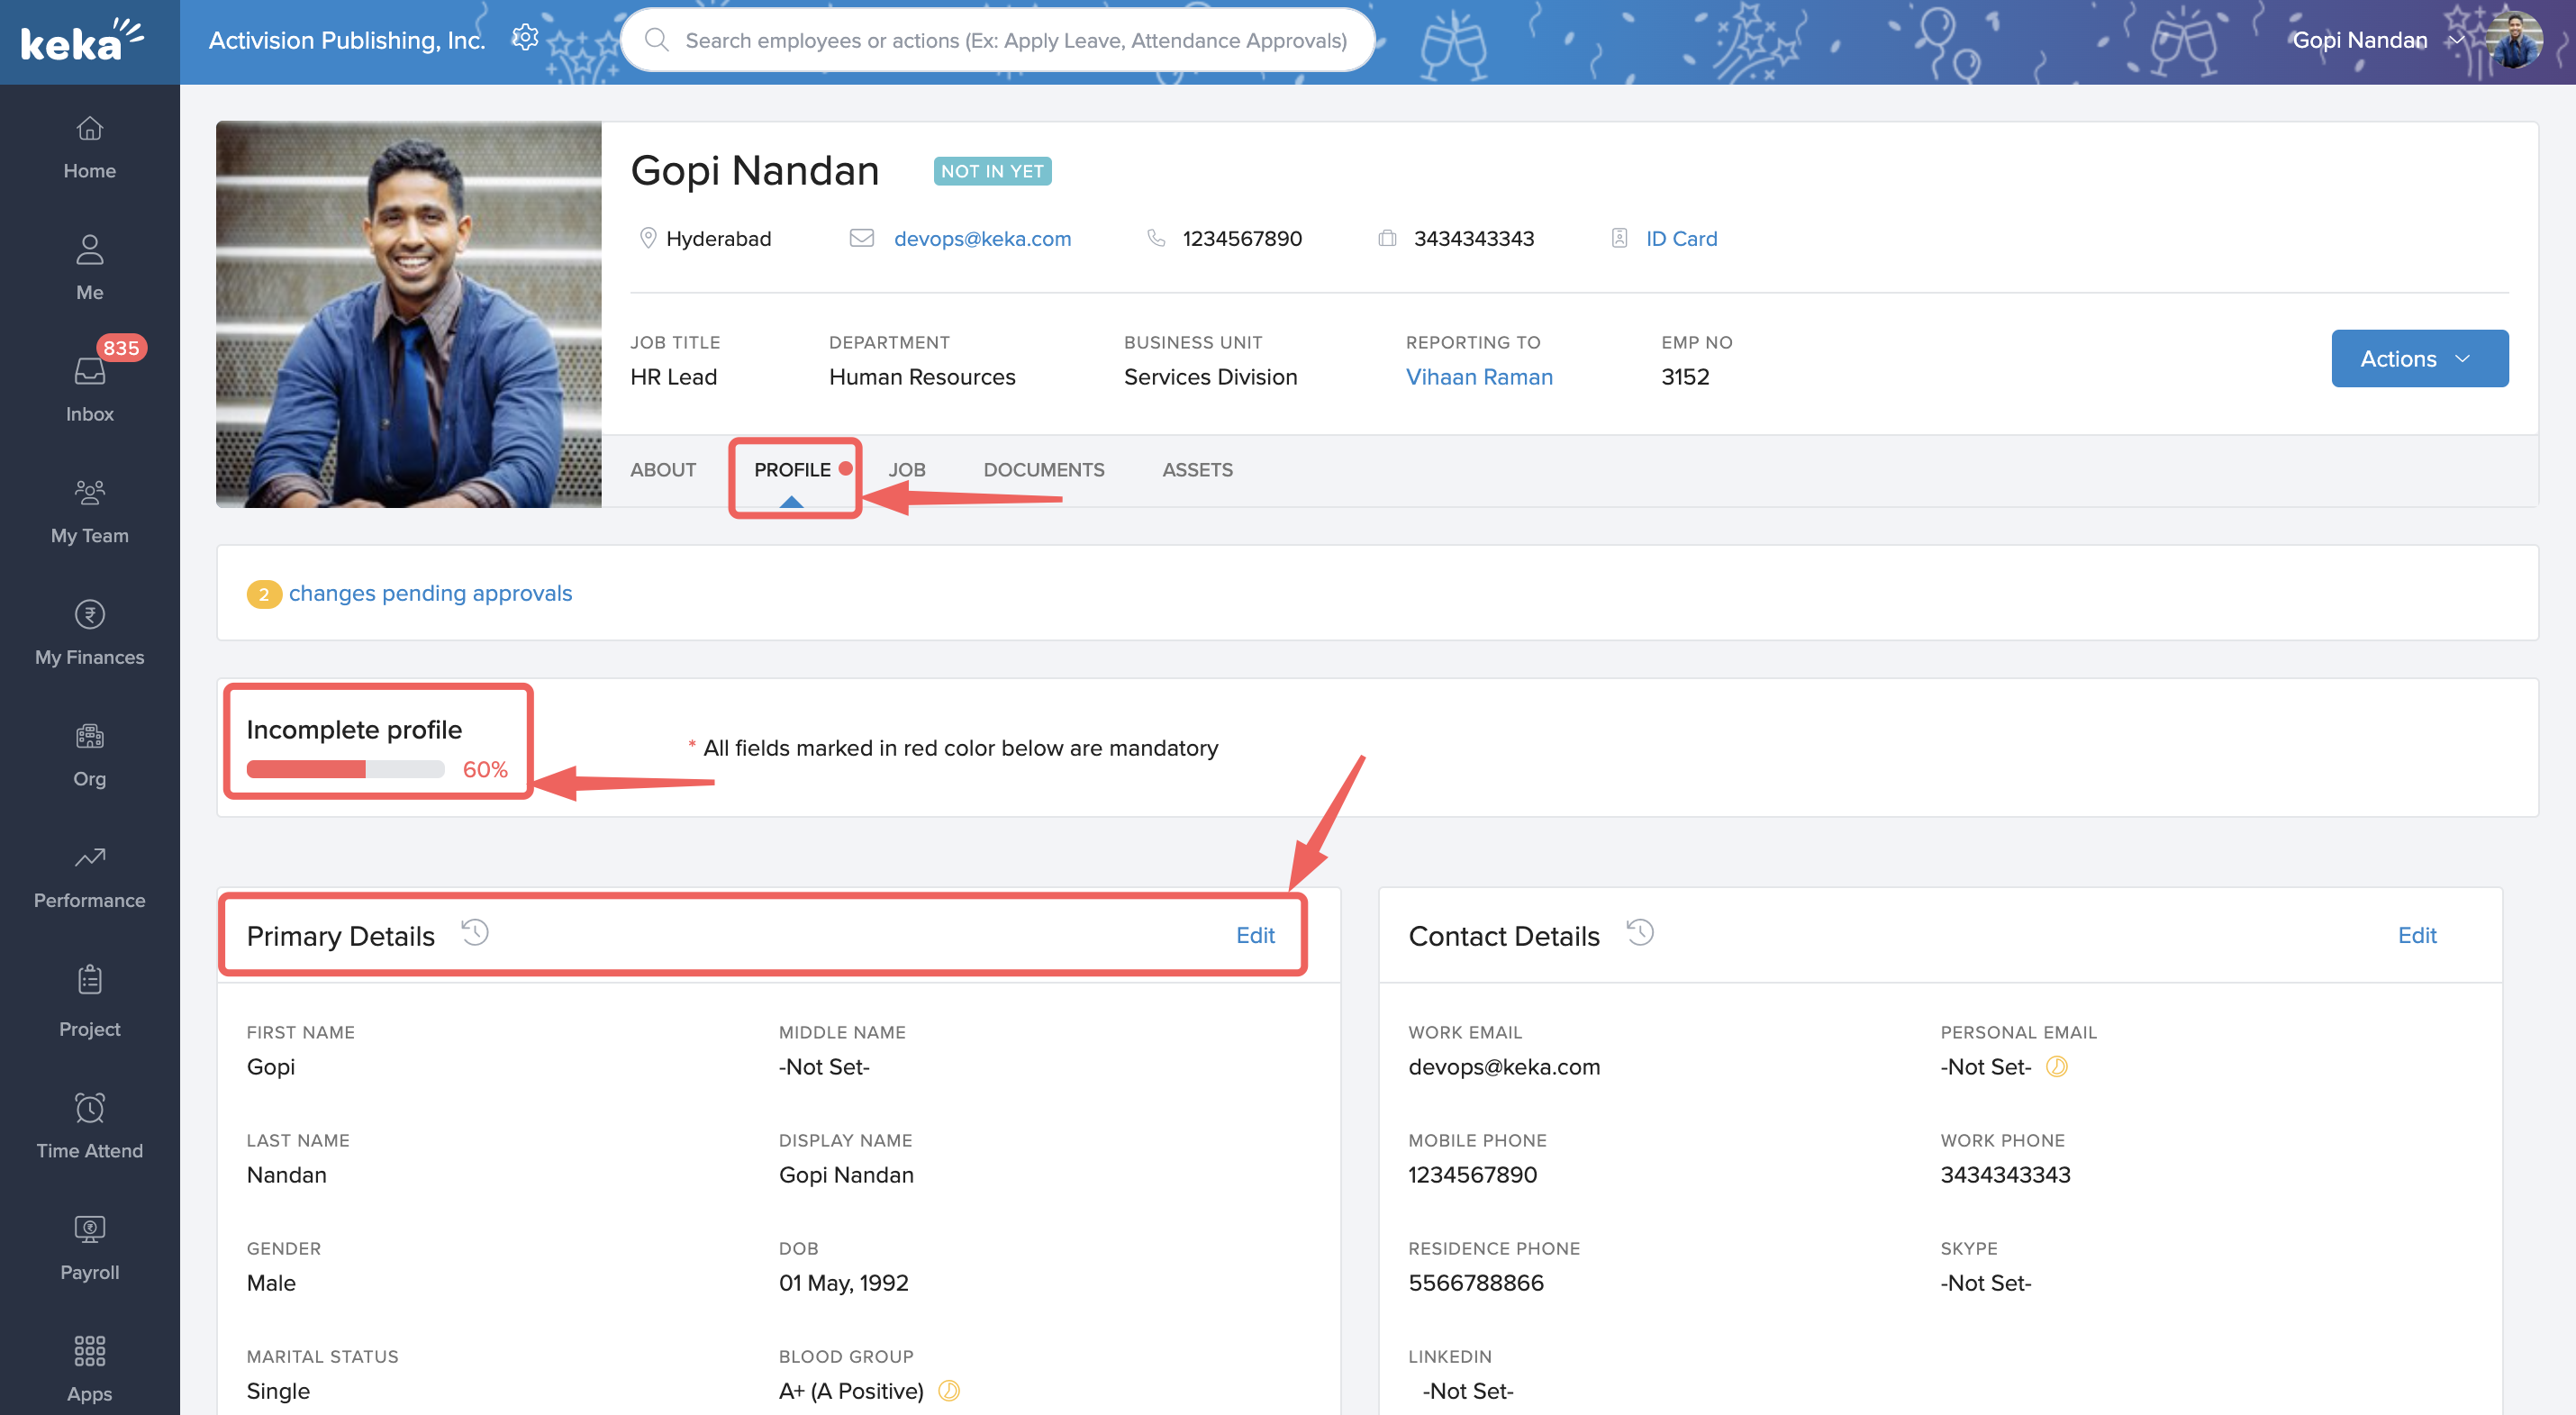
The Profile is the most significant section here. A red dot on the profile tab highlights an incomplete profile and urges you to fix it. You can also find the status of profile completeness here.
Under Profile, there are several titles like Primary Details, Contact details, Addresses, Relations, Experience, Education, etc. While it is desirable that you fill in every field under every title, only the fields marked in red are mandatory. You can edit the details on your profile at any time. However, depending on the settings for the portal in your organization, any profile change that you make may need approval from your reporting manager or the admin.
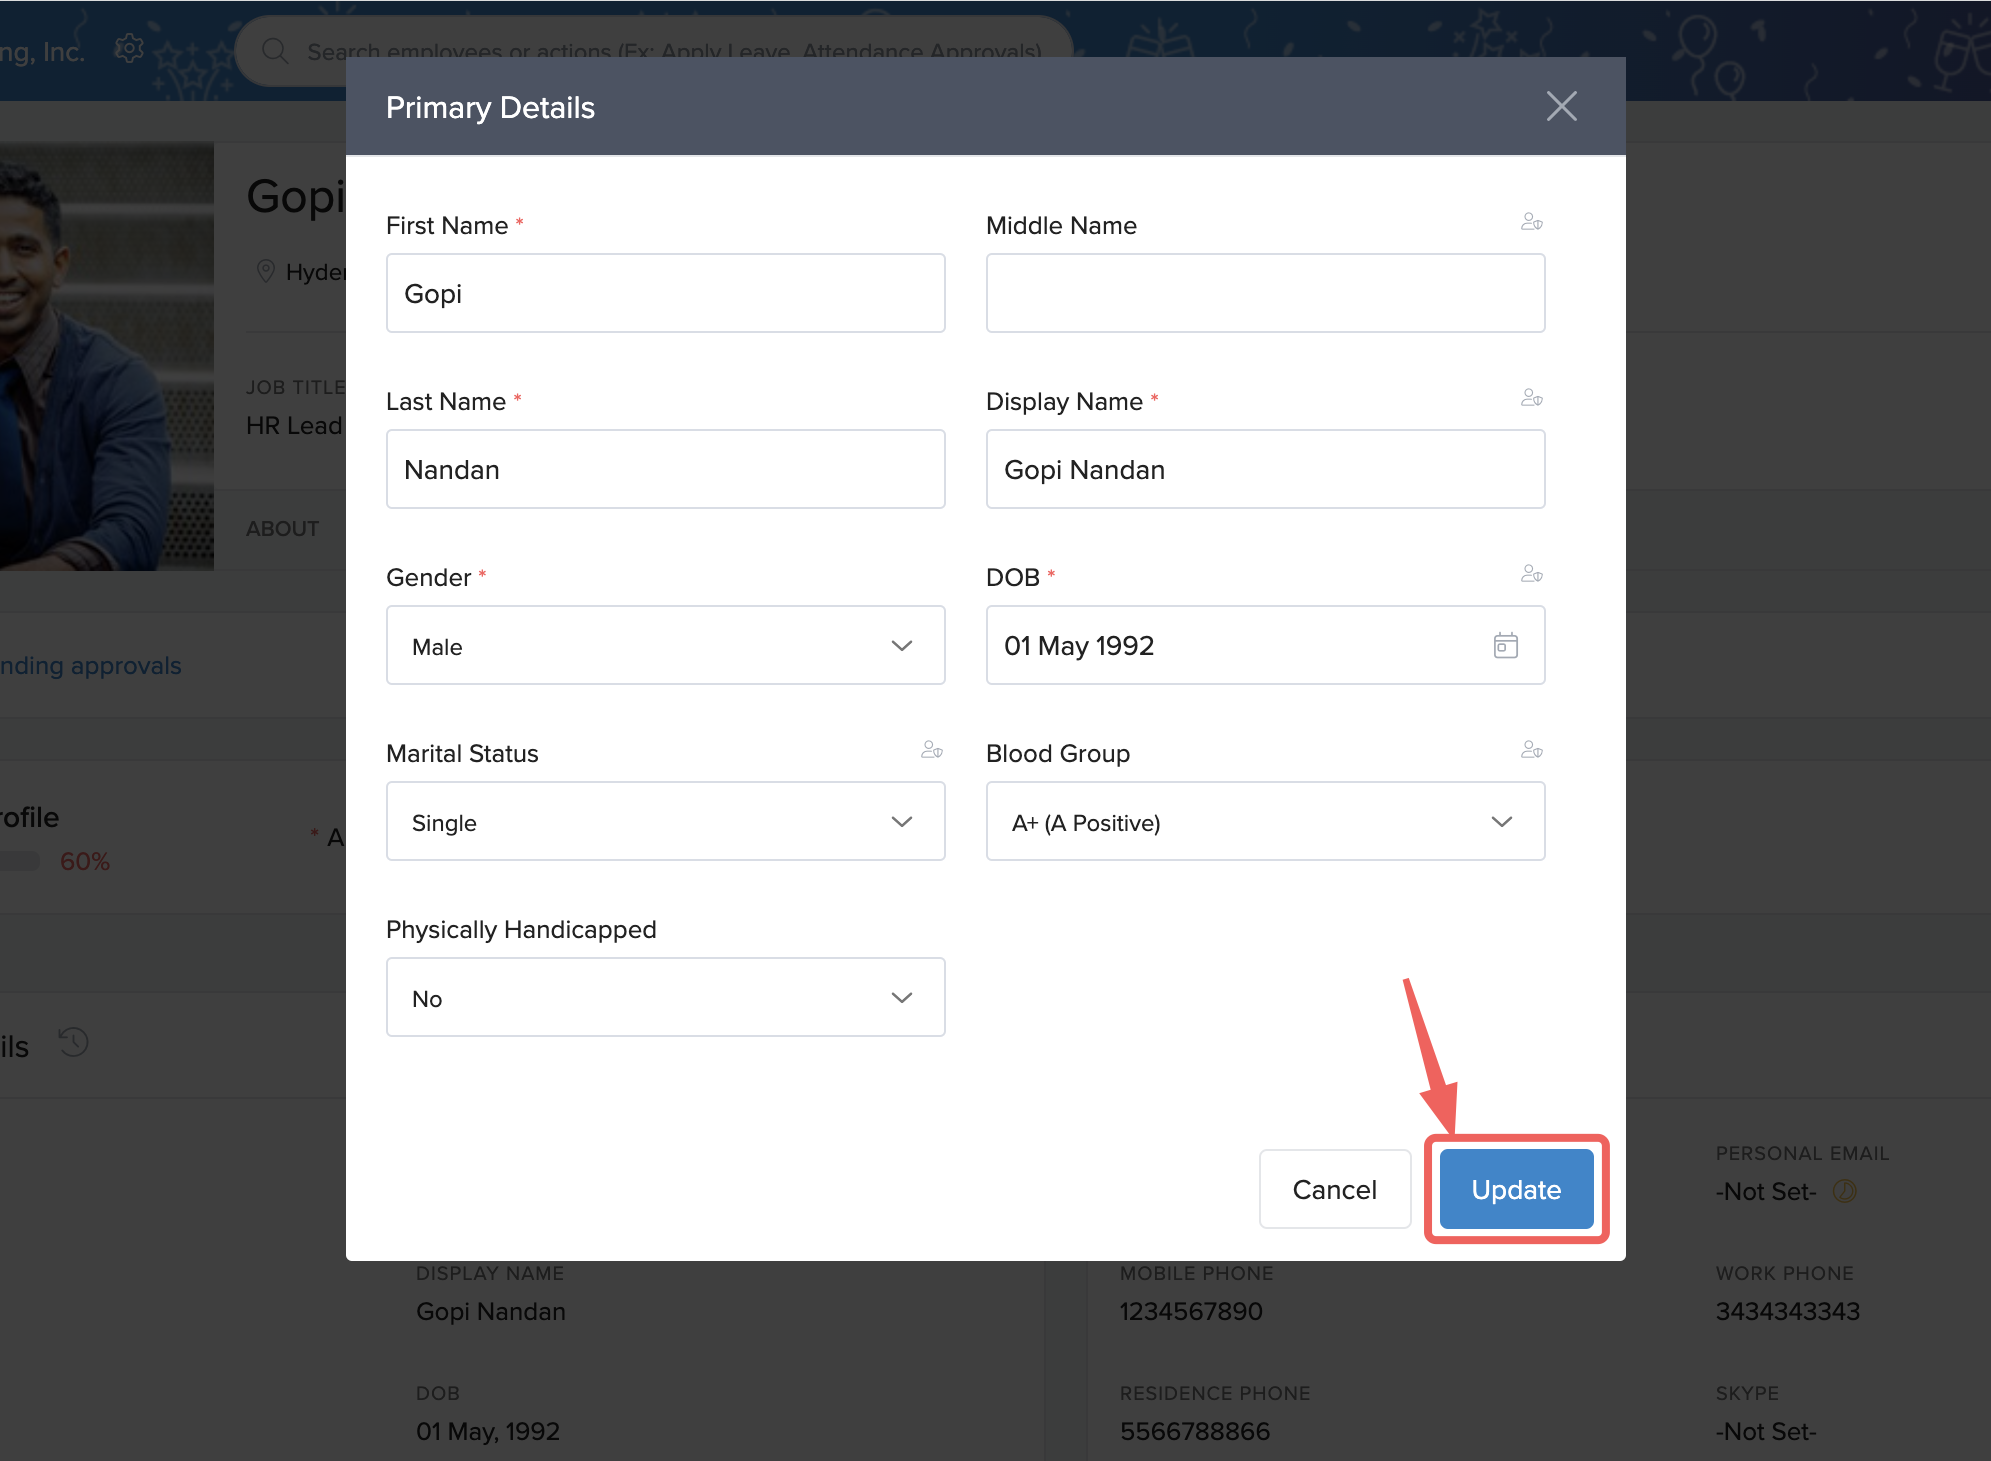
There is an Edit button against every title under Profile. To enter details in the fields, click on the Edit button against any title.
Remember to click Update after your edits.
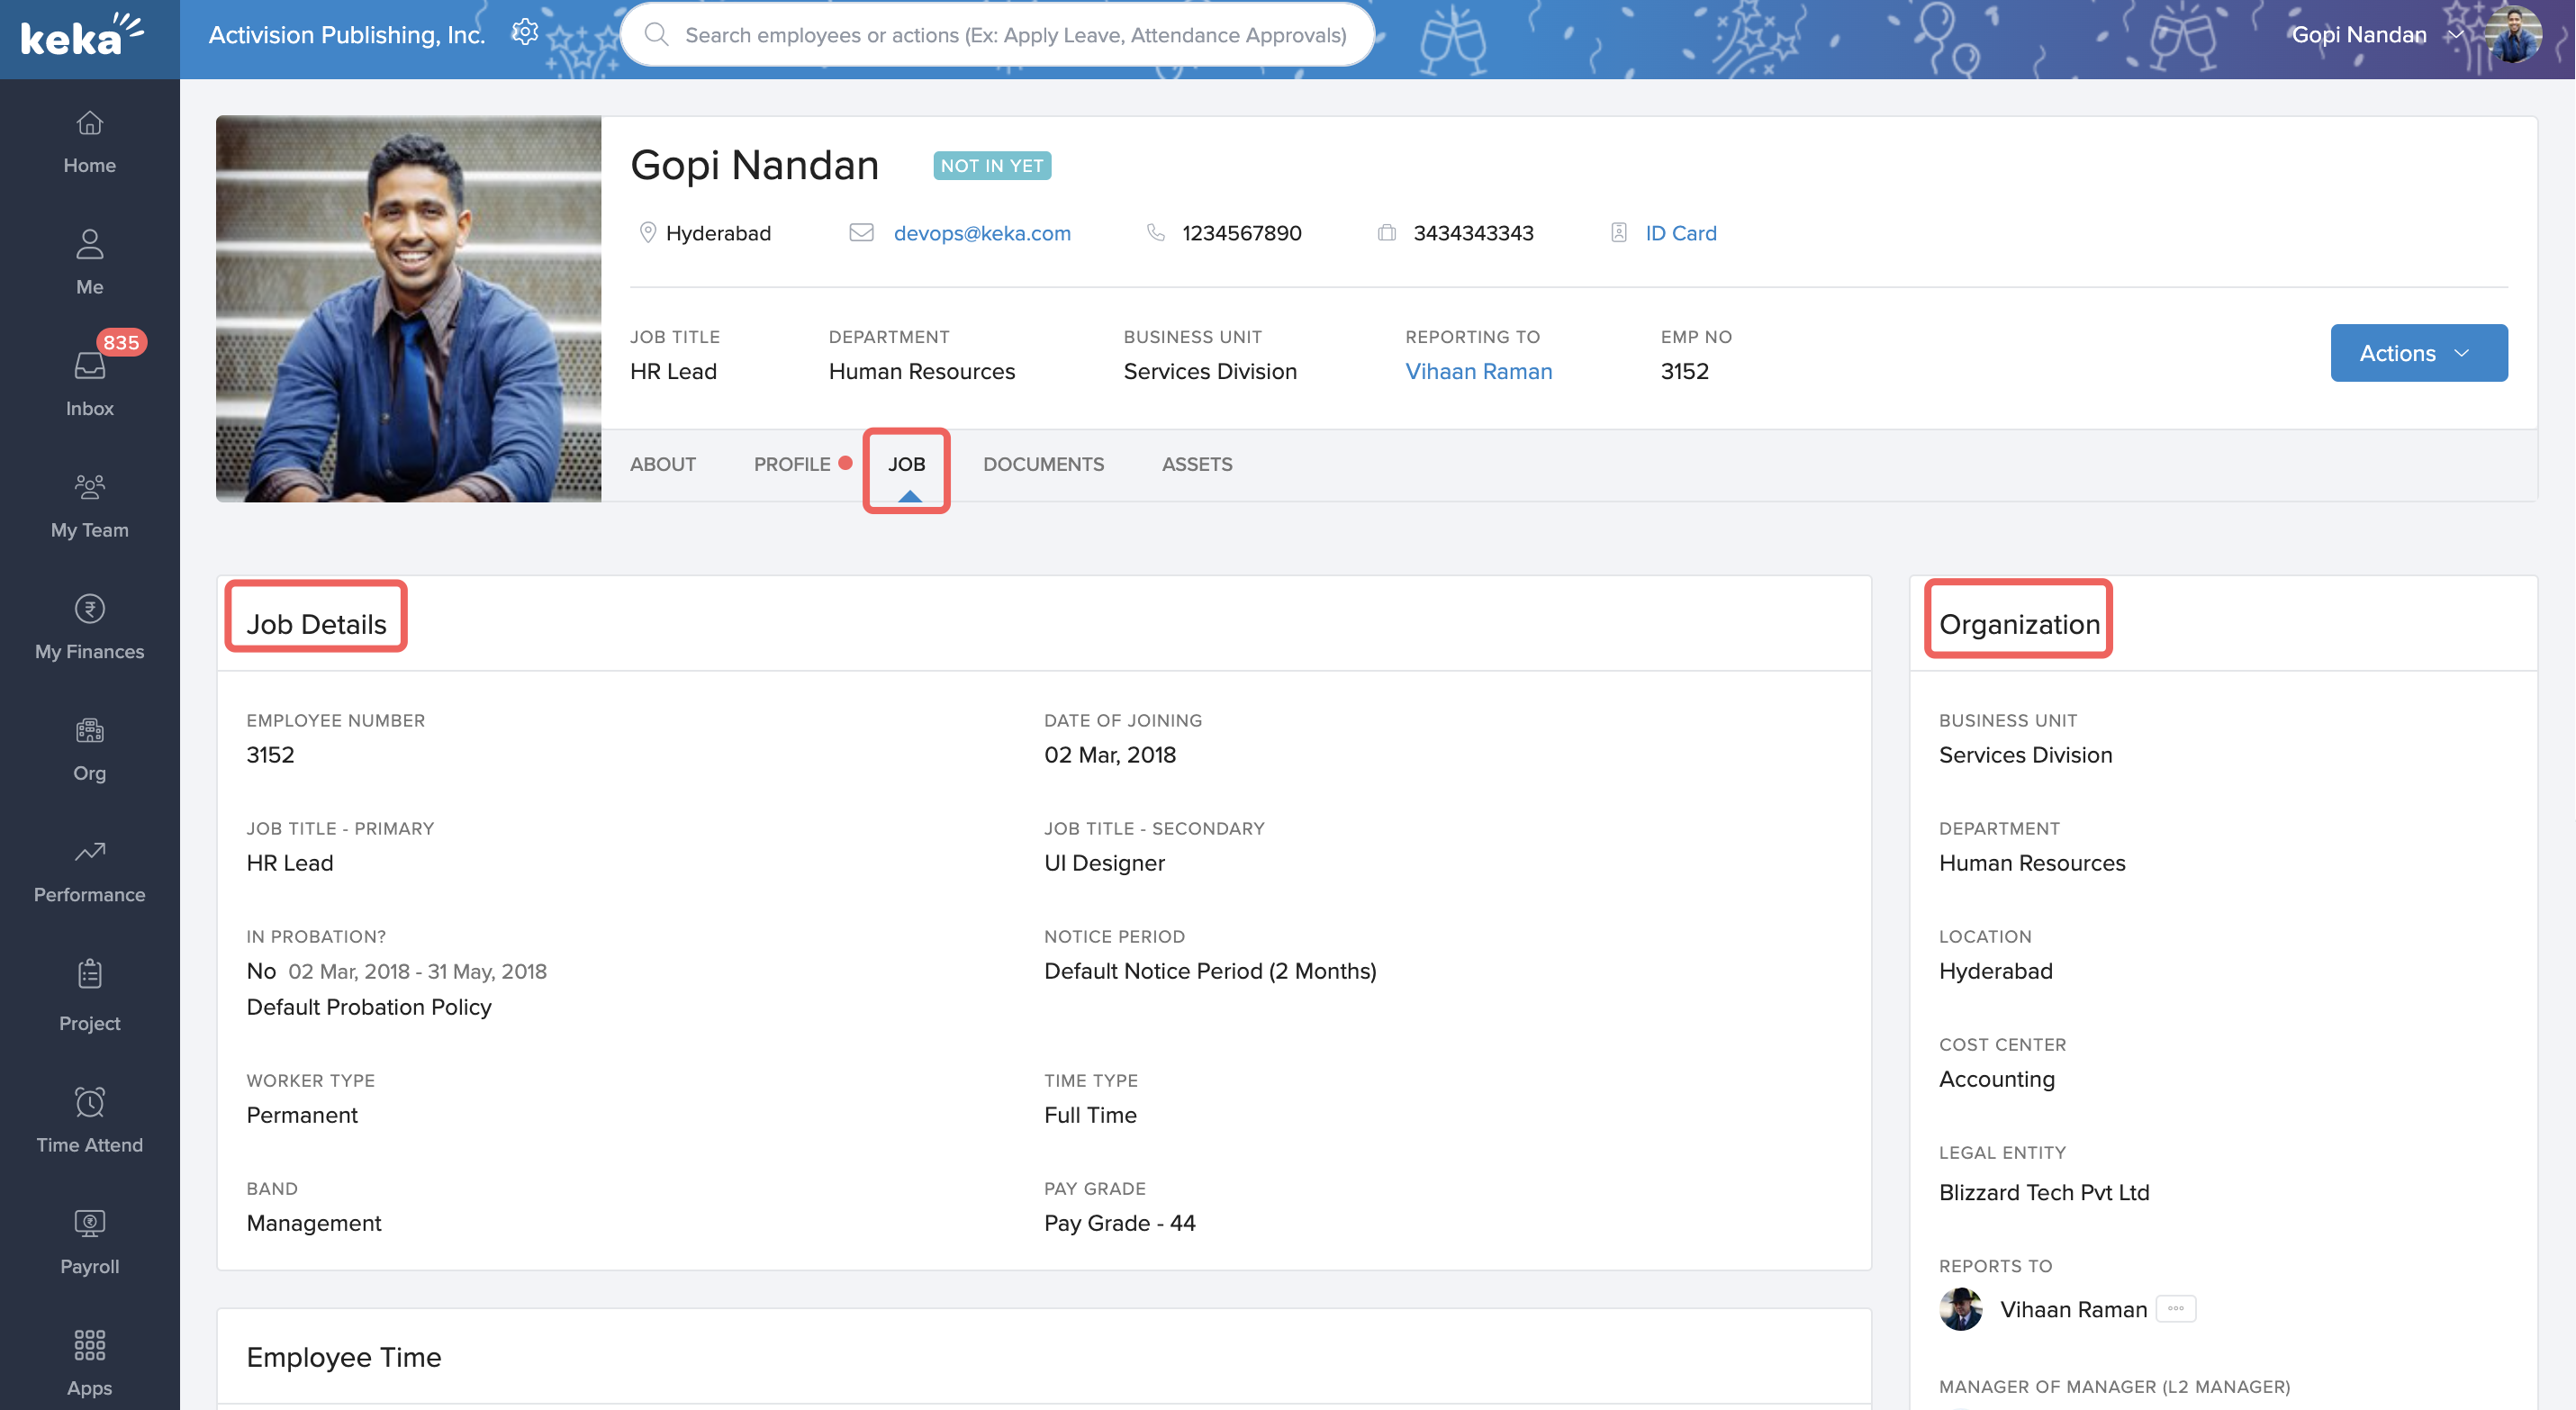
Job
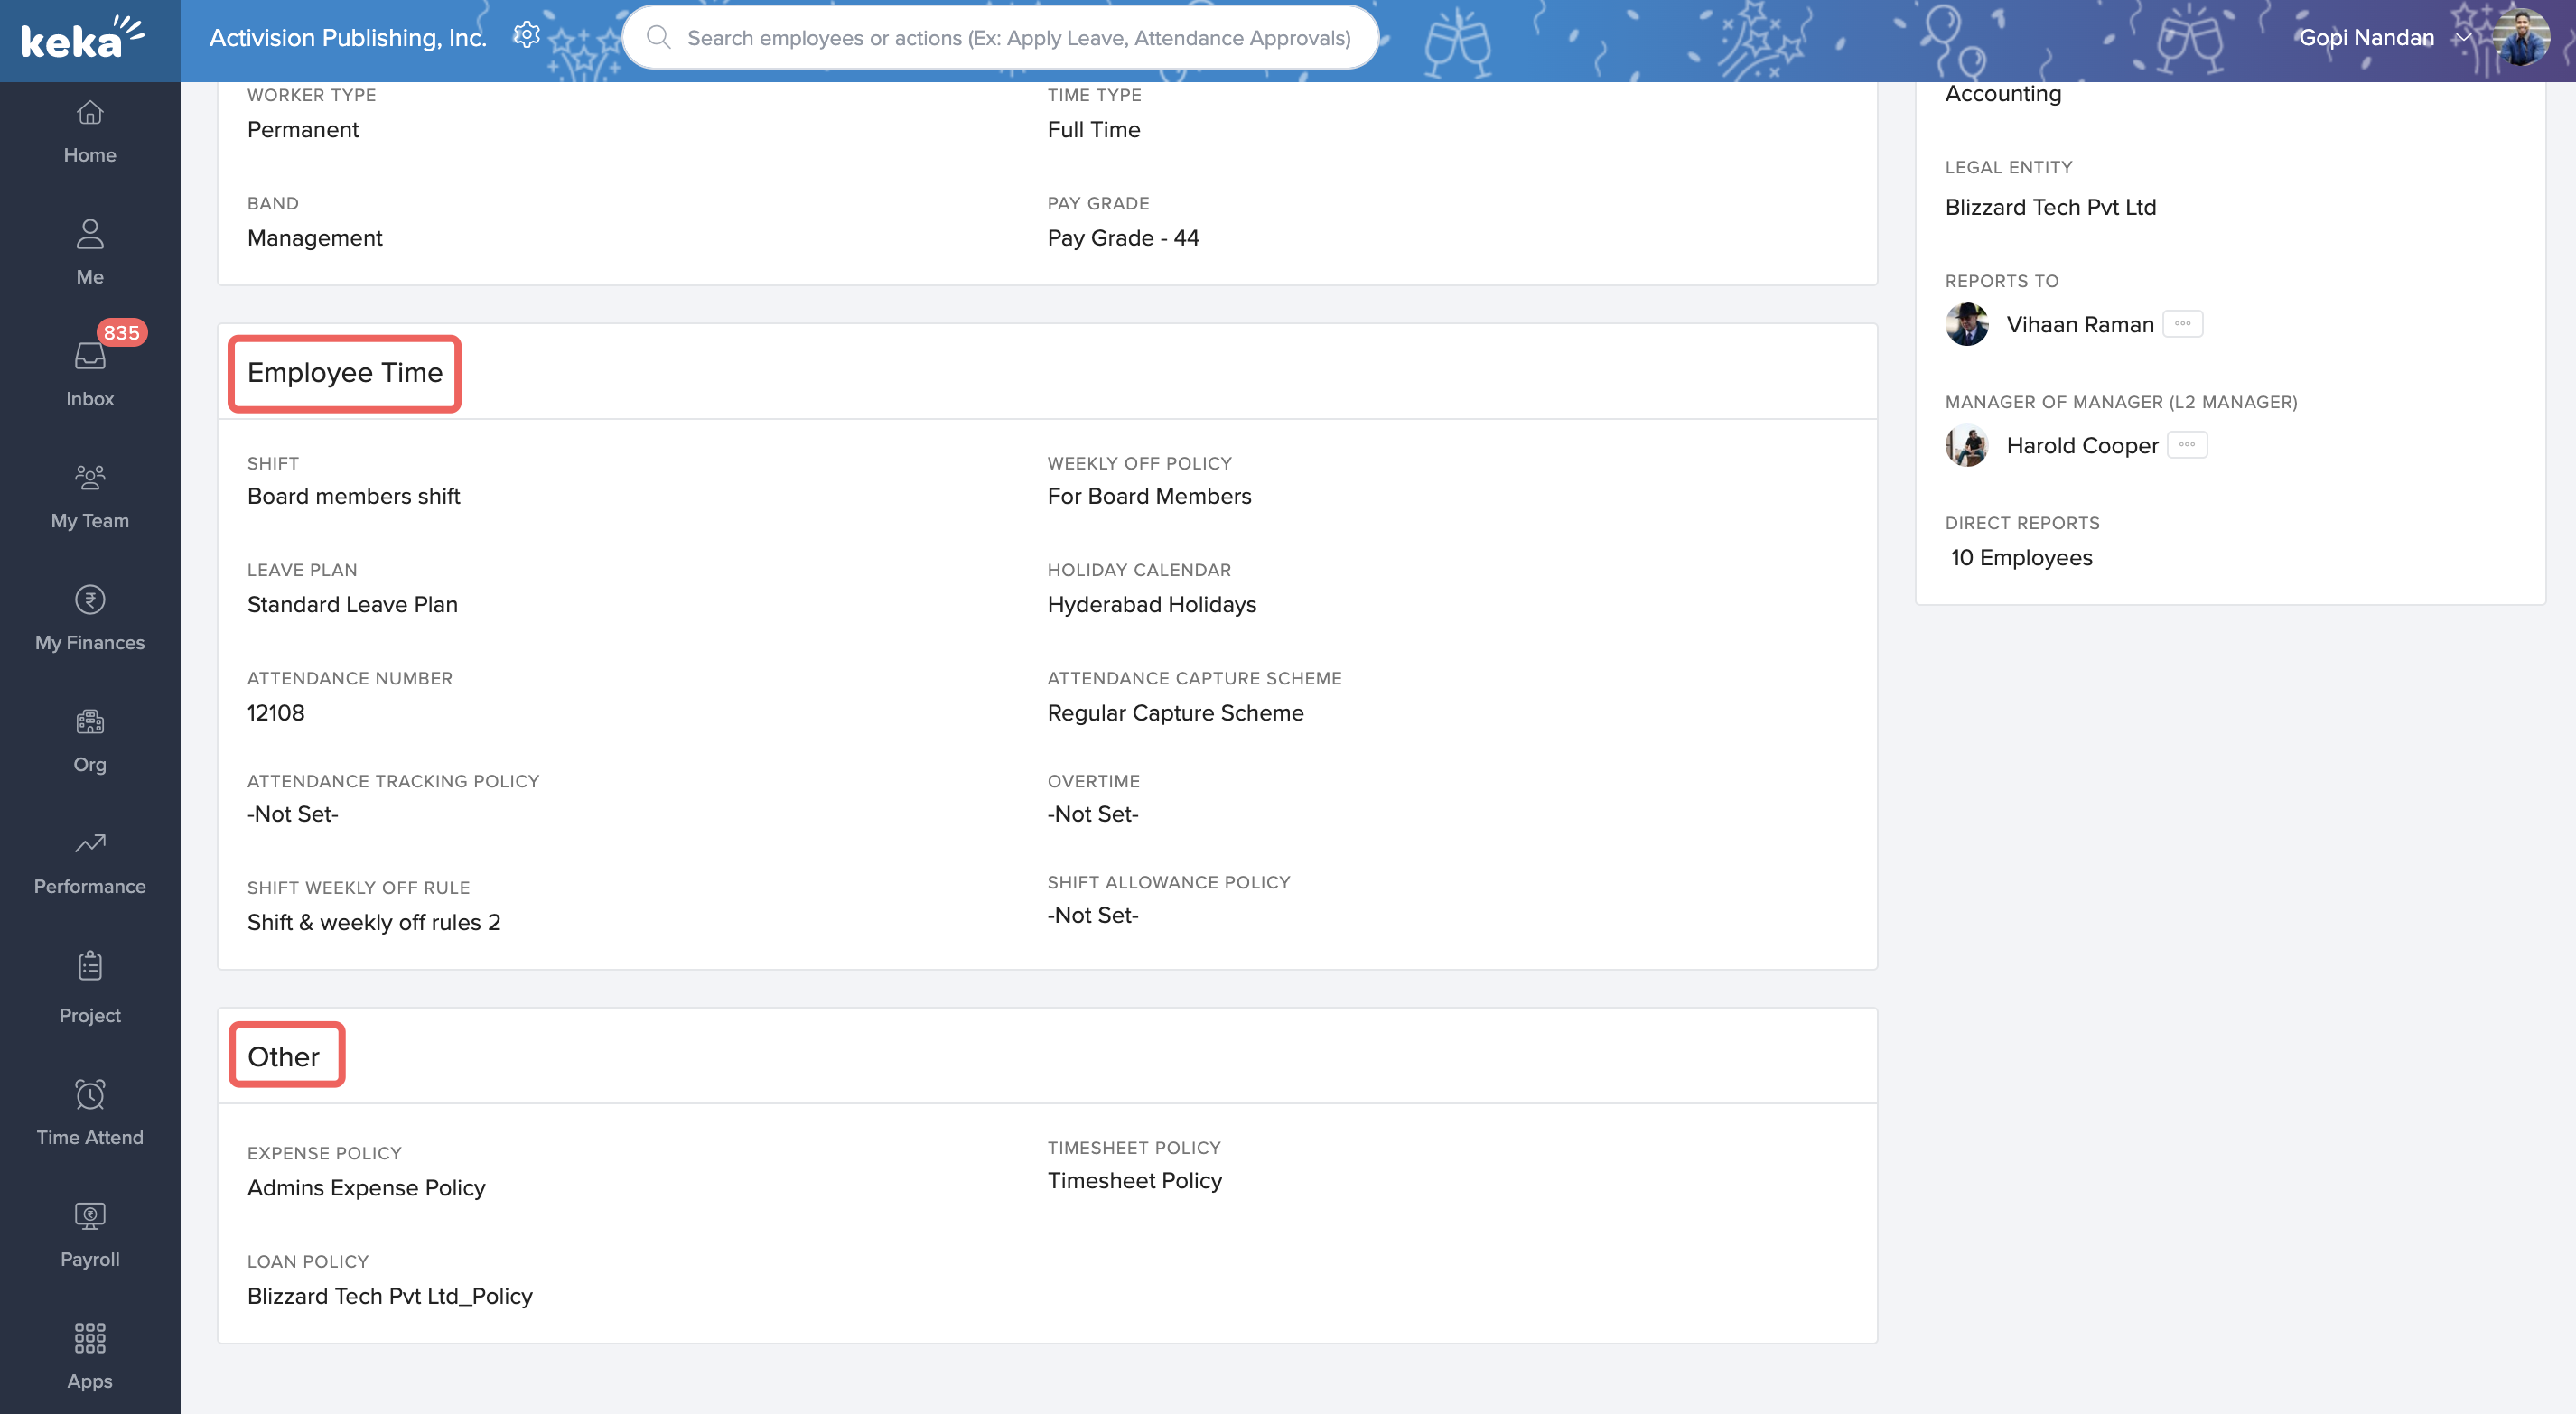
Clicking on Job gives you all the details pertaining to your job in the organization. Under Job details, you can find the employee number, primary/secondary job title, worker type, time type, notice period, pay grade, etc. Under Organization, you can find your business unit, department, work location, who you report to, etc.
Employee time gives you an overview of your work shift, weekly off policy, leave plan, attendance number, holiday calendar, etc. Other contains expense policy, timesheet policy, loan policy and any other policy that may be assigned to the employee.
An expense policy determines how you can claim expenses that you have incurred while working for the organization. This can include aspects like travel, food, and fuel expenses. The timesheet policy is assigned to you if you are working on billable client projects to help track the billable hours you are spending on each project. The policy determines the various settings such as minumum and maximum hours, the timelines for submitting timesheets and more.
Documents
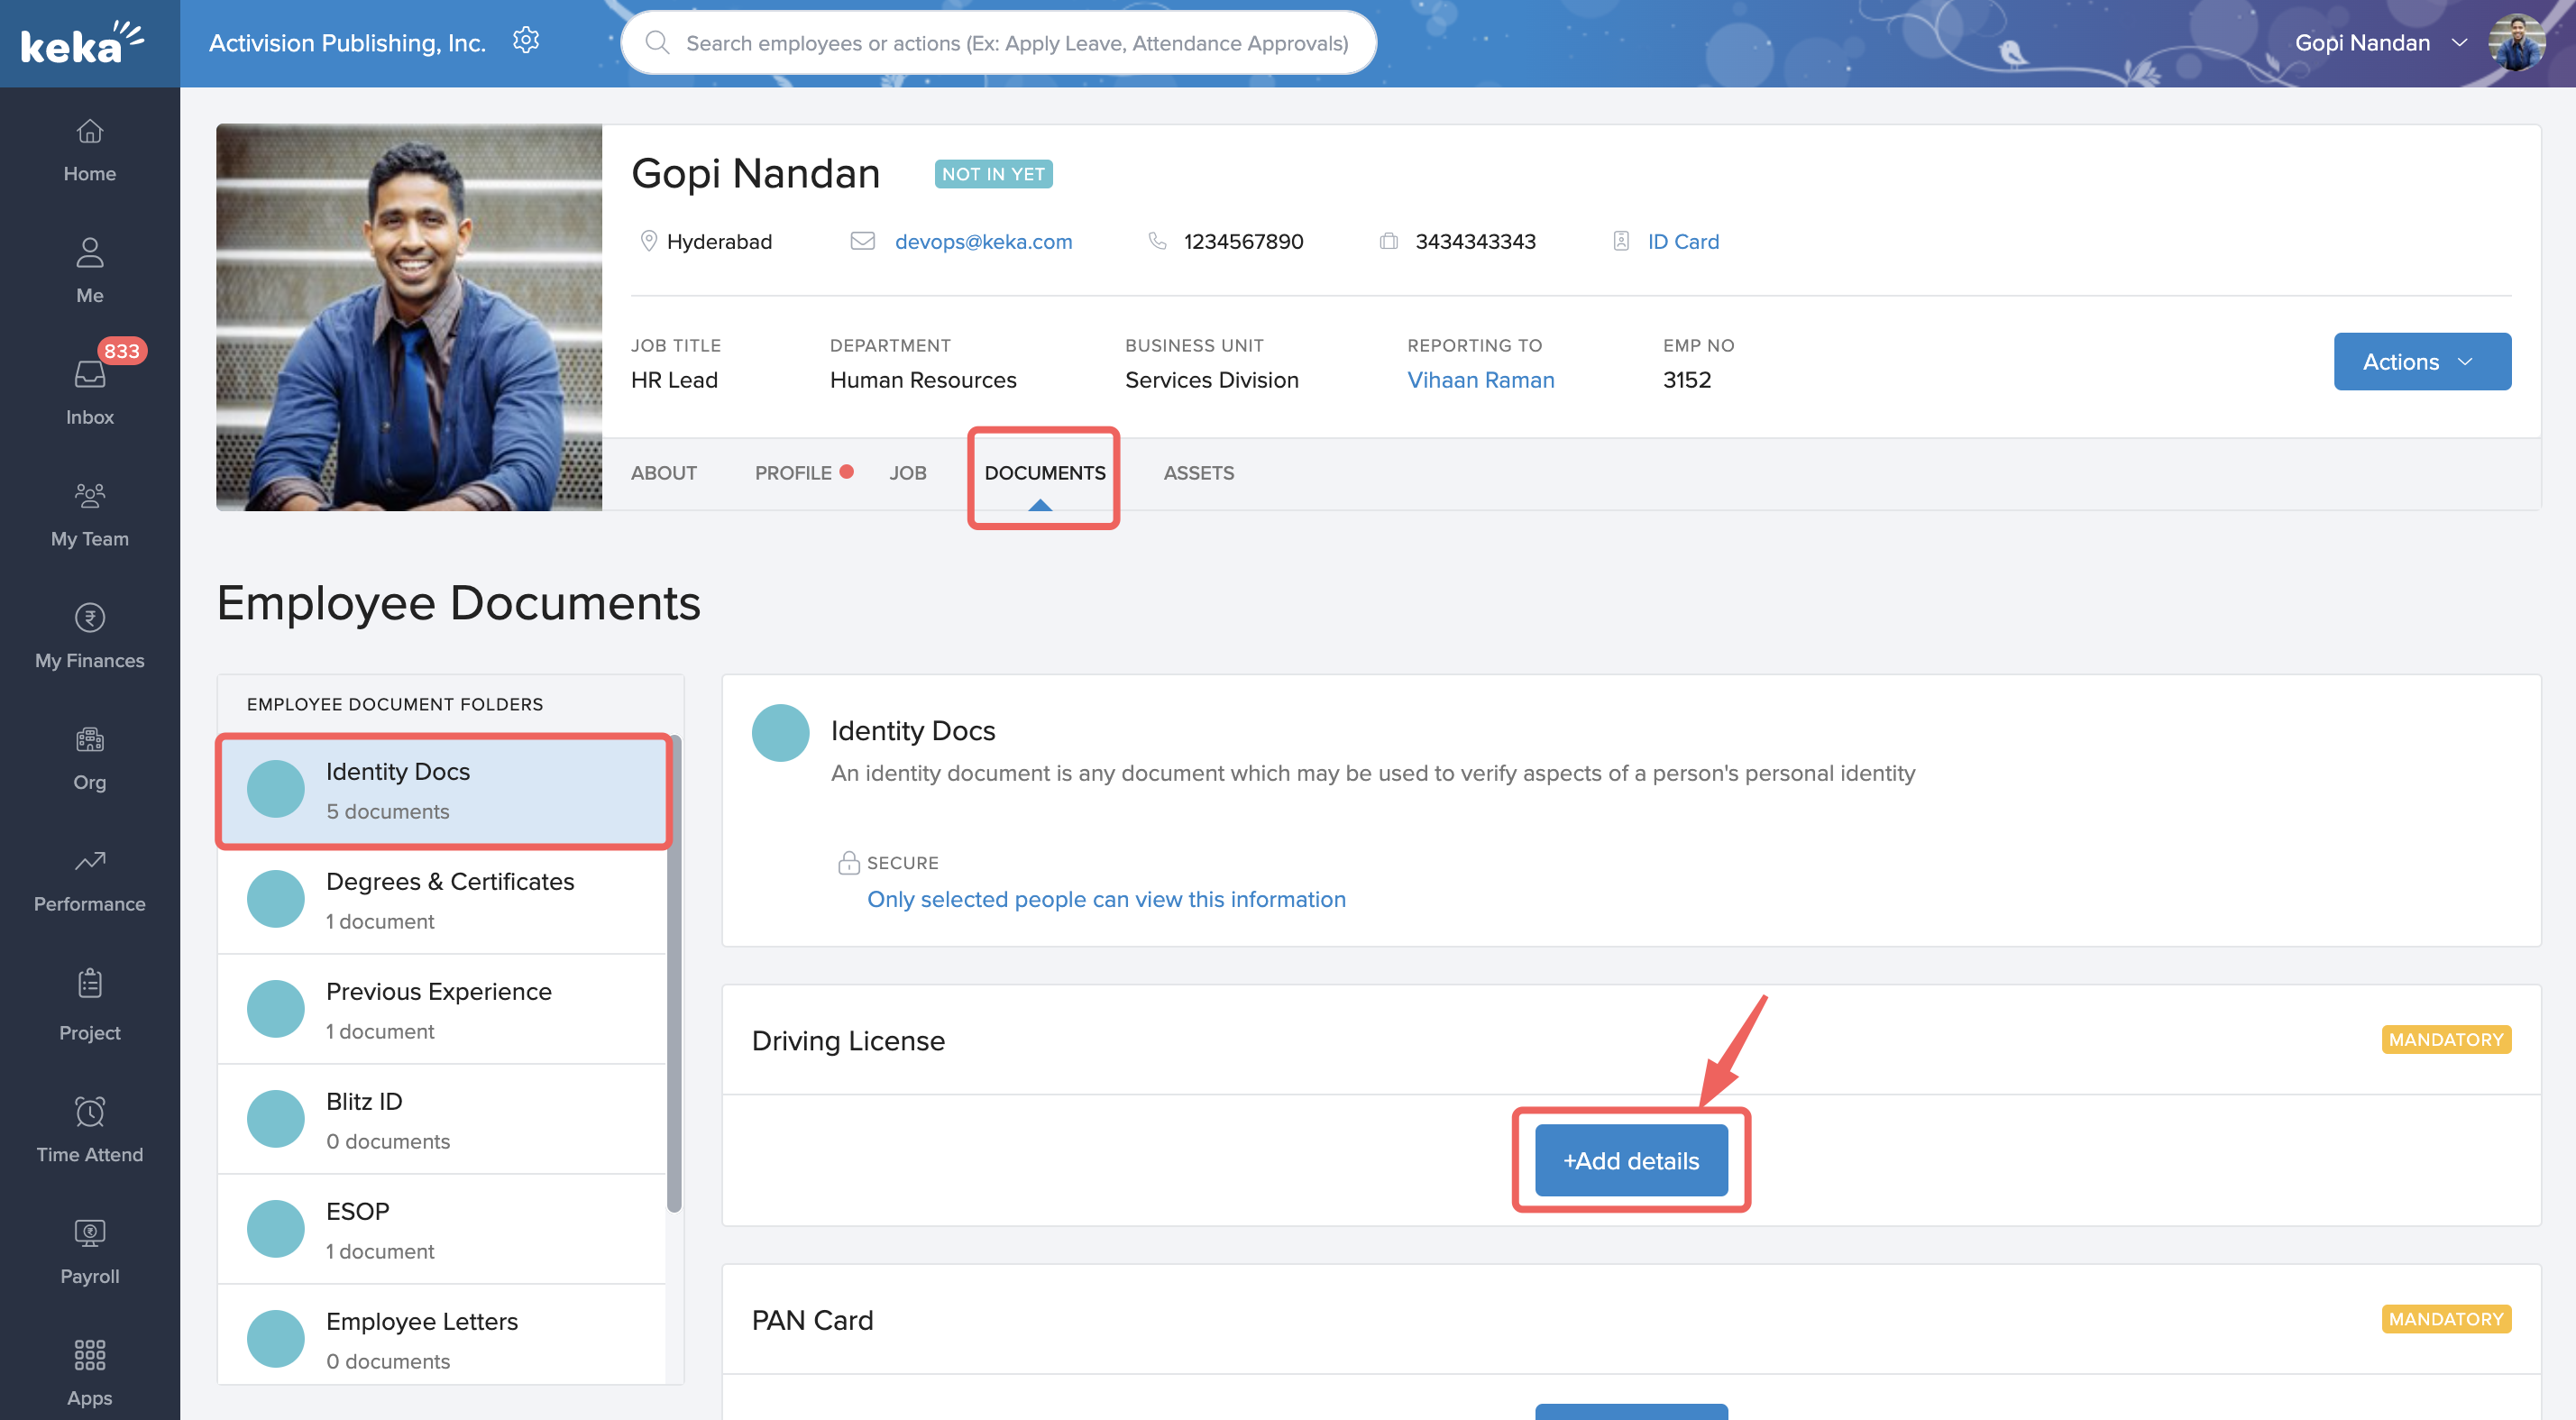
Under Documents, you can find all the documents you have submitted/are supposed to submit to the organization. The documents that you submit are stored in Employee document categories. You can view or update the documents by clicking on any of the folder titles.
Identity docs contain your identity documents like your driver's license, PAN card, passport, etc.
Degrees & certificates contain documents pertaining to your educational qualifications.
The previous experience contains the experience certificate you might have obtained from your previous organization.
Several other document categories may be available to you depending on your profile and the settings that are enabled by your organization.
Some document titles are not mandatory for all employees. For instance, if you are currently on your first job, you cannot and will not be required to submit any experience certificate. The global admin at Keka will determine what documents are required to be uploaded by you.
To submit any document, click on the appropriate folder title. Choose the document you want to submit and then click on +Add details.
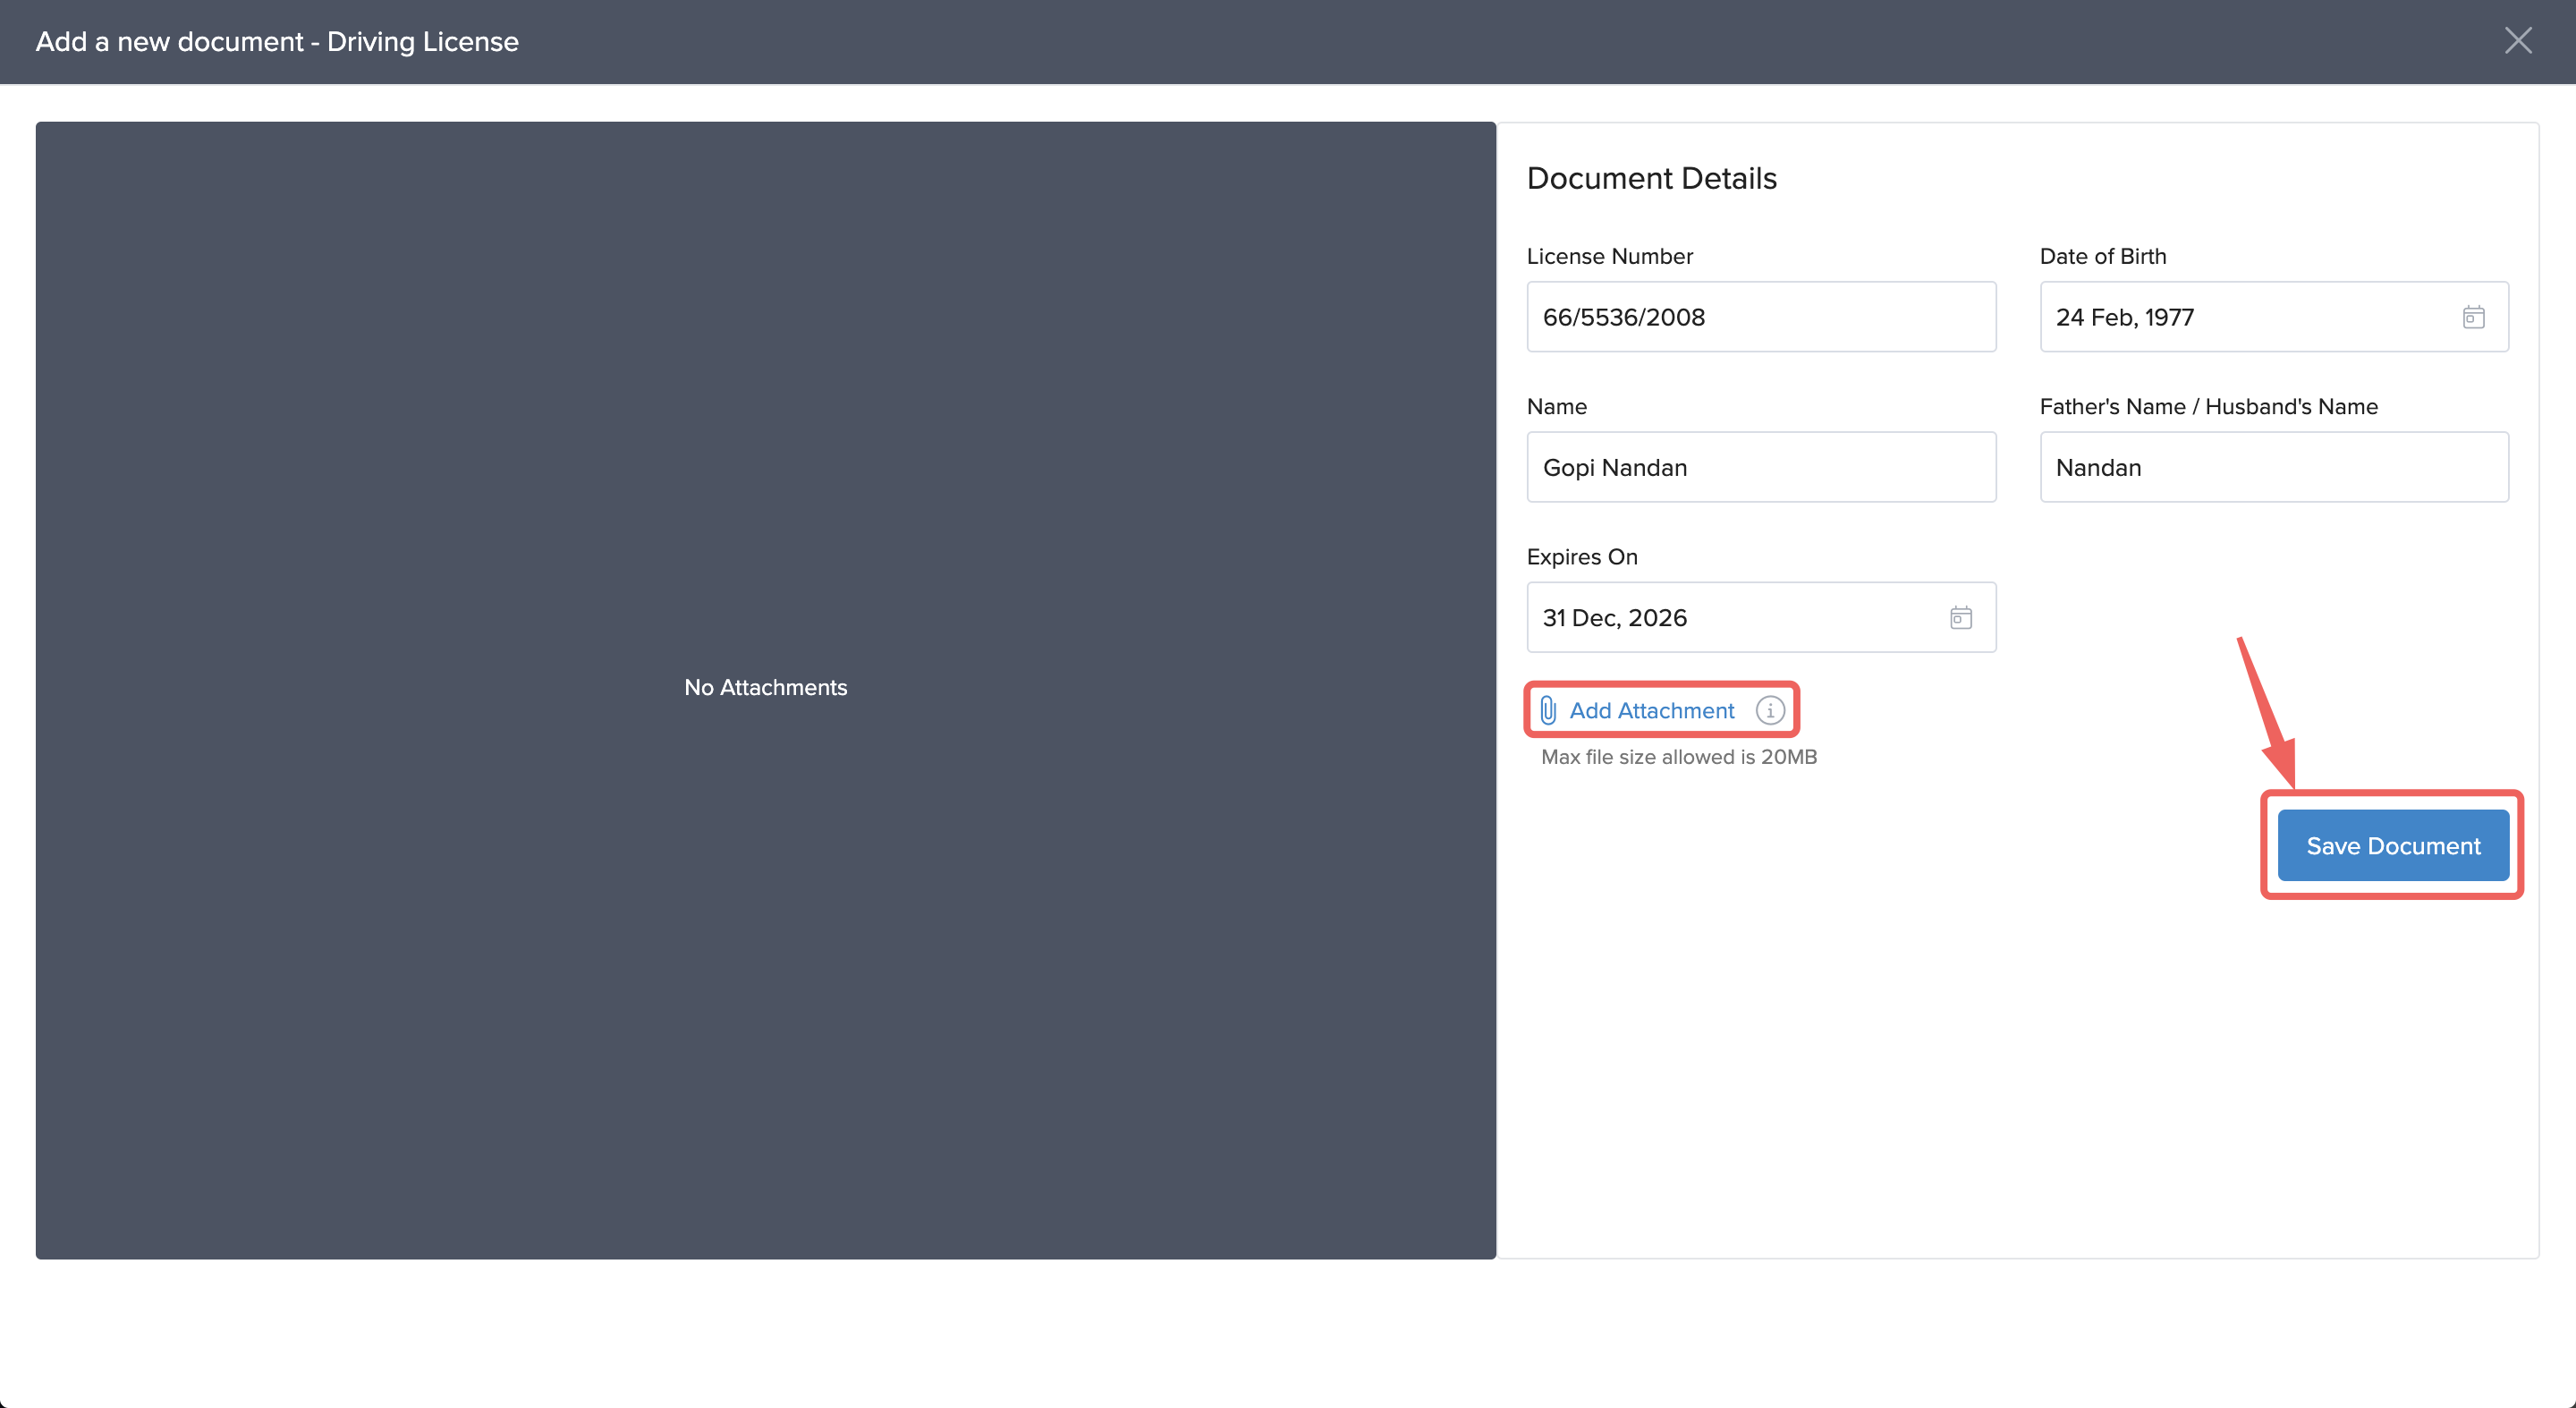
On the Add a New Document window that opens up, add the document details in the provided fields. Then, click on Add Attachment. You will now be prompted to upload the document from your computer. Before uploading, ensure that the file size is within the allowed limits. Once uploaded, click Save the document.
You can follow the same steps for uploading any document under any of the folder titles.
Assets
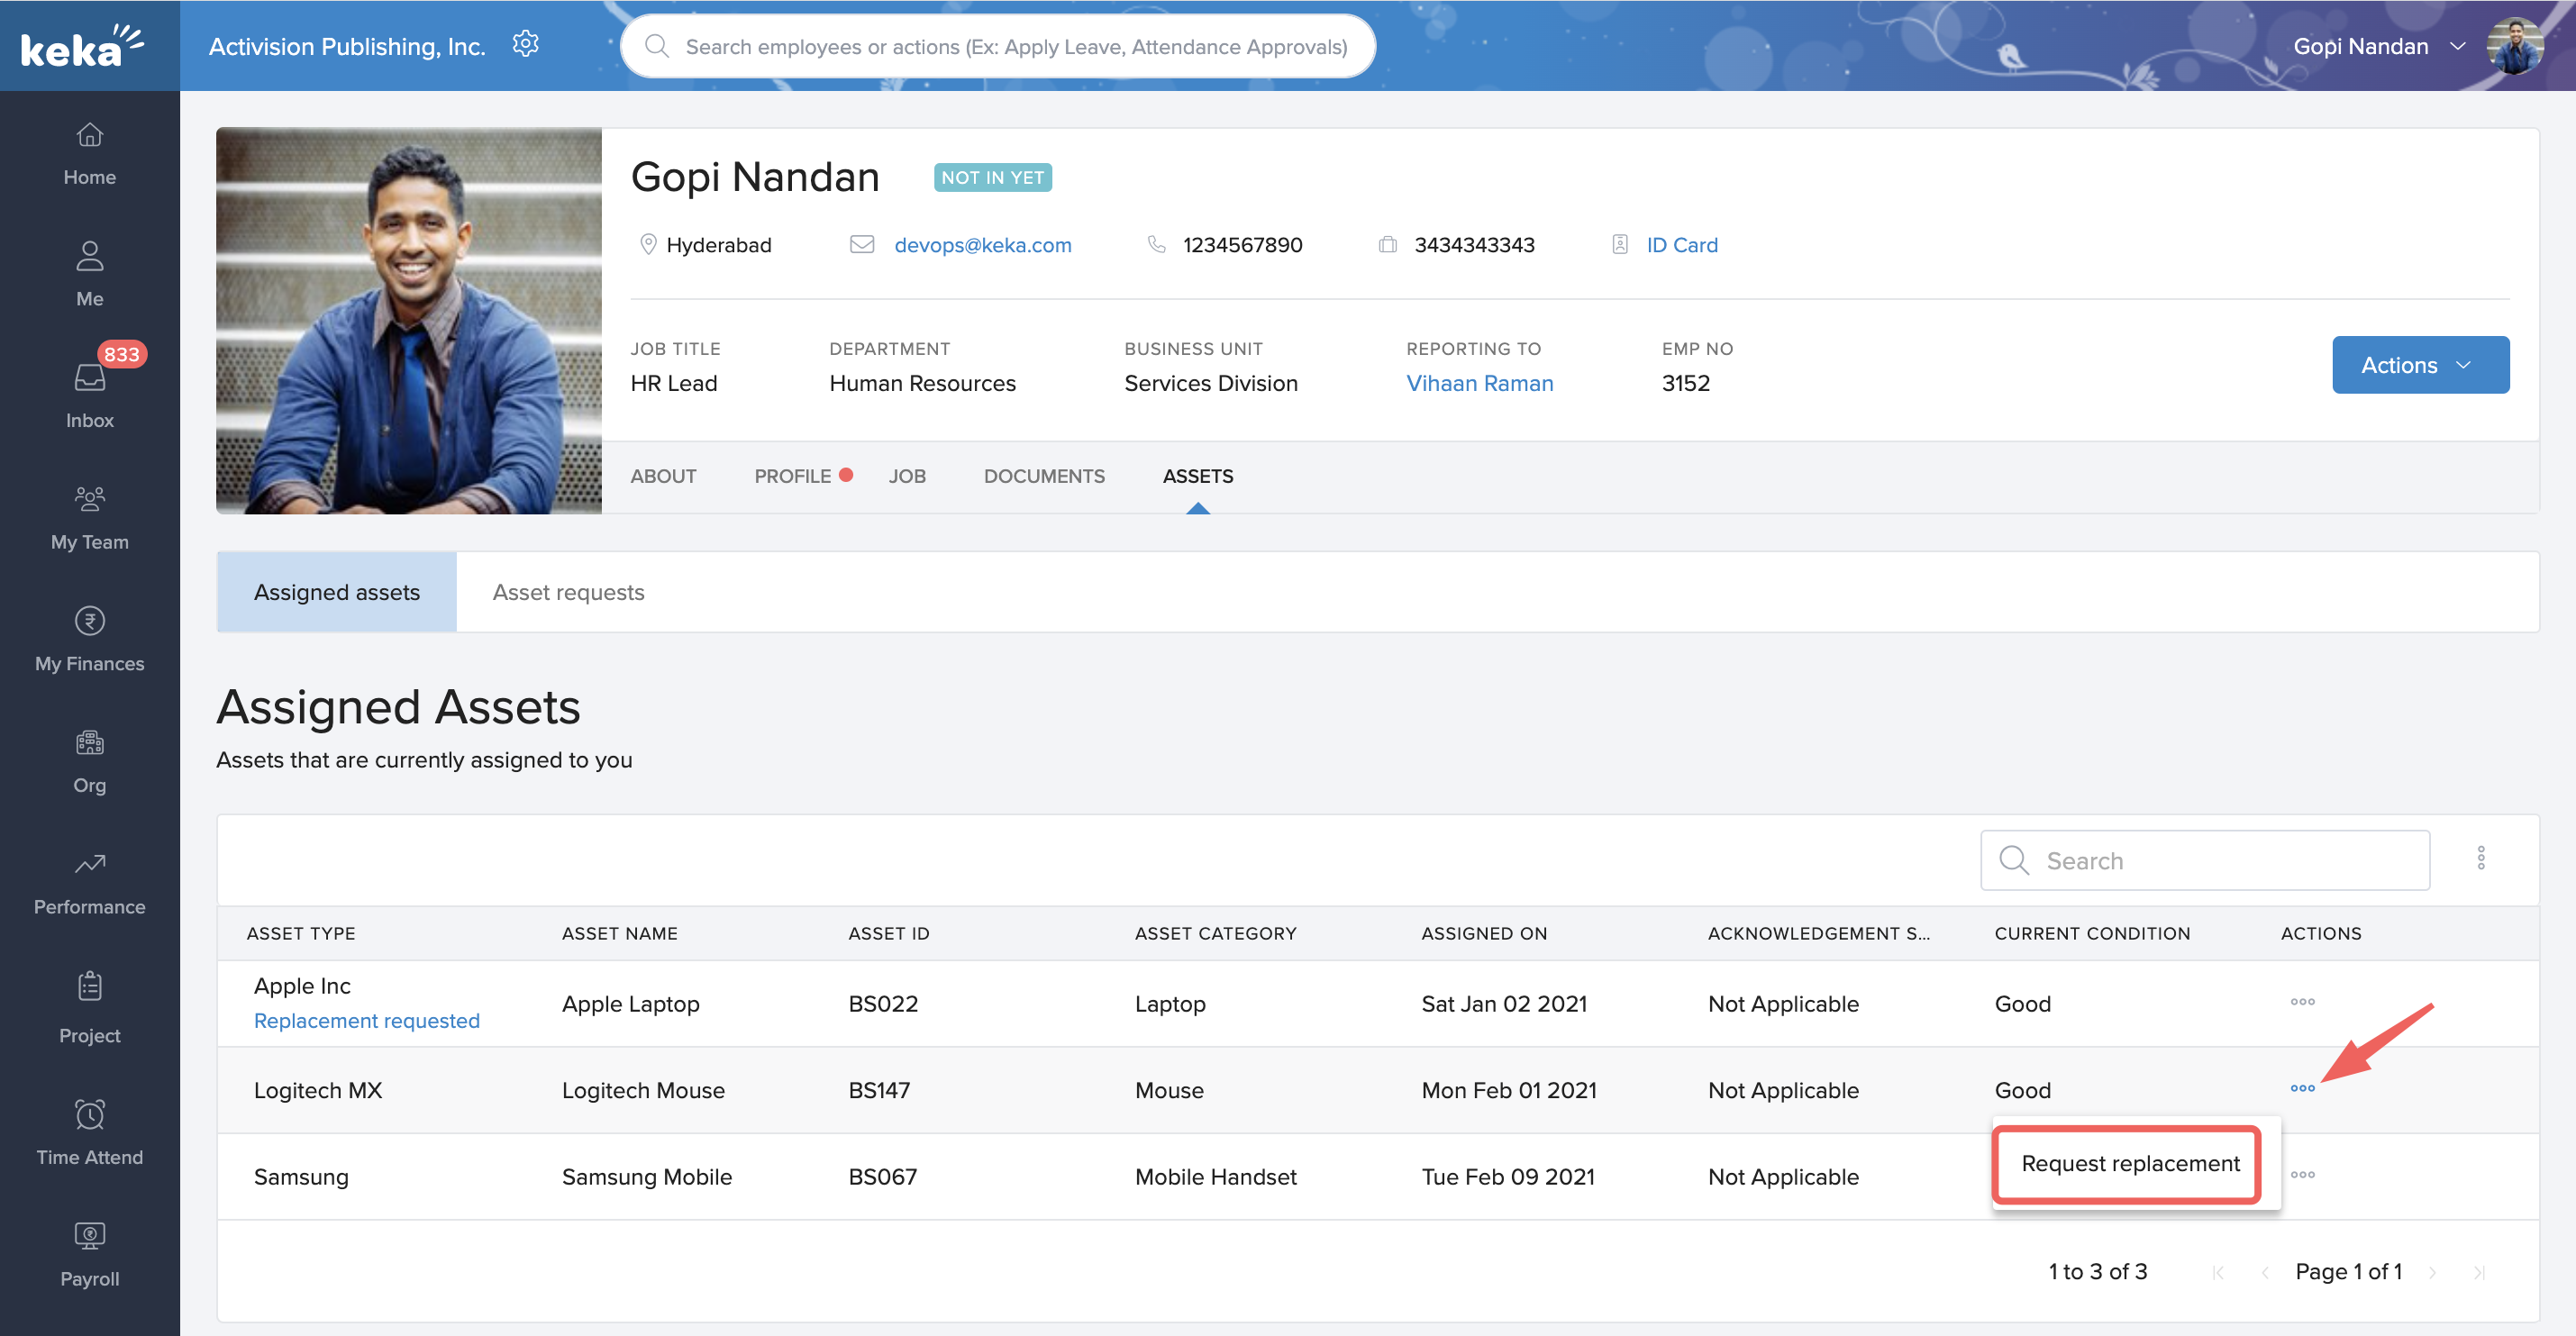
Under the Assets tab, you can find all the assets that are currently assigned to you by the organization. Here, you can find details like asset type, name, ID, category, the date assigned, etc.
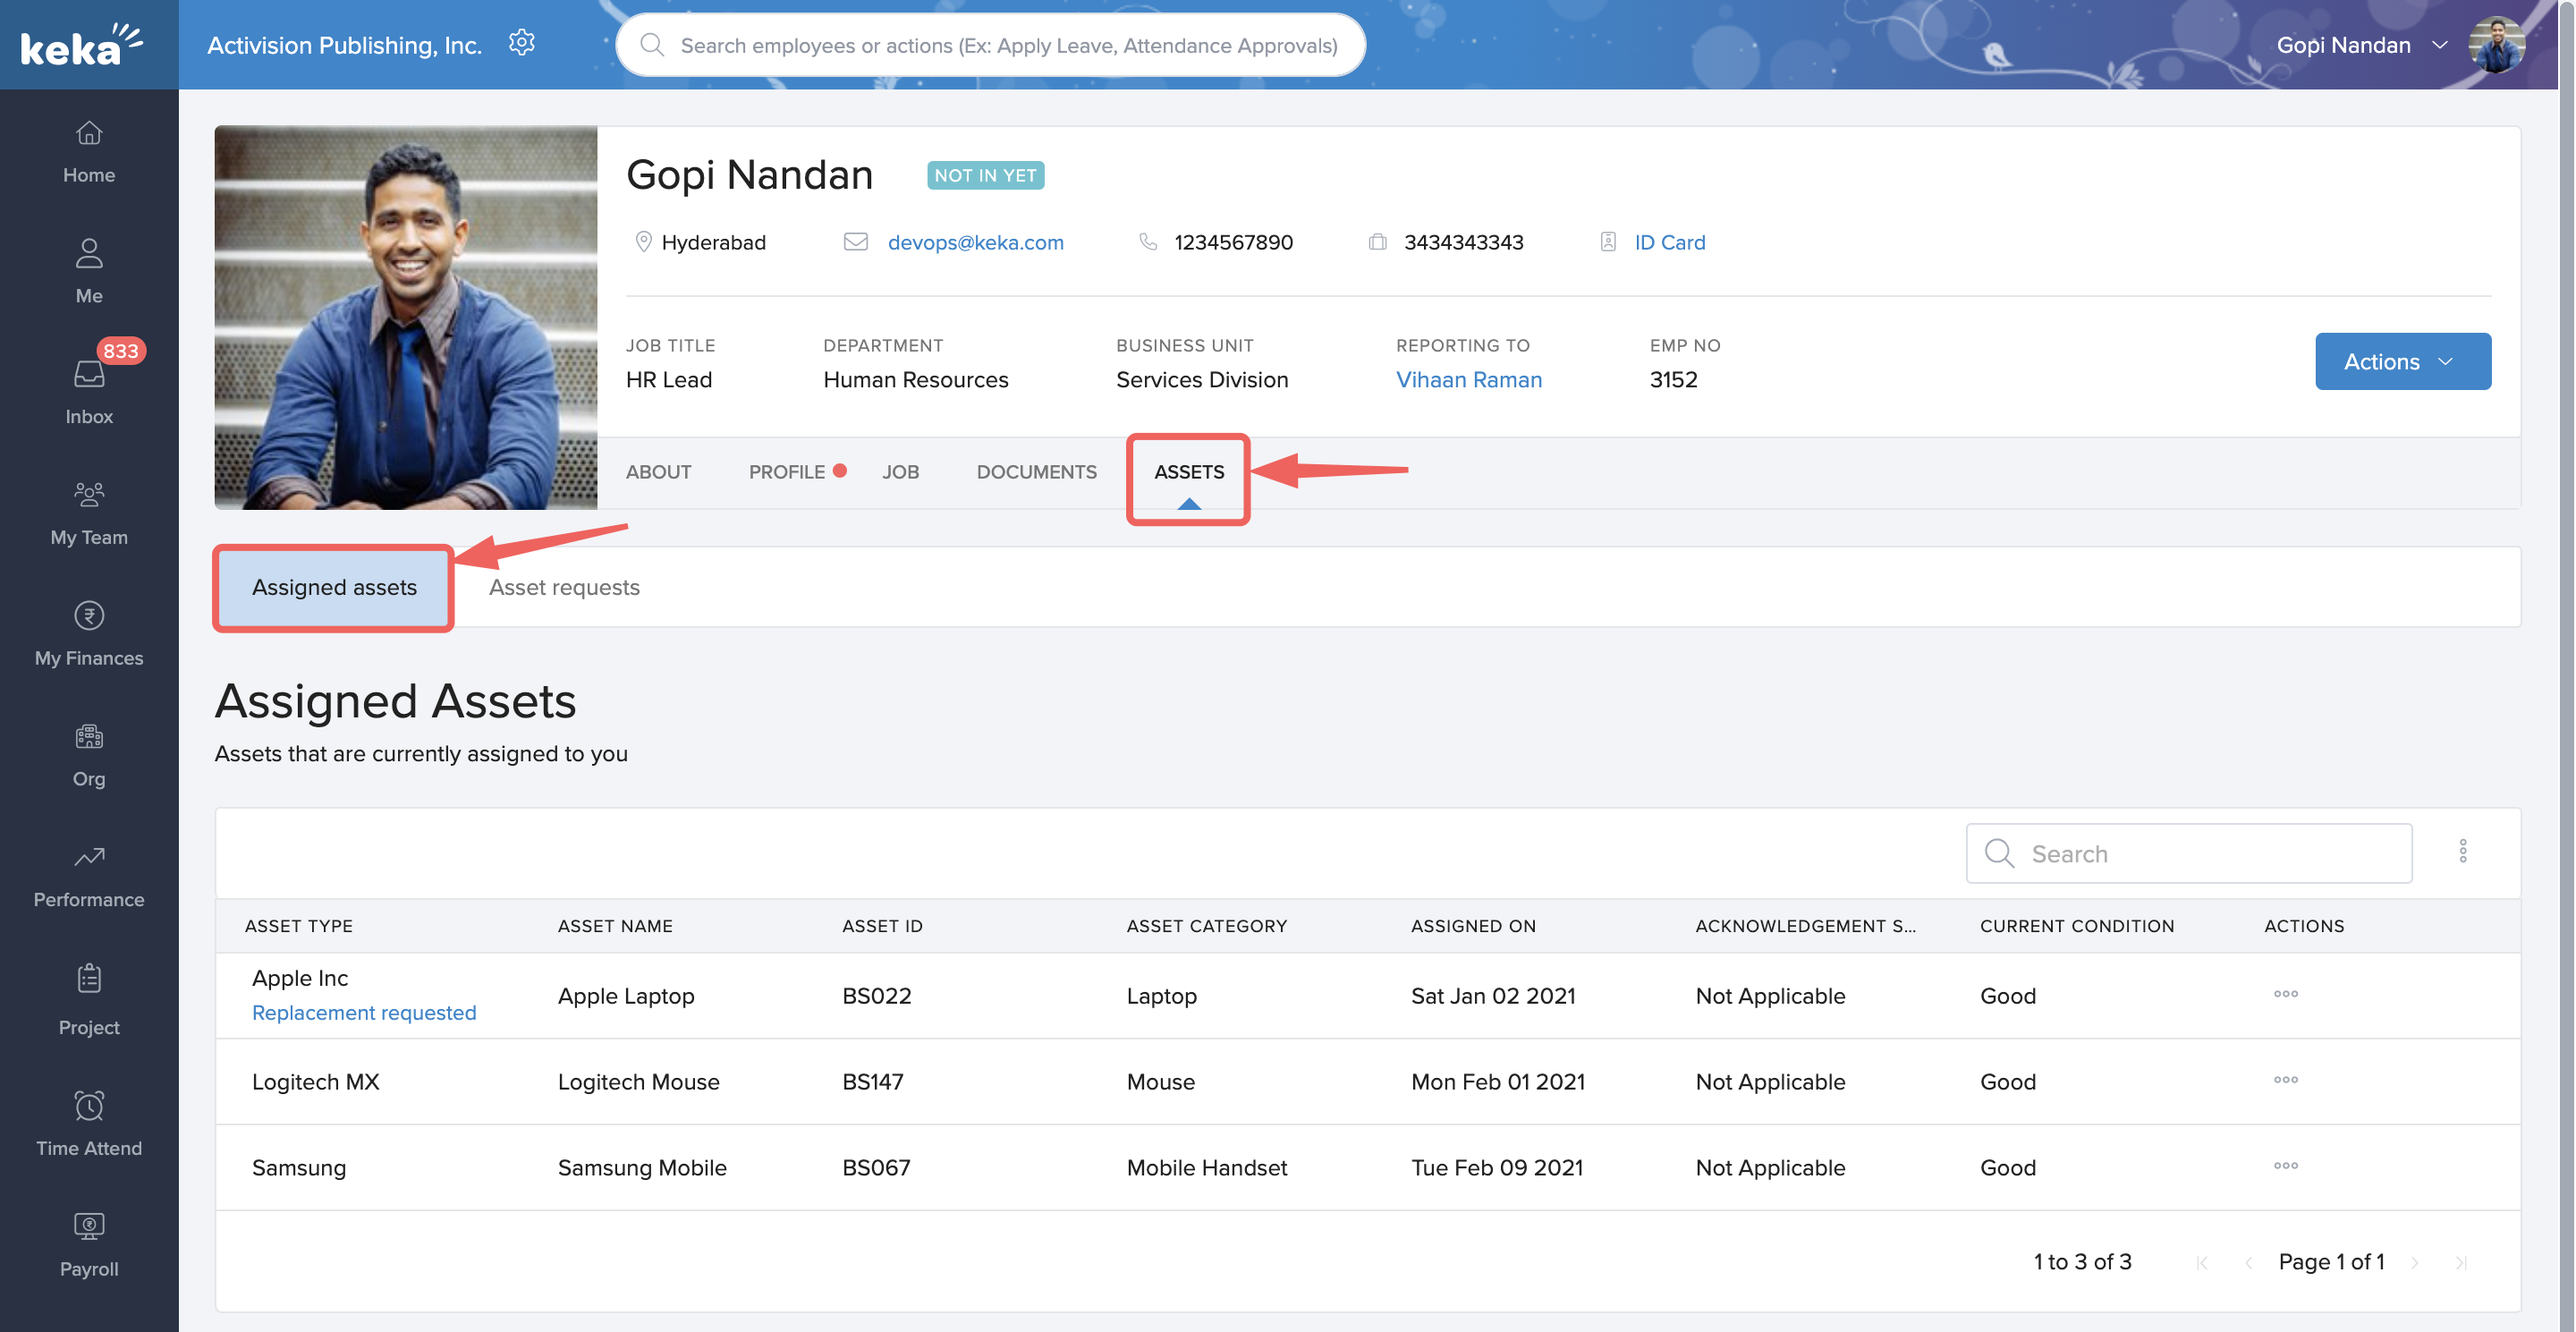
In case some of the assets that have been assigned to you aren't working or you need a different one, you can request a replacement from this page. To do so, click on the three dots corresponding to the asset under the Actions column. Select Request Replacement from the drop-down.
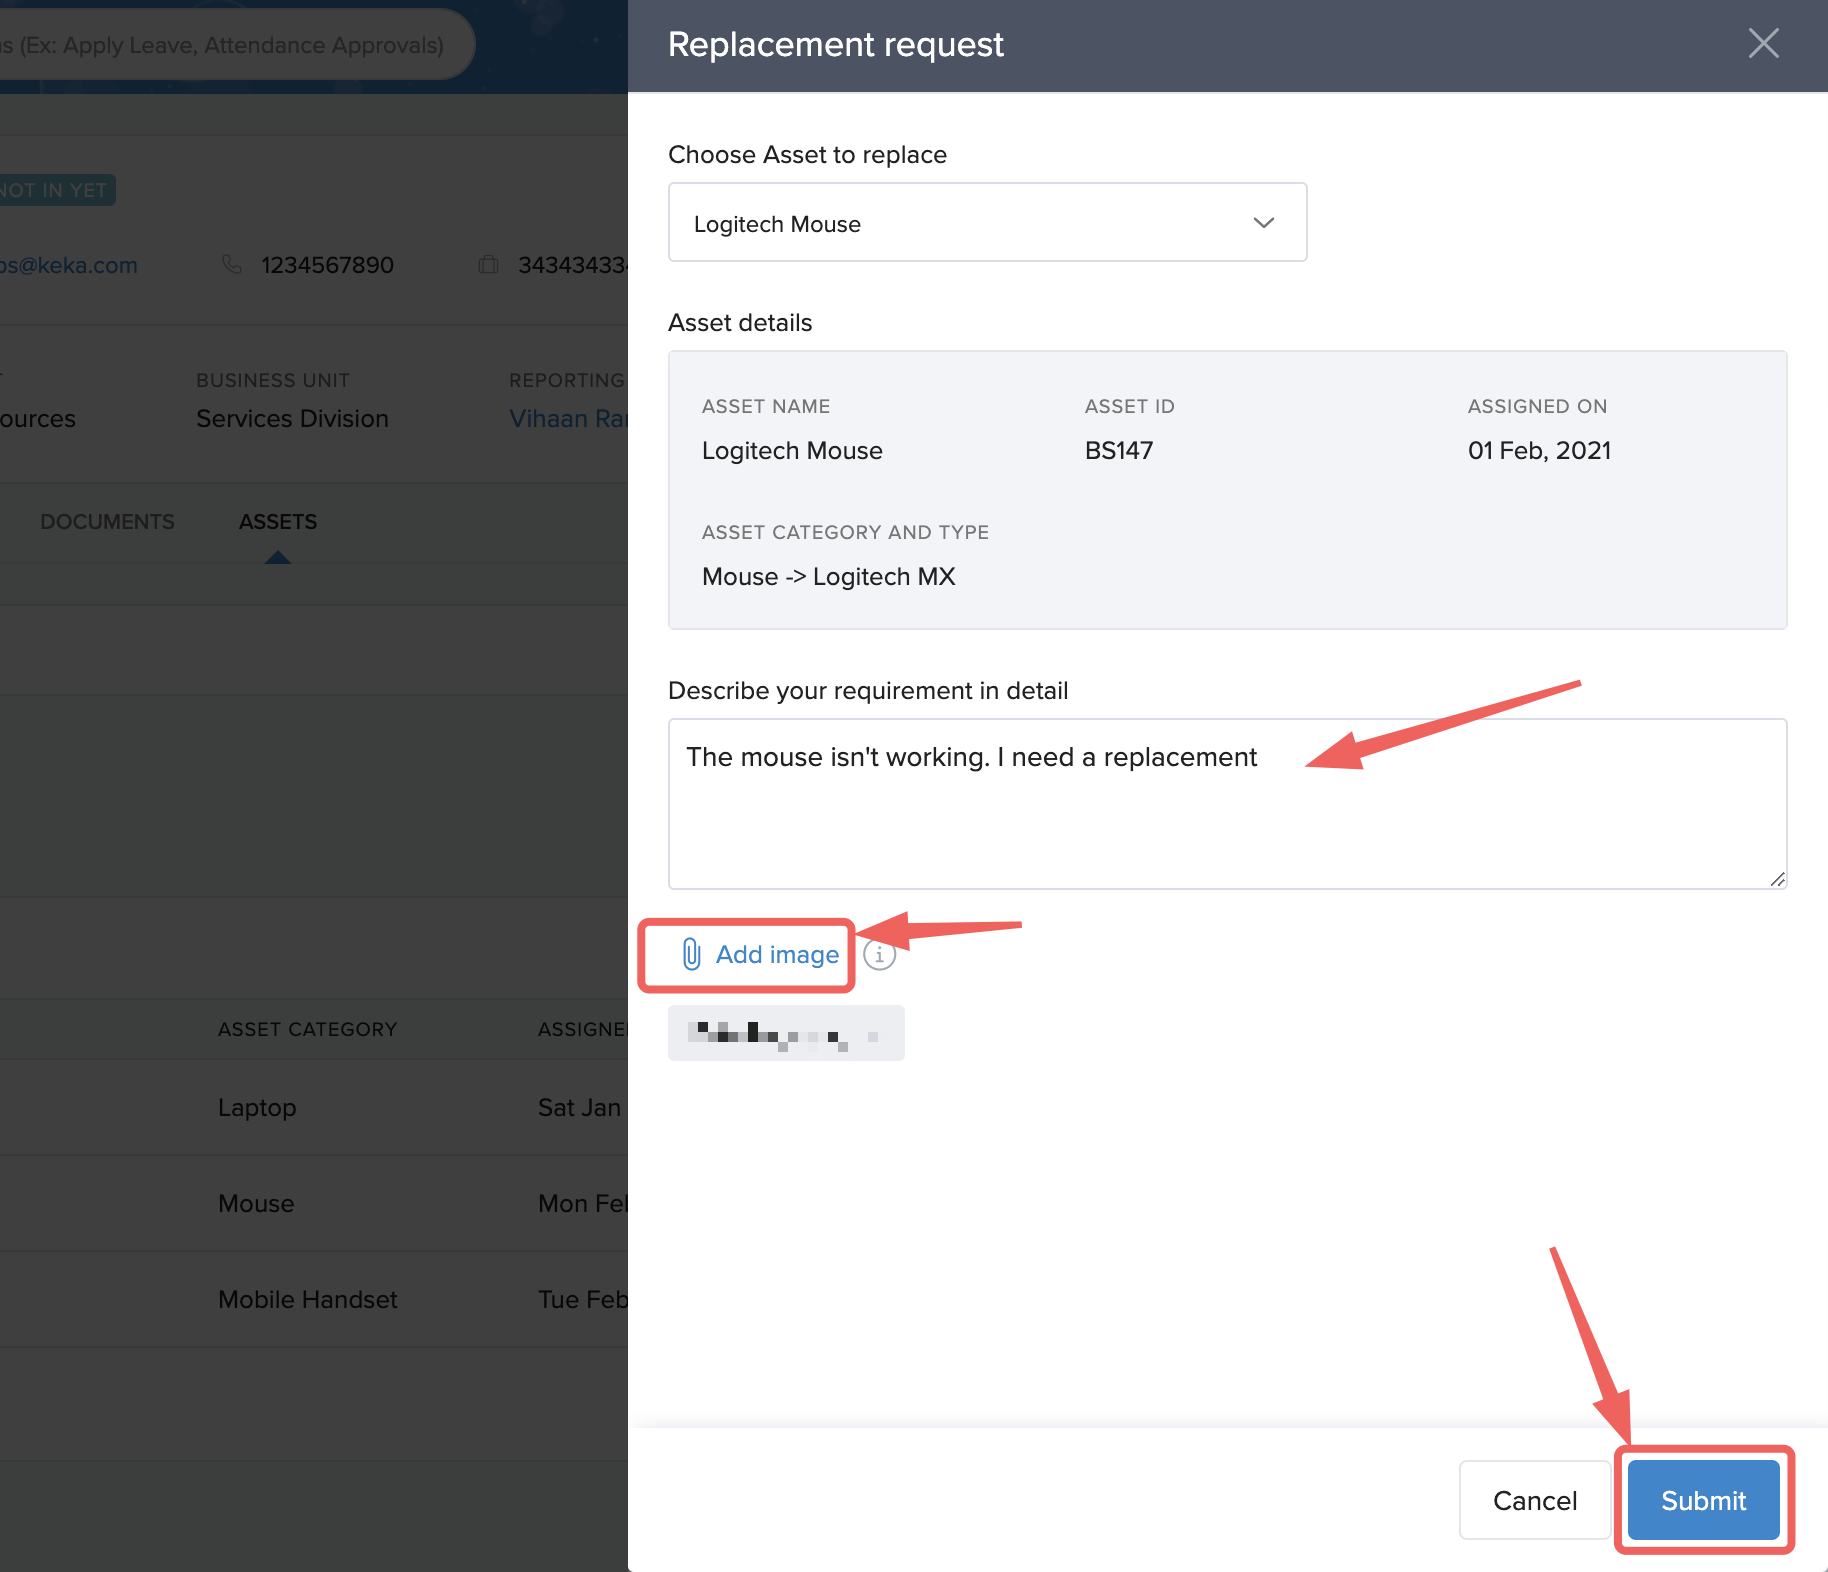
In the Replacement Request window, you can again choose the asset for which you want to raise a replacement request. Enter the requirement in the textbox and attach images to support your request.
Once you've entered the details, click Submit to raise a replacement request.
Resigning from the job
If you feel like moving out of the organization, click on the Actions drop-down. Then, click on Resign from job. This will initiate your resignation process.
The global admin for Keka determines if you get the option to resign from the job through your profile or not. In case this option is not avaialable, your reporting manager, the person assigned to the HR manager role on Keka, or the global admin can initiate your exit.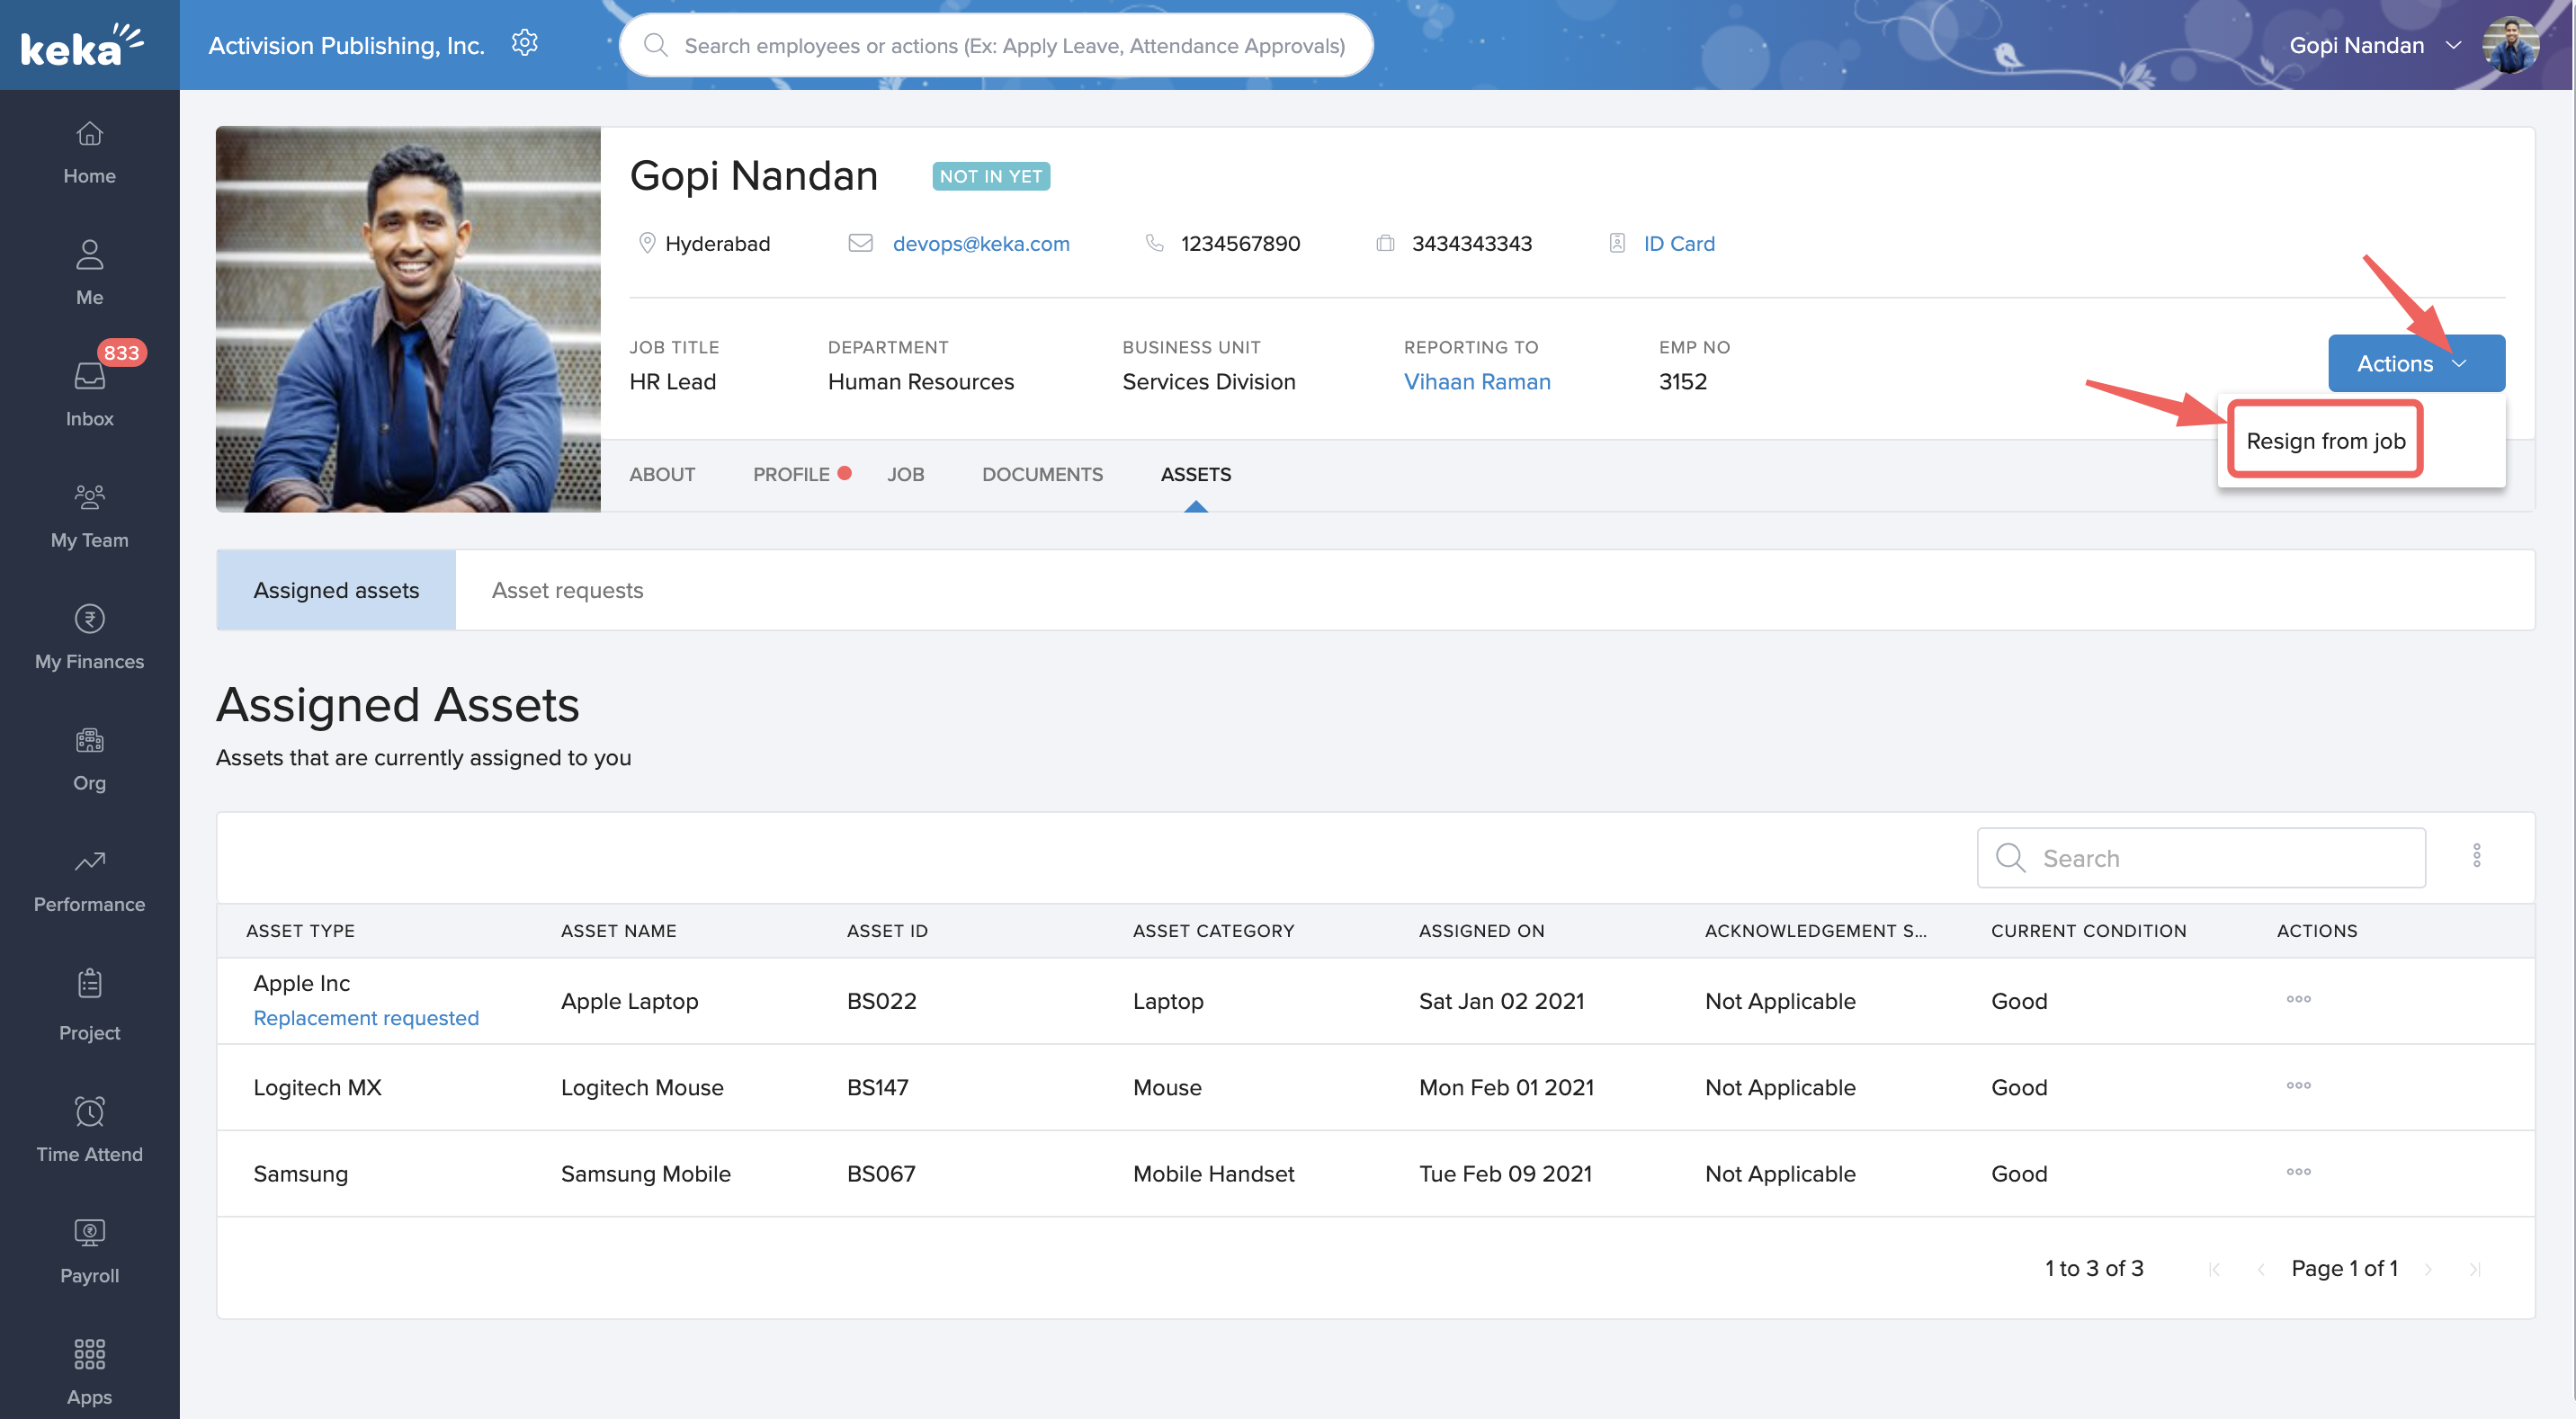
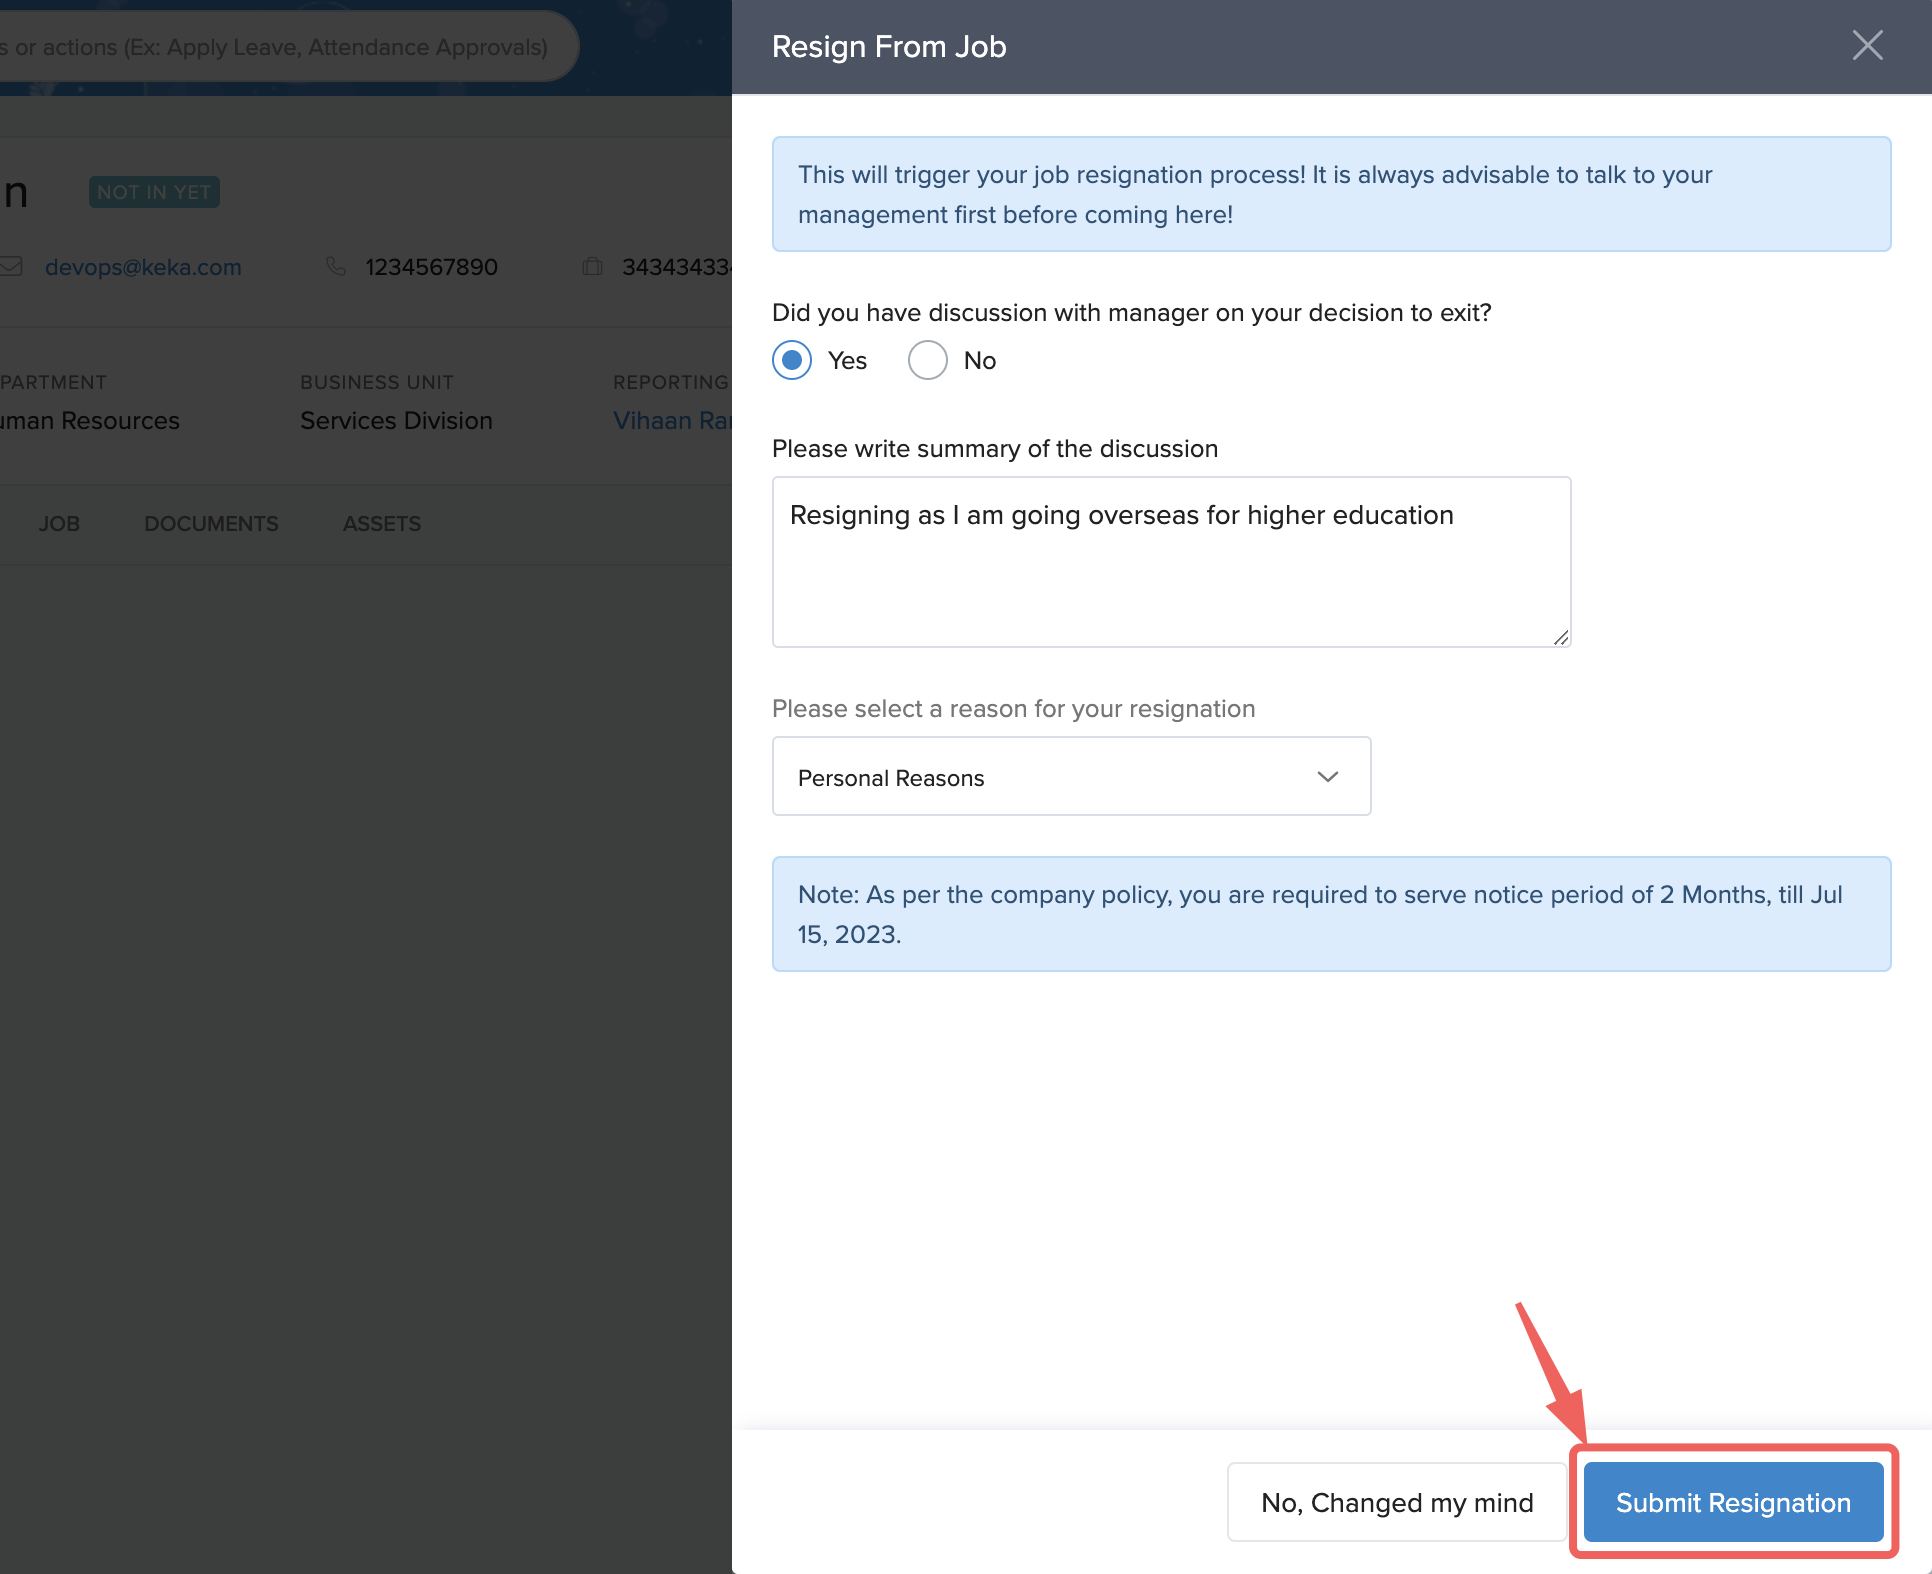
On the next window that pops up, Select a Reason for your resignation and leave your comments in the comment box. Also, select Yes if you have had a discussion with your manager regarding the resignation. You have to enter a summary of the discussion with your manager. Select No if you haven't had a discussion. Click on Submit Resignation.
Hope this document helped you learn how to manage your profile on Keka. In case of more queries, please refer to the other articles or contact our product experts.
