Keka offers various types of leave for employees, including sick leave, casual leave, earned or privileged leave, and more. You can easily access the leave section to check your available leave balance, make leave requests, and review your leave history all in one place.
It may be necessary to apply for leave in advance according to your assigned leave policy. Additionally, the Keka platform allows for the application of unpaid leaves. Let's take a closer look at how you can efficiently manage and oversee your leave through Keka.
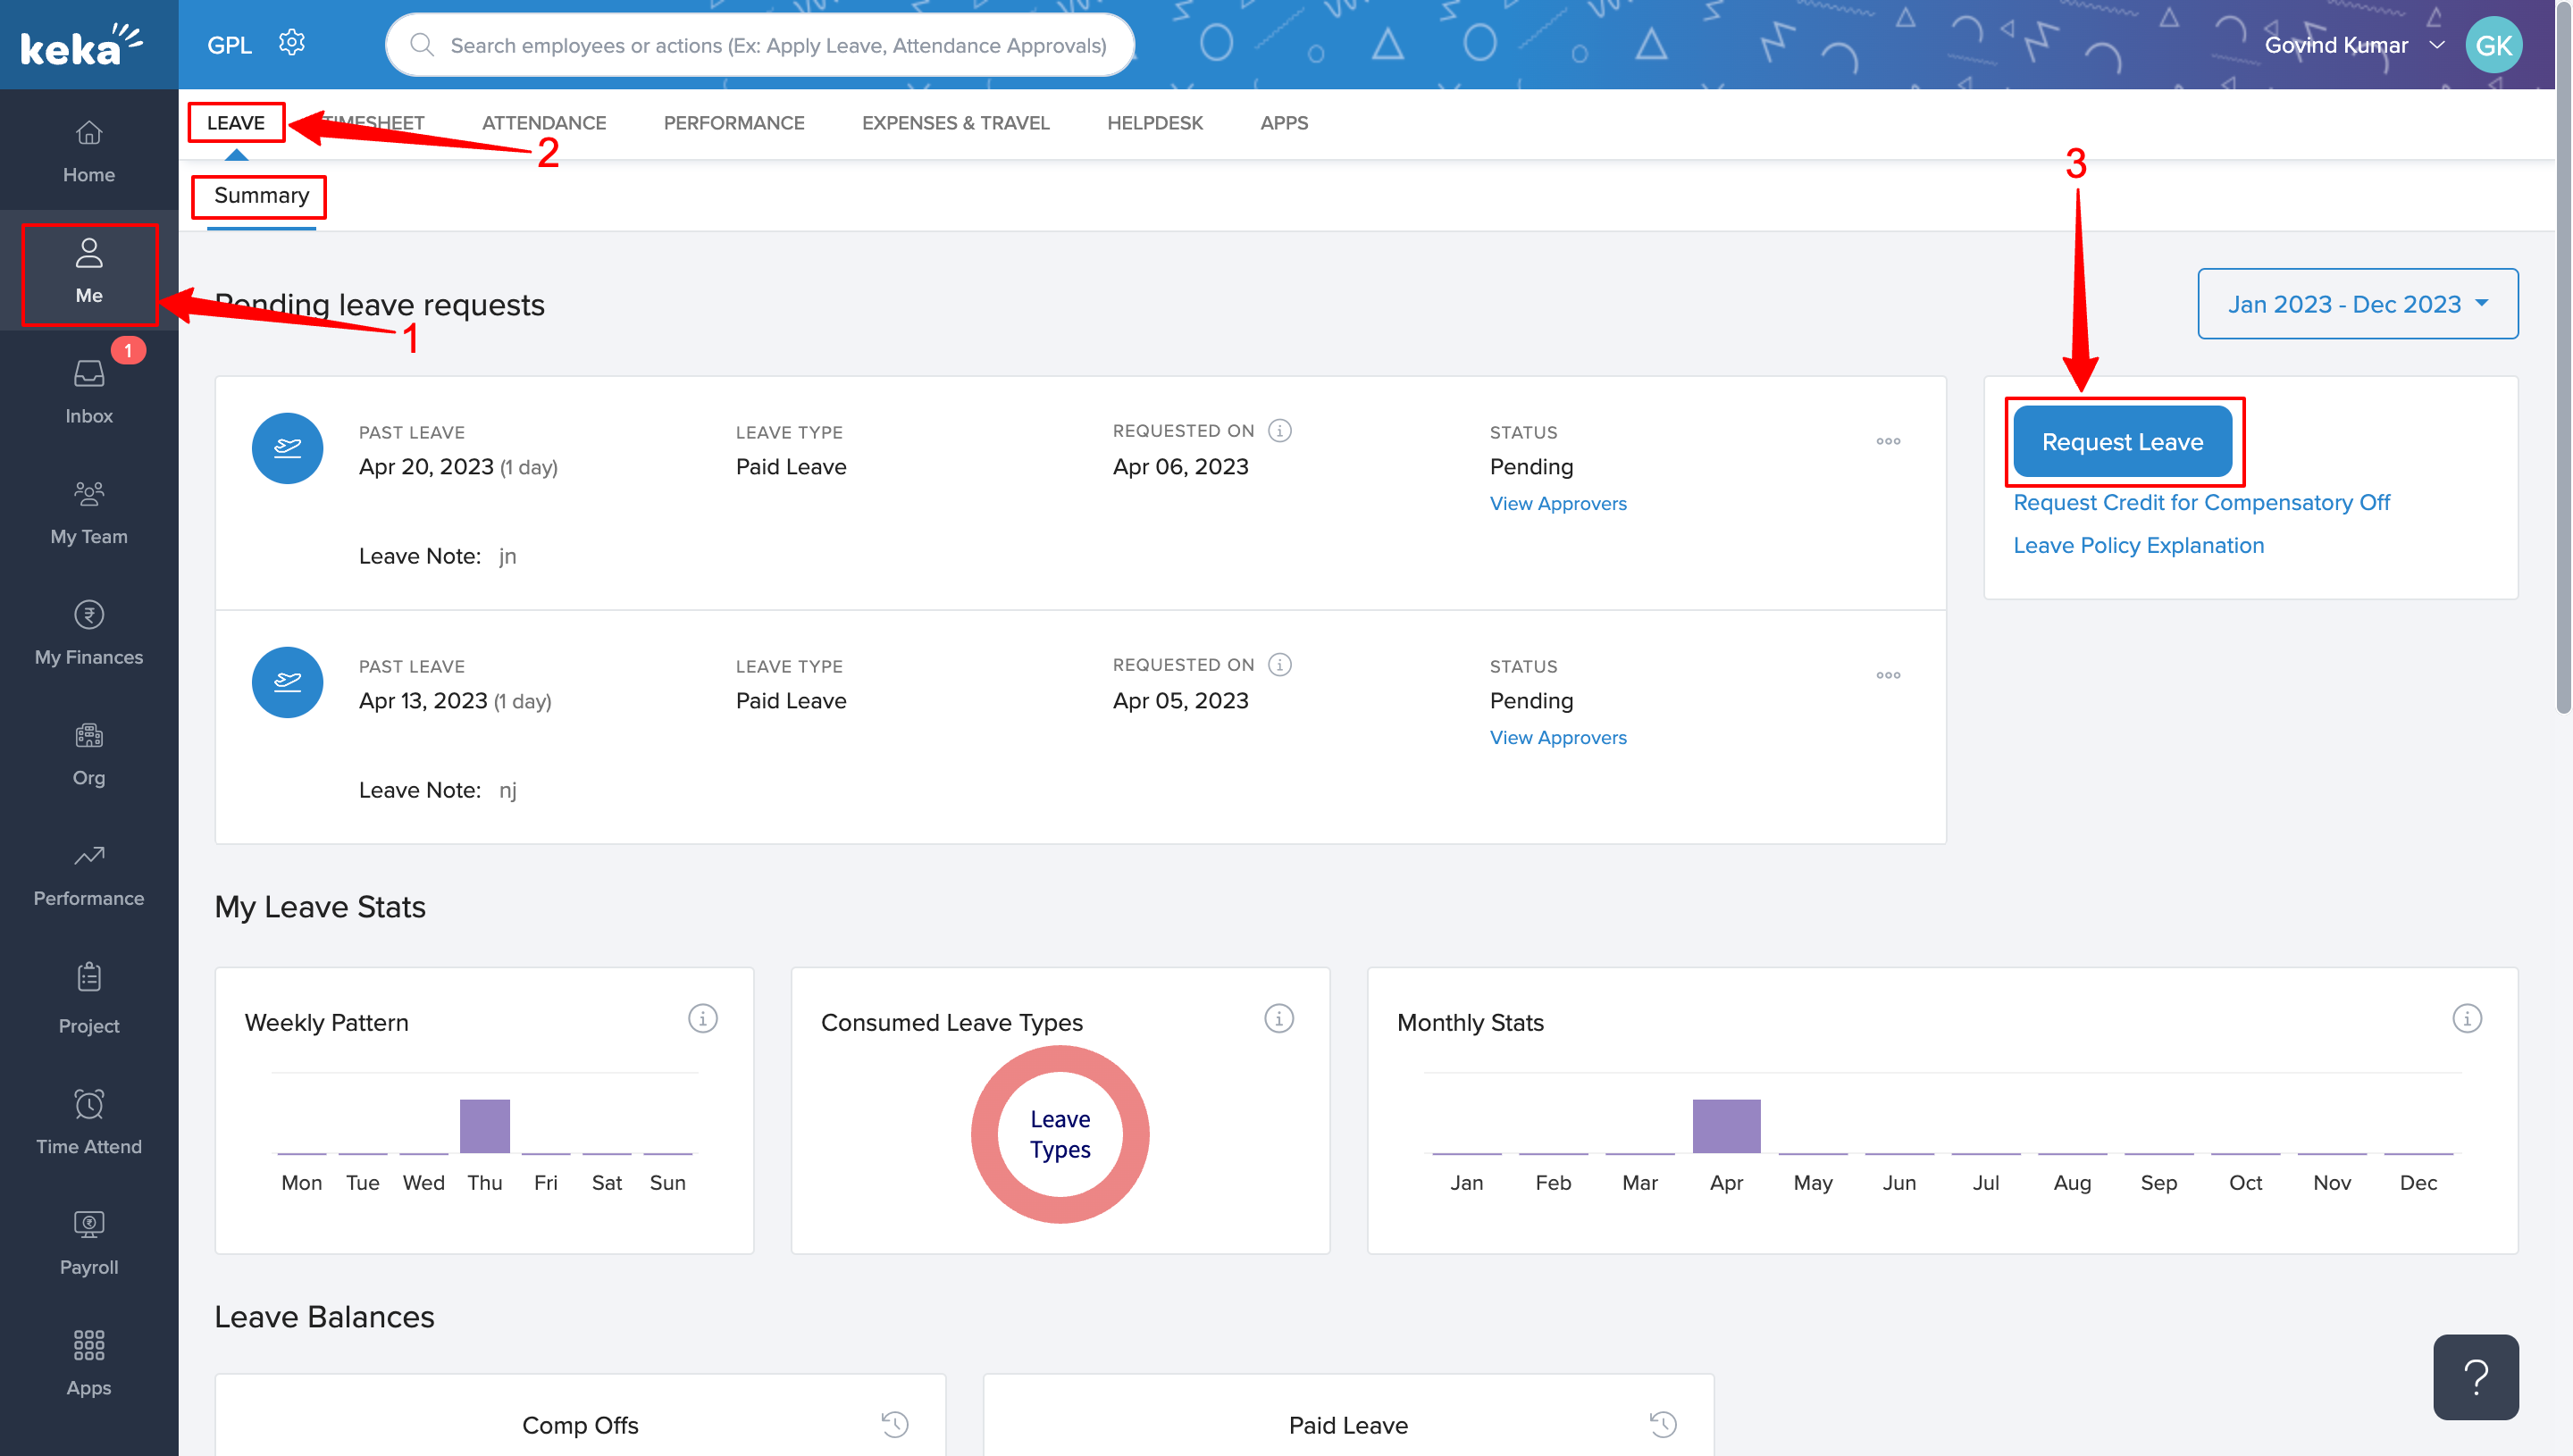
In order to manage your leave, click on the Me section on the left pane and you will be directed to the Leave tab.
TABLE OF CONTENTS
- Applying for a leave
- Viewing your leave requests
- How to request credit for compensatory off
- Leave policy explanation
Applying for a leave
In order to apply for leave, go to the Me (1) section, you will then automatically be directed to the Summary tab under Leave (2). Here, click on Apply Leave (3).
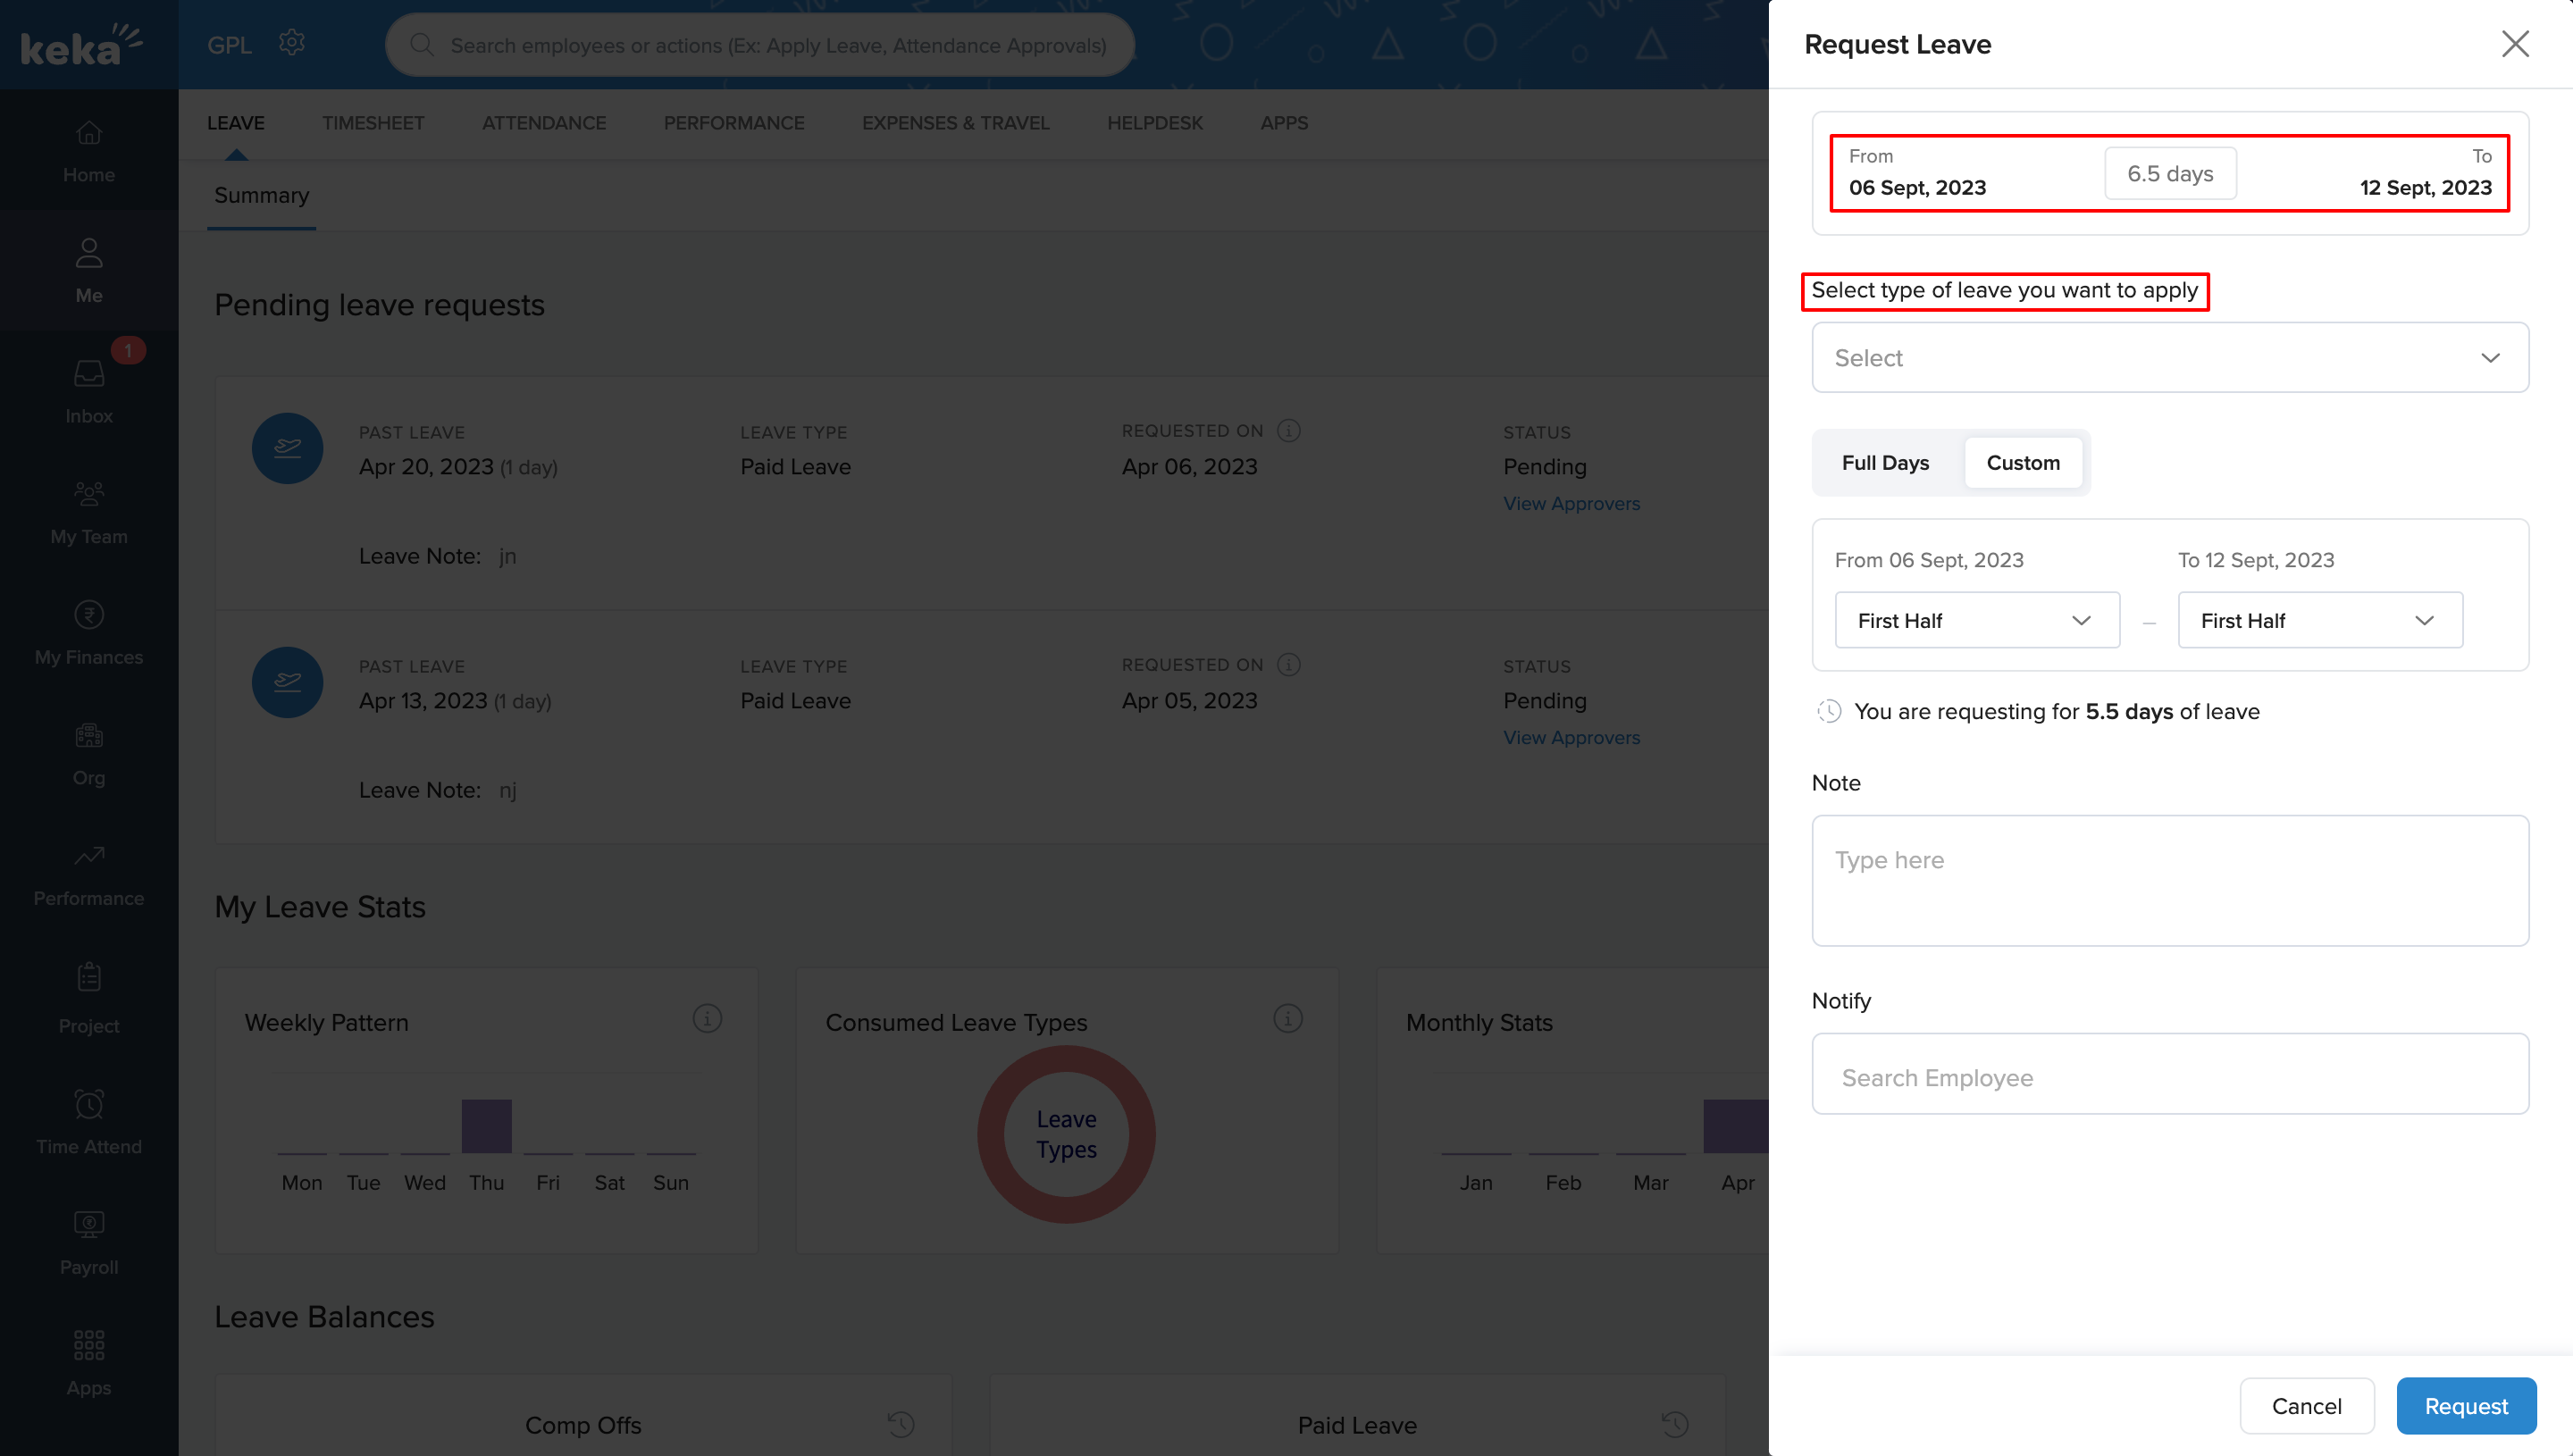
The Leave Request overlay window will now open. You will see a calendar displayed on this window for quick reference. Now, click on Select Date. Another calendar will appear where you can select the From date and To date on it.
Now, select the leave types from the Select the type of leave you want to apply and choose the relevant leave type from the available ones that have been configured in your organization's Keka HR Portal.
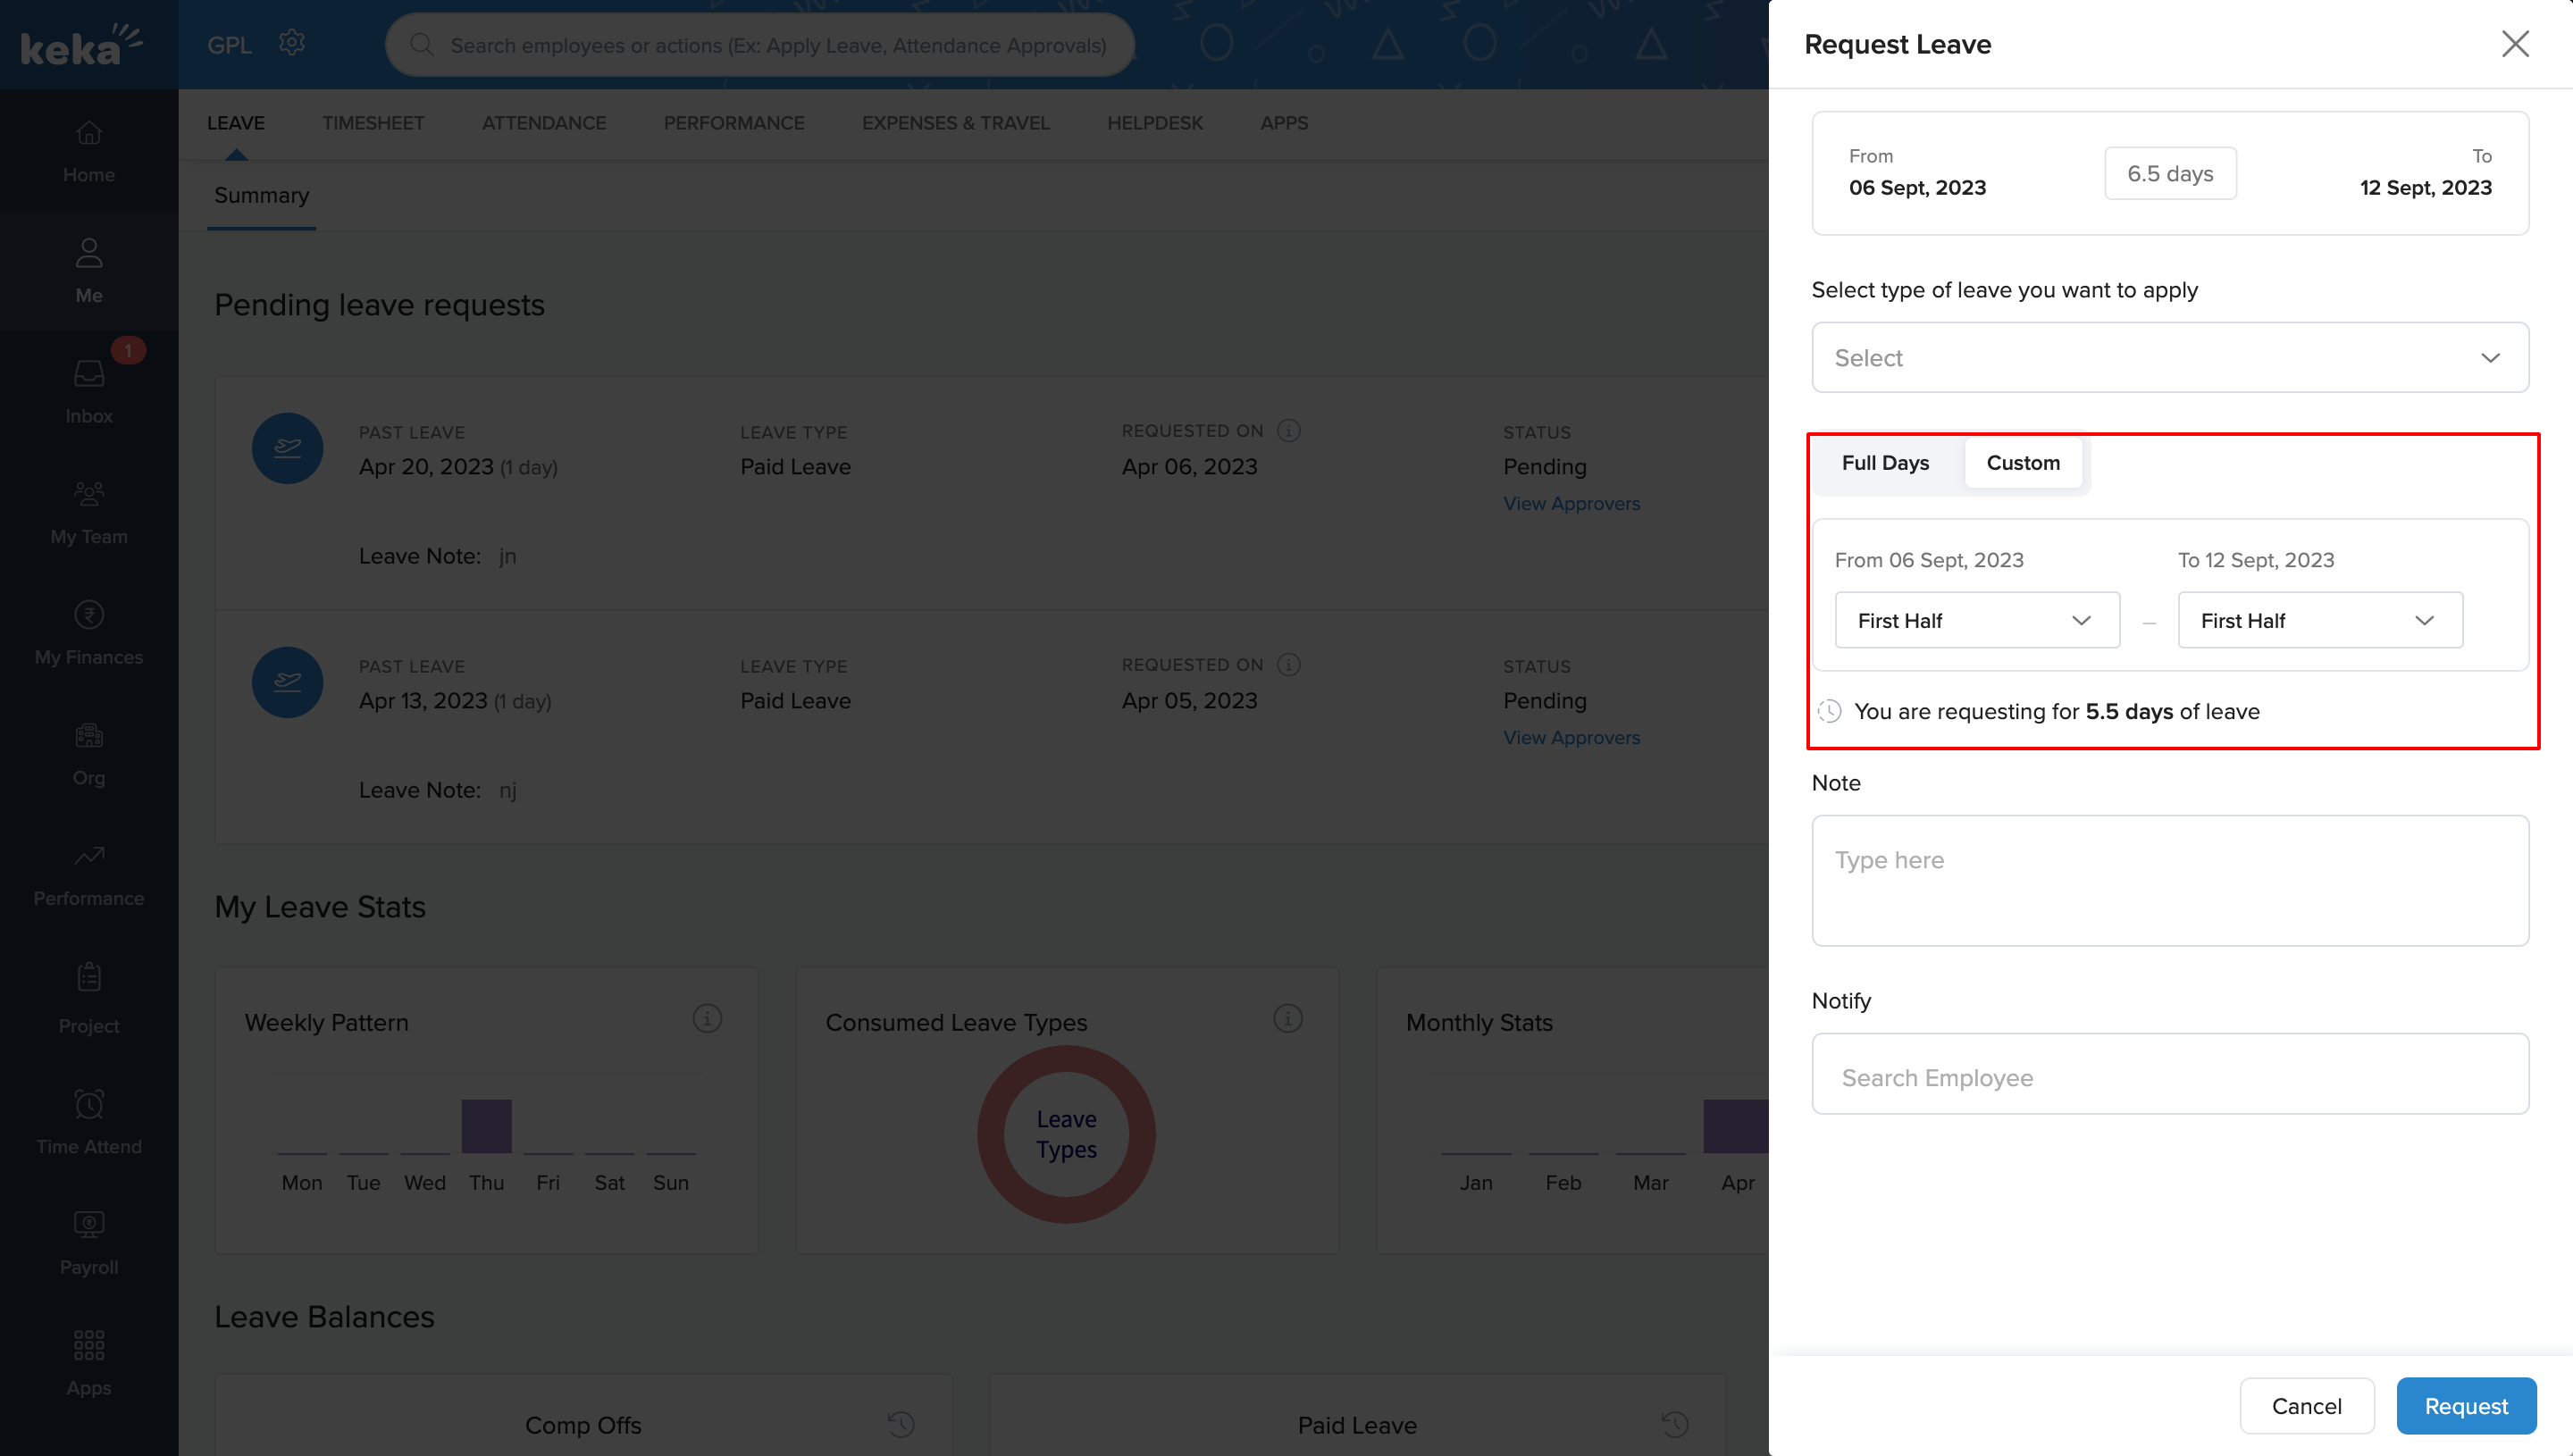
After you select your leave dates, you can pick between Full days or Custom. With 'Custom,' you get to choose if you want your leave to start in the first or second half of the day. The same goes for when your leave ends. If you choose the first half for your starting day and the second half for your ending day, it counts as full days off. Just remember, all the days you ask off for have to be in a row in one request.
You'll also see the total number of days for your leave request below.
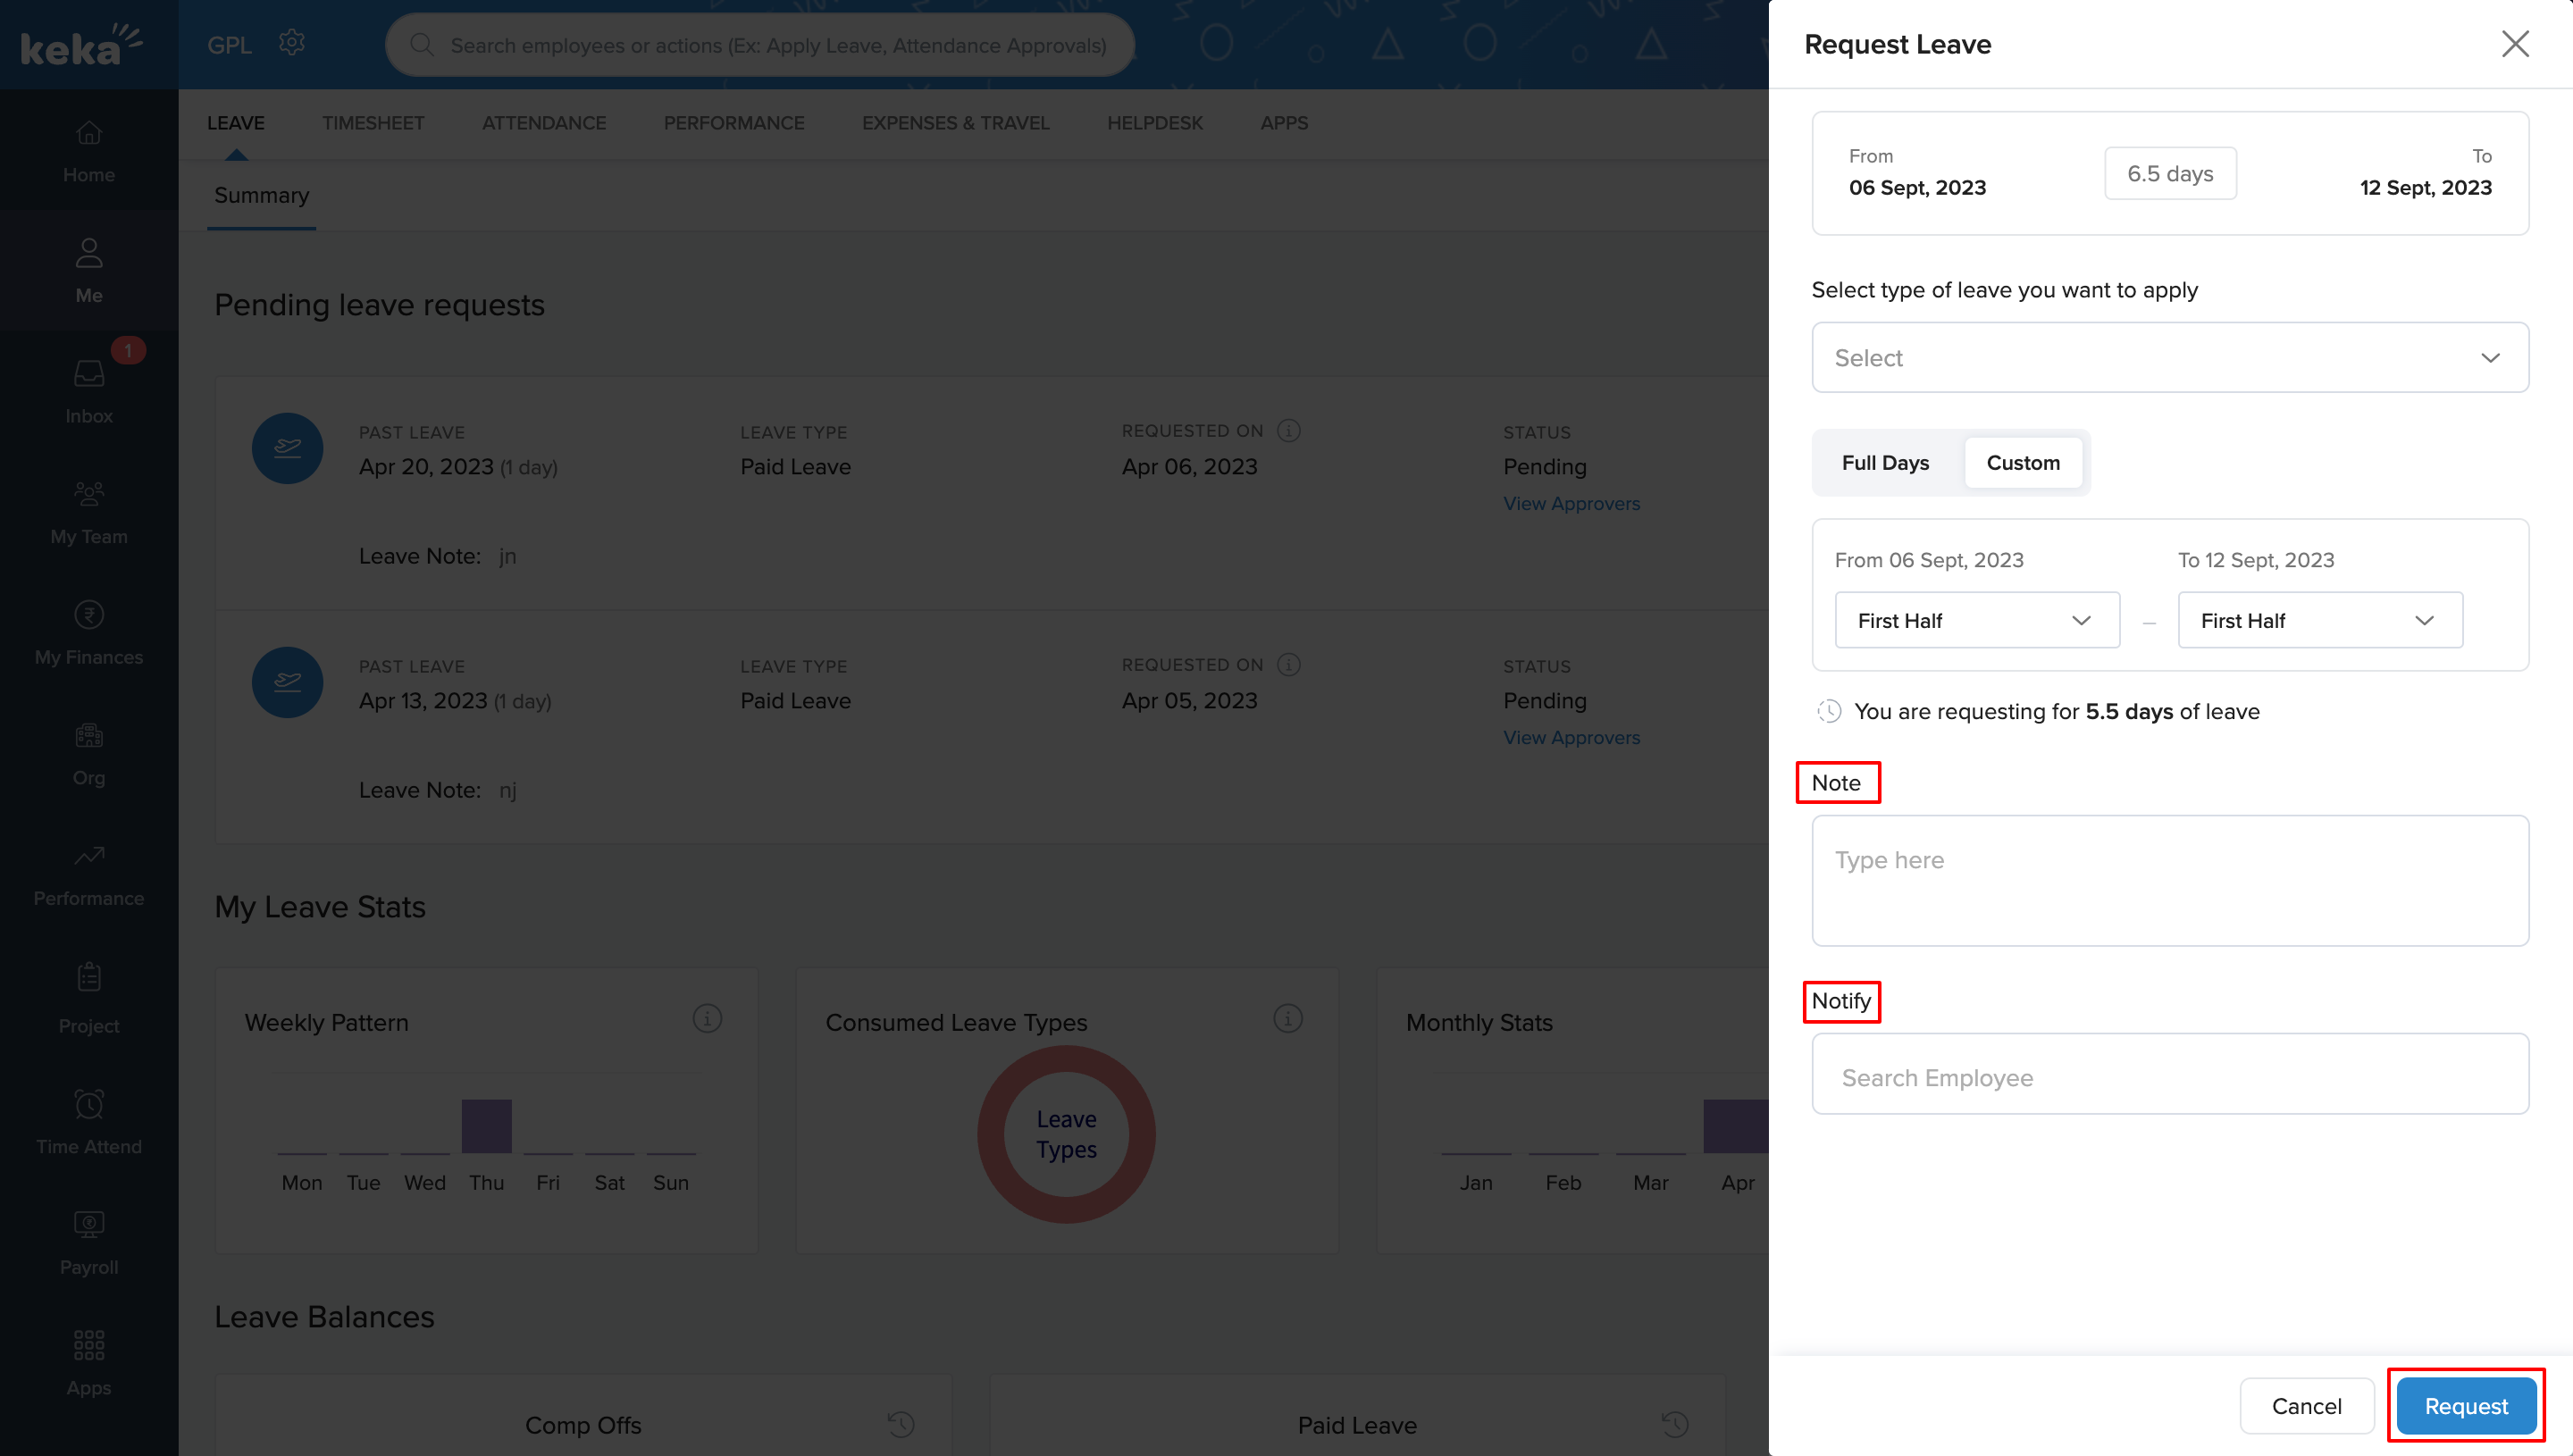
Under Note, type in a reason for the leave. You can also notify some employee(s) whom you would like to keep informed about your leave from this screen. Search for any employee you want to notify in the Notify section.
Once done, click on Request. Alternatively, you can click on Cancel, if you have changed your mind.
Viewing your leave requests
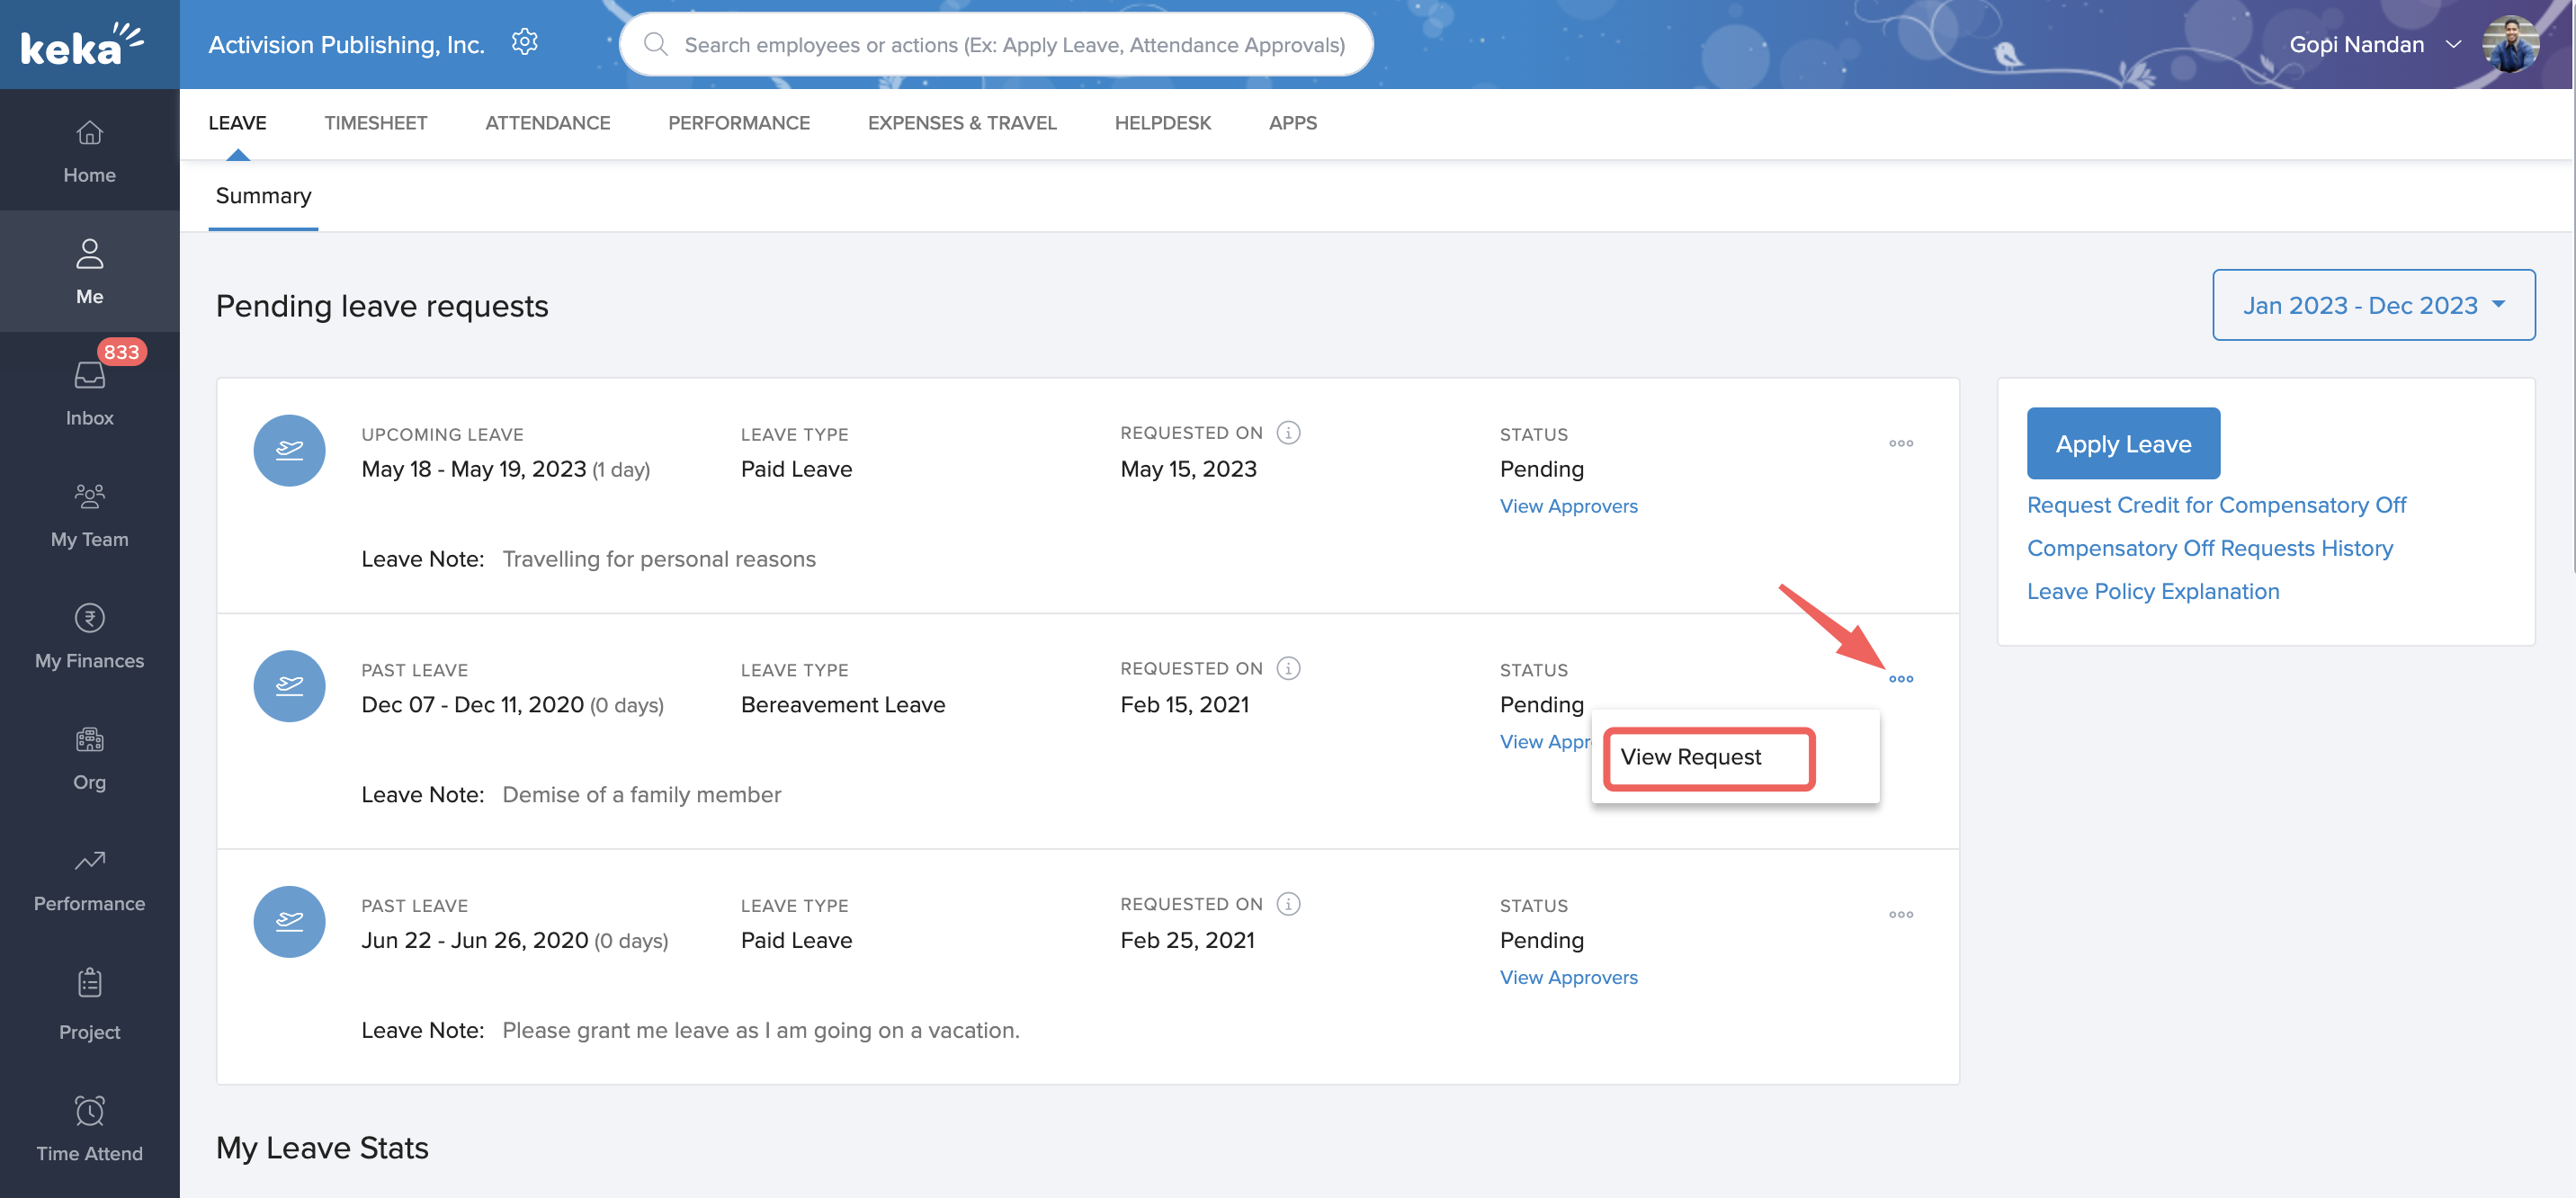
Under Summary, you will find Pending leave requests. To find details about a pending leave request and to comment on the same, click on the three dots and then click on the View request option.
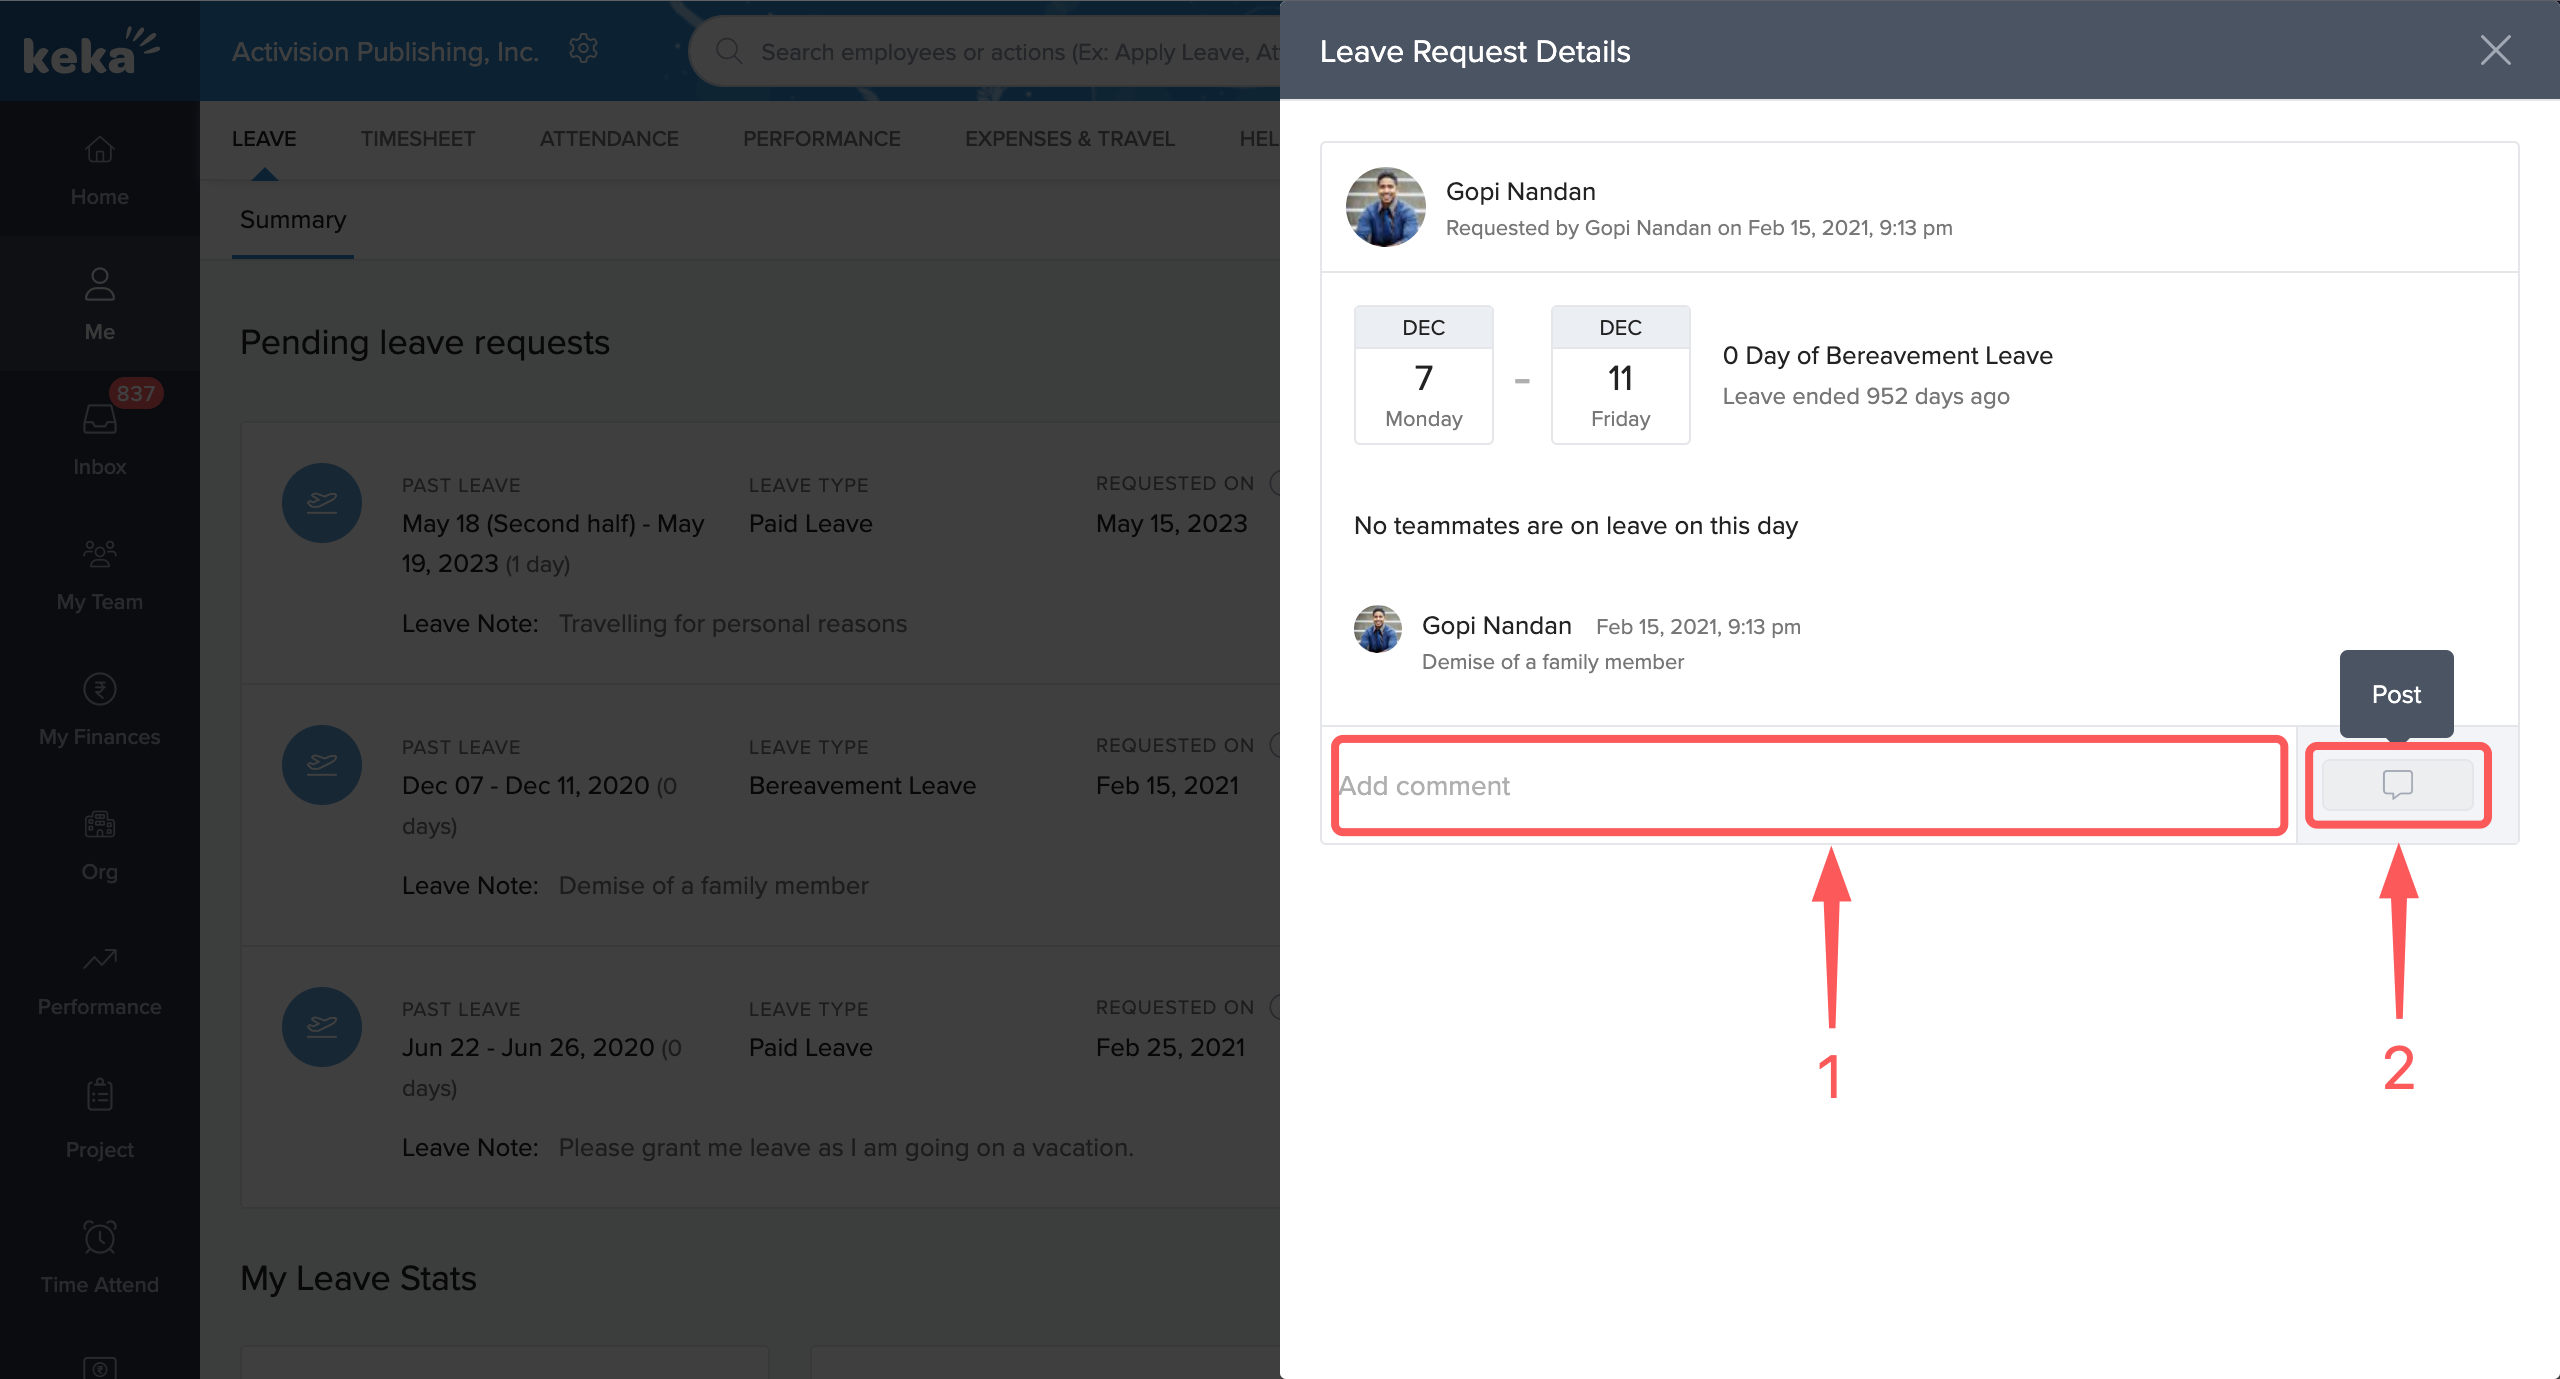
In the Add comment (1) text box, type in your comments if any, and click on the Post (2) button.
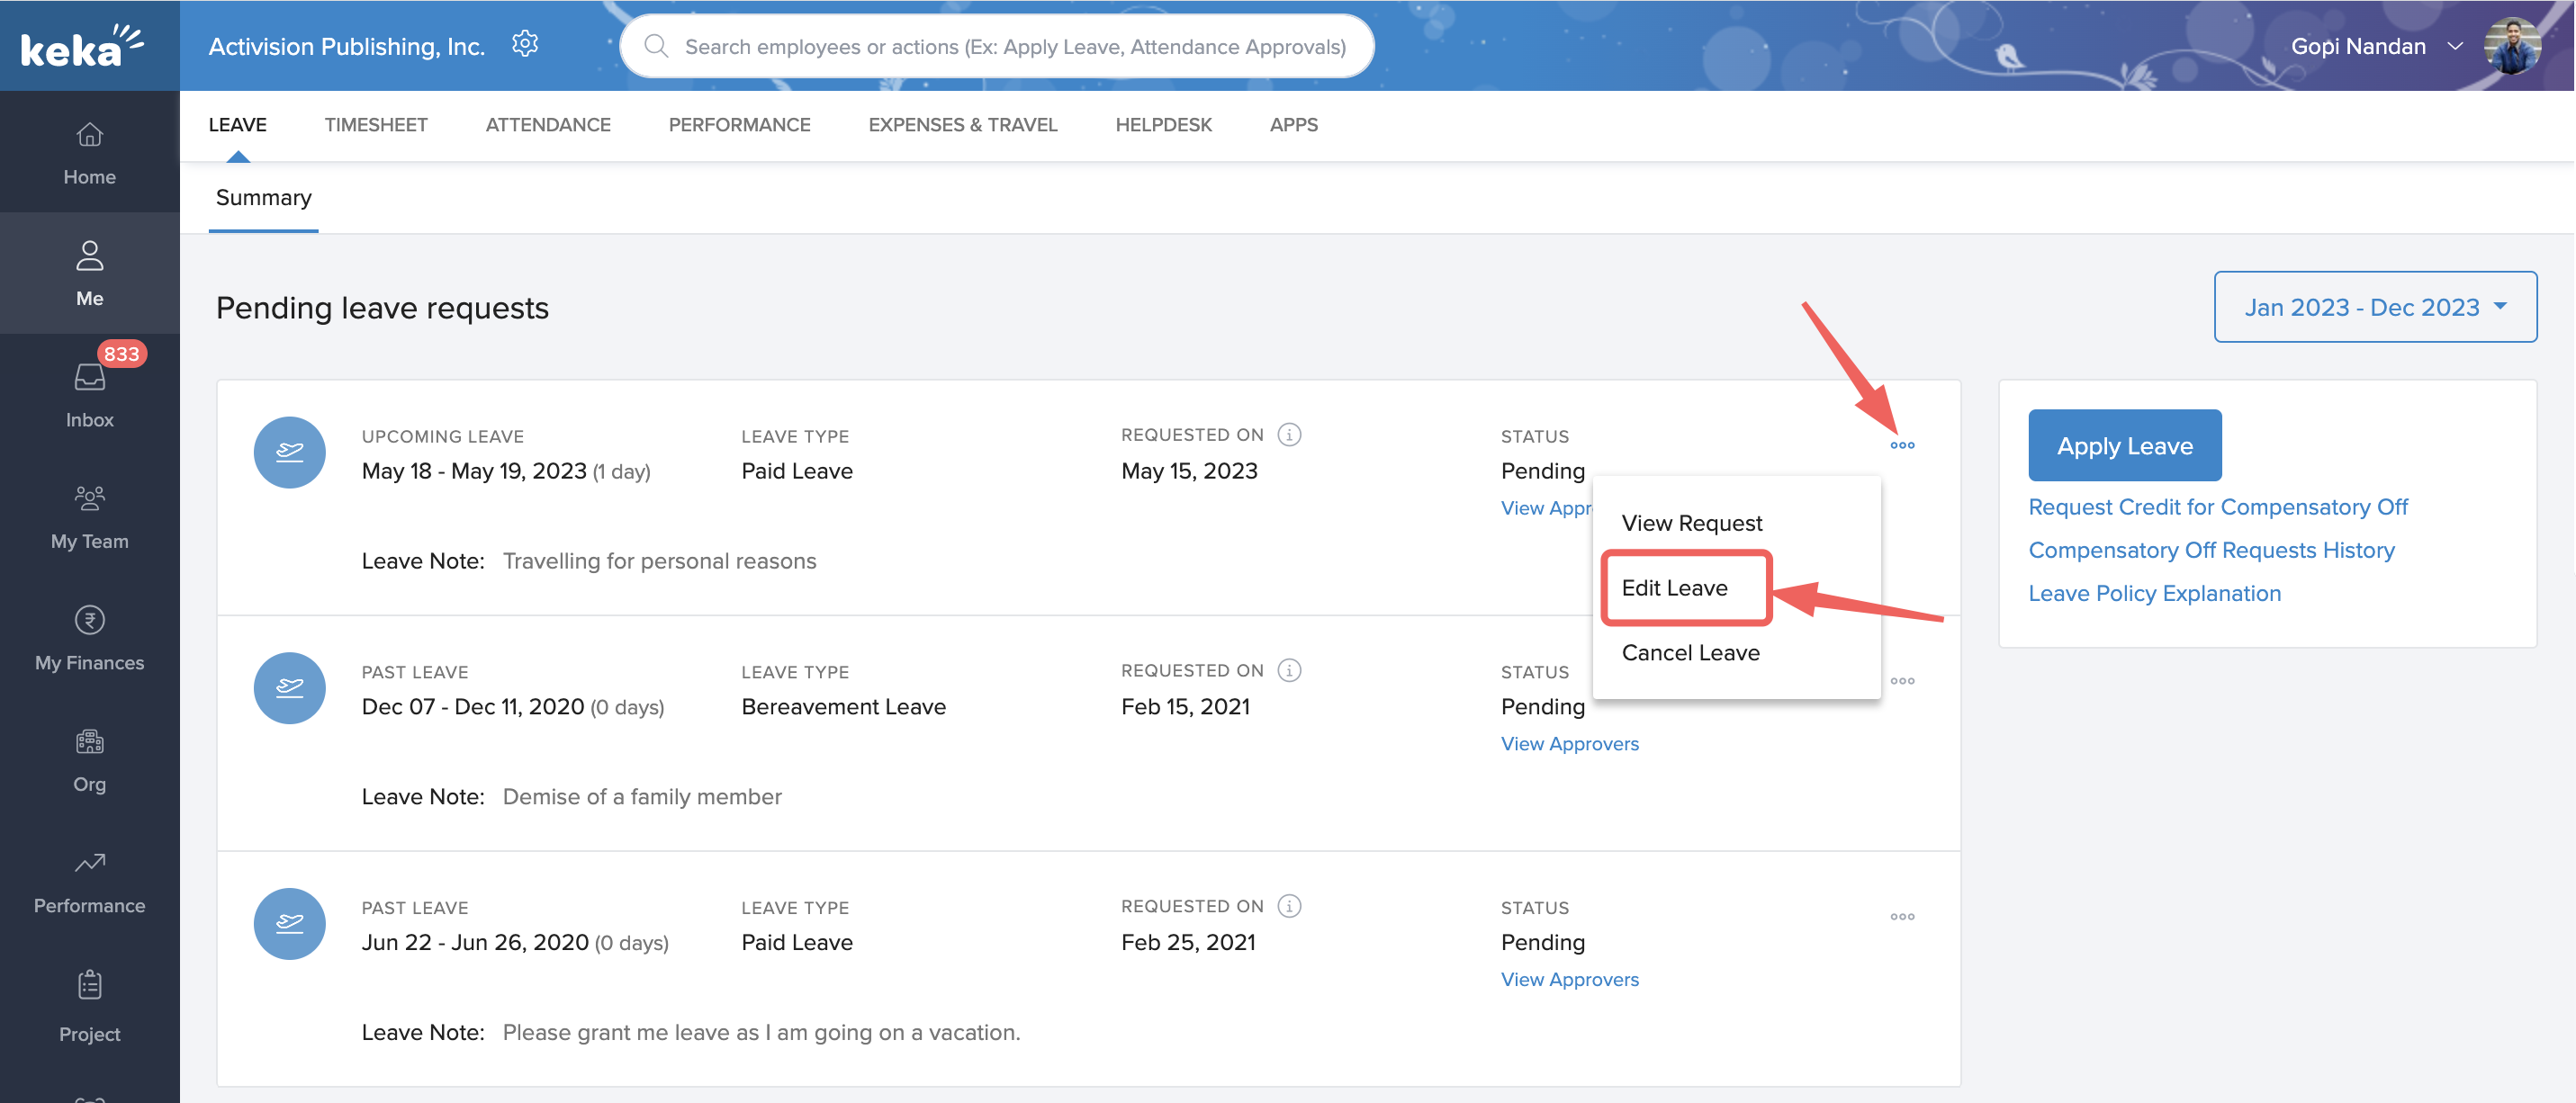
If the request is for a future date, then you will have additional options available to edit the leave request or cancel the request from this screen. To edit a leave request, click on the three dots corresponding to the leave request, and from the drop-down, select Edit Leave.
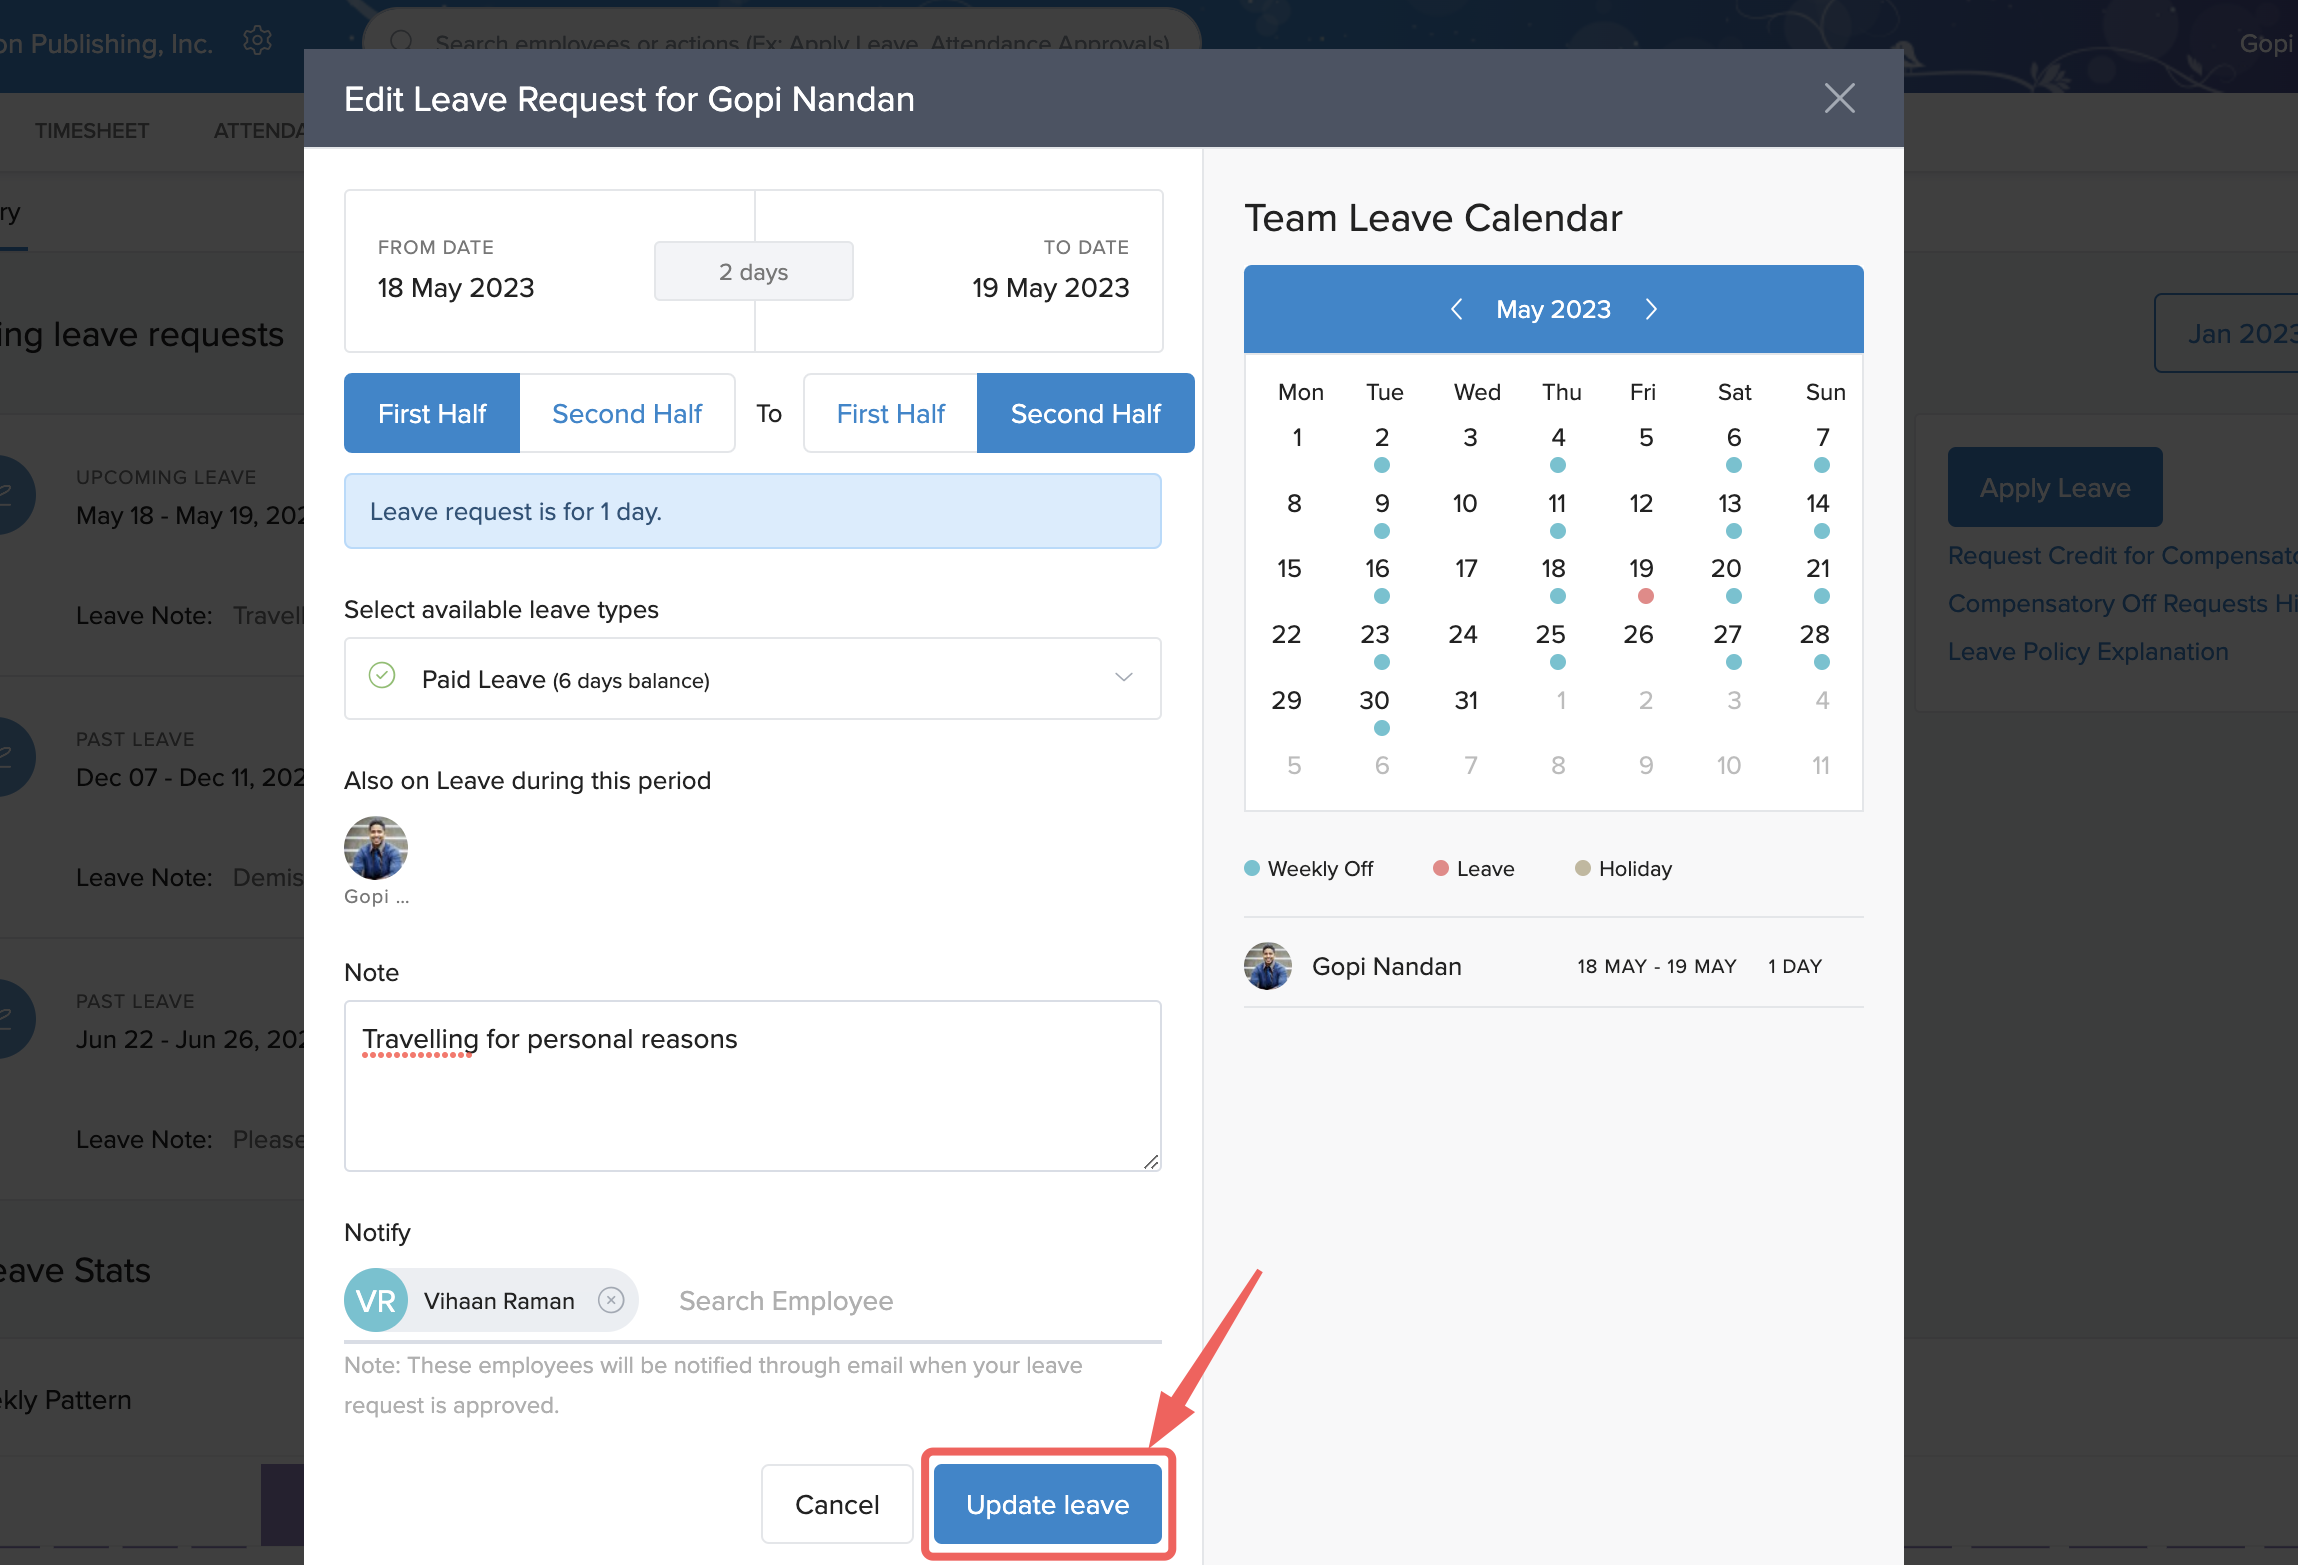
In the Edit Leave Request window, you can make the necessary changes to the request and then click Update Leave.
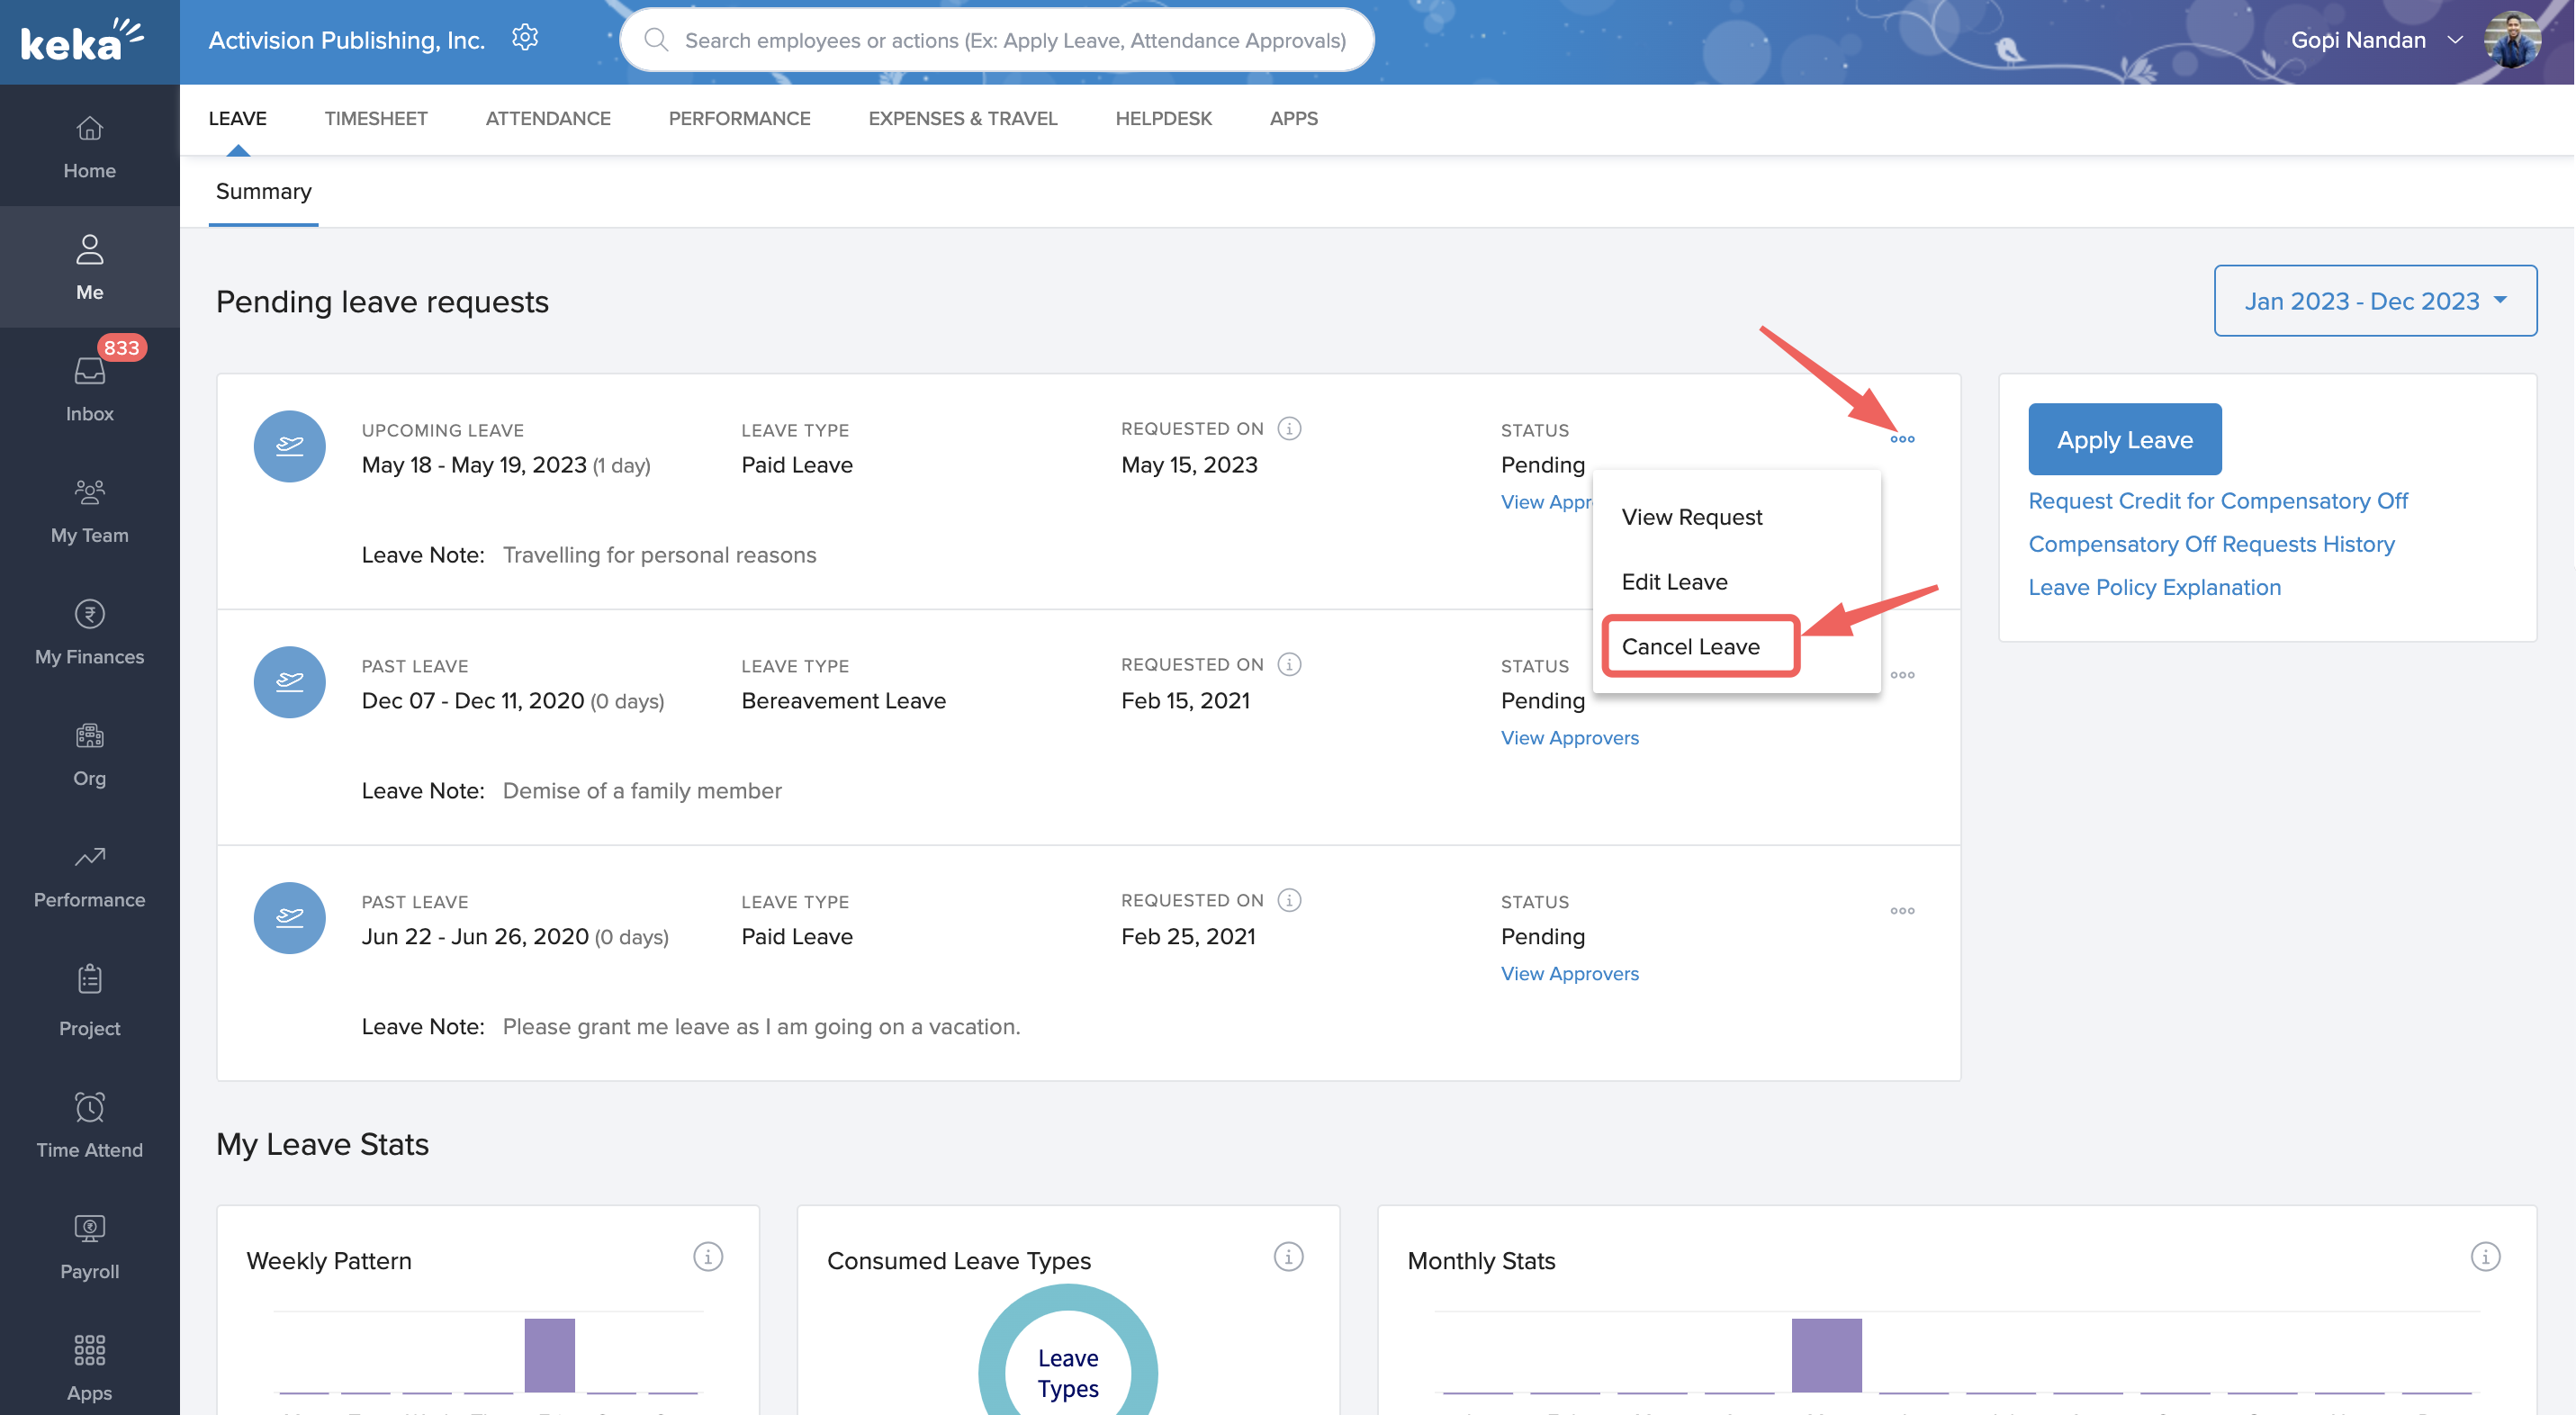
To cancel a leave request, click on the three dots and select Cancel Leave from the drop-down.
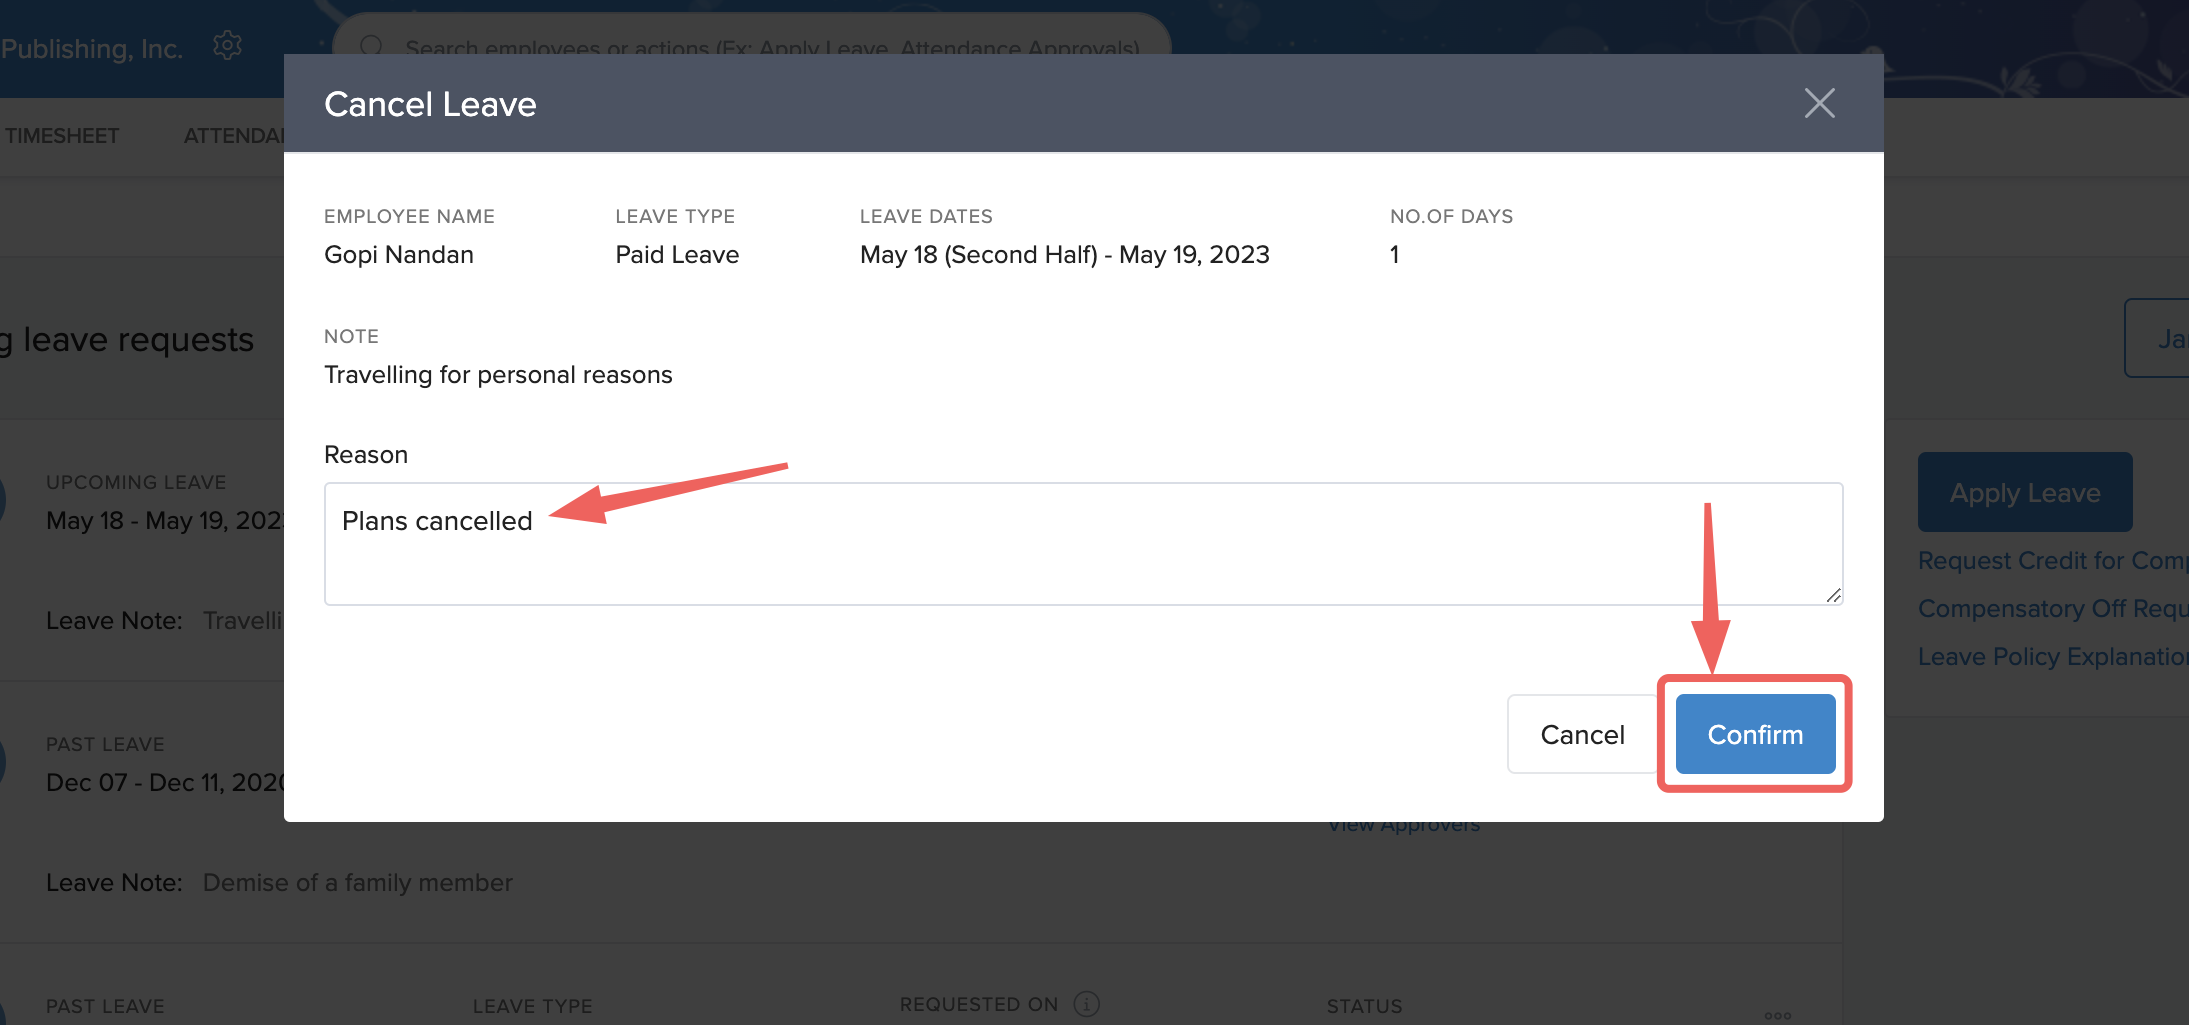
An overlay window will pop-up where you will have to enter a reason for the cancellation in the textbox and then click on Confirm to cancel the leave.
Requesting credit for compensatory off
If you work on a holiday or on a weekly off day, you can request for a compensatory off credit which is a leave type that you can use when applying for leave next time. Here is how you can request for a compensatory off-credit.
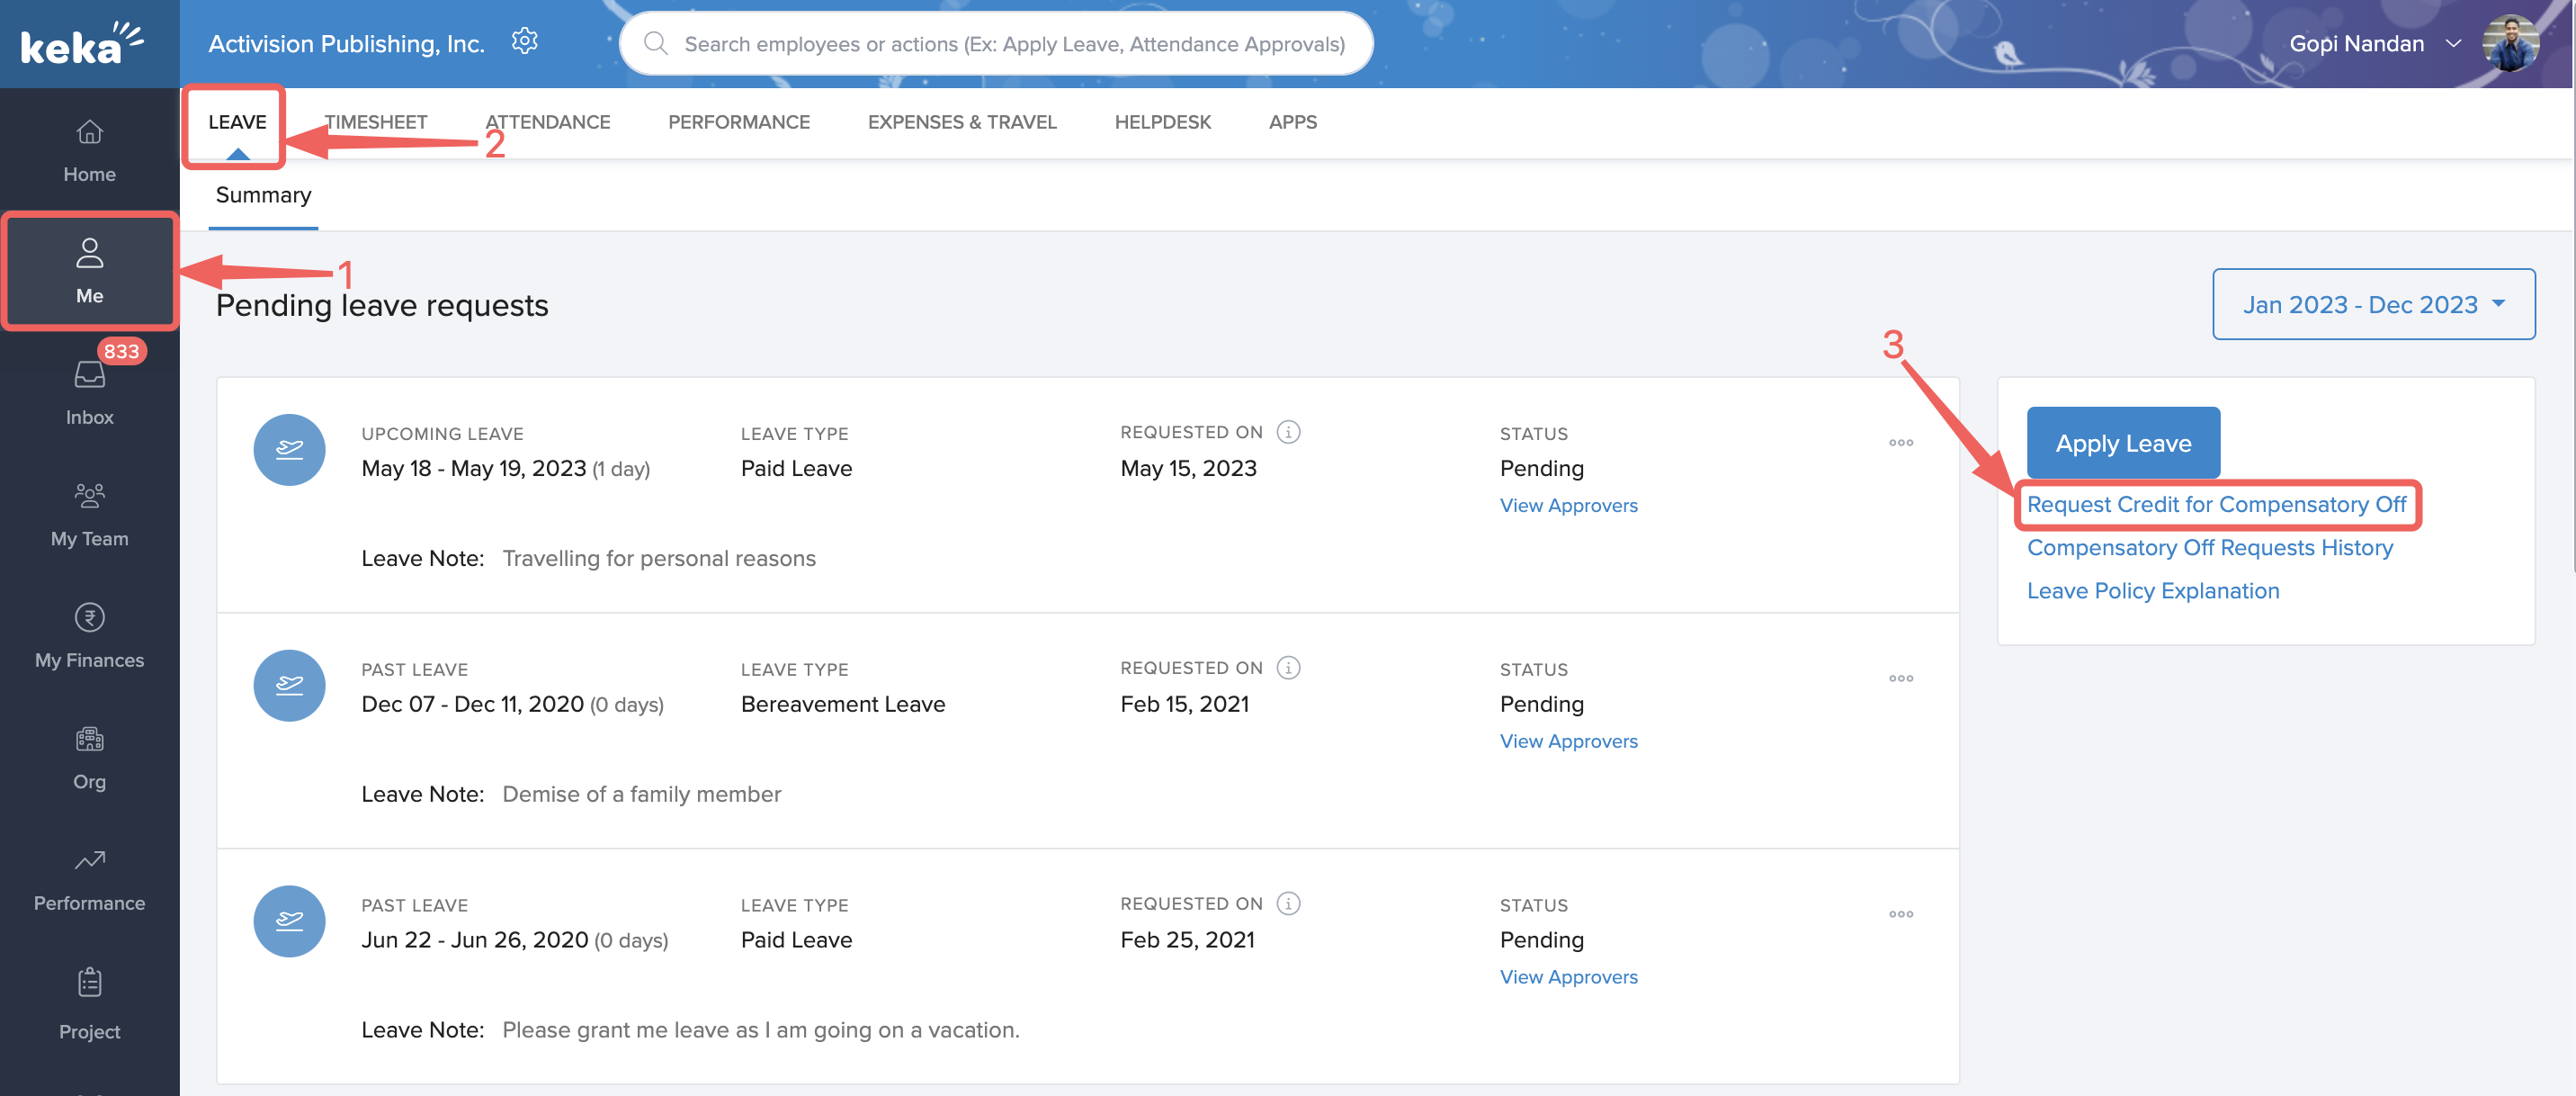
In order to request credit for a compensatory off, click on Me (1) and select Leave (2). Now, click on the Request Credit for Compensatory Off (3) link.
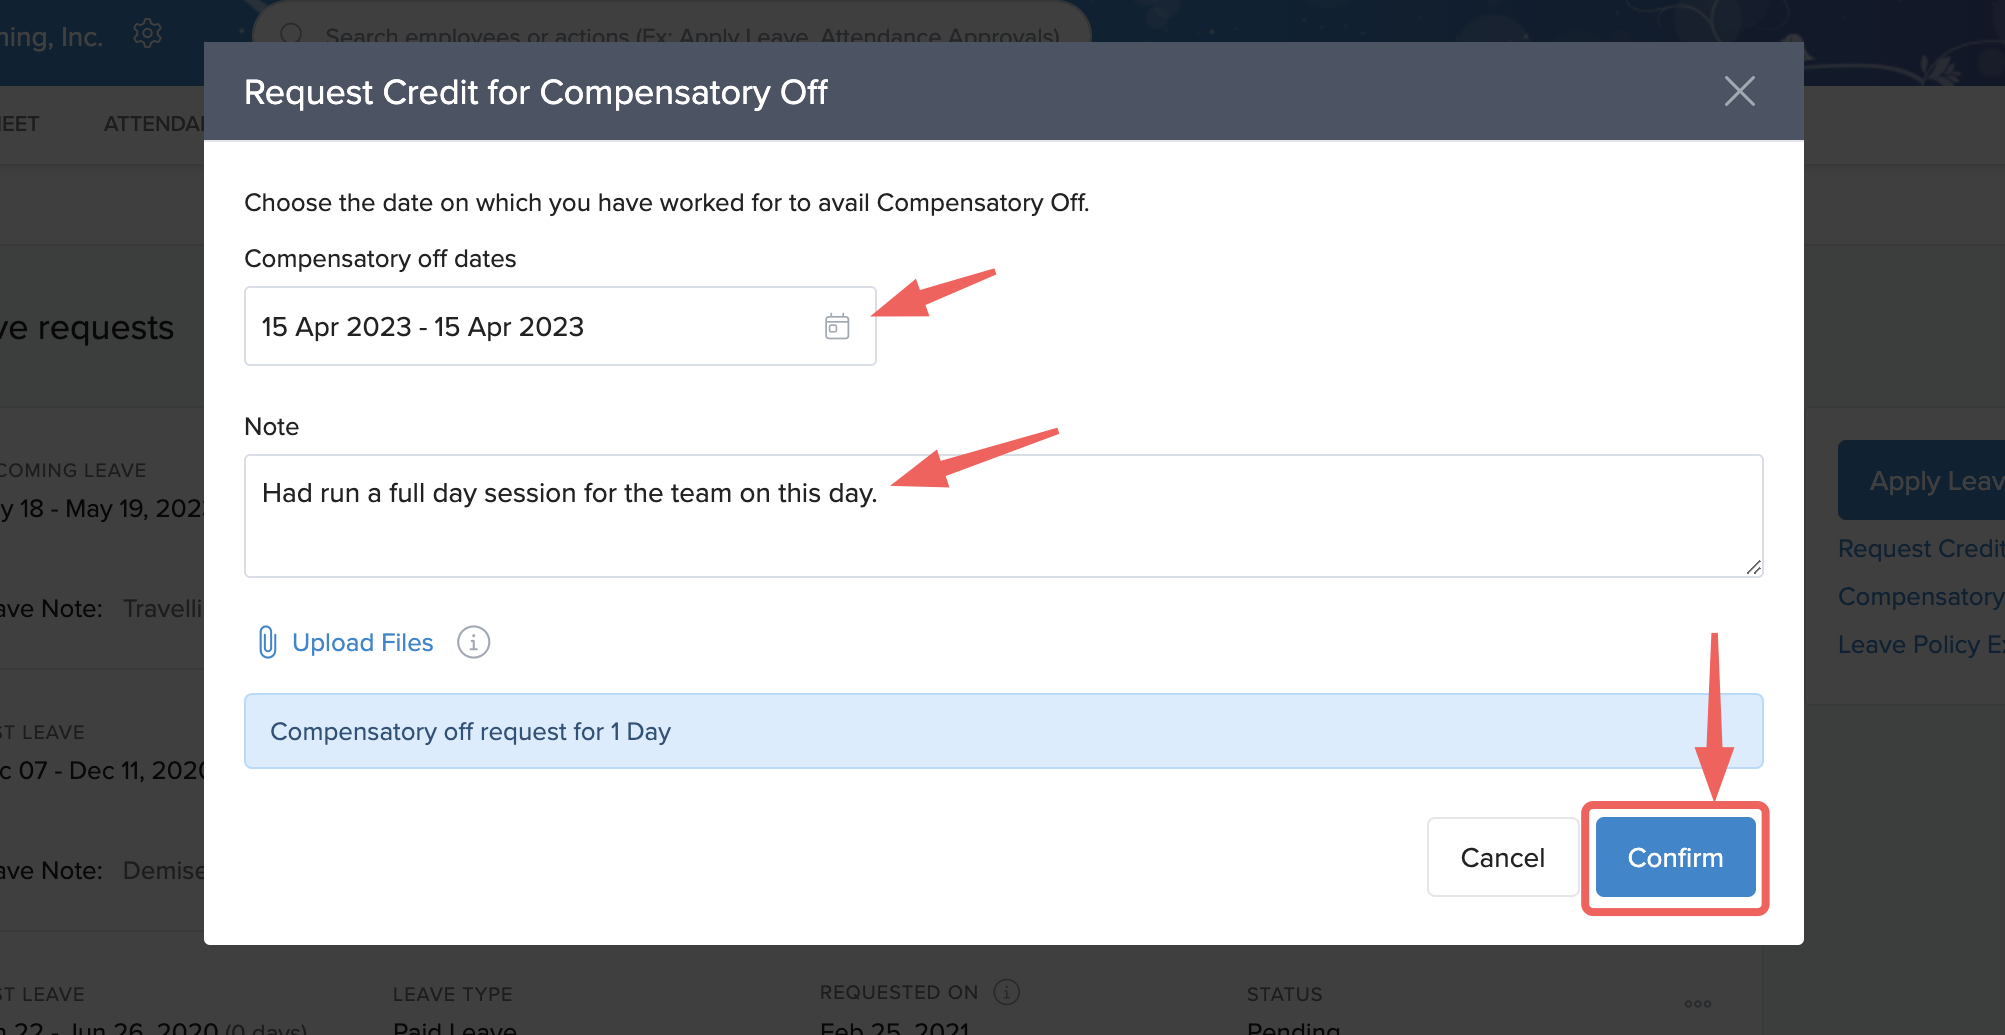
On the pop-up window, click inside the box under Compensatory Off dates and select the date(s) for which you are requesting the compensatory off from the calendar.
Now, in the text box under Note, describe the reason for your request to avail compensatory off. If you have any supporting files to submit, click on Upload files. To proceed with the request, click on Confirm.
Leave policy explanation
Your organization might allow you to avail leave under different titles/categories. Each such category is configured under pre-defined policies. These policies can be found under Leave Policy Explanation. To access it, click on the Me (1) menu and then on Leave (2). Now, click on the Leave Policy Explanation (3) link.
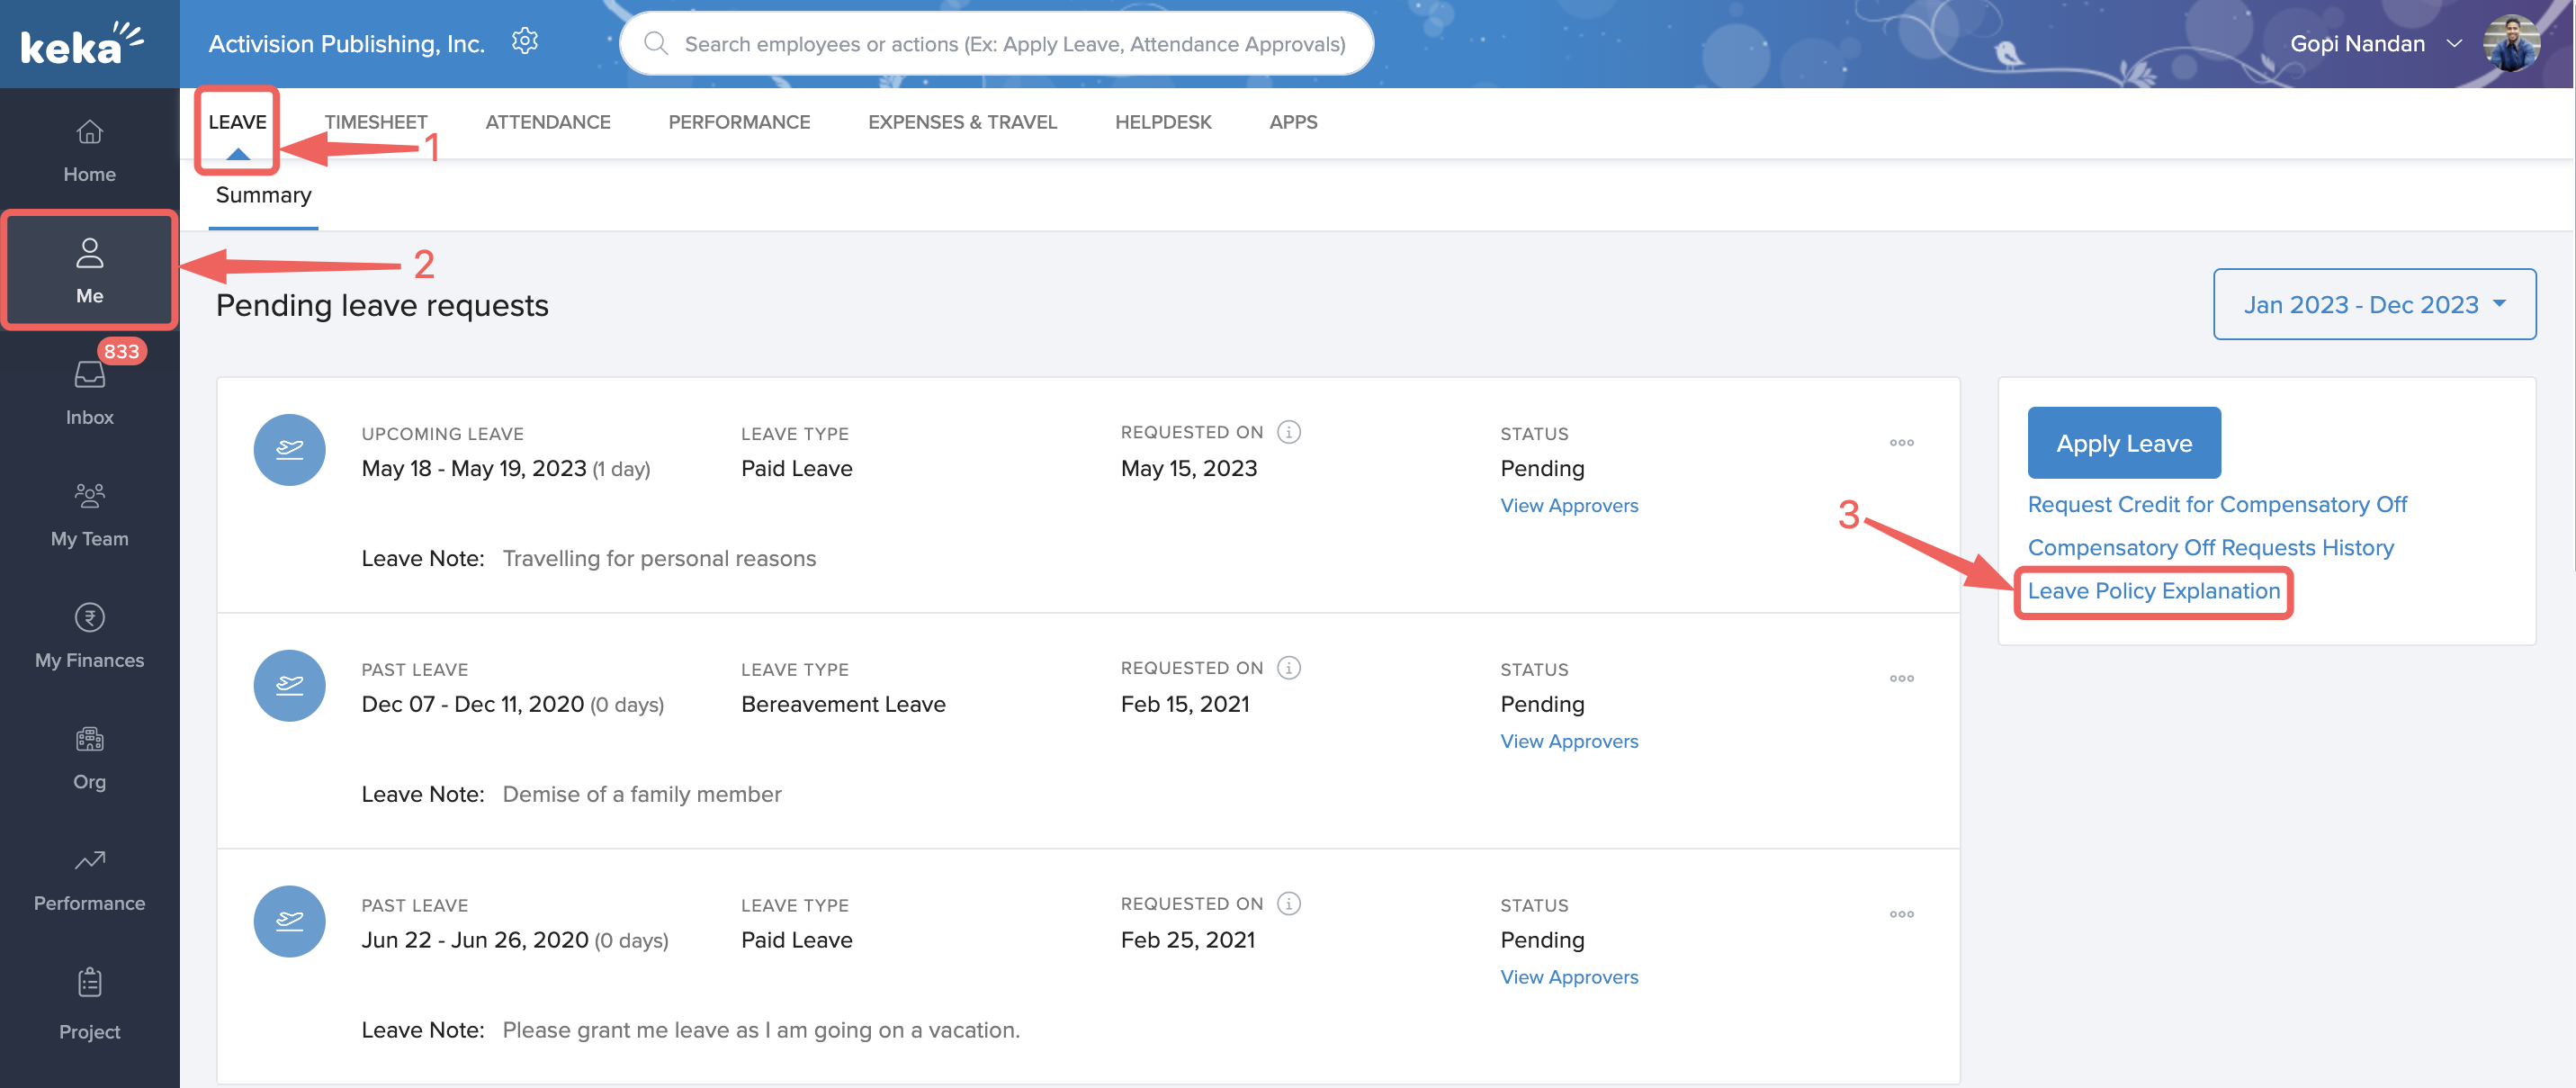
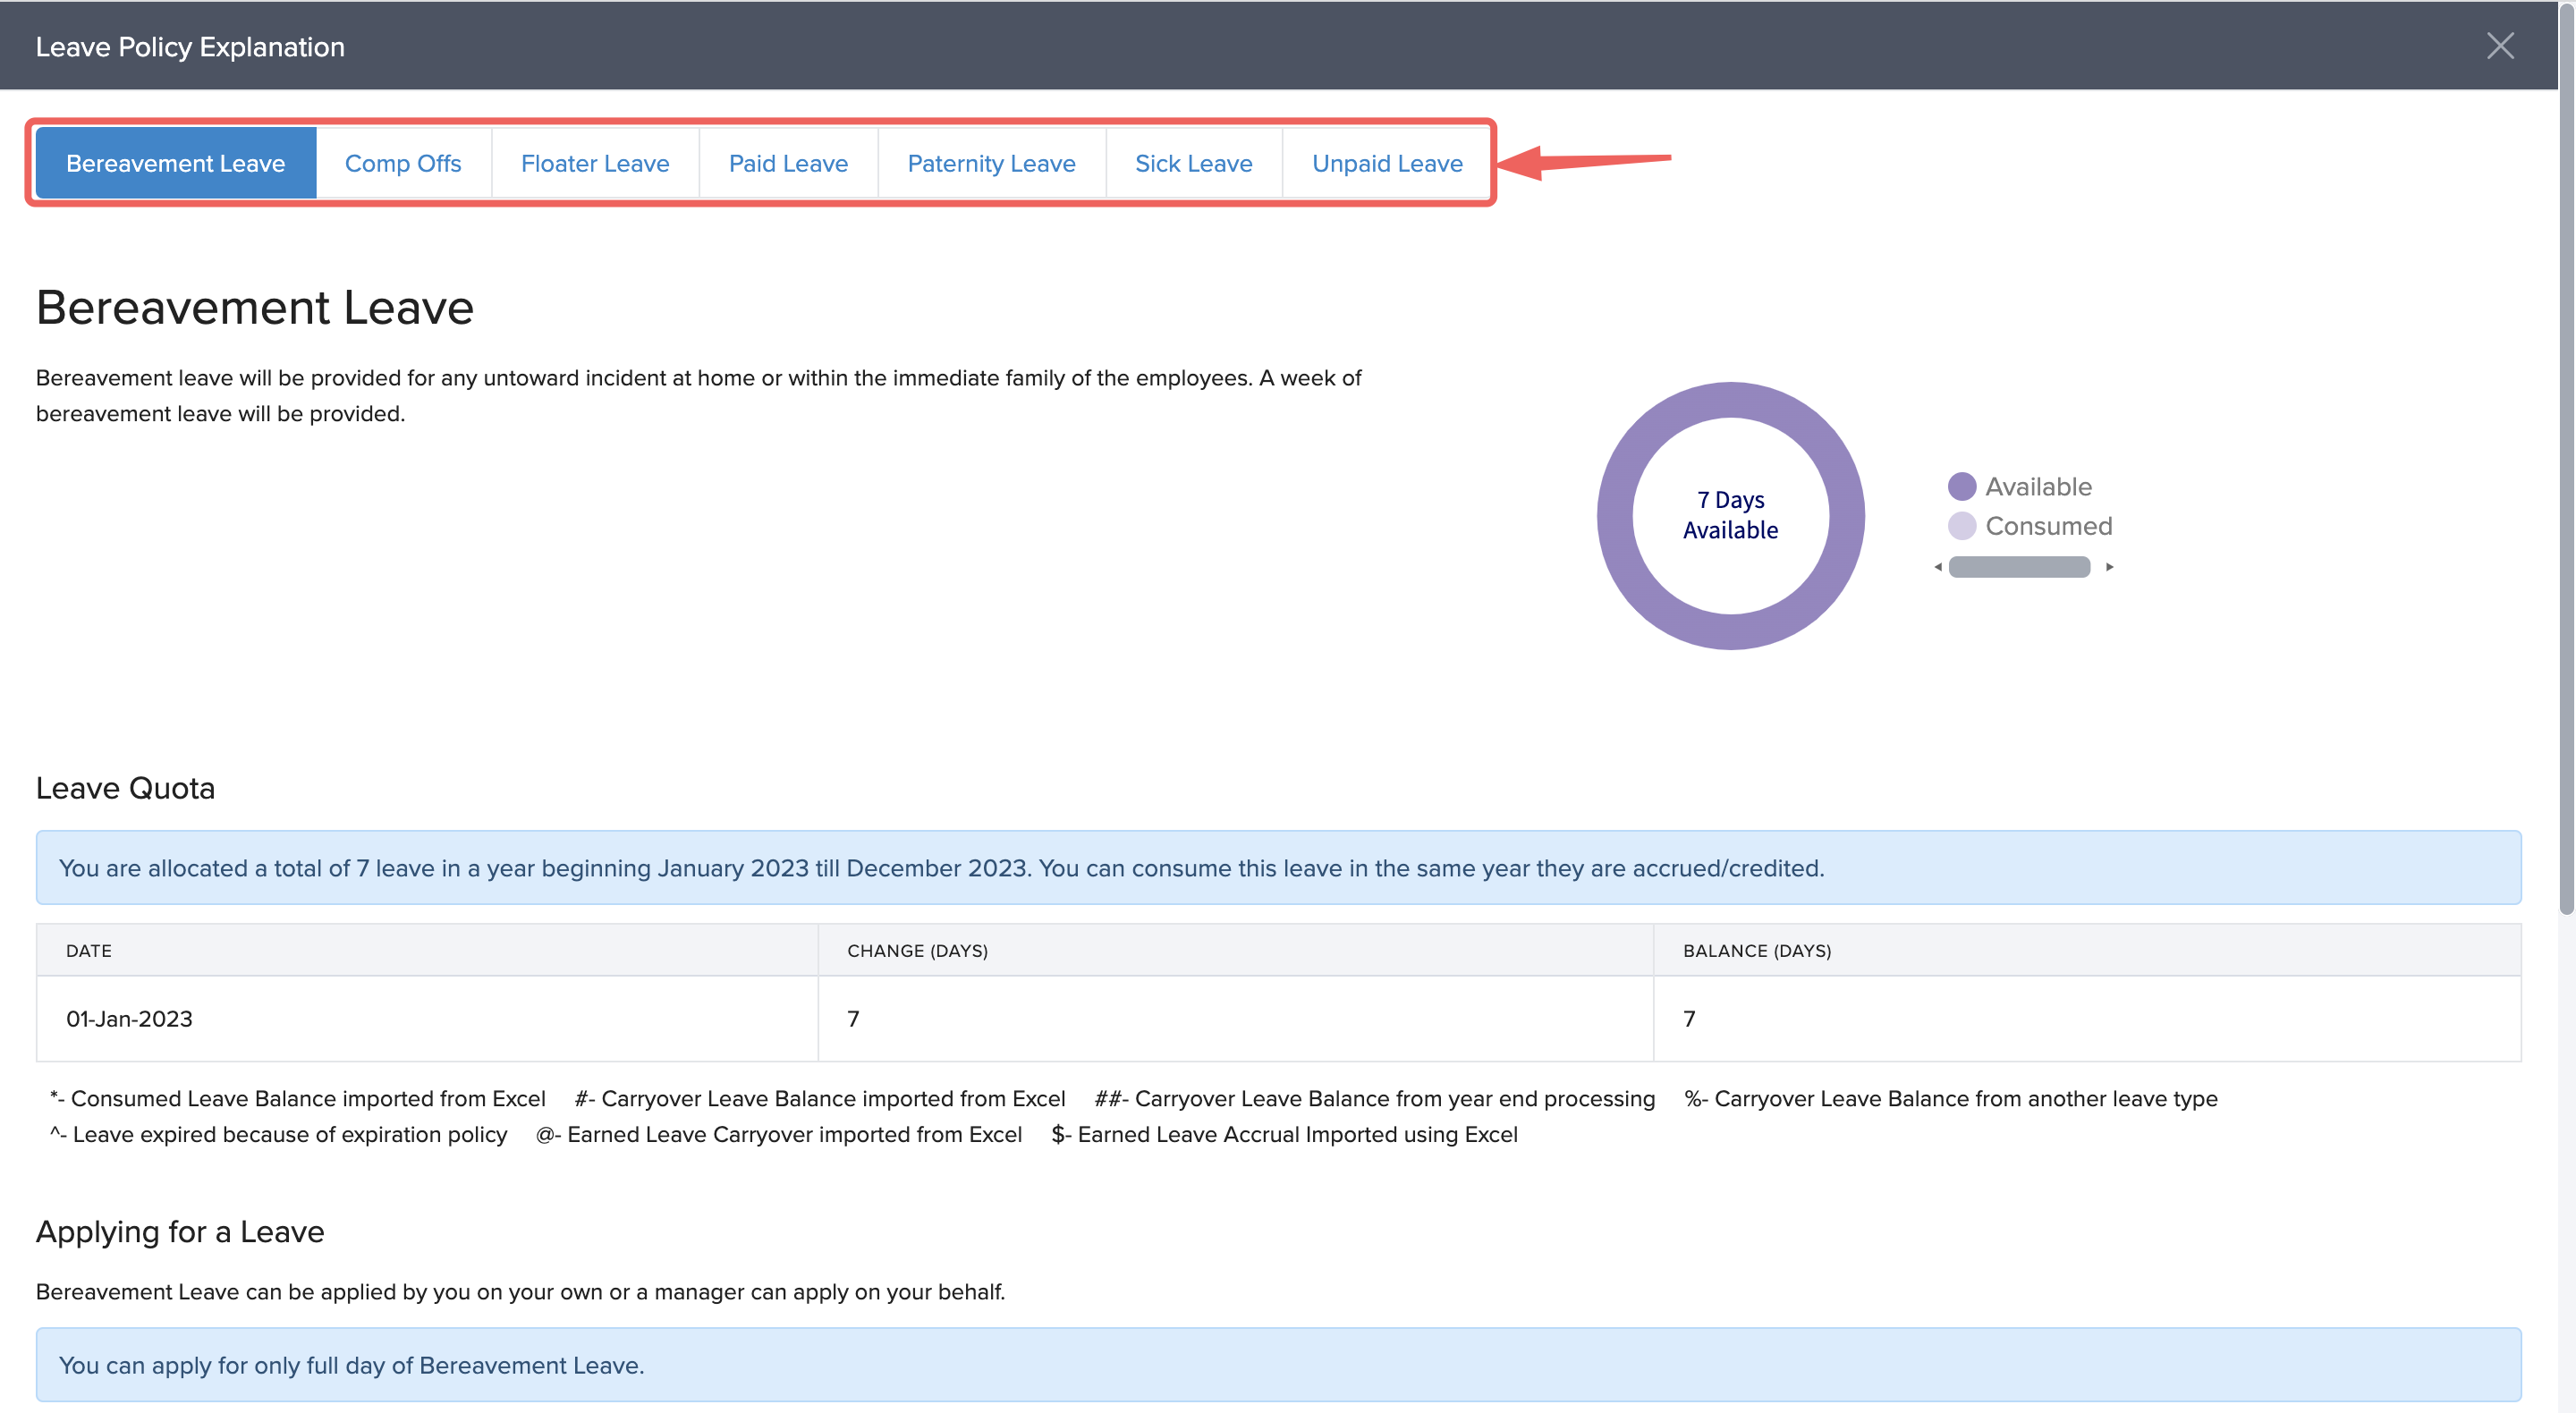
A new window will pop up. Here, you can find all types/categories of leave you can avail. You can click on any leave type to learn all the details about that particular type of leave.
We hope this article was helpful to you. If you have any other queries, please refer to the other articles or contact our product experts.
