Overview
Keka’s Event Trigger feature helps ensure that you’re notified when a resource’s allocation period on a project is about to end. This enables you to act promptly by reallocating resources to new projects, improving overall efficiency and resource management.
Step-by-Step Instructions
Create an Event Trigger for Resource Allocation End Date
- Log in to your Keka portal.
- Navigate to Global Settings by clicking on the corresponding menu option.
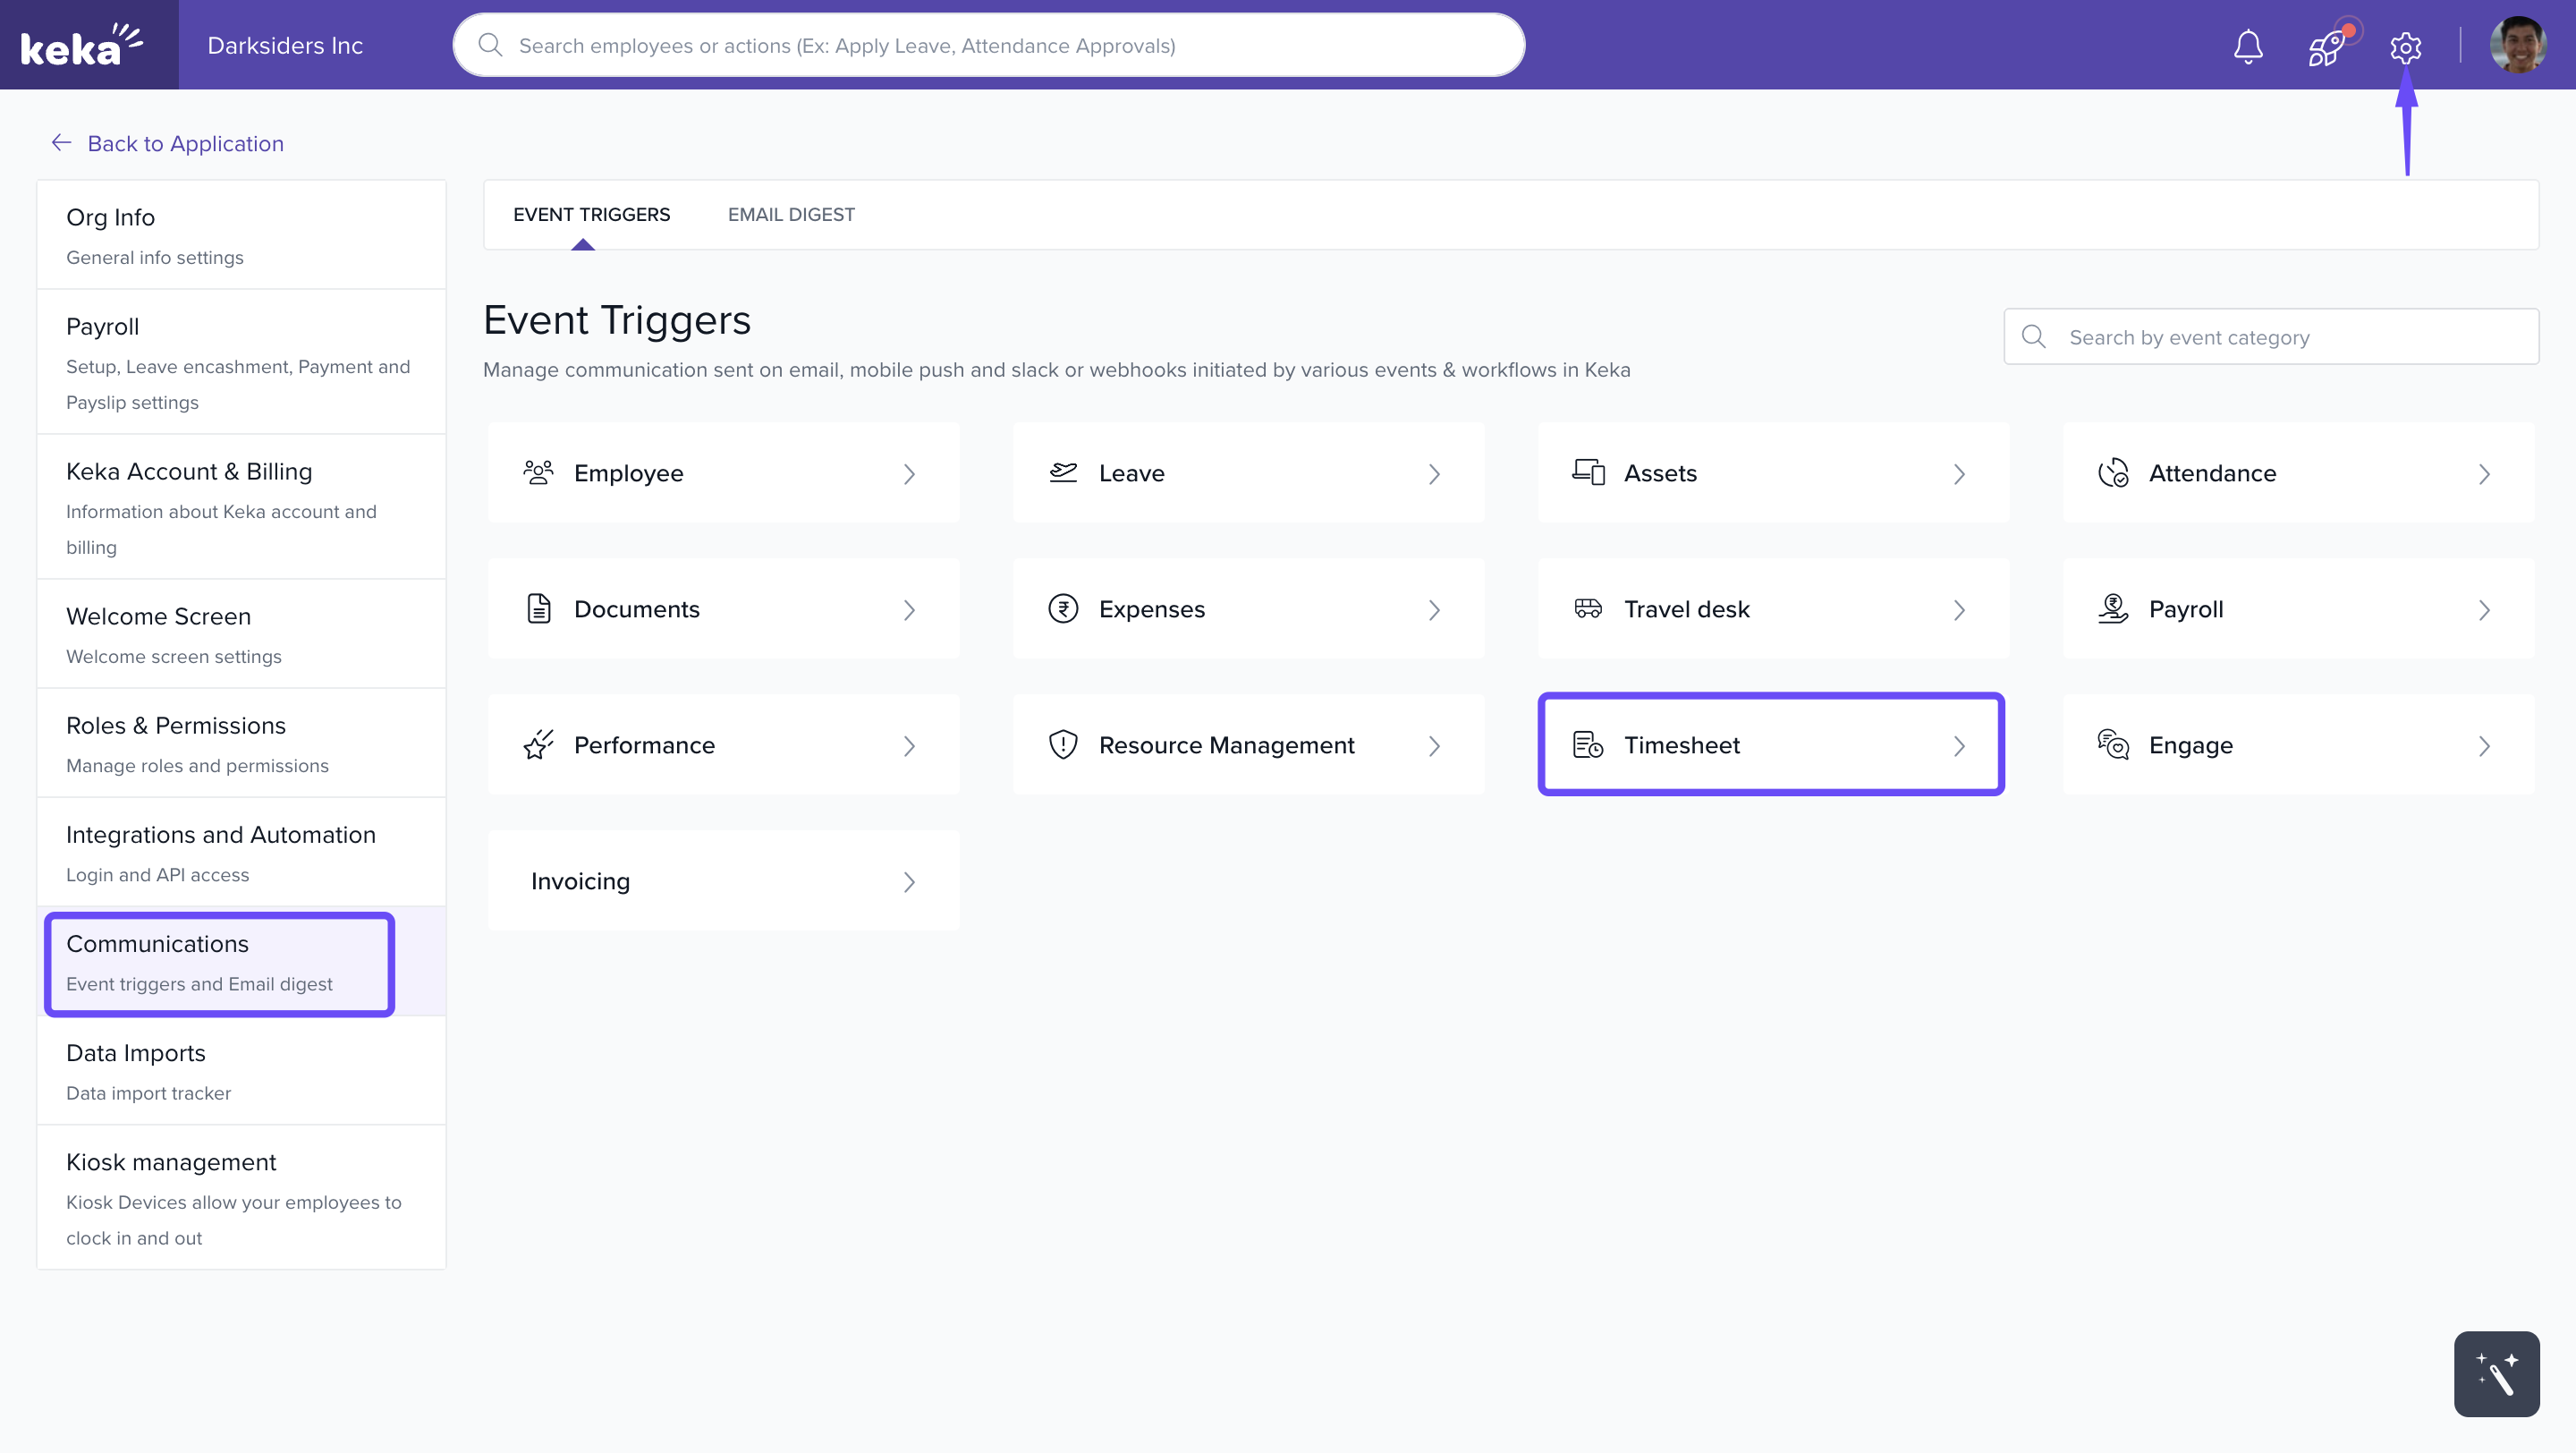
- In the Global Settings tab, select Communications.
- Under Communications, go to Event Triggers.
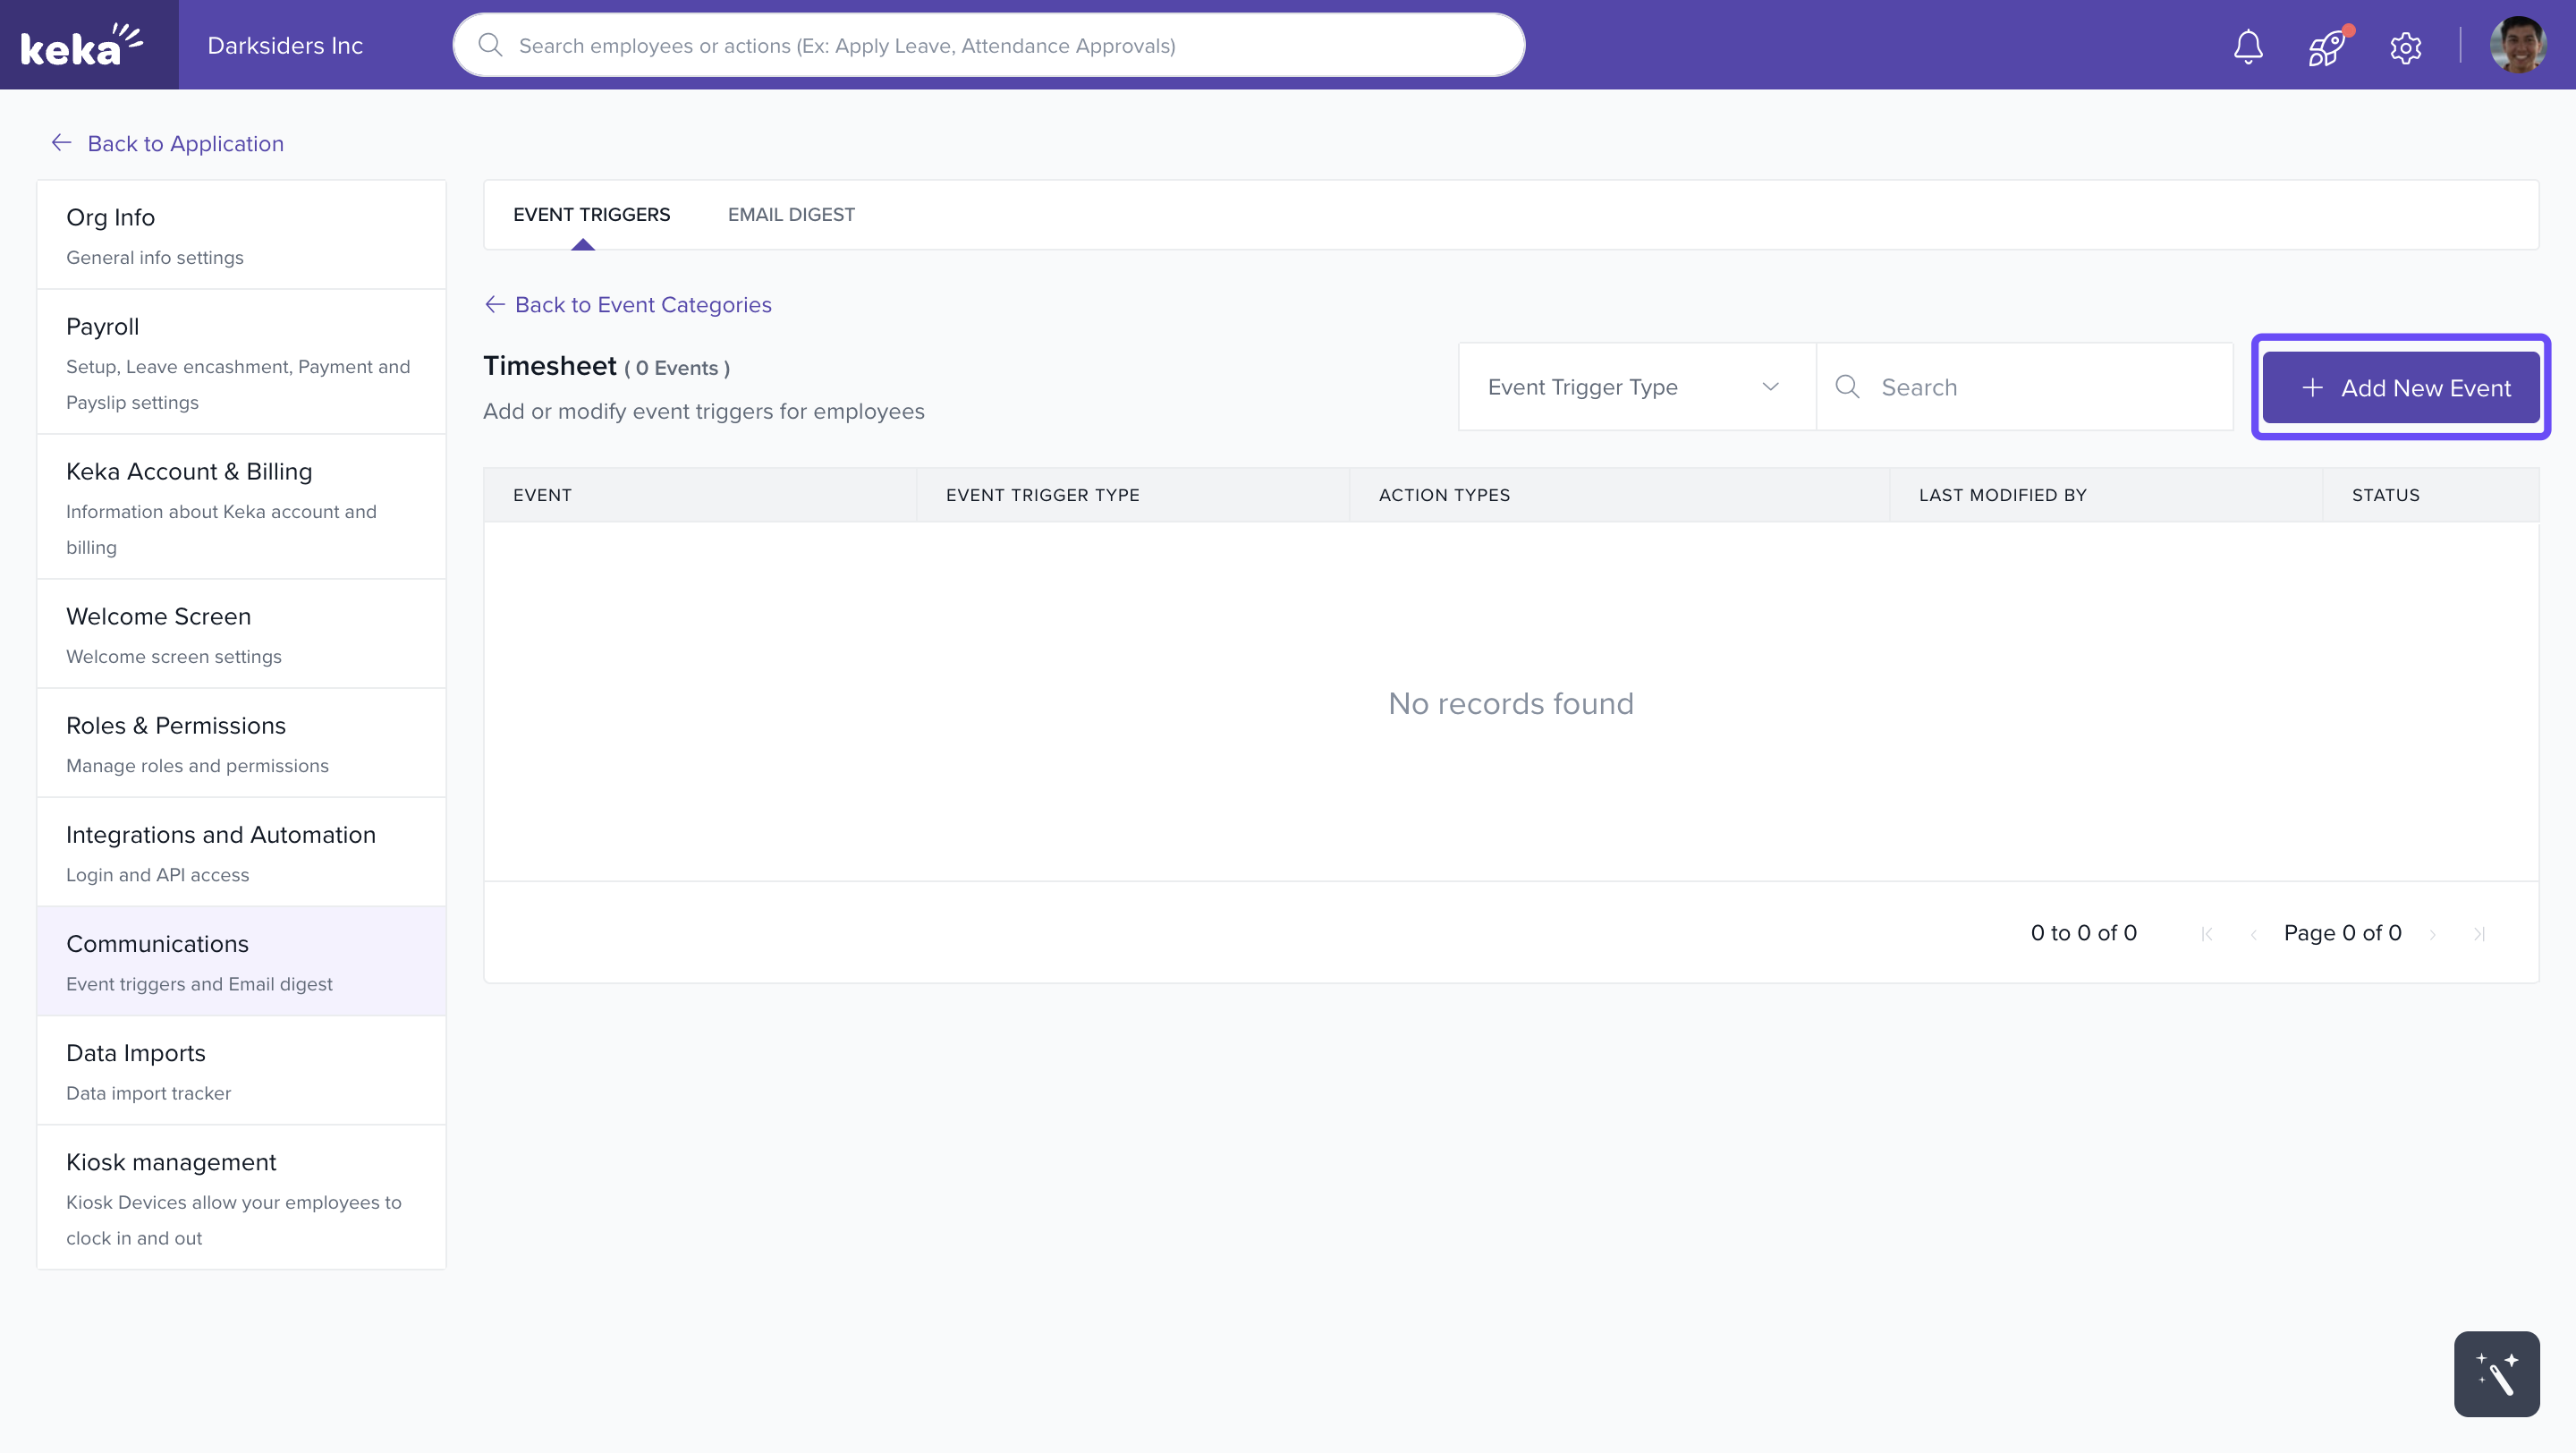
- Click on Timesheet to locate the Resource Allocation End Date trigger.
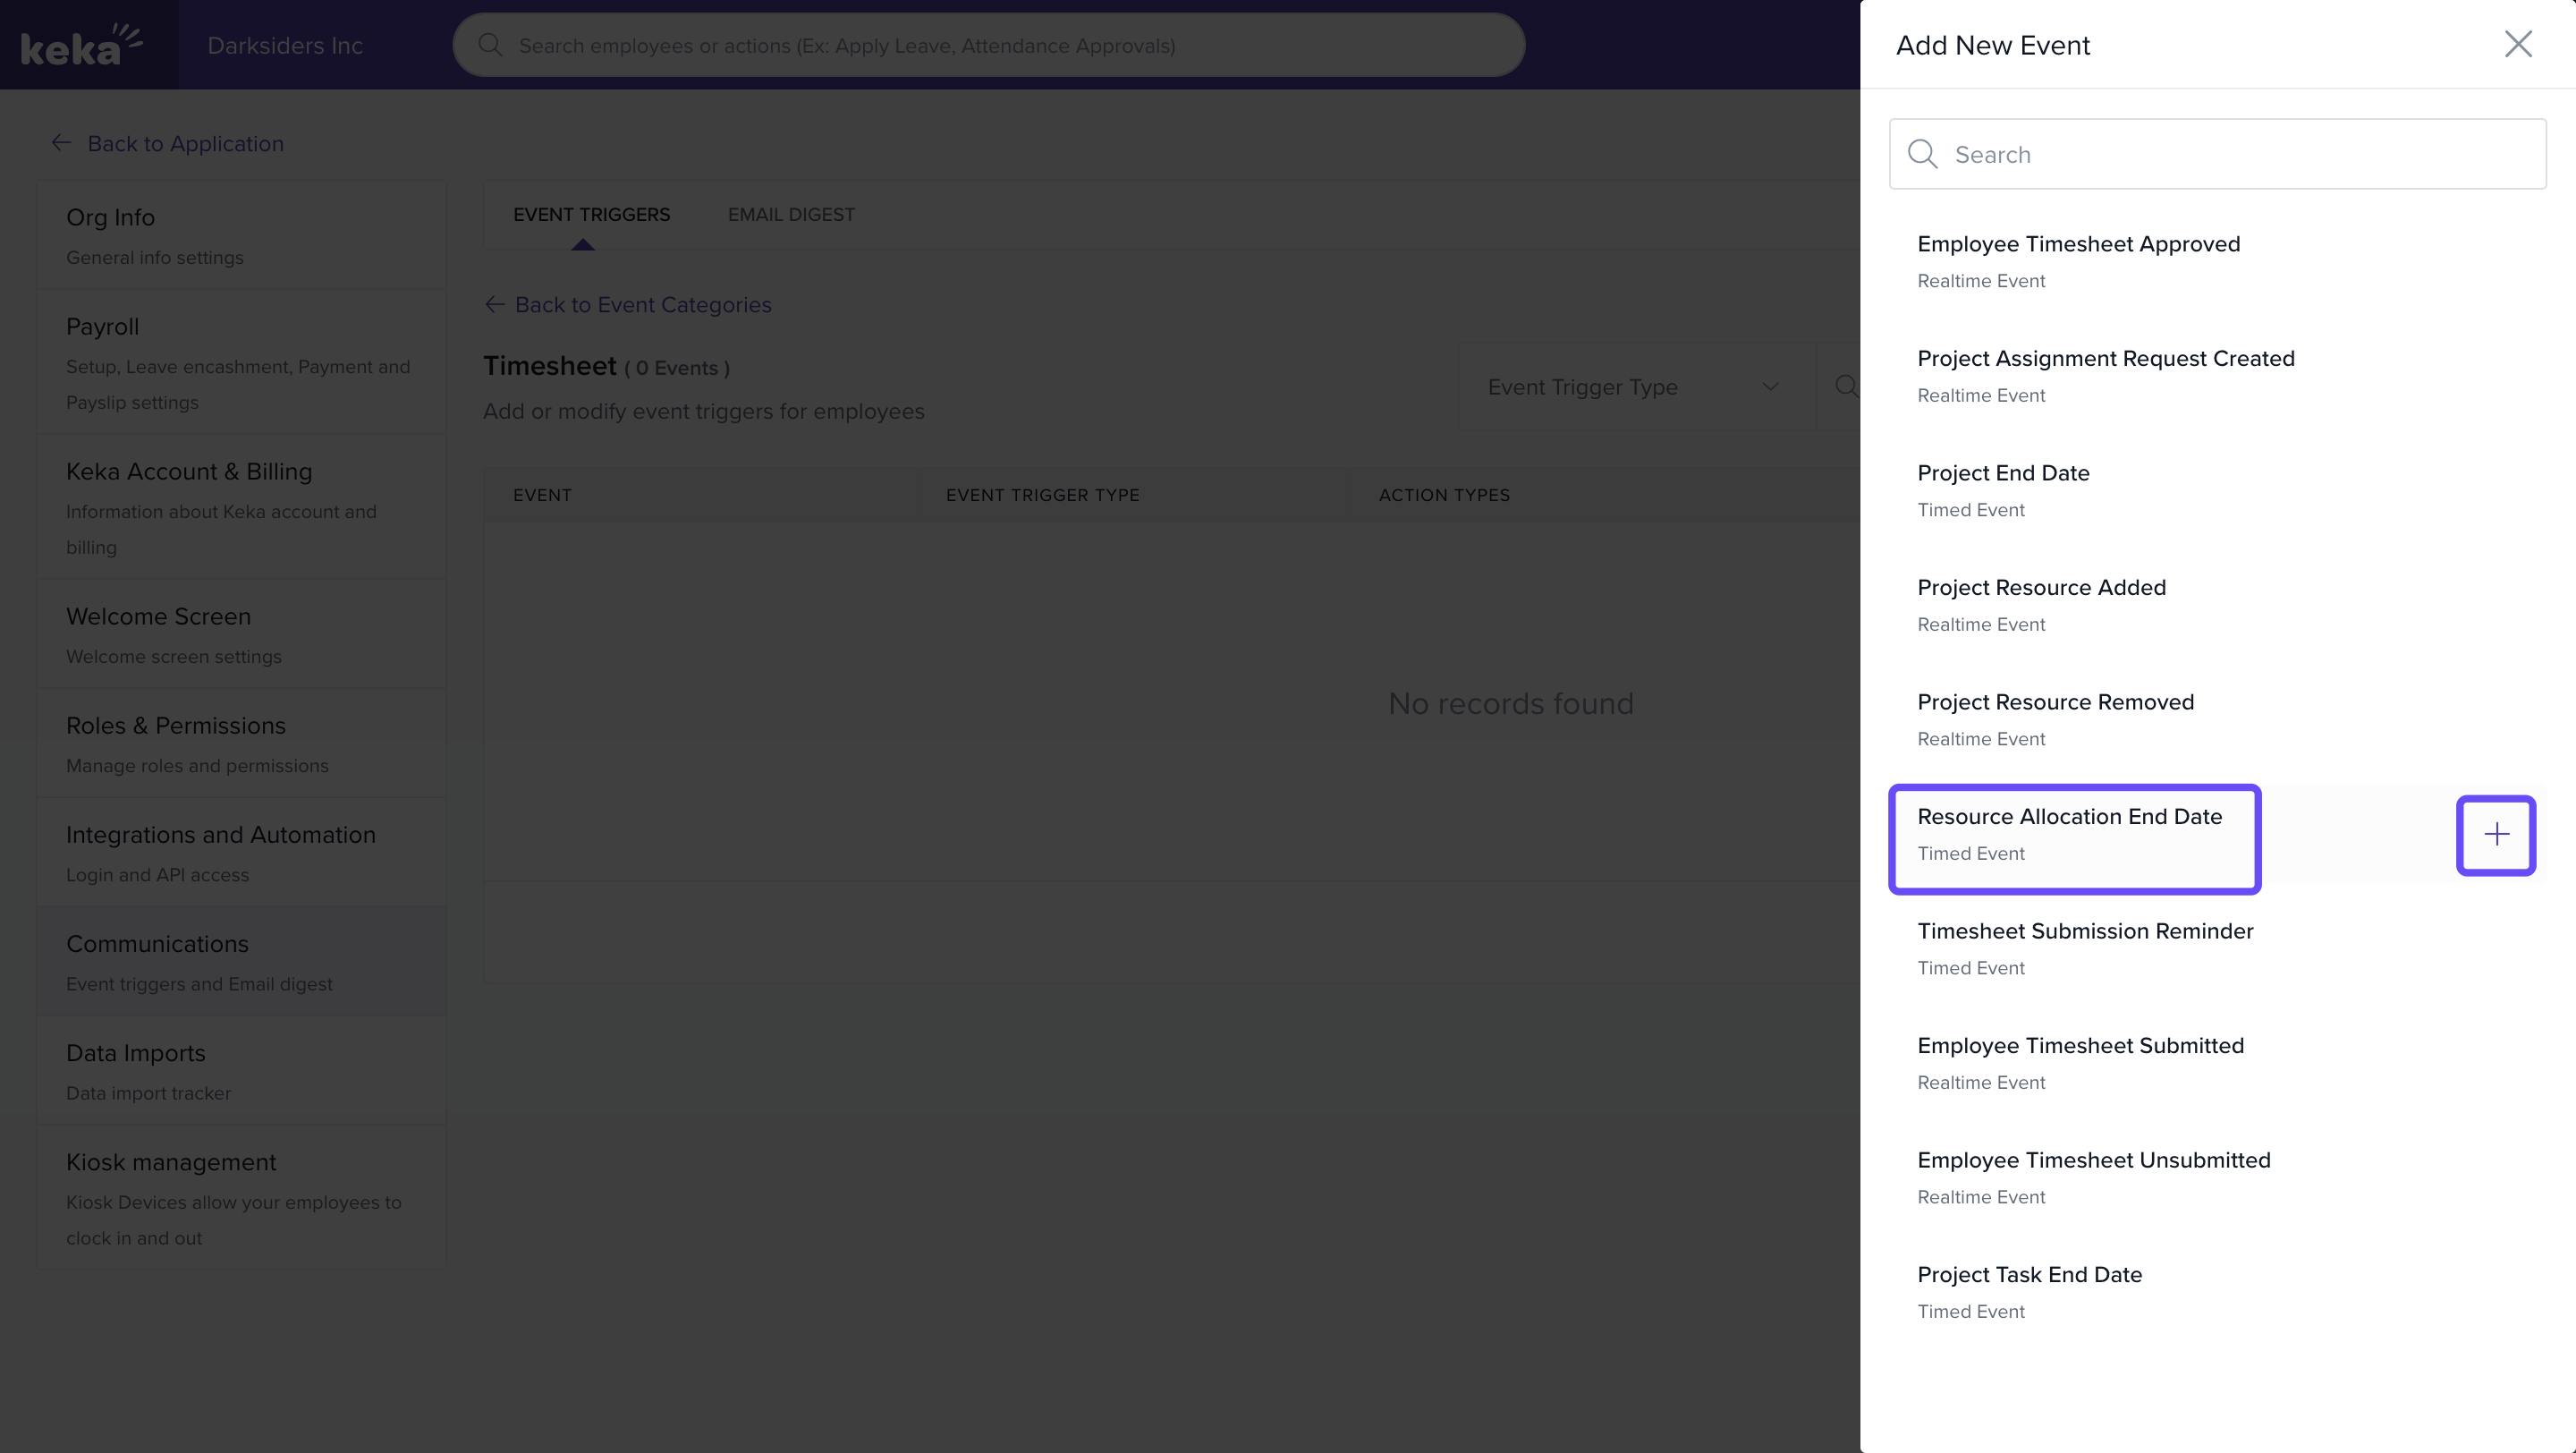
- Click on +Add event, find the Resource Allocation end date option, and click the Add icon to include it in your event triggers.
Configure Event Trigger Actions
- Within the resource allocation end date settings, you will see three levels of triggers.
- The first trigger, Execute on the day, is set by default and cannot be modified.
- To add additional actions for the remaining trigger levels, click on Add Action.
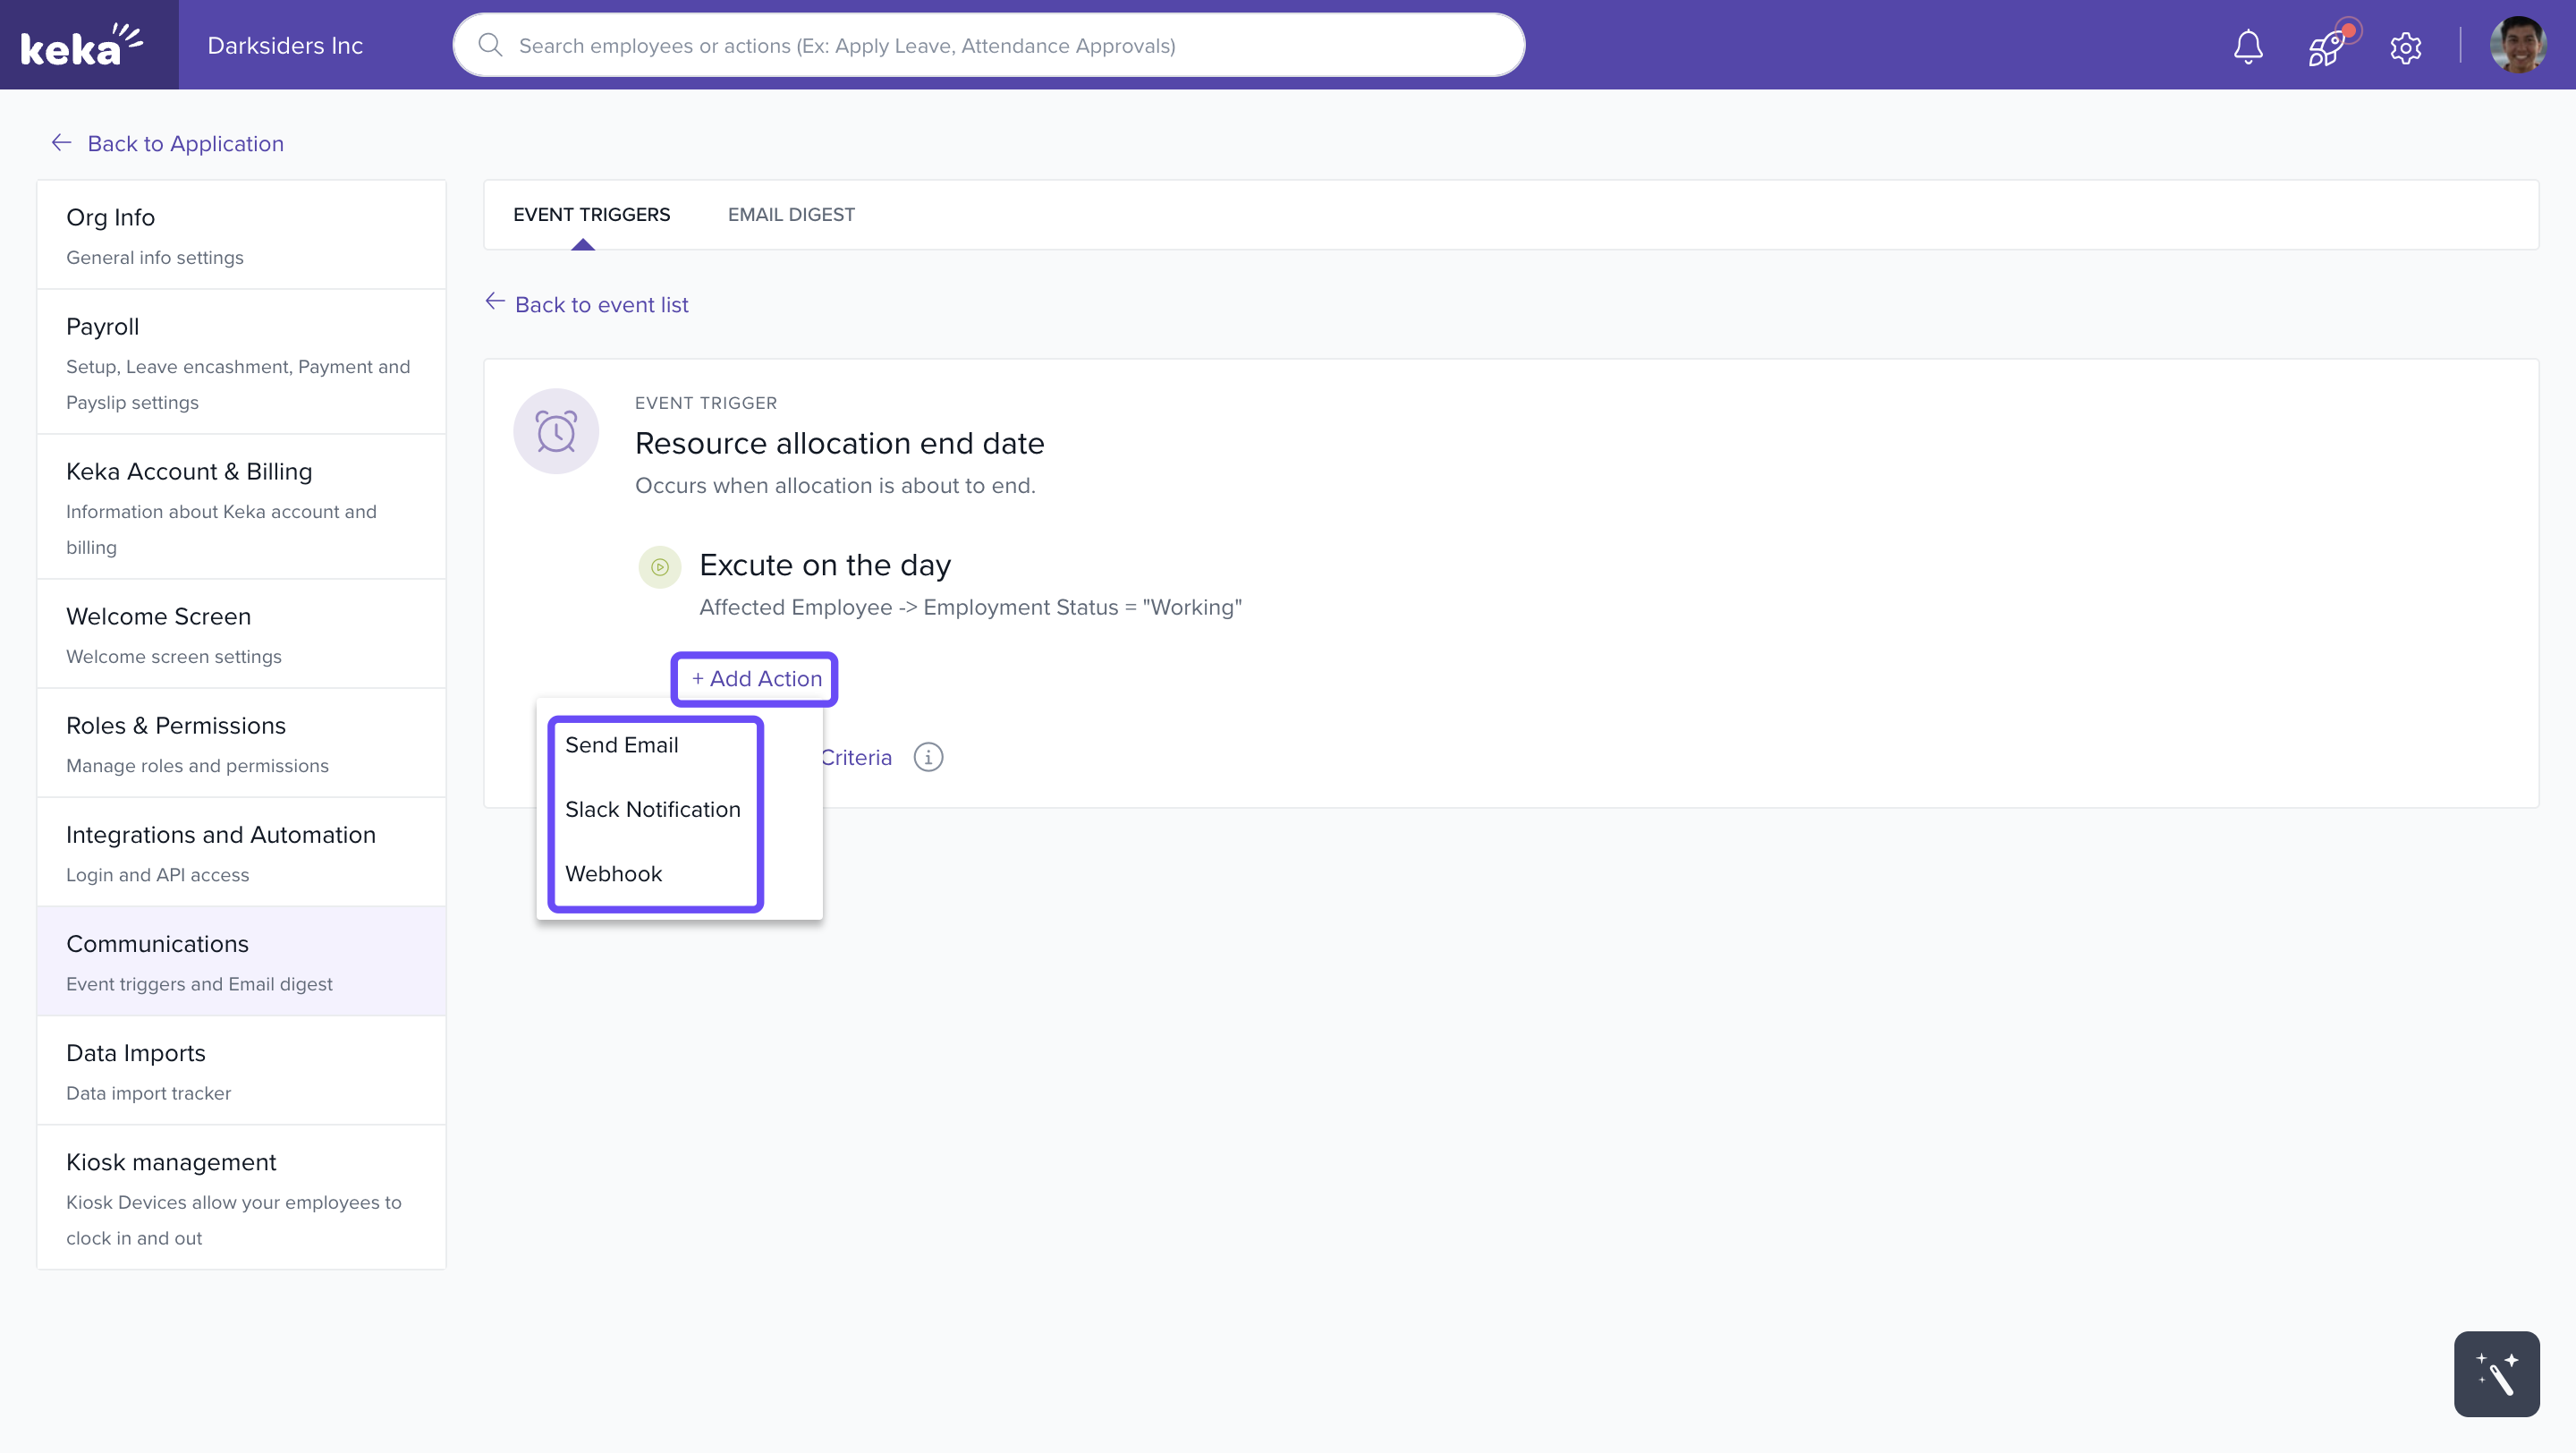
Available Trigger Actions
For all action levels, you can choose from the following options:
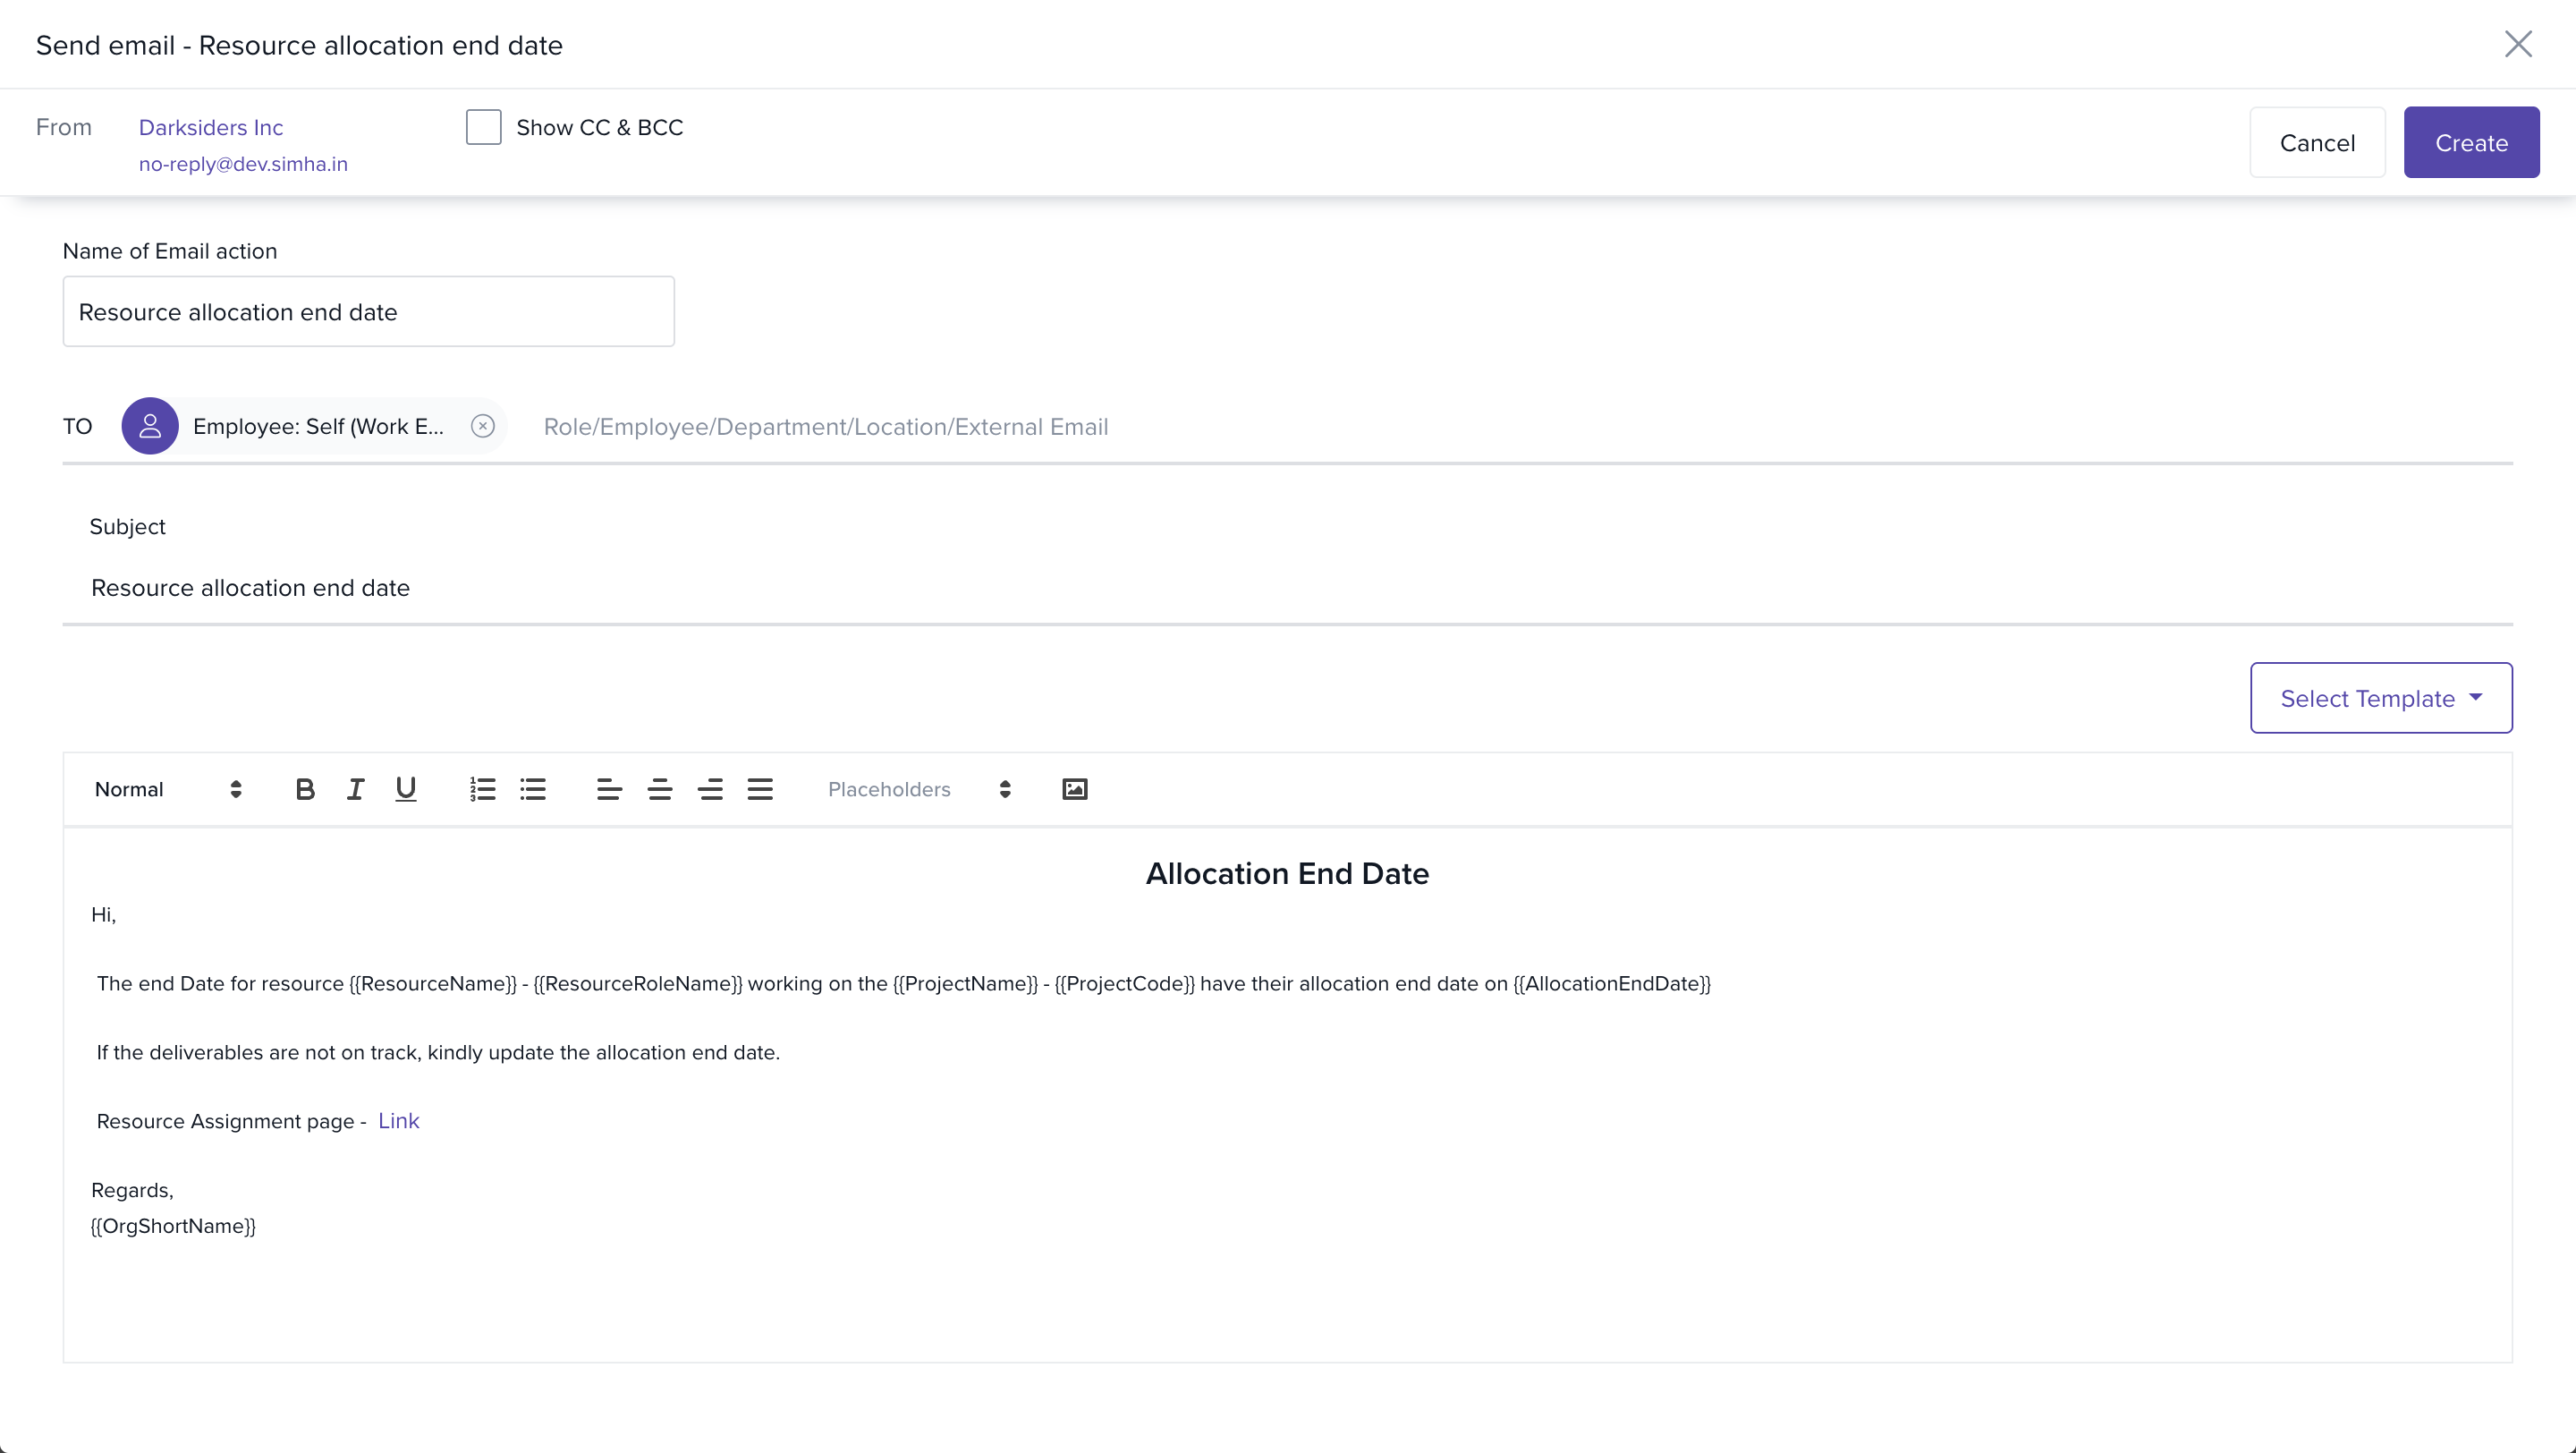
Send Email:
- Choose Send Email to send an email reminder.
- Name the action and select the recipients based on employee roles or Keka user roles.
- Optionally, include a resource assignment link for easy reference.
- Click on Create to save your changes.
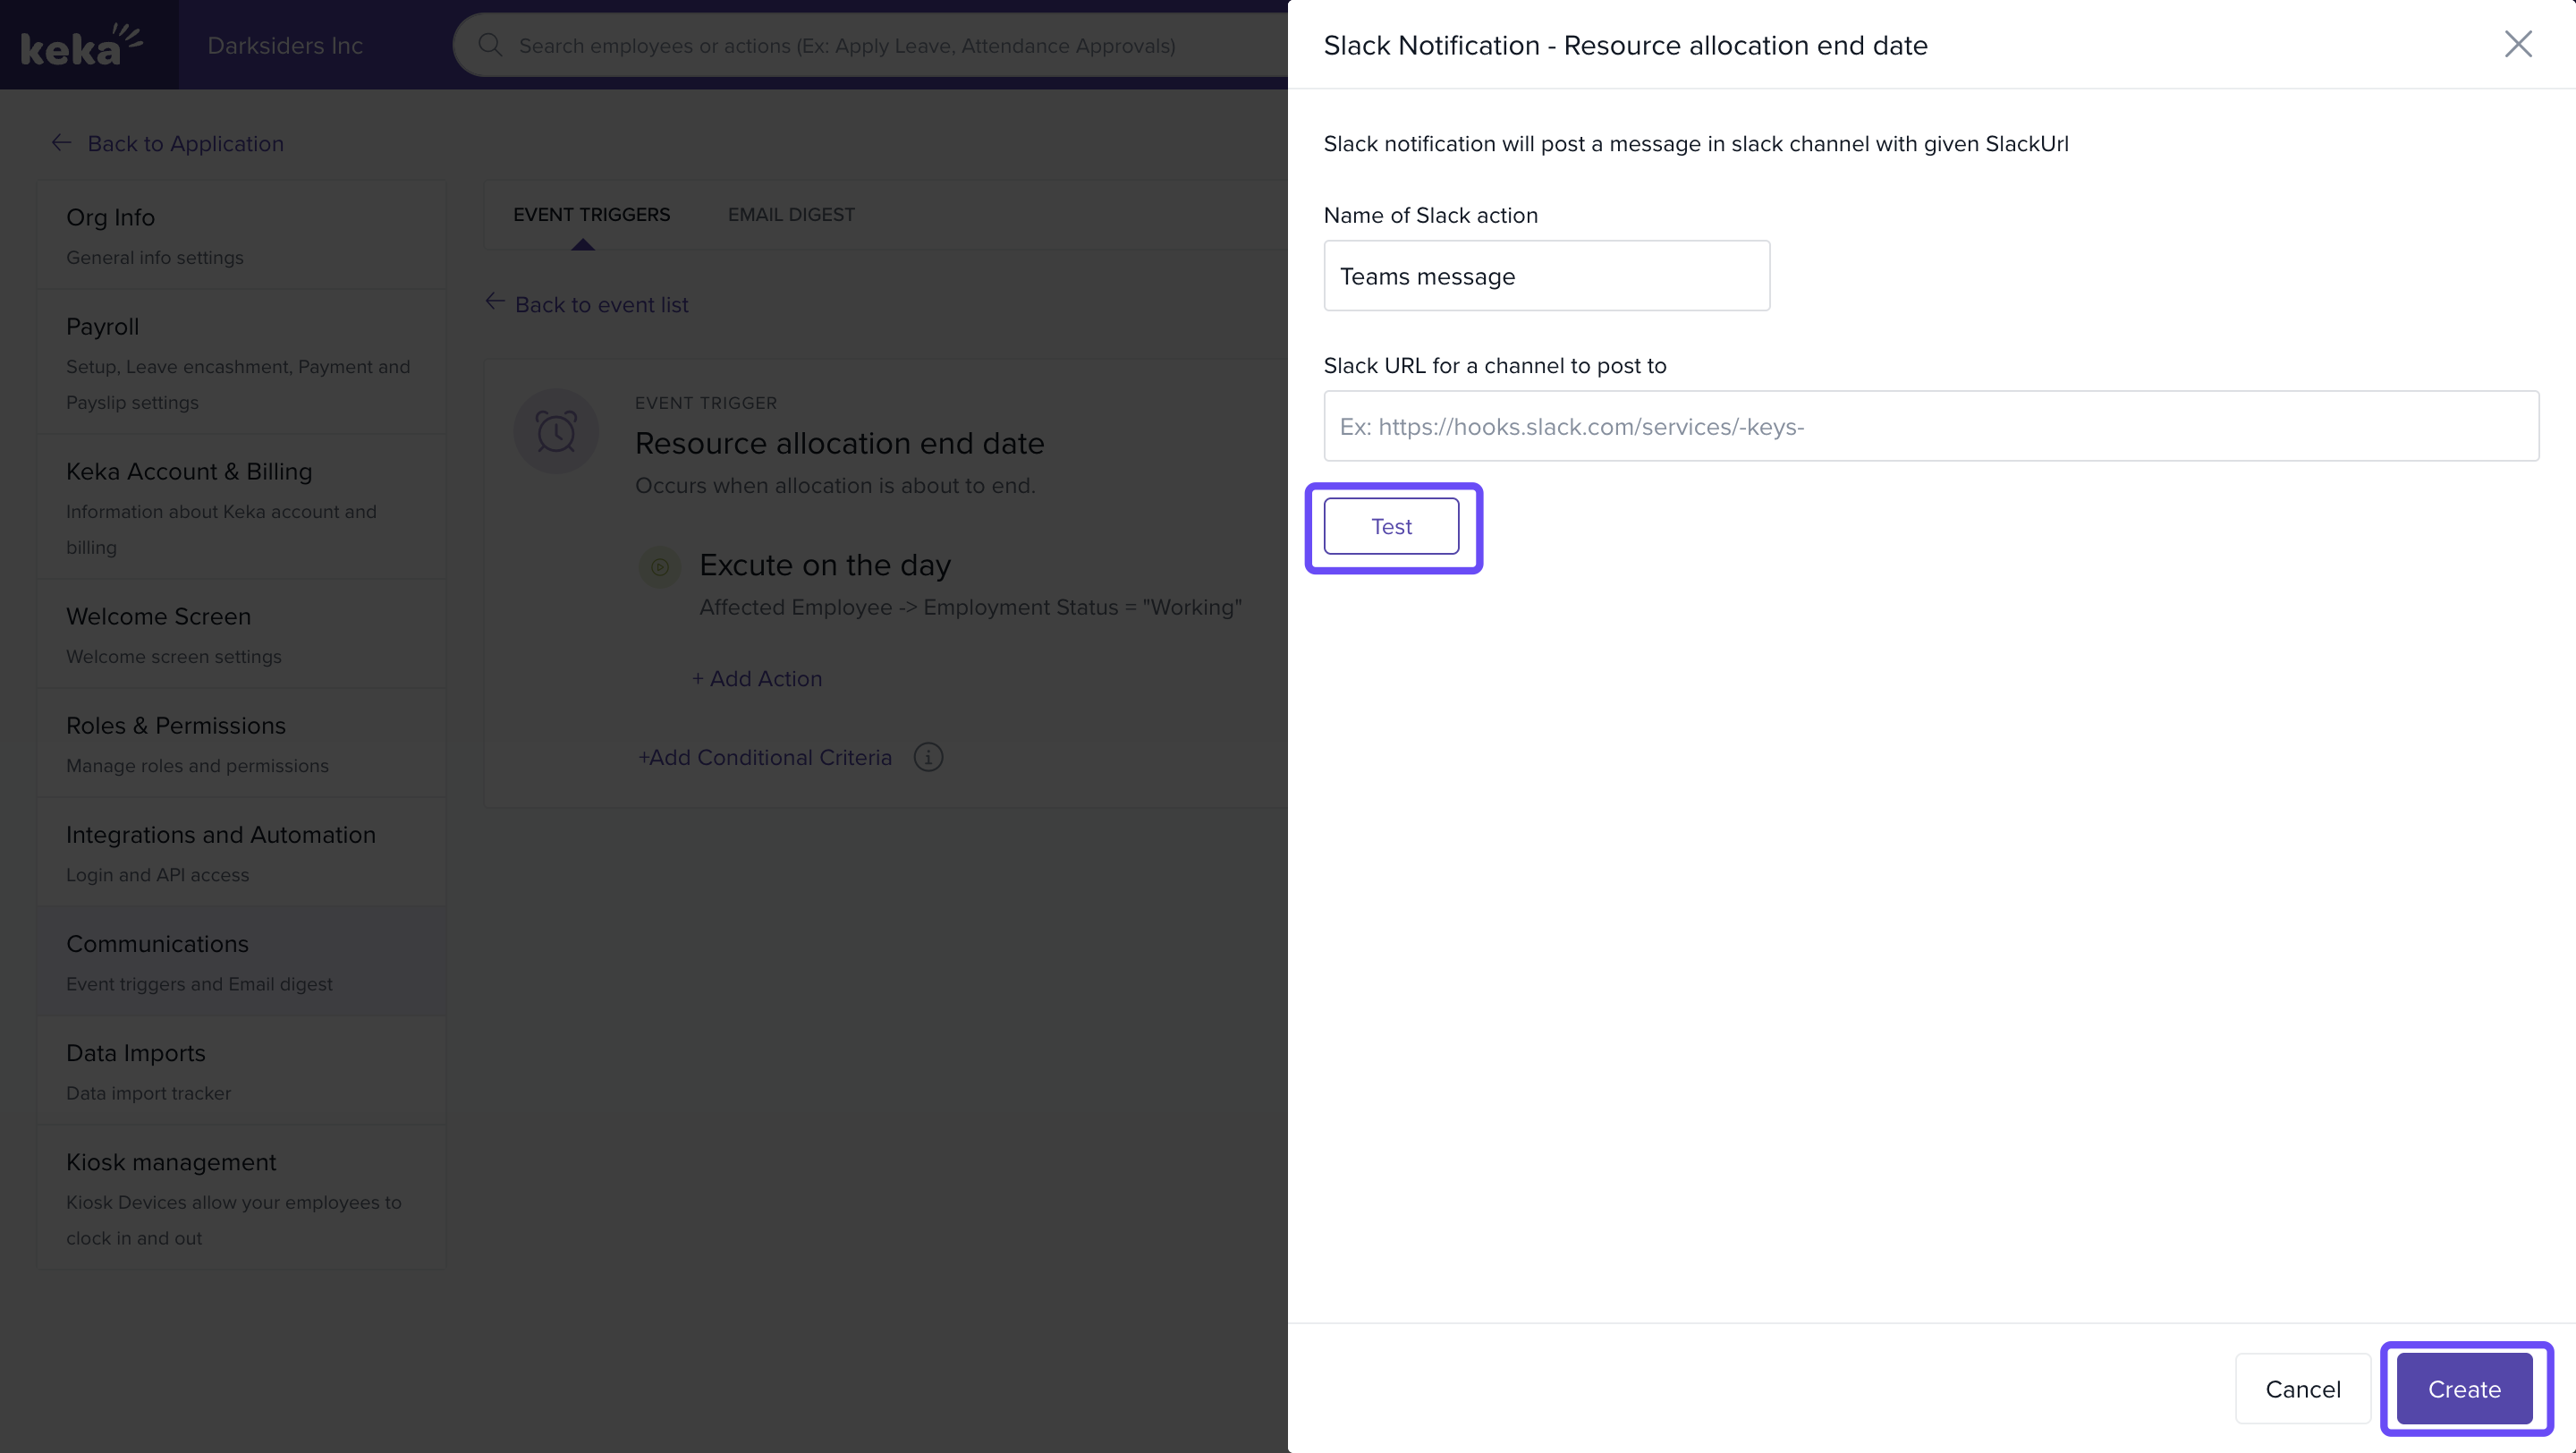
Slack Notification:
- Choose Slack Notification to send a message to a designated channel.
- Enter the channel’s URL and name the action.
- Click on Test to verify the integration with the URL.
- After verification, click Create to save.
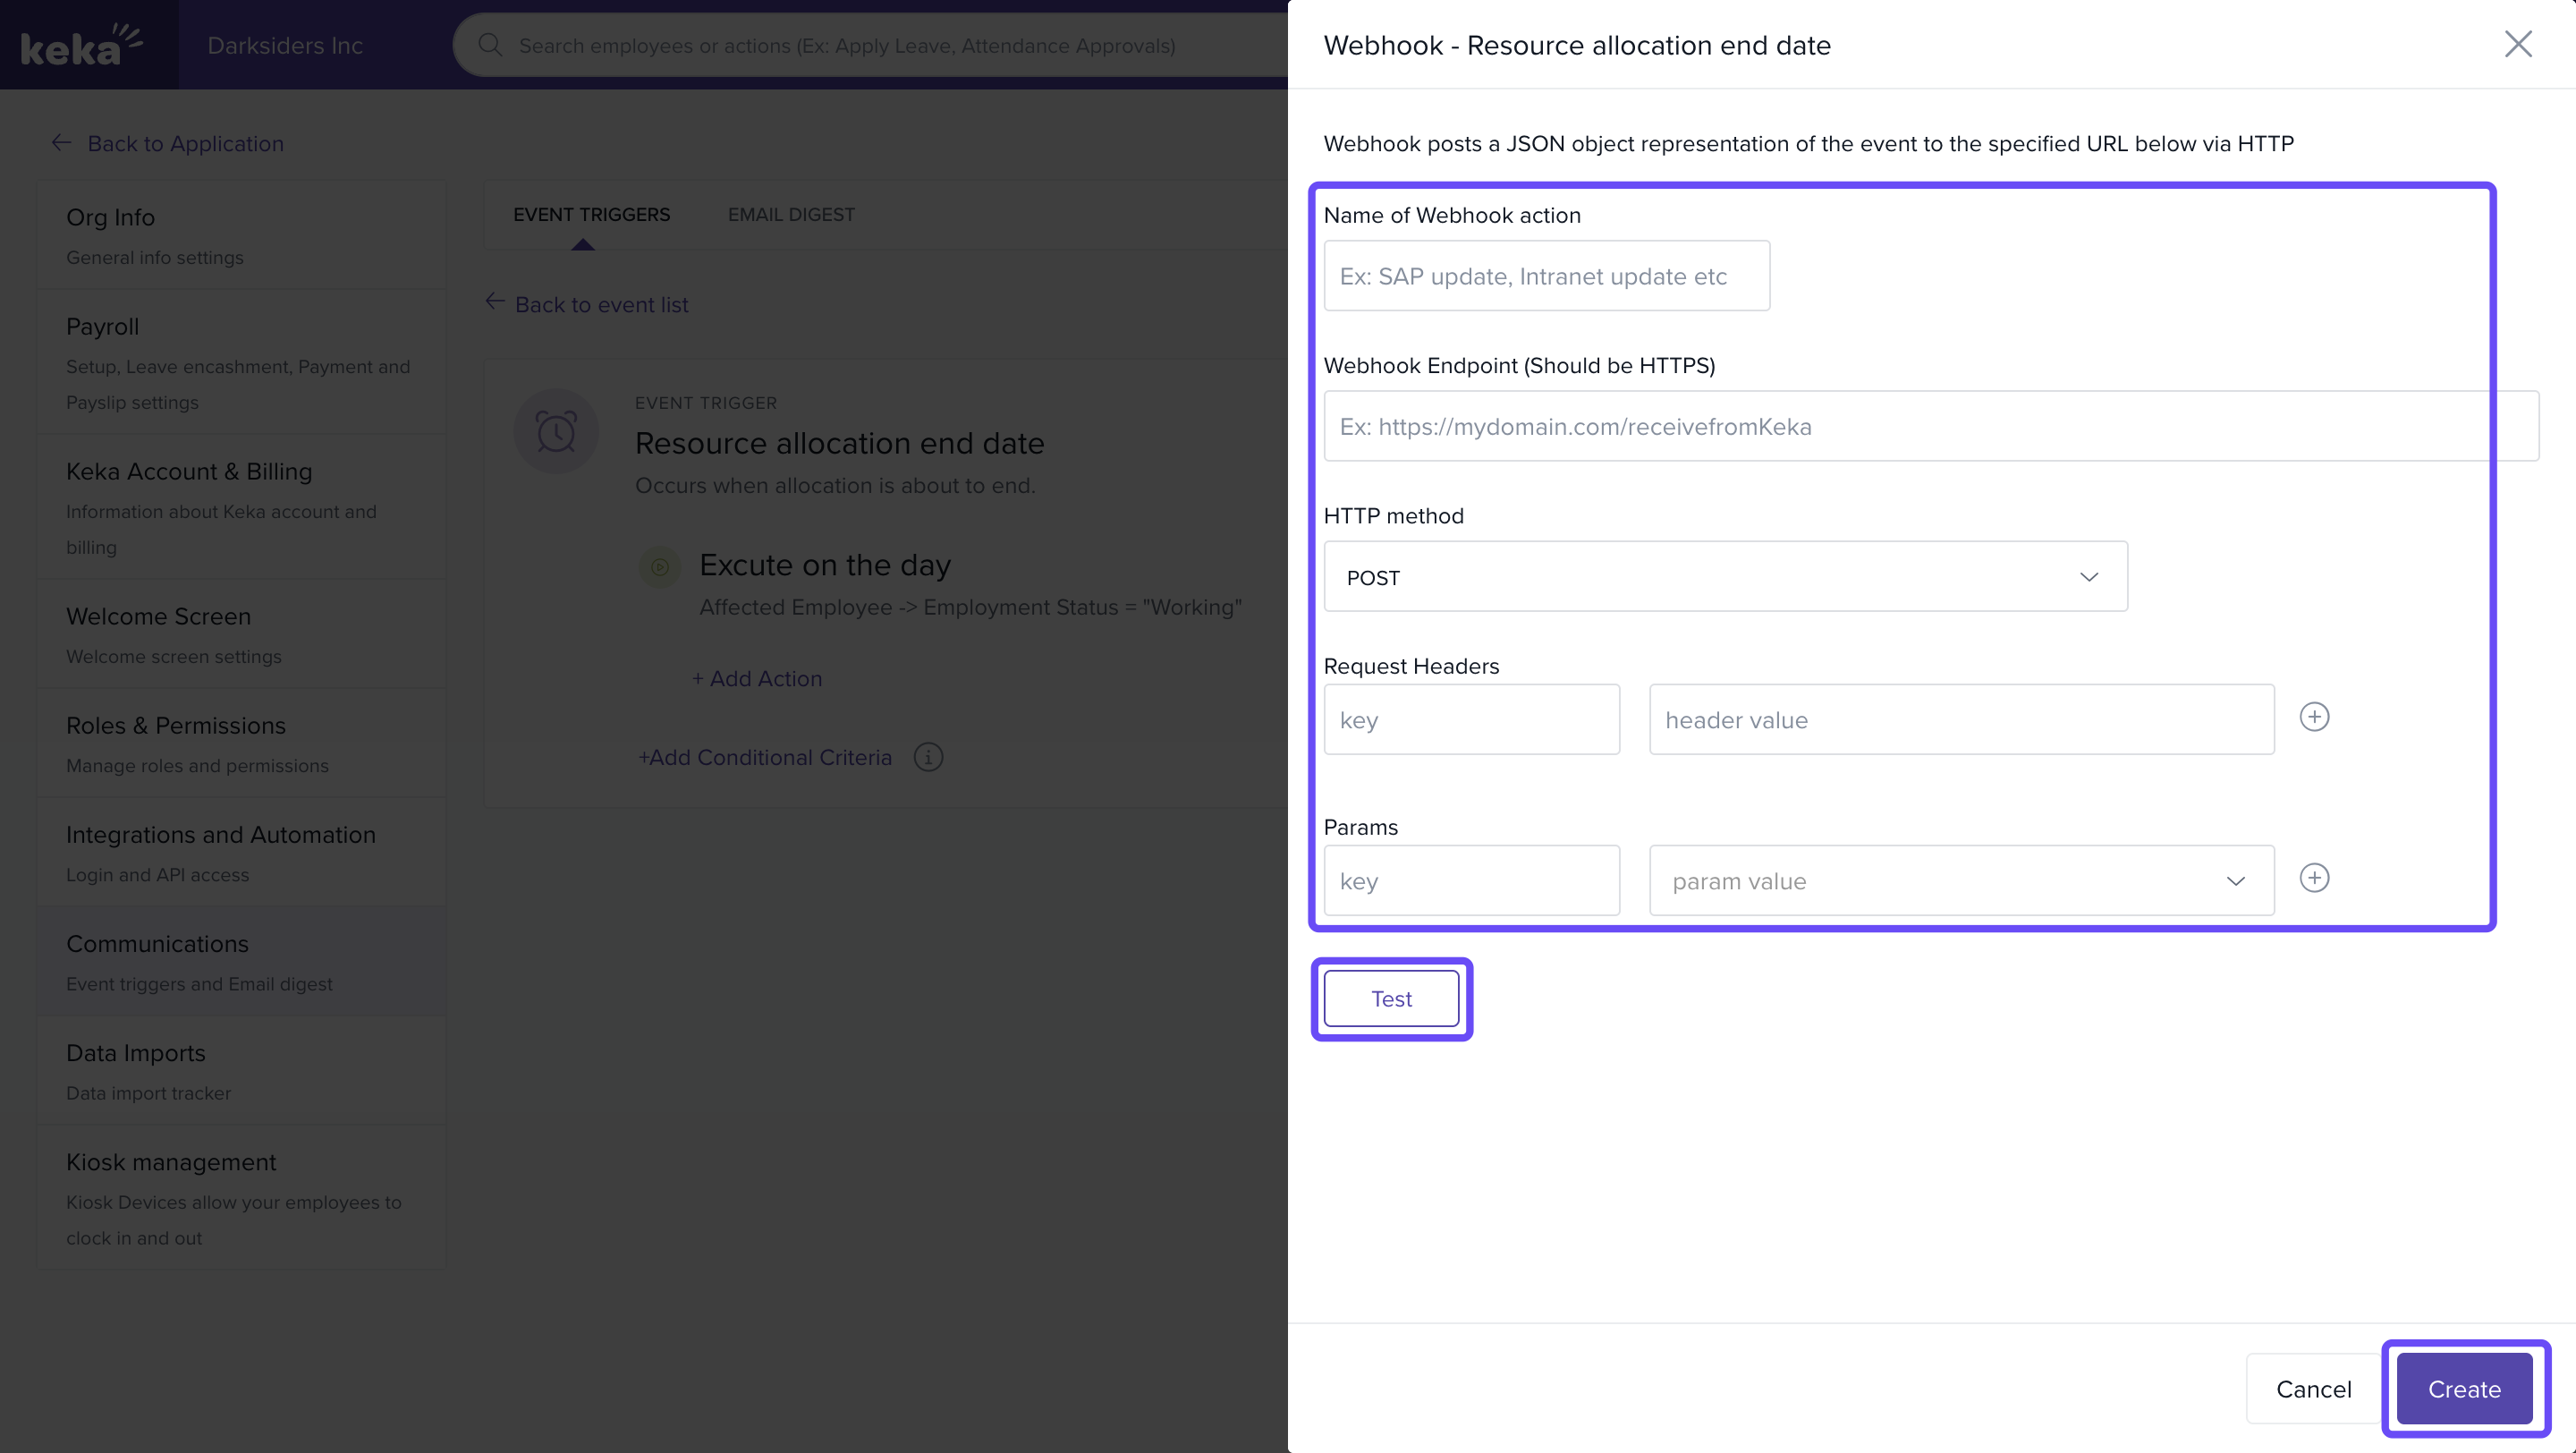
Webhook:
- Choose Webhook if you want to send data to another application when the event is triggered.
- Webhooks allow two applications to communicate, sending data from one application to another.
- Click Create to save the webhook settings.
Conditional criteria
- Click on add conditional criteria.
- Select the timeframe the number of days in advance that the triggers should activate.
- To remove any of the additional levels, click on the Delete Icon.
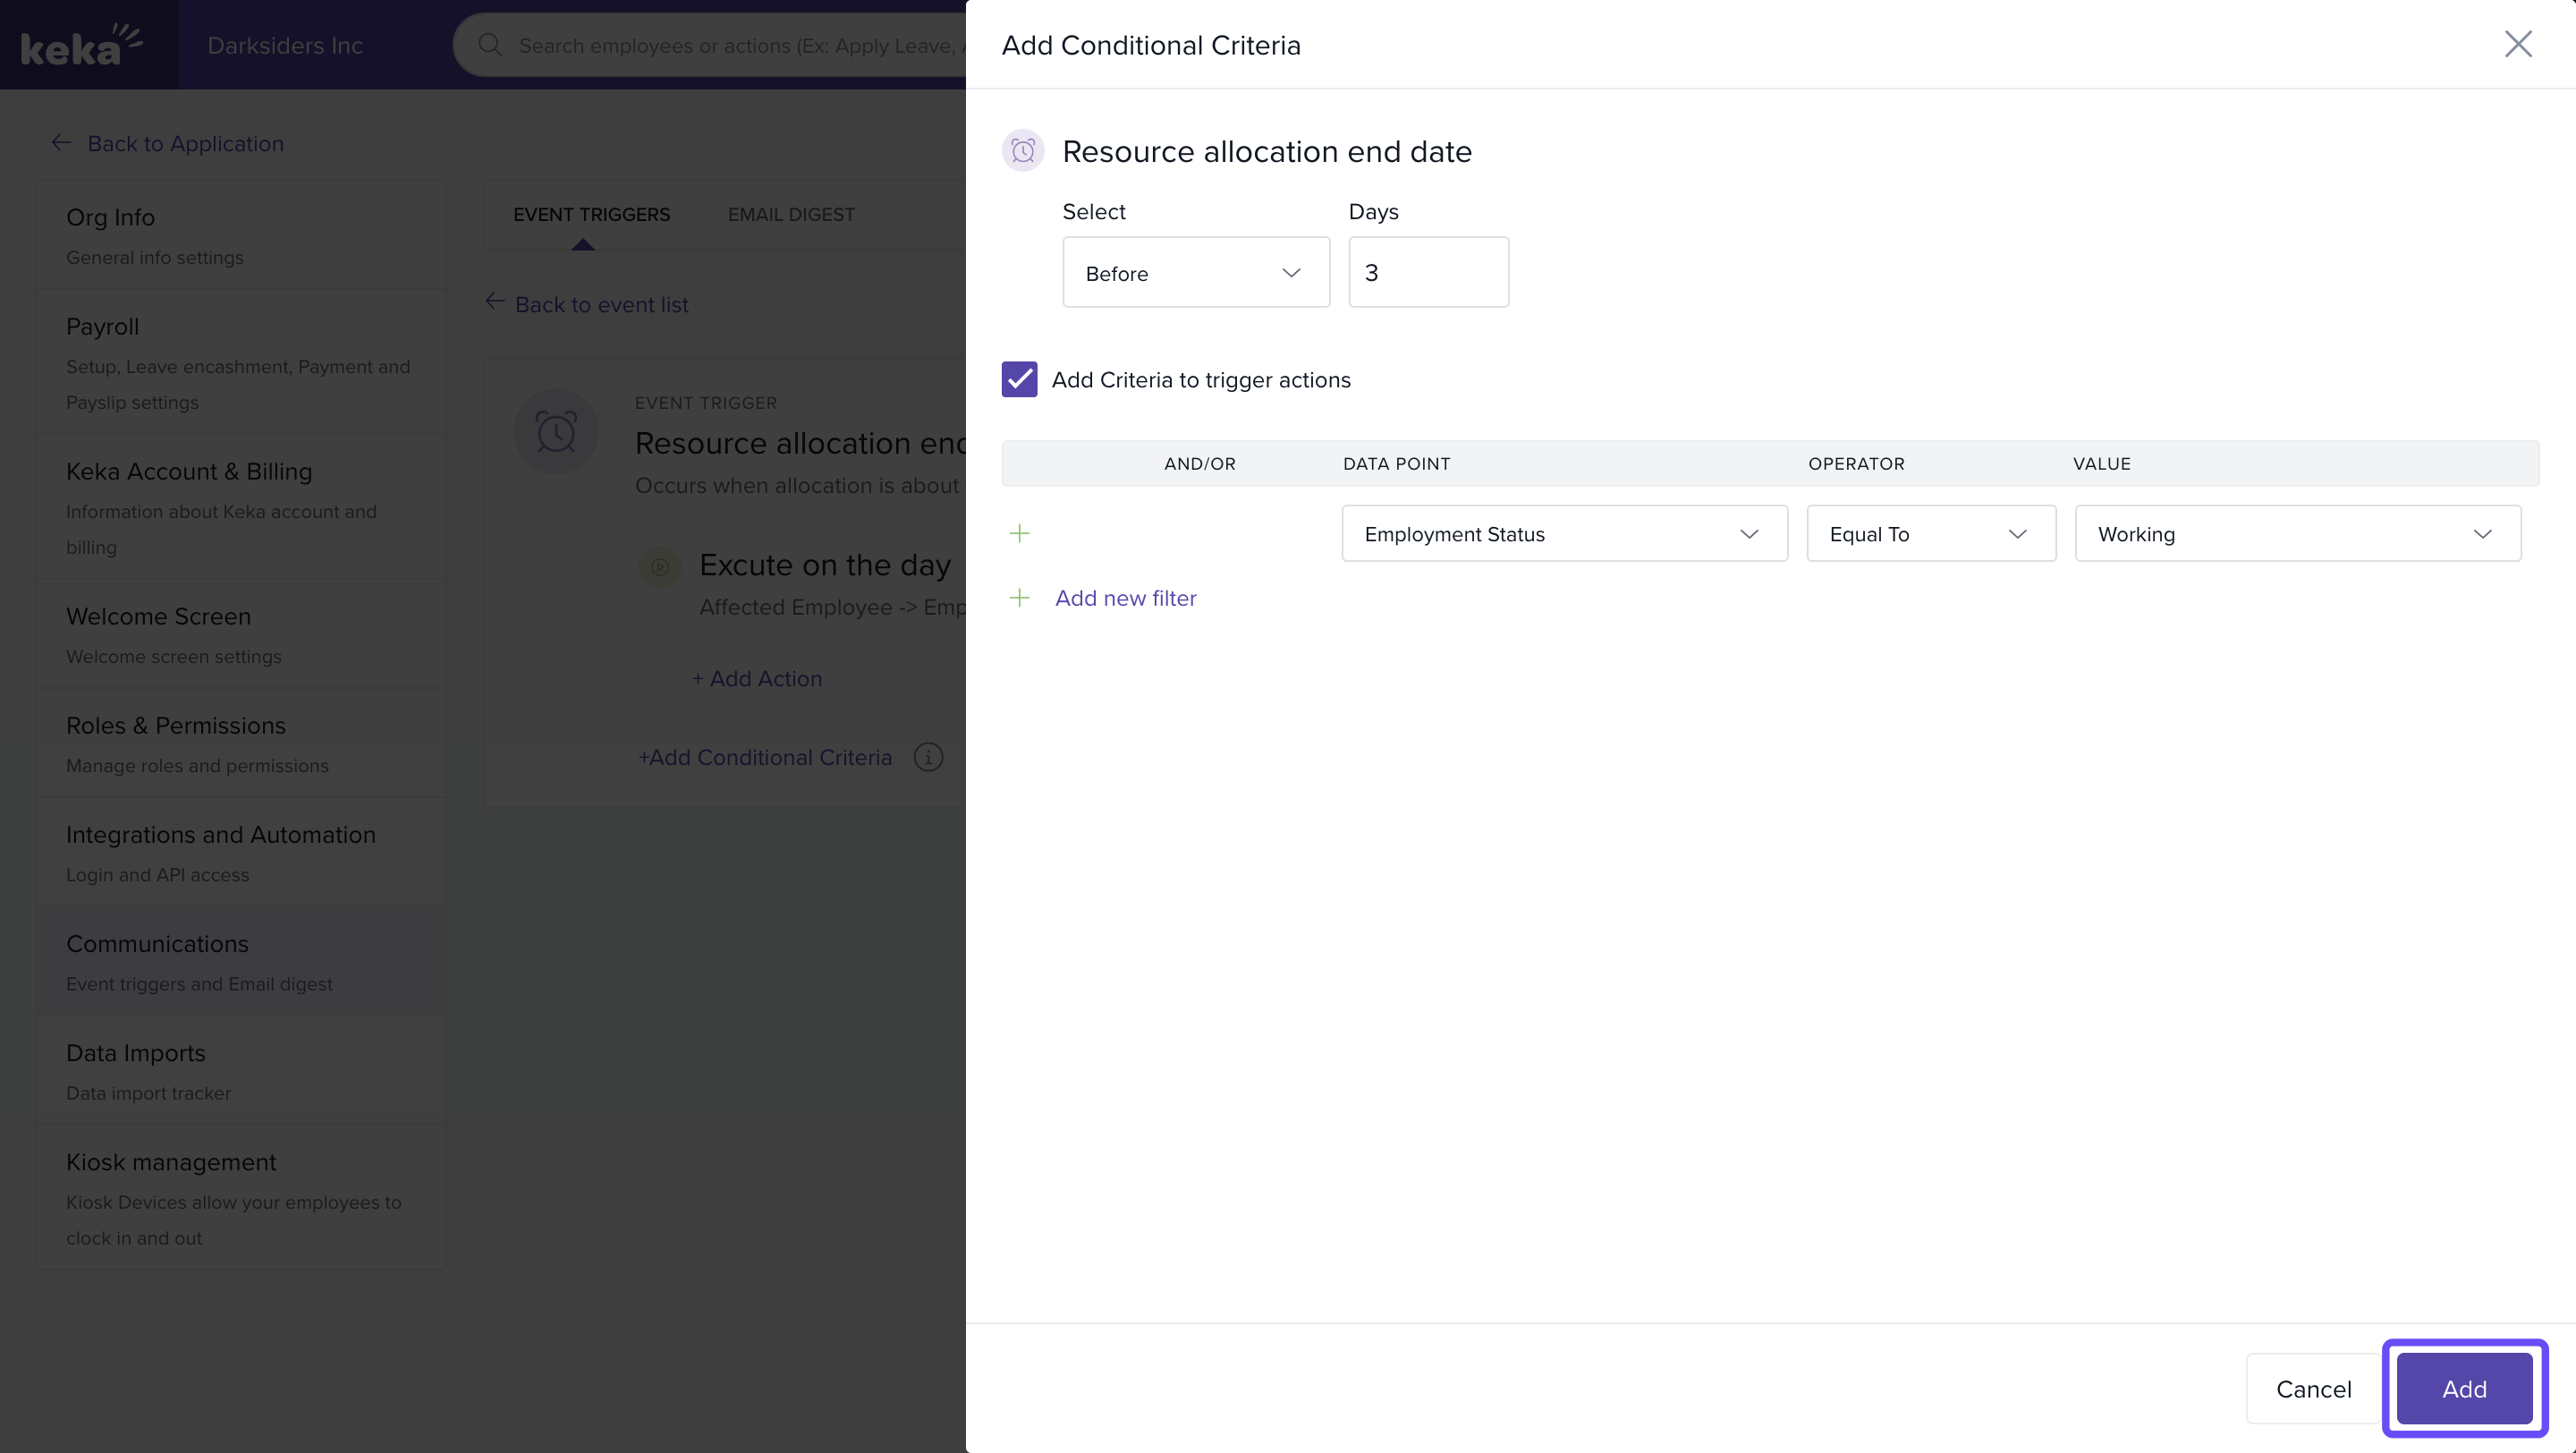
Note :It is important to note that the initial event trigger cannot be deleted; however, you do have the flexibility to remove the last two levels of reminders if desired.
FAQs
Q: Can I modify the first level of the resource allocation end date trigger?
A: No, the first trigger, labeled Execute on the day, is set by default and cannot be modified.
Q: Can I remove the event triggers after setting them up?
A: Yes, you can remove the last two levels of event triggers by clicking on the Delete Icon. The first level cannot be deleted.
Q: How do I specify when the triggers should activate?
A: You can modify the time frame for the second and third levels of the event triggers by clicking on the Pencil Icon and adjusting the number of days in advance for activation.
Comments
0 comments
Please sign in to leave a comment.